From Sketch To Canvas: The Painting Process
Creating a painting is like embarking on an adventure, where every stroke of the brush tells a story and every color evokes an emotion. The journey from a simple sketch to a vibrant masterpiece is not just about putting paint on canvas; it's about channeling your inner artist and expressing your unique vision. This article explores the intricate journey of transforming a simple sketch into a vibrant painting, detailing each step and offering insights into techniques, materials, and the artist's mindset throughout the process.
The initial sketch serves as the foundation for the painting process. Think of it as the blueprint of a house; without it, you might end up with a chaotic structure that lacks coherence. Artists use sketches to plan composition, proportions, and overall design before committing to color and detail on the canvas. This stage is crucial as it allows for experimentation and adjustment. A sketch can be as simple as a few lines or as detailed as a finished drawing, but its purpose remains the same: to guide the artist through the painting process. By laying out the basic shapes and forms, artists can visualize the final piece and make necessary changes before the paint hits the canvas.
Selecting the appropriate materials is crucial for achieving desired effects in painting. Just like a chef needs the right ingredients to create a delicious dish, artists require specific tools to bring their visions to life. Here’s a quick overview of essential materials:
| Material | Description |
|---|---|
| Paints | Oil, acrylic, watercolor - each type has its unique properties and effects. |
| Brushes | Different shapes and sizes create various textures and effects. |
| Canvas | Stretched canvas, canvas boards, or paper can all serve as surfaces for painting. |
Each material impacts the final artwork significantly, influencing everything from texture to drying time. Therefore, understanding the characteristics of paints, brushes, and canvases is essential for any artist looking to achieve their desired outcome.
Before applying paint, artists must prepare the canvas properly. This includes priming and stretching techniques that ensure a smooth surface and longevity of the artwork. Think of it like preparing a stage for a performance; if the stage isn’t set correctly, the show might not go on as planned. Priming the canvas helps to create a barrier between the paint and the canvas fibers, preventing absorption and ensuring that colors remain vibrant. Stretching the canvas correctly also prevents it from warping over time, allowing your masterpiece to stand the test of time.
Understanding color theory is vital for creating harmonious and dynamic paintings. Color is not just a visual element; it can evoke feelings, set moods, and even tell stories. The color wheel is a fundamental tool for artists, showcasing the relationships between colors. By learning about primary, secondary, and tertiary colors, as well as complementary and analogous color schemes, artists can make informed choices that enhance their work. For example, using warm colors can create a sense of energy and excitement, while cool colors may evoke calm and serenity. This section covers the color wheel, color mixing, and the emotional impact of color choices, helping artists to harness the power of color in their paintings.
Layering is a fundamental technique in painting that adds depth and complexity. It’s like building a cake; each layer contributes to the overall flavor and texture. Here, we explore various layering methods, including glazing and scumbling, to enhance the visual appeal of the artwork. Glazing involves applying thin, transparent layers of paint to create luminosity and depth, while scumbling adds a textured, opaque layer that can soften or alter the color underneath. Mastering these techniques allows artists to create stunning visual effects that draw the viewer in.
Different brush techniques can dramatically alter the texture and feel of a painting. The type of brush stroke can convey movement, emotion, and even sound within a piece. For instance, a quick, short stroke can suggest excitement, while long, sweeping strokes may evoke calm. This section examines various brush strokes, their effects, and how to use them effectively. Understanding how to manipulate your brush can unlock new dimensions in your artwork and elevate your painting to new heights.
Texture adds dimension and interest to paintings. It's like the icing on the cake; it enhances the overall experience. This part discusses techniques for creating texture, such as impasto and mixed media, and how they contribute to the overall composition. Impasto involves applying thick layers of paint, allowing for a three-dimensional effect, while mixed media combines various materials to create a unique surface. By incorporating texture, artists can engage the viewer's senses and make their work more dynamic.
The final touches are essential for bringing a painting to life. This section focuses on detailing techniques that elevate the artwork and make it visually striking. Adding highlights, shadows, and small intricate details can transform a good painting into a great one. It’s in these final moments that the artist’s vision truly comes to fruition, as they step back and see their creation come alive with personality and character.
Once the painting is complete, evaluating the work is crucial for growth as an artist. This section emphasizes the importance of reflection and critique in the creative process. Just as a musician listens to their performance to improve, artists must look at their work critically, identifying areas for growth and success. This reflective practice not only enhances skills but also fosters a deeper connection with one’s art, encouraging continuous evolution and exploration.
- What materials do I need to start painting? You will need paints, brushes, a canvas, and possibly an easel. Start with basic materials and expand as you grow.
- How long does it take to complete a painting? The time varies greatly depending on the complexity of the piece and the artist's style. Some may take hours, while others can take weeks.
- Can I paint over an old canvas? Yes, you can paint over an old canvas, but it’s advisable to prepare the surface properly to ensure the new paint adheres well.
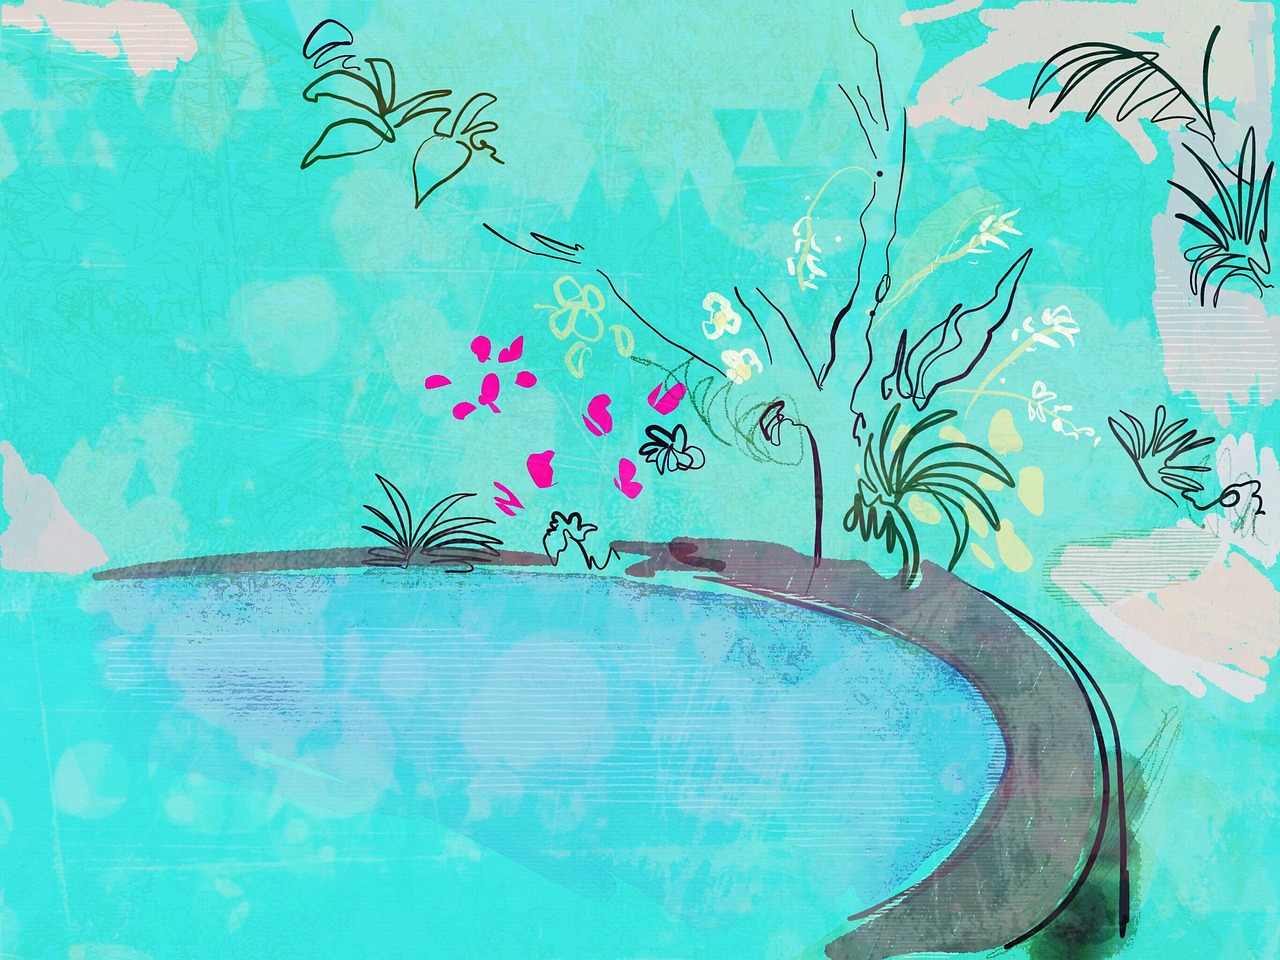
Understanding the Initial Sketch
The initial sketch serves as the foundation for the painting process, and its importance cannot be overstated. Think of it as the blueprint for a house; without it, the structure may collapse or fail to meet the vision. Artists often start with a simple pencil drawing, capturing the essence of their idea and mapping out the composition. This stage is where imagination meets reality, allowing for flexibility and creativity before any paint touches the canvas.
When creating an initial sketch, artists consider several key elements that will guide them through the painting process:
- Composition: How the elements of the painting are arranged.
- Proportions: Ensuring that the sizes of objects relate to each other correctly.
- Perspective: Creating a sense of depth and dimension in the artwork.
- Focal Point: Deciding where the viewer's eye should be drawn.
Each of these elements plays a critical role in the overall impact of the final piece. For example, a well-planned composition can lead to a more engaging and dynamic painting, while poor proportions might result in a disjointed or awkward appearance. It’s during the sketching phase that artists can easily make adjustments, erasing and redrawing until they achieve the desired look. This is the time to experiment with ideas—after all, a sketch is meant to be a playground for creativity.
Moreover, the initial sketch can be a reflection of the artist's mindset. It reveals not only technical skills but also emotional states and personal interpretations of the subject matter. For instance, a loose, flowing sketch might indicate a sense of freedom and spontaneity, while a tight, controlled drawing could suggest a more serious or contemplative approach. Understanding these nuances can help artists connect more deeply with their work.
As the artist transitions from sketch to canvas, they often refer back to their initial drawing, using it as a guide rather than a strict rulebook. This flexibility allows for growth and evolution of the artwork, as new ideas and inspirations can emerge during the painting process. In essence, the initial sketch is not just a preliminary step; it is a crucial part of the artistic journey that sets the stage for everything that follows.
In conclusion, the initial sketch is an essential component of the painting process, serving as both a practical tool and a source of inspiration. By taking the time to thoughtfully plan and execute this stage, artists can enhance their creative expression and ultimately produce more compelling and impactful works of art.
Choosing the Right Materials
When it comes to painting, the materials you choose can make all the difference in the world. Imagine trying to bake a cake without the right ingredients; it just wouldn’t turn out the same, right? Similarly, selecting the right paints, brushes, and canvases is crucial for achieving your desired effects and bringing your artistic vision to life. So, let’s dive into the essentials!
First off, let's talk about paints. There are various types available, each with its unique properties. The most common types are:
- Oil Paints: Known for their rich colors and slow drying time, oil paints allow for blending and layering.
- Acrylic Paints: These are fast-drying and versatile, making them great for beginners and experienced artists alike.
- Watercolors: Perfect for creating soft washes and delicate details, watercolors can be both challenging and rewarding.
Choosing the right paint depends on your style and the effects you want to achieve. For instance, if you love vibrant, bold colors, acrylics might be your best bet. On the other hand, if you enjoy a more traditional approach, oils could be the way to go.
Next, let’s discuss brushes. The type of brush you use can dramatically alter your painting's texture and feel. Brushes come in various shapes and sizes, each serving a different purpose. Here’s a quick breakdown:
| Brush Type | Use |
|---|---|
| Round | Great for detail work and lines. |
| Flat | Perfect for bold strokes and filling in large areas. |
| Filbert | Ideal for blending and soft edges. |
| Fan | Used for texture and special effects. |
When selecting brushes, consider the material as well. Natural bristles are fantastic for oil paints, while synthetic brushes work well with acrylics and watercolors. The right brush can help you achieve the precise strokes and textures you envision.
Now, let’s not forget about the canvas. The surface you paint on is just as important as the paint and brushes. Canvases come in various forms, including stretched canvas, canvas boards, and paper. Each type offers a different texture and absorbency, influencing how the paint interacts with the surface. For instance:
- Stretched Canvas: Ideal for oil and acrylic paintings, providing a firm, durable surface.
- Canvas Boards: More affordable and portable, perfect for practicing or creating studies.
- Watercolor Paper: Specifically designed for watercolors, allowing for beautiful washes without buckling.
Ultimately, the choice of materials should align with your artistic goals and personal preferences. Experimenting with different combinations can lead to exciting discoveries and unique results. So, don’t be afraid to try new things!
In conclusion, the right materials can elevate your painting experience and the quality of your work. Just like a chef carefully selects their ingredients, you too should thoughtfully choose your paints, brushes, and canvases. Happy painting!
Preparing the Canvas
Before diving into the world of colors and brush strokes, a crucial step in the painting process is . Think of the canvas as your stage; if it’s not set up properly, the performance might not shine as it should. The preparation phase is all about ensuring that your surface is ready to receive the paint, which not only enhances the final outcome but also extends the lifespan of your artwork. So, what does this preparation entail?
First and foremost, the canvas must be stretched. If you're using a pre-stretched canvas, this step is already taken care of, but if you’re working with raw canvas, you’ll need to stretch it over a wooden frame. This process involves pulling the canvas tight and securing it with staples or tacks, making sure there are no wrinkles or sagging areas. A well-stretched canvas provides a firm surface that supports the application of paint, allowing for smooth brushwork and detailed techniques.
Next up is priming the canvas. This is where the magic of preparation truly begins. Priming involves applying a layer of gesso, a white paint mixture that creates a barrier between the canvas and the paint. Without this layer, the paint can absorb into the canvas, leading to uneven color and a dull finish. Gesso not only prevents this absorption but also provides a slightly textured surface that enhances paint adhesion. Here’s a quick rundown of the priming process:
- Choose the Right Gesso: You can find acrylic or oil-based gesso. Choose according to the type of paint you plan to use.
- Apply Evenly: Use a wide brush or a roller to apply a thin layer of gesso. Make sure to cover the entire surface.
- Let it Dry: Allow the first layer to dry completely before applying a second layer for a smoother finish.
- Sand (Optional): For an ultra-smooth surface, lightly sand the dried gesso before applying your paint.
Once your canvas is stretched and primed, it’s time to think about the size and orientation. Do you want a grand, sprawling landscape or a compact, intimate portrait? The size of your canvas can greatly influence your composition and the emotions you wish to convey. A larger canvas invites bold strokes and expansive scenes, while a smaller canvas can create a sense of intimacy and detail.
Finally, consider the placement of your canvas. Make sure it’s positioned in a well-lit area where you can easily access it from all angles. Lighting plays a vital role in how colors appear, so natural light is often the best option. However, if you're painting indoors, an adjustable lamp can help you control the light and shadows effectively.
In summary, preparing your canvas is not just a mundane task; it’s a vital part of the painting journey that sets the tone for your creative expression. By stretching and priming your canvas properly, you’re laying the groundwork for a masterpiece that will not only look stunning but also stand the test of time. So, take your time with this process, and remember: a well-prepared canvas is like a blank page full of potential, waiting for your artistic vision to come alive!
Q: How long should I let gesso dry before painting?
A: It's best to let gesso dry for at least an hour between coats, but ideally, overnight is recommended for the best results.
Q: Can I paint directly on an unstretched canvas?
A: While you can paint on unstretched canvas, it's not advisable as it can lead to warping and uneven paint application. Stretching the canvas first is highly recommended.
Q: What if I want to paint with oil paints on a canvas that has been primed with acrylic gesso?
A: It's generally acceptable, but you should ensure that the acrylic gesso is fully dry and cured, as oil paints can sometimes react with acrylics.
Color Theory Basics
When it comes to painting, understanding color theory is like having a secret map that guides you through the vibrant world of hues and shades. Think of color as the language of emotions; it speaks to the viewer even before they consciously interpret the artwork. The color wheel is your best friend here, a circular diagram that showcases the relationships between colors. At its core, you'll find the primary colors: red, blue, and yellow. These colors can’t be created by mixing others, but they serve as the building blocks for all other colors.
As you dive deeper into the color wheel, you encounter secondary colors, which are made by mixing primary colors. For example:
| Primary Color | Secondary Color |
|---|---|
| Red + Yellow | Orange |
| Yellow + Blue | Green |
| Blue + Red | Purple |
But wait, there’s more! The color wheel also introduces us to tertiary colors, which are created by mixing a primary color with a secondary color. This adds even more depth to your palette, giving you the ability to evoke specific feelings and atmospheres in your artwork. For example, mixing blue with green gives you a tranquil teal, perfect for a serene landscape.
Now, let’s talk about the emotional impact of color choices. Colors can evoke a wide range of feelings and associations. For instance:
- Red: Passion, energy, and urgency
- Blue: Calmness, sadness, and trust
- Yellow: Happiness, optimism, and warmth
- Green: Nature, growth, and tranquility
As an artist, harnessing these emotional triggers can turn your painting from a simple image into a powerful statement. By understanding how colors interact, you can create harmony or contrast within your work. For example, complementary colors—those that are opposite each other on the color wheel, like blue and orange—can create a striking visual impact when placed side by side.
Moreover, color mixing is another essential aspect of color theory. It’s not just about grabbing a tube of paint and slapping it on the canvas. You need to consider the temperature of colors as well. Warm colors (like reds and yellows) can advance towards the viewer, while cool colors (like blues and greens) tend to recede. This principle can be used to create depth in your artwork, guiding the viewer's eye through the composition.
In summary, mastering color theory can transform your painting process. It’s not merely about picking pretty colors; it’s about understanding their relationships, emotional impacts, and how they can be utilized to create a captivating visual narrative. So, the next time you sit down to paint, remember that each color has a story to tell, and it’s up to you to bring that story to life on your canvas.
- What is the color wheel? The color wheel is a visual representation of colors arranged according to their chromatic relationship. It helps artists understand how colors interact with one another.
- How do I choose a color palette for my painting? Start by selecting a few colors that resonate with the mood you want to convey. Consider using a color wheel to find complementary or analogous colors for harmony.
- What are warm and cool colors? Warm colors are those that evoke warmth, like reds and yellows, while cool colors are calming, like blues and greens. They can be used to create depth and perspective in your artwork.
Layering Techniques
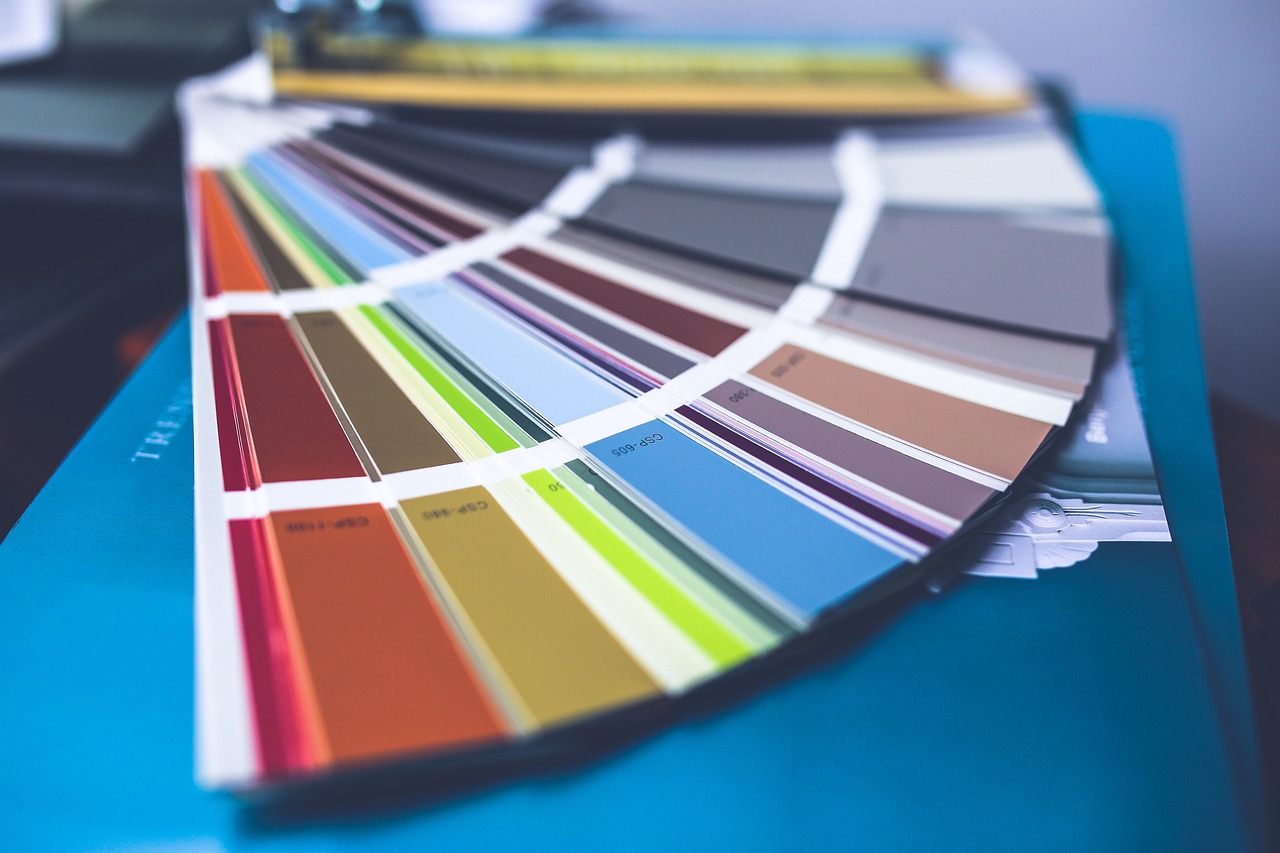
Layering is not just a technique; it’s a magical process that transforms a flat surface into a vibrant, multi-dimensional masterpiece. Think of layering like building a sandwich; each layer adds flavor and complexity, making the end result far more satisfying than a single slice of bread. In painting, layering allows artists to create depth, richness, and a sense of movement that captivates the viewer’s eye.
One of the most popular layering techniques is glazing. This method involves applying a thin, transparent layer of paint over a dry base layer. The beauty of glazing is that it can change the hue and tone of the underlying paint without completely obscuring it. Imagine the way sunlight filters through leaves, casting dappled shadows on the ground. That’s the kind of effect glazing can achieve, adding luminosity and depth to your work.
Another effective technique is scumbling, which involves applying a dry, opaque layer of paint over a dried layer of paint. This technique can create a textured, broken color effect, much like the way light dances on water. Scumbling is perfect for adding highlights or creating atmospheric effects, giving your painting a sense of movement and life. When done correctly, it can mimic the soft, hazy edges of a sunset or the rough texture of a rocky landscape.
When layering, it’s essential to consider the order of your layers. Typically, artists start with the darkest colors and build up to the lightest. This approach helps in creating a solid foundation while allowing the lighter tones to pop. Here’s a simple breakdown of the layering process:
| Layer Type | Description | Purpose |
|---|---|---|
| Base Layer | The initial layer of paint, usually darker. | Establishes depth and shadows. |
| Glaze Layer | A thin, transparent layer applied over the base. | Adds richness and complexity. |
| Highlight Layer | Light, opaque paint applied for highlights. | Brings focal points to life. |
Additionally, the choice of medium can greatly affect your layering process. For instance, oil paints allow for longer drying times, giving you the flexibility to modify layers without rushing. On the other hand, acrylics dry quickly, which can be advantageous for layering but requires more precision and speed. Understanding the properties of your materials will help you make the most of your layering techniques.
Don’t forget about the importance of transparency and opacity in your layers. A transparent layer can allow underlying colors to shine through, while an opaque layer can completely cover previous work. Balancing these two qualities is key to achieving a harmonious painting. Think of it like mixing colors in music; too much of one note can drown out the others, but the right blend creates a symphony.
In conclusion, mastering layering techniques is essential for any artist looking to elevate their work. It’s not just about adding paint; it’s about creating a dialogue between colors, textures, and forms. So grab your brushes, experiment with glazing and scumbling, and watch as your canvas transforms into a stunning work of art that tells a story all its own.
- What is the best medium for layering? Oil paints are great for layering due to their slow drying time, while acrylics are effective for quick layering.
- Can I layer different types of paint? Yes, but be cautious as different paints have different properties. Always test on a small area first.
- How can I achieve depth in my paintings? Use layering techniques with varying opacity and transparency to create a sense of depth and dimension.

Brush Techniques and Styles
When it comes to painting, the brush is your magic wand, and the techniques you use can dramatically alter the outcome of your artwork. Imagine standing in front of a blank canvas, brush in hand, ready to create something extraordinary. But wait—what kind of brush stroke will you use? Will it be bold and expressive or soft and subtle? The choice is yours, and each technique carries its own personality and flair.
Let’s dive into some exciting brush techniques that every artist should know. First up is the flat brush stroke. This technique is perfect for creating sharp lines and broad areas of color. By using the edge of a flat brush, you can achieve clean, crisp edges, making it ideal for landscapes or architectural elements. On the other hand, the round brush stroke offers versatility. With its rounded tip, it allows artists to create both fine details and broad strokes, making it a staple in any painter's toolkit.
Another fascinating technique is the dry brush method. This involves using a brush that has very little paint on it, allowing for a scratchy, textured effect. It’s fantastic for adding depth and dimension, especially in landscapes where you want to depict the roughness of tree bark or the softness of clouds. Conversely, the wash technique is all about fluidity. By diluting your paint with water, you can create a translucent layer that allows colors to blend beautifully, giving your painting an ethereal quality.
But why stop there? Let’s talk about blending. This technique is essential for creating smooth transitions between colors. Whether you’re painting a sunset or a portrait, blending helps to create a sense of realism. Use a clean, dry brush to gently feather the edges of two colors together, and watch as they dance into one another, creating a stunning gradient.
Texture is another critical aspect of brush techniques. For instance, the impasto technique involves applying paint thickly to create a three-dimensional effect. Imagine using a palette knife to lay down thick swaths of paint, making your artwork almost sculptural. This technique can add incredible depth and intrigue to your painting, drawing viewers in for a closer look.
Incorporating stippling is another way to enhance your work. This method involves applying small dots of color to build an image, which can be particularly effective for foliage in landscapes or creating a sense of movement in abstract pieces. The beauty of stippling lies in its ability to create intricate details without overwhelming the viewer.
Now, let’s not forget about the importance of brush maintenance. Proper care for your brushes can significantly affect your painting experience. Always clean your brushes thoroughly after each use to maintain their shape and longevity. A well-cared-for brush will perform better, providing you with the precision and control needed to execute your techniques flawlessly.
In summary, mastering brush techniques is about experimentation and finding your unique style. Whether you prefer the bold strokes of a flat brush or the delicate touch of a round brush, each technique offers a new way to express your creativity. So, grab your brushes, unleash your imagination, and let the canvas come alive with your personal touch!
- What type of brush is best for beginners? A round brush and a flat brush are great starting points for beginners due to their versatility.
- How do I choose the right brush for my painting style? Consider the effects you want to achieve; for detailed work, use smaller brushes, and for broader strokes, opt for larger ones.
- Can I use any type of paint with any brush? Not all brushes work well with every type of paint. For example, oil brushes are different from watercolor brushes, so choose accordingly.
Incorporating Texture
When it comes to painting, texture is like the secret ingredient that can transform a good piece of art into a truly **captivating** masterpiece. Think of texture as the **spice** in your favorite dish—it adds depth and enhances the overall experience. By incorporating texture, artists can create a sense of **dimension** and **interest** that draws the viewer in and invites them to explore the artwork more closely.
There are various techniques that artists can use to achieve texture in their paintings, and each method brings its own unique flair. For instance, the **impasto** technique involves applying thick layers of paint, often with a palette knife, which creates a three-dimensional effect on the canvas. This technique can be particularly striking in landscape paintings where the texture of the foliage or the roughness of a rocky surface can be accentuated. Imagine standing in front of a painting where the trees seem to leap off the canvas—this is the magic of impasto!
Another fascinating way to incorporate texture is through **mixed media**. This approach allows artists to combine various materials such as paper, fabric, or even natural elements like sand or leaves with traditional paint. The result is a rich tapestry of textures that can evoke emotions and tell a story. For example, a painting depicting a beach scene might use sand to give the shoreline a realistic feel, while pieces of blue fabric could represent the waves crashing against the shore.
In addition to these techniques, artists often experiment with tools beyond brushes. Items like sponges, combs, and even their fingers can be used to create a variety of textures. A sponge can produce soft, cloud-like effects in the sky, while a comb might create sharp lines that mimic the texture of grass swaying in the wind. The possibilities are endless, and the only limit is your imagination!
When incorporating texture, it's also essential to consider how it interacts with color. The interplay between textured surfaces and color can create stunning visual effects. For example, a heavily textured area might reflect light differently than a smooth section, leading to a dynamic contrast that captures the viewer's attention. Artists often use this to their advantage, strategically placing textured elements in areas where they want to draw focus.
Lastly, it's important to remember that texture should enhance, not overwhelm. The key is to strike a balance between smooth and textured areas within a painting. This not only helps to guide the viewer's eye but also creates a harmonious composition. Think of it like a well-composed song—too many notes can create chaos, but the right mix of sounds can produce a beautiful melody.
Incorporating texture into your paintings is a journey of exploration and experimentation. Don't be afraid to try new techniques and materials! Each brushstroke and layer of texture adds to the story you want to tell through your art. So grab your paints, get your hands a little messy, and let your creativity flow!
- What is the best way to start incorporating texture in my paintings? Begin by experimenting with different tools and materials. Try using palette knives or sponges to apply paint and see how they change the texture of your work.
- Can I use texture in digital painting? Absolutely! Many digital art programs offer brushes that mimic traditional texture techniques. You can also layer different textures digitally to achieve a similar effect.
- How do I know when to stop adding texture? Trust your instincts! Step back from your painting and assess the overall composition. If the texture feels balanced and enhances the piece, you're on the right track.
Final Touches and Detailing
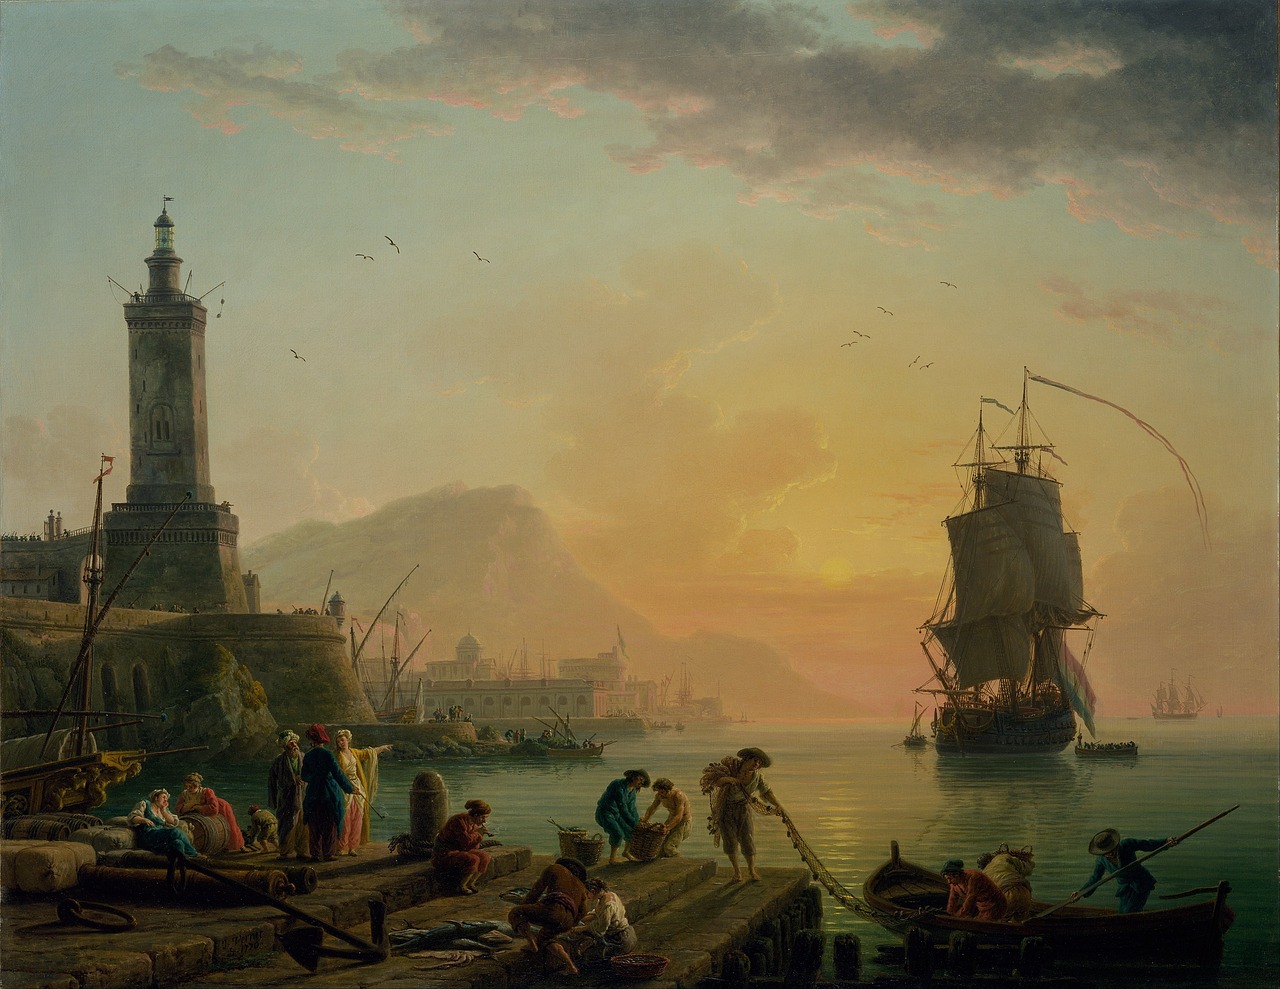
The moment has finally arrived—the painting is nearly complete, but the final touches are what will truly elevate it from good to *extraordinary*. Just like a chef adding a pinch of salt to a dish, these finishing details can make all the difference. As an artist, it's essential to step back and evaluate your work with a fresh perspective. This stage is not just about adding more paint; it’s about enhancing the overall composition and ensuring that every element harmonizes beautifully.
One effective approach is to focus on the *focal points* of your painting. These are the areas where you want the viewer's eye to land first. By adding more detail or brighter colors to these spots, you can draw attention and create a sense of depth. Think of it as spotlighting the main actors in a play—without the focus, the performance feels flat. You might consider using techniques such as glazing, where you apply a thin layer of transparent paint over dried layers, to intensify colors and add richness to your artwork.
Additionally, pay close attention to the edges of your painting. Softening some edges while keeping others sharp can create a sense of *depth and dimension*. For instance, in a landscape, the distant mountains might benefit from softer edges to suggest atmospheric perspective, while the foreground elements should be more defined. This contrast creates a dynamic visual experience that captures the viewer's imagination.
Another aspect to consider is the *texture* of your painting. Adding texture can bring a tactile quality that invites viewers to engage more deeply. Techniques like impasto, where paint is applied thickly to create a three-dimensional effect, can add intrigue. Alternatively, you might choose to use mixed media elements, such as incorporating sand or fabric, to create unique textures that enhance the visual narrative of your artwork.
Finally, don’t underestimate the power of a varnish. Once your painting is completely dry, applying a protective layer of varnish not only enhances the colors but also provides a protective barrier against dust and UV light. This final step is akin to putting a frame around your masterpiece; it gives it a polished look and preserves your hard work for years to come. Remember, the goal is to create a piece that resonates with viewers, drawing them into your world and leaving a lasting impression.
- What are the best materials for final touches? High-quality brushes, fine detail paint, and varnish are essential for achieving the best results in the final stages of your painting.
- How do I know when my painting is finished? A painting is often considered complete when you feel it conveys the message or emotion you intended. Stepping back and viewing it from a distance can help you gain perspective.
- Can I make changes after applying varnish? It's not advisable to make changes after varnishing, as it can alter the finish and texture of your work. Always finalize your painting before applying varnish.
- How do I choose the right varnish? Select a varnish based on the finish you desire—glossy, satin, or matte. Test on a small area if you're unsure, and always follow the manufacturer's instructions.

Evaluating and Reflecting on Your Work
Once you've put the finishing touches on your painting, the next step is perhaps one of the most important yet often overlooked: evaluation and reflection. This process is not just about admiring your work; it's about diving deep into what you created, understanding your artistic choices, and identifying areas for improvement. Think of it as a post-game analysis after a big match; you review your performance to learn and grow for the next challenge.
When evaluating your painting, consider several key aspects:
- Composition: Does the arrangement of elements guide the viewer's eye throughout the piece? Are there any areas that feel too crowded or too empty?
- Color Usage: Reflect on your color choices. Did they evoke the emotions you intended? Are there colors that clash or harmonize beautifully?
- Technique: Analyze the brushwork and texture. Did you effectively use layering and blending to create depth and interest?
- Overall Impact: What is the first impression of your work? Does it convey the message or feeling you aimed for?
After assessing these elements, take a moment to reflect on your artistic journey. What challenges did you face during the painting process? Did you discover any new techniques or styles that excited you? Reflection is about recognizing both your strengths and weaknesses, allowing you to celebrate your achievements while also setting goals for future projects.
One effective method for reflection is to keep an art journal. In this journal, you can:
- Document your thoughts and feelings about each piece.
- Sketch ideas for future projects.
- Record any techniques you want to explore further.
Moreover, sharing your work with fellow artists or a community can provide valuable feedback. Constructive criticism can open your eyes to perspectives you may not have considered and can be a great source of motivation. Remember, every critique is an opportunity for growth!
Lastly, don’t forget to celebrate your progress. Whether it’s a small milestone or a major breakthrough, acknowledging your growth as an artist is crucial. It fuels your passion and reinforces your commitment to your craft. So, take a step back, admire your work, and recognize how far you’ve come on this artistic journey!
Q: How often should I evaluate my work?
A: It's beneficial to evaluate your work after completing each piece, but you can also reflect periodically throughout your artistic journey. Regular reflection helps you stay mindful of your growth and areas for improvement.
Q: What should I do if I receive negative feedback?
A: Negative feedback can be tough to hear, but try to view it as a learning opportunity. Take a moment to process it, and then evaluate its validity. Constructive criticism can help you grow as an artist.
Q: Is it necessary to share my work with others?
A: While it's not mandatory, sharing your work can provide you with different perspectives and constructive feedback. It can also help you connect with other artists and build a supportive community.
Q: How can I track my artistic progress?
A: Keeping an art journal is an excellent way to track your progress. You can document your thoughts, techniques learned, and even keep a visual record of your artworks over time.
Frequently Asked Questions
- What is the importance of the initial sketch in the painting process?
The initial sketch is crucial as it lays the groundwork for your painting. It helps you plan out the composition, proportions, and overall design before you dive into the colorful chaos. Think of it as the blueprint for a house; without it, you might end up with a structure that's all over the place!
- How do I choose the right materials for painting?
Choosing the right materials can make or break your artwork. Different types of paints (like acrylics, oils, or watercolors) have unique properties that can affect your final piece. Experimenting with various brushes and canvases will help you find what suits your style best. It's like finding the perfect pair of shoes for a dance; they need to fit just right!
- What does preparing the canvas involve?
Preparing the canvas is all about ensuring a smooth surface for painting. This often includes priming and stretching the canvas to prevent it from warping. Think of it as getting your stage ready before the big performance; you want everything to be just right for the spotlight!
- Why is color theory important in painting?
Color theory is essential because it helps you understand how colors interact and how they can evoke emotions. Knowing your color wheel and how to mix colors can lead to more harmonious and dynamic paintings. It's like knowing the right notes to play in a song; the better you understand them, the more beautiful your music will be!
- What are layering techniques, and why are they used?
Layering techniques, such as glazing and scumbling, are used to add depth and complexity to your painting. These methods allow you to build up colors and textures gradually, creating a more visually appealing artwork. Imagine stacking building blocks; each layer adds to the overall structure and beauty!
- How do brush techniques affect my painting?
Different brush techniques can dramatically change the texture and feel of your painting. Whether you're using bold strokes or delicate touches, each technique contributes to the final look. It's like choosing the right brush to paint a masterpiece; each stroke tells a story!
- What are some ways to incorporate texture into my artwork?
Incorporating texture can add dimension and interest to your paintings. Techniques like impasto (applying thick paint) and mixed media can create a tactile experience. Think of it as adding layers to a cake; the more textures, the more delightful the experience!
- What should I focus on during the final touches of my painting?
The final touches are where your painting truly comes to life. Pay attention to detailing techniques that can elevate your artwork, making it visually striking. It's like putting the cherry on top of a sundae; it’s the finishing touch that makes everything pop!
- Why is evaluating my work important after completing a painting?
Evaluating your work is crucial for personal growth as an artist. Reflecting on what went well and what could be improved helps you develop your skills over time. Think of it as a coach reviewing game footage; it’s all about learning and getting better for the next round!


