
Essential Guide for Painting with Pastels
Welcome to the vibrant world of pastel painting! If you've ever been captivated by the soft, dreamy colors and the ability to blend hues seamlessly, then you're in the right place. In this guide, we will explore the fundamental techniques, tools, and tips that will help you master the art of pastel painting. Whether you're a curious beginner or an experienced artist looking to enhance your skills, this guide is designed to ignite your creativity and spark your passion for this unique medium.
Pastels are not just simple sticks of color; they are a gateway to expressing your artistic vision in a way that feels both intimate and expansive. Imagine the sensation of gliding a vibrant pastel across textured paper, leaving behind a trail of color that blends and dances with light. With a little practice and the right guidance, you can create stunning artworks that resonate with emotion and beauty.
Throughout this guide, we will delve into various aspects of pastel painting, starting with the different types of pastels available. You'll learn how to choose the right paper to complement your work, discover essential tools that can enhance your painting experience, and master basic techniques that form the foundation of your artistic journey. We will also explore the fascinating realm of color mixing and theory, helping you achieve harmonious and vibrant compositions.
Texture is another critical element in pastel art, and we'll share techniques to create everything from smooth gradients to textured surfaces that add depth to your pieces. Finally, we will discuss the importance of fixatives in preserving your artwork and provide inspiration for subject matter that can fuel your creativity.
So, whether you're looking to capture the serene beauty of a landscape, the intricate details of a portrait, or the free-spirited nature of abstract art, this guide is here to support you every step of the way. Let's embark on this colorful journey together and unlock the potential of pastel painting!
- What are pastels made of? Pastels are made from pure powdered pigments mixed with a binder, allowing for vibrant colors and easy blending.
- Can I use regular paper for pastel painting? While you can use regular paper, it's recommended to choose paper specifically designed for pastels, as it provides better texture and grip.
- How do I protect my pastel artwork? Using a fixative spray can help preserve your pastel artwork and prevent smudging. Always use it in a well-ventilated area.
- What is the difference between soft and hard pastels? Soft pastels are more pigmented and blend easily, while hard pastels are firmer and better for fine details.
Understanding Pastels
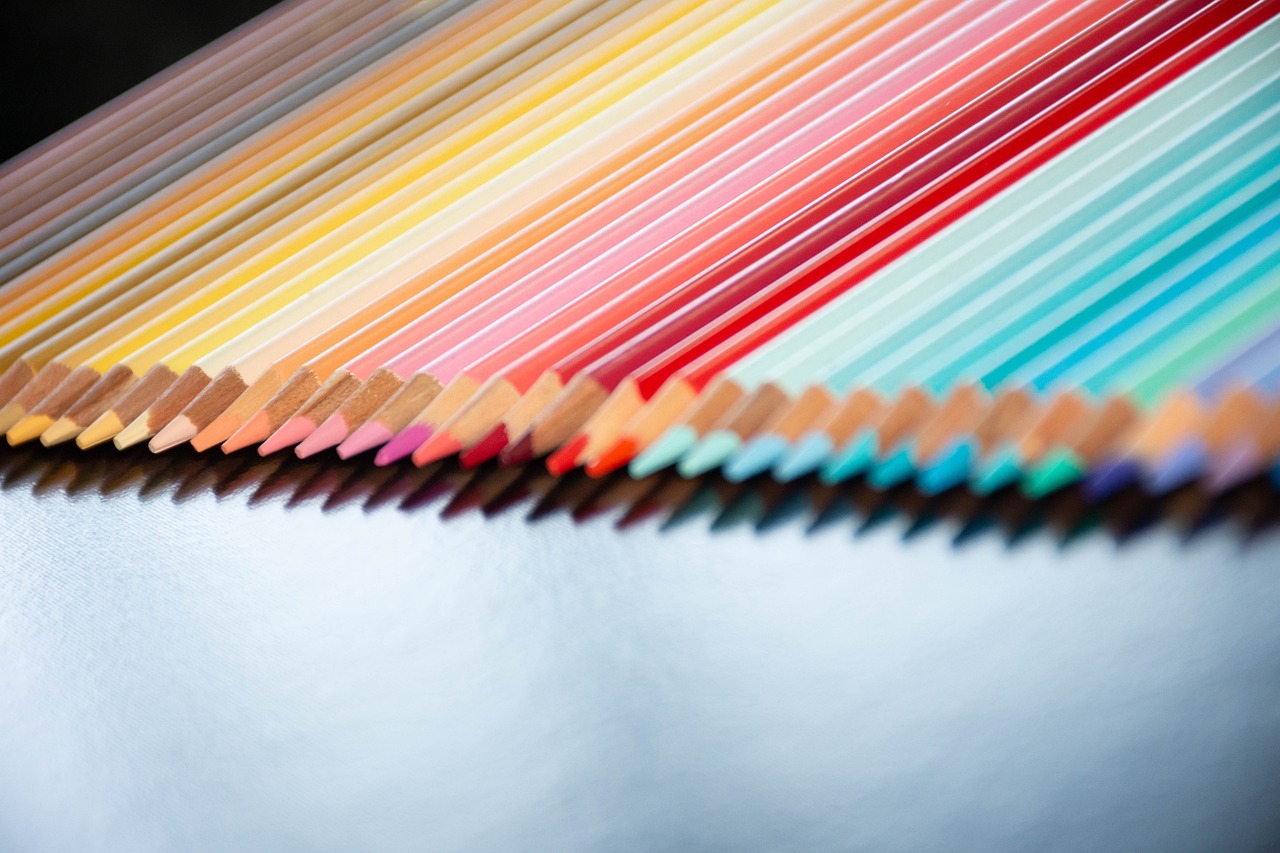
When it comes to the vibrant world of art, pastels are like a box of delicious chocolates—each type offers a unique flavor and experience! Pastels are available in various forms, each with its own characteristics that can significantly influence your artistic journey. The three main types of pastels are soft pastels, hard pastels, and oil pastels. Understanding the differences between them is crucial for selecting the right medium that resonates with your creative vision.
Soft pastels are often the most popular choice among artists due to their rich pigmentation and smooth application. They are made with a high concentration of pigment and a minimal amount of binder, which allows for vibrant colors and easy blending. When you use soft pastels, you'll notice how effortlessly they glide across the paper, creating beautiful gradients and a velvety texture. However, they can be quite fragile, so handling them with care is essential to avoid breakage.
On the other hand, hard pastels are more durable and less prone to crumbling. They contain more binder, which makes them ideal for fine details and precise lines. If you've ever tried drawing with a pencil, you'll appreciate the control that hard pastels offer. Artists often use hard pastels for underdrawings or to create sharp edges before layering with softer pastels. Think of them as the sturdy foundation on which you can build your masterpiece!
Oil pastels are a different beast altogether. They contain a non-drying oil and wax binder, giving them a creamy texture that feels luxurious to work with. Unlike their chalky counterparts, oil pastels can be blended with fingers or tools, allowing for a different range of effects. They are perfect for those who love to experiment with color and texture, as they can create both soft, subtle transitions and bold, vibrant strokes. However, keep in mind that oil pastels can be more challenging to layer and may require a different approach to fixatives.
To help you visualize these differences better, here's a quick comparison table:
| Type of Pastel | Characteristics | Best For |
|---|---|---|
| Soft Pastels | Highly pigmented, smooth application, fragile | Vibrant artwork, blending, and layering |
| Hard Pastels | Less pigmented, durable, more binder | Fine details, underdrawings, sharp edges |
| Oil Pastels | Creamy texture, non-drying, versatile | Bold strokes, unique textures, experimentation |
As you embark on your pastel painting journey, remember that each type of pastel offers its own unique set of possibilities. Whether you're drawn to the softness of soft pastels, the precision of hard pastels, or the luxurious feel of oil pastels, understanding these differences will help you make informed choices that align with your artistic goals. So, grab your pastels, and let your creativity flow!
- What are the best pastels for beginners? Soft pastels are often recommended for beginners due to their ease of use and vibrant colors.
- Can I blend pastels with my fingers? Yes! Blending with your fingers is a common technique, especially with soft and oil pastels.
- How do I preserve my pastel artwork? Using fixatives is essential to protect your work from smudging and fading.

Choosing the Right Paper
When it comes to pastel painting, the choice of paper is absolutely crucial. Think of it as the canvas for your dreams—if the foundation isn’t solid, the entire structure can crumble. Pastels, with their rich pigments and unique textures, require specific types of paper to truly shine. So, how do you choose the right paper? Let’s dive into the world of pastel paper and discover what makes each type special.
First off, you’ll want to consider the texture of the paper. Pastel papers come in a variety of textures, from smooth to rough. Smooth papers are great for detailed work and fine lines, allowing your pastels to glide effortlessly across the surface. On the other hand, rough papers have a pronounced texture that can hold more pigment, making them ideal for blending and layering. If you’re unsure which one to pick, think about the style of art you want to create. Are you aiming for intricate details or bold, sweeping strokes? Your answer will guide your choice.
Next, let’s talk about the weight of the paper. The weight of the paper determines how much pastel it can hold without buckling or tearing. Heavier papers, typically in the range of 200-300 gsm (grams per square meter), are excellent for pastel painting as they can withstand multiple layers of pigment without warping. Here’s a quick comparison to help you understand:
| Paper Weight (gsm) | Recommended Use |
|---|---|
| 200-250 | Good for light applications and single layers. |
| 250-300 | Ideal for heavy layering and blending techniques. |
| 300+ | Best for mixed media and heavy applications. |
Another important factor is the color of the paper. While many artists default to white or cream, don’t overlook the potential of colored papers! A colored background can enhance the vibrancy of your pastels and can even serve as a part of your composition. For instance, a dark paper can make bright colors pop, while a warm-toned paper can add a unique glow to your artwork. Experimenting with different colors can lead to exciting discoveries in your artistic journey.
Lastly, consider the brand of paper you choose. Not all pastel papers are created equal, and some brands are renowned for their quality and texture. Brands like Canson, Fabriano, and Sennelier offer excellent options that cater specifically to pastel artists. It’s worth investing in higher-quality paper, as it can significantly affect the outcome of your artwork.
To summarize, when choosing the right paper for your pastel painting, keep these key factors in mind:
- Texture: Smooth for details, rough for blending.
- Weight: Heavier for multiple layers.
- Color: Experiment with different backgrounds.
- Brand: Opt for reputable brands for the best quality.
In conclusion, selecting the right paper is a fundamental step that can elevate your pastel painting experience. Remember, it’s not just about the pastels themselves; the paper you choose can make all the difference in your final piece. So, take your time, experiment, and find the perfect paper that resonates with your artistic vision!
Q: Can I use regular drawing paper for pastels?
A: While you can use regular drawing paper, it may not hold the pastel as well as specialized pastel paper. It's best to use paper designed for pastels to achieve the best results.
Q: What is the difference between soft and hard pastel papers?
A: Soft pastel papers are typically more textured and can hold more pigment, while hard pastel papers are smoother and better for detailed work.
Q: How do I know if the paper is suitable for pastels?
A: Look for papers specifically labeled for pastel use. They usually have a textured surface and are heavier in weight to support layering.
Essential Tools for Pastel Painting
When it comes to pastel painting, having the right tools can make all the difference between a chaotic mess and a stunning masterpiece. Think of your tools as the paintbrushes of a chef; they are essential for creating a delicious meal, or in this case, a beautiful piece of art. While pastels themselves are the star of the show, there are several other essential tools that every pastel artist should have in their arsenal.
First and foremost, blending stumps are a must-have. These small, pointed tools are perfect for smoothing out colors and creating seamless transitions between shades. They come in various sizes, allowing you to tackle both large areas and intricate details. If you want to achieve that dreamy, soft look that pastels are known for, blending stumps will be your best friend.
Another important tool is a good fixative. Fixatives are sprays that help to set your artwork and prevent smudging. They come in various finishes, from matte to glossy, so you can choose one that complements your style. Applying fixative can be a bit like putting a protective seal on a treasure; it ensures that your hard work stays intact for years to come. Just remember to spray it from a distance to avoid saturating your artwork.
Don’t forget about erasers, which can be surprisingly useful in pastel painting. A kneaded eraser, for instance, is perfect for lifting off excess pastel and creating highlights. It’s like magic! You can mold it into any shape, allowing you to erase fine lines or larger areas with ease. This tool can help you refine your work and add those finishing touches that make a piece truly shine.
In addition to these essentials, consider investing in a palette for mixing colors. While pastels are often used straight from the stick, having a dedicated space for mixing can help you create custom shades that are uniquely yours. Think of it as your artist's kitchen, where you can whip up new colors that will bring your vision to life.
Lastly, a sturdy easel can enhance your painting experience. It allows you to work at different angles and keeps your artwork at eye level, reducing strain on your neck and back. Whether you’re painting in your studio or outdoors, an easel provides stability and comfort, letting you focus on your creativity.
To summarize, here’s a quick overview of essential tools for pastel painting:
| Tool | Purpose |
|---|---|
| Blending Stumps | Smooth and blend colors |
| Fixative | Preserve artwork and prevent smudging |
| Erasers | Lift off excess pastel and create highlights |
| Palette | Mix and create custom colors |
| Easel | Provide stability and comfort while painting |
Equipped with these tools, you’ll be well on your way to creating stunning pastel artworks that express your unique style and vision. Remember, the right tools not only enhance your creative process but also inspire you to experiment and push the boundaries of your art. So gather your supplies, unleash your imagination, and let your pastel journey begin!
Q: Can I use regular paper for pastel painting?
A: While you can use regular paper, it’s best to choose paper specifically designed for pastels as it has the right texture to hold the pigment.
Q: How do I clean my blending stumps?
A: You can clean blending stumps by rubbing them on a piece of sandpaper or using a kneaded eraser to lift off the pastel residue.
Q: How often should I use fixative on my artwork?
A: It’s a good idea to apply fixative after completing a layer of your artwork and again once you finish the piece to ensure it stays intact.
Q: Can I mix oil pastels with soft pastels?
A: While it is possible to use both together, it’s generally best to keep them separate as they have different properties and techniques.
Basic Techniques for Beginners
When diving into the world of pastel painting, mastering some basic techniques is essential for unleashing your creative potential. Think of these techniques as the building blocks of your artistic journey, laying a solid foundation that will support your future endeavors. One of the first methods to grasp is layering. This technique involves applying multiple layers of pastel to create depth and richness in color. Start with a light touch, gradually adding more pigment to achieve the desired intensity. Remember, pastels are all about building color, much like stacking blocks to create a sturdy tower.
Next up is blending. This technique is where the magic happens, as it allows you to create smooth transitions between colors. Many artists use their fingers to blend, but you can also opt for tools like blending stumps or tortillons. Each method offers a different result, so don’t hesitate to experiment! Blending is akin to mixing paints on a palette; it opens up a world of possibilities for achieving soft gradients or dramatic contrasts.
Another fundamental technique is shading. Shading gives your artwork a sense of dimension, making it appear more lifelike. To practice shading, select an object to draw and observe how light interacts with it. Notice where the highlights and shadows fall. By applying pastel in a controlled manner, you can replicate these effects on paper. This technique not only enhances realism but also adds depth to your compositions.
As a beginner, you might find yourself overwhelmed by the vast array of colors available. This is where the color mixing technique comes into play. Understanding how to mix pastels can significantly expand your palette. Start by blending two or more colors directly on your paper. This method is similar to mixing ingredients in a recipe; a little of this and a dash of that can create something entirely new and exciting!
Moreover, don't underestimate the importance of experimenting with different techniques. Try using different strokes, such as hatching or cross-hatching, to see how they affect your artwork. You can also play with the pressure you apply to the pastel, as varying pressure can produce different effects. Just like a musician experimenting with notes, you’ll discover your unique style through practice and exploration.
Finally, remember that every artist has their own journey. It’s perfectly fine to make mistakes along the way. Think of those mistakes as stepping stones rather than stumbling blocks. Embrace them, learn from them, and watch as your skills grow. The world of pastel painting is vast and full of surprises, and with these basic techniques in your toolkit, you’re well on your way to creating stunning artwork that reflects your personal vision.
- What are the best pastels for beginners? Soft pastels are often recommended for beginners due to their ease of use and vibrant colors.
- How do I choose the right paper for pastels? Look for paper with a textured surface, such as pastel paper or watercolor paper, to hold the pigment effectively.
- Can I use fixatives on my pastel paintings? Yes, using a fixative can help preserve your artwork and prevent smudging.
Color Mixing and Theory
When it comes to pastel painting, understanding color mixing and theory is not just a skill; it's an art form in itself. Imagine stepping into a world where colors dance and blend, creating a symphony of hues that breathe life into your artwork. Mastering this aspect can transform your pastel pieces from simple sketches into vibrant masterpieces that capture the viewer's attention. So, how do we navigate this colorful journey?
First off, let’s break down the basics of color theory. At its core, color theory is the study of how colors interact, complement, and contrast with one another. It’s like knowing the rules of a game before you play. The color wheel is a fantastic starting point, showcasing the primary colors—red, blue, and yellow—that mix to create secondary colors like green, orange, and purple. But don’t stop there! Understanding tertiary colors, which come from mixing primary and secondary colors, can add even more depth to your palette.
When working with pastels, the way you mix colors can dramatically affect the outcome of your piece. Unlike paints, which may require a palette and brushes, pastels allow for a more tactile approach. You can layer colors directly on your paper, creating rich blends that are both vibrant and nuanced. For instance, when you want a soft gradient, start with the lighter color and gently layer the darker shade on top, using your fingers or a blending stump to smooth the transition. This technique not only enhances the depth of your work but also invites viewers to explore the subtleties in your art.
One of the most exciting aspects of working with pastels is the ability to create vibrant and harmonious compositions. To achieve this, consider the following tips:
- Analogous Colors: These are colors that sit next to each other on the color wheel, like blue, blue-green, and green. Using analogous colors can create a serene and cohesive look.
- Complementary Colors: These colors are opposite each other on the color wheel, such as red and green. When placed next to each other, they create a striking contrast that can make your artwork pop.
- Warm and Cool Colors: Warm colors (reds, oranges, yellows) can evoke feelings of warmth and energy, while cool colors (blues, greens, purples) can create a sense of calm and tranquility. Mixing these can add emotional depth to your work.
Now, let’s talk about the importance of experimentation. Don’t be afraid to play with your pastels! Try mixing colors directly on the paper, or use a piece of scrap paper to test combinations before applying them to your artwork. Sometimes, the most unexpected mixes yield the most delightful surprises. Think of it like cooking; sometimes, a pinch of this and a dash of that can create a flavor explosion!
Lastly, keep in mind the concept of opacity and transparency. Pastels can vary in how opaque or transparent they are. Understanding this will help you layer colors effectively. For instance, lighter colors can often be layered on top of darker ones to create highlights, while darker colors can be used to deepen shadows. This layering technique not only enhances the visual depth but also allows you to create a dynamic range of tones that can transform your artwork.
In conclusion, mastering color mixing and theory in pastel painting is a journey filled with exploration and creativity. By understanding the relationships between colors, experimenting with different techniques, and learning to layer effectively, you can unlock a new level of artistry that captivates and inspires. So grab your pastels, unleash your imagination, and let the colors flow!
Q: What are the best colors to start with for pastel painting?
A: It's best to start with a basic set of primary colors (red, blue, yellow) and a few secondary colors (green, orange, purple) to allow for a wide range of mixing possibilities.
Q: Can I use water with pastels?
A: Generally, pastels are dry media and do not mix well with water. However, some artists use a technique called "wet pastel" where they apply a fixative or medium to create different effects.
Q: How can I preserve my pastel artwork?
A: Use a fixative spray specifically designed for pastels to help preserve your artwork. Always spray from a distance and in a well-ventilated area to avoid damaging your work.
Creating Texture in Pastel Art
Creating texture in pastel art is like adding a secret ingredient to your favorite recipe—it transforms the ordinary into the extraordinary! Texture can evoke emotions, set the mood, and bring life to your artwork. Whether you're aiming for the soft, delicate touch of a flower petal or the rugged, rough surface of a rocky landscape, understanding how to manipulate texture will elevate your pastel paintings to new heights.
One of the most effective ways to create texture is through the technique of layering. By applying multiple layers of pastel, you can build depth and richness in your artwork. Start with a light base layer, then gradually add darker shades, allowing the colors to blend and interact. This method not only enhances the visual appeal but also adds a tactile quality that invites viewers to engage with your work. Imagine your painting as a cake—each layer contributes to the overall flavor and texture!
Another fantastic technique for achieving texture is blending. While some artists prefer a smooth finish, others revel in the beauty of a more textured approach. Use your fingers, blending stumps, or even a soft cloth to blend the pastels. This can create soft transitions and gradients that mimic the natural world. For instance, when painting a sunset, blending can help you achieve that dreamy, ethereal quality that makes the sky feel alive.
But let's not forget about the power of contrast! Incorporating both smooth and rough textures can create a dynamic visual experience. For example, if you're painting a serene lake, consider adding rough textures to the surrounding rocks or foliage. This contrast draws the eye and adds interest. Think of it like a conversation—when different voices come together, the dialogue becomes richer and more engaging.
To further explore texture, consider experimenting with various tools and materials. For instance, you can use a palette knife to scrape away layers of pastel, revealing the paper beneath and creating an interesting texture. Alternatively, try applying pastels with a brush or even a sponge for unique effects. Each tool will yield different results, allowing you to discover your personal style.
Additionally, the choice of paper plays a critical role in the texture of your artwork. Textured papers, such as those with a toothy surface, can hold more pastel and create a lively, vibrant finish. On the other hand, smoother papers allow for finer details and softer blends. It's essential to experiment with different types of paper to find the one that best suits your artistic vision.
Remember, creating texture is not just about technique—it's also about feeling. Let your emotions guide you as you work. If you're inspired by the rugged mountains, let that passion translate into your brushstrokes and layering techniques. The more you connect with your subject matter, the more authentic and textured your artwork will become.
In conclusion, mastering texture in pastel art is an exciting journey filled with experimentation and discovery. By layering, blending, contrasting, and utilizing various tools and papers, you can create stunning pieces that resonate with viewers. So grab your pastels, let your creativity flow, and watch as your artwork transforms into a textured masterpiece!
- What types of paper are best for creating texture in pastel art?
Textured papers with a good amount of tooth are ideal, as they hold pastel better and allow for more layering. - Can I use water with pastels to create texture?
While traditional pastels are not water-soluble, you can experiment with watercolors or water-based mediums to add texture alongside your pastels. - How do I preserve the texture in my finished pastel artwork?
Using a fixative spray can help preserve the texture and prevent smudging. Make sure to apply it lightly to avoid flattening your work.
Fixatives and Their Importance
When it comes to pastel painting, one of the most crucial yet often overlooked aspects is the use of fixatives. These magical sprays are like a safety net for your artwork, ensuring that your vibrant colors and delicate details remain intact over time. Imagine spending hours layering and blending your pastels only to have them smudge or fade away—heartbreaking, right? That’s where fixatives step in, providing a protective barrier that locks in your creativity.
Fixatives come in two main types: workable fixatives and final fixatives. Workable fixatives allow you to continue working on your piece after application, which is fantastic for artists who enjoy layering their colors. You can think of them as a temporary shield, letting you build upon your masterpiece without fear of disturbing previous layers. On the other hand, final fixatives are meant to be used once you’re satisfied with your artwork. They create a more permanent protection, sealing your work and preventing any further alterations. It's like putting your painting in a glass case—once it’s done, you want it to last forever!
Now, you might be wondering how to apply these fixatives effectively. The application process is crucial for achieving the best results. Here are some tips to keep in mind:
- Distance Matters: Hold the can about 12-18 inches away from your artwork. This distance helps to ensure an even application without saturating the pastels.
- Light Coats: Apply several light coats rather than one heavy coat. Heavy application can lead to a glossy finish that may alter the appearance of your pastels.
- Ventilation is Key: Always spray in a well-ventilated area. The chemicals in fixatives can be strong, and you want to avoid inhaling them.
After applying a fixative, it's essential to let your artwork dry completely. This drying time varies depending on the type of fixative used, but generally, it takes about 15-30 minutes. If you're using a workable fixative, you can continue to add layers after it dries, but make sure to apply another coat of fixative once you're finished to secure everything in place.
In addition to preserving your artwork, fixatives can also enhance the appearance of pastels. They can help reduce the chalky texture that sometimes comes with pastel painting, giving your piece a more polished look. However, it’s important to choose a fixative that is compatible with pastels to avoid any unwanted reactions that could dull your colors.
To sum it up, fixatives are an essential part of the pastel painting process. They protect your artwork from smudging and fading while also allowing for creative flexibility. By understanding how to use them effectively, you can ensure that your pastel creations remain as vibrant and beautiful as the day you completed them.
- What is the difference between workable and final fixatives? Workable fixatives allow you to continue working on your piece, while final fixatives are meant for sealing your artwork once it's finished.
- Can I use fixatives on other mediums? Yes, some fixatives are designed for multiple mediums, but always check the label to ensure compatibility with your specific materials.
- How do I know if my fixative is dry? Generally, a fixative will dry to a clear finish. If it appears cloudy or shiny, it may need more time to dry.

Inspiration and Subject Matter
Finding inspiration can sometimes feel like searching for a needle in a haystack, especially when you're staring at a blank canvas. However, the world around you is brimming with potential subjects just waiting to be transformed into stunning pastel art. Whether you’re an aspiring artist or a seasoned pro, tapping into various themes can ignite your creativity and fuel your passion for pastel painting.
One of the most rewarding aspects of working with pastels is the versatility they offer in subject matter. You can dive into the serene beauty of landscapes, capturing the play of light on rolling hills or the vibrant colors of a sunset. Nature is an endless source of inspiration; think of the delicate petals of flowers, the intricate patterns in leaves, or even the majestic presence of animals. Each moment spent outdoors can spark new ideas and perspectives.
Portraits are another captivating avenue for pastel artists. The challenge of capturing the essence of a person, their emotions, and the subtleties of their features can be incredibly fulfilling. Consider experimenting with different angles and expressions; perhaps a candid shot of a loved one or even a self-portrait that reflects your current mood. The beauty of portraits lies in their ability to tell a story, and with pastels, you can create a rich tapestry of colors and textures that bring your subject to life.
Abstract art also offers a unique playground for creativity. With pastels, you can explore shapes, colors, and forms without the constraints of realism. Let your emotions guide your brushstrokes, creating a piece that resonates with your inner self. This freedom allows you to experiment with layering and blending techniques, resulting in a composition that is as much about the process as it is about the final product. Remember, art doesn’t always have to be perfect; it just needs to be an expression of who you are.
To help you dive deeper into your artistic journey, here are some ideas that can spark your imagination:
- Explore your local environment: parks, streets, and architecture can provide a wealth of inspiration.
- Look through photographs: they can serve as reference points for your pastel creations.
- Draw from emotions: let your feelings guide your choice of colors and subjects.
- Engage with other artists: joining a community can expose you to new ideas and techniques.
Inspiration can also come from the works of great artists. Take some time to study famous pastel paintings and analyze what you love about them. Is it the way a particular artist uses color? Or perhaps their ability to convey emotion through texture? Use these insights to inform your own work, but remember to stay true to your unique voice. The beauty of art lies in its diversity, and your perspective is what makes your creations special.
As you embark on your pastel painting journey, keep in mind that inspiration is everywhere. It’s in the laughter of a child, the quiet of a rainy day, or the bustling energy of a city. Embrace the world around you, and let it fuel your creativity. Each stroke of your pastel can be a reflection of your experiences, emotions, and observations, ultimately leading to a body of work that is distinctly yours.
| Question | Answer |
|---|---|
| What are the best subjects for pastel painting? | Landscapes, portraits, and abstract themes are popular choices, but feel free to explore whatever inspires you! |
| How do I find inspiration for my art? | Look around you! Nature, emotions, photographs, and even other artists can provide a wealth of ideas. |
| Can I mix different types of pastels? | Yes! Mixing soft, hard, and oil pastels can create unique textures and effects in your artwork. |
Frequently Asked Questions
- What are the different types of pastels?
Pastels come in three main types: soft pastels, hard pastels, and oil pastels. Soft pastels are known for their vibrant colors and smooth application, making them ideal for blending. Hard pastels, on the other hand, are firmer and great for fine details. Oil pastels are more versatile, offering a creamy texture that can be used like paint, but they have a different finish.
- How do I choose the right paper for pastel painting?
The right paper can make or break your pastel artwork. Look for paper that has a textured surface, as this helps the pastels adhere better. Papers like pastel paper, sandpaper, or watercolor paper with a rough texture are excellent choices. The weight of the paper also matters; heavier papers can handle more layers without warping.
- What tools do I need for pastel painting?
Besides pastels, you'll want a few essential tools to enhance your painting experience. Consider having blending stumps for smooth transitions, fixatives to preserve your artwork, and erasers for corrections. A good set of brushes can also be helpful for adding texture and detail.
- What are some basic techniques for beginners?
For those just starting, mastering a few basic techniques is crucial. Focus on layering colors to build depth, blending for smooth transitions, and shading to create dimension. Practice these techniques on scrap paper before diving into your main artwork to build confidence.
- How can I mix colors effectively with pastels?
Color mixing with pastels can be both fun and rewarding! Start by layering colors on top of each other and then blending them with your fingers or a blending stump. Understanding color theory can also help you create harmonious palettes, so don’t hesitate to experiment and see what combinations work best for your vision!
- What techniques can I use to create texture in my pastel art?
Texture can elevate your pastel paintings significantly. Try using different strokes, layering colors, or even scratching into the pastel surface to create interesting effects. Experiment with varying pressure on your pastels to achieve everything from soft gradients to rough, expressive marks.
- Why are fixatives important for pastel artwork?
Fixatives are crucial for preserving your pastel art. They help to lock in the pigments and prevent smudging. There are various types of fixatives available, including workable and final fixatives. Always apply them in a well-ventilated area and follow the instructions to ensure your artwork remains vibrant and intact.
- Where can I find inspiration for my pastel paintings?
Inspiration can come from anywhere! Look at nature, photographs, or even the works of other artists. Consider exploring themes like landscapes, portraits, or abstract art. Sometimes, just stepping outside or visiting a gallery can spark your creativity and lead to your next masterpiece!


