
How to Begin a Drawing: A Complete Guide for Beginners
Are you ready to embark on your artistic journey? Starting to draw can feel like standing at the edge of a vast ocean, filled with both excitement and apprehension. But don't worry! This guide is here to help you navigate those initial waves. Whether you're looking to express your creativity or simply want to pick up a new hobby, drawing is a fantastic way to unleash your imagination. In this article, we’ll explore essential tips and techniques for novice artists eager to start their drawing journey. From choosing the right materials to understanding basic shapes and finding inspiration, we’ve got you covered. So, grab your sketchbook and let’s dive in!
When it comes to drawing, the first step is selecting the right materials. Think of your drawing tools as the paintbrushes of your imagination; they can make all the difference in your artistic expression. Here’s a breakdown of what you’ll need:
- Pencils: Start with a range of pencils, from hard (H) to soft (B). The harder the pencil, the lighter the mark; the softer, the darker. A basic set usually includes 2H, HB, 2B, and 4B.
- Paper: Choose sketch paper that can handle erasing and the medium you plan to use. For beginners, a medium-weight paper (around 70-100 gsm) is perfect.
- Erasers: A good eraser is essential. Consider a kneaded eraser for gentle lifting and a vinyl eraser for more stubborn marks.
With these materials in hand, you’ll be well-equipped to start sketching your first masterpiece. Remember, the quality of your tools can impact your drawing experience, so invest in what feels right for you!
One of the most vital skills in drawing is the ability to break down complex images into basic shapes. This technique is like learning to read before you can write; it lays the groundwork for your artistic journey. By observing and sketching simple forms, you build a solid foundation that will support more intricate drawings. Here’s how to get started:
Geometric shapes are the building blocks of many drawings. They are predictable and structured, making them easier to manipulate. Think of them as the skeleton of your artwork. Recognizing and utilizing shapes like circles, squares, and triangles can enhance your drawing skills significantly. For example, when drawing a human figure, you might start with an oval for the head, rectangles for the torso, and circles for the joints. This method simplifies the process and helps you focus on proportions and angles.
In contrast to geometric shapes, organic shapes are often found in nature and are characterized by their fluidity and irregularity. These shapes can evoke emotion and movement, adding life to your drawings. When observing nature, take note of the curves of a leaf or the contours of a flower. Capturing these organic shapes allows you to create more dynamic and expressive artwork. Think of drawing organic shapes as dancing with your pencil, allowing it to flow naturally across the page.
Once you’re comfortable with basic shapes, the next step is learning how to combine them. This technique allows you to create more complex forms and develop your unique drawing style. For instance, to draw a cat, you might combine a circle for the head, ovals for the body, and triangles for the ears. The key is to experiment and see how different shapes interact with one another. Don’t be afraid to play around; art is all about exploration!
Now that you have your materials and understand basic shapes, it’s time to master some fundamental drawing techniques. Here are a few methods to enhance your artistic skills:
- Shading: Use varying pressure on your pencil to create depth and dimension. Practice shading simple shapes to understand light and shadow.
- Cross-hatching: This technique involves drawing intersecting lines to create texture and shading. It’s a great way to add detail to your sketches.
- Line Work: Pay attention to the quality of your lines. Experiment with thick and thin lines to convey different emotions and textures.
By practicing these techniques, you’ll not only improve your skills but also gain confidence in your abilities as an artist. Remember, every great artist started as a beginner!
Inspiration can come from various sources, and as an artist, it's essential to keep your eyes open to the world around you. Whether you find ideas in nature, photography, or the work of other artists, inspiration is everywhere! Here are some ways to ignite your creativity:
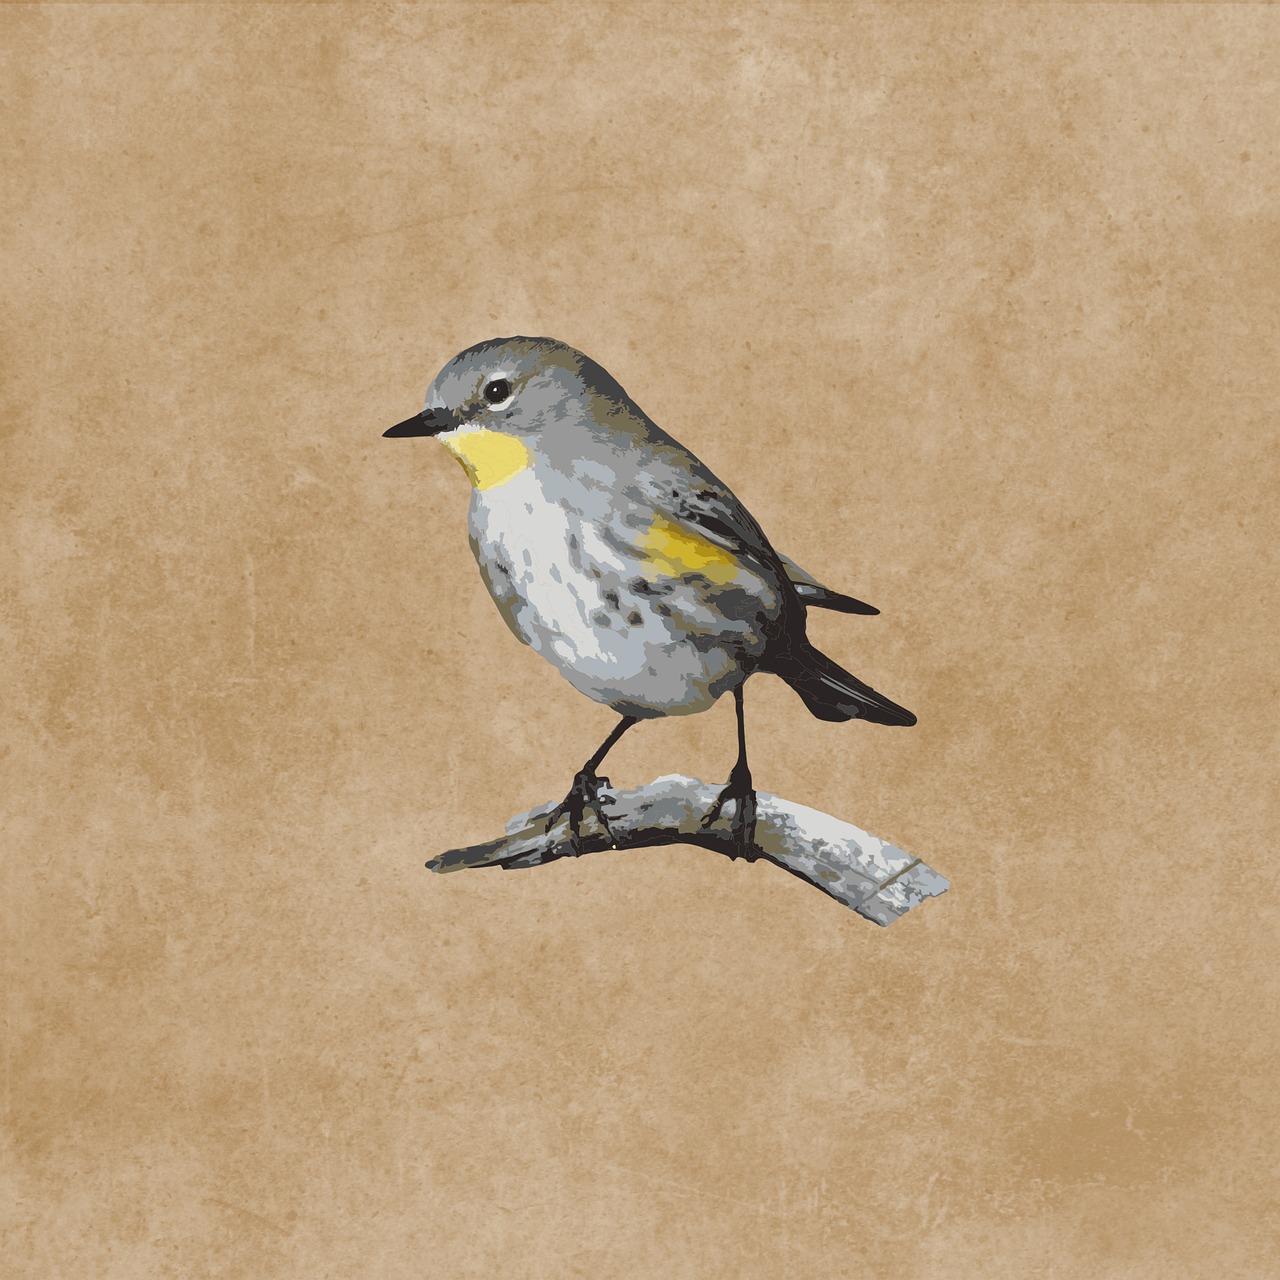
Nature offers endless inspiration for artists. From the intricate patterns of a butterfly's wings to the serene beauty of a sunset, the natural world is a treasure trove of ideas. Take a walk outside, observe the details, and try to replicate the beauty you see. Drawing from nature not only hones your skills but also deepens your appreciation for the world around you.
Joining art communities can provide invaluable support and motivation. Engaging with fellow artists allows you to share your work, receive constructive critiques, and gain new perspectives. Online platforms, local art groups, or social media can connect you with a vibrant community of creatives. Remember, art is not just a solitary journey; it’s also about collaboration and sharing experiences!
Q: What should I do if I feel stuck or uninspired?
A: It’s completely normal to feel stuck sometimes. Try taking a break, exploring different styles, or even switching up your materials. Inspiration often strikes when you least expect it!
Q: How often should I practice drawing?
A: Consistency is key! Try to draw a little every day, even if it’s just for 10-15 minutes. The more you practice, the more you’ll improve.
Q: Do I need to take classes to learn how to draw?
A: While classes can be beneficial, they’re not necessary. There are plenty of resources available online, such as tutorials and videos, that can help you learn at your own pace.
Choosing the Right Materials
When it comes to starting your drawing journey, can make all the difference. Imagine trying to bake a cake without the right ingredients; it just wouldn’t turn out the same, right? Similarly, having the proper tools can elevate your artistic experience. So, let’s dive into the essentials you’ll need to kick off your creative adventure!
First and foremost, let’s talk about pencils. As a beginner, you might be tempted to grab any old pencil lying around, but investing in a good quality set can enhance your drawing significantly. Look for pencils that range from H (hard) to B (soft). A basic set usually includes:
- H Pencils: Great for fine lines and details.
- B Pencils: Ideal for shading and softer lines.
- HB Pencil: A versatile option that balances hardness and softness.
Next up is paper. The type of paper you use can affect the final outcome of your drawing. For beginners, it’s best to start with a smooth sketching paper that can handle erasing and layering. You might also want to explore:
- Sketch Pads: Perfect for practice and quick sketches.
- Mixed Media Paper: Great for experimenting with different techniques.
- Watercolor Paper: If you plan to incorporate wet mediums in the future.
Don’t forget about erasers! They are not just for mistakes; they can also be used creatively to create highlights and textures. A good quality kneaded eraser is fantastic for lifting graphite without damaging the paper. A vinyl eraser, on the other hand, is perfect for clean corrections. Think of them as your artistic best friends!
Lastly, consider investing in a blending stump or tortillon. These tools help you achieve smooth shading and blending in your drawings. They’re like magic wands that can transform your work from basic sketches to more polished pieces. If you want to take it a step further, a set of colored pencils can add a splash of vibrancy to your creations.
To summarize, here’s a quick table of the essential materials you’ll need:
| Material | Purpose |
|---|---|
| Pencils (H, B, HB) | For detailed lines and shading |
| Sketch Paper | Ideal for practice and sketches |
| Kneaded Eraser | For lifting graphite and creating highlights |
| Blending Stump | For smooth shading and blending |
With these materials in hand, you’re well on your way to embarking on your drawing journey. Remember, the right tools can inspire you to create and express your ideas more freely. So, don’t hesitate to invest a little in your artistic arsenal!

Understanding Basic Shapes
When it comes to drawing, is like learning the ABCs of art. Every complex image you see can be broken down into simple forms. Think of it as building a house; you need a solid foundation before you can start adding the intricate details. By mastering these basic shapes, you’ll not only improve your drawing skills but also boost your confidence as an artist.
So, what are these basic shapes? They primarily include geometric shapes such as circles, squares, and triangles. These forms are the building blocks of most drawings. For instance, when you look at a human figure, you can see how the head is often represented as a circle, the torso as a rectangle, and the limbs as elongated rectangles or cylinders. By identifying these shapes in your subject, you can sketch them more easily and accurately.
Geometric shapes are straightforward and predictable. They have defined edges and angles, making them easier to replicate. Here’s a quick rundown of how to utilize these shapes:
- Circles: Great for heads, wheels, and other rounded objects.
- Squares: Perfect for buildings, books, and anything with a boxy structure.
- Triangles: Useful for creating dynamic compositions, like trees or mountains.
When you practice sketching these shapes, try to visualize how they fit together in your drawing. This will help you develop a more intuitive understanding of proportions and perspectives.
Now, let’s talk about organic shapes. Unlike geometric shapes, organic shapes are often irregular and fluid. They mimic the forms found in nature, such as the contours of a leaf or the curves of a human figure. Capturing these shapes can be a bit more challenging, but it’s where your creativity can really shine. Imagine drawing a tree: instead of focusing solely on the trunk and branches as straight lines, observe how they twist and turn, creating a more natural look.
To practice, try sketching from life. Go outside and draw the shapes you see in nature. Pay attention to how they flow and interact with one another. This will help you develop a keen eye for detail and improve your ability to replicate what you see.
Once you feel comfortable with both geometric and organic shapes, it’s time to combine them. This is where the magic happens! By merging basic shapes, you can create complex forms that are both interesting and dynamic. For example, if you want to draw a cat, start with a circle for the head, an oval for the body, and triangles for the ears. As you combine these shapes, you’ll find that your drawings become more lifelike and expressive.
Here’s a simple technique to practice combining shapes:
1. Start with basic shapes to outline your subject.
2. Gradually refine the shapes, adding details as needed.
3. Don't be afraid to erase and adjust until it feels right.
In conclusion, understanding basic shapes is essential for any beginner artist. It’s about seeing the world through a different lens and simplifying complex forms into manageable pieces. As you practice, remember that every great artist started with these foundational skills. So, grab your pencil, start sketching, and let your creativity flow!
Q: How long should I practice drawing basic shapes?
A: It’s best to practice regularly, even if it’s just for 15-30 minutes a day. Consistency is key!
Q: Can I use any type of paper for practicing shapes?
A: Yes! Any paper will do, but sketch paper is recommended as it allows for easy erasing and redrawing.
Q: What should I do if I struggle with drawing shapes?
A: Don’t get discouraged! Keep practicing, and consider using reference images to help you visualize the shapes better.
Geometric Shapes
When you embark on your drawing journey, understanding is like learning the alphabet before writing a story. These shapes are the building blocks of art, and recognizing them can transform your ability to create. Think of circles, squares, and triangles not just as shapes, but as the foundation upon which you can construct anything from a simple apple to a complex cityscape. By mastering these forms, you’ll be able to simplify complicated subjects into manageable parts, making the drawing process less daunting.
To get started, let’s break down some common geometric shapes and how they can be utilized in your artwork:
- Circles: These are versatile and can represent everything from the sun to the human eye. Practice drawing various sizes and learn to create depth by shading.
- Squares: Perfect for creating structures, squares can be the basis for buildings and objects. They can also help you understand perspective.
- Triangles: Often used in dynamic compositions, triangles can add energy and direction to your drawings. They can also form the basis of complex shapes when combined.
Once you feel comfortable with these basic shapes, try to incorporate them into your sketches. For instance, when drawing a human figure, you might use a circle for the head, rectangles for the torso, and triangles for the legs. This approach not only simplifies the drawing process but also enhances your understanding of proportions and spatial relationships.
Moreover, don’t forget that geometric shapes can also help you create patterns. Patterns can add an intriguing element to your drawings. For example, repeating a sequence of triangles can create a sense of movement, while overlapping circles can produce a mesmerizing effect. The possibilities are endless!
In conclusion, mastering geometric shapes is essential for any aspiring artist. By practicing these forms, you will not only improve your drawing skills but also gain the confidence to tackle more complex subjects. Remember, every great artist started with the basics, so embrace these shapes and let them guide your artistic journey!
Q: Why are geometric shapes important in drawing?
A: Geometric shapes provide a foundation for understanding complex forms and help simplify the drawing process. They enhance your ability to observe and replicate the world around you.
Q: How can I practice drawing geometric shapes?
A: Start by sketching each shape repeatedly. Experiment with different sizes and orientations, and try combining them to create more complex images.
Q: Can I use geometric shapes in abstract art?
A: Absolutely! Geometric shapes can be the basis for abstract compositions, allowing you to explore form, color, and space in creative ways.
Organic Shapes
When it comes to drawing, are like the wild, untamed cousins of geometric shapes. They’re not bound by straight lines or perfect angles; instead, they flow and curve in ways that mimic the natural world. Think about the shapes of leaves, clouds, or even the contours of a human body. These shapes are often irregular and asymmetrical, which can make them a bit tricky to capture, but that's what makes them so exciting!
To get started with organic shapes, you can begin by observing your surroundings. Take a moment to look at the plants in your garden or the clouds drifting overhead. Notice how they lack the rigidity of geometric forms. When you draw organic shapes, you should aim to replicate that sense of fluidity and spontaneity. Instead of focusing on perfection, embrace the imperfections that make each shape unique.
Here are some tips to help you draw organic shapes more effectively:
- Use Your Imagination: Don’t be afraid to let your creativity flow. Organic shapes can be inspired by real-life objects, but they can also be entirely abstract. Allow your hand to move freely across the paper.
- Practice Observation: Spend time sketching objects from nature. Whether it’s a flower petal or a winding river, try to capture the essence of the shape rather than getting bogged down in details.
- Experiment with Lines: Use varied line weights to convey depth and texture. Thicker lines can represent shadows or outlines, while thinner lines can suggest lightness and delicacy.
Combining organic shapes with geometric ones can lead to fascinating results. Imagine a tree where the trunk is a sturdy rectangle, but the branches and leaves are swirling, organic forms. This combination can add a dynamic quality to your drawings, making them more visually interesting and engaging.
As you continue to practice, you’ll find that drawing organic shapes not only enhances your artistic skills but also deepens your appreciation for the beauty of the world around you. Remember, the goal isn’t to replicate what you see perfectly but to capture the essence of the forms that inspire you. So grab your pencil, let your imagination run wild, and have fun exploring the world of organic shapes!
1. What are organic shapes?
Organic shapes are irregular and often asymmetrical forms that resemble objects found in nature. They contrast with geometric shapes, which are defined by straight lines and angles.
2. How can I practice drawing organic shapes?
You can practice by observing and sketching natural objects like leaves, flowers, and clouds. Focus on capturing their fluidity and irregularity rather than striving for perfection.
3. Can I combine organic and geometric shapes in my artwork?
Absolutely! Combining both types of shapes can create visually interesting compositions. For example, you might draw a geometric background with organic shapes in the foreground.
Combining Shapes
When it comes to drawing, the magic often lies in the combination of shapes. Think of it like baking a cake: you start with a few simple ingredients, but when mixed together, they create something extraordinary. In drawing, combining basic shapes allows you to construct more complex forms that can bring your artistic vision to life. So, how do you start merging these shapes effectively? Let’s dive into some practical techniques!
First off, it’s essential to understand that every complex figure can be broken down into simpler components. For instance, if you're trying to draw a cat, you might begin with a circle for the head, triangles for the ears, and ovals for the body. By visualizing your subject in this way, you can simplify the drawing process and reduce the intimidation factor that often comes with creating something intricate.
One effective technique is to use overlapping shapes. This method not only adds depth to your drawing but also helps in understanding how different forms interact with one another. For example, when drawing a tree, you could use a rectangle for the trunk and a series of overlapping circles for the foliage. This layering creates a sense of realism and dimension.
Another approach is to practice sketching outlines of combined shapes before filling in the details. Start with light pencil strokes to outline your basic shapes, and once you're satisfied with the overall composition, you can refine the details. This technique encourages flexibility and allows you to make adjustments without the pressure of committing to a final line.
To enhance your understanding of combining shapes, consider creating a shape library. This is simply a collection of sketches where you experiment with different combinations. For example, you could create a page dedicated to animals, where you practice merging circles, ovals, and triangles to form various creatures. Over time, you’ll develop a repertoire of forms that you can draw from in your future artwork.
Lastly, don’t forget to experiment and have fun! Art is all about exploration. Try combining shapes in unconventional ways. Maybe a square for a head and a circle for a body? Or a triangle for a nose? The possibilities are endless! Allowing yourself the freedom to play with shapes will not only improve your drawing skills but also help you develop a unique style that reflects your personality.
- What are the best shapes to start with? Start with basic geometric shapes like circles, squares, and triangles. They form the foundation of most drawings.
- How do I know when to combine shapes? Whenever you feel a drawing is too complex, try breaking it down into simpler shapes. If it helps, sketch the basic shapes first before adding details.
- Can I combine shapes in any way? Absolutely! There are no strict rules. The more you experiment, the more you’ll discover what works best for you.

Basic Drawing Techniques
Getting started with drawing can feel a bit daunting, especially if you're new to the world of art. But fear not! Mastering is key to building your confidence and improving your skills. Let’s dive into some fundamental methods that will not only enhance your artistic ability but also make the process of creating art enjoyable.
One of the first techniques you should familiarize yourself with is shading. Shading adds depth and dimension to your drawings, transforming flat shapes into three-dimensional forms. Imagine a simple sphere. Without shading, it would look like a mere circle on paper. But with the right shading techniques, you can create the illusion of light and shadow, making it appear as if it’s rolling off the page. Start by practicing with different pencil pressures to create a gradient from dark to light. This will help you understand how light interacts with objects.
Another essential technique is cross-hatching. This involves drawing parallel lines in one direction and then layering additional lines in another direction to create texture and depth. Cross-hatching is like weaving a fabric of lines that come together to form a rich tapestry of shadows and highlights. It’s particularly useful for depicting textures, such as fur or fabric. The more lines you add, the darker the area becomes, allowing you to convey a range of values in your drawings.
Next up is line work. The lines you draw are the foundation of your artwork. Whether you’re sketching a portrait or a landscape, the quality of your lines can dramatically affect the overall look of your piece. Practice varying your line weight by applying different pressures on your pencil. Thicker lines can create emphasis and draw attention to certain areas, while thinner lines can suggest delicacy and detail. Don’t be afraid to experiment with different tools, such as pens or charcoal, to see how they can change your line work.
As you become more comfortable with these techniques, consider incorporating them into a mixed media approach. This means combining different materials and techniques to create unique textures and effects. For example, you might start with a pencil sketch, then add ink for bold outlines, followed by watercolor for a splash of color. This not only allows for greater creativity but also helps you discover your personal style. Remember, art is about exploration and having fun!
To help you visualize these techniques, here’s a simple table summarizing them:
| Technique | Description | Application |
|---|---|---|
| Shading | Adds depth and dimension | Creates the illusion of light and shadow |
| Cross-Hatching | Layering lines for texture | Depicts shadows and highlights |
| Line Work | Foundation of your drawing | Varying line weight to create emphasis |
| Mixed Media | Combining various materials | Enhances creativity and personal style |
Remember, practice is essential! Set aside time each day or week to draw, even if it’s just doodling. The more you practice these techniques, the more natural they will become. And don’t forget to have fun with it! Art is a journey, not a destination. Embrace the learning process, and soon you’ll find yourself creating drawings that you’re proud of.
Q: How can I improve my drawing skills quickly?
A: Consistent practice is key! Try to draw every day, even if it’s just for a few minutes. Focus on different techniques and don’t be afraid to make mistakes—they’re part of the learning process!
Q: What materials do I need to start drawing?
A: You’ll need a few basic supplies: pencils (preferably different hardness), erasers, and sketch paper. As you progress, you can experiment with other materials like charcoal, ink, or colored pencils.
Q: How do I find my own drawing style?
A: Explore different techniques and subjects, and pay attention to what you enjoy most. Your style will naturally evolve as you experiment and practice!

Finding Inspiration
Inspiration is the lifeblood of any artist, especially for those just starting their drawing journey. It’s like a spark that ignites creativity, propelling you to pick up that pencil and let your imagination run wild. But where do you find this elusive inspiration? The answer is simpler than you might think! It can come from a myriad of sources, each offering a unique perspective that can transform a blank page into a captivating piece of art.
One of the most abundant sources of inspiration is nature. Just step outside, and you’ll find a treasure trove of ideas waiting to be captured. From the intricate patterns of leaves to the vibrant colors of a sunset, nature offers endless possibilities. Have you ever noticed how the light dances on the water or how the shadows play among the trees? These observations can lead to stunning drawings that resonate with both you and your audience.
Another fantastic source of inspiration is photography. Whether it’s a stunning landscape, a candid moment, or an abstract shot, photographs can serve as a reference point for your drawings. They allow you to study details you might overlook in real life. Plus, you can find countless images online that can stir your imagination. Just remember to put your own spin on it—after all, your unique perspective is what will make your artwork stand out!
Don’t forget about the power of art communities. Engaging with fellow artists can be a game-changer. Whether it’s in-person meetups, online forums, or social media groups, sharing your work and receiving feedback can provide fresh ideas and motivation. You might discover a new technique or a different way of seeing things just by interacting with others. Plus, seeing how others approach their art can inspire you to try something different!
Here are a few tips on how to seek out inspiration:
- Keep a sketchbook: Jot down ideas, doodles, and observations. This can be a goldmine for future projects.
- Visit art galleries: Immerse yourself in the works of others. You might find a style or theme that resonates with you.
- Take a walk: Sometimes, simply changing your environment can spark creativity. Look around and see what catches your eye.
Ultimately, the key is to remain open to inspiration in all its forms. Whether you're gazing at the stars, flipping through a magazine, or chatting with a friend about their latest project, inspiration is everywhere! Embrace it, and let it guide your hand as you embark on your drawing adventure.
Q: How can I find inspiration every day?
A: Try to establish a routine where you dedicate time each day to observe your surroundings. Keep a sketchbook handy to jot down ideas whenever they strike!
Q: What if I feel stuck and can't find inspiration?
A: It’s completely normal to experience creative blocks. Take a break, engage in different activities, or explore new environments. Sometimes, stepping away can help clear your mind.
Q: Are there specific artists I should follow for inspiration?
A: Absolutely! Explore both classic and contemporary artists whose styles resonate with you. Follow them on social media, visit their websites, and study their techniques.
Q: How important is it to find my own style?
A: Developing your own style is important, but don’t rush it! Allow yourself to experiment and draw inspiration from various sources until you find what feels right for you.
Nature as Inspiration
When it comes to finding inspiration, nature is like an endless treasure chest waiting to be explored. Imagine stepping outside and being greeted by a vibrant world filled with colors, textures, and shapes that can ignite your creativity. Whether it’s the soft curves of a leaf, the jagged edges of a mountain, or the delicate patterns on a butterfly's wings, nature offers a plethora of subjects just begging to be drawn. Have you ever noticed how the light changes throughout the day? The golden hour provides a magical glow that can transform even the simplest of scenes into breathtaking works of art.
As a beginner artist, tapping into the beauty of the natural world can be both rewarding and educational. One of the best ways to start is by taking a walk in your local park or a nearby nature reserve. Bring along a sketchbook and some pencils, and allow yourself to be captivated by the surroundings. You might find yourself sketching:
- The intricate patterns of tree bark
- The graceful lines of a flowing river
- The diverse shapes of flowers in bloom
Each of these elements can teach you something new about form, texture, and light. Plus, the act of drawing outdoors can help you develop your observational skills, which are crucial for any artist. Try to capture not just what you see, but also what you feel. How does the breeze feel against your skin? What sounds do you hear? Incorporating these sensory experiences into your drawings can add depth and emotion to your artwork.
Moreover, don’t forget that nature is constantly changing. Seasons shift, weather varies, and each moment presents a unique opportunity for inspiration. For instance, winter can offer stark contrasts with its bare trees and white landscapes, while spring bursts forth with vibrant colors and life. By observing these changes, you can create a series of drawings that reflect the beauty of nature throughout the year. Think of it as a visual diary that showcases your growth as an artist.
In addition to drawing from life, you can also find inspiration in photography. Capturing moments through a camera lens allows you to study details that you might overlook in real-time. Use these photographs as references for your drawings, and challenge yourself to replicate the textures and colors you see. This practice can enhance your understanding of light and shadow, which are essential components in creating realistic drawings.
Lastly, consider joining local art groups or online communities that focus on nature drawing. Sharing your work and receiving feedback can be incredibly motivating. You might even find a mentor or fellow artists who share your passion for the great outdoors. Remember, every artist has their unique style, and nature can help you discover yours. So grab your sketchbook, step outside, and let the wonders of nature inspire your next masterpiece!
Q: How do I start drawing from nature?
A: Begin by taking a walk in a natural setting. Bring a sketchbook and draw what catches your eye. Focus on simple shapes and forms to build your confidence.
Q: What materials should I use for outdoor drawing?
A: A basic set of pencils, a sketchbook, and an eraser are ideal. You may also want to bring colored pencils or watercolors to capture the vibrant colors of nature.
Q: How can I improve my observational skills?
A: Practice drawing from life regularly. Spend time observing the details of your surroundings, and try to capture them on paper. The more you practice, the better you’ll become.
Q: Can I use photographs instead of drawing from life?
A: Absolutely! Photographs can be excellent references for drawing. Just ensure you study the details and textures carefully to replicate them in your artwork.

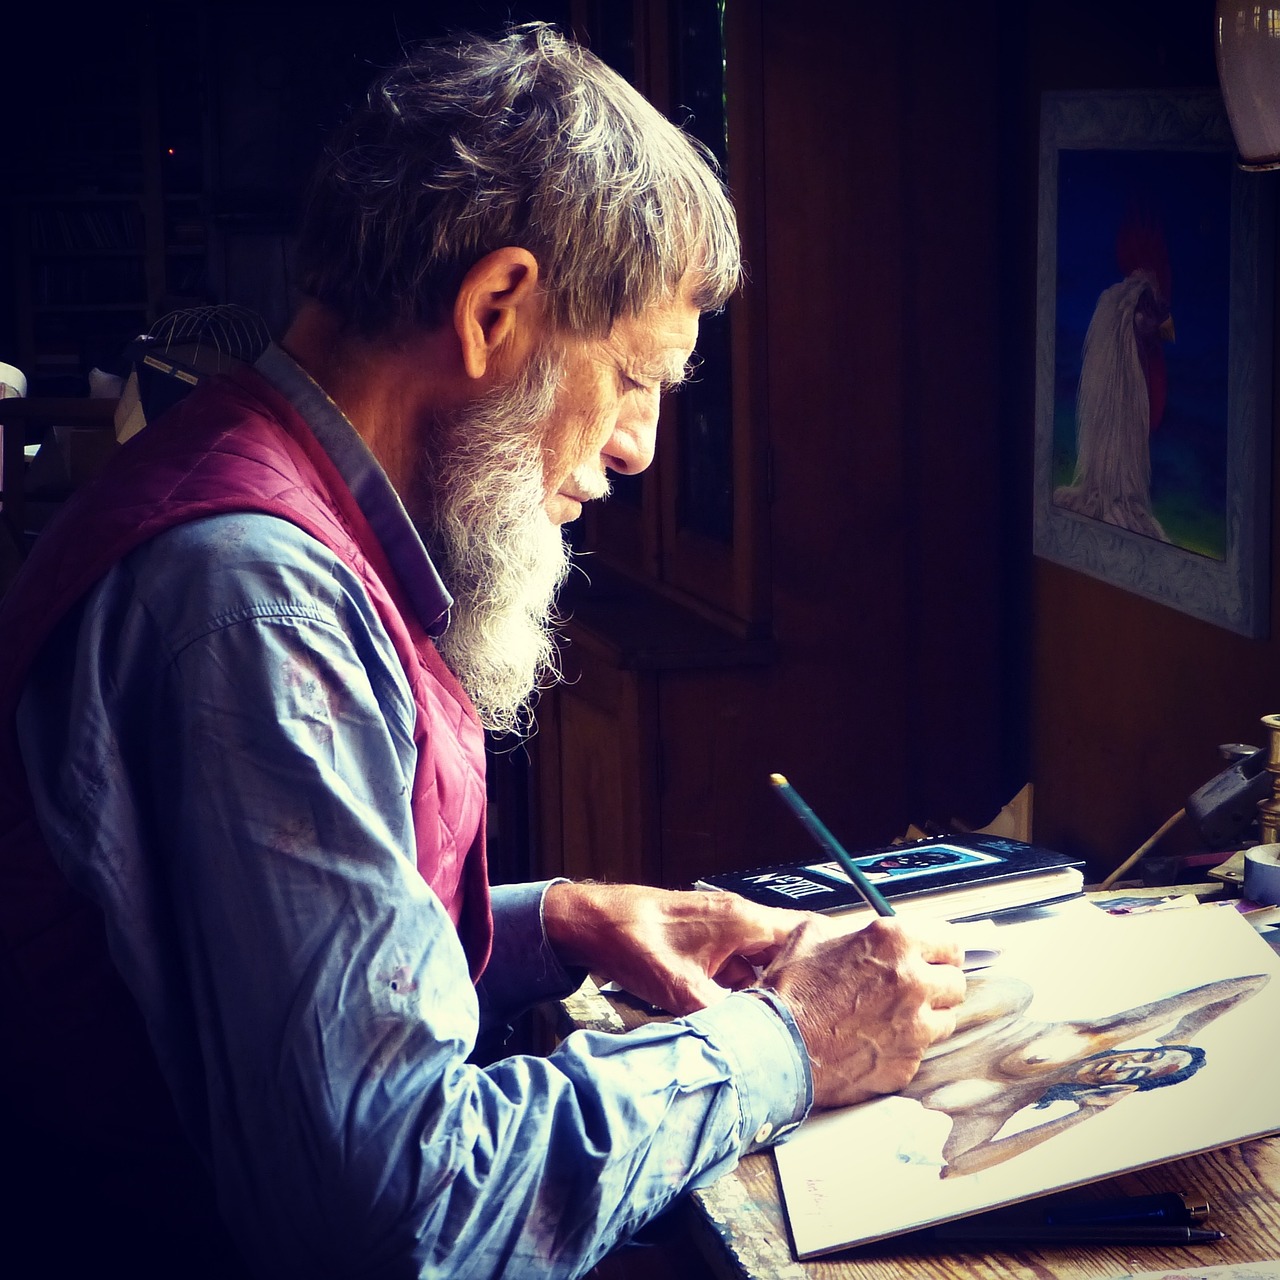
Art Communities
Joining can be a game-changer for beginners on their drawing journey. Imagine walking into a room filled with like-minded individuals who share your passion for art. It's like finding a treasure chest full of inspiration and motivation! These communities can take various forms, from local art clubs to online forums, and they offer a wealth of opportunities for growth and connection.
One of the most significant benefits of being part of an art community is the support you receive. When you’re starting out, it’s easy to feel isolated or unsure about your skills. However, in a community, you can share your work, receive constructive feedback, and learn from others who have been in your shoes. It’s reassuring to know that everyone is on their own artistic journey, facing similar challenges and celebrating victories together.
Furthermore, art communities often host events such as workshops, exhibitions, and critiques. These activities are fantastic for honing your skills. For instance, attending a workshop can introduce you to new techniques that you might not have explored on your own. Plus, exhibitions allow you to showcase your work, which can boost your confidence and provide valuable exposure. Here’s a quick overview of what you might find in an art community:
| Activity | Description |
|---|---|
| Workshops | Hands-on sessions where you can learn new techniques from experienced artists. |
| Critiques | Opportunities to receive feedback on your work from peers and mentors. |
| Exhibitions | Showcases for artists to display their creations and gain exposure. |
| Online Forums | Virtual spaces for discussing ideas, sharing work, and connecting with artists worldwide. |
Additionally, being part of an art community can spark your creativity. When you see what others are creating, it can inspire you to try new styles or subjects. It’s like a ripple effect; one artist’s passion can ignite another’s. So, whether you’re sketching at home or participating in a group project, the energy and enthusiasm of your peers can push you to explore new artistic horizons.
In conclusion, don’t underestimate the power of community in your artistic journey. Whether you join a local art club or an online group, surrounding yourself with fellow artists can provide the motivation, support, and inspiration you need to flourish. So, grab your sketchbook, find a community that resonates with you, and dive into the vibrant world of art together!
- How do I find an art community near me? Start by searching online for local art clubs or community centers that offer art classes. Social media platforms can also help you discover local meetups.
- Can I join an art community if I’m a complete beginner? Absolutely! Art communities are often welcoming to artists of all skill levels. Everyone starts somewhere!
- What if I’m shy about sharing my work? It’s normal to feel nervous, but remember that everyone in the community is there to support each other. Start by sharing small pieces and gradually build your confidence.
- Are online art communities as beneficial as in-person ones? Yes! Online communities can offer just as much support and inspiration. Plus, they give you access to a wider range of artists and styles from around the world.
This article offers essential tips and techniques for novice artists eager to start their drawing journey. It covers materials, basic techniques, and inspiration to help you create your first masterpiece.
Selecting the appropriate materials is crucial for beginners. The right tools can make a significant difference in your drawing experience. Start with a good set of pencils; you’ll want a variety ranging from hard (H) to soft (B) pencils. For instance, an H pencil is great for fine lines, while a B pencil is perfect for shading. Don't forget to invest in quality paper—sketch paper is ideal for practice, while heavier paper is better for finished pieces. And, of course, an eraser is a must-have! A kneaded eraser can be particularly useful as it allows you to lift graphite without damaging the paper.
Learning to break down complex images into basic shapes is fundamental for beginners. This skill allows you to simplify what you see and makes it easier to sketch accurately. Start by observing the world around you; many objects can be broken down into simple forms. For example, a human figure can often be represented with circles and rectangles. This technique not only enhances your drawing skills but also builds a solid foundation for more intricate drawings.
Geometric shapes form the basis of many drawings. Recognizing and utilizing circles, squares, and triangles can significantly enhance your artwork. For instance, a circle can represent the head, while triangles can be used for the body and limbs. Understanding how to manipulate these shapes will allow you to create more complex forms. Additionally, practicing drawing these shapes in various sizes and orientations can help you gain control over your pencil and improve your overall precision.
Organic shapes differ from geometric forms and are often found in nature. These shapes are more fluid and irregular, and capturing their essence can add life to your drawings. When drawing organic shapes, focus on the curves and lines that make them unique. For example, the soft curves of a leaf or the irregular outline of a flower can create dynamic compositions. To practice, try sketching from real-life objects or photographs, paying close attention to their natural forms.
Combining basic shapes allows for the creation of more complex forms. This technique is essential in developing your drawing style and improving your artistic expression. Start by taking two or more basic shapes and merging them to create a new form. For instance, by combining a circle and a rectangle, you can easily sketch a simple character or object. Experimenting with different combinations will not only enhance your creativity but also help you discover your unique artistic voice.
Mastering fundamental drawing techniques is essential for beginners. Techniques such as shading, cross-hatching, and line work can significantly enhance your skills and confidence. Shading involves adding depth to your drawings by varying the pressure on your pencil, while cross-hatching creates texture and dimension. Line work, on the other hand, focuses on the quality and style of the lines you use. Practicing these techniques will allow you to express your ideas more effectively and bring your drawings to life.
Inspiration can come from various sources, and it’s essential to seek out ideas for your drawings. Whether it’s from nature, photography, or other artists, finding what excites you will ignite your creativity. Keep a sketchbook handy to jot down ideas or sketches whenever inspiration strikes. Remember, the world is full of beauty and creativity; sometimes all it takes is a fresh perspective to see it!
Nature offers endless inspiration for artists. Observing the intricate details of a flower or the majestic lines of a mountain can spark new ideas and techniques. When you draw from the natural world, you not only improve your skills but also develop a deeper appreciation for the beauty around you. Take your sketchbook outdoors and practice drawing trees, animals, or landscapes. You’ll be amazed at how much inspiration you can find just outside your door!
Joining art communities can provide support and motivation. Engaging with fellow artists allows you to share your work, receive constructive feedback, and participate in critiques. This interaction fosters growth and inspiration, helping you to refine your skills and discover new techniques. Whether online or in-person, being part of an art community can be incredibly rewarding. So don’t hesitate to connect with others who share your passion for drawing!
- What materials do I need to start drawing? You will need a variety of pencils (H and B), quality paper, and an eraser.
- How can I improve my drawing skills? Practice regularly, observe the world around you, and experiment with different techniques.
- Where can I find inspiration for my drawings? Look to nature, photography, and other artists for inspiration.
- Should I join an art community? Yes! Engaging with other artists can provide support, motivation, and valuable feedback.
Frequently Asked Questions
- What materials do I need to start drawing?
To kick off your drawing journey, you don't need a fancy setup. Just grab a good quality sketchbook, a range of pencils (like HB and 2B), and an eraser. These basics will help you experiment and practice without breaking the bank!
- How can I improve my drawing skills?
Improvement comes with practice! Start by breaking down complex images into basic shapes. Spend time sketching everyday objects, and don’t shy away from experimenting with different techniques like shading and cross-hatching. Remember, every artist was once a beginner!
- Where can I find inspiration for my drawings?
Inspiration is everywhere! Look around you—nature, architecture, and even your daily life can spark ideas. You can also explore art communities online or in-person, where sharing and critiquing work can ignite your creativity.
- What are geometric shapes, and why are they important?
Geometric shapes are the building blocks of many drawings. They include circles, squares, and triangles, and understanding them helps you create more structured and balanced compositions. They simplify complex forms, making it easier to sketch what you see.
- How do I combine shapes in my drawings?
Combining shapes involves layering and merging basic forms to create more intricate designs. Start by sketching simple shapes that represent parts of your subject and then refine them into a cohesive drawing. It’s like building a puzzle—start with the edges and fill in the details!
- Can I draw from photographs?
Absolutely! Drawing from photographs is a fantastic way to practice. It allows you to focus on details without the pressure of working from life. Just remember to use it as a learning tool and try to develop your own style over time.
- Should I join an art community?
Yes! Joining an art community can be incredibly beneficial. You’ll find support, motivation, and constructive feedback from fellow artists. Plus, sharing your work and experiences can boost your confidence and help you grow as an artist!


