Drawing Figures for Beginners: A Simple Guide
Welcome to the fascinating world of figure drawing! If you're just starting out, you might feel a bit overwhelmed by the complexities of the human form. But fear not! This guide is designed to help you navigate through the basics, making it easier for you to develop your skills and boost your confidence. Think of figure drawing as a journey—one that requires patience, practice, and a willingness to learn. Just like learning to ride a bike, it might feel tricky at first, but with time, you'll find your balance.
As you embark on this artistic adventure, remember that every artist was once a beginner. You’ll find that drawing figures is not just about replicating what you see but also about understanding the underlying structures and proportions that make up the human body. It’s like building a house; you need a solid foundation before you can add the beautiful details. In this guide, we will cover essential techniques, tips, and tricks that will help you grasp the fundamentals of figure drawing.
We'll start by diving into the importance of proportions. Understanding how to measure and maintain correct proportions is crucial for achieving a realistic representation of the human form. After that, we'll break down complex figures into basic shapes and forms, making it easier for you to sketch. You'll learn how to use circles and ovals effectively to create the head and body of your figures. We’ll also explore how to add details, capture movement through gesture drawing techniques, and identify common mistakes to avoid.
So grab your sketchbook and pencils, and let’s get started! Whether you dream of becoming a professional artist or just want to doodle for fun, this guide will equip you with the tools you need to bring your figures to life. Remember, every stroke you take is a step closer to mastering the art of figure drawing, so enjoy the process and don’t be afraid to make mistakes along the way!
- What materials do I need to start drawing figures? You’ll need basic supplies like pencils, erasers, and sketch paper. As you progress, you can experiment with charcoal, ink, or digital tools.
- How long should I practice each day? Consistency is key! Aim for at least 30 minutes a day to see improvement over time.
- Can I use photographs as references? Absolutely! Using photographs can help you understand proportions and details better.
- What if I don’t see improvement? Remember, progress takes time. Keep practicing and be patient with yourself!

Understanding Proportions
Proportions are the backbone of figure drawing, acting as the invisible framework that holds your artwork together. Understanding how to measure and maintain correct proportions is essential for creating a more realistic representation of the human form. Think of proportions as the recipe for a delicious dish; if one ingredient is off, the entire meal can taste wrong. In figure drawing, if the head is too large compared to the body, or the limbs are disproportionate, your figure will look awkward and unbalanced.
To start, it’s helpful to use a method known as the "head measurement." This technique involves using the size of the head as a unit of measurement to determine the proportions of the entire body. Generally, an average adult human figure is about 7 to 8 heads tall. For example, if the head measures 10 inches, the entire figure may range from 70 to 80 inches tall. This simple rule can be a game-changer for beginners trying to grasp the concept of proportions.
Here’s a quick breakdown of common proportions in figure drawing:
| Body Part | Proportion (in heads) |
|---|---|
| Head | 1 |
| Torso | 2-3 |
| Legs | 4 |
| Arms | 3 |
By understanding these proportions, you can start to sketch figures that look more lifelike. Remember, practice makes perfect! It’s not just about memorizing these ratios but also about training your eye to see them. A great exercise is to draw from life or reference photos, constantly checking and adjusting as you go. You’ll find that over time, your ability to judge proportions will improve dramatically.
Another useful technique is to use a grid or a measuring tool, like a pencil held at arm's length, to compare the lengths and widths of different body parts. This method can help you maintain accuracy and keep everything in harmony. As you become more comfortable with these techniques, you’ll notice a significant boost in your confidence and skill level.
In conclusion, mastering proportions is a crucial step in your figure drawing journey. It lays the foundation for more advanced techniques and helps you create figures that are not only accurate but also aesthetically pleasing. So grab your sketchbook, start measuring, and watch your figures come to life!

Basic Shapes and Forms
When it comes to drawing figures, understanding the basic shapes and forms is essential. Think of these shapes as the building blocks of your artwork. Just like a house needs a solid foundation, your drawings require a strong grasp of these fundamental shapes to create a realistic representation of the human body. By breaking down complex figures into simpler geometric forms, you can sketch with greater ease and confidence.
To get started, let’s consider the basic shapes that make up the human figure. The most common shapes include:
- Circles: Great for heads and joints.
- Ovals: Useful for torsos and limbs.
- Rectangles: Perfect for the ribcage and pelvis.
- Triangles: Helpful for indicating the direction of limbs and the overall posture.
By visualizing these shapes, you can lay down a framework for your figure drawing. Imagine constructing a figure as if you were assembling a puzzle. Each piece represents a shape that contributes to the whole. For instance, the head can be represented by a circle, while the torso can take the form of an oval or rectangle. This method allows you to focus on proportions and placement before diving into the details.
Circles and ovals serve as the foundation of many figures. They are not just arbitrary shapes; they help establish the overall structure. When drawing the head, for example, start with a circle to represent the skull. Then, use ovals to define the neck and shoulders. This approach ensures that the proportions remain correct, making your figure look more realistic.
The head is a critical element in figure drawing. To achieve proper proportions, begin by sketching a circle for the head. Next, divide that circle into sections to help place the facial features accurately. This method not only aids in maintaining symmetry but also enhances your ability to capture the essence of the character you are drawing. Remember, the eyes typically sit halfway down the head, and this simple guideline can drastically improve your results.
Once you have the head established, it's time to focus on the body. Start with an oval for the torso, and then add rectangles for the pelvis and limbs. This technique allows you to visualize the figure's posture and movement. For instance, if your figure is in a dynamic pose, you can tilt the ovals and rectangles to reflect that action.
In summary, mastering basic shapes and forms is crucial for any aspiring artist. By simplifying the human figure into circles, ovals, rectangles, and triangles, you can create a solid foundation for your drawings. This approach not only makes the process less intimidating but also enhances your ability to depict the human form accurately.
Q: Why are basic shapes important in figure drawing?
A: Basic shapes provide a framework that helps you maintain correct proportions and structure in your drawings, making it easier to create realistic figures.
Q: How can I practice using basic shapes?
A: Start by sketching simple figures using circles, ovals, and rectangles. Gradually increase the complexity of your drawings as you become more comfortable with the shapes.
Q: What should I do if I struggle with proportions?
A: Use guidelines and reference images to help maintain proportions. You can also practice drawing from life to improve your understanding of how shapes relate to each other.

Using Circles and Ovals
When it comes to figure drawing, circles and ovals are your best friends. They serve as the building blocks for establishing the structure of the human body. Think of them as the foundation of a house; without a solid base, everything else can crumble. By using these shapes, you can simplify complex forms and create a more realistic representation of the human figure.
To get started, envision the figure you want to draw. Begin by sketching a large oval for the torso. This shape will not only represent the ribcage but also give you a sense of the figure's overall proportions. Next, add a smaller circle for the head at the top of the oval. This will help you maintain the correct scale and placement of facial features later on. Remember, the size of the head in relation to the body is crucial in achieving a realistic look.
Now, let's break it down even further. When drawing the limbs, you can use elongated ovals for the arms and legs. Picture the upper arm as a larger oval connected to a smaller oval for the forearm. This method allows you to visualize how the limbs connect to the torso while maintaining flexibility in your drawing. Don't be afraid to adjust the shapes as you go; the beauty of sketching is that you can refine your work until it feels just right.
Here’s a quick tip: when sketching the legs, try using two ovals for each leg—one for the thigh and another for the lower leg. This approach will help you create a sense of movement and fluidity. Plus, it makes it easier to adjust the pose without starting from scratch. As you practice, you’ll find that these shapes can be manipulated to create various poses and expressions, giving life to your drawings.
In summary, circles and ovals are essential tools in figure drawing. They help you establish proportions, maintain structure, and simplify complex forms. So, the next time you sit down to draw, remember to start with these fundamental shapes. With practice, you'll be amazed at how much more confident and skilled you become in your figure drawing journey.
- Why are circles and ovals important in figure drawing? Circles and ovals simplify complex forms and help establish proportions, making it easier to draw the human figure accurately.
- How can I improve my use of basic shapes in drawing? Practice sketching various figures using circles and ovals. Focus on breaking down the human form into these basic shapes before adding details.
- Can I use other shapes besides circles and ovals? While circles and ovals are foundational, you can also incorporate rectangles and triangles for different body parts, especially for limbs and joints.
Creating the Head
When it comes to drawing the head, it’s essential to understand its proportions and shape. The head is not just a random oval; it has specific features and dimensions that need to be captured accurately. To begin, think of the head as a combination of simple shapes. Start with a circle for the cranium and an oval for the jawline, merging them to form the basic outline. This foundational shape will serve as a guide for the rest of your drawing.
Next, it’s important to establish the facial guidelines. These guidelines will help you position the eyes, nose, and mouth correctly. A common method is to draw a vertical line down the center of the face and a horizontal line halfway down the circle. This cross will help you align the facial features symmetrically. Here’s a simple breakdown:
- The eyes are generally located on the horizontal line.
- The bottom of the nose typically sits halfway between the eyes and the chin.
- The mouth is placed about one-third of the way down from the nose to the chin.
Once you have the guidelines in place, it’s time to add details. Start with the eyes, which are often considered the most expressive part of the face. Make sure to capture their shape and spacing accurately; the distance between the eyes is usually about one eye's width. Next, sketch the nose, paying attention to its width and length, which can vary significantly between individuals. The mouth should follow, focusing on the curvature of the lips and the overall shape.
Don’t forget about the ears! They typically align with the eyes and the bottom of the nose. As you draw, keep in mind that the head is three-dimensional, so adding subtle shading and highlights can bring your drawing to life. Use light strokes to define the skull's shape and the contours of the face, enhancing the depth and realism.
Lastly, practice is key. Spend time observing real faces or reference images to understand the nuances of different head shapes and features. The more you draw, the more comfortable you’ll become in creating realistic heads. Remember, it’s all about proportion and practice, so don’t be discouraged if your first attempts don’t turn out perfectly!
Q: What materials do I need to start drawing heads?
A: You can begin with just a pencil and paper. As you progress, you might want to explore different pencils, erasers, and sketchbooks to enhance your experience.
Q: How can I improve my understanding of facial proportions?
A: Studying anatomy books or online resources that focus on facial proportions can be incredibly helpful. Additionally, practicing with live models or photographs can provide valuable insights.
Q: Is it necessary to use guidelines when drawing heads?
A: While it’s not mandatory, using guidelines can significantly improve the accuracy of your drawings, especially when you’re just starting out. They serve as a helpful roadmap!
Forming the Body
Forming the body is a critical step in figure drawing that requires both understanding and practice. It's essential to remember that the human body is not just a collection of limbs and a torso; it’s a complex structure that has to be represented with accuracy and proportion. To start, visualize the body as a series of interconnected shapes. This method allows you to break down the figure into manageable parts, making the drawing process less overwhelming. Think of it like constructing a building; you wouldn't just throw up walls without a solid foundation, right?
Begin by sketching the torso, which can be represented as an elongated rectangle or an oval. This shape serves as the central anchor of your figure. Next, you can add the limbs. The arms can be represented as cylinders extending from the shoulders, while the legs can be drawn as slightly thicker cylinders. The key is to ensure that the proportions are correct; for instance, the length of the arms should generally be about the same as the length of the torso. This proportional relationship helps maintain balance in your drawing.
When forming the body, keep in mind the following tips to improve your accuracy:
- Use Reference Points: Identify key points on the body, such as the shoulders, elbows, and knees. These points will help you maintain proportions and ensure that the limbs are correctly placed.
- Consider the Joints: Remember that the body has joints that allow for movement. When sketching limbs, think about how they bend and rotate at the joints, creating a more dynamic pose.
- Focus on Balance: Ensure that your figure has a sense of equilibrium. A figure that leans too far to one side may look unnatural, so adjust the positioning of the limbs as necessary.
As you continue to shape the body, don’t forget about the contours and curves that define the human form. The waist, hips, and shoulders create an organic flow that can add life to your drawing. Use light, sweeping lines to indicate these curves before refining them into more defined shapes. This technique not only enhances the realism of your figure but also makes it more visually appealing.
Lastly, it's important to practice regularly. Try sketching from life or using reference images to understand how different body types and poses affect the overall shape and proportion. The more you practice, the more intuitive the process will become. So grab your sketchbook and start forming those bodies!
Q: How do I ensure my proportions are correct when drawing figures?
A: Use reference points and compare the lengths of different body parts against each other. Keeping a proportion guide handy can also be beneficial.
Q: What should I do if my figure looks stiff?
A: Incorporate more dynamic poses and focus on the gesture of the figure. Practicing gesture drawing can help you capture movement and fluidity.
Q: How can I improve my understanding of body shapes?
A: Study anatomy and observe real-life figures. Breaking down complex forms into basic shapes can also help simplify the drawing process.

Adding Details
Once you've established the basic shapes of your figure, the real fun begins—adding details! This is where your drawing transforms from a simple sketch into a captivating representation of life. Think of this stage as the icing on the cake; it’s what makes your artwork truly stand out. But how do you go about this? Let’s dive into some techniques that will help you refine your figures and breathe life into them.
First, consider the facial features. The face is often the focal point of any figure drawing, so it’s essential to get it right. Start by lightly sketching in the eyes, nose, and mouth. Remember, the placement of these features is crucial. For instance, the eyes should generally be positioned halfway down the head, while the bottom of the nose is typically halfway between the eyes and the chin. This simple rule of thumb can help maintain proper proportions. Once you’re satisfied with the placement, you can begin to add details like eyelashes, eyebrows, and the contours of the lips.
Next, let’s talk about clothing and accessories. Clothing can add character and context to your figures, so it’s worth spending some time on. Start by observing how fabric drapes over the body. Notice how it folds and creases, especially at joints like elbows and knees. This will give your figures a more natural look. You can use lines to indicate the flow of the fabric, and remember that different materials behave differently—silk flows smoothly, while denim holds its shape. Here’s a quick tip: when drawing clothing, think of it as a second skin. Your goal is to show how it wraps around the figure, enhancing its form rather than hiding it.
Don’t forget about shading and texture. Adding depth to your drawing can make it pop off the page. Use light and shadow to create volume; this is where your understanding of light sources comes into play. Determine where your light is coming from and add shadows accordingly. A simple way to practice this is by using a light source in your workspace. Observe how it casts shadows on your own body or on objects around you. You can also experiment with different shading techniques, such as cross-hatching or stippling, to find what works best for you.
Finally, take a step back and assess your work. Sometimes, a fresh perspective can reveal areas that need more detail or adjustment. Don’t be afraid to make changes; this is part of the artistic process. Remember, adding details is not just about filling in the blanks; it’s about enhancing the story your figure tells. So, let your creativity flow and enjoy the process!
- What are the best materials for figure drawing?
The best materials often depend on your personal preference, but many artists find that graphite pencils, charcoal, and sketching paper work well for figure drawing due to their versatility.
- How long should I spend on adding details?
It varies from artist to artist. Some may spend hours perfecting details, while others may prefer a more spontaneous approach. The key is to find a balance that works for you.
- Is it necessary to draw from a live model?
While drawing from a live model can be incredibly beneficial, it’s not strictly necessary. Many artists practice with photographs or even their own reflections to improve their skills.
Gesture Drawing Techniques
Gesture drawing is an exhilarating way to capture the essence of movement and the fluidity of the human form. It’s like trying to catch a fleeting moment, a snapshot of life that can often be gone in the blink of an eye. This technique is not just about replicating what you see; it’s about expressing the energy and emotion behind the figure. By focusing on quick sketches, you can train your hand and eye to work together, allowing you to convey dynamic poses with confidence. But how do you get started? Let's dive into the world of gesture drawing!
One of the most exciting aspects of gesture drawing is the freedom it provides. You can use a variety of tools, from charcoal to ink, and the sketches can be as loose or as tight as you like. The key here is to keep it quick—aim for capturing the essence of the pose in just a few strokes. This is where the magic happens! You might find yourself amazed at how much you can express with so little. Think of it like a dance; the more you practice, the more fluid and natural your movements become.
To effectively capture movement, consider the following techniques:
- Line of Action: Start with a single, sweeping line that represents the movement of the figure. This line acts as the backbone of your drawing, guiding the flow of the body.
- Exaggeration: Don’t be afraid to exaggerate certain features or poses. This can add a dramatic flair to your drawings and really convey the energy of the movement.
- Focus on Rhythm: Just like music has a rhythm, so does the human body in motion. Try to feel the rhythm of the pose and let it guide your pencil.
Another fantastic way to enhance your gesture drawing skills is to practice with timed sessions. Set a timer for 30 seconds to 2 minutes, and challenge yourself to complete a sketch within that time frame. This exercise will push you to focus on the essential shapes and movements without getting bogged down in details. You’ll be surprised at how much you can achieve in such a short time! Plus, it’s a great way to build your confidence. You might even find that these quick sketches become some of your favorites.
As you practice, remember that the goal isn’t to create a perfect drawing. Instead, it’s about capturing the feeling and motion of the figure. With time and dedication, you’ll start to see improvements in your ability to portray dynamic poses. So grab your sketchbook, find a model or use reference images, and let your creativity flow!
Q: What materials do I need for gesture drawing?
A: You can use any drawing materials you like! Pencils, charcoal, ink, or even digital tools work well. The focus should be on the speed and fluidity of your sketches rather than the medium.
Q: How often should I practice gesture drawing?
A: Aim to practice regularly—ideally a few times a week. Consistency is key to improving your skills and gaining confidence in your drawing abilities.
Q: Can I use photographs for gesture drawing?
A: Absolutely! Photographs can be great reference points for practicing gesture drawing. Just remember to focus on capturing the movement and energy of the pose rather than getting caught up in details.

Capturing Movement
Capturing movement in figure drawing is akin to trying to catch a fleeting moment in time. It’s all about translating the energy and dynamism of a pose onto paper. Imagine you’re a photographer, but instead of a camera, you have a pencil. Your goal is to freeze that moment, to convey the essence of motion with just a few strokes. This can be challenging, especially for beginners, but with practice and the right techniques, you can master the art of gesture drawing.
One effective method for capturing movement is to focus on fluidity. Instead of getting bogged down in details, allow your hand to move freely across the page. This means using longer, sweeping lines that mimic the curves and angles of the body in motion. Think of your pencil as an extension of your arm, flowing with the rhythm of the pose. When drawing a dancer leaping through the air, for example, let your lines soar and dip, reflecting the grace of their movement.
Another key aspect is to focus on the center of gravity. Every figure has a point where its weight is balanced, and this is crucial for conveying movement. By identifying this point, you can create a more realistic representation of how the figure would appear in motion. If a person is running, their center of gravity shifts with each stride, and capturing this shift can greatly enhance the dynamism of your drawing.
Additionally, consider the direction of movement. Is the figure moving forward, backward, or perhaps spinning? The direction can be indicated through the positioning of limbs and the tilt of the torso. For instance, if someone is reaching out, their arm should extend naturally forward, while their body may lean slightly in that direction. This creates a visual flow that guides the viewer’s eye, making the movement feel more real and engaging.
To practice capturing movement, try using quick sketches. Set a timer for one or two minutes and draw a figure in a dynamic pose. Don’t worry about perfection; instead, focus on the overall form and energy of the movement. This will help you develop a sense of speed and confidence in your strokes. Over time, you’ll find that your ability to capture movement improves significantly.
In summary, the key to capturing movement lies in understanding fluidity, center of gravity, and direction. By incorporating these elements into your figure drawing practice, you’ll be able to convey not just the physical form, but also the energy and spirit of the figure in motion. So, grab your sketchbook, pick a dynamic pose, and let your creativity flow!
- What is gesture drawing? Gesture drawing is a technique used to capture the basic form and movement of a figure in a short amount of time.
- How long should I spend on gesture drawings? Typically, gesture drawings are done in quick sessions ranging from 30 seconds to 5 minutes.
- Can I use reference photos for practice? Absolutely! Reference photos can help you understand movement and proportion better.
- What materials are best for figure drawing? Pencils, charcoal, and ink are great for figure drawing, but you can experiment with whatever medium you enjoy.
Practicing with Timed Sessions
Practicing with timed sessions is a fantastic way to boost your figure drawing skills. Imagine you're an athlete training for a marathon; just like they need to build endurance, you need to build your drawing speed and confidence. Setting a timer not only pushes you to work quickly but also helps you focus on capturing the essence of the figure rather than getting bogged down in details. The thrill of racing against the clock can be invigorating, turning your practice into a fun challenge!
To get started, choose a time limit that feels comfortable yet challenging. For beginners, 30 seconds to 2 minutes per sketch can be a great starting point. As you gain confidence, you can gradually decrease the time. During these sessions, focus on the overall shape and posture of the figure rather than intricate details. This approach encourages you to think critically about proportions and movement, allowing you to develop a more intuitive understanding of the human form.
Here's a simple structure you might follow during your timed sessions:
| Time Limit | Focus Area | Goal |
|---|---|---|
| 30 seconds | Overall shape | Capture the basic outline |
| 1 minute | Proportions | Ensure limbs and head are proportional |
| 2 minutes | Basic features | Add simple features like eyes and mouth |
After each timed session, take a moment to reflect on your sketches. What worked well? What didn’t? This self-assessment is crucial for improvement. You could even keep a sketchbook dedicated to these timed drawings, allowing you to track your progress over time. It's like a personal diary of your artistic evolution, where you can see how far you've come.
Another effective technique is to practice with a partner or in a group setting. You can set the timer together and share your sketches afterward. This not only adds a social element to your practice but also provides you with valuable feedback from others. Remember, the goal is to have fun while improving your skills. So, embrace the challenge, enjoy the process, and watch your confidence soar as you become more adept at capturing the human figure!
- How long should I practice timed sessions? - Start with 10-20 minutes a day and gradually increase as you feel comfortable.
- What if I don't like my sketches? - Don't be too hard on yourself! The goal is to improve, not to create perfect drawings every time.
- Can I use references during timed sessions? - Yes! Using references can help you understand proportions and poses better.
- How do I stay motivated during practice? - Set small goals, reward yourself for progress, and remember to enjoy the creative process!

Common Mistakes to Avoid
When it comes to figure drawing, even the most seasoned artists can fall into traps that can hinder their progress. For beginners, these pitfalls can be particularly frustrating, but recognizing and avoiding them is essential for growth. One of the most common mistakes is overcomplicating shapes. Many beginners tend to dive straight into intricate details without first establishing a solid foundation. This can lead to confusion and a lack of confidence in their work. Instead, it's crucial to break down complex figures into simpler geometric forms. By focusing on basic shapes, such as circles, ovals, and rectangles, artists can create a more stable and proportionate figure.
Another frequent error is neglecting perspective. Perspective plays a vital role in creating depth and realism in figure drawing. When artists ignore this aspect, their figures can appear flat and lifeless. To avoid this mistake, it's important to understand how to apply perspective principles. For instance, when drawing a figure in motion or from an angle, consider how the body parts relate to one another in space. This can be achieved by employing techniques such as foreshortening, which involves drawing objects closer to the viewer as larger and those farther away as smaller.
Additionally, many beginners struggle with the proportions of the human figure. It's easy to get caught up in the details and lose sight of the overall structure. To combat this, artists should regularly practice measuring proportions using reference points. For example, the head can serve as a unit of measurement for the entire figure, where the body is often about 7 to 8 heads tall. Keeping this in mind can help maintain a balanced and realistic representation.
Lastly, it's essential to be aware of the importance of practice. Many aspiring artists may expect to see immediate improvement after just a few sketches. However, drawing is a skill that requires time and dedication to develop. Regular practice, even if it's just a few minutes each day, can lead to significant progress over time. Consider setting up a routine where you focus on different aspects of figure drawing, such as proportions one day and gesture drawing the next. This structured approach can help build confidence and enhance your skills.
To help clarify some common concerns among beginners, here are a few frequently asked questions:
- What should I focus on when starting to draw figures? Start with basic shapes and proportions. Build a strong foundation before adding details.
- How can I improve my understanding of perspective? Practice drawing from different angles and incorporate perspective techniques into your sketches.
- How often should I practice figure drawing? Aim for daily practice, even if it's just for a short period. Consistency is key to improvement.
- Are there any resources for learning figure drawing? Yes! Consider online tutorials, books, and figure drawing classes to enhance your skills.
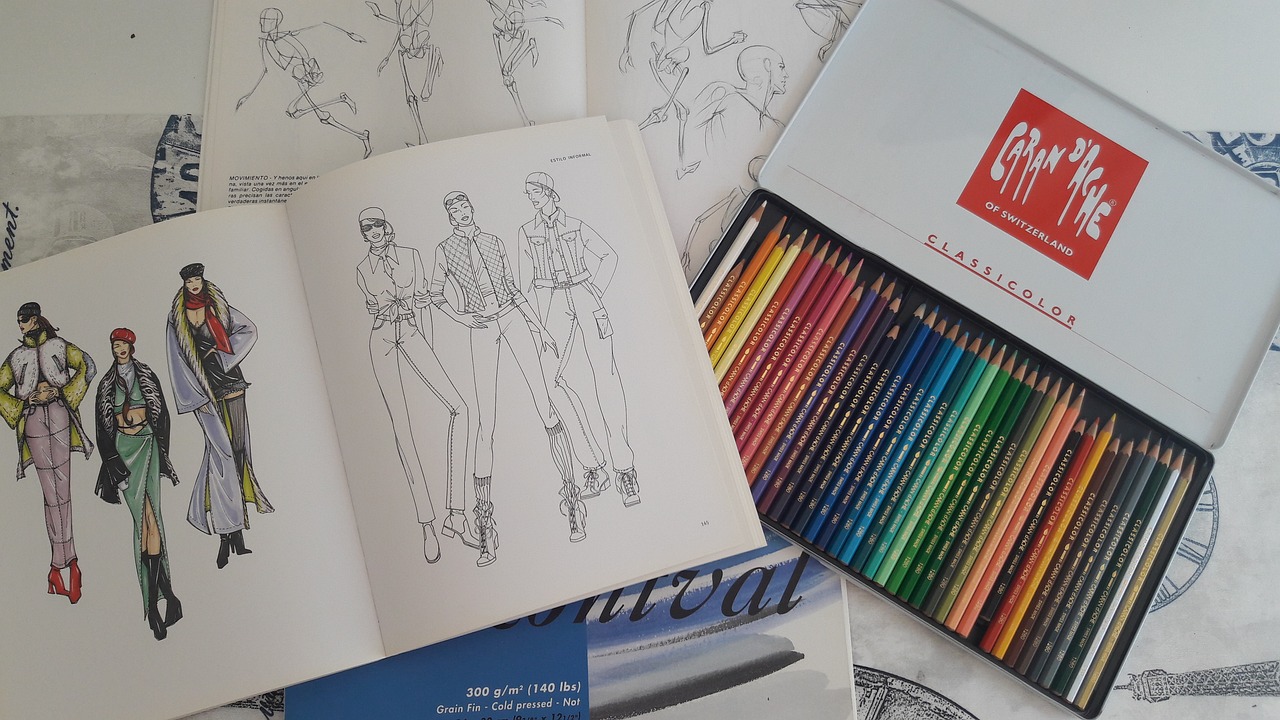
Overcomplicating Shapes
When it comes to figure drawing, one of the most common pitfalls that beginners encounter is . It’s easy to get caught up in the intricate details of the human form and forget that the foundation of a good drawing lies in simplicity. Think of it like building a house; you wouldn’t start with the roof before laying down the foundation, right? The same principle applies to drawing. By focusing on the basic shapes that make up the human figure, you can create a more accurate and confident representation.
Many beginners tend to dive straight into complex forms, trying to capture every muscle and curve. This often leads to frustration and a lack of confidence in their abilities. Instead, try breaking down the human figure into its most basic components. For instance, the torso can be represented as a rectangle, limbs as cylinders, and the head as an oval. By simplifying these shapes, you can create a solid framework for your drawing. Once you have this foundation, you can gradually add details without feeling overwhelmed.
Here’s a quick way to think about it: imagine you’re sculpting a figure out of clay. Before you start adding intricate details like facial features or clothing, you first need to mold the basic shape. This approach allows you to make adjustments easily and ensures that the proportions are correct. If you rush into detailing, you might find yourself in a situation where you have to erase or redo large sections, which can be disheartening.
To help illustrate the importance of simplifying shapes, consider the following table that compares complex shapes with their simplified versions:
| Complex Shape | Simplified Shape |
|---|---|
| Detailed torso with muscles | Rectangle |
| Intricate limbs with joints | Cylinders |
| Elaborate head features | Oval |
By practicing this method of simplification, you’ll find that your confidence in figure drawing will grow. It’s all about building a strong foundation and allowing yourself the freedom to explore details once the basic shapes are in place. Remember, even the most skilled artists started with basic shapes before refining their technique. So, embrace the process, and don’t be afraid to simplify!
In conclusion, overcomplicating shapes can hinder your progress as a figure artist. By focusing on the fundamentals and breaking down the human form into simple geometric shapes, you’ll set yourself up for success. The key is to practice regularly, allowing yourself to experiment with different approaches while keeping things simple. As you grow more comfortable with these basic forms, you’ll be able to add complexity and detail with greater ease and confidence.
- What are the best shapes to start with in figure drawing? Start with basic geometric shapes like rectangles for the torso, cylinders for limbs, and ovals for the head.
- How can I improve my figure drawing skills? Practice regularly, focus on simplifying shapes, and study the proportions of the human body.
- Is it necessary to draw every detail? No, it's better to focus on the overall form and structure first before adding details.
- What tools should I use for figure drawing? Pencils, charcoal, or digital tools can all be effective. Choose what feels comfortable for you.
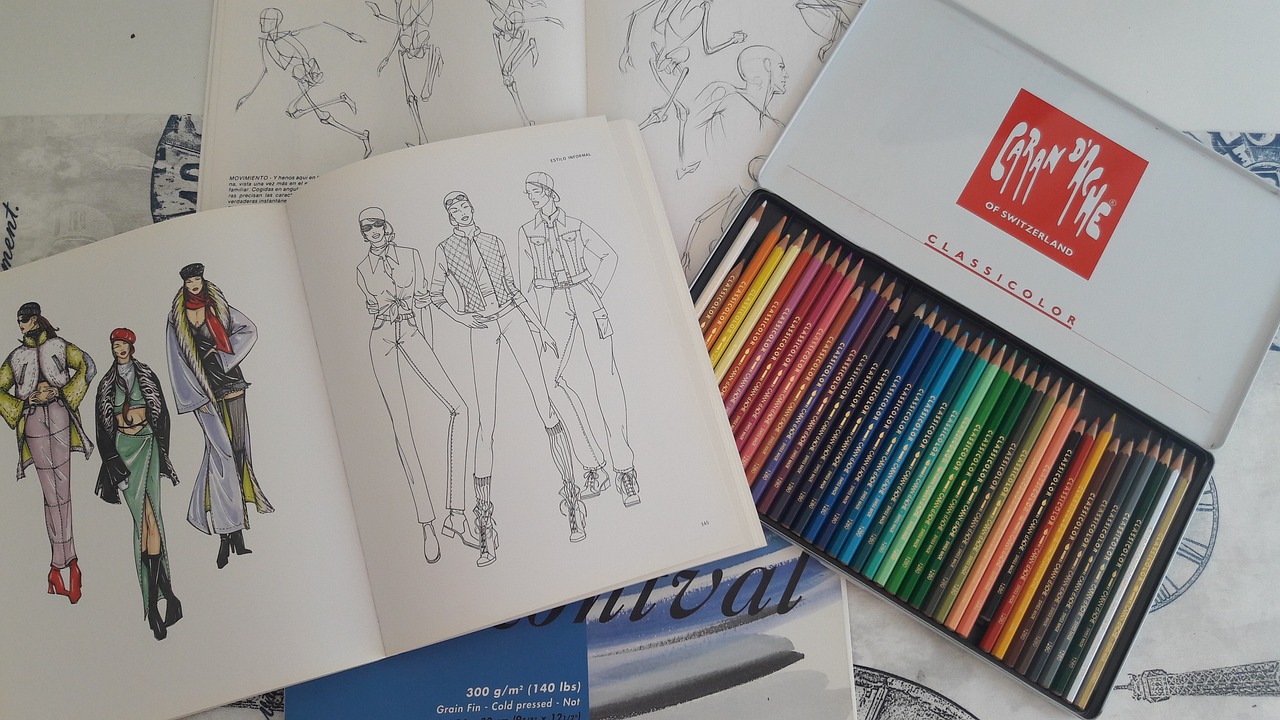
Neglecting Perspective
When it comes to figure drawing, one of the most common pitfalls beginners encounter is neglecting perspective. You might be wondering, "What does perspective have to do with drawing figures?" Well, let me tell you, it plays a monumental role in how we perceive and represent the human form on paper. Without a solid grasp of perspective, your drawings can end up looking flat and lifeless, like a pancake instead of a deliciously layered cake!
Imagine trying to draw a person standing on a street corner. If you fail to incorporate perspective, your figure may appear to be floating above the ground or squished into an unrealistic shape. This is because perspective helps us to understand how objects relate to one another in space, especially when they are at different distances from the viewer. To put it simply, perspective is your best friend when it comes to creating depth in your drawings. It's the secret ingredient that can transform a simple sketch into a three-dimensional masterpiece!
To effectively use perspective in figure drawing, consider these essential points:
- Vanishing Points: These are points on the horizon line where parallel lines seem to converge. Understanding where to place your vanishing points can help you accurately depict the proportions of your figure in relation to the background.
- Foreshortening: This technique involves shortening the length of an object to create the illusion of depth. For example, if a figure's arm is reaching out towards you, it will appear larger than the rest of the body. Mastering foreshortening can add a dramatic flair to your drawings!
- Horizon Line: This is the eye level of the viewer. It's crucial to maintain a consistent horizon line in your drawings to ensure that all elements are in harmony. If your horizon line is too high or too low, it can distort the overall composition.
Incorporating these elements into your figure drawing will not only enhance the realism of your work but also give your figures a sense of place within their environment. To illustrate this point, let's take a look at a simple table comparing two drawings: one that utilizes perspective effectively and one that does not.
| Drawing | With Perspective | Without Perspective |
|---|---|---|
| Example 1 | Figure appears grounded, with limbs proportionate and realistic in relation to the background. | Figure looks flat, with limbs appearing awkward and disconnected from the environment. |
| Example 2 | Dynamic pose that conveys movement, depth, and energy. | Static pose that lacks life and fails to engage the viewer. |
In conclusion, neglecting perspective can significantly hinder your ability to create lifelike figures. By paying attention to the relationship between your figures and their surroundings, you can enhance the depth and realism of your artwork. So, the next time you sit down to draw, remember to give perspective the attention it deserves. Your drawings will thank you for it!
- What is the best way to practice perspective in figure drawing?
Start with simple shapes and gradually incorporate more complex figures. Use reference images to understand how perspective affects proportions and angles. - Can I use digital tools to help with perspective?
Absolutely! Many digital drawing programs offer perspective grids that can guide you in creating accurate compositions. - How can I improve my understanding of foreshortening?
Practice drawing from life or use reference images where foreshortening is prominent. Experiment with different angles and positions to see how they affect your figure.
Frequently Asked Questions
-
What are the basic shapes I should start with for figure drawing?
When starting with figure drawing, it's essential to break down complex forms into basic shapes like circles, ovals, rectangles, and triangles. These shapes serve as the foundation for constructing the human figure, making it easier to maintain proportions and achieve a balanced look.
-
How can I improve my understanding of proportions?
Improving your understanding of proportions involves practice and observation. Try measuring different parts of the body in relation to one another, using a pencil or your fingers as a guide. Additionally, studying reference images and practicing with live models can significantly enhance your ability to capture accurate proportions.
-
What is gesture drawing, and why is it important?
Gesture drawing is a technique used to capture the essence and movement of a figure quickly. It's important because it helps you focus on the overall flow and dynamics of a pose rather than getting bogged down in details. This practice can enhance your ability to depict action and emotion in your drawings.
-
How do I avoid common mistakes in figure drawing?
To avoid common mistakes, it's crucial to simplify your shapes and focus on the overall structure before adding details. Many beginners tend to overcomplicate their drawings, which can lead to inaccuracies. Additionally, being mindful of perspective can drastically improve the realism of your figures.
-
How can timed sessions help improve my drawing skills?
Timed sessions can boost your drawing skills by encouraging you to work quickly and efficiently. Setting a time limit for your sketches forces you to make quick decisions and enhances your confidence in capturing the essence of a figure without overthinking. This practice can lead to more dynamic and expressive drawings.


