
How to Paint a Realistic Rainy Scene
This article explores techniques and tips for creating a captivating rainy scene in your artwork, covering everything from color choices to texture and composition.
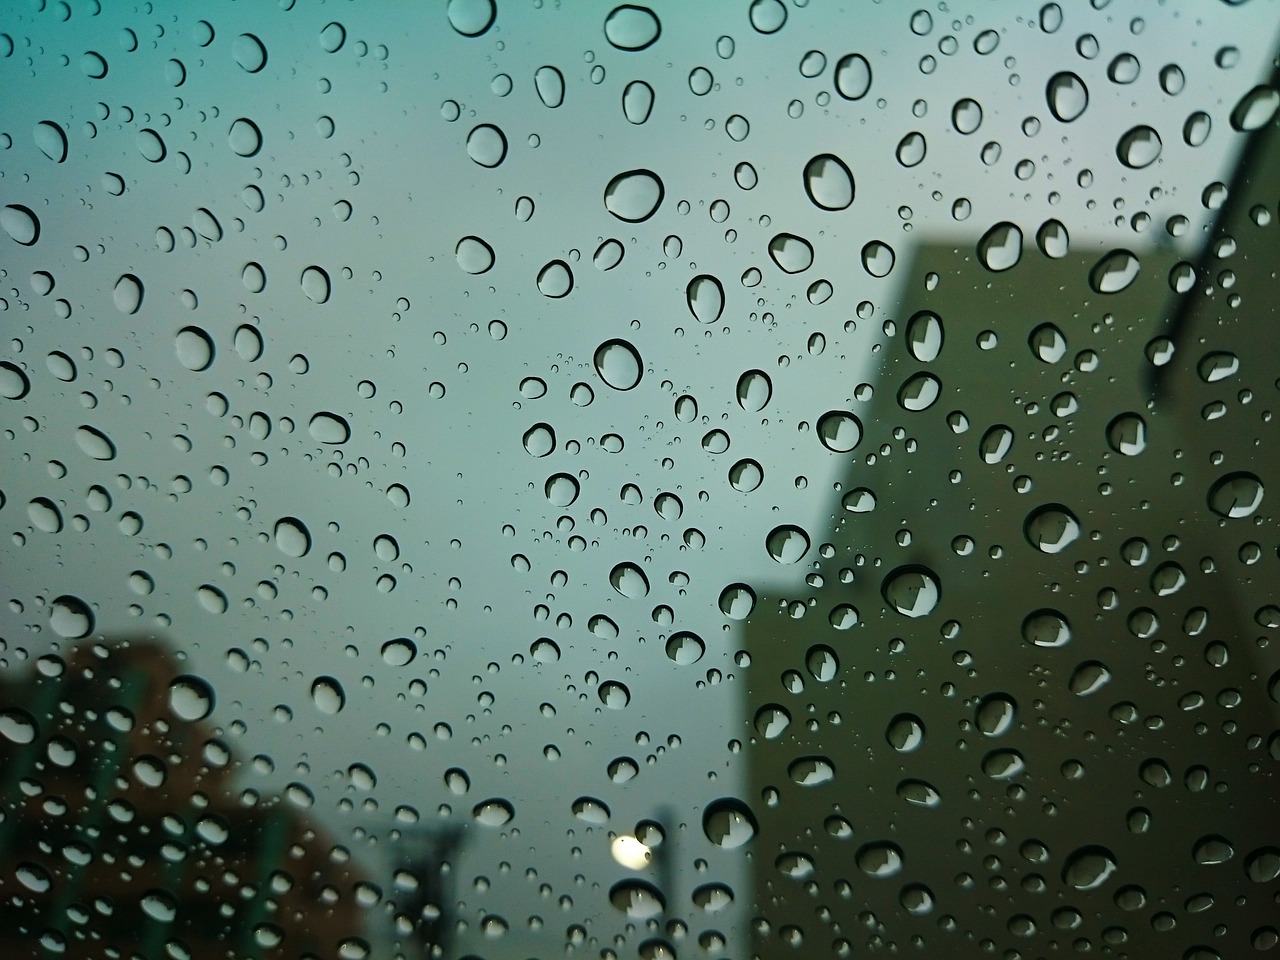
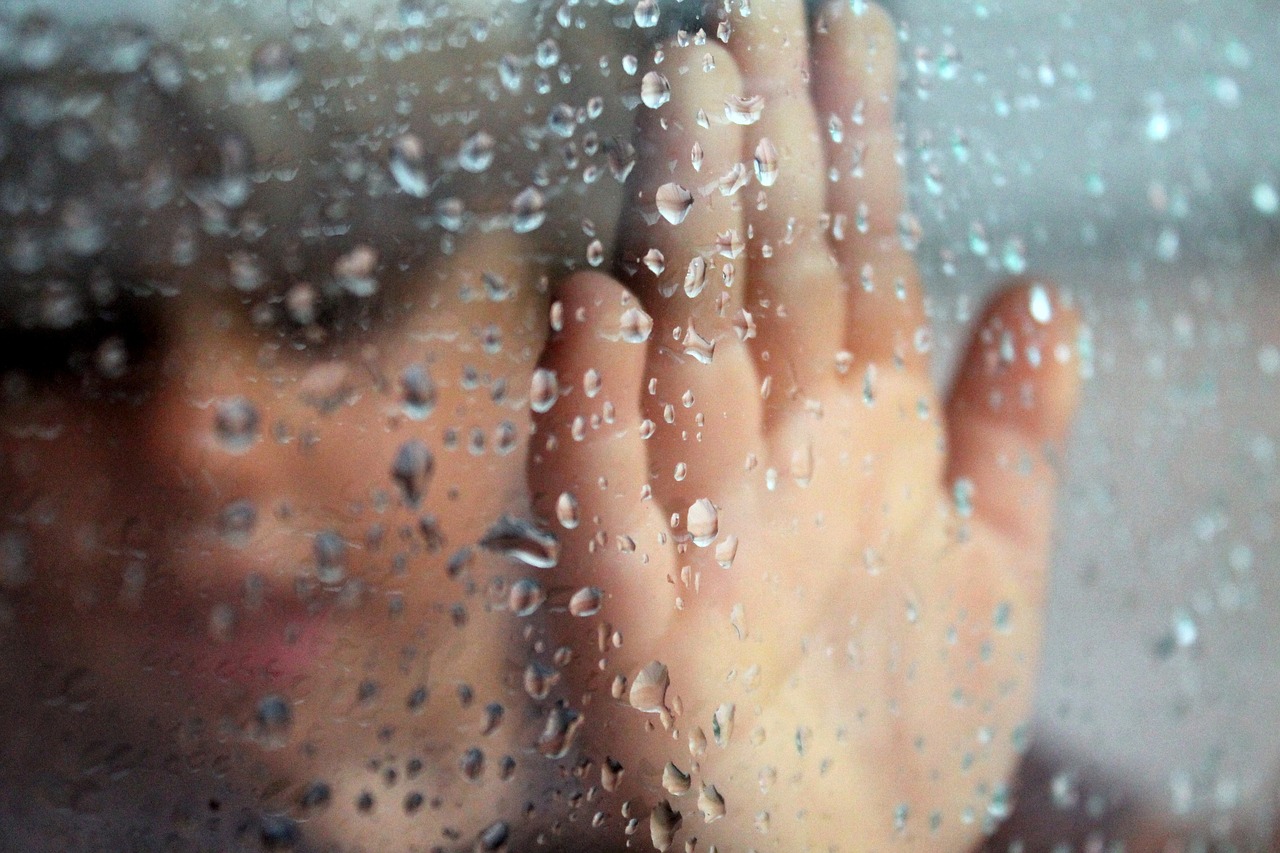
To paint a realistic rainy scene, it's essential to grasp the unique qualities of light and color that define rainy weather. Think about how the world transforms when the skies open up; colors become muted, and light diffuses in a way that creates a distinct atmosphere. The air feels heavy, and the colors around you seem to blend into a palette of soft grays and blues. This transformation is what you want to capture on your canvas. Not only does the rain change the colors, but it also alters the way we perceive light. Shadows soften, highlights become less pronounced, and everything takes on a dreamy quality. By understanding these elements, you can start to translate them into your artwork and evoke the feeling of a rainy day.
Selecting the appropriate color palette is crucial for depicting rain. You want to create a mood that resonates with viewers, and nothing does that quite like the right colors. Start by combining cool and neutral colors to effectively evoke the essence of a rainy day. Imagine a palette filled with rich blues, muted grays, and soft whites. These colors will help you convey the overcast sky and the wet surfaces that characterize a rainy scene. Remember, the key is to blend these tones seamlessly to create a cohesive look that feels natural.
Discover techniques for mixing cool tones, such as blues and grays, to represent the overcast sky and wet surfaces in your painting. For instance, you might start with a deep navy blue and gradually mix in lighter shades of blue and gray. This layering technique not only enhances the realism of your scene but also adds depth and interest. As you work, don’t be afraid to experiment with different ratios of colors until you find the perfect balance. The goal is to mimic the soft, diffused light that often accompanies a rainy day.
Using varying shades of your chosen colors can add depth to your painting. Think of your artwork as a multi-layered cake; each layer contributes to the overall flavor. By layering different shades of blue and gray, you can create a sense of complexity that draws the viewer in. Consider the way light interacts with surfaces during rain; reflections and shadows play a significant role. Explore how to layer these shades to mimic the complexity of a rainy environment, creating a more immersive experience for the viewer.
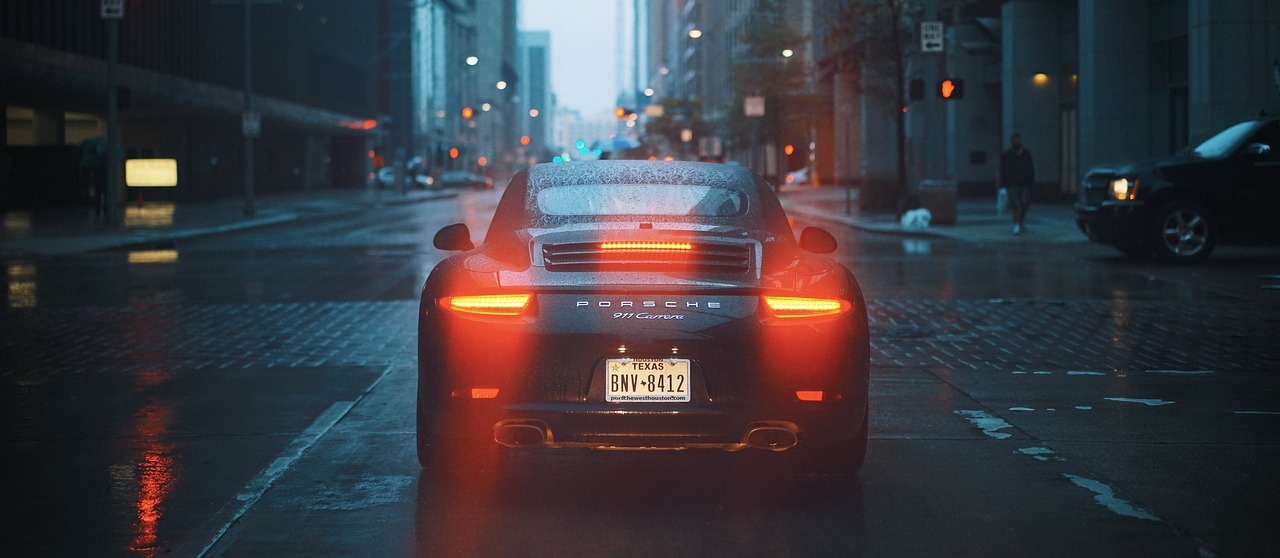
Incorporating accent colors can bring vibrancy to your rainy scene. Just as a dash of spice can elevate a dish, a few strategically placed brighter hues can draw attention and create focal points in your painting. Maybe a bright yellow umbrella or a splash of red from a storefront can serve as a striking contrast against the cooler background. The trick is to use these colors sparingly, allowing them to stand out without overwhelming the overall mood of the piece.
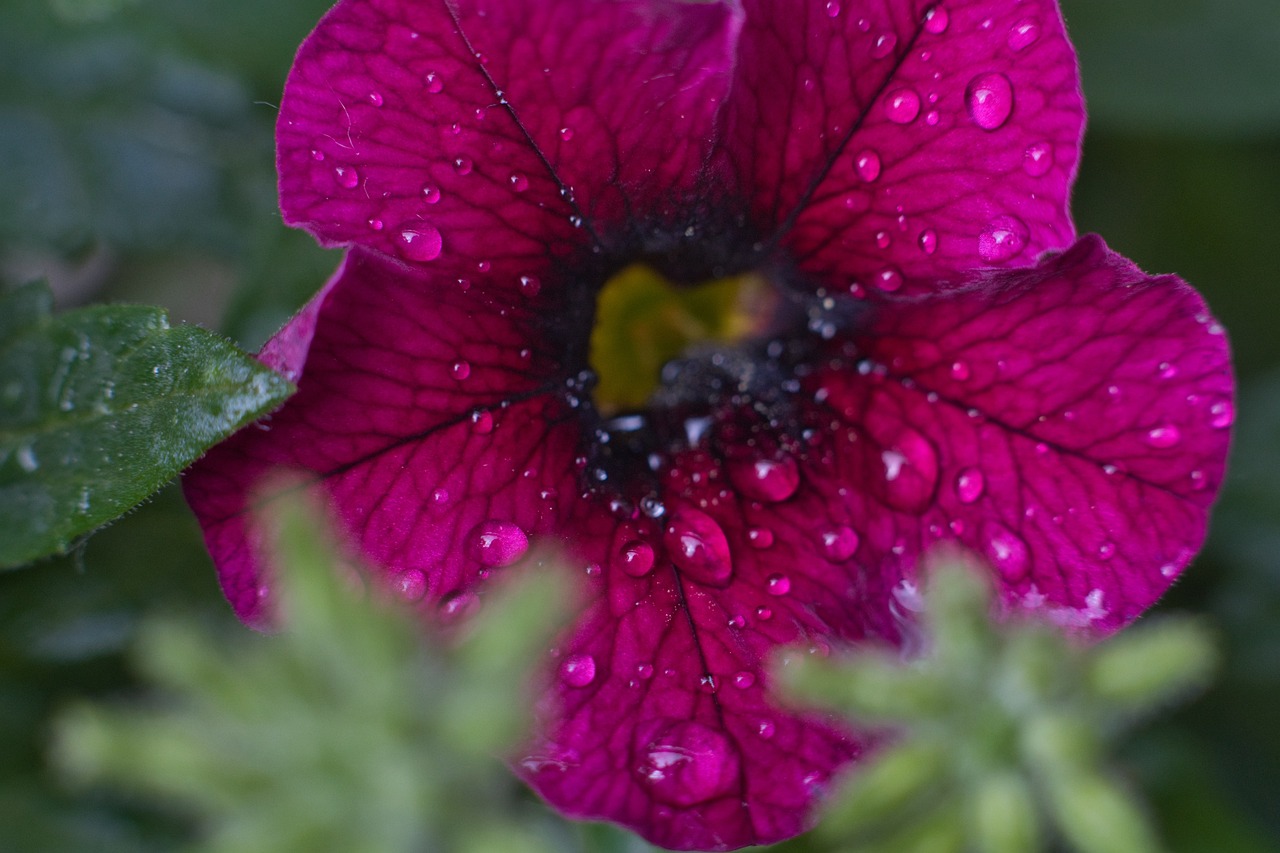
Textures play a vital role in conveying the feel of rain. To enhance your painting's realism, you need to understand how to replicate the look of wet surfaces and raindrops. Think about the way rain creates a sheen on pavement or how it collects in puddles. You might use a palette knife to create texture on the canvas, or employ techniques like glazing to simulate the effect of water on various surfaces. The goal is to make the viewer almost feel the rain through your artwork.
Effective composition is key to a compelling rainy scene. Just like a well-crafted story, your painting should guide the viewer’s eye through the narrative you are telling. Examine various techniques, such as leading lines and focal points, to create a dynamic composition. For example, you might use the lines of buildings or the curve of a street to draw the viewer’s attention deeper into the scene. This helps to create a sense of movement and invites the viewer to explore every detail of your artwork.
Incorporate foreground elements to create a sense of depth and perspective in your painting. Think of these elements as the first chapter of your story; they set the stage for what’s to come. Positioning objects like trees, people, or vehicles in the foreground can help establish a more immersive experience. These elements not only add interest but also help frame your scene, leading the viewer’s eye toward the background and creating a layered effect.
Mastering the balance of light and shadow is essential for realism. In a rainy setting, reflections and shadows play a crucial role in adding dimension to your artwork. Imagine how the light filters through clouds, casting soft shadows on the ground. By carefully observing how light interacts with different surfaces, you can replicate this in your painting. Use darker shades to create shadows and lighter tones for highlights, ensuring that your composition feels balanced and harmonious.
- What materials do I need to paint a rainy scene? You will need quality paints, brushes, a canvas, and possibly a palette knife for texture.
- Can I use acrylics for painting rain? Absolutely! Acrylics are versatile and can be used to create stunning effects in rainy scenes.
- How do I create realistic raindrops in my painting? Use a small brush to add tiny dots of white or lighter colors to simulate raindrops on surfaces.
Understanding Rainy Atmosphere
When it comes to painting a rainy scene, it's essential to understand the unique atmosphere that rain creates. Picture this: the sky is a soft, muted gray, and the light is diffused, casting a gentle glow over everything. This isn’t just any ordinary day; it’s a day where colors seem to whisper rather than shout, and the world feels alive in a different way. The beauty of a rainy atmosphere lies in its ability to evoke emotions and set a mood that can turn a simple landscape into a captivating story.
To truly capture the essence of rain, you need to pay attention to how it alters the perception of light and color. On a rainy day, shadows soften, and highlights become more pronounced, creating a delicate balance that artists must replicate. The light that filters through clouds creates a unique palette of colors that can transform the ordinary into the extraordinary. Think of how the greens of trees become richer, the browns of earth are deepened, and even the grays of the sky are filled with subtle hints of blue and purple. This complexity is what makes a rainy scene so compelling.
Moreover, understanding the effects of moisture on surfaces is crucial. When rain falls, it doesn’t just wet the ground; it creates reflections that can add a dramatic flair to your painting. Puddles can mirror the sky, while wet streets can shimmer with the colors of surrounding lights. To illustrate this concept, consider the following points:
- Light Diffusion: Rain scatters light, creating a soft, ethereal glow.
- Color Saturation: Rain enhances the saturation of colors, making them appear more vibrant.
- Texture Variation: Wet surfaces have different textures compared to dry ones, influencing how we perceive them.
As you prepare to paint, remember that the atmosphere of a rainy day is not just about the colors you choose but also about how you convey the feeling of moisture in the air. The way you depict raindrops, the sheen on wet surfaces, and the overall mood of your painting will transport viewers into that rainy world. It’s like stepping into a dream where every droplet tells a story, and every shadow holds a secret. By embracing the nuances of a rainy atmosphere, you can create artwork that resonates deeply with your audience.
- What colors should I use for a rainy scene? Cool tones like blues, grays, and soft greens are ideal, but don't shy away from adding accent colors for contrast.
- How can I create the illusion of rain in my painting? Use thin, vertical strokes to mimic raindrops and consider adding texture to represent wet surfaces.
- What techniques can enhance the depth of my rainy scene? Layering different shades and incorporating foreground elements can significantly add depth and perspective.
Choosing the Right Colors
When it comes to painting a rainy scene, the color palette you choose can make or break the mood of your artwork. Rainy days are often characterized by a unique blend of colors that can evoke feelings of melancholy, calmness, or even nostalgia. In this section, we will explore how to effectively combine cool and neutral colors to capture the essence of a rainy day. Think of your palette as a musical score; each color plays its part in creating a harmonious composition that resonates with the viewer.
To start off, consider the cool tones that dominate a rainy landscape. Shades of blue, gray, and even hints of green can help you depict the overcast sky and the wet surfaces below. Mixing these colors should be approached with care; too much saturation can lead to an unrealistic portrayal. Instead, aim for a balance that reflects the natural world. For example, a soft blue mixed with a touch of gray can create the perfect shade for a stormy sky. It’s like cooking—you want to add just the right amount of seasoning to enhance the dish without overpowering it.
Here's a simple table to illustrate some effective color combinations for rainy scenes:
| Color | Mix With | Effect |
|---|---|---|
| Sky Blue | Gray | Creates a moody overcast sky |
| Steel Blue | White | Softens the tone for distant clouds |
| Charcoal Gray | Black | Adds depth to wet pavement |
| Muted Green | Brown | Represents wet foliage |
Once you have your base colors, it’s essential to introduce accent colors to bring life to your rainy scene. These can be brighter hues that stand out against the muted background. For instance, a splash of yellow or red can represent reflections in puddles or the glow of streetlights during a rainstorm. Think of these accent colors as the jewelry that complements an outfit; they draw the viewer's attention and add interest to the overall composition.
Moreover, layering your colors can create a sense of depth and realism. When painting, try to apply lighter shades on top of darker ones to mimic the way light interacts with wet surfaces. This technique not only enhances the visual appeal but also gives your painting a dynamic quality. Just like in life, where shadows and light coexist, your painting should reflect this balance to truly resonate with the observer.
In summary, choosing the right colors for a rainy scene is all about understanding the mood you want to convey and selecting a palette that reflects that. By mixing cool tones, incorporating accent colors, and layering your shades, you can create a captivating artwork that transports viewers into the heart of a rainy day. Remember, every brushstroke counts, so take your time and enjoy the process!
- What colors should I avoid when painting a rainy scene? It's best to steer clear of overly bright and vibrant colors that don't align with the somber mood of rain. Instead, focus on muted tones that evoke the atmosphere of a rainy day.
- How can I create the illusion of depth in my painting? Use varying shades of your chosen colors and incorporate foreground elements to guide the viewer's eye into the scene.
- Can I use acrylics for painting rainy scenes? Absolutely! Acrylics are versatile and can be layered to achieve the depth and texture needed for a realistic rainy atmosphere.
Mixing Cool Tones
When it comes to painting a rainy scene, is essential for capturing the essence of a dreary, overcast day. The beauty of cool colors lies in their ability to evoke a sense of calm and melancholy, perfectly mirroring the mood of rain-soaked landscapes. So, how do you achieve that perfect blend of blues, grays, and greens? Let's dive into some effective techniques!
First off, consider starting with a basic palette. A few key colors can work wonders when mixed correctly. For a rainy scene, you might want to focus on:
- Cobalt Blue - A vibrant blue that can represent the sky.
- Payne's Gray - This deep gray adds a hint of darkness, perfect for clouds.
- Ultramarine Blue - A rich blue that can create depth in your sky.
- Viridian Green - A muted green that can depict wet foliage.
Mixing these colors together can create a variety of shades that will enhance the realism of your painting. For instance, combining Cobalt Blue with Payne's Gray can yield a beautiful slate blue, ideal for illustrating the sky just before a downpour. Remember, the key is to experiment! You might find that adding a touch of white can lighten your shades, giving them a more ethereal quality, while a bit of black can deepen them for dramatic effect.
Another technique to consider is layering your cool tones. Start with a base layer of your chosen color, then gradually add darker shades to create shadows and depth. This method not only adds complexity to your scene but also mimics the natural variations found in real life. Think of it like building a sandwich; each layer adds flavor and texture, making the final product much more satisfying.
Finally, don’t forget about the importance of texture when mixing your cool tones. Using a palette knife or a sponge can create interesting effects that mimic the feel of rain on different surfaces, such as wet pavement or leaves. Try dabbing your brush or tool lightly to create a sense of movement, as if the rain is gently falling. This technique can transform your painting from a flat representation into a dynamic scene that draws the viewer in.
In conclusion, mixing cool tones is not just about selecting the right colors; it’s about understanding how they interact and contribute to the overall mood of your artwork. By experimenting with combinations, layering techniques, and adding texture, you can create a stunning rainy scene that captures the viewer’s imagination. So grab your brushes, unleash your creativity, and let the cool tones flow!
Q: What colors should I avoid when painting a rainy scene?
A: Bright, warm colors like yellows and oranges can detract from the mood of a rainy scene. It's best to stick with cool, muted tones.
Q: How can I make my rain look realistic?
A: Use a combination of brush techniques and layering to create the illusion of raindrops. Consider adding highlights to mimic the way light reflects off wet surfaces.
Q: Is it necessary to use expensive paints for a rainy scene?
A: Not at all! While high-quality paints can offer better pigmentation, many affordable brands can provide excellent results. It's more about how you use them than the price tag.
Creating Depth with Shades
When it comes to painting a realistic rainy scene, depth is your best friend. Just like in life, depth adds layers to your artwork, making it more engaging and lifelike. Think of it as giving your painting a three-dimensional quality that draws the viewer in, almost as if they can feel the cool mist of rain on their skin. To achieve this depth, you’ll want to focus on the shades of colors you use, creating a sense of distance and texture that mimics a real rainy day.
One effective technique is to use layering. Start with a base layer of your chosen colors—perhaps a soft gray or muted blue for the sky. As you build upon this layer, gradually add darker shades to represent the clouds and wet surfaces. This layering technique not only adds depth but also creates a more complex visual experience. For example, if you're painting a street scene, the wet pavement can be depicted with darker shades of gray or blue, reflecting the sky above and the light around it.
Another important aspect is understanding the contrast between light and dark. In a rainy scene, you often have very pronounced contrasts due to the way light interacts with water. For instance, highlights on wet surfaces can be achieved with lighter shades, while shadows can be deepened with darker hues. This interplay of light and shadow can create a dramatic effect, making your painting more dynamic. Remember, the key is to observe how rain affects the world around you; the way it darkens surfaces and enhances the vibrancy of colors can provide invaluable insight into your color choices.
To help visualize how to create depth with shades, consider the following tips:
- Start with a gradient: Begin with lighter shades at the top of your canvas, gradually transitioning to darker shades as you move down. This mimics the natural gradient of an overcast sky.
- Use complementary colors: Pairing a cool color with a warm color can create a striking contrast that enhances depth.
- Experiment with transparency: By using a glazing technique, you can apply thin layers of color over dried layers, allowing previous shades to show through and adding complexity.
Finally, don't shy away from using a variety of shades within the same color family. This not only adds richness to your painting but also helps to convey the mood of a rainy day. A scene might have various shades of blue, from deep navy to soft sky blue, creating a harmonious yet dynamic palette that captures the essence of rain. The more you practice this technique, the more intuitive it will become, allowing you to express the beauty and complexity of rainy days in your artwork.
Q: What colors should I primarily use for a rainy scene?
A: Focus on cool tones like blues, grays, and muted greens. You can also incorporate some warmer accent colors to add interest.
Q: How can I make my rainy scene look more realistic?
A: Pay attention to the light and shadow dynamics, use layering techniques, and observe how rain affects colors and textures in real life.
Q: Is it necessary to use a lot of colors to create depth?
A: Not necessarily. Using various shades of a few colors can effectively create depth and interest without overwhelming the palette.
Q: What is a glazing technique?
A: Glazing involves applying a thin, transparent layer of paint over a dried layer to modify its color and create depth.
Accent Colors for Interest
When painting a rainy scene, the use of accent colors can transform an otherwise muted landscape into a captivating visual narrative. Imagine standing under a gray sky, drops of rain dancing around you, yet amidst the somber tones, a splash of color catches your eye—a bright umbrella, a glimmering storefront, or even the vibrant foliage of a tree. These accents not only draw the viewer's attention but also evoke emotions and create focal points that make your artwork come alive.
To effectively incorporate accent colors, consider the overall mood you want to convey. For instance, if your scene is dramatic and moody, a deep red or golden yellow can provide warmth and contrast against the cooler blues and grays of the rain. Alternatively, if you're aiming for a more serene atmosphere, soft pastels like light pink or mint green can introduce a gentle vibrancy that complements the subdued background. The key is to use these colors sparingly; too many bright hues can overwhelm the scene and detract from the realism you’re striving for.
Think of your accent colors as the spices in a well-cooked dish. Just as a pinch of salt can enhance flavors without overpowering them, a carefully placed accent can elevate your painting. For example, consider highlighting raindrops on a windowpane with a touch of white or light blue. This not only adds realism but also creates a sense of movement and life within the stillness of the rain.
Here’s a quick guide to help you choose and apply accent colors effectively:
| Color | Effect | Best Used With |
|---|---|---|
| Bright Red | Creates a striking focal point | Cool blues, grays |
| Golden Yellow | Adds warmth and optimism | Dark greens, browns |
| Light Pink | Softens the scene, adds calmness | Muted grays, whites |
| Mint Green | Brings freshness and vibrancy | Earthy tones, blues |
In conclusion, accent colors are more than just a decorative element; they are essential tools for storytelling in your artwork. By thoughtfully integrating these hues, you can guide the viewer’s eye and evoke the emotional resonance of a rainy day. So, the next time you pick up your brush, remember that a little splash of color can make a world of difference!
Q: How do I choose the right accent colors for my rainy scene?
A: Start by considering the mood you wish to convey. Use colors that contrast with your primary palette but don't overwhelm it. Experiment with different combinations to see what resonates best with your vision.
Q: Can I use more than one accent color?
A: Yes, but be cautious! Using too many accent colors can distract from the main focus of your painting. Aim for one or two that complement each other and enhance the overall composition.
Q: How can I make my accent colors stand out?
A: Place your accent colors next to contrasting shades, such as dark against light or warm against cool. This juxtaposition will make them pop and draw the viewer's attention.
Textures in Rainy Scenes
When it comes to painting a rainy scene, textures are absolutely crucial in conveying the mood and atmosphere of the moment. Imagine standing on a street corner, feeling the cool droplets of rain on your skin, and hearing the soft patter as they hit the pavement. This sensory experience can be translated onto your canvas through various techniques that replicate the look of wet surfaces and the intricate patterns of raindrops. The goal is to make your audience feel as if they are right there with you, experiencing the rain firsthand.
To achieve this, you can start by using a variety of brush strokes that mimic the effects of rain. For instance, using a dry brush technique can create the illusion of splashes and droplets, while a wet-on-wet technique can help you blend colors seamlessly, giving the impression of a soft, diffused atmosphere. Think of it as layering a cake; each stroke adds a new flavor, contributing to the overall experience of your artwork.
Additionally, consider incorporating different mediums to enhance the texture. For example, using a palette knife can create sharp, defined lines that represent puddles or wet streets. On the other hand, sponges can be used to dab on paint, simulating the irregular patterns of raindrops as they hit various surfaces. Each method adds a unique touch, much like how every rainstorm has its own character.
Another important aspect is to pay attention to the reflections created by rain. Wet surfaces reflect light differently than dry ones, so it's essential to incorporate this into your painting. Use lighter shades to indicate where the light hits the wet ground, and darker shades to show the areas where the water pools. This contrast not only adds depth but also brings your rainy scene to life. Remember, the way light interacts with water can be mesmerizing, and capturing that essence can elevate your artwork significantly.
To summarize, textures in rainy scenes are about creating a sensory experience that resonates with the viewer. By combining various techniques and mediums, you can replicate the unique feel of rain and its effects on the environment. Whether it’s the soft glow of wet pavement or the intricate patterns of raindrops, each texture contributes to the overall narrative of your painting. So, grab your brushes and start experimenting—your canvas is waiting!
- What types of paint are best for creating textures in rainy scenes? Acrylics and oils are great choices as they allow for various techniques like wet-on-wet and dry brushing.
- Can I use digital tools to create textures for a rainy scene? Absolutely! Digital painting software often includes brushes that can replicate textures like wet surfaces and raindrops.
- How do I know when to stop adding texture? A good rule of thumb is to step back and view your painting from a distance. If it feels balanced and the textures enhance the scene, you’re likely on the right track.
Composition Techniques
When it comes to painting a realistic rainy scene, composition is more than just arranging elements on the canvas; it's about creating a visual journey that captures the viewer's attention and evokes emotion. Think of your painting as a story, where each element plays a role in narrating the experience of a rainy day. To achieve this, effective composition techniques are essential. You want to guide the viewer's eye seamlessly through the artwork, allowing them to feel the chill of the rain and the ambiance of the moment.
One of the most powerful tools in your composition arsenal is the use of leading lines. These lines can be anything from the edge of a sidewalk to the branches of a tree, drawing the viewer's gaze toward the focal point of your painting. Imagine standing on a rainy street; the lines formed by the wet pavement or the direction of the raindrops can lead your eyes into the heart of the scene. By strategically placing these lines, you can create a sense of movement and depth that pulls the viewer in.
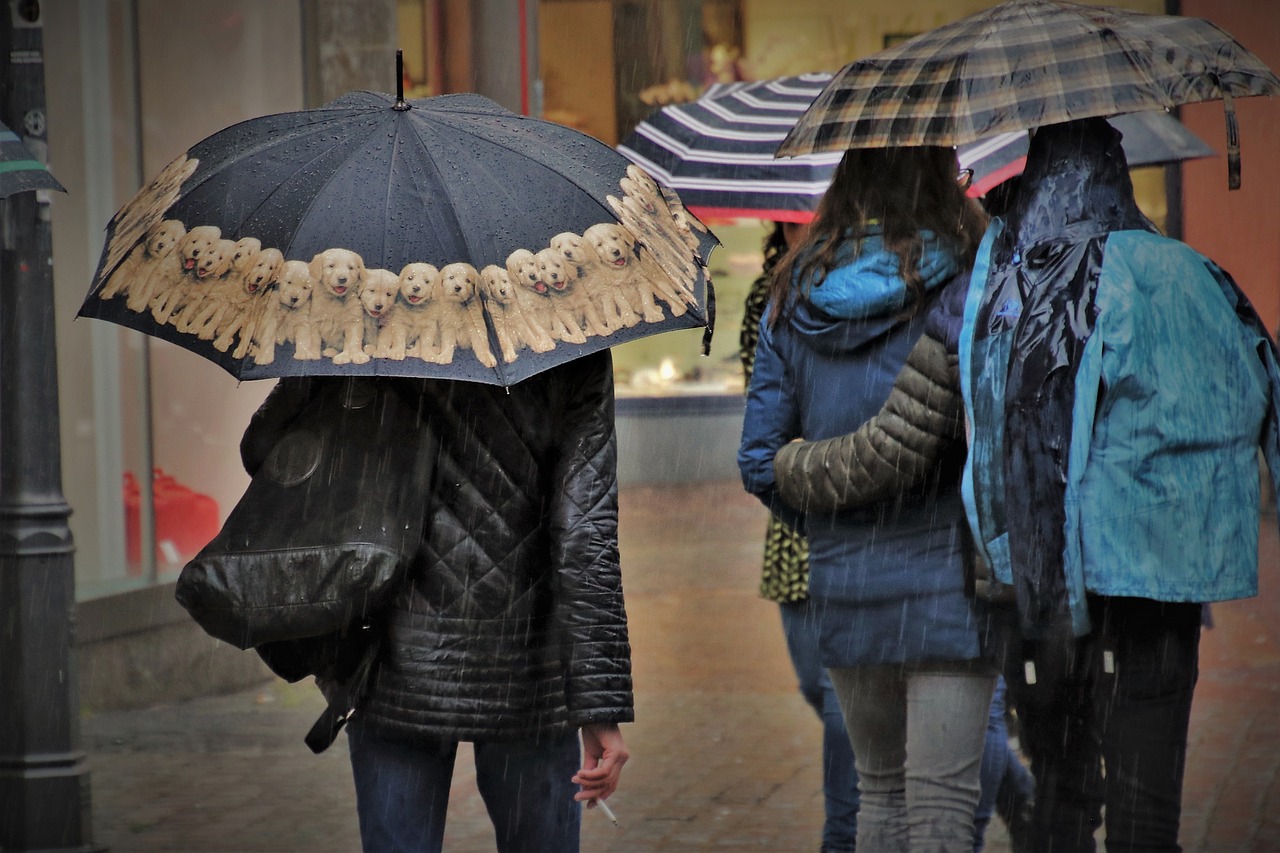
Another crucial aspect of composition is the placement of foreground elements. These elements add layers to your painting and create a sense of depth and perspective. For instance, consider incorporating items like umbrellas, puddles, or even figures huddled under raincoats. Not only do they add interest, but they also help establish a scale for the viewer. Positioning these elements effectively can transform a flat image into a dynamic scene that feels alive. Think of it as building a stage for your rainy story, where every character and prop contributes to the overall narrative.
Now, let's talk about the balance of light and shadow. In a rainy scene, the interplay between these two elements can significantly enhance the realism of your artwork. The soft, diffused light characteristic of overcast skies creates gentle shadows that can add dimension to wet surfaces. For example, when painting a street scene, consider how the reflections in puddles can mirror the colors and shapes above. This reflection not only adds realism but serves as a beautiful contrast against the darker shadows of the wet pavement. Mastering this balance is key to capturing the essence of a rainy day.
In addition to these techniques, consider the rule of thirds when composing your painting. This classic guideline suggests dividing your canvas into a grid of nine equal sections and placing your focal points along these lines or at their intersections. By doing so, you create a more engaging and dynamic composition. For instance, if your focal point is a lamppost glowing in the rain, positioning it off-center can create a more visually appealing balance with the surrounding elements, like trees or buildings.
Lastly, don’t forget to incorporate negative space into your composition. This is the area around your subject that helps to define and highlight it. In a rainy scene, the emptiness of a gray sky or the vastness of a wet street can create a feeling of solitude and enhance the overall mood. Think of negative space as the quiet between the notes of a song; it’s just as important as the elements you choose to include.
By combining these composition techniques—leading lines, foreground elements, light and shadow balance, the rule of thirds, and negative space—you can create a rainy scene that not only looks realistic but also tells a compelling story. So grab your brushes, and let your creativity flow as freely as the rain!
- What colors work best for a rainy scene? Cool tones like blues, grays, and muted greens are ideal for capturing the essence of rain.
- How can I create depth in my painting? Use varying shades and incorporate foreground elements to give your painting a three-dimensional feel.
- What techniques can I use to depict reflections? Pay attention to the interplay of light and shadow, and use a wet-on-wet technique to create smooth transitions.
- Can I use bright colors in a rainy scene? Absolutely! Use accent colors strategically to draw attention and create focal points amidst the muted tones.
Using Foreground Elements
When it comes to painting a captivating rainy scene, foreground elements are your best friends. They do more than just fill space; they create a sense of depth and perspective that draws the viewer into your artwork. Imagine standing on a street corner, watching the rain fall, with puddles forming at your feet. That sense of being there, in that moment, is what you want to capture. To achieve this, think about incorporating elements like wet pavement, shimmering reflections, or even the silhouettes of people with umbrellas. Each of these details adds to the richness of your scene and invites the viewer to step into your world.
One effective way to position these foreground elements is by considering their relationship to the background and midground. For instance, if you have a cityscape in the background, placing a few streetlights or trees in the foreground can create a natural frame for your painting. This technique not only enhances the composition but also guides the viewer's eye towards the focal points of your artwork. You might also want to play with the scale of these elements; larger objects in the foreground can create a sense of intimacy, while smaller objects can add to the overall atmosphere.
Don't forget about the effects of rain on your foreground elements. The way light interacts with wet surfaces can create mesmerizing reflections and highlights. For example, when painting a street, consider how the rain might cause the colors to become more vibrant and the edges to soften. You can achieve this by using a glazing technique—applying thin layers of transparent color over your base layer to mimic the effect of water on pavement. This not only adds realism but also creates a dynamic interplay between light and shadow.
As you work on your painting, keep in mind that the mood of a rainy day can vary significantly. Are you aiming for a dramatic downpour or a gentle drizzle? This will influence your choice of foreground elements as well. For a more intense scene, consider using bold shapes and contrasting colors. Conversely, for a softer approach, you might opt for delicate lines and muted tones. The key is to ensure that your foreground elements complement the overall atmosphere of your painting.
To summarize, using foreground elements effectively can elevate your rainy scene from ordinary to extraordinary. By focusing on depth, scale, and the interplay of light and shadow, you can create a painting that not only depicts rain but also evokes the feeling of being enveloped in its embrace. So grab your brushes, and let your imagination run wild as you bring your rainy scene to life!
- What are some common mistakes to avoid when painting rainy scenes?
One common mistake is neglecting the importance of light and shadow. Rainy scenes require careful consideration of how light interacts with wet surfaces. - How can I make my rainy scene more dynamic?
Incorporating movement, such as falling raindrops or swaying branches, can add energy to your painting. - What materials work best for painting rain?
Watercolors and acrylics are often preferred for their ability to create soft washes and layers, mimicking the look of rain.
Balancing Light and Shadow
When it comes to painting a realistic rainy scene, is not just a technique; it's an art form. Imagine standing outside during a downpour, where the world transforms under the influence of rain. The way light interacts with the wet surfaces around you creates a dance of reflections and shadows that can be mesmerizing. To capture this in your artwork, you need to understand how to manipulate these elements to create depth and realism.
First, consider the source of light in your scene. On a rainy day, light often comes from a diffused source, such as the sun hidden behind gray clouds or street lamps casting a warm glow through the rain. This means that shadows are softer and less defined than on a clear day. To replicate this effect, use soft brush strokes and avoid harsh lines. This will help create that gentle transition between light and shadow that is characteristic of rainy weather.
Next, think about the reflections that rain creates. Puddles on the ground can mirror the colors and shapes of the surroundings, adding an extra layer of complexity to your painting. To achieve this, you might want to use a glazing technique, where you apply thin layers of transparent color over your base layer. This allows the underlying colors to show through while adding depth. For instance, if you're painting a street scene, consider how the colors of the buildings and trees will reflect in the puddles. A well-placed splash of color can make your painting pop!
Additionally, don’t forget about the importance of contrast. In rainy scenes, the contrast between light and shadow can create a dramatic effect. Use darker shades to define areas that are obscured by rain or shadowed by buildings. This contrast will not only add interest but will also guide the viewer's eye through your artwork. For example, if you have a brightly lit area, such as a street lamp, position darker shadows nearby to enhance that brightness.
It might also be helpful to think about the emotional tone of your painting. Rain can evoke feelings of melancholy, tranquility, or even joy, depending on how you balance light and shadow. If you want to convey a sense of calm, consider using softer shadows and lighter highlights. Conversely, if you’re aiming for a more dramatic or intense atmosphere, increase the contrast between your light and dark areas.
Lastly, practice is key! Experiment with different techniques and observe how light interacts with wet surfaces in real life. Take a moment to step outside during a rainstorm and observe the world around you. What colors do you see? How do the shadows shift as the rain falls? By incorporating these observations into your painting, you’ll not only improve your skill but also create a more realistic and captivating rainy scene.
- What colors should I use for a rainy scene? Aim for cool and muted tones like blues, grays, and greens. Accent these with brighter colors to create focal points.
- How can I create a sense of depth in my painting? Use foreground elements and varying shades of color to add layers and perspective.
- What techniques can I use to depict reflections? Glazing and soft brush strokes can help you replicate the reflective quality of wet surfaces.
- How do I balance light and shadow effectively? Observe real-life rainy scenes and practice using softer shadows and highlights to create a realistic atmosphere.
Frequently Asked Questions
- What are the best colors to use for a rainy scene?
When painting a rainy scene, it's essential to choose a palette that reflects the mood of overcast skies. Cool tones like blues and grays are ideal, as they evoke the dreariness of rain. You can also incorporate some muted greens and neutral tones to balance the composition and enhance the atmosphere.
- How can I create a sense of depth in my rainy painting?
To create depth, consider using foreground elements that draw the viewer's eye into the scene. Layering different shades of your chosen colors can also help, as it mimics the complexity of a rainy environment. Don't forget to balance light and shadow to give your painting a three-dimensional feel!
- What techniques can I use to depict textures in rain?
Textures are crucial for conveying the feel of rain. You can use techniques like dry brushing to create the illusion of wet surfaces and stippling for raindrops. Experiment with different brush strokes to replicate the unique textures found in a rainy atmosphere.
- How do I balance light and shadow in a rainy scene?
Balancing light and shadow is key to realism. Focus on how light reflects off wet surfaces and the shadows cast by objects. Use lighter shades to depict reflections and darker shades for shadows, ensuring you maintain a harmonious interplay between the two.
- Can I use bright colors in a rainy scene?
Absolutely! While the overall palette should be cool and muted, incorporating accent colors can add vibrancy and interest. Use brighter hues strategically to create focal points that draw attention, such as a brightly colored umbrella or a glowing streetlight.


