
How to Draw a Realistic Dog: Step-By-Step Guide
Drawing a dog can be an incredibly rewarding experience, whether you're a seasoned artist or just starting out. In this comprehensive guide, we will walk you through the entire process of creating a lifelike portrait of a dog. By following these steps, you'll not only learn how to draw a realistic dog but also gain insights into the techniques and tools that can elevate your artwork to a whole new level. So, grab your pencils and let’s embark on this artistic journey together!
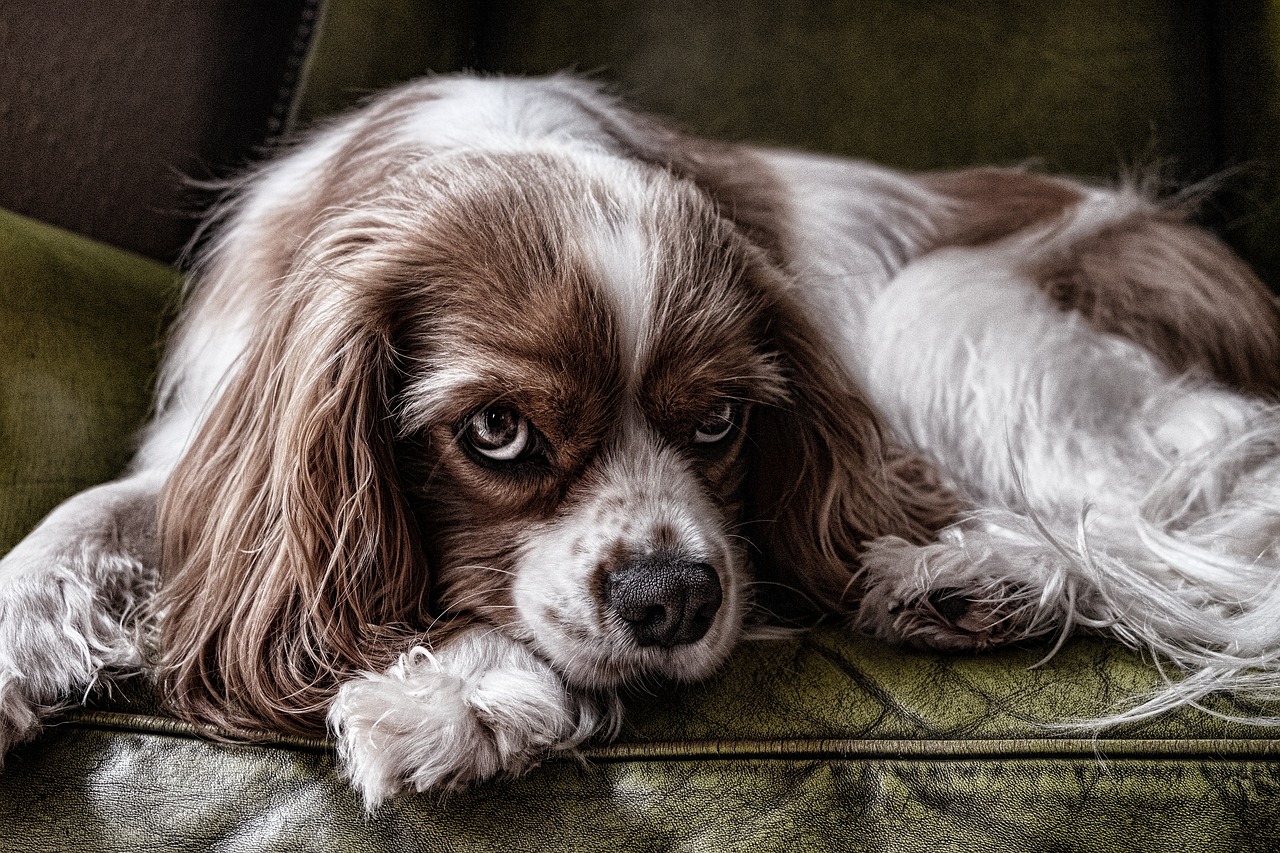
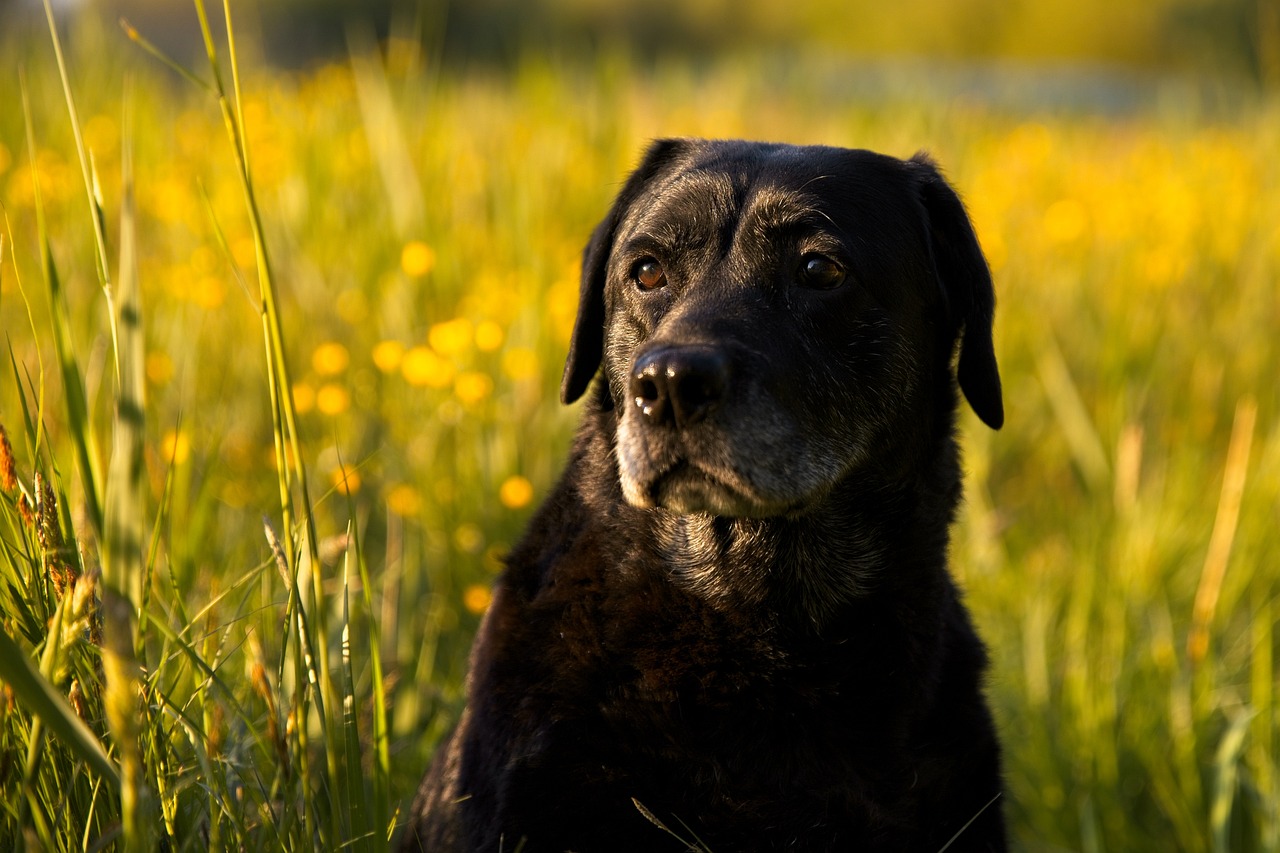
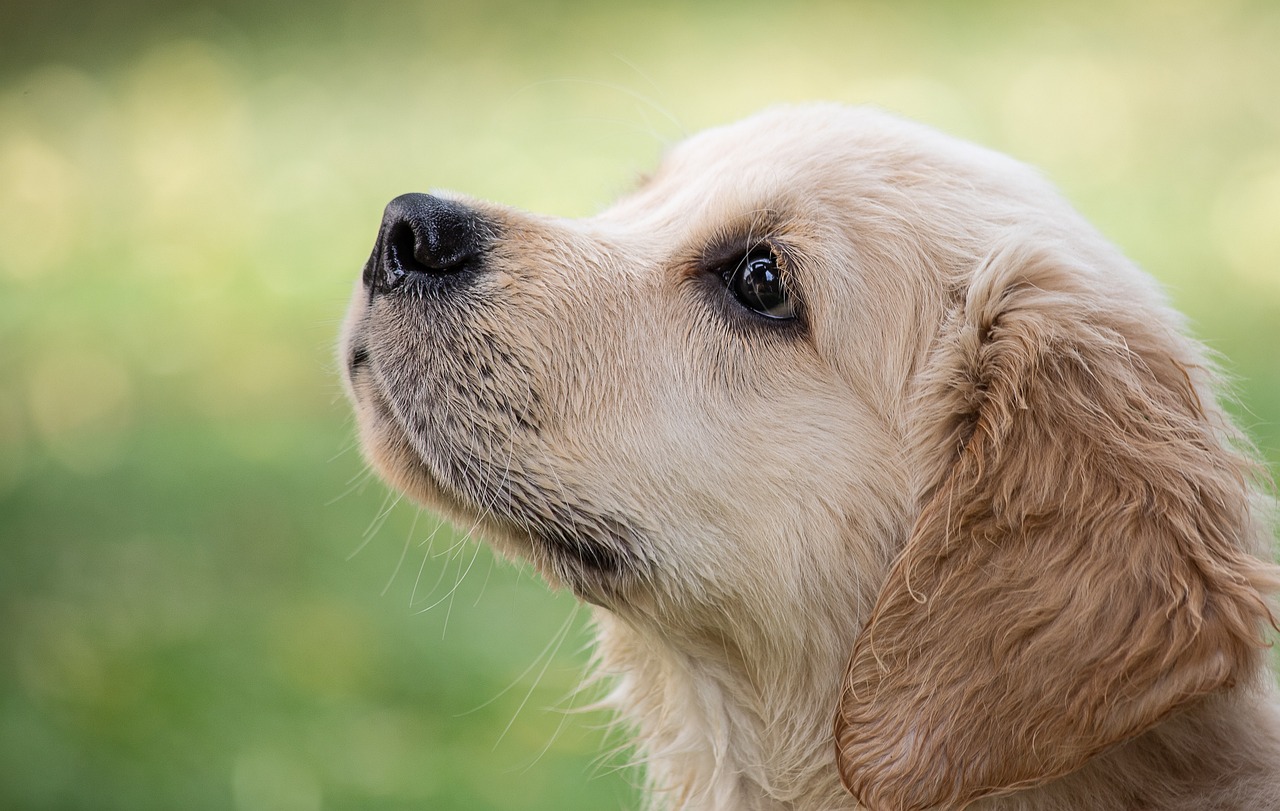
Before putting pencil to paper, it's essential to choose a high-quality reference photo. This step is crucial because a good reference will help you capture accurate details and proportions. Look for images that showcase different dog breeds and angles. Websites like Unsplash or Pexels offer free, high-resolution photos that can serve as excellent references. When selecting your photo, consider the following:
- Lighting: Good lighting will highlight the dog's features.
- Angle: Choose an angle that shows off the dog's personality.
- Expression: A captivating expression can bring your drawing to life.
Now that you have your reference photo, it’s time to gather the right materials. The tools you choose can significantly enhance your drawing experience. Here’s a quick overview of what you’ll need:
| Tool | Purpose |
|---|---|
| Pencils | For sketching and shading. |
| Paper | To support your drawing style. |
| Erasers | For correcting mistakes and blending. |
| Blending Stumps | To smooth out your shading. |
Pencils come in various grades, each offering different levels of hardness and darkness. Understanding these grades can help you create depth and realism in your dog portrait. Here's a brief overview:
- H Pencils: Hard pencils that create lighter lines.
- B Pencils: Softer pencils that produce darker, richer lines.
- F Pencils: A good middle ground for general sketching.
Soft pencils (B grades) are excellent for shading and creating texture, while hard pencils (H grades) are perfect for fine details and outlines. If you want to depict the intricate fur texture of a dog, soft pencils will be your best friends. On the other hand, for the initial sketching, hard pencils can help you maintain control over your lines.
The type of paper you choose can significantly impact your drawing. Look for paper that can handle the pressure of your pencil without tearing or smudging. Here are some tips:
- Weight: Heavier paper (around 200gsm) is ideal for pencil work.
- Texture: A slight texture can help grip the pencil better.
- Color: White paper is standard, but toned paper can add a unique effect.
To start your drawing, sketch basic shapes to outline the dog's form. Think of the dog as a series of simple shapes—circles for the head, ovals for the body, and rectangles for the legs. This foundational step is crucial for achieving correct proportions. Don’t worry about details at this stage; focus on getting the overall structure right. Once you have a solid foundation, you can start refining your shapes into a more realistic representation.
With your basic shapes in place, it's time to add details. This is where your drawing will start to come alive! Pay close attention to the fur, facial features, and other textures that make each dog unique. For instance, different breeds have distinct fur patterns and lengths—some are fluffy while others are sleek. Use varying pencil strokes to depict these textures accurately.
Different fur types require unique rendering techniques. For long fur, use long, sweeping strokes to mimic the natural flow, while short fur can be represented with quick, short strokes. Shading is also essential; pay attention to the light source in your reference photo and add shadows accordingly to create depth.
A dog's expression can convey a world of emotions. Focus on the eyes, mouth, and overall posture to capture your subject's character. For example, slightly raised eyebrows can suggest curiosity, while a relaxed mouth can indicate calmness. Take your time here; the expression can make or break your drawing!
The final touches can elevate your drawing from good to great. Adding highlights and shadows will bring depth and realism to your piece. Use a white pencil or eraser to add highlights, particularly in the eyes and on shiny fur. Don’t forget to step back occasionally and assess your work as a whole—sometimes, a fresh perspective can highlight areas that need more attention.
Q: What is the best pencil for beginners?
A: A good starting point is a set that includes a range of H and B pencils, such as 2H, HB, and 2B.
Q: How do I practice drawing dogs?
A: Regular practice is key! Start with simple shapes and gradually progress to more detailed drawings.
Q: Can I draw a dog without a reference photo?
A: While it’s possible, using a reference photo is highly recommended for accuracy.
Choosing the Right Reference Photo
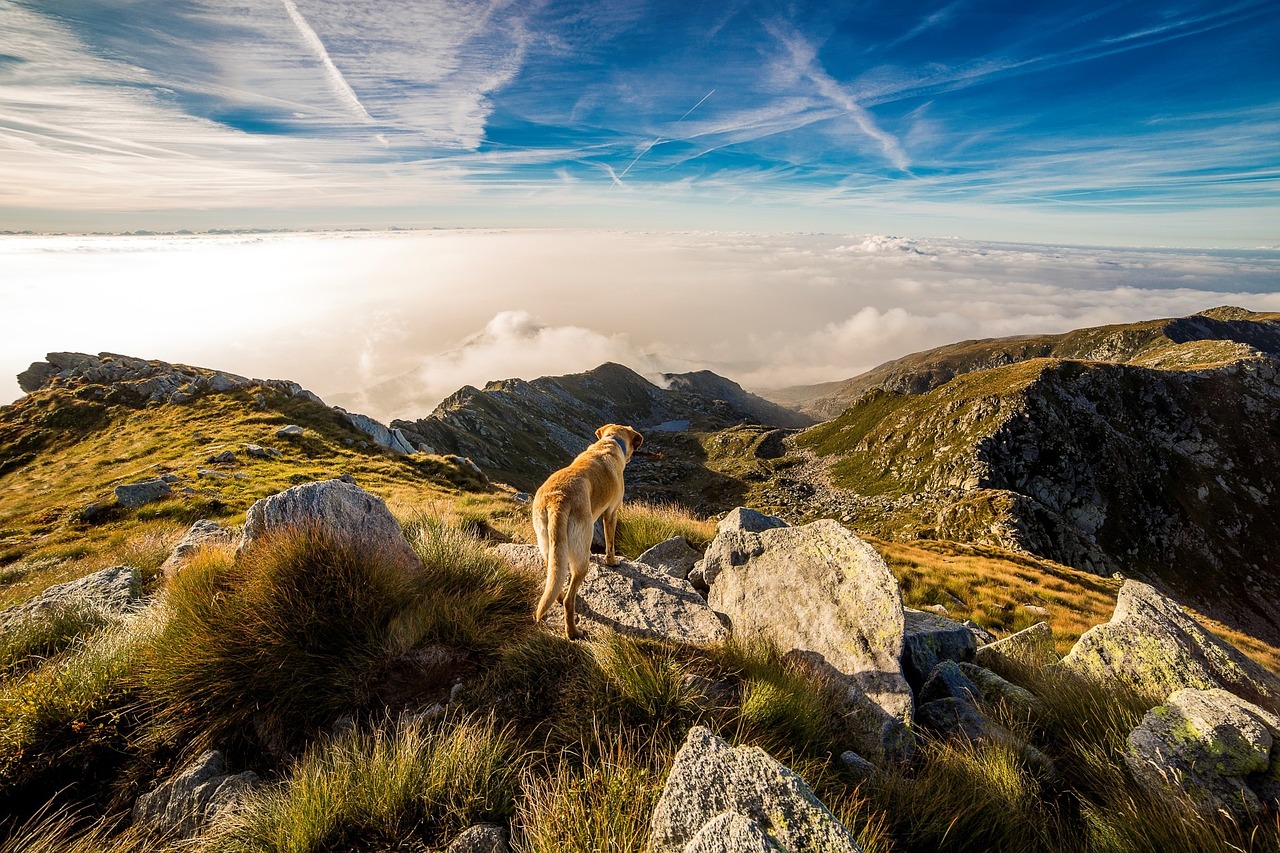
When it comes to drawing a realistic dog, one of the most critical steps is selecting the right reference photo. A high-quality image can make all the difference in capturing the intricate details and personality of your canine subject. But how do you find the perfect photo? Start by considering the breed you want to draw. Different breeds have unique features, and a well-chosen reference will highlight these characteristics effectively.
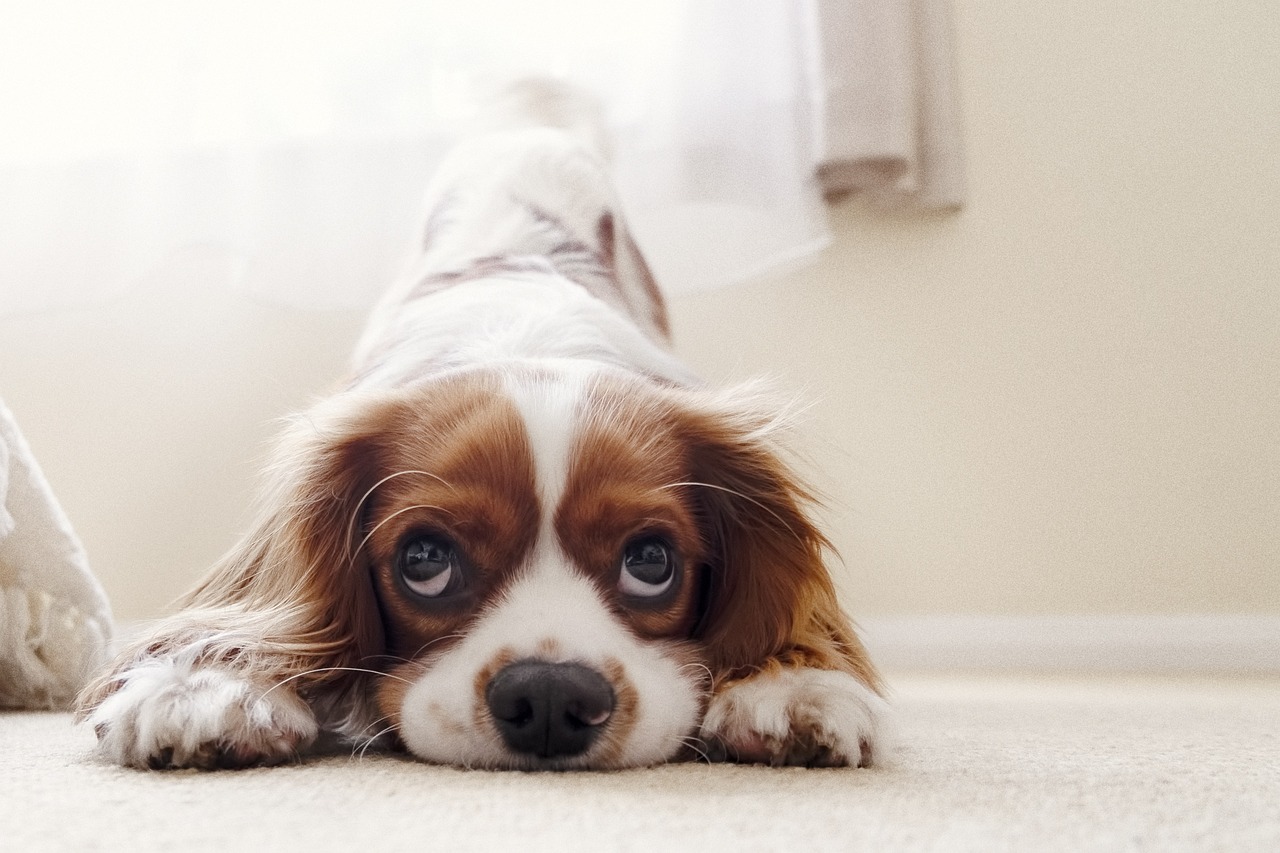
Look for images that showcase a dog in a natural pose. Whether it’s a playful stance, a relaxed sitting position, or an alert stance, the pose can significantly influence the dynamics of your drawing. Websites like Unsplash and Pixabay offer a plethora of high-resolution images that can serve as excellent references. Just remember, the more detail in the photo, the easier it will be for you to replicate those features on paper.
Consider these factors when choosing your reference photo:
- Lighting: Good lighting can enhance the details in the dog's fur and facial features. Look for photos with natural light that create soft shadows.
- Angle: Different angles can provide unique perspectives. Choose a photo that gives you a clear view of the dog's face and body.
- Expression: A dog's expression can convey emotion and personality. Select an image that captures the essence of the dog.
Once you have your reference photo, take a moment to study it. Notice the shapes, shadows, and highlights. You might even want to print it out and keep it nearby as you work. By doing this, you can ensure that your drawing remains true to the reference while allowing your artistic flair to shine through.
In summary, choosing the right reference photo is not just about picking a pretty picture; it’s about finding an image that will guide you in creating a lifelike representation of a dog. With the right photo, you’ll be well on your way to capturing the spirit and essence of your furry friend on paper.
Gathering Your Drawing Materials
Before you dive into the world of dog portraiture, it's essential to gather the right drawing materials. Think of your tools as the paintbrushes of a painter; they can make or break your masterpiece! You wouldn’t want to start a new project with a half-empty paint tube, right? The same principle applies here. Having quality materials will not only enhance your drawing experience but also contribute significantly to the final outcome. So, let’s explore what you need to get started on your journey to creating a lifelike dog portrait.
Firstly, let’s talk about pencils. The type of pencil you choose plays a crucial role in achieving the desired level of detail and texture in your drawing. You’ll want to have a range of pencil grades on hand, from soft to hard, as each will offer different shading capabilities. For instance, softer pencils (like 2B or 4B) are fantastic for creating deep shadows and rich textures, while harder pencils (like H or 2H) are perfect for fine lines and lighter areas. This variety will allow you to experiment and find the right balance for your artwork.
Next up, you’ll need a good eraser. Trust me, having a reliable eraser can save you from a lot of frustration. There are different types of erasers available, such as kneaded erasers, which are great for lifting graphite without damaging the paper, and traditional vinyl erasers, which are excellent for clean up. Having both types can be beneficial, as they serve different purposes during the drawing process.
Now, let’s discuss paper. The choice of paper can significantly impact your drawing. You’ll want to select a paper that can handle the pressure of your pencil strokes and the various techniques you’ll employ. Look for papers that are specifically designed for pencil drawing, typically with a textured surface, as they can hold the graphite better and allow for smoother shading. A weight of at least 200 gsm is recommended to prevent any warping or tearing.
In addition to these basics, consider investing in some blending tools like tortillons or blending stumps. These handy tools help blend your pencil strokes and create smooth transitions between light and shadow, adding depth to your drawing. You might also want to have some fixative spray on hand to preserve your finished artwork. This spray can help prevent smudging and fading, ensuring your dog portrait looks stunning for years to come.
To summarize, here’s a quick table of the essential drawing materials you’ll need:
| Material | Purpose |
|---|---|
| Pencils (various grades) | For shading and detailing |
| Erasers | For corrections and clean-up |
| Drawing paper | To provide a suitable surface for your artwork |
| Blending tools | To create smooth transitions |
| Fixative spray | To preserve the finished drawing |
By gathering these materials, you’re setting yourself up for success. Remember, the right tools can make all the difference in your artistic journey. So, take your time to find the materials that feel right for you and your style. Happy drawing!
- What type of paper is best for drawing dogs? Look for textured drawing paper with a weight of at least 200 gsm for the best results.
- Do I need special pencils for drawing? Having a range of pencil grades, from soft to hard, will help you achieve various shades and details.
- Can I use colored pencils instead of graphite? Yes, colored pencils can also be used to create vibrant dog portraits, but ensure you have the right blending tools for smooth transitions.
Understanding Pencil Grades
When it comes to drawing, the choice of pencil can make a world of difference in the quality and realism of your artwork. Understanding pencil grades is essential for any artist looking to create stunning, lifelike portraits of dogs. Pencils are graded based on their hardness or softness, which directly affects the darkness of the marks they make on paper. In general, pencils are categorized into two main types: graphite pencils and colored pencils. For realistic dog drawings, graphite pencils are the go-to choice.
Graphite pencils are graded on a scale that ranges from H (hard) to B (black or soft), with F (fine point) in the middle. The H pencils produce lighter marks and are great for fine details, while B pencils create darker, softer lines that are perfect for shading and depth. Here’s a quick breakdown of the pencil grades:
| Pencil Grade | Characteristics | Best Used For |
|---|---|---|
| H | Hard, light marks | Fine details and light shading |
| HB | Medium hardness | General purposes, sketching |
| B | Soft, dark marks | Shading, depth, and bold lines |
For drawing a realistic dog, a good combination of both hard and soft pencils will allow you to achieve the necessary contrast and depth. You might start with an H pencil for the initial sketch, outlining the basic shapes and features of the dog. Then, switch to a B pencil for shading and adding texture to the fur. This combination helps you create a more dynamic and engaging piece of art.
Another important aspect to consider is the pencil's tip. A sharp tip is essential for detailed work, especially when rendering fine fur or delicate facial features. Conversely, a blunt tip can be useful for broader strokes and shading, allowing for smoother transitions between light and dark areas. So, keep a pencil sharpener handy!
Ultimately, the key to mastering pencil grades is experimentation. Try out different grades to see how they work with your style and the specific dog breed you are drawing. You'll discover that each pencil has its unique personality, just like the dogs you aim to portray. So grab your pencils and start experimenting—you might just find your new favorite tool!
- What is the best pencil grade for beginners? - Many beginners find that starting with an HB pencil is ideal as it offers a good balance between hardness and softness.
- Can I use colored pencils for drawing dogs? - While graphite pencils are preferred for realism, colored pencils can add a unique touch and vibrancy to your artwork.
- How do I maintain my pencils? - Regularly sharpen your pencils and store them in a case to prevent breakage and maintain their quality.
Soft vs. Hard Pencils
When it comes to drawing a realistic dog, the choice between soft and hard pencils can significantly affect your artwork. Each type of pencil has its unique characteristics, and understanding these differences is essential for achieving the desired textures and effects in your drawing. Soft pencils, typically graded from 2B to 9B, are known for their ability to produce rich, dark lines and smooth shading. They contain a higher percentage of graphite, which allows for deeper tones and a more dynamic range of values. This makes them ideal for rendering fur, where you want to capture the softness and depth of the dog's coat.
On the other hand, hard pencils, graded from H to 4H, are perfect for creating fine, precise lines. They have a higher clay content, which makes them less prone to smudging and allows for more controlled strokes. This quality is particularly useful when sketching the intricate details of a dog's face, such as the eyes and nose. Here's a quick breakdown of how each pencil type can be used effectively:
| Pencil Type | Characteristics | Best Uses |
|---|---|---|
| Soft Pencils (2B - 9B) | Dark, rich lines; smooth shading | Rendering fur, shading, and creating depth |
| Hard Pencils (H - 4H) | Fine lines; less smudging | Detail work, sketching outlines, and precise features |
To truly master the art of drawing dogs, consider using a combination of both pencil types. Start with a hard pencil to outline the basic shapes and features of the dog. This will give you a solid foundation without overwhelming the drawing with dark lines. Once the outline is complete, switch to a soft pencil to fill in the details and add depth. The transition from hard to soft pencil will create a more lifelike representation of your furry friend.
Remember, the key to a successful drawing lies not only in the tools you choose but also in how you use them. Experiment with both soft and hard pencils to discover what works best for your style. With practice, you'll find that each type of pencil has its place in your artistic toolkit, allowing you to create stunning, realistic portraits of dogs that capture their unique personalities.
- What is the best pencil grade for beginners? Beginners often find that a 2B pencil offers a good balance between softness and hardness, making it versatile for various techniques.
- Can I use colored pencils for drawing dogs? Absolutely! Colored pencils can add a vibrant touch to your dog portraits, especially if you want to emphasize the dog's unique coat colors.
- How do I prevent smudging while drawing? Using hard pencils for initial sketches can help minimize smudging. Additionally, you can use a fixative spray once your drawing is complete.
Paper Selection Tips
Choosing the right paper for your dog drawing is like picking the perfect canvas for a masterpiece—it's essential for achieving the desired effect. The texture, weight, and finish of the paper can significantly influence how your pencils interact with the surface and the overall look of your artwork. For instance, if you're aiming for a smooth finish, a hot-pressed paper might be your best bet. This type of paper has a very smooth surface, making it ideal for detailed work and fine lines.
On the other hand, if you're looking to create a more textured appearance, cold-pressed paper is your go-to option. This paper has a more pronounced texture, which can add a unique dimension to your drawing, especially when rendering fur. The choice between these two types depends on the style you want to achieve. Furthermore, consider the weight of the paper: heavier papers (around 200gsm and above) can handle more layers of graphite without warping, while lighter papers may buckle if you apply too much pressure.
Another factor to consider is the color of the paper. While white paper is the most common choice, toned papers in shades of gray or tan can provide a different backdrop that enhances the contrast of your drawing. This can be particularly effective for highlighting lighter fur against a darker background. Remember, the right paper can make your drawing process smoother and more enjoyable, leading to a stunning final piece.
Here’s a quick comparison table to help you choose the right paper:
| Paper Type | Texture | Best For |
|---|---|---|
| Hot-Pressed | Smooth | Detailed work and fine lines |
| Cold-Pressed | Textured | Adding dimension, fur rendering |
| Toned Paper | Varies | Contrast enhancement, unique backgrounds |
In conclusion, selecting the right paper is a crucial step in your artistic journey. Don't hesitate to experiment with different types to find what works best for your style and technique. After all, the path to creating a stunning dog portrait is paved with the right choices, including the paper that holds your artwork!
1. What paper is best for beginners?
For beginners, a medium-weight, smooth paper is often recommended. It allows for easy erasing and layering, making it forgiving for those still mastering their techniques.
2. Can I use regular printer paper for drawing?
While you can use regular printer paper, it's not ideal for detailed pencil work. It may not hold up to heavy shading and could tear easily. Investing in quality drawing paper is worth it.
3. How do I know if my paper is suitable for pencil drawing?
Test the paper with your pencil; it should allow for smooth application and easy blending. If the pencil drags or the paper feels too rough, it may not be suitable.
4. Should I stretch my paper before drawing?
Stretching is typically not necessary for drawing papers. However, if you're using watercolor paper or a very heavy paper, it might be beneficial to prevent buckling.
Sketching the Basic Shapes
When it comes to drawing a realistic dog, is like laying down the foundation of a house. You wouldn’t build a house without a solid base, right? Similarly, starting with basic shapes will give your drawing the structure it needs to come to life. Begin by observing the dog you want to draw; notice the overall shape of its body, head, legs, and tail. Each part can be broken down into simple geometric shapes.
For instance, the dog's head can often be represented by a circle or an oval, while the body can be depicted as a larger oval or rectangle. The legs can be visualized as elongated rectangles or cylinders. By using these shapes, you can create a rough outline that captures the proportions and posture of the dog. This approach not only simplifies the drawing process but also ensures that you maintain accurate proportions throughout your artwork.
Here’s a quick guide on how to start sketching:
- Start with Basic Shapes: Use circles for the head and ovals for the body.
- Outline the Legs: Draw straight lines or rectangles for the legs.
- Define the Tail: Use a line or a triangle to represent the tail's shape.
After sketching these basic shapes, it’s time to connect them. Gently refine the lines to create a more cohesive outline of the dog's form. Don’t worry about making it perfect at this stage; the goal is to get a feel for the overall structure. You can always erase and adjust as needed. Remember, this is just the beginning, and your drawing will evolve as you continue to add details.
As you sketch, keep your pencil strokes light. This allows for easy corrections and adjustments without damaging the paper. Think of your sketch as a roadmap; you’re setting the stage for the detailed work to come. Once you’re satisfied with the basic shapes, you can begin to refine the outline, adding curves and contours that reflect the dog's unique features.
In summary, sketching basic shapes is an essential step in creating a realistic dog drawing. It provides a solid framework that you can build upon, allowing you to focus on details later. So grab your pencil, start sketching those shapes, and prepare to bring your canine companion to life on paper!
Q: What if my shapes don’t look perfect?
A: That's totally fine! The initial shapes are just a guide. You can refine them as you go along.
Q: How can I ensure the proportions are correct?
A: Continuously compare the sizes of different parts of the dog as you draw. Using reference images can also help a lot!
Q: Should I use a specific type of pencil for sketching?
A: A softer pencil (like 2B or 4B) is great for sketching because it allows for smoother lines and easier erasing.
Adding Details and Textures
Once you've laid down the basic shapes of your dog drawing, it's time to breathe life into your artwork by . This is where the magic happens! Think of your drawing as a blank canvas waiting to be filled with personality and character. By focusing on the finer details, you can transform your sketch into a stunning representation of a beloved canine companion.
Start by observing your reference photo closely. Notice how the light interacts with the dog's fur, creating highlights and shadows. These elements are essential for adding depth to your drawing. Use your pencils to create a range of values, from the darkest shadows to the brightest highlights. This contrast is what gives your dog a three-dimensional appearance. Remember, it's all about layering! Begin with light strokes and gradually build up the darker areas.
When it comes to rendering fur, different types of fur require different techniques. For instance, a long-haired breed like a Golden Retriever will have a different texture compared to a short-haired breed like a Beagle. Here are some techniques to consider:
- Short Fur: Use short, quick strokes to mimic the texture of short fur. Keep your pencil sharp for more defined lines.
- Long Fur: For longer fur, use longer, sweeping strokes. Layer your strokes in different directions to replicate the natural flow of the fur.
- Curly Fur: For breeds with curly fur, such as Poodles, use circular motions to create the illusion of curls and waves.
Next, focus on the dog's face, as this is where the personality shines through. The eyes are often referred to as the windows to the soul, and capturing their expression is crucial. Pay attention to the details of the eyes—notice the reflections and how the light catches them. Use a softer pencil to create the subtle shading around the eyes, making them appear more lifelike. Don’t forget about the nose and mouth; these features can greatly influence the overall expression of your dog.
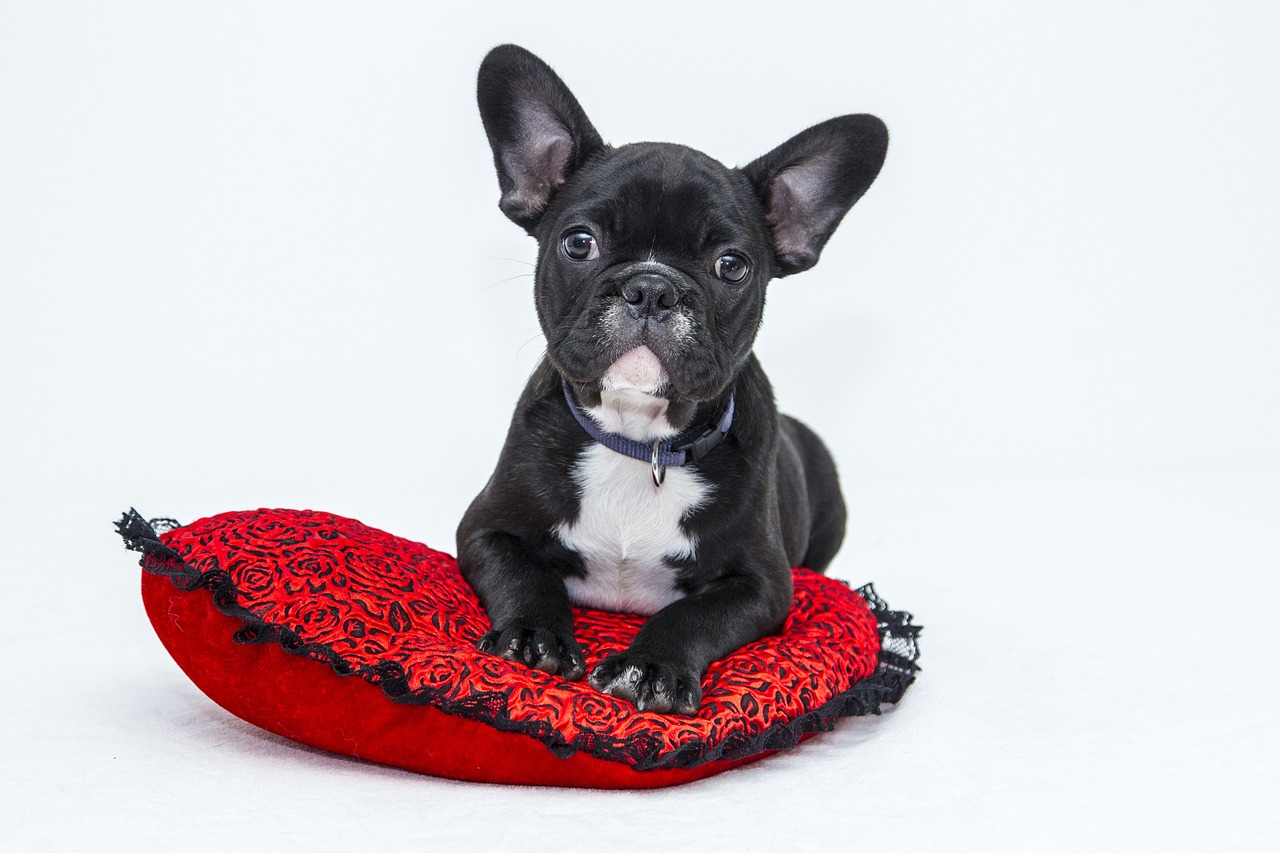
To enhance the realism of your drawing, consider incorporating textures beyond fur. The dog's skin, for instance, can show wrinkles and folds, especially in breeds like Bulldogs or Shar Peis. Use gentle shading techniques to depict these textures, ensuring that they complement the fur rather than overpower it. The goal is to create a harmonious balance that brings your subject to life.
Finally, don't underestimate the power of negative space—the areas around your dog can also contribute to the overall composition. By carefully considering the background and how it interacts with your subject, you can add context that enhances the realism of your drawing. A simple, soft background can help your dog stand out, while a more detailed scene can tell a story about their environment.
As you work through the details and textures, remember that practice makes perfect. Don’t be afraid to experiment with different techniques and styles. Each drawing is a step towards mastering the art of capturing the essence of dogs on paper. So grab your pencils and let your creativity flow!
Q: How can I make my dog's fur look more realistic?
A: Focus on the direction of the fur and use varying pencil pressures to create depth. Layer your strokes and pay attention to light and shadow.
Q: What is the best way to capture a dog's expression?
A: Study the reference photo closely, paying attention to the eyes, mouth, and overall posture. Small details can convey a lot of emotion.
Q: Should I use color in my dog drawing?
A: While this guide focuses on pencil techniques, adding color can enhance your drawing. Consider using colored pencils or watercolors for a different effect!
Fur Rendering Techniques
When it comes to drawing a realistic dog, play a crucial role in achieving that lifelike quality. Just like a painter uses different brushes to create various textures, you, as an artist, must adapt your pencil strokes to mimic the unique characteristics of different dog breeds. The key is to observe closely and practice consistently. Here’s how you can get started!
First off, consider the type of fur you are working with. Dogs have a variety of fur types, from the short, sleek coat of a Greyhound to the long, flowing mane of an Airedale Terrier. Each type demands a different approach. For instance, short-haired breeds often require smoother, more controlled strokes, while long-haired breeds call for more layered, sweeping motions.
To effectively render fur, you can utilize a combination of techniques:
- Cross-Hatching: This technique involves drawing parallel lines that intersect to create depth and texture. It’s especially useful for depicting shadows and the direction of fur.
- Stippling: By using dots instead of lines, you can create a softer texture. This method is great for areas where the fur is finer or less dense.
- Blending: Use a blending stump or your finger to smooth out pencil strokes, creating a more realistic appearance. Just be careful not to overdo it; you want to maintain some texture.
Another essential aspect of fur rendering is understanding the direction of fur growth. Always draw in the direction that the fur naturally lays. This not only adds realism but also helps in creating a sense of volume. For example, the fur on the back of a dog often lies flat, while the fur on its legs may stand out more due to muscle movement. Pay attention to these details!
Moreover, don’t forget about the lighting. The way light interacts with fur can dramatically change its appearance. Use lighter strokes to indicate highlights where the light hits the fur directly and darker strokes in the shadowed areas. This contrast will help your drawing pop with life.
Let’s not forget about layering. Start with a base layer of light strokes to establish the general color and direction, then gradually build up darker tones and more detailed strokes. This method adds depth and dimension, making the fur appear more three-dimensional.
To summarize, here are the key fur rendering techniques:
| Technique | Description |
|---|---|
| Cross-Hatching | Intersecting lines for depth and texture. |
| Stippling | Using dots for a softer texture. |
| Blending | Smoothing strokes for a realistic appearance. |
Finally, practice is the secret ingredient. The more you draw, the better you’ll become at rendering fur. So grab your pencils, find a reference photo of your favorite dog, and start experimenting with these techniques. Remember, every stroke brings you closer to mastering the art of drawing realistic dogs!
Q: What is the best pencil for drawing fur?
A: A range of pencils from HB to 6B is ideal. Softer pencils (like 4B or 6B) are great for darker areas and blending, while harder pencils (like HB) are good for fine details.
Q: How can I make my dog drawing look more realistic?
A: Focus on the details! Pay attention to the fur texture, the dog's expression, and the play of light and shadow. Using reference photos can greatly assist in this process.
Q: Is it necessary to use special paper for drawing dogs?
A: While it's not mandatory, using textured paper can enhance the look of your fur rendering, allowing for better pencil grip and blending.
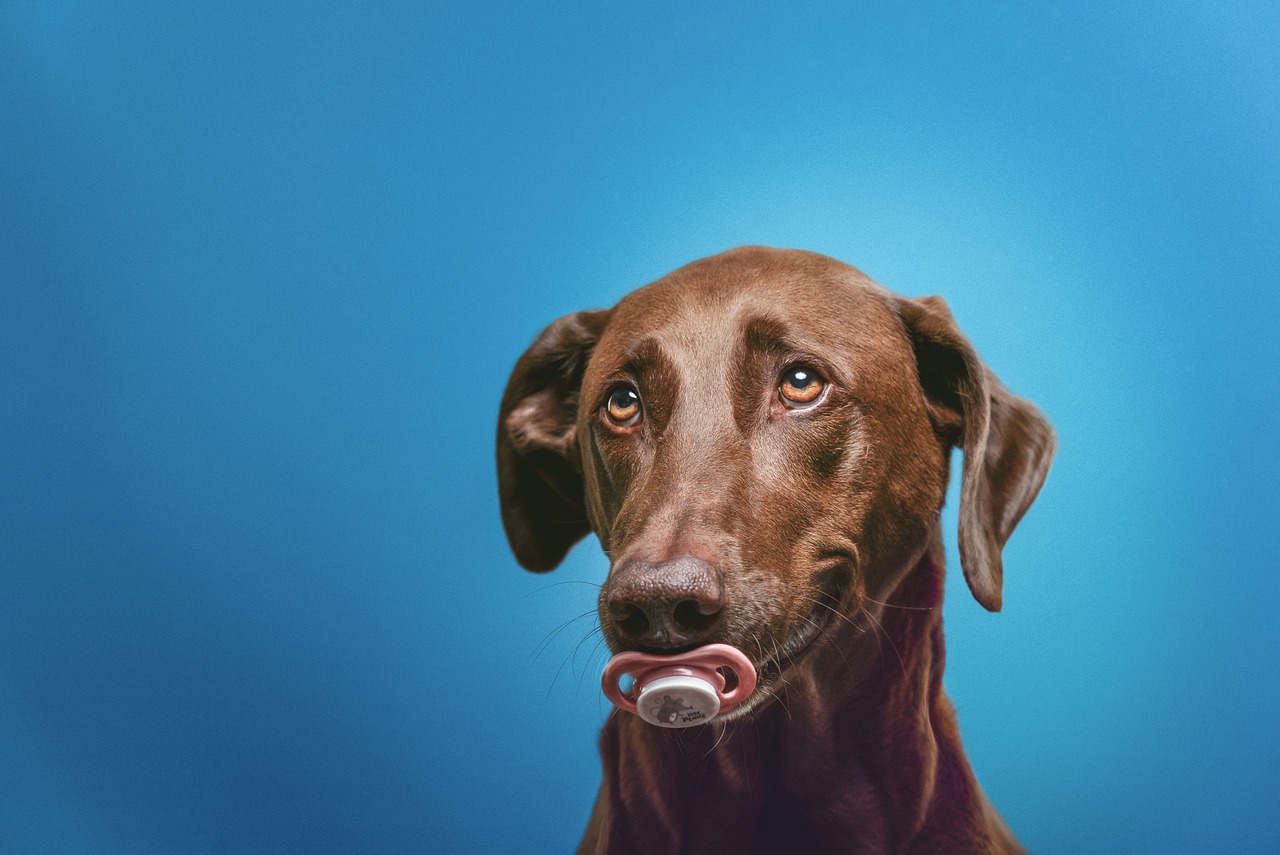
Capturing the Dog's Expression
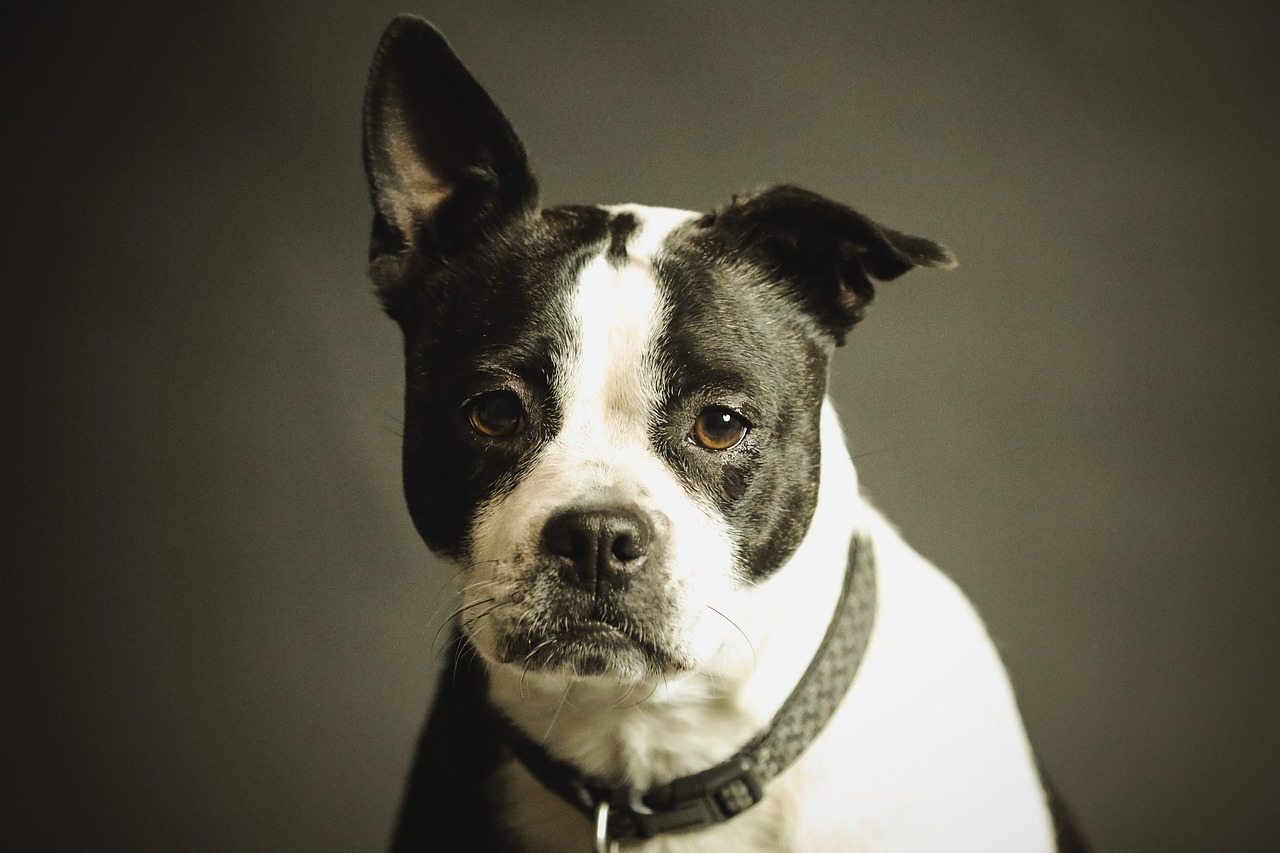
Capturing a dog's expression is like catching a fleeting moment in time; it’s all about conveying the emotion and personality of your furry friend. The eyes, often referred to as the windows to the soul, play a pivotal role in expressing feelings. When you look into a dog's eyes, you can often see curiosity, playfulness, or even a hint of mischief. To recreate this in your drawing, focus on the shape and position of the eyes. Are they wide open, sparkling with excitement, or slightly squinted, suggesting a calm demeanor?
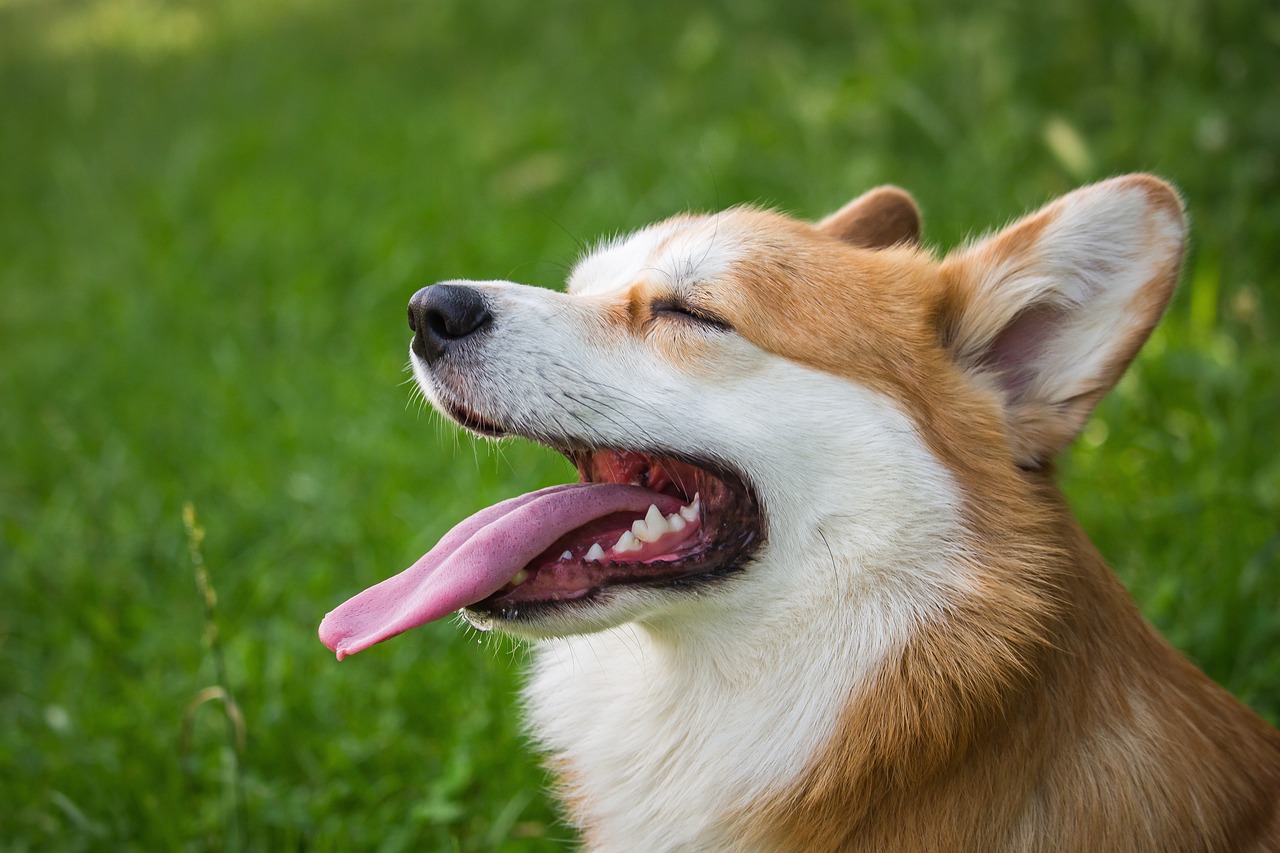
Next, consider the mouth. A dog's mouth can tell you so much! Is it slightly open, revealing a playful tongue, or is it closed in a relaxed manner? The way you depict the mouth can dramatically alter the expression. For instance, a happy dog often has a relaxed jaw with a bit of a smile, while a dog that’s anxious may have a closed mouth with a tense posture. Pay close attention to the details—the subtle curves and angles can make all the difference in conveying the right mood.
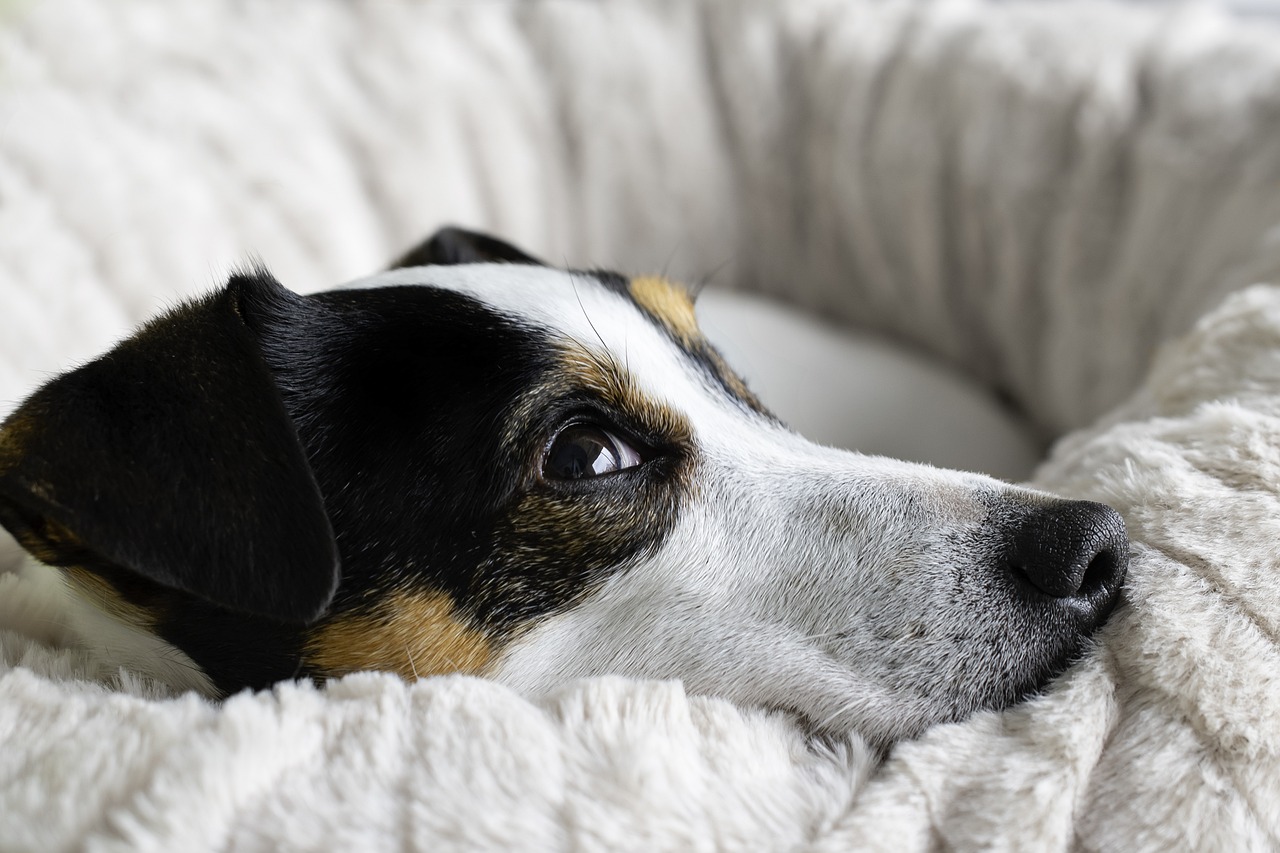
Moreover, don’t forget about the overall posture of the dog. A dog's body language complements its facial expression. Is the dog sitting proudly with an alert stance, or is it lying down in a relaxed position? The angle of the ears can also provide clues; perked ears might indicate alertness or excitement, while droopy ears can suggest calmness or submission. By combining these elements, you can create a more lifelike representation of your subject.
To help you visualize this better, let’s break down the key elements to focus on when capturing a dog's expression:
- Eyes: Shape, size, and direction of gaze.
- Mouth: Open or closed, relaxed or tense.
- Ears: Position and angle can indicate mood.
- Body posture: Sitting, standing, or lying down affects overall expression.
Incorporating these details into your drawing will not only enhance the realism but also breathe life into your artwork. Just like a good actor can convey a range of emotions through subtle changes in their expression, your ability to capture these nuances in your dog drawing will resonate with anyone who views it. Remember, practice makes perfect, so take your time and don’t be afraid to experiment with different techniques to find what works best for you!
Q: What are some common mistakes to avoid when drawing a dog's expression?
A: One common mistake is not paying enough attention to the eyes. They are crucial for conveying emotion. Additionally, neglecting the dog's body language can lead to a flat expression. Always consider how the eyes, mouth, and posture work together.
Q: How can I improve my skills in capturing expressions?
A: Practice is key! Spend time studying photos of dogs and observe the differences in their expressions. Try sketching quickly to capture the essence of what you see before moving on to more detailed work.
Q: Are there specific breeds that are easier to draw than others?
A: Some artists find breeds with more distinct features, like Bulldogs or Poodles, easier to capture. However, every breed has its unique challenges, so choose one that inspires you!
Final Touches and Enhancements
Once you've laid down the foundation and added the intricate details to your dog drawing, it’s time for the final touches. These finishing elements can truly elevate your artwork, transforming it from a simple sketch into a stunning, lifelike portrait. Think of this stage as the icing on the cake; it’s where you can really bring your drawing to life and make it pop off the page.
To start, you want to focus on adding highlights and shadows. Highlights are essential for creating a sense of depth and dimension. They mimic the way light interacts with the fur and features of your dog. To achieve this, you can use a white pencil or an eraser to gently lift some graphite from the paper, especially in areas where the light would naturally hit, such as the top of the head, the snout, and the tips of the ears.
On the flip side, shadows are equally important. They add weight and realism to your drawing. Use a soft pencil to deepen the shadows in the areas where the light doesn’t reach, like under the chin, between the legs, and behind the ears. The interplay between light and shadow is what gives your drawing a three-dimensional feel, almost as if the dog could leap off the page at any moment!
Another crucial aspect of the final touches is to pay attention to the background. A well-considered background can enhance the overall composition. Whether you choose a simple gradient or a more detailed setting, make sure it complements your dog without overshadowing it. Use softer lines and lighter shading for the background to keep the focus on your subject.
Finally, don’t forget to step back and assess your work from a distance. Sometimes, we get so close to our drawings that we lose perspective. Take a moment to look at your artwork as a whole; this will help you identify any areas that may need more attention or adjustment. You might find that a little extra shading here or a highlight there can make all the difference.
In summary, the final touches are about enhancing your drawing through highlights, shadows, and thoughtful background choices. These elements work together to create a cohesive and engaging piece of art that captures the essence of your canine subject. So grab your pencils, and let’s put the finishing touches on your masterpiece!
- How do I know when my drawing is finished? A drawing is often considered complete when you feel satisfied with the details, shading, and overall composition. Stepping back can help you see if anything feels off.
- Can I use color in my final touches? Absolutely! Adding color can enhance the realism of your drawing. Consider using colored pencils or pastels for highlights and shadows.
- What if I make a mistake during the final touches? Mistakes happen! Use an eraser gently to correct areas, or you can blend over them with a darker shade to cover them up.
Frequently Asked Questions
- What materials do I need to draw a realistic dog?
To get started on your dog drawing, you'll need a few essential materials. Grab some quality pencils, preferably a range from hard to soft grades, a good eraser, and smooth drawing paper. Each of these tools plays a vital role in helping you achieve those lifelike details that make your drawing pop!
- How do I choose the right reference photo?
Selecting a high-quality reference photo is crucial for capturing the essence of the dog you're drawing. Look for images that showcase the breed clearly, with good lighting and various angles. This will help you observe details like fur texture and facial expressions more accurately.
- What pencil grades should I use for different effects?
Pencil grades range from H (hard) to B (soft), and each serves a different purpose. For fine details and light shading, use H pencils. For darker areas and rich textures, B pencils are your best bet. Mixing these grades can create depth and realism in your artwork.
- Can I use any type of paper for drawing dogs?
Not all paper is created equal! For pencil drawings, opt for smooth or slightly textured paper that can handle erasing and layering. Heavier weight papers will also prevent warping, allowing you to create stunning, detailed drawings without any hassle.
- What techniques should I use for rendering fur?
Rendering fur can be tricky, but with practice, you'll get the hang of it! Use short, quick strokes to mimic the direction of the fur, and don't forget to vary your pressure to create different shades. Layering your strokes can also add dimension, making your drawing feel more lifelike.
- How can I capture the dog's expression effectively?
The eyes and mouth are key to conveying emotions in your drawing. Pay close attention to the shape and placement of the eyes, as well as the subtle curves of the mouth. These details can dramatically change the overall feel of your artwork, so take your time to get it right!
- What are some final touches I can add to enhance my drawing?
Final touches can really elevate your artwork! Consider adding highlights to the eyes and subtle shadows to create depth. A little blending can also smooth out harsh lines and give your drawing a polished finish. Don't be afraid to experiment with these techniques!


