
How to Create a Vegetable Patch in Your Backyard
Creating a vegetable patch in your backyard is not just a fun weekend project; it’s a rewarding journey that brings you closer to nature and provides fresh produce right at your doorstep. Imagine stepping outside and plucking ripe tomatoes, crisp lettuce, or fragrant herbs, all nurtured by your own hands. But where do you start? This article provides a comprehensive guide on establishing a successful vegetable patch, from selecting the right location to maintaining your plants for a bountiful harvest.
Selecting an appropriate spot for your vegetable patch is crucial. Look for areas with ample sunlight, good drainage, and convenient access to water to ensure your plants thrive. Ideally, your patch should receive at least 6-8 hours of direct sunlight each day. Sunlight is the lifeblood of your plants, much like how a warm hug can brighten your day. Additionally, ensure the area has good drainage; soggy roots can lead to rot, which is the last thing you want for your precious veggies. Consider proximity to a water source too; after all, plants need hydration, just like we do!
Healthy soil is the foundation of a successful vegetable garden. Think of your soil as the bedrock of a thriving ecosystem. To get started, you need to learn how to test your soil, amend it with organic matter, and ensure it has the right pH for optimal plant growth. A well-prepared soil not only enhances fertility but also improves structure and moisture retention, leading to healthier plants and a more fruitful harvest.
Understanding your soil's nutrient levels is essential. You wouldn’t go grocery shopping without a list, right? Similarly, knowing what your soil needs helps tailor your amendments effectively. There are various soil testing methods available:
- DIY Soil Testing Kits: These kits are user-friendly and provide quick results, allowing you to make informed decisions on soil amendments.
- Professional Soil Testing Services: For a more comprehensive analysis, consider hiring professional services. They offer detailed insights into soil health, guiding your planting and fertilization strategies.
Once you know what your soil needs, it's time to enrich it. Adding organic compost, fertilizers, and other amendments can transform your soil from a barren wasteland into a nutrient-rich paradise. Think of it as a spa day for your garden! Properly amended soil enhances fertility, structure, and moisture retention, leading to healthier plants. Remember, the better the soil, the better the plants!
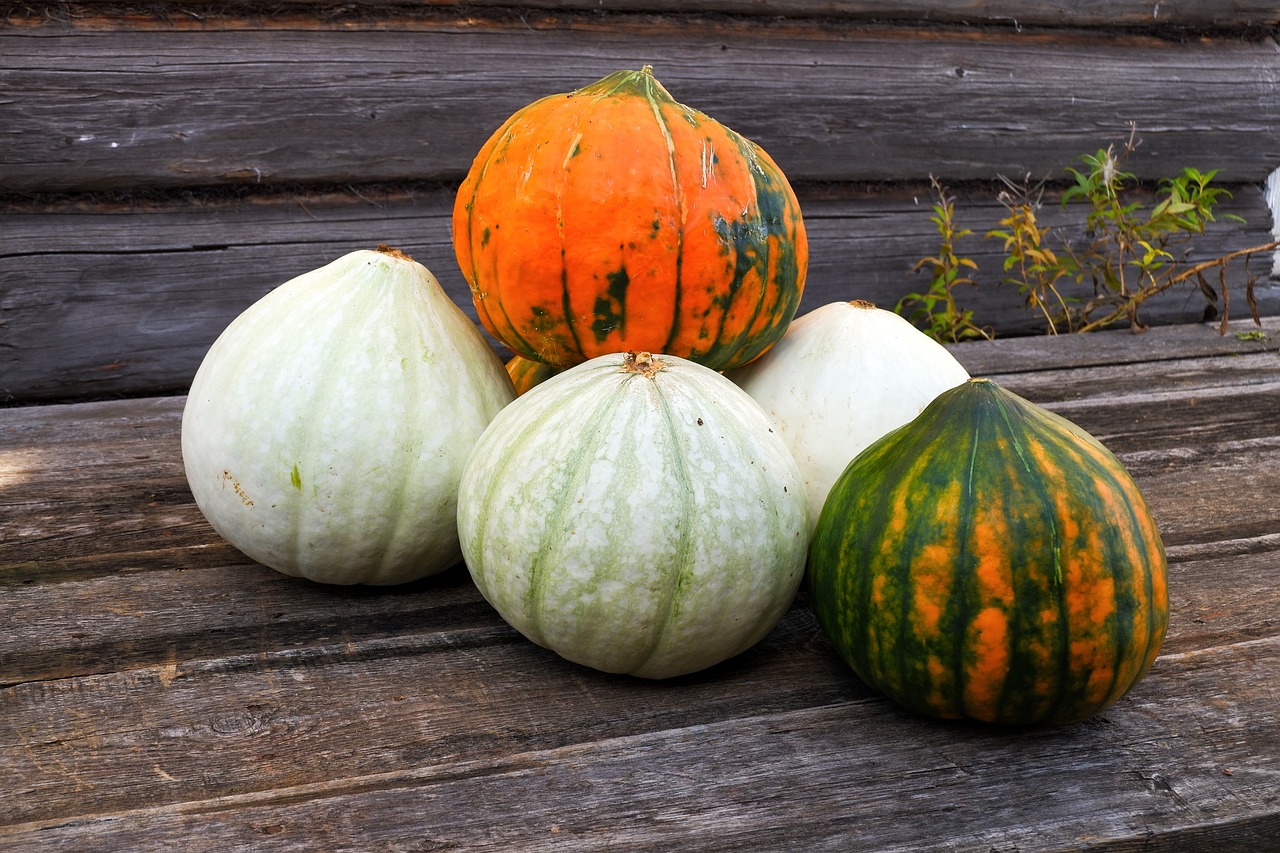
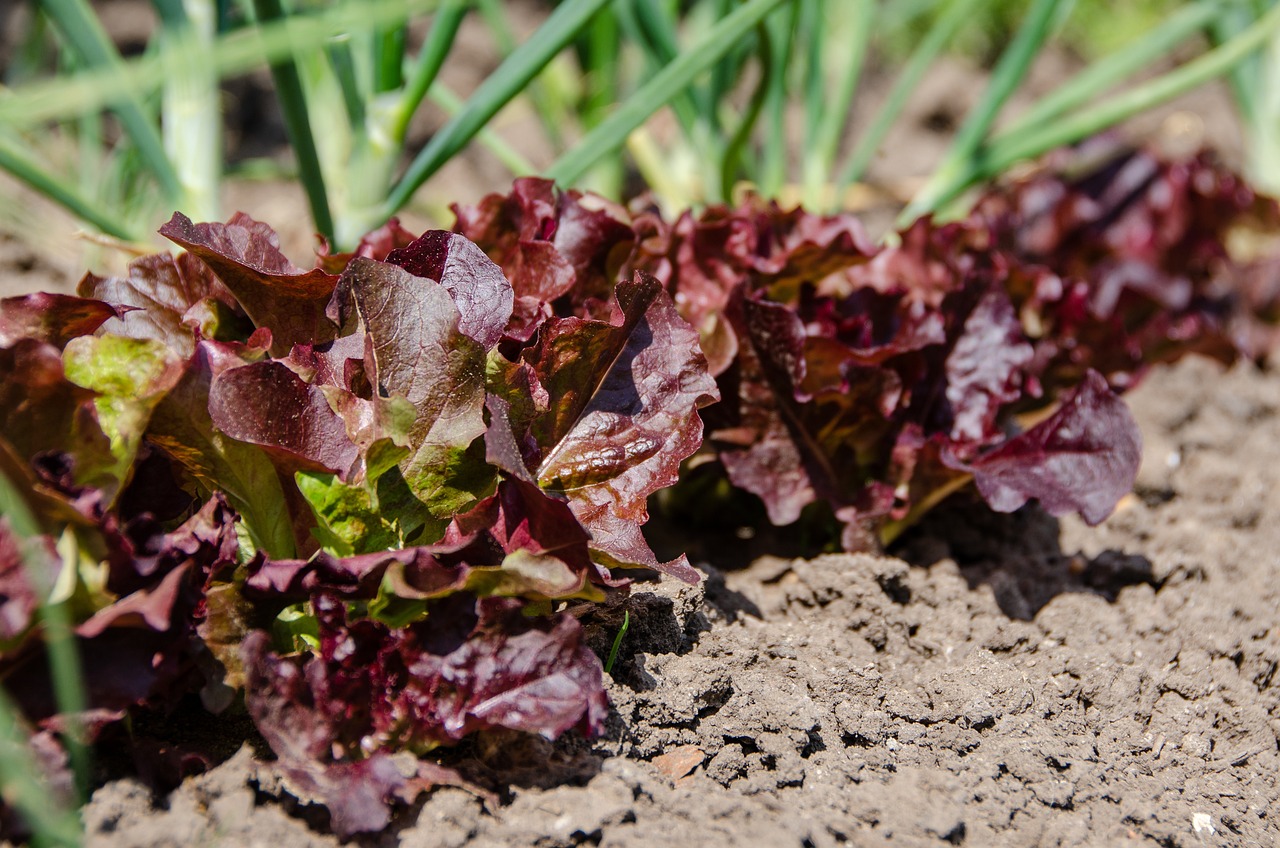
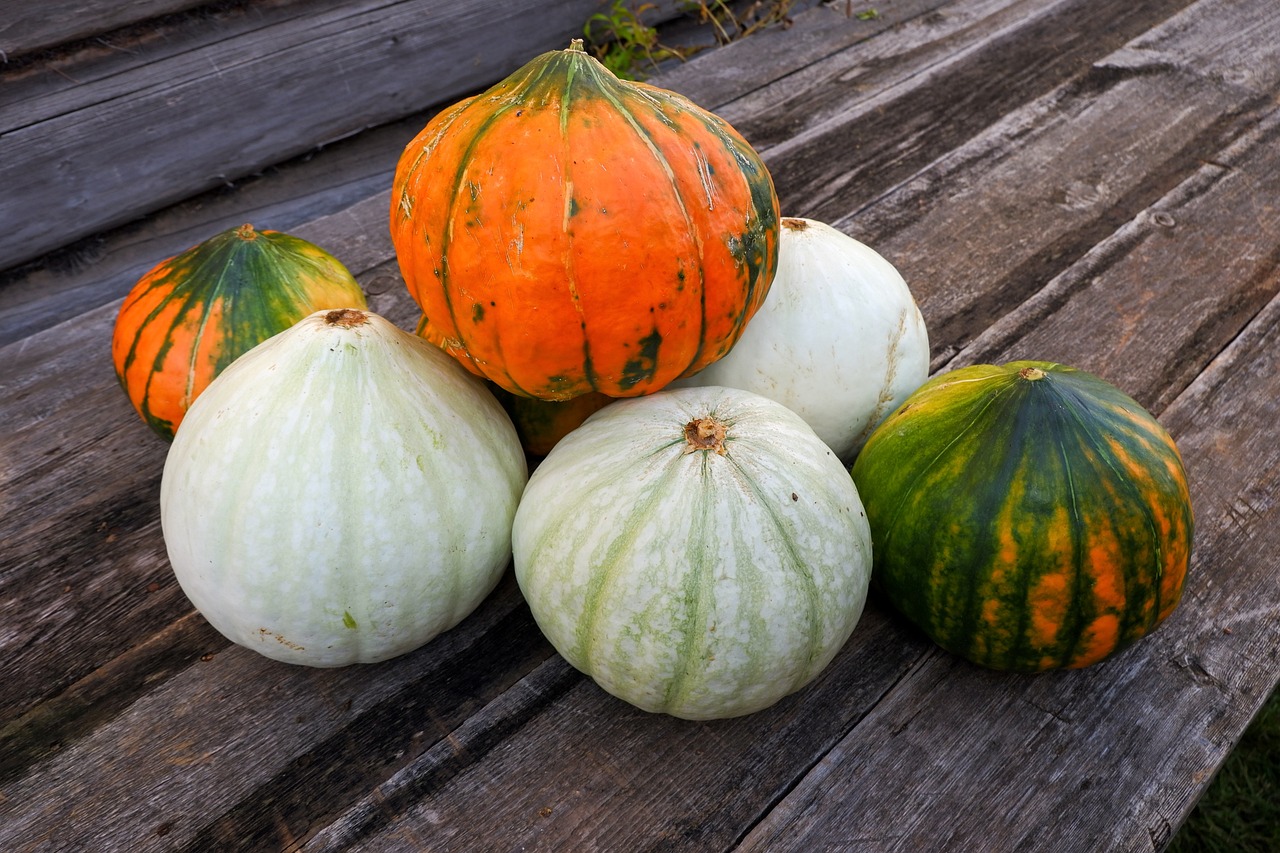
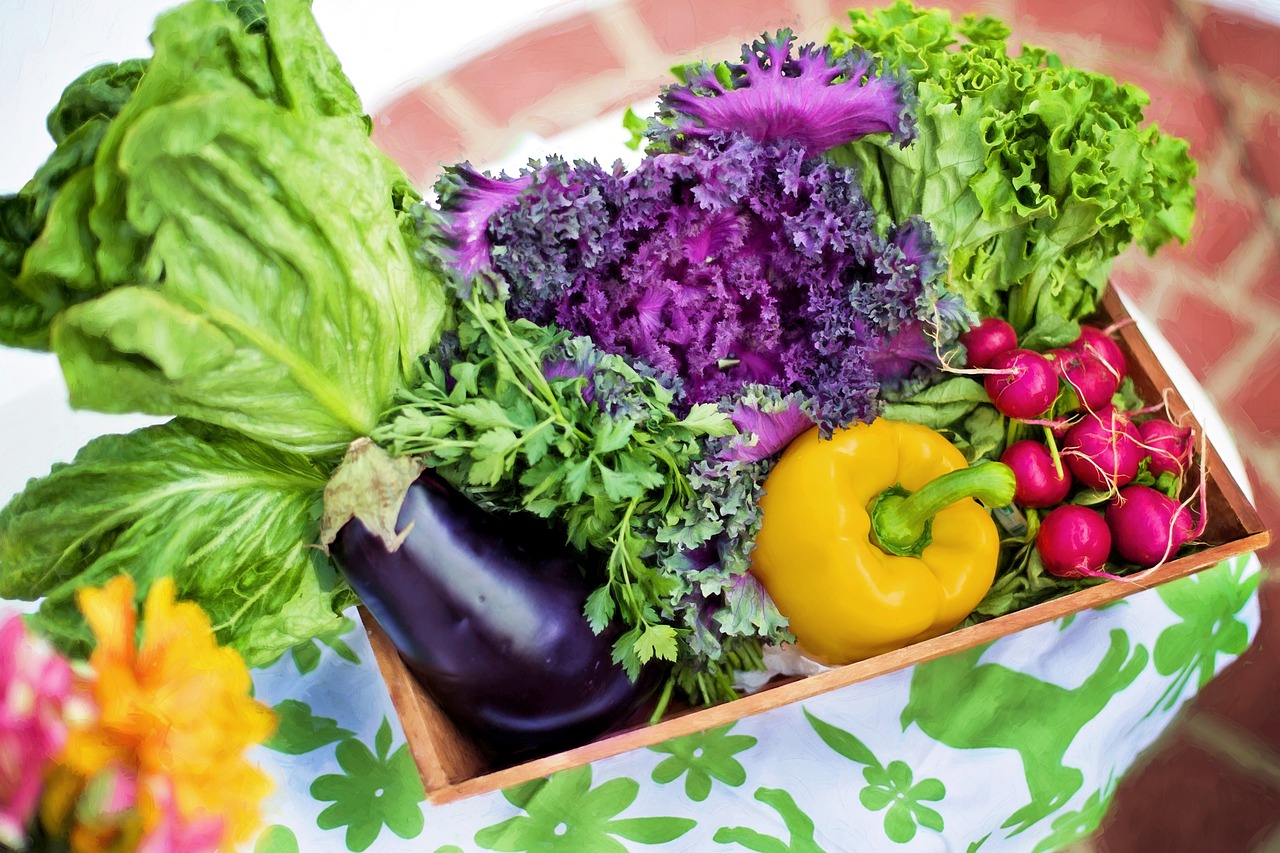
Choosing the right vegetables for your patch is vital for a successful harvest. It’s like picking the perfect ingredients for your favorite recipe; the right choices make all the difference! Consider factors such as climate, soil type, and your family's preferences when selecting crops. Do you love salads? Plant lettuce and tomatoes. Are you a fan of stir-fries? Consider bell peppers and broccoli. The options are endless!
Understanding which vegetables grow best in each season can maximize your harvest. Here’s a quick breakdown:
| Season | Vegetables to Plant |
|---|---|
| Spring | Carrots, peas, lettuce |
| Summer | Tomatoes, peppers, cucumbers |
| Fall | Broccoli, kale, squash |
Companion planting can enhance growth and deter pests. By pairing certain plants together, you create a natural ecosystem that supports healthy growth. For instance, planting basil near tomatoes can improve their flavor while also repelling pests. It’s like having a buddy system in your garden!
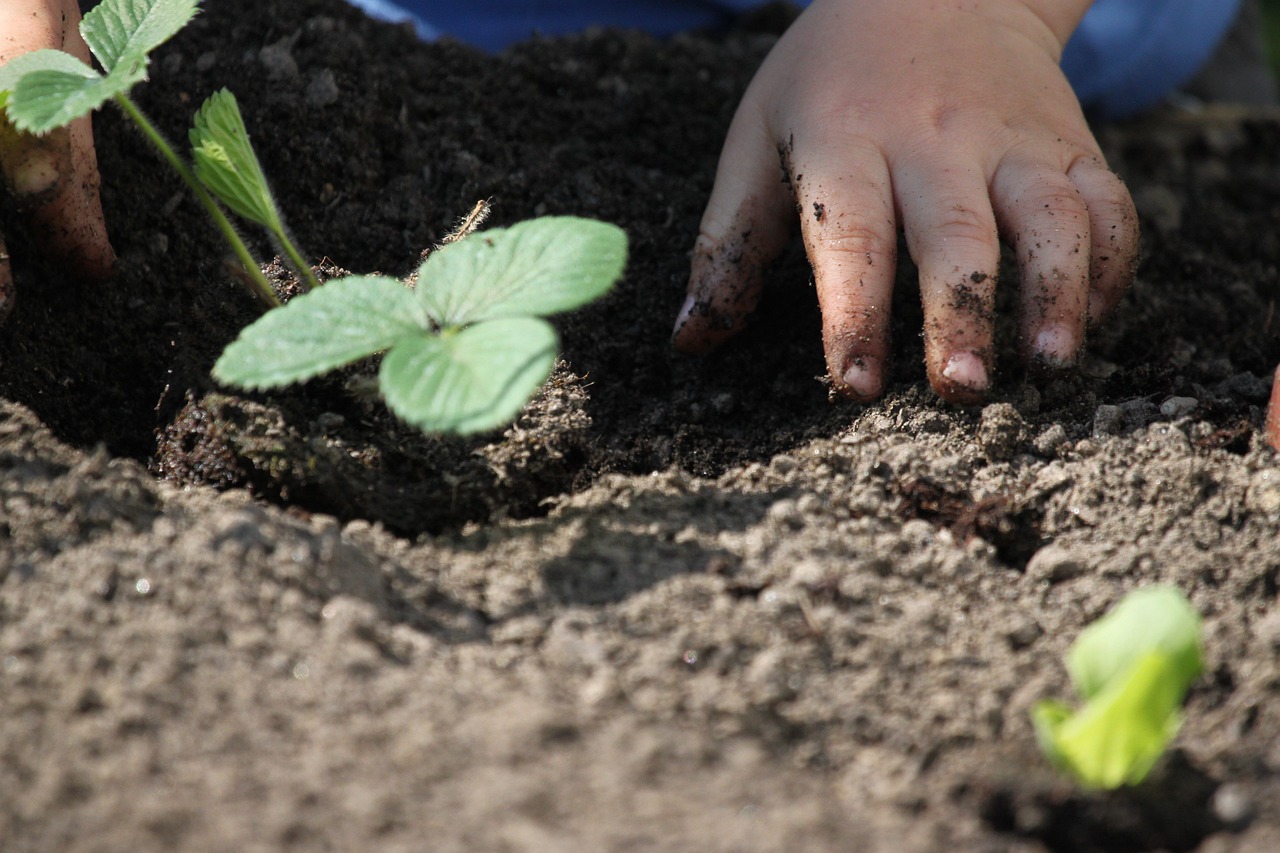
Proper planting techniques can significantly impact the success of your vegetable garden. Discover various methods for sowing seeds and transplanting seedlings to ensure robust growth. Remember, the way you plant is just as important as what you plant!
Explore the differences between direct seeding and transplanting seedlings. Each method has its advantages, depending on the type of vegetable and your gardening goals. Direct seeding is often simpler and allows for a more natural growth process, while transplanting gives you a head start on the growing season.
Understanding the correct spacing and planting depth for each vegetable is crucial. Proper spacing allows for air circulation and light penetration, while correct depth ensures optimal germination and growth. Think of it as giving each plant its own personal space to thrive!
Consistent watering and maintenance are key to a thriving vegetable patch. Imagine trying to grow a plant in a desert—without water, it simply won’t survive. Learn best practices for watering schedules, mulching, and weeding to keep your garden healthy. Your plants will thank you for it!
Different watering techniques can affect plant health. Discover efficient methods such as drip irrigation and soaker hoses that conserve water while providing adequate moisture to your vegetables. It’s all about giving your plants a drink without drowning them!
Weeds can compete with your vegetables for nutrients and water. Explore various strategies for effective weed control, including mulching, hand-pulling, and using organic herbicides. Keeping your patch weed-free is like keeping your kitchen tidy; it makes everything run smoother!
Managing pests and diseases is essential for a successful vegetable garden. Learn about common threats and organic methods to protect your plants without harmful chemicals. Think of it as being a guardian for your plants, ensuring they stay healthy and productive.
Recognizing common garden pests is the first step in managing them. Familiarize yourself with signs of infestation and effective control methods to safeguard your crops. Knowledge is power when it comes to pest control!
Explore various organic pest control methods, such as introducing beneficial insects and using natural repellents. These approaches help maintain a healthy ecosystem in your vegetable patch, allowing you to grow your food responsibly.
Knowing when and how to harvest your vegetables ensures peak flavor and nutrition. Discover tips on timing and techniques for a successful harvest. After all, what’s the point of growing your veggies if you don’t enjoy them at their best?
Learn to identify the signs of ripeness for different vegetables. Understanding when to harvest can enhance taste and prevent overripening, ensuring a bountiful yield. It’s like knowing when to pick the perfect fruit—timing is everything!
Using the right harvesting techniques can prevent damage to your plants. Discover best practices for safely harvesting vegetables to promote continued growth and future yields. Remember, a gentle touch goes a long way in the garden!
Q: How much sunlight do vegetables need?
A: Most vegetables require at least 6-8 hours of direct sunlight daily to thrive.
Q: What is the best time to plant vegetables?
A: The best time to plant varies by vegetable and climate, but generally, spring is ideal for most crops.
Q: How often should I water my vegetable patch?
A: Watering needs depend on the weather and soil type, but a general rule is to keep the soil consistently moist, especially during dry spells.
Choosing the Right Location
Choosing the right location for your vegetable patch is like setting the stage for a grand performance; it’s all about creating the perfect environment for your plants to thrive. Imagine your vegetables basking in the sun, soaking up the nutrients from the soil, and having easy access to water. Sounds idyllic, right? Well, it can be your reality if you pay attention to a few key factors when selecting the spot for your garden.
First and foremost, **sunlight** is crucial. Most vegetables require at least 6 to 8 hours of direct sunlight each day. So, take a stroll around your yard at different times of the day to observe how the sun moves. Are there any shady spots created by trees or buildings? If so, you might want to steer clear of those areas. A sunny location not only helps your plants grow but also enhances their flavor, making your harvest even more delicious.
Next up is **drainage**. You want your vegetable patch to be in a spot where water doesn’t pool after heavy rains. Poor drainage can lead to root rot and other issues that can spell disaster for your plants. To check for drainage, dig a small hole about 12 inches deep and fill it with water. If the water drains away within a few hours, you’re in good shape. If not, you might need to consider raised beds or amending the soil to improve drainage.
Additionally, consider **access to water**. Having a nearby water source makes it much easier to keep your plants hydrated, especially during those hot summer months. If you have to lug a hose or watering can from the other side of your yard, you might find yourself skipping watering sessions, which can lead to stressed plants. A convenient location not only saves time but also ensures that your plants get the moisture they need to flourish.
Lastly, think about the **proximity to your home**. You want your vegetable patch to be easily accessible so you can monitor it regularly. If it’s too far away, you might not notice pests or diseases until it’s too late. A garden close to your kitchen also makes it convenient to grab fresh ingredients for your meals. It’s like having a mini grocery store right in your backyard!
In summary, when choosing the right location for your vegetable patch, remember to consider:
- Sunlight: 6-8 hours of direct sunlight daily.
- Drainage: Well-drained soil to prevent waterlogging.
- Water Access: Proximity to a water source for easy irrigation.
- Accessibility: Close to home for regular monitoring and harvesting.
By taking these factors into account, you’ll be well on your way to establishing a thriving vegetable patch that not only provides fresh produce but also brings joy and satisfaction to your gardening experience. So grab your gardening gloves and get ready to dig in!

Preparing the Soil
Healthy soil is the foundation of a successful vegetable garden. Before you even think about planting those seeds, it’s crucial to understand what’s happening beneath the surface. Think of your soil as a living entity—a complex ecosystem that needs to be nurtured and enriched to support your plants. To get started, you’ll want to test your soil to determine its composition, nutrient levels, and pH balance. This initial step is like checking the pulse of your garden; it tells you what’s needed for your plants to thrive.
Understanding your soil's nutrient levels is essential for a flourishing vegetable patch. There are several methods you can use to evaluate your soil:
- DIY Soil Testing Kits: These kits are widely available and can provide quick results. You simply collect a soil sample, mix it with the provided reagents, and compare the color changes to a chart. This will give you a basic understanding of your soil's pH and nutrient levels.
- Professional Soil Testing Services: For a more comprehensive analysis, consider hiring professionals. They will provide detailed insights into your soil's health, including specific nutrient deficiencies, which can guide your planting and fertilization strategies.
Once you’ve tested your soil, it’s time to amend it. This means adding organic matter, fertilizers, and other amendments to create an optimal environment for your vegetables. Think of soil amendment like feeding your garden; it provides the nutrients necessary for growth. Adding organic compost is one of the best ways to enhance soil fertility, as it improves structure, moisture retention, and provides a slow release of nutrients.
When it comes to enriching your soil, here are some key amendments to consider:
| Ammendment | Benefits |
|---|---|
| Compost | Improves soil structure, moisture retention, and nutrient availability. |
| Manure | Rich in nutrients; enhances microbial activity. |
| Peat Moss | Increases moisture retention and aeration. |
| Bone Meal | Provides phosphorus, essential for root development. |
After amending your soil, it’s crucial to mix these materials thoroughly. This is where the magic happens! The nutrients need to be evenly distributed to ensure that every plant has access to what it needs. Think of it like stirring a pot of soup; you want all the flavors to blend perfectly. Once your soil is amended and mixed, allow it to rest for a week or two before planting. This gives the amendments time to integrate into the soil, creating a rich, nutrient-dense environment for your crops.
Soil health doesn’t just happen overnight; it’s a continuous process. Regularly adding organic matter, practicing crop rotation, and minimizing soil disturbance can significantly enhance your soil's vitality. Also, consider using cover crops during the off-season. These crops not only prevent erosion but also enrich the soil when turned under. Remember, a thriving vegetable patch starts with a commitment to nurturing your soil!
Q: How often should I test my soil?
A: It’s a good practice to test your soil at least once a year or whenever you notice changes in plant health.
Q: Can I use regular garden soil for my vegetable patch?
A: While garden soil can be used, it’s best to enrich it with organic matter to improve its fertility and structure.
Q: What is the best time to amend my soil?
A: The best time to amend your soil is in the fall or early spring before planting.
Soil Testing Techniques
Understanding your soil's nutrient levels is essential for growing healthy vegetables. You wouldn’t want to cook a dish without knowing the ingredients, right? Similarly, knowing what’s in your soil helps you tailor your gardening efforts effectively. There are several methods to test your soil, each with its own advantages and drawbacks. Let's explore some of the most popular soil testing techniques that can help you get the most out of your vegetable patch.
One of the simplest methods is the DIY soil testing kit. These kits are widely available at garden centers and online. They typically include everything you need to test for pH, nitrogen, phosphorus, and potassium levels. Using these kits is generally straightforward:
- Collect Soil Samples: Take samples from different areas of your garden to ensure a comprehensive analysis.
- Mix and Prepare: Follow the kit instructions to mix your soil with the provided solutions.
- Analyze Results: Compare the color change in the test solutions to the included chart to determine nutrient levels.
While DIY kits are convenient and cost-effective, they may not provide the depth of information you need for more complex soil issues. In such cases, you might consider professional soil testing services. These services offer comprehensive analyses that can reveal not just nutrient levels but also soil texture, organic matter content, and even contaminants. Here’s a quick comparison between the two methods:
| Testing Method | Cost | Detail Level | Time for Results |
|---|---|---|---|
| DIY Soil Testing Kit | Low | Basic | Instant to a few days |
| Professional Soil Testing | Moderate to High | Comprehensive | 1-2 weeks |
Regardless of which method you choose, the key takeaway is to regularly test your soil. This practice not only helps you understand what your garden needs but also allows you to monitor changes over time. Think of it as a health check-up for your garden! By keeping tabs on your soil’s health, you can make informed decisions about amendments and fertilizers, ultimately leading to a more fruitful harvest.
Q1: How often should I test my soil?
A1: It's generally recommended to test your soil every 2-3 years, or annually if you're making significant changes to your garden.
Q2: Can I test my soil in any season?
A2: Yes, you can test your soil at any time of the year, but it's best to do it when the soil is not too wet or frozen.
Q3: What should I do if my soil test shows nutrient deficiencies?
A3: If your soil test indicates deficiencies, consider adding organic compost, fertilizers, or other amendments to improve nutrient levels.
DIY Soil Testing Kits
If you're eager to get started on your vegetable patch but feel overwhelmed by the idea of soil testing, fear not! DIY soil testing kits are a fantastic and affordable way to assess the health of your garden's soil right from the comfort of your home. These kits are designed to be user-friendly, making them accessible even for novice gardeners. Typically, they include all the necessary tools and instructions to help you gauge essential soil parameters such as pH levels, nitrogen, phosphorus, and potassium content.
Using a DIY soil testing kit is as easy as pie. Most kits come with test strips or powders that you mix with a soil sample and water. Within minutes, you can see how your soil measures up! This quick feedback allows you to make informed decisions about what amendments your soil might need. For instance, if your test reveals a low pH, you might want to consider adding lime to balance it out. On the other hand, if nitrogen levels are lacking, incorporating organic compost or a nitrogen-rich fertilizer could be beneficial.
Here’s a quick overview of the typical components you might find in a DIY soil testing kit:
| Component | Description |
|---|---|
| Test Strips | Used for measuring pH levels by dipping them in a soil-water mixture. |
| Reagents | Powders or liquids that react with soil samples to indicate nutrient levels. |
| Measuring Tools | Scoops or spoons for collecting soil samples. |
| Instructions | Step-by-step guide to help you conduct the tests accurately. |
After testing, you'll have a clearer picture of your soil's strengths and weaknesses, which is vital for planning your vegetable garden. You can even keep a simple garden journal to track your soil's health over time. This way, you can see how your amendments are impacting your soil quality and make adjustments as needed. Plus, it’s a great way to celebrate your gardening journey!
While DIY kits are convenient, they do have their limitations. They usually provide a snapshot of your soil's current state but may not offer the comprehensive analysis that professional soil testing services can provide. If you find that your garden is still struggling despite your best efforts, consider sending a sample to a professional lab for a more detailed assessment. This can help identify specific nutrient deficiencies or soil issues that a DIY kit might miss.
In summary, DIY soil testing kits are a valuable tool for any gardener looking to cultivate a thriving vegetable patch. They offer a practical way to understand your soil's needs and make informed decisions about amendments. So, roll up your sleeves, grab a kit, and get ready to dig deep into the world of soil health!
1. How often should I test my soil?
It’s recommended to test your soil at least once a year, especially before planting your vegetable patch. This helps you stay ahead of any nutrient deficiencies or pH imbalances.
2. Can I use the same soil testing kit for different areas of my garden?
Yes, you can! However, it’s a good idea to test different areas separately, as soil composition can vary significantly even within a small space.
3. What should I do if my soil test results are poor?
If your soil test reveals poor results, consider adding organic matter like compost, adjusting the pH with lime or sulfur, and applying appropriate fertilizers based on the nutrient deficiencies indicated.
4. Are DIY soil testing kits accurate?
While DIY kits can provide a good general idea of your soil's health, they may not be as precise as professional testing. For critical assessments, consider consulting a soil testing service.
Professional Soil Testing Services
When it comes to creating a thriving vegetable patch, understanding the intricacies of your soil is absolutely paramount. While DIY soil testing kits can provide you with a basic overview, take it a step further, offering a comprehensive analysis that can significantly enhance your gardening success. These services analyze various aspects of your soil, including pH levels, nutrient content, and even the presence of contaminants. By employing professionals, you gain access to detailed insights that are tailored specifically to your garden's needs.
One of the key benefits of using professional soil testing services is the accuracy of the results. Unlike home testing kits, which can sometimes yield inconsistent data due to user error or improper testing methods, professionals utilize advanced equipment and techniques to ensure precision. This means you can trust the recommendations they provide, leading to better soil amendments and, ultimately, healthier plants.
Typically, a soil testing service will involve the following steps:
- Sample Collection: Professionals will collect soil samples from various locations in your garden to ensure a comprehensive assessment.
- Laboratory Analysis: The samples are sent to a lab where they undergo rigorous testing for nutrient levels, pH balance, and other critical factors.
- Detailed Report: You'll receive a detailed report outlining the findings, along with tailored recommendations for soil amendments and fertilization strategies.
Moreover, many soil testing services also offer follow-up consultations to help you interpret the results and create a customized plan for your vegetable patch. This can be especially beneficial for novice gardeners who may feel overwhelmed by the technical aspects of soil health. By having a professional guide you through the process, you can confidently make informed decisions that will lead to a bountiful harvest.
In addition to nutrient analysis, some services also evaluate soil structure and microbial activity. Healthy soil is not just about NPK (nitrogen, phosphorus, potassium) levels; it also involves a thriving ecosystem of beneficial microorganisms that contribute to plant health. Understanding the biological aspect of your soil can help you cultivate a more resilient garden that withstands pests and diseases.
In conclusion, investing in professional soil testing services is a wise decision for any gardener serious about achieving a successful vegetable patch. The insights gained from these services can save you time, effort, and resources in the long run, ensuring that your plants receive the best possible start in life.
1. How often should I have my soil tested?
It's generally recommended to test your soil every 2-3 years, or annually if you're making significant changes to your gardening practices.
2. Can I test my soil myself?
Yes, DIY soil testing kits are available, but they may not be as accurate as professional services. They can provide a basic understanding of your soil's health.
3. What should I do if my soil test shows imbalances?
Follow the recommendations provided in your soil test report. This may involve adding specific fertilizers or organic matter to correct nutrient deficiencies.
4. Are professional soil testing services expensive?
The cost can vary depending on the service and the depth of analysis required. However, the investment can lead to better gardening outcomes, making it worthwhile.

Amending the Soil
Amending the soil is an essential step in creating a thriving vegetable patch. Think of your soil as the foundation of a house; without a solid base, everything built on top is at risk of collapsing. Healthy soil is rich in nutrients and has the right structure to support plant growth. To achieve this, you’ll want to enrich your garden soil with organic matter, fertilizers, and other amendments that enhance its fertility and overall health.
One of the most effective ways to amend your soil is by adding organic compost. Compost not only provides essential nutrients but also improves soil structure, allowing for better air and water retention. You can create your own compost by collecting kitchen scraps, yard waste, and other biodegradable materials. This not only reduces waste but also gives your plants a nutrient-rich boost. If you're short on time, consider purchasing pre-made compost from your local garden center.
In addition to compost, you may want to incorporate various fertilizers. Organic fertilizers, such as bone meal, fish emulsion, and well-rotted manure, can provide a slow-release source of nutrients. They enrich the soil without the risk of chemical buildup, making them a safer choice for your vegetable patch. However, it’s crucial to know your soil's nutrient needs before applying fertilizers, as over-fertilizing can lead to nutrient imbalances and harm your plants.
Another important factor to consider is the pH level of your soil. Most vegetables thrive in a slightly acidic to neutral pH range of 6.0 to 7.0. If your soil is too acidic or too alkaline, your plants may struggle to absorb nutrients. You can adjust the pH by adding lime to raise it or sulfur to lower it. To determine the current pH of your soil, you can use a DIY soil testing kit or send a sample to a professional lab for analysis.
Here’s a quick overview of some common soil amendments and their benefits:
| Amendment | Benefits |
|---|---|
| Compost | Improves soil structure, adds nutrients, enhances moisture retention. |
| Bone Meal | Rich in phosphorus, promotes root development and flowering. |
| Fish Emulsion | Provides nitrogen and trace minerals, encourages leafy growth. |
| Well-Rotted Manure | Enhances soil fertility, improves texture, boosts microbial activity. |
In conclusion, amending your soil is not just a one-time task; it’s an ongoing process that requires observation and adjustment. Regularly testing your soil and adding amendments as needed will ensure your vegetable patch remains healthy and productive. Remember, just like a good recipe, the right mix of ingredients will lead to a bountiful harvest!
- How often should I amend my soil? It’s best to amend your soil annually, especially before planting season. However, you should also monitor your soil's health throughout the growing season.
- Can I use chemical fertilizers instead of organic? While chemical fertilizers can provide quick results, they may harm soil health in the long run. Organic options are generally safer and better for the environment.
- What’s the best way to incorporate amendments into the soil? You can use a garden fork or tiller to mix amendments thoroughly into the top 6-12 inches of soil.
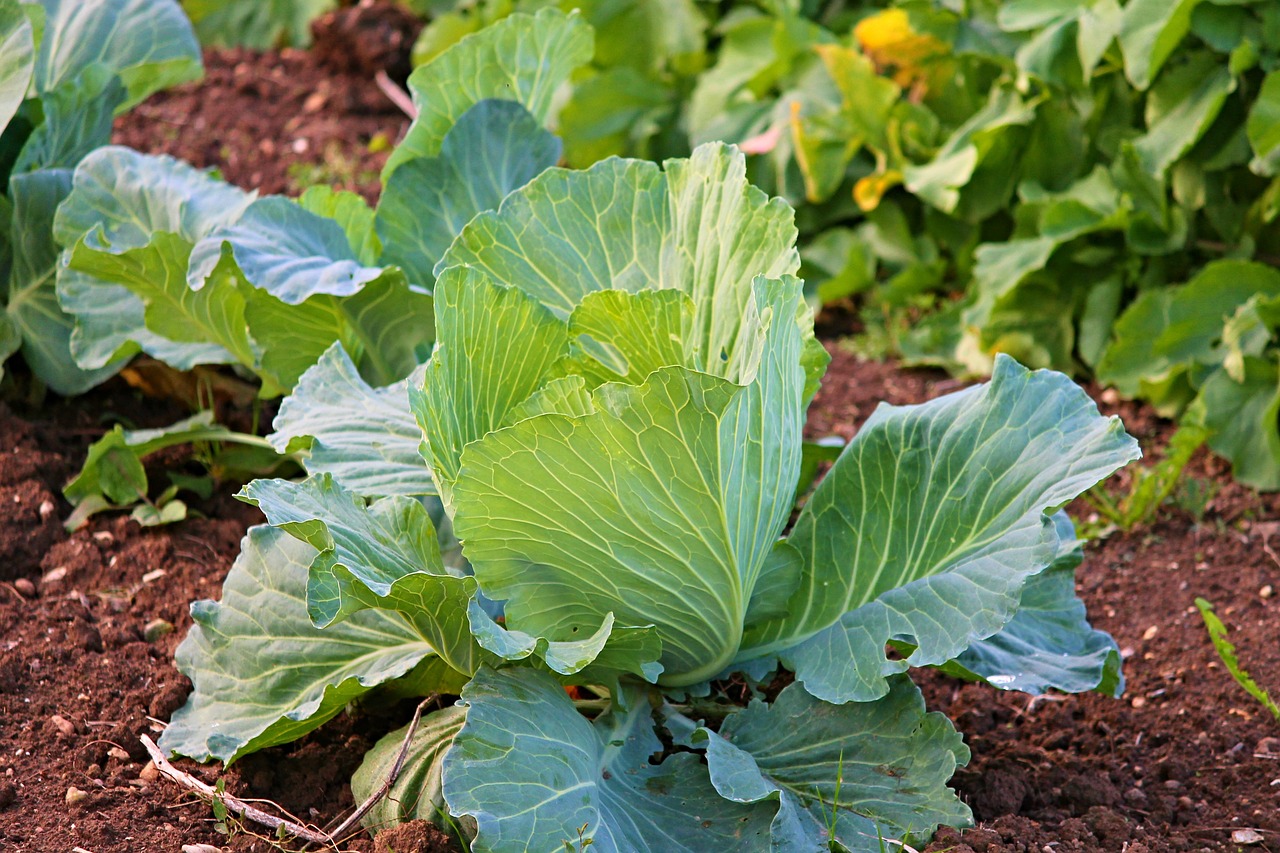
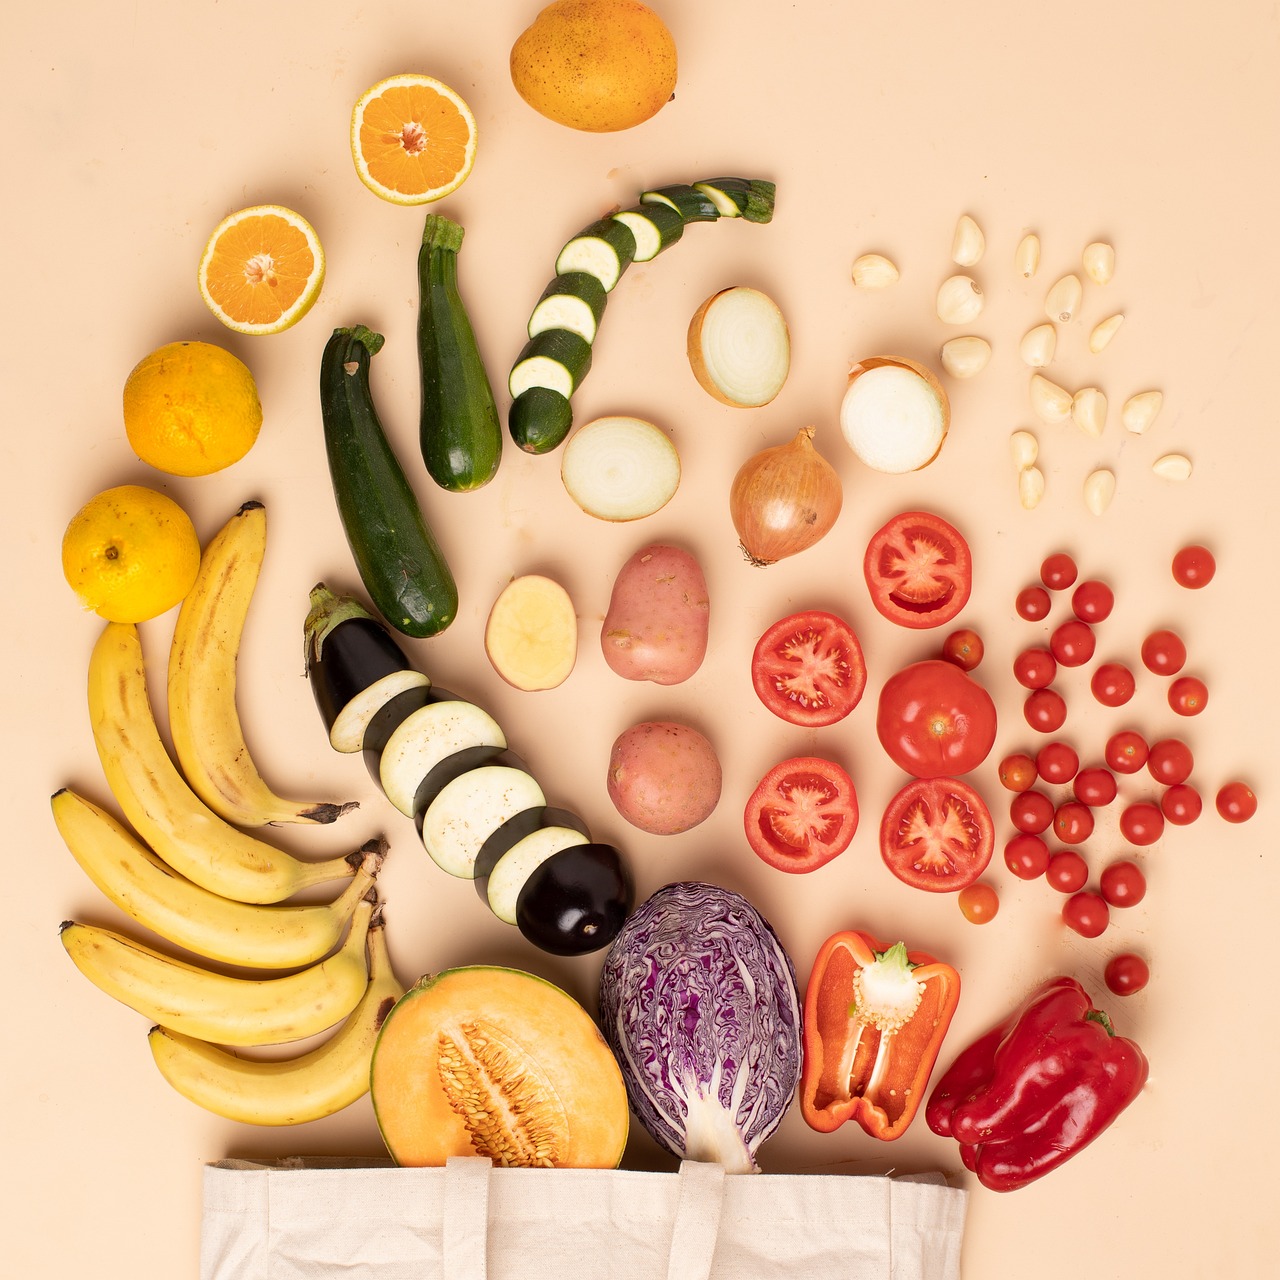
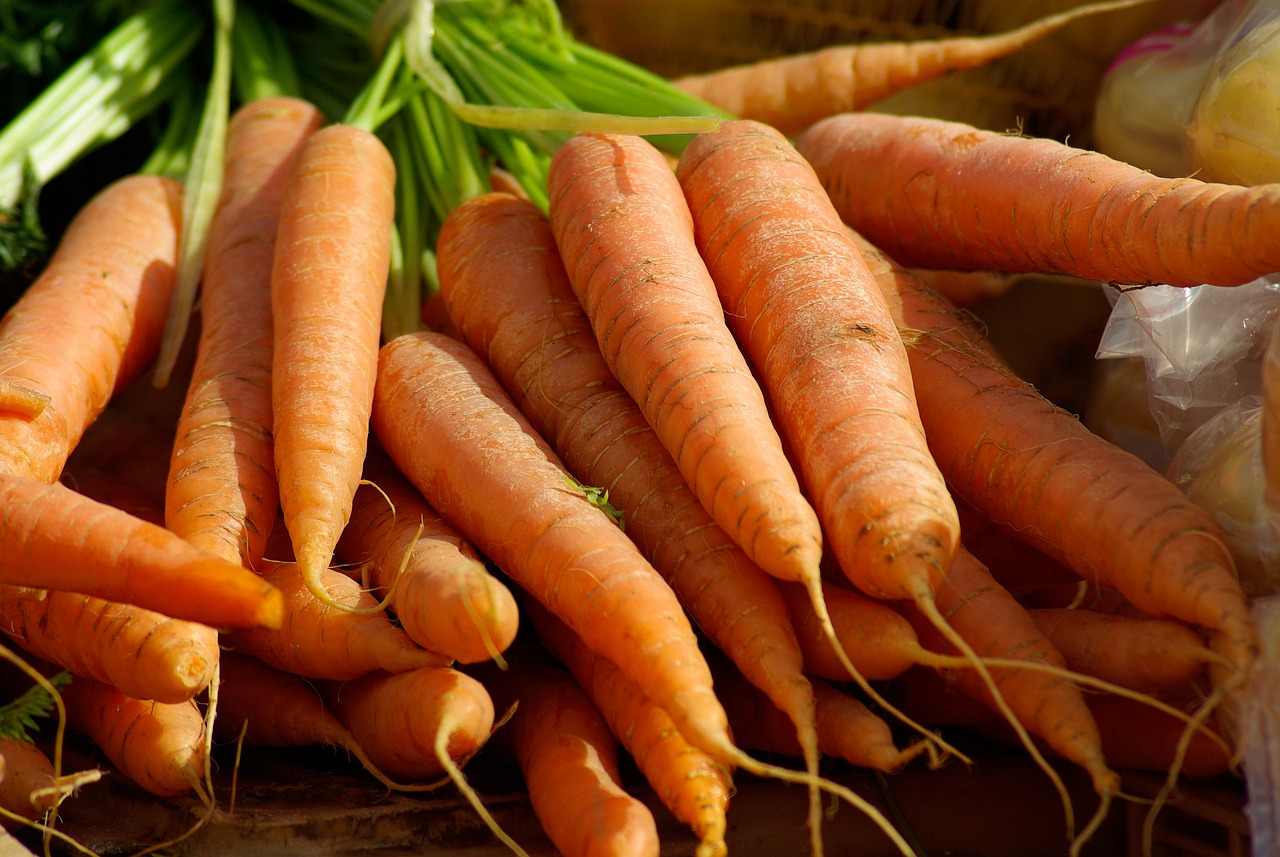
Selecting the Right Vegetables
Choosing the right vegetables for your patch is not just a matter of personal preference; it’s a crucial step that can determine the success of your entire garden. Imagine planting a crop that thrives in your local climate and soil conditions, resulting in a bountiful harvest that your family can enjoy. To make this happen, you need to consider several factors. First, think about your climate. Different vegetables have varying temperature and sunlight requirements. For instance, while tomatoes love the heat of summer, spinach prefers cooler weather. So, understanding your local climate is essential.
Next, take a good look at your soil type. Is it sandy, clayey, or loamy? Each type has its own characteristics that can affect which vegetables will flourish. For example, root vegetables like carrots and potatoes do well in loose, sandy soil, while leafy greens thrive in rich, loamy soil. Additionally, consider your family's preferences. After all, there’s no point in growing vegetables that no one wants to eat! Make a list of your family's favorite veggies and prioritize those when planning your garden.
Another important aspect is to think about crop rotation and companion planting. These techniques not only help in maximizing your yield but also in maintaining soil health. For instance, planting legumes like peas or beans can enrich the soil with nitrogen, benefiting subsequent crops. Furthermore, certain plants can help each other grow better when planted together. For example, tomatoes and basil make great companions, as basil can deter pests that typically attack tomatoes.
To help you visualize the best choices for your garden, here’s a quick overview of some popular vegetables categorized by their growing seasons:
| Season | Vegetables |
|---|---|
| Spring | Spinach, Lettuce, Radishes, Peas |
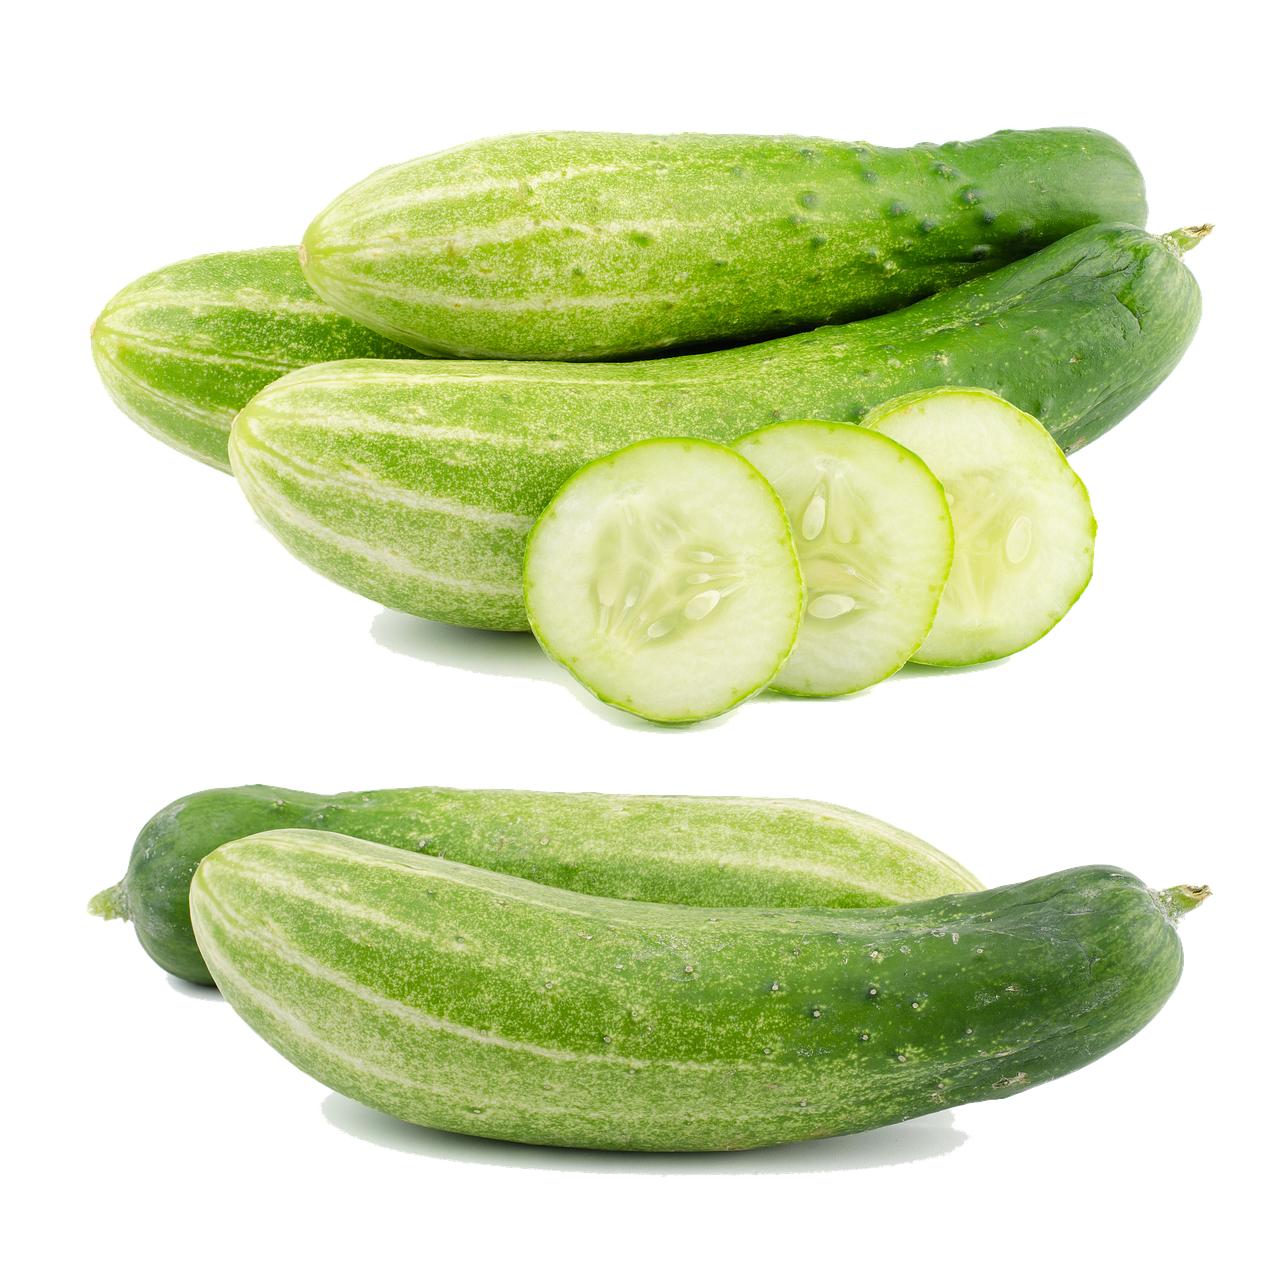
| Summer | Tomatoes, Cucumbers, Peppers, Zucchini |
| Fall | Broccoli, Kale, Carrots, Beets |
| Winter | Garlic, Onions, Leeks |
By selecting vegetables that align with your climate, soil, and family preferences, you’ll set the stage for a thriving vegetable patch. Remember, gardening is not just about planting; it’s about creating a harmonious ecosystem where each plant contributes to the overall health of your garden. So, take your time, do your research, and enjoy the process of selecting the perfect vegetables for your backyard oasis!
Q: What vegetables can I grow in a small space?
A: If space is limited, consider growing compact varieties or using vertical gardening techniques. Vegetables like cherry tomatoes, lettuce, and herbs can thrive in smaller areas.
Q: How do I know which vegetables are best for my region?
A: Check with your local extension office or gardening center for advice on the best vegetables suited to your climate and soil conditions.
Q: Can I grow vegetables year-round?
A: Yes, with the right planning and potentially using techniques like cold frames or greenhouses, you can grow vegetables throughout the year!
Seasonal Vegetables
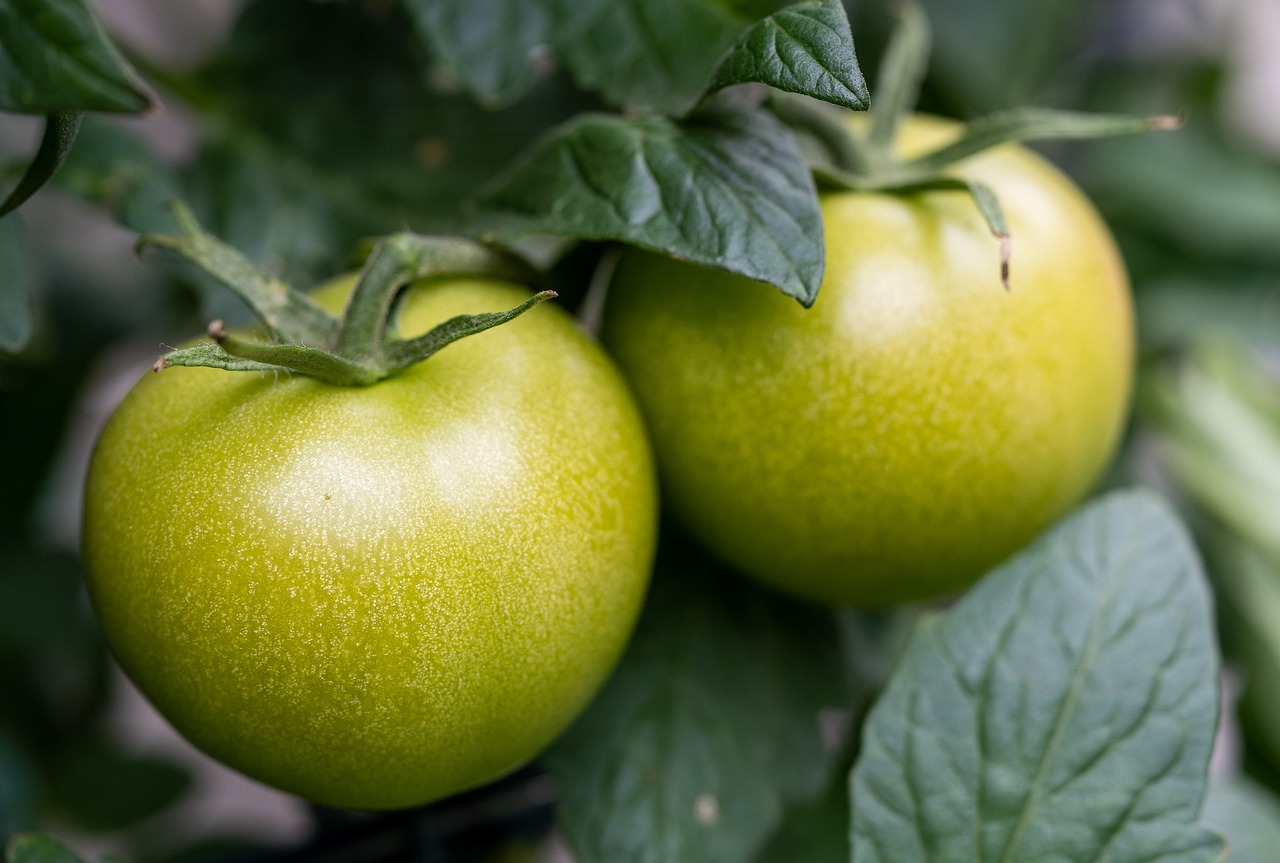
Understanding which vegetables grow best in each season is like having a secret map to a treasure trove of fresh produce. By planting seasonal vegetables, you not only maximize your harvest but also enjoy the freshest flavors and the highest nutrient content. Think about it: when you eat a tomato in the summer, it’s bursting with flavor because it’s in its prime! But if you try to grow that same tomato in the winter, you might end up with something that tastes more like cardboard than a juicy delight.
So, how do you determine which vegetables to plant each season? It all boils down to recognizing your local climate and understanding the growing cycles of each vegetable. Some veggies thrive in the cool, crisp air of spring and fall, while others bask in the warm sun of summer. Here’s a helpful breakdown:
| Season | Vegetables |
|---|---|
| Spring |
|
| Summer |
|
| Fall |
|
| Winter |
|
By aligning your planting schedule with the natural seasons, you’ll create a garden that not only thrives but also brings joy and satisfaction. Imagine stepping into your backyard and picking fresh vegetables that are perfectly in season, ready to be tossed into a salad or grilled for dinner. It’s not just about the harvest; it’s about the experience of growing your own food and connecting with nature.
Moreover, seasonal vegetables are often more resilient to pests and diseases. When you plant them during their optimal growing season, they’re better equipped to fend off threats. For instance, summer crops like tomatoes and peppers can withstand the heat better than if they were planted in the cooler months. So, not only do you enjoy better flavors and nutrition, but you also reduce the need for chemical interventions in your garden.
In summary, embracing seasonal vegetables is a game-changer for any home gardener. It enhances your garden's productivity and allows you to enjoy a diverse range of flavors throughout the year. So, get out there, plan your garden, and let the seasons guide you to a bountiful harvest!
Q: What are the benefits of planting seasonal vegetables?
A: Planting seasonal vegetables ensures that you grow crops at their optimal time, leading to better flavor, higher nutrient content, and increased resistance to pests and diseases.
Q: How do I know which vegetables are in season?
A: Research your local climate and growing zones, or consult local gardening resources. Many vegetables have specific seasons based on temperature and weather patterns.
Q: Can I grow vegetables out of season?
A: While it’s possible to grow some vegetables out of season using greenhouses or row covers, it’s generally more challenging and may require additional resources.
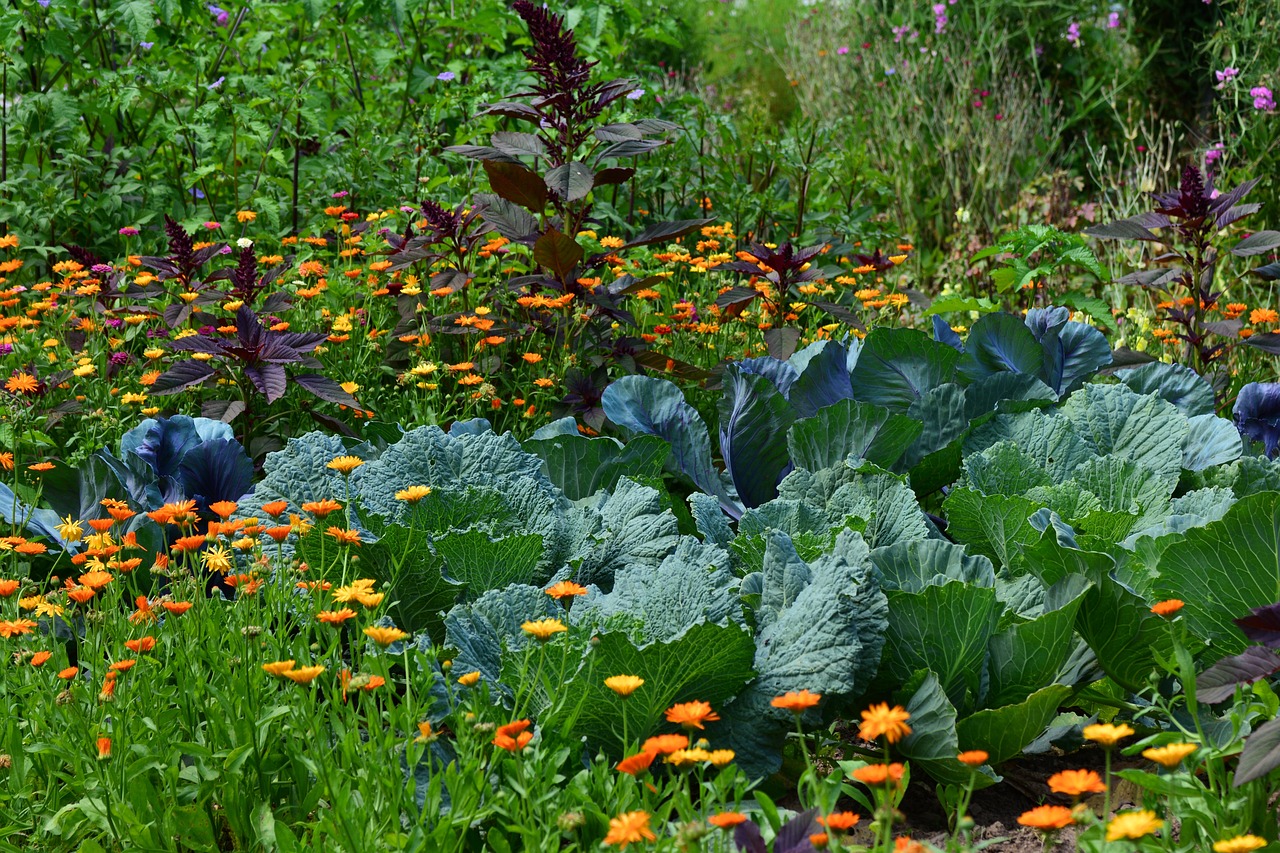
Companion Planting
Companion planting is like throwing a party for your garden! It’s the art of pairing plants together to boost their growth, deter pests, and enhance flavors. Imagine having a buddy system in your vegetable patch where certain plants support each other, creating a harmonious ecosystem that thrives on collaboration. For instance, planting tomatoes alongside basil not only improves the flavor of the tomatoes but also helps repel pesky insects that might ruin your harvest. It's a win-win situation!
But wait, there's more! Companion planting can also improve soil health and attract beneficial insects. Some plants, like marigolds, are known to attract pollinators and predatory insects that feast on aphids and other harmful pests. Meanwhile, legumes, such as peas and beans, have a special talent for fixing nitrogen in the soil, enriching it for their neighboring plants. It’s like having a natural fertilizer right in your garden!
When planning your vegetable patch, consider the following beneficial pairings:
- Carrots and Onions: They help each other by masking their scents, which confuses pests.
- Cucumbers and Radishes: Radishes can deter cucumber beetles, protecting your cucumbers.
- Bell Peppers and Spinach: Spinach provides shade to peppers, keeping them cool during hot weather.
However, not all plants get along. Just like in any social setting, there are some combinations that should be avoided. For example, planting cabbage near strawberries can stunt the growth of strawberries. This is where a little research goes a long way. Knowing which plants are friends and which are foes can make a significant difference in your garden's success.
Incorporating companion planting into your gardening routine can lead to a more vibrant and productive vegetable patch. It’s not just about what you plant, but how you plant it. So, as you dig into your gardening plans, think about the friendships you can cultivate among your plants. They just might surprise you with their cooperative spirit!
Q: What is companion planting?
A: Companion planting is the practice of growing different plants together for mutual benefits, such as pest control, improved growth, and enhanced flavors.
Q: Can companion planting really help with pest control?
A: Yes! Certain plants can repel pests or attract beneficial insects that prey on harmful ones, helping to keep your garden healthy without the need for chemical pesticides.
Q: Are there any plants that should not be planted together?
A: Absolutely! Some plants can inhibit each other's growth or attract pests. For instance, avoid planting potatoes near tomatoes as they can both be susceptible to similar diseases.
Q: How can I learn more about which plants are good companions?
A: There are many gardening books and online resources dedicated to companion planting. Additionally, local gardening clubs or extension services can provide valuable insights specific to your region.
Planting Techniques
When it comes to establishing a flourishing vegetable patch, play a pivotal role in ensuring your plants not only survive but thrive. Whether you're a novice gardener or a seasoned green thumb, understanding the nuances of planting can make all the difference. You might wonder, what are the best methods for sowing seeds or transplanting seedlings? Let’s dive into the world of planting techniques and explore the options available to you.
One of the primary decisions you'll make is whether to use direct seeding or transplanting. Direct seeding involves sowing seeds directly into the soil, which works best for crops that don’t mind a little rough and tumble. Think of it as letting your plants take the lead from the get-go. On the other hand, transplanting gives you a head start by allowing you to nurture seedlings indoors or in a greenhouse before moving them to their permanent home. This method is particularly beneficial for plants that prefer a more stable environment during their early growth stages.
But how do you know which method to choose? It really boils down to the type of vegetable and your gardening objectives. For instance, root vegetables like carrots and radishes thrive when directly seeded, while tender plants such as tomatoes and peppers often do better when transplanted. Each method has its own set of advantages, and understanding these can help you tailor your approach to your specific gardening goals.
Next, let’s talk about spacing and depth. These two factors are crucial for the health of your plants. Proper spacing allows for air circulation, which is vital for preventing diseases and ensuring that each plant receives adequate sunlight. If plants are too close together, they’ll compete for resources, leading to stunted growth. On the other hand, planting too far apart can lead to wasted space and lower yields. A good rule of thumb is to refer to the seed packet or plant label for specific spacing recommendations.
As for planting depth, it varies by vegetable type. Some seeds, like lettuce, require just a light covering of soil, while others, like beans, need to be planted deeper to ensure proper germination. Here’s a simple table to help you understand the recommended planting depths for common vegetables:
| Vegetable | Recommended Planting Depth |
|---|---|
| Carrots | 1/4 inch |
| Beans | 1-2 inches |
| Lettuce | 1/8 inch |
| Tomatoes | 1-2 inches |
With these techniques in mind, you're well on your way to planting success. Remember, gardening is as much about experimentation as it is about following guidelines. Don't be afraid to try different methods to see what works best in your unique environment. And as you dig into the soil and witness the magic of growth, you’ll realize that every seed you plant is a step toward a bountiful harvest.
- What is the best time to plant vegetables? The best time to plant varies by region and vegetable type, but generally, spring is ideal for many crops.
- How deep should I plant my seeds? Each vegetable has its own recommended planting depth; refer to seed packets for specific instructions.
- Can I transplant seedlings directly into the garden? Yes, but ensure they are hardened off first to acclimate them to outdoor conditions.
- How do I know if my soil is ready for planting? Conduct a soil test to check for nutrient levels and pH balance to ensure optimal growing conditions.

Direct Seeding vs. Transplanting
When it comes to establishing your vegetable patch, one of the most important decisions you'll face is whether to use direct seeding or transplanting. Each method has its own set of advantages and disadvantages, which can significantly impact the success of your garden. Let's dive into these two approaches and see which one might be the best fit for your gardening style and the specific vegetables you want to grow.
Direct seeding involves planting seeds directly into the soil where they will grow. This method is often favored for its simplicity and cost-effectiveness. You simply prepare your soil, sow the seeds, and wait for them to germinate. This approach is particularly advantageous for crops like carrots, radishes, and beans, which thrive when planted directly in their final growing location. However, direct seeding can be a gamble; if the weather is uncooperative—too cold, too wet, or too dry—your seeds may struggle to sprout or may even wash away.
On the other hand, transplanting involves starting seeds indoors or in a controlled environment, then moving them to your garden once they are strong enough. This method is ideal for tender plants like tomatoes, peppers, and eggplants, which benefit from a head start. By growing these plants in a nursery setting, you can control factors like temperature and moisture, ensuring they develop strong root systems before facing the outdoor elements. However, transplanting requires more effort upfront and can be more expensive due to the need for seed trays, soil, and additional care.
To help you weigh the options, consider the following comparison:
| Criteria | Direct Seeding | Transplanting |
|---|---|---|
| Cost | Generally lower; just seeds and soil | Higher; requires additional materials like trays and potting soil |
| Labor | Less labor-intensive | More labor-intensive due to initial setup |
| Success Rate | Variable; dependent on weather conditions | Higher; plants are started in ideal conditions |
| Best For | Root vegetables, beans, and hardy annuals | Warm-season crops like tomatoes and peppers |
Ultimately, the choice between direct seeding and transplanting depends on your specific circumstances, including the types of vegetables you want to grow, your local climate, and the amount of time and resources you can dedicate to your garden. If you're a beginner, you might want to start with direct seeding for its simplicity, but as you gain experience, experimenting with transplanting can yield some incredible results.
Q: Can I use both methods in the same vegetable patch?
A: Absolutely! Many gardeners find success by using a combination of both direct seeding and transplanting. This allows you to maximize your yield and take advantage of the benefits each method offers.
Q: What vegetables are best for direct seeding?
A: Vegetables like carrots, lettuce, radishes, and peas are great choices for direct seeding, as they tend to germinate well in the soil.
Q: How do I know when to transplant?
A: Transplant when your seedlings have developed at least two sets of true leaves and are sturdy enough to handle the outdoor conditions. This usually occurs a few weeks after germination, depending on the vegetable type.
Spacing and Depth
When it comes to creating a thriving vegetable patch, are two of the most crucial factors you need to consider. Imagine trying to fit a group of friends into a tiny car; if everyone is crammed together, it’s not going to be a pleasant ride. Similarly, your plants need their space to grow, breathe, and soak up that glorious sunlight. Proper spacing allows for adequate air circulation and light penetration, both of which are essential for healthy growth.
Each type of vegetable has its own specific requirements for spacing and planting depth. For instance, root vegetables like carrots and beets thrive when planted deeper, while leafy greens such as lettuce prefer a shallower depth. Here’s a handy table to give you a quick reference on the ideal spacing and depth for some common vegetables:
| Vegetable | Spacing (inches) | Depth (inches) |
|---|---|---|
| Carrots | 2-3 | 1/4-1/2 |
| Tomatoes | 24-36 | 1-2 |
| Lettuce | 12-18 | 1/4 |
| Beans | 3-4 | 1-2 |
| Peppers | 18-24 | 1-2 |
As you can see, the spacing varies greatly from one vegetable to another. Not only does this spacing prevent overcrowding, but it also reduces competition for nutrients and water, allowing each plant to thrive. Additionally, consider the mature size of the plants. For example, while seedlings may look small and innocent, they can grow into sprawling plants that need room to spread out. So, give them the space they deserve!
Now, let’s talk about depth. Planting too deep can suffocate seedlings, while planting too shallow can expose them to harsh conditions. A good rule of thumb is to plant seeds at a depth that is about two to three times their diameter. If you’re ever in doubt, consult the seed packet or do a little research on the specific vegetable you’re growing. It’s like checking the manual before assembling furniture; it saves a lot of headaches later!
In summary, understanding the specific spacing and depth requirements for your vegetables is essential for a flourishing garden. By giving your plants plenty of room to grow and ensuring they are planted at the right depth, you’ll be setting yourself up for a bountiful harvest. Remember, gardening is not just about putting seeds in the ground; it’s about creating a nurturing environment where those seeds can flourish into delicious, homegrown vegetables.
- What happens if I plant my vegetables too close together?
Planting vegetables too closely can lead to competition for sunlight, nutrients, and water, which can stunt their growth and lead to poor yields. - How do I know the right depth for different seeds?
The depth for planting seeds is usually indicated on the seed packet. As a general guideline, plant seeds at a depth of two to three times their diameter. - Can I use the same spacing for all vegetables?
No, different vegetables have different spacing needs. Refer to a planting guide or seed packet for specific recommendations. - What tools can help me measure spacing and depth?
A garden ruler or measuring tape can be very helpful for ensuring proper spacing and depth when planting your seeds.

Watering and Maintenance
When it comes to nurturing your vegetable patch, watering and maintenance are the lifeblood of your garden. Think of your plants as living beings that need just the right amount of water to thrive. Too little, and they’ll wither; too much, and you risk drowning them. The key here is to find that sweet spot where your vegetables are happy and healthy. A consistent watering schedule is essential, especially during the hot summer months when the sun can be unforgiving.
One effective method to ensure your plants receive adequate moisture is through drip irrigation or soaker hoses. These techniques deliver water directly to the roots, minimizing evaporation and runoff. Imagine giving your plants a refreshing drink exactly where they need it most—at their roots! This not only conserves water but also promotes deeper root growth, leading to stronger plants. If you prefer a more hands-on approach, consider watering early in the morning or late in the evening when temperatures are cooler, reducing evaporation and allowing the moisture to soak in.
Mulching is another fantastic way to maintain your vegetable patch. By adding a layer of organic material, such as straw, grass clippings, or wood chips, you can help retain soil moisture, suppress weeds, and regulate soil temperature. It’s like giving your garden a cozy blanket to snuggle under! Mulch can also break down over time, enriching the soil and providing nutrients to your plants.
Speaking of weeds, let’s talk about weed control. Weeds are like unwanted guests at a party—they compete for resources and can quickly take over your vegetable patch. Regularly checking for weeds and pulling them out by the roots can save you a lot of trouble down the line. You can also use organic herbicides or cover crops to keep those pesky weeds at bay. Remember, a weed-free garden is a happy garden!
To keep your vegetable patch thriving, make it a habit to inspect your plants regularly. Look for signs of stress, such as yellowing leaves or wilting, which could indicate issues like pests or nutrient deficiencies. By catching these problems early, you can take action before they escalate. Think of it as giving your plants a routine check-up to ensure they’re in tip-top shape!
Lastly, don't forget the importance of fertilization. Just like we need a balanced diet to stay healthy, your plants require nutrients to grow strong and produce bountiful harvests. Depending on your soil test results, you may need to amend your soil with organic fertilizers or compost. This not only boosts nutrient levels but also improves soil structure, enhancing moisture retention and aeration. It's a win-win!
- How often should I water my vegetable garden? It typically depends on the climate and the type of vegetables you're growing, but a good rule of thumb is to water deeply once or twice a week, adjusting based on rainfall and temperature.
- What is the best time to water my plants? Early morning or late evening is ideal to minimize evaporation and allow plants to absorb moisture effectively.
- How can I tell if my plants are getting enough water? Check the soil moisture by sticking your finger about an inch into the soil; if it feels dry, it's time to water.
- What types of mulch are best for vegetable gardens? Organic mulches like straw, shredded leaves, or compost are excellent choices as they break down over time and enrich the soil.
Watering Techniques
When it comes to nurturing your vegetable patch, play a crucial role in ensuring your plants thrive. It's not just about how much water you give; it's also about how you deliver it. Different methods can significantly impact the health and growth of your vegetables. For instance, traditional overhead watering methods can lead to water evaporation before it even reaches the roots, not to mention that wet leaves can promote fungal diseases. Instead, consider more efficient techniques that conserve water and promote deeper root growth.
One of the most effective methods is drip irrigation. This system delivers water directly to the base of each plant, minimizing evaporation and runoff. By using a network of tubing and emitters, you can ensure that your plants receive a consistent and adequate supply of moisture. Not only does this method save water, but it also helps prevent diseases by keeping the foliage dry. If you're looking for a more hands-on approach, soaker hoses are another excellent option. These porous hoses allow water to seep slowly into the soil, providing a gentle and even distribution of moisture. They can be laid out in rows or circles around your plants, making them a versatile choice for any garden layout.
Another technique to consider is hand watering. While it may seem old-fashioned, it allows you to give your plants the attention they need. Using a watering can or a hose with a spray nozzle, you can control the amount of water each plant receives. This method is particularly useful for smaller gardens or for areas where you want to focus on specific plants. However, it can be time-consuming, especially during the hotter months when plants need more frequent watering.
Regardless of the method you choose, timing is essential. Watering early in the morning or late in the afternoon helps reduce evaporation losses and ensures that your plants can absorb moisture before the heat of the day. Additionally, consider the soil's moisture level before watering. A simple test involves sticking your finger about an inch into the soil; if it feels dry, it's time to water. Overwatering can be just as detrimental as underwatering, leading to root rot and other issues.
To help you choose the best watering technique for your garden, here's a quick comparison of some popular methods:
| Watering Technique | Advantages | Disadvantages |
|---|---|---|
| Drip Irrigation | Water-efficient, reduces disease risk | Higher initial setup cost |
| Soaker Hoses | Even moisture distribution, easy to use | May clog over time if not maintained |
| Hand Watering | Personalized care, low cost | Time-consuming for large areas |
In conclusion, selecting the right watering technique is vital for the success of your vegetable patch. By understanding the needs of your plants and the characteristics of each method, you can ensure that your garden flourishes. Remember, a well-watered garden not only produces better vegetables but also creates a vibrant ecosystem that benefits all the plants within it.
- How often should I water my vegetable garden? It depends on your climate and soil type, but generally, watering once or twice a week is sufficient.
- Is it better to water in the morning or evening? Morning is best, as it allows plants to absorb moisture before the heat of the day.
- Can I overwater my vegetables? Yes, overwatering can lead to root rot and other plant diseases, so it's essential to check soil moisture levels.
- What is the best method for watering raised beds? Drip irrigation or soaker hoses are ideal for raised beds, as they provide consistent moisture without waterlogging.

Weed Control Strategies
Weeds can be the nemesis of any vegetable gardener, competing fiercely with your precious crops for nutrients, water, and sunlight. To maintain a thriving vegetable patch, it's essential to implement effective . Think of weeds as uninvited guests at a party; they show up unannounced and can ruin the fun unless you take action! So, how do you keep these pesky intruders at bay? Let’s dive into some tried-and-true methods that will help you reclaim your garden.
One of the most effective ways to control weeds is through mulching. By applying a layer of organic material, such as straw, wood chips, or grass clippings, you can suppress weed growth while also enriching the soil as the mulch breaks down. This not only prevents light from reaching weed seeds but also helps retain moisture in the soil, creating a win-win situation for your vegetables. Aim for a mulch layer of about 2 to 4 inches to maximize its effectiveness.
Another strategy is hand-pulling, which can be surprisingly satisfying! Regularly checking your garden and pulling out weeds by hand can help keep them under control. However, it’s crucial to pull them out by the roots to prevent them from growing back. This method works best when the soil is moist, making it easier to extract the entire root system. Just think of it as a mini workout while you enjoy the fresh air!
If you’re looking for a more systematic approach, consider using organic herbicides. These products are designed to target weeds while being gentle on your vegetables. They typically contain natural ingredients that can effectively kill weeds without the harsh chemicals found in conventional herbicides. Always read the labels and apply them carefully to avoid any unintended harm to your plants.
It’s also worth mentioning the importance of crop rotation in your weed management strategy. By changing the types of vegetables you plant in a particular area each season, you disrupt the life cycles of weeds that may have established themselves in your garden. This not only helps in controlling weeds but also improves soil health and reduces pest problems.
Lastly, consider the use of ground cover plants in your vegetable patch. These plants can act as a living mulch, covering the soil and preventing weeds from sprouting. They also provide additional benefits, such as attracting beneficial insects and improving soil structure. Just make sure to choose ground covers that won’t compete with your vegetables for resources!
To summarize, here’s a quick table that outlines some effective weed control strategies:
| Method | Description |
|---|---|
| Mulching | Applying a layer of organic material to suppress weeds and retain moisture. |
| Hand-Pulling | Regularly removing weeds by hand, ensuring to get the roots. |
| Organic Herbicides | Using natural products to target and kill weeds without harming vegetables. |
| Crop Rotation | Changing the types of vegetables planted each season to disrupt weed cycles. |
| Ground Cover Plants | Planting species that cover the soil and prevent weeds while benefiting the garden. |
By incorporating these into your gardening routine, you'll not only protect your vegetable patch but also create a more productive and enjoyable gardening experience. Remember, the goal is to create a harmonious environment where your vegetables can flourish, free from the competition of weeds. Happy gardening!
Q: How often should I check for weeds in my vegetable garden?
A: It's best to check your garden at least once a week, especially during the growing season, to catch weeds early before they can take over.
Q: Can I use plastic mulch instead of organic mulch?
A: Yes, plastic mulch can be effective in suppressing weeds, but it doesn't provide the same soil benefits as organic mulch. Consider your gardening goals when choosing between the two.
Q: Are there any weeds that are beneficial to my garden?
A: Some weeds can attract beneficial insects or improve soil health. However, it's essential to manage them carefully to prevent them from overwhelming your vegetables.
Pest and Disease Management
Managing pests and diseases in your vegetable garden is not just about keeping your plants safe; it’s about creating a sustainable ecosystem that thrives. Picture your garden as a delicate balance, where every organism plays a role. When pests invade, they disrupt this harmony, but with the right strategies, you can protect your crops while fostering a healthy environment. The key is to stay vigilant and proactive.
First, understanding the common threats to your vegetable patch is crucial. Pests like aphids, caterpillars, and beetles can wreak havoc if left unchecked. On the disease front, fungal infections and bacterial blights can spread rapidly, especially in humid conditions. To keep your garden flourishing, you need to be familiar with the signs of these invaders. For instance, look for discoloration on leaves or unusual spots that could indicate a disease. Early detection is your best defense!
Now, let’s talk about some effective organic methods for pest control. These methods not only protect your plants but also keep the ecosystem intact. Here are a few strategies you can employ:
- Encourage Beneficial Insects: Ladybugs and lacewings are natural predators of many garden pests. Creating a welcoming environment for these insects can help keep harmful populations in check.
- Natural Repellents: Sprays made from garlic or neem oil can deter pests without harming beneficial insects. These natural solutions are a fantastic way to protect your plants while being kind to the environment.
- Physical Barriers: Using row covers or netting can physically block pests from reaching your plants. This is especially useful for young seedlings that are more vulnerable to attacks.
In addition to pest management, being aware of diseases and how to combat them is equally important. Regularly inspect your plants for any signs of distress. If you notice wilting or unusual leaf spots, it could be time to act. Here are some organic methods to manage diseases:
- Crop Rotation: Changing the location of your crops each season can prevent diseases from taking hold in your soil.
- Good Hygiene: Keep your garden tools clean and remove any dead or diseased plants promptly to minimize the spread of pathogens.
- Companion Planting: Some plants can naturally deter diseases when grown alongside your vegetables. For example, marigolds are known to repel certain nematodes.
In conclusion, managing pests and diseases in your vegetable patch is an ongoing journey. By staying informed and implementing organic practices, you can protect your crops while nurturing a vibrant ecosystem. Remember, every garden is unique, so take the time to observe and adapt your strategies as needed. Your hard work will pay off when you enjoy a bountiful harvest of healthy, delicious vegetables.
Q: What are the most common pests found in vegetable gardens?
A: Common pests include aphids, whiteflies, caterpillars, and beetles. Regularly inspecting your plants can help you catch infestations early.
Q: How can I tell if my plants are diseased?
A: Look for signs such as wilting, discoloration, spots on leaves, or stunted growth. If you notice any of these symptoms, investigate further to identify the issue.
Q: What are some natural ways to deter pests?
A: You can encourage beneficial insects, use natural repellents like garlic or neem oil, and employ physical barriers such as row covers to protect your plants.
Q: Is crop rotation really necessary?
A: Yes! Crop rotation helps prevent soil-borne diseases and pests from establishing themselves in your garden. It’s a simple yet effective way to maintain soil health.
Identifying Common Pests
When it comes to cultivating a thriving vegetable patch, one of the most crucial skills you can develop is the ability to identify common pests. These little critters can wreak havoc on your plants if left unchecked, so being able to spot them early is key. Imagine your garden as a bustling city; just like cities have their share of troublemakers, your garden can attract a variety of pests looking to feast on your hard work.
Some of the most notorious pests that you might encounter include aphids, caterpillars, and beetles. Each of these pests has its own unique characteristics that can help you identify them. For instance, aphids are tiny, soft-bodied insects that often cluster on the undersides of leaves, sucking out the plant's juices. You might notice a sticky residue on your plants, known as honeydew, which is a telltale sign of an aphid infestation. On the other hand, caterpillars can be a bit more challenging to spot, as they blend in with the foliage. Look for chewed leaves or frass (caterpillar droppings) to catch them in the act.
Another common pest is the Japanese beetle, which is easily recognizable by its metallic green body and copper-colored wings. These beetles are notorious for skeletonizing leaves, leaving behind a lace-like appearance that can be quite alarming. To help you identify these pests, here’s a quick reference table:
| Pest | Appearance | Damage |
|---|---|---|
| Aphids | Tiny, green or black, soft-bodied insects | Yellowing leaves, sticky residue (honeydew) |
| Caterpillars | Varies in color, often blends with leaves | Chewed leaves, frass present |
| Japanese Beetles | Metallic green body with copper wings | Skeletonized leaves, defoliation |
In addition to these pests, you might also encounter slugs and snails, which can leave a slimy trail and create holes in your leaves. Recognizing these signs of pest activity is crucial, as early detection can make a world of difference in managing an infestation. As you spend time in your garden, keep an eye out for any unusual signs, and don’t hesitate to investigate further if you notice something amiss.
Remember, the key to successful pest management is not just identifying these nuisances but also understanding their life cycles and habits. By doing so, you can implement effective control strategies that will keep your vegetable patch healthy and productive. Just like a detective solving a mystery, you’ll become adept at spotting clues that lead you to the culprits harming your plants. With practice and vigilance, you can ensure that your garden remains a flourishing oasis rather than a battleground.
- What are the most common pests found in vegetable gardens? Common pests include aphids, caterpillars, Japanese beetles, slugs, and snails.
- How can I prevent pests from damaging my plants? Regular monitoring, maintaining healthy soil, and using companion planting techniques can help deter pests.
- Are there organic methods for pest control? Yes, introducing beneficial insects, using natural repellents, and applying organic pesticides can effectively manage pests.
- What should I do if I find pests in my garden? Identify the pest first, then choose an appropriate control method, whether it be manual removal, natural deterrents, or organic pesticides.
Organic Pest Control Methods
When it comes to managing pests in your vegetable patch, embracing is not only beneficial for your garden but also for the environment. These methods emphasize the use of natural solutions rather than harmful chemicals, ensuring that your vegetables remain safe for consumption and the ecosystem is preserved. One of the most effective strategies is to introduce beneficial insects into your garden. For instance, ladybugs and lacewings are known for their appetite for aphids, which can wreak havoc on your plants.
Another approach involves using natural repellents. Many gardeners have found success with homemade sprays made from ingredients like garlic, chili pepper, or neem oil. These sprays can deter a variety of pests without harming beneficial insects. To create a simple garlic spray, for example, blend a few cloves of garlic with water, strain the mixture, and spray it directly onto the affected plants. Not only does this method keep pests at bay, but it also adds a layer of protection without introducing toxic substances into your garden.
Additionally, practicing crop rotation can significantly reduce pest populations. By changing the location of your crops each season, you disrupt the life cycles of pests that may have established themselves in the soil. This technique can be particularly effective for vegetables that are prone to specific pests, as it makes it harder for those pests to find their favorite food source year after year.
Another organic method is to use companion planting. This involves planting certain crops together to naturally deter pests. For example, marigolds are known to repel nematodes and other harmful insects, making them a great companion for vegetables like tomatoes and peppers. By strategically planning your garden layout, you can create a natural defense system that minimizes pest issues.
Finally, maintaining a healthy garden ecosystem is crucial. Encourage birds and other wildlife that prey on pests to visit your garden by providing birdhouses or water sources. The presence of these natural predators can significantly reduce pest populations and contribute to a balanced garden environment.
Q: What are some signs that I have a pest problem in my vegetable patch?
A: Common signs include visible damage on leaves, such as holes or discoloration, the presence of insect droppings, and wilting or stunted growth of your plants.
Q: Can I use essential oils for pest control?
A: Yes! Essential oils like peppermint, lavender, and tea tree oil can be effective in repelling certain pests. Mix a few drops with water and spray it on your plants for natural protection.
Q: How often should I apply organic pest control methods?
A: It depends on the specific method and the severity of the pest problem. Generally, it's good to apply natural repellents every few days or after rain, and to monitor your garden regularly for any signs of pests.
Harvesting Your Vegetables
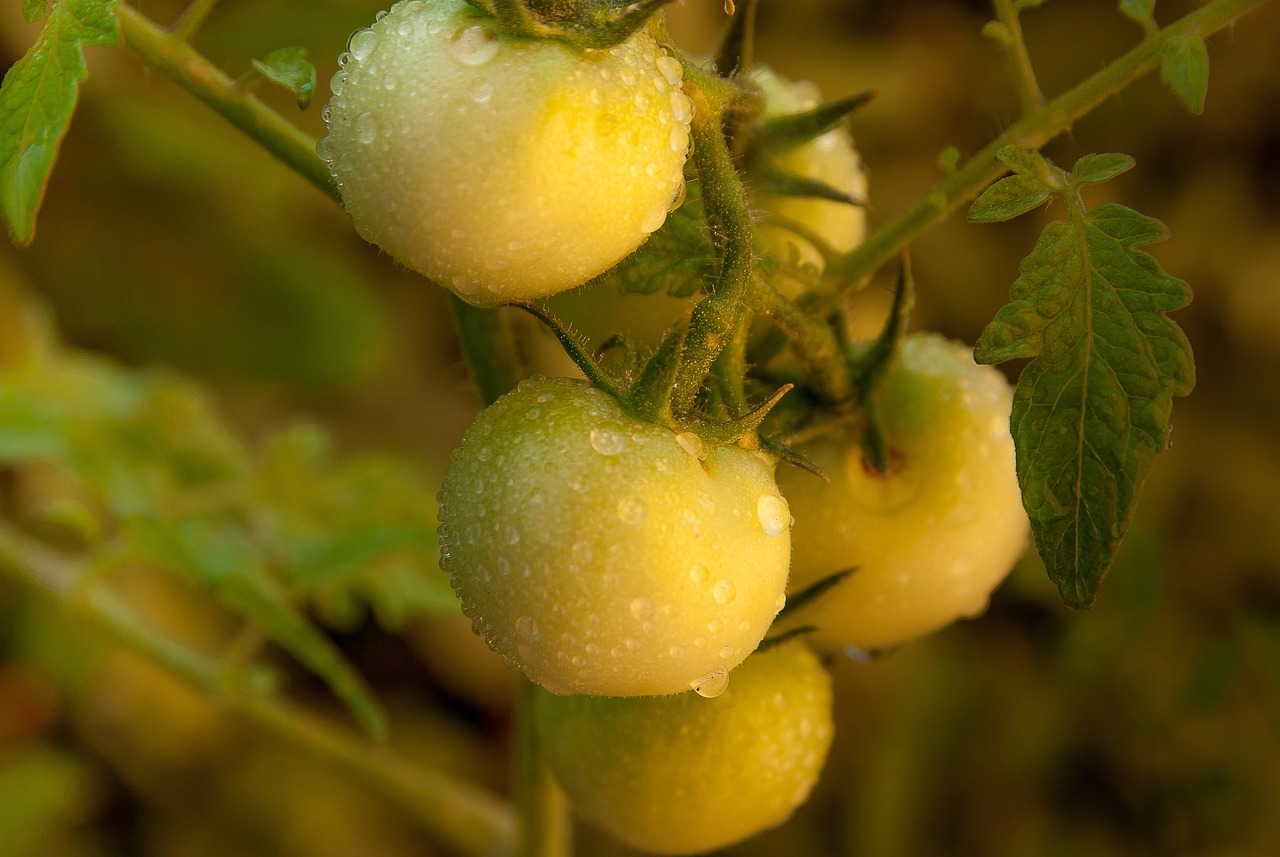
Harvesting your vegetables is like unwrapping a gift you’ve nurtured from the ground up. It’s that moment of triumph when all your hard work pays off, and you get to enjoy the fruits of your labor. But how do you know when the time is right to pluck those tasty morsels from your garden? Timing is everything! Each vegetable has its own signs of ripeness, and understanding these can make a world of difference in flavor and nutrition.
For instance, tomatoes should be harvested when they are fully colored and slightly soft to the touch, while cucumbers are best picked when they are firm and around 6-8 inches long. This is crucial because waiting too long can lead to overripening, which can compromise taste and texture. To help you identify the right harvesting times, here’s a quick reference table:
| Vegetable | Signs of Ripeness | Optimal Harvesting Time |
|---|---|---|
| Tomato | Fully colored, slightly soft | Summer |
| Cucumber | Firm, 6-8 inches long | Summer |
| Bell Pepper | Bright color, firm | Summer to Fall |
| Carrot | Top visible, firm | Fall |
When it comes to the actual act of harvesting, using the right techniques is just as important as knowing when to do it. You wouldn’t want to damage your plants while trying to reap their rewards, right? For leafy greens like lettuce and spinach, a gentle twist and pull will do the trick. For root vegetables, such as carrots and beets, using a garden fork to loosen the soil before pulling them out is advisable. This method minimizes stress on the plant and ensures that you get the entire root.
Another crucial aspect of harvesting is the time of day you choose to do it. Early morning is often the best time, as vegetables are crisp and full of moisture, having absorbed water overnight. Plus, it’s cooler, making your gardening tasks more pleasant. After harvesting, be sure to handle your veggies with care. Place them gently in baskets or containers to avoid bruising. Remember, the way you treat your harvest now can affect how they taste later!
Lastly, consider the concept of succession planting, which allows you to stagger your harvests throughout the season. By planting new seeds every few weeks, you can enjoy a continuous supply of fresh vegetables. This not only keeps your meals exciting but also ensures that you’re maximizing your garden’s potential. So, as you prepare to harvest, keep in mind that this is just one part of a larger cycle that can lead to ongoing enjoyment from your vegetable patch.
- What is the best time to harvest vegetables? Early morning is ideal as vegetables are fresh and crisp.
- How can I tell if my vegetables are ripe? Each vegetable has specific signs; for example, tomatoes should be fully colored and slightly soft.
- Can I harvest vegetables too early? Yes, harvesting too early can result in less flavorful produce.
- What tools do I need for harvesting? A sharp knife or garden scissors, and sometimes a garden fork for root vegetables.

Signs of Ripeness
Knowing when to harvest your vegetables is an art as much as it is a science. Each vegetable has its unique signs of ripeness, which can sometimes be subtle or even tricky to identify. For instance, tomatoes should be harvested when they are a deep red color, firm to the touch, and slightly soft at the stem end. On the other hand, cucumbers should be picked when they are still small, about 6-8 inches long, and have a bright green color. The key is to observe your plants regularly and familiarize yourself with their growth patterns.
One crucial aspect to consider is the texture and firmness of the vegetable. For example, bell peppers should be harvested when they have reached their full size and have a glossy finish. If they start to wrinkle, they may be past their prime. Similarly, zucchini should be picked when they are still young and tender, ideally around 6-8 inches long; waiting too long can lead to oversized, tough, and seedy fruits.
Additionally, the color of your vegetables can be a telltale sign of ripeness. For instance, carrots should be pulled from the ground when they have developed a vibrant orange hue, while potatoes should be harvested when their skins are firm and not easily scratched. It's also important to note that some vegetables, like beans, should be harvested while they are still young and tender, indicated by a bright green color and a slight snap when bent.
To help you better understand the signs of ripeness for various vegetables, here's a quick reference table:
| Vegetable | Signs of Ripeness |
|---|---|
| Tomatoes | Deep red color, firm yet slightly soft at the stem end |
| Cucumbers | Bright green, about 6-8 inches long |
| Bell Peppers | Full size, glossy finish |
| Zucchini | 6-8 inches long, young and tender |
| Carrots | Vibrant orange color |
| Potatoes | Firm skin, not easily scratched |
| Beans | Bright green, slight snap when bent |
Ultimately, the best advice is to trust your instincts and experience. Regularly checking your vegetable patch will not only help you recognize the signs of ripeness but also enhance your connection with the plants you've nurtured. Remember, harvesting at the right time not only improves flavor but also encourages further production, ensuring a continuous supply of fresh vegetables for your table.
- How do I know when my tomatoes are ripe? Look for a deep red color and a slight softness at the stem end.
- What is the best time of day to harvest vegetables? Early morning is ideal, as the vegetables are cooler and have retained moisture.
- Can I harvest vegetables that are not fully ripe? While you can harvest some vegetables early, it’s best to wait until they are fully ripe for the best flavor and texture.
- How often should I check my vegetable patch for ripeness? Regular checks, ideally every few days, will help you catch vegetables at their peak.
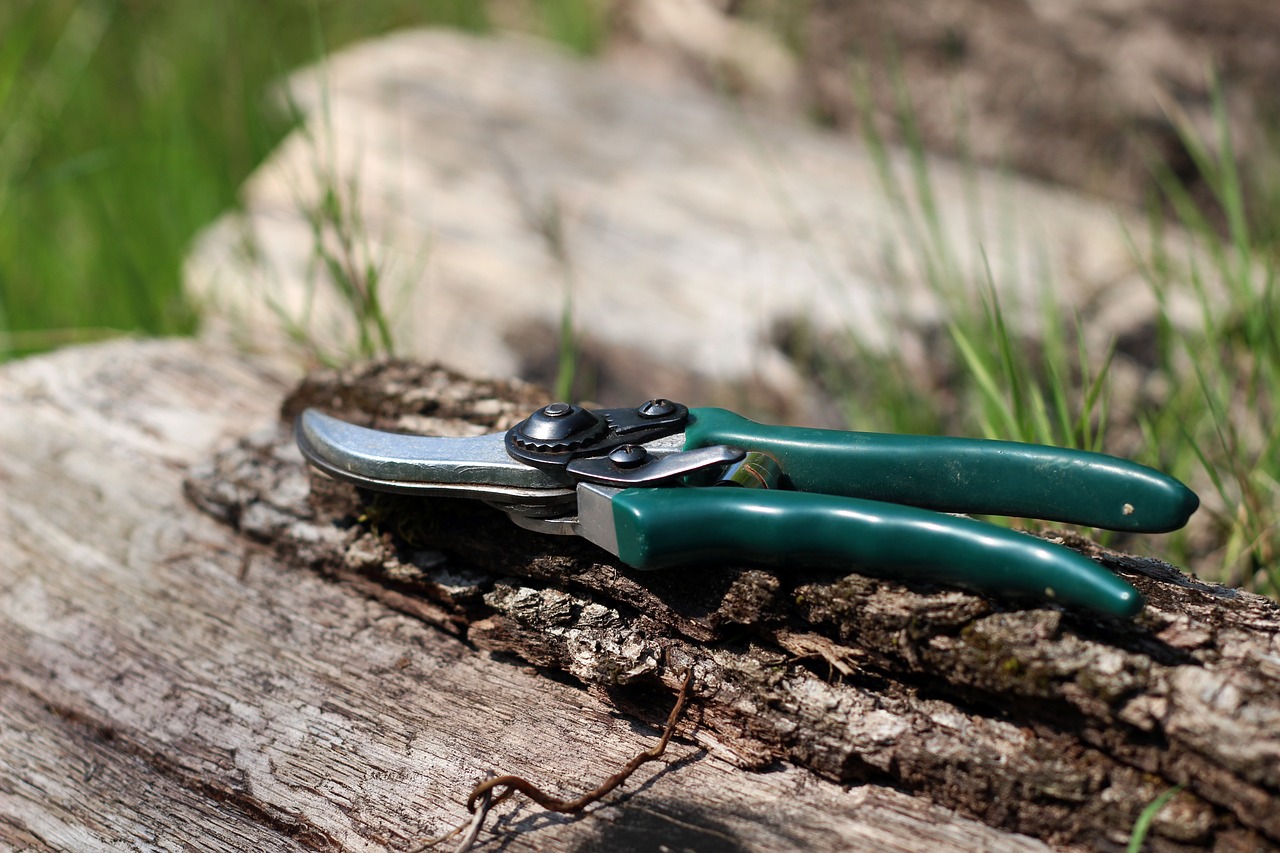
Harvesting Techniques
When it comes to harvesting your vegetables, the right techniques can make a world of difference. Imagine the satisfaction of plucking a ripe tomato or crisp cucumber from your garden; it's not just about the taste but also about the care you put into ensuring that each vegetable is harvested at its peak. To achieve this, you need to be aware of the best practices that will help you avoid damaging your plants and ensure that your harvest remains plentiful for future yields.
One of the most important aspects of harvesting is timing. Each vegetable has its own signs of ripeness, and knowing when to pick them can greatly enhance both flavor and nutrition. For instance, tomatoes should be harvested when they are fully colored and slightly soft to the touch, while cucumbers are best picked when they are firm and still young. If you let them grow too long, they can become bitter and less enjoyable to eat.
To help you identify the right moment for harvesting, here’s a quick guide:
| Vegetable | Signs of Ripeness |
|---|---|
| Tomatoes | Fully colored, slightly soft |
| Cucumbers | Firm, young, bright green |
| Bell Peppers | Fully colored, firm |
| Carrots | Shoulder visible above soil, firm |
Once you’ve identified that your vegetables are ripe, it’s time to harvest them using the right techniques. Here are some tips:
- Use the Right Tools: A sharp pair of garden shears or scissors can help you make clean cuts, which is crucial for preventing damage to the plant. For root vegetables like carrots and beets, a garden fork can help loosen the soil without harming the roots.
- Harvest in the Morning: The best time to harvest is in the morning when temperatures are cooler. This helps preserve the freshness and flavor of your vegetables.
- Be Gentle: Handle your vegetables with care to avoid bruising. For instance, when picking tomatoes, support the fruit with your hand and twist gently to detach it from the vine.
After harvesting, it’s essential to store your vegetables properly to maintain their quality. Most vegetables do best in a cool, dark place, while others, like leafy greens, may require refrigeration. Always wash your harvest gently to remove any dirt, but avoid washing them until you’re ready to eat, as excess moisture can lead to spoilage.
In conclusion, mastering the art of harvesting not only ensures that you enjoy the fruits of your labor at their best but also encourages your plants to continue producing. Remember, each vegetable has its own unique needs, so take the time to learn about them, and your vegetable patch will reward you with a bountiful harvest season after season.
Q: When is the best time to harvest vegetables?
A: The best time to harvest vegetables is generally in the morning when temperatures are cooler. This helps maintain freshness and flavor.
Q: How can I tell if my vegetables are ripe?
A: Each vegetable has specific signs of ripeness. For example, tomatoes should be fully colored and slightly soft, while cucumbers should be firm and bright green.
Q: What tools do I need for harvesting?
A: Sharp garden shears or scissors are ideal for most vegetables. For root vegetables, a garden fork can help loosen the soil.
Q: Should I wash my vegetables after harvesting?
A: It's best to wash your vegetables just before you eat them to prevent spoilage. Excess moisture can lead to quicker deterioration.
Frequently Asked Questions
- What is the best location for a vegetable patch?
Choosing the right location is crucial for your vegetable patch's success. Look for a spot that receives at least 6-8 hours of sunlight daily, has good drainage, and is easily accessible for watering and maintenance. A sunny area with rich soil will set the stage for healthy plants and a bountiful harvest.
- How do I test my soil?
You can test your soil using DIY soil testing kits available at garden centers or online. These kits typically measure pH and nutrient levels like nitrogen, phosphorus, and potassium. Alternatively, you can send a sample to a professional lab for a more comprehensive analysis. Knowing your soil's composition helps you amend it effectively for optimal plant growth.
- What vegetables should I plant for my climate?
When selecting vegetables, consider your local climate and growing season. Research which crops thrive in your area during different seasons. For instance, cool-season vegetables like spinach and lettuce are great for spring and fall, while warm-season crops like tomatoes and peppers flourish in summer. Tailoring your choices to your climate ensures a successful harvest.
- How often should I water my vegetable patch?
Watering frequency depends on several factors, including the type of plants, weather conditions, and soil type. Generally, vegetables need about 1-2 inches of water per week. It's best to water deeply but infrequently to encourage deep root growth. Using techniques like drip irrigation can help conserve water while ensuring your plants receive adequate moisture.
- What are some effective weed control strategies?
Weed control is vital for a healthy vegetable garden. You can use several strategies, including mulching to suppress weeds, hand-pulling, or using organic herbicides. Regularly monitoring your garden and addressing weeds early can prevent them from competing with your vegetables for nutrients and water.
- How can I manage pests in my vegetable patch?
Managing pests organically is essential for a thriving vegetable garden. Start by identifying common pests and their signs of infestation. You can use natural repellents, introduce beneficial insects like ladybugs, or employ companion planting to deter harmful pests. Maintaining a healthy garden ecosystem helps keep pests at bay.
- When is the right time to harvest my vegetables?
Timing your harvest is key to enjoying the best flavor and nutrition. Each vegetable has specific signs of ripeness, such as color changes or size. Familiarize yourself with these indicators to know when to pick. Harvesting at the right time not only enhances taste but also encourages continued growth for future yields.


