
How to Draw Dramatic Portrait Lighting
Creating a dramatic portrait is like telling a story with light and shadow. It's an art form that transcends mere representation, allowing the viewer to feel the emotions and nuances of the subject. In this article, we'll explore various techniques and tips that will help you master the art of dramatic lighting in your portrait drawings. Whether you're a seasoned artist or just starting out, understanding how to manipulate light can elevate your artwork from ordinary to extraordinary.
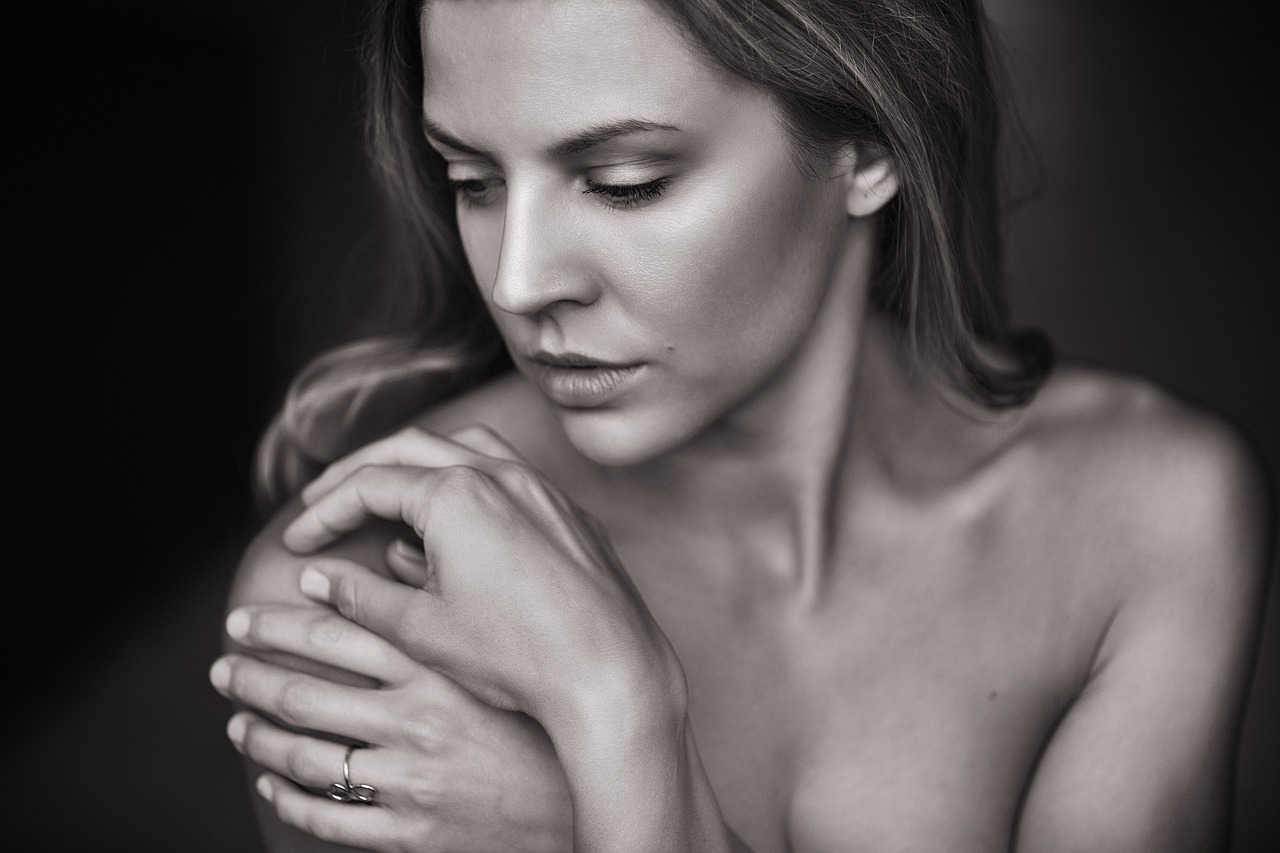
Grasping the fundamentals of light and shadow is crucial for creating dramatic portraits. Think of light as a sculptor, shaping the features of your subject. When light hits a surface, it creates highlights, midtones, and shadows, each playing a vital role in defining the form. The interplay between these elements adds depth and dimension to your drawing. For instance, a well-placed shadow can create a sense of mystery or drama, while a bright highlight can draw attention to a particular feature. Understanding how light interacts with different surfaces will empower you to create more compelling portraits.
The type of light source you choose can dramatically affect the mood of your portrait. Natural sunlight, with its soft and warm qualities, can create a serene and inviting atmosphere. On the other hand, studio lights can be manipulated to produce sharp contrasts and bold shadows, perfect for a more dramatic effect. Consider the following light sources:
- Natural Light: Ideal for capturing soft, organic tones.
- Studio Lights: Provides flexibility to control intensity and direction.
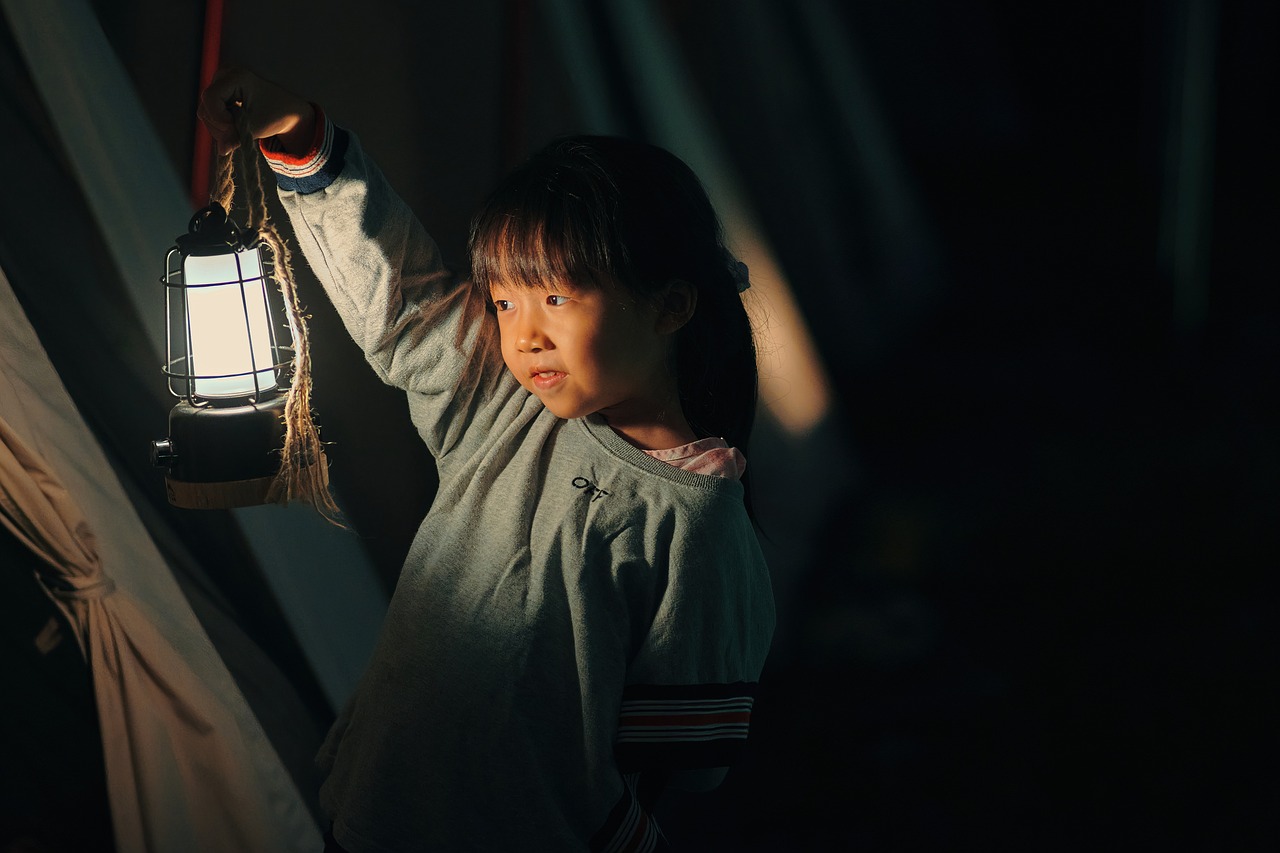
- Candles or Lamps: Creates intimate and moody lighting.
Experimenting with these sources can lead to unique and powerful outcomes in your portraits.
Utilizing contrast effectively can enhance the three-dimensionality of your portraits. Imagine your drawing as a stage where light and shadow play the leading roles. To achieve depth, focus on balancing light and dark areas. A common technique is to use a chiaroscuro approach, which emphasizes the dramatic effect of light and shadow. By layering your tones and gradually building up the contrast, you can create a sense of volume and presence in your subject. Remember, too much light can flatten your work, while too much shadow can obscure details. Finding the right balance is essential.
Color plays a vital role in portraying light in your drawings. It's not just about black and white; the hues you choose can evoke different emotions and atmospheres. For example, warm colors like reds and oranges can create a sense of warmth and intimacy, while cool colors like blues and greens can evoke calmness or sadness. By applying color theory, you can enhance the illusion of light and shadow in your portraits. Consider using complementary colors to make your highlights pop, or analogous colors for a more harmonious look.
Highlights and reflections add realism to portraits, creating a sense of liveliness. These elements can be found in the eyes, lips, and even on the skin. Identifying where the light hits your subject is key. For instance, the bridge of the nose and the cheekbones are often prominent areas for highlights. To render these effectively, use a lighter pencil or a white chalk for a striking effect against darker tones. This technique not only enhances the dramatic lighting but also brings your subject to life.
The angle of your light source can drastically change the portrait's mood. A light source positioned above can cast dramatic shadows that accentuate facial features, while a low light source can create a more mysterious or eerie atmosphere. Don’t be afraid to experiment with various angles; try moving your light source around your subject and observe how the shadows shift and change. This exploration can lead to surprising and captivating results in your artwork.
Textures can influence how light is perceived in a portrait. For instance, the smoothness of skin will reflect light differently than the roughness of hair or fabric. Incorporating textures into your drawings not only adds realism but also enhances the lighting effects. Techniques such as cross-hatching or stippling can be used to create various textures that interact with light. The more you practice these techniques, the more adept you'll become at capturing the subtleties of light in your portraits.
Practice is essential for mastering dramatic lighting in portrait drawing. Here are a few exercises designed to help you apply the techniques discussed:
- Shadow Studies: Create a series of sketches focusing solely on light and shadow.
- Color Experiments: Use different color palettes to see how they affect the mood of your portraits.
- Angle Exploration: Draw the same subject with different light angles to observe the changes in mood.
These exercises will not only sharpen your skills but also boost your confidence in using dramatic lighting effectively.
Q: What is the best light source for beginners?
A: Natural light is often the best choice for beginners due to its availability and soft quality. It allows for easier observation of how light interacts with forms.
Q: How can I practice contrast in my portraits?
A: Start with simple shapes and gradually incorporate more complex forms. Focus on identifying light and shadow areas, and practice shading to create depth.
Q: Can I use digital tools to create dramatic lighting?
A: Absolutely! Digital tools offer a wide range of options for manipulating light and shadow, allowing for experimentation without the limitations of traditional media.

Understanding Light and Shadow
Grasping the fundamentals of light and shadow is crucial for creating dramatic portraits. Think of light as the artist's brush, painting the forms and contours of your subject, while shadow acts as the canvas, providing depth and dimension. Without a solid understanding of how these two elements interact, your portraits may end up looking flat and lifeless. So, how does light really work? Imagine standing outside on a sunny day. The way the sunlight hits your face creates highlights on your cheeks and nose, while the areas under your chin and around your eyes fall into shadow. This interplay is what brings your subject to life.
The key to mastering light and shadow lies in understanding the light source. Light can come from various sources, each with its own characteristics. For instance, natural sunlight is bright and harsh, casting strong shadows, while a soft lamp might create a gentle, diffused light that wraps around your subject. Here's a quick breakdown:
| Light Source | Characteristics | Effect on Portraits |
|---|---|---|
| Natural Sunlight | Bright, harsh shadows | Creates dramatic contrasts |
| Studio Lights | Adjustable intensity | Allows for controlled shadow depth |
| Soft Lamps | Diffused, gentle light | Enhances skin tones |
When you draw, think of how the light interacts with the shapes of your subject. Each part of the face has its own unique curvature, and light will hit these curves differently. For example, the forehead may catch more light, while the nose may cast a shadow on the upper lip. By paying attention to these subtleties, you can add a layer of realism to your portraits that draws the viewer in.
Moreover, understanding the contrast between light and shadow is essential. High contrast can evoke strong emotions, making your artwork feel more intense, while lower contrast can create a softer, more serene atmosphere. Consider how you want your audience to feel when they view your portrait; this will guide your choices in lighting and shadowing.
In summary, mastering light and shadow is not just about knowing where to place highlights and dark areas; it's about understanding the relationship between them. By experimenting with different light sources and observing how they affect your subjects, you can create portraits that are not only visually stunning but also rich in emotion and depth. So grab your sketchpad, find a light source, and start observing the world around you!

Choosing the Right Light Source
When it comes to creating a stunning portrait, the light source you choose can make all the difference. Imagine you’re a photographer; the moment you step outside, you’re greeted by the warm embrace of the sun, casting long shadows and illuminating your subject in a way that feels almost magical. Well, the same principle applies to portrait drawing! The right light can evoke emotions, highlight features, and set the overall mood of your artwork.
There are several types of light sources you can consider, each offering unique effects:
- Natural Light: This is perhaps the most accessible and dynamic light source. Whether it’s the soft glow of a cloudy day or the harsh rays of a midday sun, natural light can create stunning contrasts and bring your portraits to life. For instance, positioning your subject near a window can create beautiful highlights and shadows, enhancing depth.
- Studio Lights: If you’re looking to have more control over the lighting, studio lights are your best friend. With options like softboxes and ring lights, you can manipulate the intensity and direction of light to achieve the desired effect. This is particularly useful for creating dramatic lighting where shadows play a crucial role.
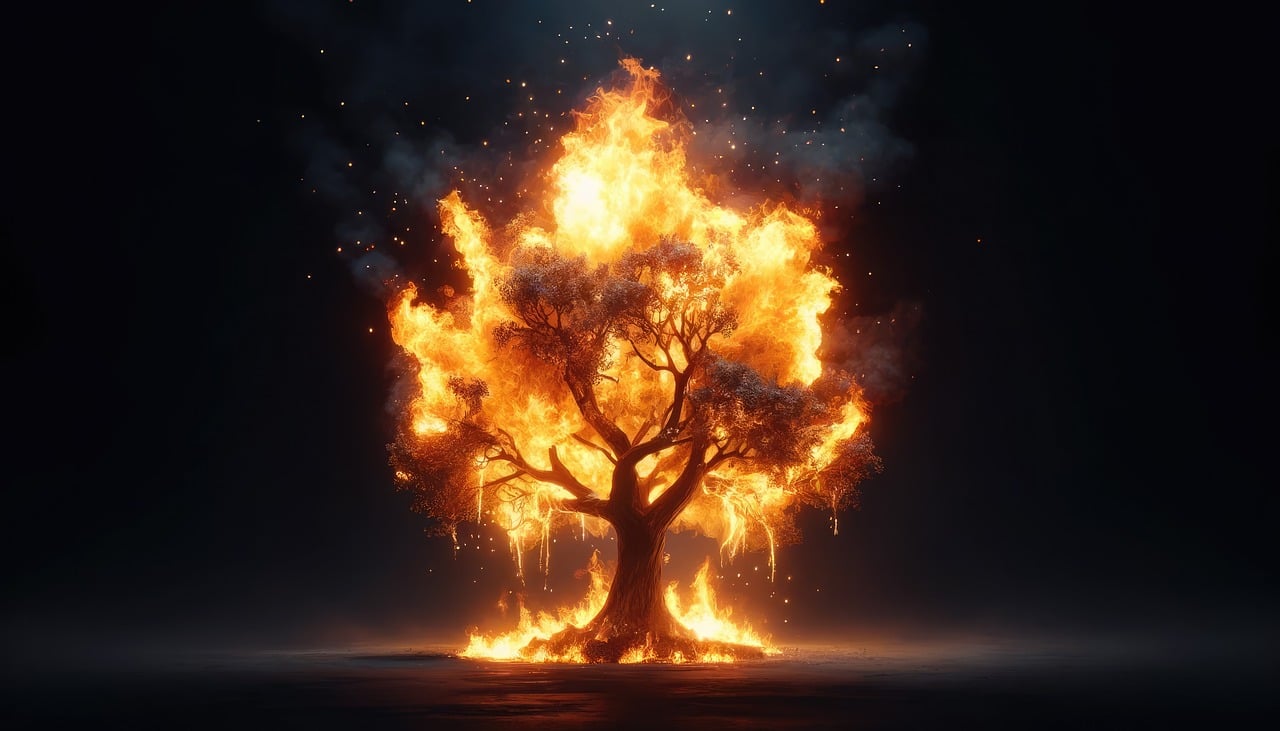
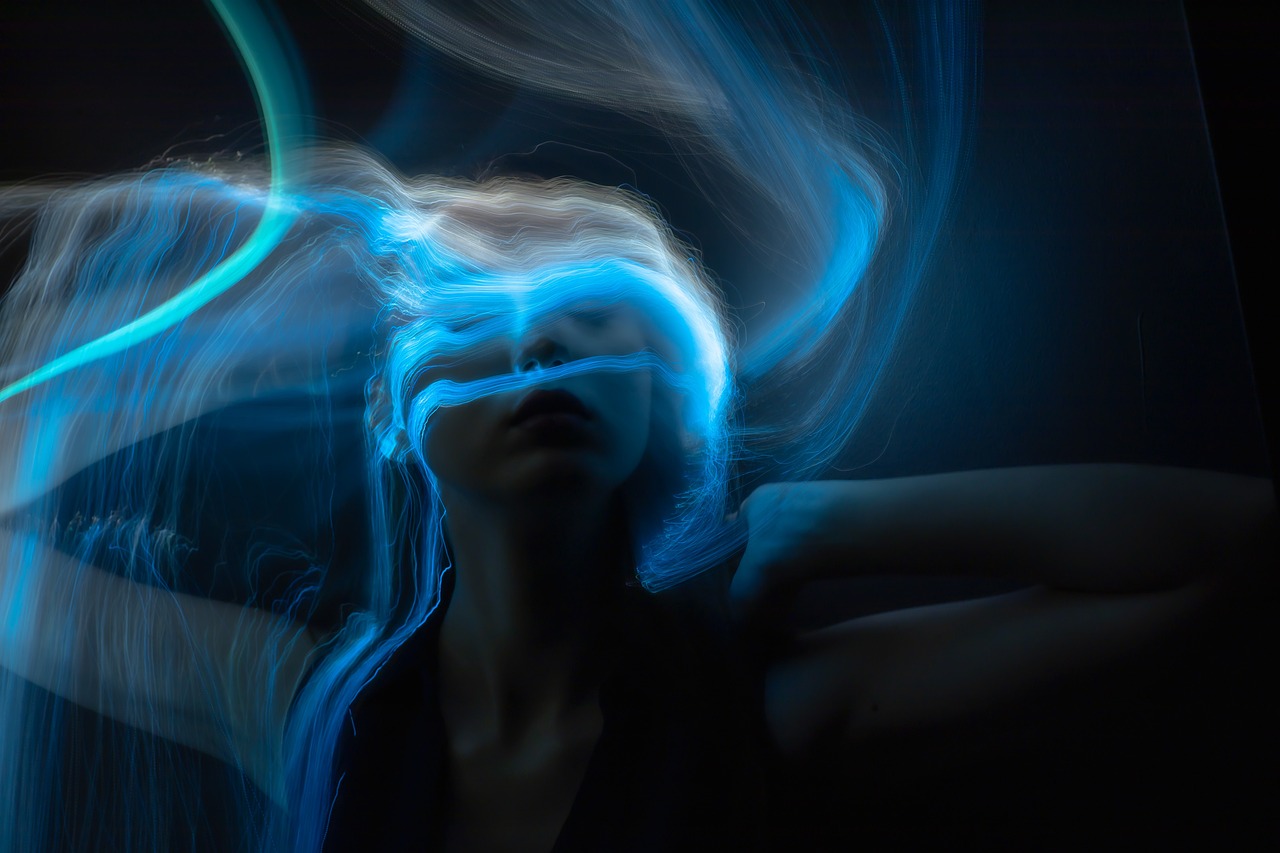
- Colored Lights: Adding colored lights can introduce a whole new dimension to your portraits. By using gels or colored bulbs, you can create a specific mood or atmosphere. For example, a warm orange light can evoke feelings of comfort, while a cool blue can impart a sense of calm or melancholy.
Choosing the right light source isn’t just about aesthetics; it’s also about understanding how light interacts with your subject. For example, a direct overhead light can create unflattering shadows on the face, while a side light can accentuate the contours and add drama. To illustrate this point, consider the following table:
| Light Source | Effect on Portrait | Best Used For |
|---|---|---|
| Natural Light | Soft, natural shadows | Casual, outdoor portraits |
| Studio Lights | Controlled highlights and shadows | Professional studio portraits |
| Colored Lights | Creates mood and atmosphere | Artistic or themed portraits |
Ultimately, the choice of light source will depend on the mood you want to convey in your portrait. Think of it like choosing the right ingredients for a recipe; each light source adds its own flavor to the final dish. So, experiment with different lighting conditions, and don’t be afraid to play around with angles and intensities. The beauty of art lies in exploration!
As you embark on your portrait-drawing journey, remember that lighting is a powerful tool. By understanding how to manipulate various light sources, you can transform a simple sketch into a dramatic masterpiece that captures the essence of your subject. So grab your sketchpad, find your light, and let your creativity shine!
Creating Depth with Contrast
When it comes to portrait drawing, is like seasoning in a recipe; it can elevate your artwork from bland to breathtaking. The interplay between light and dark not only adds dimension but also evokes emotion and draws the viewer into the scene. Think of contrast as the backbone of your portrait—it supports and enhances every feature, making your subject come alive on the page.
To effectively use contrast, it's essential to understand how light behaves. Imagine standing outside on a sunny day; the bright sunlight casts deep shadows that define your facial features. In your drawings, you want to replicate this natural phenomenon. Start by identifying the light source in your composition. Is it a soft, diffused light or a harsh, direct beam? This decision will guide how you apply contrast in your work.
One effective technique is to utilize a value scale, which helps you visualize the range of light and dark tones. A simple value scale can look like this:
| Value | Description |
|---|---|
| 1 | Darkest Shadow |
| 5 | Midtones |
| 10 | Brightest Highlight |
As you draw, think about the placement of your darkest shadows and brightest highlights. The more you can push these extremes, the more three-dimensional your portrait will appear. For instance, if you're drawing a face, the area under the chin or the sides of the nose often require deeper shadows, while the forehead and cheekbones can benefit from bright highlights. This contrast creates a visual tension that captures attention and adds intrigue.
Another technique to enhance depth is to layer your contrasts. Start with a mid-tone base and gradually build up darker shades and lighter highlights. This layering process not only adds richness to your portrait but also allows for smoother transitions between light and dark areas. Just like in photography, where an image can be enhanced by adjusting the exposure, your drawing can be transformed by skillfully managing contrast.
Don’t forget about the background! A well-chosen background can amplify the contrast in your portrait. For example, a dark background can make a lighter subject pop, while a lighter background can envelop a darker subject in a halo of light. Experiment with different backgrounds to see how they affect the overall mood and depth of your artwork.
Finally, remember that contrast isn't just about black and white. It can also be achieved through color contrast. Warm colors can appear to advance towards the viewer, while cool colors tend to recede. This can create an illusion of depth that adds another layer of complexity to your portraits. Play around with complementary colors to see how they interact and enhance the overall composition.
In conclusion, mastering the art of creating depth with contrast is a game-changer for portrait drawing. By understanding the dynamics of light and shadow, utilizing a value scale, and experimenting with layers and backgrounds, you can breathe life into your drawings. Remember, the goal is to create a visual experience that resonates with your audience, drawing them in and holding their attention.
- What materials are best for practicing contrast in portrait drawing?
Charcoal and graphite are excellent for practicing contrast due to their ability to produce deep blacks and subtle grays. Colored pencils can also be used for exploring color contrast. - How do I know if I have enough contrast in my drawing?
Step back and assess your work; if the light and dark areas are not distinct enough to create a sense of depth, consider enhancing the shadows or highlights. - Can I use digital tools to create contrast in my portraits?
Absolutely! Digital art software offers various tools for adjusting contrast, allowing for precise control over light and shadow.

Using Color to Enhance Lighting
When it comes to creating a dramatic portrait, color is your secret weapon. It’s not just about shading and highlights; the hues you choose can dramatically alter the perception of light and shadow in your artwork. Imagine standing in a room filled with warm sunlight versus one bathed in cool, fluorescent light. The colors you see are influenced by the type of light, and this principle applies equally to your drawings.
To harness the power of color in lighting, start by understanding the color wheel. Familiarize yourself with the relationships between colors—primary, secondary, and tertiary. Colors can be grouped into warm and cool tones, and each group can evoke different emotions and atmospheres in your portraits. For instance, warm colors like reds, oranges, and yellows can create a sense of warmth and intimacy, while cool colors like blues and greens can impart a feeling of calmness or detachment.
When applying color to enhance lighting, consider the following techniques:
- Use Color Temperature: Warm colors can be used to represent light sources like the sun or incandescent bulbs, while cool colors work well for shadows and artificial light. This contrast can make your portraits feel more dynamic.
- Experiment with Saturation: A highly saturated color can create a vibrant highlight, while desaturated colors can effectively portray shadow areas. This interplay can add depth and interest to your work.
- Play with Complementary Colors: Placing complementary colors next to each other can enhance the perception of light. For example, if you have a warm light source, introducing a cool shadow can make the light appear more intense.
Another important aspect is the local color of your subject. This refers to the natural color of the object or skin tone before any lighting effects are applied. When you introduce light, you should consider how it interacts with the local color. For example, a red apple under yellow light will appear different than under blue light. The interplay between the local color and the color of the light can create a stunning visual effect that enhances the overall impact of your portrait.
Additionally, don’t be afraid to incorporate color theory into your practice. Understanding how colors mix and influence each other can lead to more sophisticated lighting effects. For instance, if you want to create a glowing effect, layering transparent colors can simulate the way light interacts with surfaces. Think of it as building a sandwich: each layer adds to the overall flavor of your artwork.
In conclusion, using color to enhance lighting in your portraits is a powerful technique that can transform your artwork from flat to fabulous. By understanding color relationships, experimenting with saturation, and considering the local color of your subjects, you can create portraits that not only capture likenesses but also convey deep emotional resonance. So grab your palette and start exploring the vibrant world of color!
Q: How can I choose the right colors for my portrait lighting?
A: Start by understanding the emotional tone you want to convey. Warm colors create intimacy, while cool colors evoke calmness. Experiment with different combinations to see what works best for your subject.
Q: Should I use pure colors or mix them for lighting effects?
A: Mixing colors can create more realistic lighting effects. Use transparent layers to build depth and richness in your highlights and shadows.
Q: How do I know which colors to use for shadows?
A: Shadows are often cooler and less saturated than the light areas. Consider using complementary colors to add complexity to your shadows without making them flat.

Implementing Highlights and Reflections
When it comes to drawing portraits, highlights and reflections are your best friends. They breathe life into your artwork, adding that much-needed touch of realism and drama. Imagine a portrait without highlights; it would look flat and lifeless, much like a pancake without syrup! So, how do we effectively implement these elements in our drawings? Let's dive in.
First, understanding where light hits your subject is essential. Highlights occur where the light source directly illuminates the surface of the skin. For instance, the bridge of the nose, the cheekbones, and the forehead are prime spots for highlights. These areas should be rendered with a lighter touch, using a softer pencil or lighter color to create that glowing effect. Think of it as adding sparkles to your drawing; it draws the viewer's eye and creates a focal point.
Reflections, on the other hand, can be a bit trickier. They occur when light bounces off surfaces, creating a shimmering effect. For example, if your subject has shiny hair or glasses, you'll want to capture those reflections accurately. A common mistake is to overlook these details, thinking they are insignificant. However, they can significantly enhance the overall impact of your portrait. To illustrate this, consider the following table that summarizes where to place highlights and reflections:
| Feature | Highlight | Reflection |
|---|---|---|
| Nose | Bridge of the nose | Tip of the nose (if shiny) |
| Cheeks | High points of the cheekbones | Near the jawline (if light reflects) |
| Eyes | Cornea and eyelids | Reflection in the iris |
| Hair | Lightened strands | Shiny spots where light hits |
Now, let’s talk about techniques. A popular method is to use a blending stump to smooth out your highlights. This tool can help you create soft transitions between light and shadow, making the highlights pop even more. Additionally, using a white gel pen or a white pencil can be effective for adding those final touches of brightness. Just remember, less is often more; too many highlights can overwhelm your portrait and detract from its natural beauty.
Another crucial aspect to consider is the color temperature of your highlights. Warm highlights can convey a sense of warmth and intimacy, while cool highlights can evoke feelings of calmness and serenity. This choice can dramatically change the mood of your portrait. For instance, if you're drawing a portrait of someone happy and vibrant, warm yellow or peach highlights can enhance that emotion. In contrast, using cool blues and greens can lend a more somber or reflective mood.
In conclusion, implementing highlights and reflections in your portrait drawing is not just about making things look shiny; it's about capturing the essence of your subject. By paying attention to where the light hits, using the right tools, and understanding the emotional impact of color, you can elevate your artwork from ordinary to extraordinary. So grab your pencils and start experimenting with these techniques. Your portraits will thank you!
Experimenting with Different Angles
When it comes to creating dramatic portraits, the angle of your light source can be a game-changer. Think of it as the difference between a flat, lifeless image and one that practically jumps off the page! Experimenting with different angles not only adds interest but also significantly alters the mood of your artwork. Just like how a simple change in perspective can shift our understanding of a story, adjusting the angle of your light can transform the narrative of your portrait.
Imagine you’re taking a photograph. If you shoot from above, you might create a sense of vulnerability. Conversely, shooting from below can evoke power and dominance. The same principles apply to portrait drawing. By shifting your light source, you can manipulate shadows and highlights to create emotions that resonate with the viewer. It’s like playing with the dynamics of a conversation; the tone and delivery can change everything.
Here are some angles to consider when lighting your portraits:
- High Angle: This angle casts shadows downward, emphasizing features like cheekbones and the bridge of the nose. It can create a sense of fragility or innocence.
- Low Angle: Lighting from below can produce dramatic shadows and enhance the subject's stature, giving them an imposing presence.
- Side Lighting: This approach creates strong contrasts and can highlight textures, making your subject appear more three-dimensional.
- Backlighting: Placing the light behind your subject can create a halo effect, adding a sense of mystery and depth.
To truly master the art of lighting, it’s essential to experiment with these angles. Grab your sketchbook and try drawing the same subject under different lighting conditions. You might be surprised at how each angle brings out different characteristics and emotions in your subject. It's like discovering hidden layers of a personality; each angle reveals something new!
Moreover, don’t be afraid to get creative! Use objects to block or reflect light, creating unique shadows that can add depth and intrigue to your portraits. A simple piece of cardboard can become a dramatic light blocker, while a shiny surface can produce unexpected reflections. The world is your studio, and your imagination is the only limit.
In conclusion, experimenting with different angles is not just a technical exercise; it's an invitation to explore the emotional landscape of your subject. Each angle tells a story, and by playing with light, you become the storyteller. So, grab your pencils and start exploring the myriad of possibilities that different lighting angles can offer!
Q: How do I know which angle works best for my portrait?
A: It often depends on the mood you want to convey. Experiment with various angles and observe how they affect the overall feel of your portrait.
Q: Can I use artificial lights to achieve dramatic effects?
A: Absolutely! Artificial lights can be manipulated easily to create the desired shadows and highlights, allowing for more control over your portrait's mood.
Q: What if I don’t have professional lighting equipment?
A: Natural light is a fantastic alternative! Position your subject near a window or outdoors during the golden hour to achieve beautiful lighting effects.
Incorporating Textures in Lighting
When it comes to portrait drawing, textures are not just an afterthought; they are crucial in creating a lifelike representation that captivates the viewer. Think of textures as the fabric of your artwork, adding depth and richness that can transform a simple drawing into a breathtaking piece. When you incorporate textures into your lighting, you create a dynamic interplay between light and shadow that can evoke emotion and draw the eye. But how do you achieve this? Let’s dive into some techniques that can help you master this art.
First, consider the surface you are drawing on. Different surfaces can reflect and absorb light in unique ways. For instance, a smooth surface will give you a different lighting effect compared to a rough texture. A rough texture can scatter light, creating a more diffused look, while a smooth surface can produce sharp highlights. By understanding these properties, you can manipulate textures to enhance the lighting in your portraits. Imagine drawing a face with a glossy sheen on the skin; the way light bounces off the surface adds a realistic touch that can make your portrait pop.
Next, let’s talk about the importance of layering. Just like a chef layers flavors in a dish, you can layer textures in your artwork. Start by establishing a base texture for your portrait. This could be the skin texture, hair, or clothing. Once you have that foundation, you can build upon it by adding highlights and shadows. For example, if you’re drawing hair, you might start with a base color and then add lighter strokes to create the illusion of shine. This layering technique not only adds depth but also helps to define the light source in your portrait.
Another technique to consider is the use of contrasting textures. By juxtaposing different textures, you can create a striking visual effect. For instance, imagine a portrait where the subject has smooth skin but is wearing a rough, textured fabric. The contrast between the two can highlight the light falling on the subject’s face, making it appear even more dramatic. This interplay of textures can guide the viewer’s eye and create a narrative within your artwork.
Moreover, don't forget about the role of color in texture. Different colors can convey different textures. Warm colors can give the illusion of softness, while cool colors may appear more rigid. By choosing your colors wisely, you can enhance the texture and lighting in your portrait. For example, using a warm golden hue for skin tones can create a sense of warmth and life, while cooler shades can add a touch of elegance and depth.
Lastly, practice is essential. Try experimenting with various materials such as charcoal, pastels, or digital tools that allow you to play with textures. Each medium has its unique way of interacting with light, and by familiarizing yourself with these differences, you can find the best ways to incorporate textures into your lighting. Remember, the goal is to create a portrait that not only captures a likeness but also tells a story through light and texture.
In conclusion, incorporating textures in lighting is all about understanding the relationship between light, shadow, and surface. By paying attention to the texture of your subject and the medium you are using, you can create portraits that are not just visually appealing but also emotionally resonant. So, grab your tools and start experimenting with textures today; you might just surprise yourself with the dramatic effects you can achieve!
- How can I practice incorporating textures in my portrait drawings?
Start by drawing simple objects with different textures and practice applying light and shadow to them. Gradually move on to more complex subjects. - What materials are best for creating textures in portraits?
Experiment with various mediums like charcoal, pastels, and digital tools. Each can offer unique textures and lighting effects. - Can I use photographs to study textures and lighting?
Absolutely! Analyzing photographs can provide insights into how light interacts with different surfaces and textures.
Practice Exercises for Mastery
Mastering dramatic portrait lighting is like learning to dance; it requires practice, patience, and a willingness to experiment. To truly grasp the techniques discussed in this article, you need to roll up your sleeves and dive into some hands-on exercises. Here are a few engaging activities that will help you hone your skills and bring your portraits to life.
First, start with simple sketches. Grab a sketchbook and a pencil, and set up a basic still life with a single light source. This could be a lamp or even natural sunlight streaming through a window. Observe how the light interacts with the objects. Pay attention to the shadows and highlights, and try to replicate them in your drawings. You might be surprised at how much depth you can create with just one light source!
Next, challenge yourself by incorporating different light sources. For instance, use both warm and cool lights to see how they affect the mood of your drawings. You can create a small table of different light sources and their characteristics, like this:
| Light Source | Color Temperature | Mood Effect |
|---|---|---|
| Natural Sunlight | 5500K | Bright, cheerful |
| Incandescent Bulb | 2700K | Warm, cozy |
| Fluorescent Light | 4000K | Cool, clinical |
| LED Light | Different options | Varied, depending on the setting |
Another fantastic exercise is to create a series of portraits using the same subject but changing the angle of the light source for each one. This will help you understand how light can dramatically alter the perception of your subject. For example, try placing the light above, below, and to the side of your subject. Document the changes in your sketches and reflect on how each position creates a different mood and emphasizes various features.
Don’t forget to experiment with colors! Use colored pencils or watercolors to add hues that reflect the lighting conditions. For instance, if you're drawing under a warm light, incorporate yellows and oranges in your highlights. This will not only enhance the realism of your portrait but also deepen the emotional connection viewers will have with your work.
Finally, consider collaborating with a friend or fellow artist. Set up a small portrait session where you can take turns posing and drawing each other. This collaborative environment can lead to new insights and techniques. Plus, having someone else’s perspective can help you see things you might have missed on your own.
In summary, practice is the key to mastering dramatic lighting in portrait drawing. By engaging in these exercises, you’ll not only improve your technical skills but also develop your unique artistic voice. Remember, every stroke of the pencil is a step towards becoming a more skilled artist. So, grab your materials, and let the creative journey begin!
Q1: How can I improve my understanding of light and shadow?
A1: The best way to improve is through observation and practice. Study how light interacts with different surfaces and forms. Experiment with various light sources and note the changes in shadows and highlights.
Q2: What type of paper is best for practicing portrait drawing?
A2: While it depends on your medium, a smooth, heavyweight paper is generally ideal for pencil and charcoal work. If you’re using watercolors, opt for watercolor paper that can handle moisture.
Q3: How often should I practice to see improvement?
A3: Consistency is key! Aim to practice a little every day, even if it’s just for 15-30 minutes. Regular practice will lead to noticeable improvements over time.
Frequently Asked Questions
- What is the importance of light and shadow in portrait drawing?
Understanding light and shadow is crucial for creating depth and emotion in your portraits. It helps to define shapes and adds a three-dimensional quality to your artwork, making it more engaging and lifelike.
- How do different light sources affect my portraits?
Different light sources, such as natural sunlight or studio lights, create varying moods and effects in your drawings. For instance, soft, diffused light can create a gentle and serene atmosphere, while harsh, direct light can add drama and intensity.
- What techniques can I use to create depth with contrast?
To create depth, you can use techniques like chiaroscuro, which involves the strong contrast between light and dark areas. Balancing these elements will help your portraits pop and feel more dimensional.
- How does color theory play a role in dramatic lighting?
Color theory is essential for portraying light effectively. By understanding how colors interact, you can create the illusion of light and shadow, enhancing the overall mood of your portrait.
- What are highlights and reflections, and why are they important?
Highlights and reflections add realism to your portraits. They help to define surfaces and shapes, making the light appear more dynamic and believable. Identifying where to place these elements can significantly enhance the dramatic effect of your lighting.
- How can I experiment with different angles of light?
Experimenting with light angles is key to discovering unique lighting effects. Try moving your light source around your subject to see how the shadows and highlights change, which can lead to more interesting and varied portraits.
- Why is texture important in portrait lighting?
Texture influences how light interacts with surfaces in your portrait. Adding texture can enhance the lighting effects, making your artwork feel more tactile and alive. Techniques like cross-hatching or stippling can help achieve this.
- What practice exercises can help me master dramatic lighting?
To master dramatic lighting, consider exercises like drawing from life under different lighting conditions, practicing with various light sources, or creating studies focused solely on light and shadow. Regular practice will improve your skills and confidence.


