Painting Landscapes: Tips and Techniques
Painting landscapes is not just about replicating what you see; it's about capturing the essence of a scene and conveying emotion through your brushstrokes. Whether you're a beginner picking up a paintbrush for the first time or an experienced artist looking to refine your skills, this article is packed with essential tips and techniques that will elevate your landscape paintings to new heights. From understanding composition and color theory to mastering brushwork and lighting, we'll guide you through the key elements that make a stunning landscape. So, grab your palette and let's dive into the vibrant world of landscape painting!
Composition is the backbone of any successful landscape painting. It’s like the skeleton of your artwork, providing structure and balance. One of the most effective ways to achieve a harmonious composition is by employing the rule of thirds. Imagine dividing your canvas into a grid of nine equal parts; placing key elements along these lines or at their intersections can create a more dynamic and engaging scene. Additionally, consider using leading lines—natural pathways in your landscape that draw the viewer's eye into the painting. This could be a winding river, a dirt road, or even a row of trees. Finally, establishing a clear focal point is essential. This could be a striking mountain, a vibrant sunset, or a quaint cottage. By directing the viewer’s attention, you create a narrative within your artwork.
The colors you choose can dramatically influence the mood of your landscape. Understanding color theory is crucial for any artist. Start by familiarizing yourself with the color wheel, which illustrates how colors relate to one another. For instance, complementary colors—those opposite each other on the wheel—can create vibrant contrasts, while analogous colors, which sit next to each other, can produce a more harmonious effect. When selecting your palette, think about the emotions you want to evoke. Are you aiming for a serene sunset with warm oranges and yellows, or a moody, misty morning with cool blues and grays?
Understanding the difference between warm and cool colors is essential for adding depth and atmosphere to your paintings. Warm colors, like reds, oranges, and yellows, tend to advance in a composition, making them ideal for foreground elements. In contrast, cool colors—such as blues, greens, and purples—recede, creating a sense of distance. By skillfully balancing these two color groups, you can create a three-dimensional feel in your landscapes. For example, placing a warm sunlit area in the foreground against a cooler, shadowy background can enhance the perception of space.
To create a sense of depth in your landscapes, consider using color gradients and tonal variations. Gradually transitioning from one color to another can mimic the way light behaves in nature. For instance, a bright blue sky might gradually shift to a softer hue near the horizon. Additionally, using lighter tones in the foreground and darker shades in the background can enhance the illusion of depth. This technique invites the viewer into the scene, making them feel as if they could step right into your painting.
Achieving color harmony is vital for creating a cohesive landscape painting. You can accomplish this through complementary and analogous color schemes. A complementary scheme might involve a vibrant orange sunset against a deep blue sky, while an analogous scheme could feature varying shades of green in a lush forest. Using a limited palette can also help maintain harmony, allowing you to explore different shades and tones without overwhelming the viewer.
Texture adds interest and realism to your landscape paintings. Different brush techniques can evoke various effects. For instance, a dry brush technique can create the illusion of rough tree bark or grassy fields, while a wet-on-wet approach can produce soft, blended skies. Experimenting with different brushes—flat, round, or fan—can also yield unique textures. Don’t be afraid to layer your paint; building up texture can add depth and dimension to your work.
Lighting is a crucial element in landscape painting. It can set the mood, highlight specific areas, and create a sense of time within your artwork. Capturing different lighting conditions—such as the golden hour just before sunset or the soft light of a cloudy day—can dramatically change the feel of your painting. Pay attention to how shadows and highlights interact; they can enhance the realism and depth of your landscape.
To effectively capture natural light, observe how it interacts with your subject. Notice the way shadows fall and how highlights can bring certain elements to life. Using a limited palette can help you focus on the light's effects rather than getting lost in color choices. For instance, painting a bright sunlit area can contrast beautifully with a darker shadow, emphasizing the light’s impact on the scene.
Atmospheric effects like fog, haze, and distance can add an intriguing layer to your landscapes. To depict fog, use soft brush strokes and muted colors, allowing the background to fade into the distance. Haze can be created by layering translucent washes of color, giving the impression of depth. These techniques not only enhance the realism of your artwork but also invite the viewer to explore the scene further.
The final touches can elevate your painting from good to great. Consider applying a protective varnish to enhance the colors and provide a finished look. Framing your artwork can also add a professional touch, making it ready for display. Remember, the finishing techniques you choose can significantly impact the overall impression of your landscape painting.
- What materials do I need to start painting landscapes? All you need is a canvas, some paint (oil, acrylic, or watercolor), brushes, and a palette.
- How can I improve my landscape painting skills? Practice regularly, study the works of other artists, and don’t hesitate to experiment with different techniques.
- What is the best time of day to paint landscapes? The golden hour—shortly after sunrise or before sunset—provides beautiful lighting conditions.
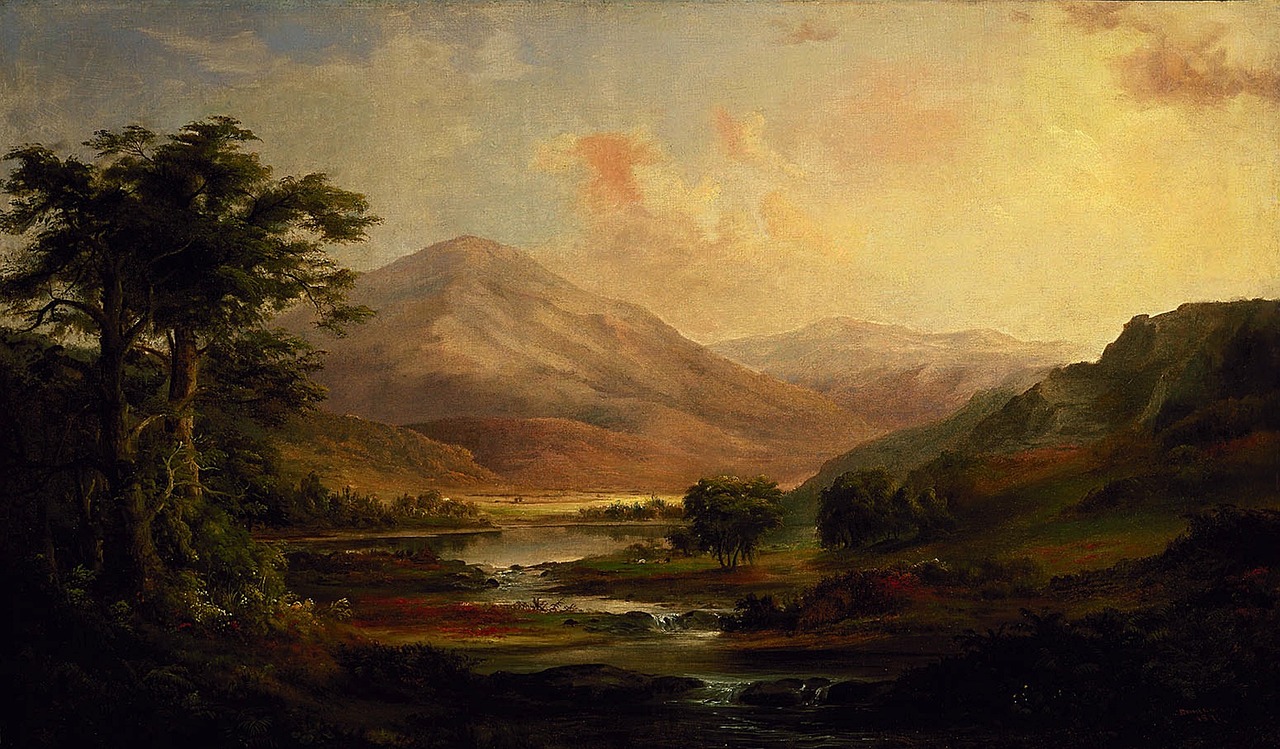
Understanding Composition
When it comes to painting landscapes, composition is your secret weapon. It’s like the backbone of your artwork; without a solid structure, even the most vibrant colors can fall flat. Think of composition as the blueprint for your painting. It guides the viewer’s eye and creates a sense of harmony within the scene. One of the most effective techniques for achieving a balanced composition is the rule of thirds. Imagine dividing your canvas into a grid of nine equal parts with two vertical and two horizontal lines. The idea is to place the most important elements of your landscape along these lines or at their intersections. This technique naturally draws the viewer’s attention and creates a more dynamic scene.
Another vital aspect of composition is the use of leading lines. These are lines within your painting that lead the viewer's eye to the focal point. Think of a winding river or a path that draws you deeper into the landscape. By incorporating leading lines, you can create a sense of depth and invite your audience to explore your artwork. Additionally, establishing a clear focal point is crucial. This could be a majestic mountain, a vibrant tree, or a serene lake. Whatever it is, make sure it stands out and captures the viewer's attention. You can achieve this by using contrasting colors, varying textures, or positioning it strategically within the composition.
Let’s not forget about balance, which is essential for a pleasing composition. Balance can be symmetrical or asymmetrical. In symmetrical balance, elements on either side of the canvas mirror each other, creating a sense of stability. In contrast, asymmetrical balance involves placing different elements that are visually unequal but still create harmony. For example, a large tree on one side can be balanced by a cluster of smaller bushes on the other side. This technique keeps the viewer engaged, as their eyes dance across the canvas, discovering new elements.
Lastly, consider the foreground, middle ground, and background in your landscape. This layering creates depth and perspective, making your painting feel more three-dimensional. The foreground can include detailed elements like rocks or flowers, while the middle ground might feature rolling hills or trees, and the background can consist of distant mountains or skies. By carefully planning these layers, you can create a captivating landscape that feels alive and inviting.
In summary, mastering composition is key to enhancing your landscape paintings. By applying the rule of thirds, utilizing leading lines, establishing a focal point, creating balance, and layering your elements, you can transform a simple scene into a breathtaking work of art that resonates with viewers. So grab your brushes, and let your creativity flow as you embark on this exciting artistic journey!

Choosing the Right Colors
When it comes to painting landscapes, color selection is everything. It’s like the magic wand that brings your artwork to life! Imagine standing in front of a breathtaking sunset, the sky ablaze with hues of orange, pink, and purple. Now, think about how you can capture that moment on canvas. The right colors not only enhance the beauty of your painting but also evoke emotions and set the mood. So, how do you choose the right colors for your landscape? Let’s dive into the colorful world of color theory and palettes.
First off, understanding color theory is essential. It’s the science of how colors interact with each other. For instance, complementary colors—those opposite each other on the color wheel, like blue and orange—can create a vibrant contrast that makes your landscape pop. On the other hand, analogous colors, which sit next to each other, like blue, blue-green, and green, can create a more harmonious and tranquil scene. Think of how a serene lake reflects the sky; using analogous colors can help you achieve that soothing effect.
Next, let’s talk about palettes. Your palette is like your toolbox; it should contain a variety of colors that work well together. Consider creating a limited palette for your landscape paintings. This means selecting a few colors that can be mixed to create a broad range of shades and tones. For example, a palette consisting of titanium white, ultramarine blue, cadmium yellow, and burnt sienna can give you the flexibility to create stunning skies, lush greens, and earthy browns—all essential for landscapes.
Now, mixing colors is an art in itself. It’s not just about slapping some paint together; it’s about understanding how they interact. When mixing colors, start with the primary colors—red, blue, and yellow. From there, you can create secondary colors (green, orange, purple) and tertiary colors (like red-orange or blue-green). Remember, a little goes a long way! Adding too much of one color can muddy your painting, so always mix gradually and test on a scrap piece of paper first.
Another exciting aspect of color in landscape painting is the use of warm and cool colors. Warm colors, such as reds, oranges, and yellows, can bring a sense of energy and warmth to your painting, making elements seem closer. In contrast, cool colors like blues and greens can create a sense of calm and distance. By strategically using warm and cool colors, you can guide the viewer’s eye through your landscape, creating a sense of depth and dimension.
Understanding how to balance warm and cool colors can be a game-changer in your landscape paintings. For instance, if you’re painting a sunset over a mountain range, you might use warm colors for the sky and cool colors for the mountains in the background. This contrast not only enhances the visual appeal but also adds a layer of realism to your work. It’s like creating a conversation between the elements in your painting!
One of the most effective ways to create depth in your landscapes is through color gradients and tonal variations. By gradually transitioning from lighter to darker shades, you can simulate the effects of distance and perspective. For example, foreground elements can be painted in brighter and more saturated colors, while background elements can be rendered in softer, muted tones. This technique draws the viewer into the painting, making them feel as though they are stepping into the scene.
Lastly, let’s not forget about color harmony. Achieving harmony in your landscape painting is crucial for creating a cohesive and visually appealing piece. You can achieve this through complementary and analogous color schemes. For example, if you choose a warm palette for your sunset, consider using cooler tones for the foreground elements, like trees or rocks. This interplay creates a dynamic balance that keeps the viewer engaged.
In conclusion, choosing the right colors for your landscape painting is not just about picking pretty shades; it’s about understanding the emotional and visual impact of colors. By mastering color theory, experimenting with palettes, and applying warm and cool tones effectively, you can elevate your landscape paintings to new heights. So grab your brushes and let your creativity flow—your canvas is waiting!
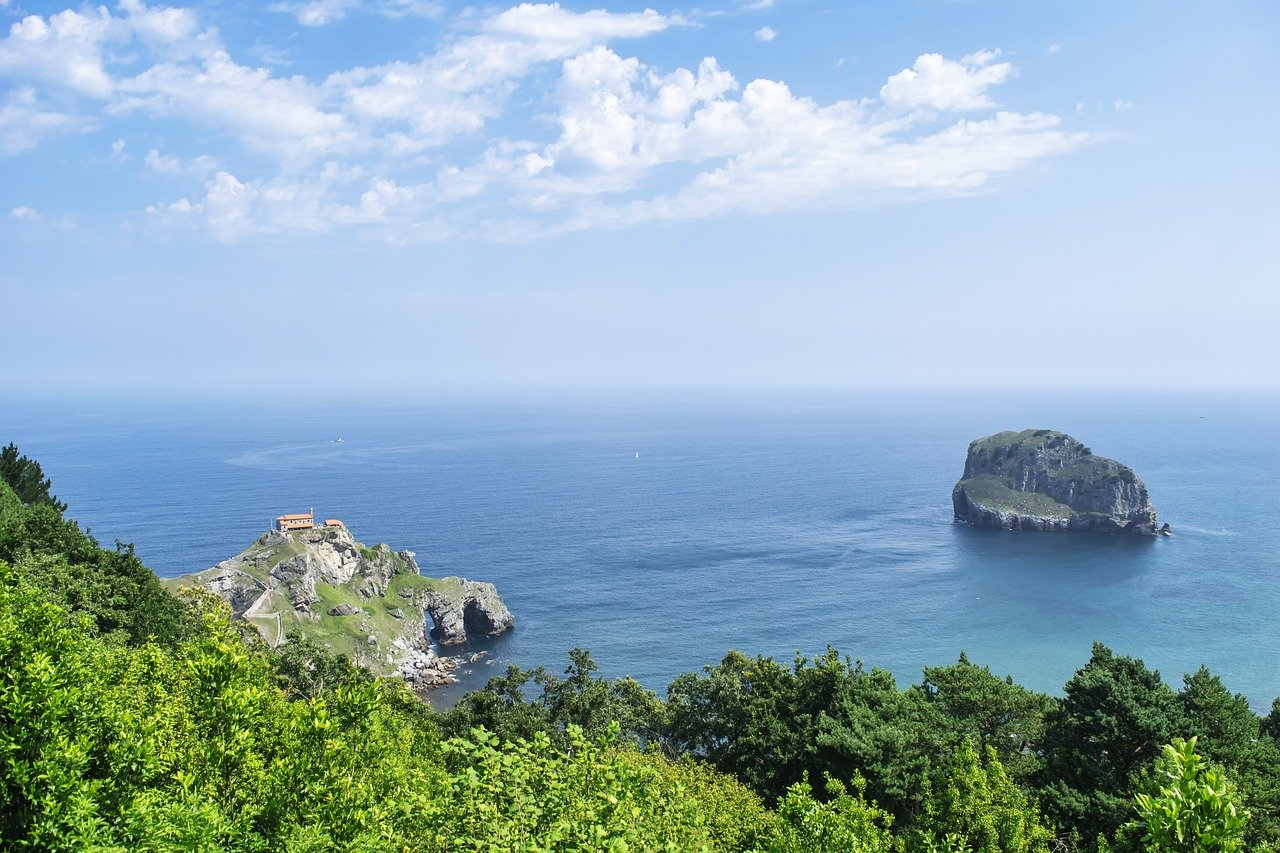
Warm vs. Cool Colors
When it comes to painting landscapes, understanding the distinction between warm and cool colors is essential. These two categories of colors evoke different emotions and can dramatically alter the viewer's perception of depth and atmosphere in your artwork. Warm colors, such as reds, oranges, and yellows, tend to create a sense of energy and vibrancy. They can make elements in your painting appear closer, inviting the viewer to feel the warmth of the sun or the heat of a summer day. On the other hand, cool colors like blues, greens, and purples evoke calmness and tranquility. They often suggest distance and can create an illusion of depth, making objects recede into the background.
Imagine standing in a sunlit meadow with flowers blooming in shades of orange and yellow. The warmth of those colors draws you in, making you feel the heat of the day. Now, picture the same scene but with a backdrop of distant mountains painted in cool blues and greens. Suddenly, that same meadow feels expansive, with the cool colors suggesting a vast distance beyond the immediate foreground. This interplay of warm and cool colors is what makes landscape painting so dynamic and engaging.
To effectively use warm and cool colors in your landscapes, consider the following tips:
- Balance is Key: A successful landscape often incorporates both warm and cool colors. Use warm colors to highlight focal points and create interest, while cool colors can help to establish depth and background.
- Context Matters: Think about the time of day and the mood you want to convey. For instance, a sunrise or sunset scene will naturally lean towards warm colors, while a misty morning might call for cooler tones.
- Experiment: Don't be afraid to mix warm and cool colors on your palette. Sometimes, unexpected combinations can yield stunning results!
In conclusion, mastering the use of warm and cool colors will not only enhance your landscape paintings but also deepen the emotional connection they create with viewers. By thoughtfully applying these colors, you can bring your landscapes to life, guiding the viewer's eye and evoking the desired feelings with each brushstroke.
Q: How do I know when to use warm or cool colors in my landscape painting?
A: Consider the mood you want to create. Warm colors are great for lively, energetic scenes, while cool colors work well for serene, calm settings. Observing nature can also guide your choices!
Q: Can I use both warm and cool colors in the same painting?
A: Absolutely! Combining both can create a more dynamic composition. Just be mindful of how they interact to maintain balance and harmony in your artwork.
Q: How can I practice using warm and cool colors?
A: Try creating small studies focusing solely on warm or cool palettes. This will help you understand their effects and how they can be used to enhance your landscapes.
Creating Depth with Color
Creating a sense of depth in your landscape paintings is akin to inviting the viewer into a three-dimensional world. When you master the use of color gradients and tonal variations, your artwork transforms from a mere depiction of scenery into a captivating visual journey. Think of color as a tool that can manipulate perception—just as a magician uses tricks to create illusions, you can use color to create layers and distance in your landscapes.
One of the most effective techniques for achieving depth is the use of color gradients. By gradually shifting from one color to another, you can simulate the way light interacts with objects in nature. For instance, when painting a mountain range, the colors at the forefront should be richer and more saturated, while those in the background should become lighter and more muted. This not only creates an illusion of distance but also adds a sense of realism to your work.
Consider the following points when applying color gradients:
- Foreground Colors: Use vibrant and saturated hues to draw attention to the foreground elements.
- Midground Colors: Introduce slightly muted tones that still maintain some vibrancy to bridge the foreground and background.
- Background Colors: Employ cooler and lighter shades, often leaning towards blues and grays, to suggest distance.
Another crucial aspect of creating depth is understanding tonal variations. This technique involves altering the lightness or darkness of your colors to create contrast and highlight different elements within your painting. Imagine a serene lake reflecting the sky; the water closest to you may appear darker, while the sections further away become lighter as they reflect the distant horizon. By skillfully manipulating tonal values, you can guide the viewer's eye and enhance the spatial relationships within your landscape.
To further illustrate how color can create depth, consider a simple table that outlines how different colors can evoke various distances:
| Distance | Color Choice | Tonal Variation |
|---|---|---|
| Foreground | Warm Colors (Reds, Oranges) | Dark and Rich |
| Midground | Neutral Colors (Browns, Greens) | Medium Tone |
| Background | Cool Colors (Blues, Grays) | Light and Soft |
Finally, don’t forget the emotional impact of your chosen colors. The right color palette can evoke feelings of tranquility, excitement, or even mystery, all of which contribute to the overall depth of your landscape painting. For example, a sunset scene with warm oranges and reds can feel inviting and warm, while a misty morning with cool blues and grays might evoke a sense of calm or solitude.
In conclusion, mastering the art of creating depth with color is a powerful skill that can elevate your landscape paintings. By understanding and applying color gradients, tonal variations, and emotional color choices, you can create stunning, immersive landscapes that draw viewers in and leave a lasting impression.
- What is the importance of color in landscape painting? Color sets the mood and can create a sense of depth and realism in your artwork.
- How can I practice creating depth with color? Experiment with different color palettes and gradients in your sketches to see how they affect depth perception.
- Are there specific colors I should avoid for backgrounds? It's generally best to avoid overly bright or saturated colors for backgrounds, as they can pull attention away from the focal point.
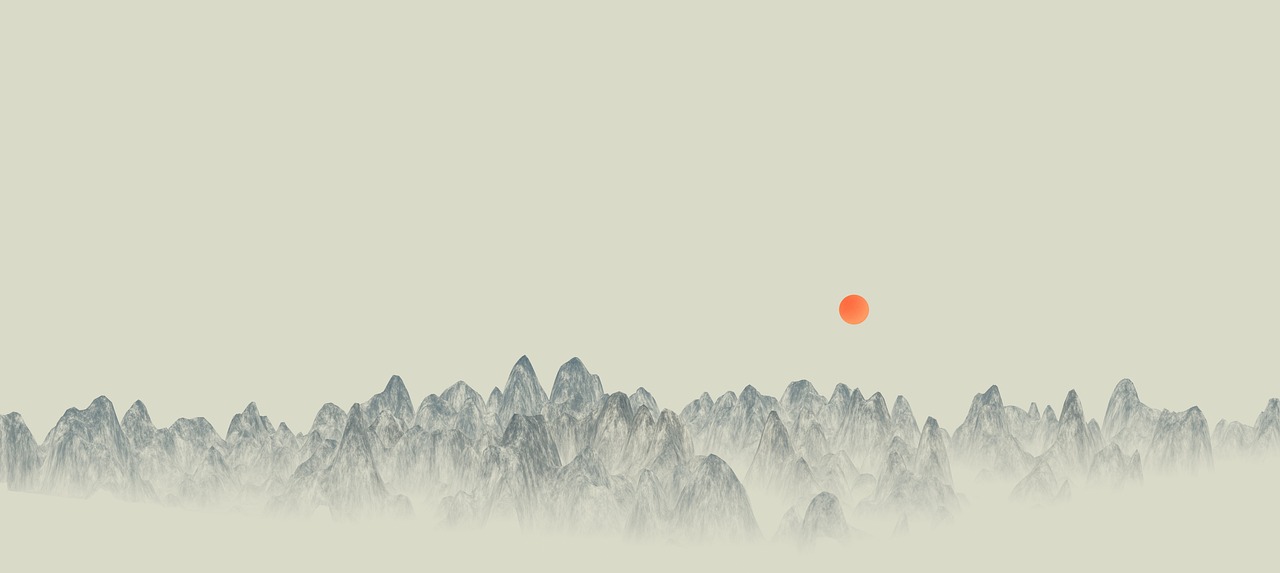
Color Harmony in Landscapes
When it comes to landscape painting, achieving color harmony is essential for creating a visually appealing piece that resonates with viewers. Think of color harmony as the melody in a song; it brings all the elements together, creating a cohesive and engaging experience. To achieve this, artists often rely on complementary and analogous color schemes. But what do these terms really mean, and how can they be applied effectively in your artwork?
Complementary colors are those that are opposite each other on the color wheel. For example, blue and orange or red and green. When used together, they can create a striking contrast that makes each color pop, adding vibrancy and energy to your landscape. Imagine a sunset where the fiery reds and oranges contrast against the cool blues of the sky. This dynamic interplay not only draws the eye but also evokes strong emotional responses.
On the other hand, analogous colors sit next to each other on the color wheel, like blue, blue-green, and green. These colors blend seamlessly, creating a sense of harmony and tranquility. Using analogous colors can be particularly effective in landscapes, as they mimic the natural gradients found in nature. For instance, a serene forest scene might use various shades of green and yellow to depict the lush foliage, creating a peaceful atmosphere.
To further illustrate the importance of color harmony, consider the following table that summarizes the characteristics of both complementary and analogous color schemes:
| Color Scheme | Characteristics | Examples |
|---|---|---|
| Complementary | High contrast, vibrant, eye-catching | Blue and Orange, Red and Green |
| Analogous | Soft, harmonious, cohesive | Blue, Blue-Green, Green |
In addition to understanding these color schemes, it’s essential to experiment with them in your paintings. Don’t be afraid to play around with different combinations and observe how they interact with one another. You might discover that a seemingly odd pairing creates a stunning effect. Remember, art is all about exploration and expression!
Moreover, consider the overall mood you want to convey in your landscape. Colors can evoke feelings—warm colors like reds and yellows can create excitement and warmth, while cool colors like blues and greens can induce calmness and serenity. By thoughtfully choosing your color palette based on the emotions you wish to express, you can greatly enhance the impact of your artwork.
In conclusion, mastering color harmony in landscapes is a journey of discovery. By understanding and applying complementary and analogous color schemes, you can create stunning, cohesive pieces that capture the beauty of nature and resonate with your audience. So grab your brushes, experiment with colors, and let your creativity flow!
- What is color harmony? Color harmony refers to the pleasing arrangement of colors in a painting that creates a sense of balance and aesthetic appeal.
- How do I choose a color palette for my landscape painting? Consider the mood you want to convey, then select complementary or analogous colors that enhance that emotion.
- Can I mix different color schemes in one painting? Absolutely! Mixing color schemes can add complexity and interest to your artwork, just be mindful of how they interact.
- What tools can I use to understand color relationships? Color wheels, swatches, and digital tools can help you visualize and experiment with different color combinations.

Brush Techniques for Texture
When it comes to painting landscapes, the texture you create can make or break your artwork. Imagine standing in front of a breathtaking view; the rough bark of a tree, the soft petals of a flower, or the rippling surface of a lake all have distinct textures that evoke emotions and memories. To capture these sensations on canvas, mastering various brush techniques is essential. Let’s dive into some methods that can help you achieve stunning texture in your landscape paintings.
One of the most effective ways to create texture is through dry brushing. This technique involves using a dry brush with minimal paint to lightly drag across the surface of your canvas. This method is perfect for depicting rough surfaces like rocks or tree bark. The key is to use a stiff brush and a light touch, allowing the underlying layers of paint to show through, which adds depth and interest to your piece.
Another technique to consider is stippling, which consists of applying small dots or dabs of paint to create a textured effect. This technique can be especially useful for painting foliage or distant mountains. By varying the size and density of your dots, you can create a sense of depth and dimension. For instance, larger, denser dots can represent closer objects, while smaller, more spaced-out dots can depict those that are further away.
Don't overlook the power of glazing as well. Glazing involves applying a thin, transparent layer of paint over a dried layer. This technique can enrich colors and add subtle textures, creating a luminous effect that can bring your landscapes to life. For example, a glaze of yellow over a blue sky can create a stunning sunset effect, while multiple layers can build a rich, complex surface that captures the eye.
To help visualize these techniques, here’s a quick comparison of some popular brush techniques and their textures:
| Technique | Description | Best For |
|---|---|---|
| Dry Brushing | Using a dry brush to create a rough texture. | Tree bark, rocks |
| Stippling | Applying small dots of paint for texture. | Foliage, distant landscapes |
| Glazing | Applying a transparent layer over dried paint. | Enhancing colors, creating depth |
Lastly, let’s not forget about the importance of layering. Building up layers of paint not only adds texture but also enhances the overall richness of your landscape. Start with a base layer of color and gradually add more details using different brush techniques. This approach allows you to create a dynamic surface that invites the viewer to explore your work more closely.
In conclusion, mastering brush techniques for texture is a game changer in landscape painting. Each method offers unique possibilities to express the beauty of nature. So grab your brushes and start experimenting with these techniques to bring your landscapes to life!
- What is the best brush for creating texture in landscape painting? A stiff bristle brush is often recommended for techniques like dry brushing, while softer brushes work well for glazing.
- Can I use these techniques with acrylic paints? Absolutely! These techniques can be effectively applied with acrylics, oils, or watercolors.
- How do I know which technique to use for a specific texture? It often comes down to experimentation. Try different techniques on a practice canvas to see which one best captures the texture you want.
Lighting and Atmosphere
When it comes to painting landscapes, lighting is not just an afterthought; it’s one of the most critical elements that can make or break your artwork. Imagine standing in a serene forest at dawn, the soft golden light filtering through the trees, casting long shadows that dance across the ground. Capturing this essence in your painting can evoke emotions and transport viewers right into that moment. But how do you achieve that magical effect on canvas?
First, let’s talk about the different lighting conditions you might encounter. Each time of day offers a unique palette and mood. For instance, the vibrant hues of a sunset can create a sense of warmth and tranquility, while the stark light of midday might lend an air of harshness to your scene. To master these variations, you can follow these essential tips:
- Observe the Light: Spend time outdoors observing how light interacts with the landscape. Notice the changes as the sun moves across the sky.
- Use Shadows: Shadows can add depth and dimension. Experiment with their placement to enhance the three-dimensionality of your painting.
- Highlighting Techniques: Use lighter tones to create highlights where the light hits the surfaces, which can dramatically enhance realism.
Next, let’s explore how to effectively capture natural light in your landscapes. One of the best ways to do this is by using a technique called chiaroscuro, which is the contrast of light and shadow. This technique helps create a sense of volume and depth, making your painting feel more dynamic. For example, if you are painting a mountain range, consider how the rising sun would illuminate one side while casting the other in shadow.
Another aspect to consider is the atmospheric effects in your landscape. These effects can range from foggy mornings to hazy afternoons, each contributing to the overall mood of your artwork. To depict these effects, you can use a combination of color gradients and soft brush strokes. For instance, to create a foggy atmosphere, you might blend soft grays and whites, allowing the colors to merge seamlessly, which can evoke a sense of mystery and calm.
Moreover, understanding how atmospheric perspective works is crucial. Objects in the distance appear lighter and less saturated due to the atmosphere between them and the viewer. This can be achieved by gradually lightening your colors as you move back in your composition. The result? A stunning depth that draws the viewer’s eye into the landscape.
Lastly, don’t underestimate the power of color temperature in conveying mood. Warm colors (like reds and oranges) can evoke feelings of warmth and comfort, while cool colors (like blues and purples) can create a sense of calm or distance. By strategically placing these colors in your landscape, you can guide the viewer's emotional response and make your painting resonate on a deeper level.
In summary, mastering lighting and atmosphere in landscape painting is about observation, practice, and experimentation. By understanding how light interacts with your subject and how to manipulate color and shadow, you can create breathtaking landscapes that not only capture a scene but also evoke the feelings associated with it.
- What is the best time of day to paint landscapes? The golden hour, just after sunrise or before sunset, provides soft, warm light that enhances colors and creates beautiful shadows.
- How can I practice capturing light in my paintings? Spend time outdoors sketching or painting en plein air to observe how light changes throughout the day.
- What colors should I use for different lighting conditions? Use warmer tones for sunset or sunrise, and cooler tones for midday or overcast conditions to reflect the atmosphere accurately.
Capturing Natural Light
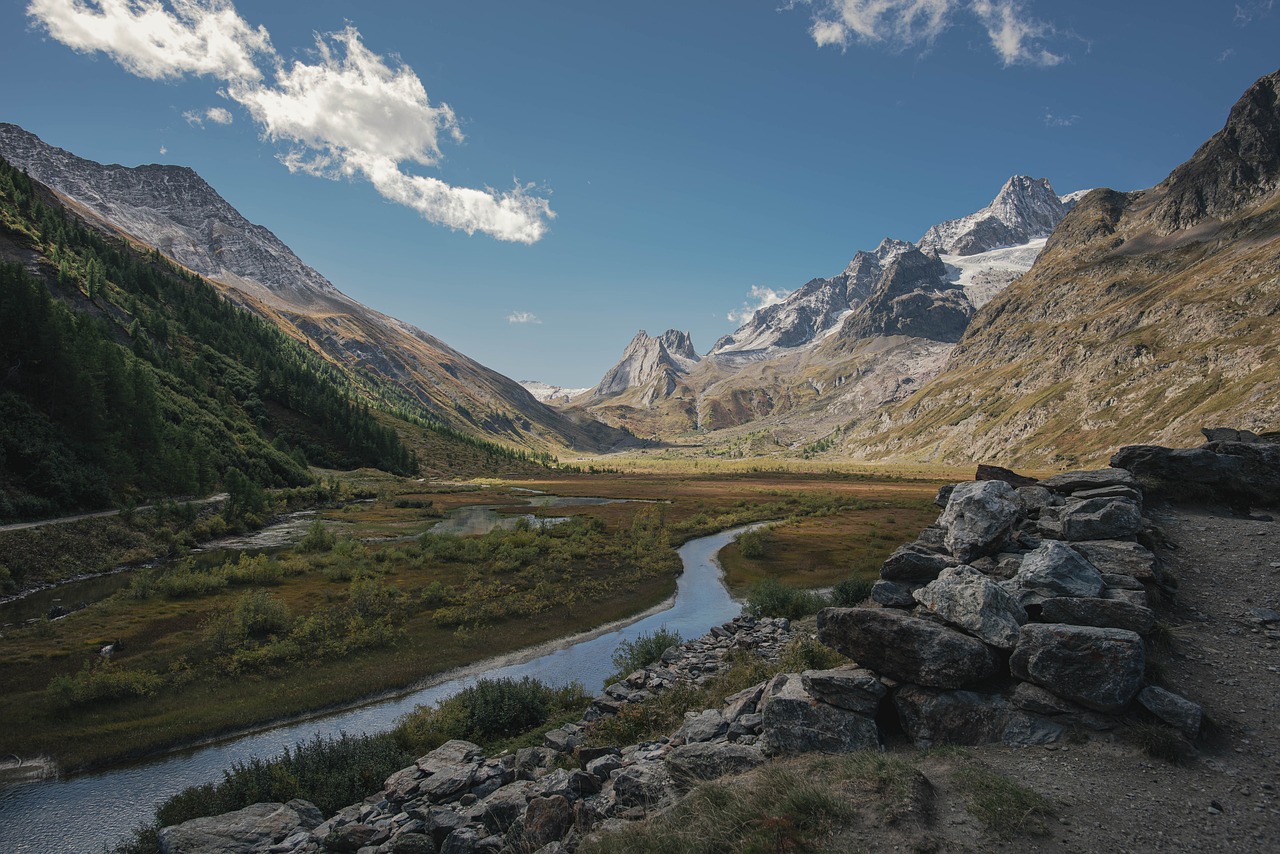
Capturing natural light in your landscape paintings is akin to capturing the very essence of the scene before you. It's not just about the colors you choose; it's about how those colors interact with light and shadow. Imagine standing in a sun-drenched meadow, feeling the warmth on your skin and watching how the light dances across the grass. This sensation is what you want to translate onto your canvas. To begin, observe the way light affects the landscape at different times of the day. Early mornings and late afternoons provide a soft, golden light that can transform ordinary scenes into extraordinary ones.
One of the best techniques for capturing natural light is to pay attention to the shadows they create. Shadows can add depth and dimension to your artwork, making it feel more realistic. For instance, consider how the shadows of trees stretch across a field during sunset. These shadows are not just dark patches; they are rich in color and can even reflect the hues of the sky. When painting, use a mix of colors to represent shadows rather than simply using black or grey. This approach will enhance the vibrancy of your work.
Additionally, don't forget about highlights. These are the areas where light hits the landscape directly, creating a striking contrast with the shadows. When painting highlights, think of them as the 'sparkle' of your artwork. Use a lighter tone of your base color, or even a touch of white, to make these areas pop. For example, the sunlight glistening on a lake's surface can be depicted with small, swift brush strokes that mimic the shimmer of light.
To effectively capture the nuances of natural light, consider the following techniques:
- Observe the Environment: Spend time outdoors, studying how light changes the landscape. Take notes or create quick sketches to capture your observations.
- Use a Limited Palette: Limit your color choices to help maintain harmony and focus on light effects. This can simplify your process and enhance the overall impact of your painting.
- Experiment with Different Times of Day: Each time of day offers unique lighting conditions. Morning light is soft, while midday light is harsh and bright. Evening light can create dramatic shadows.
Finally, practice is key. The more you paint with an emphasis on capturing natural light, the more intuitive it will become. Don’t be afraid to experiment and make mistakes. Each canvas is an opportunity to learn and grow as an artist. Remember, the magic of natural light can turn a simple landscape into a breathtaking masterpiece, so embrace it fully!
Q: How can I practice capturing natural light effectively?
A: One effective way to practice is to set up a still life outdoors at different times of the day. Observe how the light changes and take notes on the colors you see. You can also take photographs to reference later.
Q: What colors should I use for shadows?
A: Instead of using black or grey, try using darker shades of the colors already present in your landscape. For example, use darker greens for foliage shadows or deep blues for water shadows.
Q: How do I know when to add highlights?
A: Look for areas that are directly illuminated by light. If a part of your landscape appears brighter than the rest, it's a good candidate for highlights. Adding them can significantly enhance the three-dimensionality of your painting.

Creating Atmospheric Effects
When it comes to painting landscapes, capturing atmospheric effects can transform a simple scene into a breathtaking masterpiece. Think about the last time you stood outside and marveled at how the light shifted during different times of the day. The way the sun casts shadows, how clouds create a blanket of softness, or how fog envelops the world around you—all of these elements can add a layer of depth and intrigue to your artwork. In this section, we will explore techniques that allow you to depict these atmospheric effects, making your landscapes not just a representation of a place, but an experience that resonates with the viewer.
One of the most effective ways to create atmospheric effects is through the use of color and value. By adjusting the brightness and saturation of your colors, you can simulate the way light interacts with the atmosphere. For instance, distant mountains often appear more muted and cooler in color compared to those in the foreground. This is due to the atmospheric perspective, a technique that artists have used for centuries to create the illusion of depth. When painting distant objects, consider using lighter and cooler hues, while reserving warmer and more saturated colors for elements that are closer to the viewer.
Another essential technique is the incorporation of fog and haze. To achieve this effect, you can use a dry brush technique or a glazing method with transparent paints. Start by laying down a base layer of color for your landscape, and once it's dry, lightly brush on a thin layer of white or a very light color to create the illusion of fog. This will soften the edges of your shapes and add a mystical quality to your painting. Remember, the key is to build up layers gradually, allowing the underlying colors to show through, which will create a more realistic effect.
Additionally, shadow play can significantly enhance the atmosphere of your landscape. Shadows are not just dark areas; they can convey a sense of time and mood. For example, long, soft shadows during the golden hour can evoke feelings of warmth and tranquility, while sharp, dark shadows in the midday sun can create a sense of drama and tension. To paint effective shadows, observe how they fall in real life and replicate that in your artwork. Use a mix of colors that reflect the local environment rather than just black or gray; this will add richness and complexity to your shadows.
To summarize, creating atmospheric effects in landscape painting involves a combination of color manipulation, layering techniques, and a keen observation of natural light. By employing these methods, you can invite viewers into your paintings, allowing them to feel the atmosphere you’ve captured on canvas. Remember, the goal is not just to depict a scene, but to evoke emotions and transport the audience to that moment in time.
- What materials do I need to create atmospheric effects?
To create atmospheric effects, you’ll need a good set of paints (acrylics or oils), various brushes, a palette for mixing colors, and canvases. Additionally, a spray bottle with water can help with blending and softening edges. - How can I practice creating depth in my landscapes?
Start by studying photographs of landscapes and try to replicate the depth you see. Pay attention to how colors change with distance and practice painting from life to improve your skills. - Can I use digital tools to create atmospheric effects?
Absolutely! Digital painting software offers various brushes and effects that can mimic traditional techniques. Experiment with layers and blending modes to achieve realistic atmospheric effects.
Final Touches and Finishing Techniques
When it comes to landscape painting, the final touches can truly make a difference, transforming your artwork from merely good to absolutely stunning. After you’ve invested time and effort into your painting, it’s crucial to pay attention to those last details that can enhance the overall appeal of your piece. Think of these final touches as the cherry on top of a delicious cake; they can elevate the entire experience and draw viewers in.
One of the most important finishing techniques is varnishing. Varnish serves multiple purposes: it protects your painting from dust and UV light, enhances the colors, and adds a beautiful sheen that can make your artwork pop. There are different types of varnishes available, including matte, satin, and gloss. Each has its own effect on the finished piece, so choose wisely based on the mood you want to convey. For example, a glossy finish might be perfect for a vibrant sunset, while a matte finish could suit a tranquil, foggy landscape.
Another aspect to consider is framing. A well-chosen frame can complement your painting and enhance its appeal. When selecting a frame, consider the colors and style of your artwork. For instance, a rustic wooden frame might work beautifully with a pastoral scene, while a sleek, modern frame could elevate a contemporary landscape. Don’t forget to measure your painting accurately before purchasing a frame; the right fit is essential to showcase your work properly.
Additionally, signing your artwork is a vital step that many artists overlook. A signature not only personalizes your piece but also establishes your identity as an artist. Choose a spot that doesn’t detract from the composition, yet remains visible. Some artists prefer to sign in the corner, while others opt for a more discreet location. Whatever your choice, make sure it’s consistent across your body of work.
Finally, consider creating a certificate of authenticity for your artwork, especially if you plan to sell it. This document adds value and assures potential buyers of the painting’s originality. It should include details such as the title, date of creation, and a brief description of the piece. You can also include a small photo of the artwork for reference.
In summary, the final touches and finishing techniques are essential for any landscape painting. By varnishing, framing, signing, and providing a certificate of authenticity, you can significantly enhance the visual appeal and value of your artwork. Remember, these details are not just afterthoughts; they are integral to presenting your masterpiece to the world.
- What type of varnish should I use for my landscape painting? It depends on the desired finish. Gloss varnish enhances colors and adds shine, while matte varnish offers a more subdued look.
- How do I choose the right frame for my painting? Consider the style and colors of your artwork. A frame should complement, not overpower, your painting.
- Is it necessary to sign my artwork? Yes, signing adds a personal touch and establishes your identity as an artist.
- What should be included in a certificate of authenticity? Include the title, date, description, and optionally a photo of the artwork.
Frequently Asked Questions
- What is the rule of thirds in landscape painting?
The rule of thirds is a composition guideline that suggests dividing your canvas into nine equal parts with two horizontal and two vertical lines. By placing key elements along these lines or at their intersections, you create a more balanced and engaging scene, drawing the viewer's eye naturally across the painting.
- How can I choose the right colors for my landscape?
Choosing the right colors involves understanding color theory and how different hues interact. Start by selecting a palette that reflects the mood you want to convey. You can experiment with warm colors like reds and yellows for a vibrant feel, or cool colors like blues and greens for a calm atmosphere. Mixing colors to achieve the desired shades is key to enhancing your landscape's emotional impact.
- What brush techniques can I use to add texture?
There are several brush techniques to create texture in your landscape paintings. For example, using a dry brush technique can give a rough, textured appearance, while a wet-on-wet technique allows colors to blend seamlessly. Experiment with different strokes, such as stippling or scumbling, to find the effects that best enhance your artwork.
- How does lighting affect my landscape painting?
Lighting is crucial in landscape painting as it sets the mood and defines the atmosphere. Different times of day and weather conditions can dramatically alter how colors appear. By studying natural light and incorporating shadows and highlights, you can create depth and realism, making your landscapes come alive.
- What are some tips for capturing natural light?
To effectively capture natural light, observe how it interacts with your landscape. Pay attention to the direction of light, the shadows it casts, and how it highlights certain areas. Using a limited palette can help you focus on the light's effects rather than getting lost in details. Remember, the goal is to reflect the transient beauty of natural light in your work.
- How can I create atmospheric effects in my paintings?
Creating atmospheric effects like fog or haze involves using softer edges and lighter colors to suggest distance. Gradually blend colors to depict these effects, and consider layering to build depth. Techniques such as glazing can also help you achieve a sense of atmosphere, making your landscapes feel more immersive.
- What are the final touches I should consider for my artwork?
Final touches can include varnishing to protect your painting and enhance its vibrancy, as well as framing to present your work beautifully. Additionally, consider adding highlights or adjusting contrasts to elevate the overall impact of your piece. These finishing techniques can transform a good painting into a stunning one.


