How to Draw Cartoon Characters: A Step-By-Step Guide
Have you ever looked at a cartoon character and thought, “I wish I could draw like that!”? Well, you’re in luck! This guide provides a comprehensive approach to drawing cartoon characters, from basic shapes to advanced techniques, helping both beginners and experienced artists improve their skills. Whether you’re aiming to create your own comic strip or simply want to doodle fun characters in your notebook, this step-by-step guide will walk you through the essential elements of cartooning. So grab your pencils and let’s dive into the colorful world of cartoon character creation!
Every cartoon character starts with basic shapes. Think of it like building a house; you wouldn’t start with the roof, right? You need a solid foundation! In this section, we’ll explore how to break down complex figures into simple forms. For instance, a character's head can often be represented by a circle, while their body can be a rectangle or oval. By mastering these basic shapes, you’ll find the drawing process easier and more manageable, regardless of your skill level. Remember, even the most intricate designs can be traced back to these fundamental shapes!
The tools you use can significantly impact your drawing experience. Imagine trying to paint a masterpiece with a broken brush! In this section, we’ll discuss various materials, including pencils, pens, and digital tools. Each tool has its unique advantages, and selecting the right one can enhance your cartooning journey. For traditional drawing, a good set of pencils with varying hardness can help you achieve different effects. On the digital front, software like Adobe Illustrator or Procreate can open up a new realm of possibilities for your artwork.
Different pencil techniques can enhance your cartoon drawings. Think of your pencil as a magic wand that can bring your characters to life on paper! This part covers shading, line work, and sketching methods. Shading adds depth, making your characters pop off the page. By varying your pressure and angle, you can create stunning contrasts that make your drawings feel more dynamic. Additionally, mastering line work—how you draw the outlines—can greatly affect your character's personality. A thick, bold line might suggest strength, while a delicate, thin line could convey fragility.
Understanding shading is crucial for adding depth to your cartoons. Without it, your characters might look flat and lifeless. In this subsection, we’ll introduce basic shading techniques that can make your characters appear more three-dimensional and dynamic. For example, consider where your light source is coming from; this will dictate where the shadows fall. Practice creating gradients to transition smoothly between light and dark areas, giving your characters a sense of volume.
Line variation can add personality to your drawings. Just like how different voices can convey different emotions, the thickness and style of your lines can express various character traits. This section explains how to manipulate line thickness and style to create unique character expressions and movements. For instance, a quick, jagged line might suggest excitement or chaos, while a smooth, flowing line could indicate calmness or grace. Experimenting with these variations can lead to more engaging and lively characters!
Digital platforms offer unique advantages for cartooning. Here, we explore popular software and applications that can enhance your drawing process and allow for easy edits and experimentation. Programs like Clip Studio Paint and Krita are specifically designed for artists, providing tools that mimic traditional drawing methods while also offering innovative features like layering and undo options. With digital tools, you can easily adjust colors, resize elements, and even animate your characters, making the creative process exciting and versatile!
Creating memorable cartoon characters involves understanding design principles. Think of your character as a brand; they need to stand out and be easily recognizable. This section focuses on character traits, proportions, and unique features that contribute to effective and engaging designs. Whether it’s a quirky hairstyle or an unusual outfit, these elements can help your character resonate with audiences. Remember, the goal is to create characters that not only look good but also tell a story!
Even cartoon characters need a sense of proportion. This part discusses how to maintain balance and scale in your designs, ensuring your characters are visually appealing and believable. For example, a character with a large head and small body can convey a sense of cuteness or innocence, while a tall, lanky character might suggest humor or awkwardness. Understanding these proportions can help you create characters that feel authentic, even in their exaggerated forms.
Color plays a vital role in character design. It’s like the seasoning in a dish; the right colors can elevate your character from bland to brilliant! This section introduces color theory basics, helping you choose palettes that reflect your character's personality and enhance their visual impact. Warm colors like reds and yellows can evoke excitement, while cool colors like blues and greens can create a sense of calm. Experimenting with color combinations can lead to unique and captivating character designs!
Once your characters are designed, it's time to animate them. This section covers techniques for creating movement and expression, ensuring your cartoon characters resonate with audiences. Think of your character as an actor; they need to convey emotions and actions convincingly. This is where the fun really begins!
Facial expressions convey emotions and personality. This part delves into how to draw various expressions, allowing your characters to connect with viewers on an emotional level. From joy to sadness, mastering these expressions will make your characters relatable and engaging. Practice drawing different emotions, and soon you’ll be able to capture the essence of feelings in just a few lines!
Dynamic poses can add excitement to your drawings. This section teaches how to position your characters in action, making them feel alive and engaging in their environment. Think of how a dancer moves; their body tells a story through every twist and turn. By studying movement and practicing various poses, you can create characters that not only look good but also feel like they’re in motion, ready to leap off the page!
- What materials do I need to start drawing cartoons? You can start with just a pencil and paper, but investing in good quality materials like colored pencils, markers, or digital tools can enhance your experience.
- Can I learn to draw cartoons if I’m a beginner? Absolutely! Everyone starts somewhere. With practice and patience, you can develop your skills over time.
- How do I find my unique cartoon style? Experiment with different techniques and styles. Over time, you’ll discover what resonates with you and develop your own unique voice in cartooning.
Understanding Basic Shapes
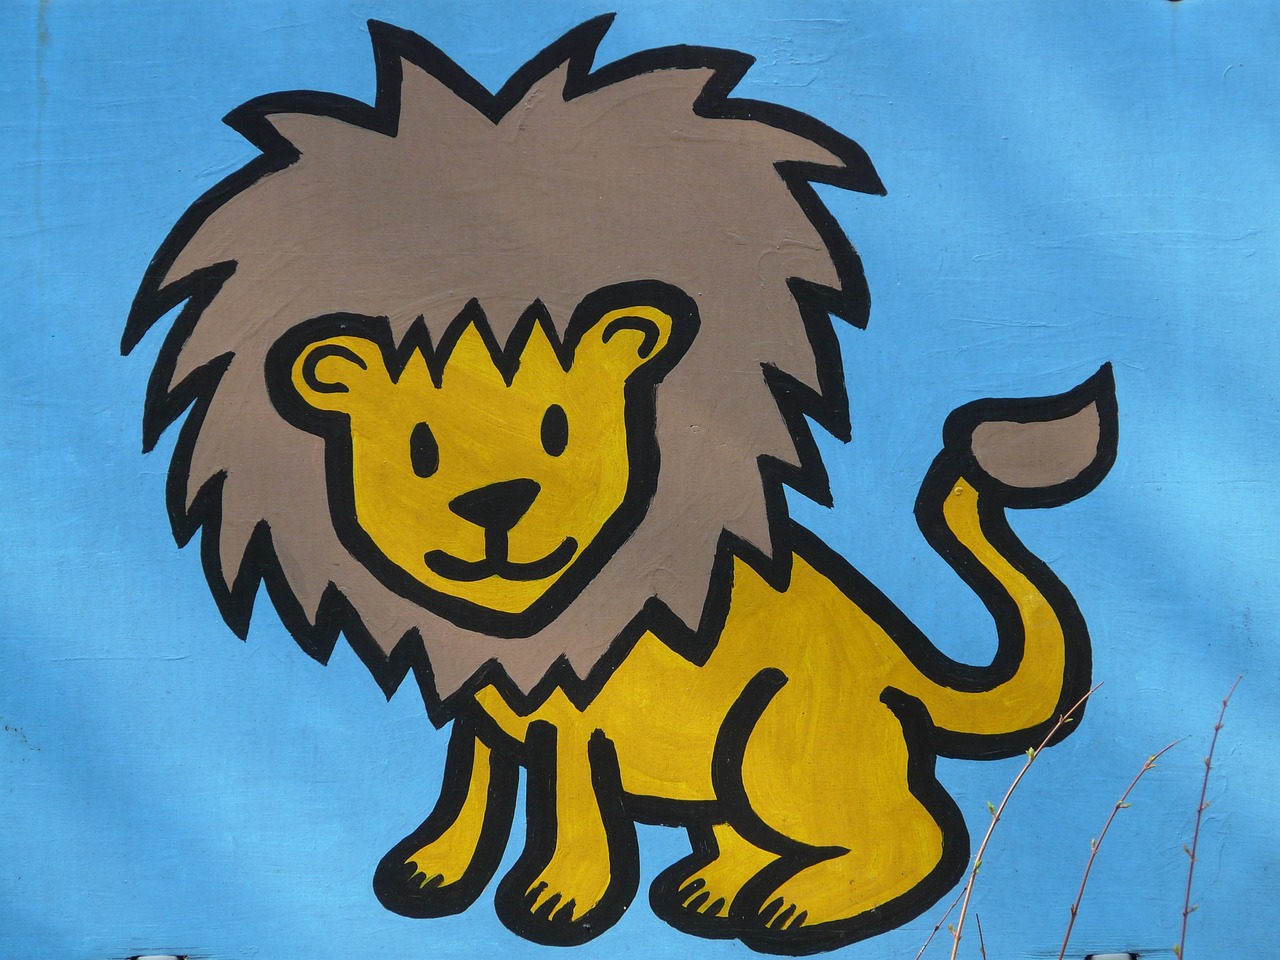
Every cartoon character starts with basic shapes. Think of it as the foundation of a house; without a solid base, everything else could crumble. When you break down complex figures into simple forms, you make the drawing process easier and more manageable for artists of all levels. By starting with basic shapes like circles, squares, and triangles, you can create a sturdy framework that will support your character's unique features and personality.
Imagine a cartoon character as a sculpture made from clay. Before you can add the intricate details, you need to form the basic structure. For instance, a round head can be achieved by drawing a circle, while the body can be represented by an oval or rectangle. This approach not only simplifies the drawing process but also allows you to focus on proportions and placement.
Here’s a quick breakdown of how you can use basic shapes to create your cartoon characters:
- Circle: Great for heads and limbs.
- Square: Useful for creating strong, sturdy characters.
- Triangle: Perfect for dynamic poses or characters with sharp features.
Once you have your basic shapes down, it’s time to refine your character. Start by sketching the outline of your character using these shapes as guides. Don’t worry about making it perfect on the first try; the beauty of drawing is in the process. You can always erase and adjust until you get it just right. Remember, even the most skilled artists started with simple shapes!
Another key point is to pay attention to proportions. Just like in real life, the size and relationship between different parts of your character can greatly affect their overall look and feel. For example, a character with a large head and small body might convey a sense of innocence or playfulness, while a character with a large body and small head might look more imposing or comical. Keeping these proportions in mind will help you create characters that resonate with your audience.
In addition to proportions, consider the style of your character. Are they cartoonishly exaggerated or more realistic? The basic shapes you choose will influence the overall style of your character. For instance, using softer, rounder shapes can create a friendly and approachable character, while sharper angles and lines can evoke a sense of danger or edginess. This is where your creativity can truly shine!
In summary, understanding and utilizing basic shapes is essential for any aspiring cartoonist. It allows you to simplify the drawing process and focus on what truly matters: bringing your characters to life. So grab your pencil, start sketching, and let those shapes guide you on your artistic journey!
Choosing the Right Tools
When it comes to drawing cartoon characters, the tools you choose can make a world of difference. Think of it like cooking; having the right ingredients and utensils can elevate a simple recipe into a culinary masterpiece. Similarly, the right drawing tools can transform your ideas into vibrant, lively characters. So, what should you consider when picking your arsenal?
First off, let's talk about traditional tools. Pencils are often the go-to choice for many artists, and for good reason. They allow you to sketch lightly and make adjustments as you go along. A range of pencils, from hard (H) to soft (B), provides a variety of line qualities. For instance, a 2H pencil is great for fine, light lines, while a 4B pencil can create bold, dark strokes. You might want to have a few different grades on hand to give your drawings depth and texture.
Next, consider the inking tools. Once you're satisfied with your pencil sketch, inking is the next step to bring your character to life. Fine liners, brush pens, and even traditional ink and quills can create different effects. Each tool has its own personality; for example, a brush pen can give you beautiful, fluid lines, while a fine liner offers precision. Experimenting with these can help you find the style that resonates with you.
Now, let's not forget about coloring tools. Whether you prefer markers, colored pencils, or digital options, color can dramatically affect the mood and personality of your character. Markers are fantastic for bold, vibrant colors, while colored pencils allow for subtle shading and blending. If you're leaning towards digital, software like Adobe Illustrator or Procreate can provide endless possibilities with layers, brushes, and effects. The beauty of digital tools is that they allow for easy corrections and experimentation without the fear of ruining your work.
To help you visualize the options, here’s a simple
| Tool Type | Examples | Benefits |
|---|---|---|
| Pencils | Graphite, Colored | Versatile for sketching and shading |
| Inking Tools | Fine Liners, Brush Pens | Creates defined lines and adds depth |
| Coloring Tools | Markers, Colored Pencils, Digital Software | Enhances character design and expression |
Ultimately, the best tools are the ones that feel right in your hands. Don’t be afraid to experiment with different materials until you find what suits your style. Just like a chef finds their signature flavor, you too will develop a unique approach to your cartooning. Remember, the journey of creating is just as important as the end result, so enjoy the process!
- What are the best pencils for beginners? A good starting point is to use a range of pencils from H to B grades, with 2B being a versatile choice for sketching.
- Can I use digital tools if I prefer traditional drawing? Absolutely! Many artists blend both traditional and digital methods to enhance their work.
- How do I choose a good sketchbook? Look for a sketchbook with thick, smooth paper that can handle your preferred medium, whether it’s pencil, ink, or markers.
Pencil Techniques
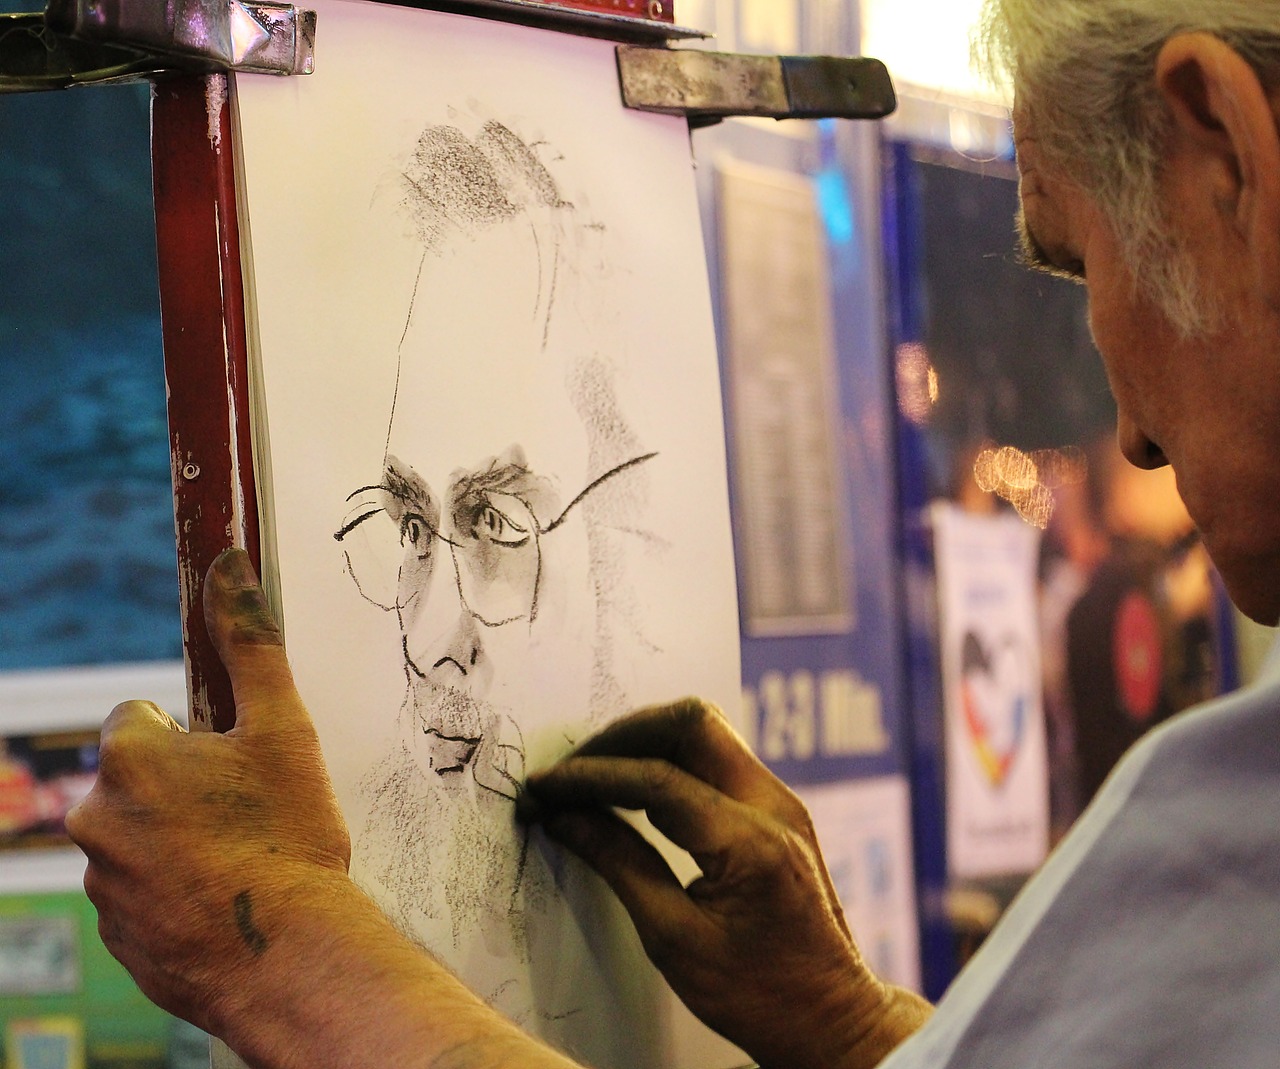
When it comes to drawing cartoon characters, mastering is crucial for bringing your ideas to life. Whether you're sketching a whimsical creature or a dynamic superhero, the way you handle your pencil can make all the difference. Let's dive into some essential techniques that will elevate your cartoon drawings from basic sketches to captivating illustrations.
First and foremost, shading is an art form in itself. It adds depth and dimension to your characters, transforming flat images into lively figures that pop off the page. To start shading effectively, consider the light source in your drawing. This will guide where you place shadows and highlights. For instance, if the light is coming from the top left, the right side of your character will be darker. A great way to practice is to use a simple sphere; by shading it based on a light source, you can see how shadows create a three-dimensional effect.
Next up is line work. The lines you choose to use can convey a lot about your character's personality. Thick lines can express strength and boldness, while thinner lines may suggest delicacy or vulnerability. Experimenting with line variation can add a unique flair to your characters. For example, when drawing a cartoonish cat, using thicker lines for the body and thinner lines for the whiskers can create a striking contrast that draws the eye. Don’t be afraid to play around with different styles—your pencil is your best friend in this creative journey!
Another important technique is sketching methods. Start with light, loose sketches to capture the essence of your character. This allows for flexibility as you refine your ideas. Once you're satisfied with the basic shape, you can gradually build up the details, adding features like eyes, mouth, and hair. Remember, the goal is to have fun and experiment with different styles until you find what resonates with you.
Let's not forget about the importance of blending. Using a blending stump or even your fingers can help smooth out harsh lines and create softer transitions in shading. This technique is particularly useful when you want to achieve a more realistic look for your cartoon characters. Just be sure to keep your fingers clean to avoid smudging your work!
In summary, pencil techniques are the backbone of cartoon drawing. By mastering shading, line work, sketching methods, and blending, you can add a professional touch to your illustrations. Remember, practice makes perfect, so grab your pencil and start experimenting today!
- What type of pencil is best for cartoon drawing?
While any pencil can work, many artists prefer using a range of pencils from H (hard) to B (soft) for different effects. A 2B pencil is a good starting point for cartooning. - How do I improve my shading skills?
Practice shading with various objects and light sources. Study how light interacts with different shapes to better understand shading techniques. - Can I use digital tools for pencil techniques?
Absolutely! Many digital drawing programs mimic traditional pencil techniques, allowing you to experiment with shading and line variation easily.

Shading Basics
When it comes to bringing your cartoon characters to life, shading is an essential technique that can add depth and dimension to your drawings. Think of shading as the artist's way of creating a three-dimensional effect on a two-dimensional surface. Without it, your characters may look flat and lifeless. So, how do you master this crucial skill? Let's break it down.
First, it's important to understand the light source. The direction of the light will dictate where shadows and highlights fall on your character. Imagine a cartoon character standing under a streetlamp at night. The side facing the light will be bright and vibrant, while the opposite side will be darker and more muted. This contrast creates a sense of volume and makes your character pop off the page.
To get started, you can use a variety of shading techniques. Here are a few popular methods:
- Hatching: This involves drawing closely spaced parallel lines. The closer the lines are to each other, the darker the area will appear.
- Cross-hatching: This is similar to hatching but involves layering lines in different directions, creating a richer texture.
- Stippling: Using dots instead of lines can also create shading effects. The density of the dots will determine how dark the area appears.
- Blending: This technique uses tools like blending stumps or even your fingers to smudge and soften pencil marks, resulting in smooth transitions between light and shadow.
Each technique has its own charm and can be used to convey different moods and styles. For instance, hatching can give a more graphic look, while blending might lend a softer, more organic feel to your character. The key is to experiment and find what works best for you.
Another important aspect of shading is understanding contrast. High contrast between light and dark areas can create drama and excitement, while lower contrast can evoke a more subtle, serene feeling. Think about the emotions you want your character to convey and adjust your shading accordingly.
Finally, don’t forget about the highlight. These are the areas where the light hits your character directly, and they can help to define shapes and features. A well-placed highlight can make a character's eyes sparkle or give their hair a glossy sheen. Always remember: the right balance between shadows and highlights is what gives your characters that extra flair!
In summary, mastering shading techniques is crucial for any aspiring cartoonist. By understanding light sources, experimenting with various shading methods, and paying attention to contrast and highlights, you will be well on your way to creating dynamic and engaging cartoon characters that truly stand out.
Q: What is the best pencil for shading?
A: A range of pencils from H (hard) to B (soft) can be useful. Softer pencils (like 2B or 4B) are great for darker shades, while harder pencils can create lighter tones.
Q: How do I know where to place shadows?
A: Always consider your light source. Shadows will fall on the opposite side of where the light hits. Observing real-life objects under different light conditions can help you understand this better.
Q: Can I shade with color?
A: Absolutely! Colored pencils or markers can be used to create beautiful shading effects. Just keep in mind the principles of light and shadow when applying color.

Line Variation
When it comes to cartooning, is like the spice in your favorite dish—it adds flavor, excitement, and personality to your drawings! Think about it: have you ever seen a character that looked flat or lifeless? Chances are, it lacked the dynamic lines that can make a drawing pop. By manipulating line thickness and style, you can create characters that not only look interesting but also convey emotion and action.
Imagine drawing a character in a dramatic pose. Using thicker lines on the outer edges can give a sense of strength and presence, while thinner lines can suggest delicacy and detail. This technique allows you to guide the viewer's eye and emphasizes crucial aspects of your character. For instance, if you're illustrating a superhero, you might want to use bold lines to showcase their muscular physique. Conversely, if you're sketching a whimsical fairy, softer, lighter lines can evoke a sense of grace and lightness.
Moreover, line variation can also express different moods and actions. A quick, jagged line can indicate speed or excitement, while smooth, flowing lines can suggest calmness or serenity. It’s all about creating a visual language that communicates what your character is feeling or doing. Think of it as a dance—each stroke has its rhythm and purpose, contributing to the overall performance of your artwork.
To truly master line variation, consider practicing with a range of tools. Experiment with different pencils, pens, or brushes to see how they affect your lines. You might find that a brush pen creates beautiful, sweeping strokes that lend themselves well to dynamic poses, while a fine-tip pen is perfect for intricate details. The table below summarizes some common tools and their effects on line variation:
| Tool | Effect on Line Variation |
|---|---|
| Brush Pen | Creates bold, expressive lines with varying thickness. |
| Fine-tip Pen | Produces precise, delicate lines ideal for detail work. |
| Pencil | Allows for smooth gradations and shading effects. |
| Marker | Offers vibrant colors and can produce both thick and thin lines. |
In conclusion, mastering line variation is essential for any aspiring cartoonist. It can transform your drawings from simple sketches into captivating works of art that resonate with viewers. So, pick up your tools, experiment with different line styles, and watch your characters come to life!
- What is line variation? Line variation refers to the differences in line thickness and style used in drawing to create depth, interest, and emotion in characters.
- How can I practice line variation? You can practice line variation by experimenting with different drawing tools and techniques, focusing on how each tool affects the thickness and style of your lines.
- Why is line variation important in cartooning? Line variation adds personality and expression to your characters, making them more engaging and relatable to the audience.
- What tools are best for achieving line variation? Tools like brush pens, fine-tip pens, and different types of pencils are excellent for creating varied line thickness and styles.
Digital Drawing Tools
In the modern age of art, have revolutionized the way artists create their masterpieces. Gone are the days when artists were confined to traditional pen and paper; now, a universe of possibilities opens up with just a click. Whether you’re a budding cartoonist or an experienced illustrator, having the right tools can make all the difference in your creative journey. But what exactly should you be looking for in digital drawing tools?
First off, let’s talk about hardware. A good drawing tablet is essential for anyone serious about digital art. There are various types available, ranging from budget-friendly options to high-end devices that offer pressure sensitivity and tilt recognition. For instance, brands like Wacom and Huion are popular choices among artists. A tablet allows you to draw directly onto the screen, making the process feel intuitive and natural. If you’re considering investing in a tablet, think about how often you’ll use it and what features matter most to you.
Next up, we have software. The software you choose can greatly influence your workflow and the quality of your art. Programs like Adobe Photoshop and Corel Painter are industry standards, offering a plethora of brushes and tools that can mimic traditional media. However, there are also excellent free options like Krita and GIMP that provide robust features for beginners and professionals alike. It’s crucial to experiment with different software to find the one that aligns with your style and needs.
Another aspect to consider is the user interface. A clean, intuitive interface can enhance your drawing experience, making it easier to access tools and features without getting lost in menus. Look for software that allows for customization of toolbars and shortcuts, so you can streamline your workflow. After all, the last thing you want is to be fumbling around when inspiration strikes!
Additionally, many digital drawing tools come with a variety of brushes and textures. These can add depth and character to your drawings, allowing you to create unique styles. Don’t hesitate to download custom brushes from online communities; they can be a game changer in achieving the look you desire. Remember, the right brush can elevate your art from good to extraordinary!
Finally, let’s not forget about the importance of practice and experimentation. The beauty of digital art is that mistakes can be easily corrected. Use layers to separate elements of your drawing, allowing you to make changes without starting over. Don’t be afraid to try new techniques or tools; sometimes, the best discoveries happen when you step outside your comfort zone.
In summary, investing in the right digital drawing tools—whether they be hardware or software—can significantly enhance your cartooning experience. By understanding what options are available and how they can benefit your artistic process, you’ll be well on your way to bringing your cartoon characters to life in vibrant, dynamic ways. So grab your tablet, fire up your favorite drawing program, and let your imagination run wild!
- What is the best drawing tablet for beginners? - Many beginners find that the Wacom Intuos series offers a great balance of quality and affordability.
- Can I use my iPad for digital drawing? - Absolutely! The iPad, especially when paired with the Apple Pencil, is a fantastic tool for digital artists.
- Is it necessary to have a stylus for digital drawing? - While you can draw with your fingers on some devices, a stylus provides more precision and control.
- What software is best for cartooning? - Programs like Clip Studio Paint and Adobe Illustrator are excellent for cartoonists due to their vector capabilities and brush options.
- How can I improve my digital drawing skills? - Regular practice, studying tutorials, and experimenting with different styles and techniques can significantly enhance your skills.

Character Design Fundamentals
Creating memorable cartoon characters is more than just putting pencil to paper; it involves a deep understanding of design principles. Whether you're sketching a quirky sidekick or a heroic protagonist, the foundation of your character lies in their traits, proportions, and unique features. These elements not only define their appearance but also influence how audiences perceive and connect with them. Think of character design as the personality of your drawing; just like people, characters should have distinct traits that make them unique and relatable.
When starting your design, consider the traits that will define your character. Are they funny, serious, adventurous, or shy? Each trait can be visually represented through their facial expressions, body language, and even the colors you choose. For instance, a cheerful character might have bright colors and an open posture, while a villain could be depicted with darker hues and a more closed-off stance. This visual representation is crucial as it instantly communicates the character's personality to the audience.
Next, let’s talk about proportions and anatomy. Even in the whimsical world of cartoons, a sense of proportion is essential. While you have the creative freedom to exaggerate features, maintaining a balance ensures that your character remains visually appealing and believable. For example, a character with an oversized head might be cute and funny, but if the body is too small, it can look awkward. Understanding basic anatomy principles, even in a simplified form, will help you create characters that resonate with viewers. Here’s a simple breakdown of proportion guidelines:
| Feature | Proportion Guidelines |
|---|---|
| Head | Typically 1/8 of the total height |
| Torso | About 1/2 of the total height |
| Legs | Roughly 1/2 of the total height |
| Arms | Should reach mid-thigh when hanging |
Another vital aspect is color theory. Colors can evoke emotions and set the mood for your character. For instance, warm colors like reds and yellows can convey energy and excitement, while cool colors like blues and greens can suggest calmness or sadness. When designing your character, think about how the color palette reflects their personality. A character who is adventurous might wear vibrant colors, while a more mysterious character could be draped in darker shades. Understanding color harmony and how different colors work together will enhance your character's visual impact.
In summary, character design fundamentals are about crafting a unique identity through traits, proportions, and color. By paying attention to these elements, you can create characters that not only look good but also resonate with your audience on a deeper level. Remember, a well-designed character is like a good book—it draws you in and makes you want to know more!
- What are the key elements of character design?
The key elements include personality traits, proportions, and color choices that reflect the character's identity. - How important is color theory in character design?
Color theory is crucial as it influences the emotional response of the audience and helps in conveying the character's personality. - Can I exaggerate features in cartoon character design?
Yes, exaggeration is common in cartooning, but maintaining a balance in proportions ensures the character remains appealing.

Proportions and Anatomy
When it comes to cartoon characters, understanding proportions and anatomy is essential for creating visually appealing designs. You might think that since cartoons are often exaggerated, the rules of anatomy don't apply. However, that's a common misconception! In fact, even the most whimsical characters benefit from a basic understanding of how body parts relate to one another. This knowledge allows you to create characters that feel more believable, even in their exaggerated forms.
To get started, it's helpful to think in terms of basic shapes. For instance, a character's head can often be represented as a circle, while their body might be a rectangle. Limbs can be simplified into cylinders or tubes. By breaking down your character into these fundamental shapes, you can maintain a sense of proportion that feels right, even when you stretch the rules a bit. For example:
| Body Part | Basic Shape |
|---|---|
| Head | Circle |
| Body | Rectangle |
| Arms/Legs | Cylinders |
| Feet | Triangles or Ovals |
Moreover, it's crucial to consider the proportional relationships between different body parts. For instance, a character's head might be larger in proportion to their body in a chibi style but smaller in a more realistic cartoon. As a rule of thumb, you can use the following ratios:
- Standard cartoon characters often have heads that are about 1/8th the height of their body.
- In exaggerated styles, this ratio can increase to 1/4th or even 1/3rd.
- Limbs should be roughly half the height of the body for a balanced look.
Don't forget about dynamic poses! Even when you have the proportions down, how you position your character can significantly impact their appeal. A character standing stiffly may seem lifeless, while one in a dynamic pose can convey energy and excitement. Consider how the weight of the body shifts when a character moves. For example, if a character leans to one side, the opposite leg might bear more weight, creating a sense of balance and realism.
Finally, practice is key! Spend time sketching different characters and experimenting with proportions. You can even create a reference sheet with various poses and proportions to guide you in your future drawings. Remember, the more you draw, the more intuitive these principles will become. So grab your pencil, and let your imagination run wild!
- What are the basic shapes to start with when drawing cartoon characters? Begin with circles for heads, rectangles for bodies, and cylinders for limbs.
- How do I determine the right proportions for my characters? Use ratios, like 1/8th for the head compared to the body, and adjust based on your style.
- Is it necessary to follow realistic anatomy when drawing cartoons? While realism isn't required, understanding anatomy helps create believable characters.
- How can I practice proportions effectively? Create reference sheets and sketch various poses to enhance your understanding of proportions.
Color Theory
Color theory is an essential aspect of cartoon character design that can significantly influence how your audience perceives your creations. It’s more than just picking pretty colors; it’s about understanding how different hues interact and the emotional responses they evoke. Imagine your character as a blank canvas waiting for the perfect splash of color to bring them to life! By mastering color theory, you can create characters that not only look good but also resonate with viewers on a deeper level.
At its core, color theory consists of three primary components: the color wheel, color harmony, and the psychology of color. The color wheel is a circular diagram that illustrates the relationships between colors. It’s divided into primary colors (red, blue, yellow), secondary colors (green, orange, purple), and tertiary colors (like red-orange or blue-green). Understanding this wheel allows you to see which colors complement each other, making your character designs more visually appealing.
Next, let’s talk about color harmony. This concept refers to the way colors work together to create a pleasing aesthetic. There are several types of color harmonies you can explore:
- Complementary colors: Colors that are opposite each other on the color wheel, like blue and orange. They create a vibrant look when paired together.
- Analogous colors: Colors that are next to each other on the wheel, such as red, red-orange, and orange. These create a serene and comfortable design.
- Triadic colors: Three colors that are evenly spaced around the wheel, like red, yellow, and blue. This harmony offers a balanced yet dynamic feel.
Finally, let’s dive into the psychology of color. Different colors can evoke various emotions and associations, which can be particularly powerful in character design. For instance:
| Color | Emotion/Association |
|---|---|
| Red | Passion, energy, danger |
| Blue | Calm, trust, sadness |
| Yellow | Happiness, optimism, caution |
| Green | Nature, health, tranquility |
| Purple | Creativity, mystery, luxury |
By understanding these emotional connections, you can choose colors that not only enhance your character's visual appeal but also communicate their personality and story. For example, a villain might be designed using darker colors like deep purples and blacks, while a cheerful hero could be adorned in bright yellows and greens. The right color palette can make your characters memorable and relatable, drawing the audience into their world.
In conclusion, mastering color theory is a powerful tool in your cartooning arsenal. It allows you to create characters that are not only visually striking but also filled with personality and emotion. So, the next time you're sketching out a new character, take a moment to consider how color can enhance your design and tell a story of its own!
Bringing Your Characters to Life
Once you've designed your cartoon characters, the real magic begins: bringing them to life. This is where your characters evolve from static images into vibrant entities that resonate with your audience. Think of it as the difference between a photograph and a movie; both capture moments, but only one tells a story. To achieve this, you need to focus on two critical aspects: facial expressions and dynamic poses.
Facial expressions are the windows to your characters’ souls. They convey emotions and personality and can turn a simple smile into a heartfelt connection. To effectively draw various expressions, consider how real people express emotions. For instance, when someone is happy, their eyes might widen, and their mouth stretches into a broad smile. By exaggerating these features, you can capture the essence of that emotion in your cartoon. Here’s a quick breakdown of common expressions:
| Expression | Key Features |
|---|---|
| Happy | Wide eyes, big smile, raised eyebrows |
| Sad | Droopy eyes, downturned mouth, furrowed brows |
| Angry | Narrowed eyes, clenched teeth, furrowed brows |
| Surprised | Wide eyes, open mouth, raised eyebrows |
Now, let’s talk about dynamic poses. Imagine your character in motion—perhaps they’re jumping, running, or even just leaning casually against a wall. These poses can add excitement and energy to your drawings. To create dynamic poses, consider the following:
- **Action Lines**: Use lines to indicate movement. A simple curved line can show the direction your character is moving in.
- **Weight and Balance**: Ensure your character looks balanced. If they’re jumping, their legs should be positioned in a way that suggests they’re pushing off the ground.
- **Foreshortening**: This technique helps create the illusion of depth. For example, if a character is reaching out towards the viewer, their arm should appear larger than their body.
Combining these elements—facial expressions and dynamic poses—can create characters that feel alive and engaging. It’s like adding a splash of color to a black-and-white painting; suddenly, it’s not just a picture, but a story waiting to unfold. Remember, practice is key. The more you experiment with different expressions and poses, the more natural they will become in your art.
Q: How can I improve my character expressions?
A: Study real-life emotions and practice drawing them. Use references from photos or videos to capture the nuances of facial expressions.
Q: What are dynamic poses, and how can I practice them?
A: Dynamic poses are positions that convey movement and energy. You can practice by sketching from action scenes in movies or using reference images of athletes or dancers.
Q: Is it necessary to use digital tools for character animation?
A: While digital tools can enhance your workflow, traditional methods like pencil and paper are equally effective. Choose what feels comfortable for you!
Facial Expressions
Facial expressions are the windows to your characters' souls. They convey emotions and personality in a way that words often cannot. When you draw a cartoon character, think of their face as a canvas where you can paint feelings. Have you ever noticed how a simple smile can light up an entire character? Or how a furrowed brow can instantly communicate anger or confusion? Understanding how to effectively illustrate facial expressions can elevate your cartooning skills and make your characters resonate with viewers on a deeper emotional level.
To get started, it's essential to understand the basic emotions you want to portray. Here are some fundamental emotions that can serve as a foundation:
- Happiness: A wide smile, raised eyebrows, and sparkling eyes.
- Sadness: Downturned mouth, drooping eyelids, and a furrowed brow.
- Anger: Tight lips, narrowed eyes, and furrowed brows.
- Surprise: Wide eyes, raised eyebrows, and an open mouth.
Now, let’s dive deeper into how to draw these expressions. Start by sketching the basic shape of the head. Once you have that down, focus on the eyes, mouth, and eyebrows. For example, when drawing a surprised expression, you might want to exaggerate the size of the eyes and keep the mouth open wide. This exaggeration is key in cartooning; it helps convey emotions clearly and effectively. Remember, the more you practice, the more intuitive this process will become.
Another tip is to study real-life references. Observe how people express emotions in their faces. You can even take photos of yourself or friends making different expressions. This practice will help you understand the subtle shifts in features that convey different feelings. A slight tilt of the head or a change in the angle of the eyebrows can make a world of difference in how your character is perceived.
Finally, don't forget about the context in which your character is placed. The surrounding elements can enhance the emotional impact of the facial expression. For instance, if your character is smiling in a gloomy setting, it can create a humorous contrast that adds depth to the story you’re telling. In contrast, a frown in a bright, cheerful environment can evoke curiosity and concern. Always consider how the background and other elements interact with your character's expression.
In summary, mastering facial expressions in cartooning is about observation, practice, and a touch of creativity. By understanding the basic emotions and experimenting with different techniques, you can breathe life into your characters, making them more relatable and engaging for your audience. So grab your pencil, and let those faces tell a story!
Q1: How can I improve my ability to draw facial expressions?
A1: Practice is key! Study real-life faces and try to replicate various emotions. Use photo references and experiment with exaggeration to make expressions more pronounced.
Q2: Should I focus on realism when drawing cartoon facial expressions?
A2: Not necessarily! Cartooning often thrives on exaggeration and simplicity. Focus on capturing the essence of the emotion rather than perfect realism.
Q3: Are there specific tools that can help with drawing facial expressions?
A3: Yes! Using a variety of pencils for different line weights, and digital tools that allow for easy edits can enhance your ability to experiment with expressions.
Dynamic Poses
Creating is an essential skill for any cartoon artist looking to breathe life into their characters. Think about it: when you see a character leaping through the air or striking a heroic stance, it immediately grabs your attention, right? That's the power of movement! To effectively capture this energy, you'll want to focus on a few key elements: balance, exaggeration, and fluidity.
First off, let's talk about balance. Every pose needs to feel stable, even if your character is in mid-air. Imagine a tightrope walker balancing on a thin line; they have to distribute their weight carefully to avoid falling. Similarly, when drawing your characters, consider their center of gravity. For instance, if a character is jumping, their body should lean slightly forward to indicate motion, while their legs might be positioned to show the push-off. This balance creates a sense of realism, even in a cartoonish style.
Next, we delve into exaggeration. Cartoons thrive on hyperbole, so don’t shy away from stretching limbs or bending bodies in ways that might seem unrealistic. This technique not only adds a fun flair but also communicates the character's emotions and actions more effectively. For example, when illustrating a character who is surprised, you might draw their arms flailing wildly and their eyes bulging. Such exaggeration can evoke laughter and connect better with your audience, making your characters memorable.
Additionally, fluidity is crucial. Think of how a dancer moves across the stage; their motions are smooth and graceful. To achieve this in your drawings, consider the lines of action. A line of action is an imaginary line that runs through your character, guiding their pose. It helps you visualize the flow of movement. For instance, if your character is running, the line might start at their foot and arc up through their torso and out through their opposite arm. This technique will ensure that your drawings feel alive and vibrant.
To illustrate these concepts further, here’s a simple table showcasing different dynamic poses and their characteristics:
| Pose Type | Description | Key Features |
|---|---|---|
| Jumping | A character leaping into the air | Arms raised, legs bent, leaning forward |
| Running | A character in motion | One leg forward, opposite arm swinging, body leaning |
| Falling | A character in free fall | Arms and legs spread, facial expression of surprise |
Finally, practice is the key to mastering dynamic poses. Try sketching from life, observing athletes, dancers, or even pets in motion. The more you study movement, the better you’ll become at translating that energy onto the page. Remember, each stroke of your pencil is a step closer to creating characters that leap off the page and resonate with viewers.
- What are dynamic poses in cartooning? Dynamic poses refer to positions that convey movement and energy, making characters appear lively and engaging.
- How can I practice drawing dynamic poses? Observing real-life movements, sketching from photos, and using reference materials can help you improve your skills.
- Why is exaggeration important in cartooning? Exaggeration adds humor and character to your drawings, allowing for more expressive and memorable illustrations.
Frequently Asked Questions
- What are the best basic shapes for drawing cartoon characters?
When starting out, think of your cartoon characters as combinations of simple shapes like circles, squares, and triangles. These basic forms help you establish the character's structure and proportions, making it easier to add details later. For instance, a round head can represent a friendly character, while sharp angles might give a more mischievous vibe.
- What tools do I need to start drawing cartoons?
To kick off your cartooning journey, you don't need an elaborate setup. A simple pencil and paper will do the trick! However, if you want to explore further, consider adding colored pencils, pens, or even digital tools like drawing tablets and software. Each tool can enhance your creativity in different ways, so try a few to see what feels right!
- How can I improve my shading techniques?
Shading is all about adding depth and dimension to your drawings. Start by practicing with different pencil pressures to create light and dark areas. Use hatching and cross-hatching techniques to build texture. Remember, the goal is to make your characters pop off the page, so don’t be afraid to experiment!
- What is the importance of character proportions?
Proportions are crucial in making your characters look believable, even if they’re cartoonish! Maintaining a sense of balance and scale helps your audience connect with them. For example, oversized heads can convey cuteness, while elongated limbs might suggest speed. Play around with proportions to find what works best for your character's personality!
- How do I choose the right colors for my characters?
Color theory can be your best friend when it comes to character design! Consider the emotions and traits you want to convey. Warm colors like red and orange can evoke energy, while cool colors like blue and green can create a sense of calm. Don’t hesitate to experiment with different palettes until you find one that resonates with your character!
- What techniques can I use to animate my characters?
Animating your characters involves bringing them to life through movement and expression. Start by sketching out various poses and expressions to capture their personality. Use dynamic poses to convey action and emotion. The more you practice, the more natural it will feel to animate your creations!
- How can I make my characters more expressive?
Facial expressions are key to conveying emotions! Practice drawing different expressions like happiness, sadness, or surprise to see how they change your character's personality. Don’t forget about the eyes and mouth—they can dramatically alter the mood. Think of your character as an actor; the more expressive they are, the more they’ll connect with your audience!


