How to Organize Your Art Studio for Creativity
Welcome to the colorful world of creativity! If you're an artist, you know that your environment plays a crucial role in your artistic flow. An organized art studio is not just about tidiness; it's about creating a sanctuary that inspires you to unleash your imagination. In this article, we'll dive deep into effective strategies to organize your art studio, ensuring that it becomes a hub of inspiration and productivity. Ready to transform your space? Let’s get started!
Understanding your studio's layout is crucial. Take a moment to survey your space—what do you see? Is it chaotic, cluttered, or perhaps a bit too cramped? Evaluating the available area allows you to identify aspects that could be improved. Think of your art studio as a canvas itself; it needs the right elements to create a masterpiece. Consider the following:
- How much natural light does your studio receive?
- Is there enough room to move around comfortably?
- Are your supplies within easy reach?
By answering these questions, you can pinpoint areas for enhancement that will foster a more functional and inspiring environment for your art practice.
Decluttering your space can significantly boost creativity. Imagine trying to paint with a palette full of muddy colors; it just doesn’t work! The same goes for your studio. A cluttered space can stifle creativity and make it hard to focus. Here are some effective techniques to eliminate unnecessary items:
- Start with a clean slate: Clear everything out and only bring back what you use.
- Use the 'one-year rule': If you haven’t used it in a year, it might be time to let it go.
- Group similar items together to see how much you really have.
By making room for inspiration and ensuring that your essential tools are easily accessible, you’ll create a space that invites creativity rather than hinders it.
Organizing supplies by category helps streamline your workflow. Think about how much time you waste searching for that perfect brush or the right shade of paint. By sorting your materials—paints, brushes, canvases, and tools—you can enhance efficiency and make your studio more inviting. Consider setting up a sorting system that works for you:
| Category | Examples |
|---|---|
| Paints | Acrylic, Oil, Watercolor |
| Brushes | Flat, Round, Fan |
| Tools | Palette knives, Sponges |
This method not only saves time but also makes it easier to find what you need when inspiration strikes!
Explore various storage options such as shelves, bins, and carts that can help you keep your art supplies organized while maximizing your studio's space and functionality. Think of storage solutions as the architecture of your creative space; they should support your artistic endeavors. Here are a few ideas:
- Use vertical space: Install shelves to keep supplies off the floor.
- Rolling carts: These are great for mobility and can be moved to wherever you need them.
- Clear bins: They allow you to see what's inside without having to dig around.
By implementing these solutions, you’ll create a more efficient workspace that encourages creativity.
Implementing a labeling system can simplify finding materials. Imagine trying to find a needle in a haystack—frustrating, right? Clear labels for your supplies can make it easier to maintain organization. You can use:
- Color-coded labels for different categories.
- Descriptive labels that specify the contents.
- Digital labels for tech-savvy artists.
This small step can significantly enhance your workflow and encourage creativity by reducing the time spent searching for materials.
Designate specific areas for different activities, such as painting, drawing, or crafting. This zoning approach can help you stay focused and inspire creativity while working on various projects. Just like a chef has different stations in a kitchen, your studio can benefit from zones that cater to specific tasks. Consider creating:
- A painting area with easels and palettes.
- A drawing nook with comfortable seating.
- A crafting corner for mixed media projects.
By organizing your studio into functional zones, you’ll find that your creativity flourishes, making it easier to switch between different artistic endeavors.
Surrounding yourself with inspiring elements can enhance your artistic process. Your studio should reflect your personality and artistic style, making it a place where you feel energized and motivated. Here’s how you can incorporate inspiration into your studio environment:
Showcasing your artwork can serve as motivation. Learn how to create an art display that reflects your style and encourages creativity while providing a sense of accomplishment. Consider using:
- Gallery walls to showcase your favorite pieces.
- Rotating displays to keep the inspiration fresh.
- Incorporating works from fellow artists to create a community feel.
This display not only beautifies your space but also reminds you of your artistic journey.
Adding personal items or decor can make your studio feel unique. Explore ideas for infusing your personality into the space, creating an atmosphere that nurtures creativity and artistic expression. Think about:
- Framing photos that inspire you.
- Incorporating colors that resonate with your artistic style.
- Displaying meaningful objects that tell your story.
By making your studio a reflection of who you are, you’ll create a welcoming space that fuels your creativity.
Q: How often should I declutter my art studio?
A: It's a good idea to declutter every few months. However, if you notice your space becoming chaotic, it’s time for a quick tidy-up!
Q: What are the best materials for labeling?
A: You can use label makers, colored tape, or even handwritten tags. The key is to ensure they are clear and easy to read.
Q: How can I make my studio more inspiring?
A: Incorporate elements that resonate with you, such as artwork, colors, and personal mementos. Surrounding yourself with meaningful items can significantly boost your creativity.
Assessing Your Space
This article explores effective strategies to organize your art studio, fostering an inspiring and productive environment that enhances creativity and artistic expression.
Understanding your studio's layout is crucial for unleashing your creative potential. Think of your art studio as a blank canvas; how you arrange it can significantly influence your artistic flow. Start by taking a step back and evaluating the available space. Walk around, observe, and take mental notes. Are there areas that feel cramped or cluttered? Are your supplies scattered, making it difficult to find what you need? Identifying these pain points is the first step towards creating a functional and inspiring environment for your art practice.
Consider the following aspects when assessing your space:
- Lighting: Natural light can be a game changer for artists. If possible, position your workspace near a window. If not, ensure you have adequate artificial lighting that mimics daylight.
- Accessibility: Your most-used supplies should be within arm's reach. Think about how often you use different materials and arrange them accordingly.
- Flow: Imagine how you move through your space when you're creating. Is there a clear path from one area to another? You want to minimize distractions and maximize your focus.
After identifying these factors, sketch a rough layout of your studio. This doesn’t have to be perfect—just a simple diagram that helps you visualize how you can rearrange your space for better functionality. Consider the zones you want to create for different activities. For instance, a painting zone could be separate from a drawing or crafting area. This zoning approach not only keeps you organized but also helps you mentally switch gears between different types of work.
Lastly, don't forget to think about the vibe you want to create. Your studio should reflect your personality and inspire you. Whether it’s through the colors you choose for the walls, the type of furniture you select, or even the artwork you hang, every element contributes to the overall atmosphere. A well-assessed and organized space can serve as a sanctuary for your creativity, making it easier for you to immerse yourself in your artistic endeavors.
Decluttering your space can significantly boost creativity. Learn effective techniques to eliminate unnecessary items, making room for inspiration and ensuring that your essential tools are easily accessible.
Organizing supplies by category helps streamline your workflow. Discover methods for sorting paints, brushes, and other materials to enhance efficiency and make your studio more inviting.
Explore various storage options such as shelves, bins, and carts that can help you keep your art supplies organized while maximizing your studio's space and functionality.
Implementing a labeling system can simplify finding materials. Learn how to create clear labels for your supplies, making it easier to maintain organization and encourage creativity.
Designate specific areas for different activities, such as painting, drawing, or crafting. This zoning approach can help you stay focused and inspire creativity while working on various projects.
Surrounding yourself with inspiring elements can enhance your artistic process. Discover ways to incorporate artwork, colors, and textures that resonate with you into your studio environment.
Showcasing your artwork can serve as motivation. Learn how to create an art display that reflects your style and encourages creativity while providing a sense of accomplishment.
Adding personal items or decor can make your studio feel unique. Explore ideas for infusing your personality into the space, creating an atmosphere that nurtures creativity and artistic expression.
Q: How often should I reassess my art studio layout?
A: It's a good idea to reassess your studio layout every few months or whenever you start a new project. As your artistic needs change, so should your space.
Q: What are some quick decluttering tips?
A: Start with one area at a time, use the "one in, one out" rule (for every new item, get rid of an old one), and donate or recycle supplies you no longer use.
Q: How can I make my studio more inspiring?
A: Incorporate elements that resonate with you, such as artwork, colors, and textures. Personal touches like photos or quotes can also enhance the creative atmosphere.

Decluttering Techniques
Decluttering is not just about tidying up; it's a transformative process that can significantly boost your creativity and productivity in your art studio. Imagine walking into a space where everything is in its place, and your mind is free to explore new ideas rather than being bogged down by chaos. To get started, consider the following effective techniques that can help you eliminate unnecessary items and create a more inspiring environment.
First, it's essential to adopt a mindset of minimalism. This doesn't mean you have to get rid of everything you love, but rather, focus on what truly inspires you. Take a moment to assess each item in your studio. Ask yourself questions like, "Does this spark joy?" or "Will I use this in the next month?" If the answer is no, it's time to let it go. You can donate, sell, or recycle items that no longer serve your artistic journey.
Once you've sorted through your materials, it's time to create categories for your supplies. Group similar items together, such as paints, brushes, canvases, and tools. This not only makes it easier to find what you need but also helps you visualize your supplies better. For example, when you see all your brushes neatly arranged in one spot, you might be inspired to try new techniques or styles that you hadn't considered before. You can use a simple table to categorize your supplies:
| Category | Items |
|---|---|
| Paints | Acrylic, Watercolor, Oil |
| Brushes | Flat, Round, Detail |
| Canvas | Stretched, Panels, Paper |
| Tools | Palettes, Knives, Rulers |
Next, consider implementing storage solutions that maximize your space. Shelves, bins, and carts can help keep your art supplies organized and easily accessible. For instance, a rolling cart can be a game-changer, allowing you to move your supplies wherever you need them without cluttering your workspace. Think of it as your mobile art station, ready to roll into action whenever inspiration strikes!
Another vital aspect of decluttering is establishing a labeling system. Clear labels can save you time and frustration when searching for materials. Use a label maker or simply write on masking tape to create labels for your bins and shelves. This small step can make a huge difference in how quickly you can find what you need, allowing you to dive straight into your creative process. Imagine not having to sift through piles of supplies; instead, you can grab what you need and get to work!
Finally, don’t forget to regularly reassess your studio. Make it a habit to go through your supplies every few months to see if anything needs to be decluttered again. This ongoing process will help maintain an organized and inspiring environment, making it easier for you to focus on what you love most: creating art. Remember, a clean space often leads to a clear mind, which is essential for unleashing your creative potential!
So, take a deep breath, roll up your sleeves, and start decluttering your art studio today. You'll be amazed at how much more inspired and productive you feel in a well-organized space!

Sorting Supplies
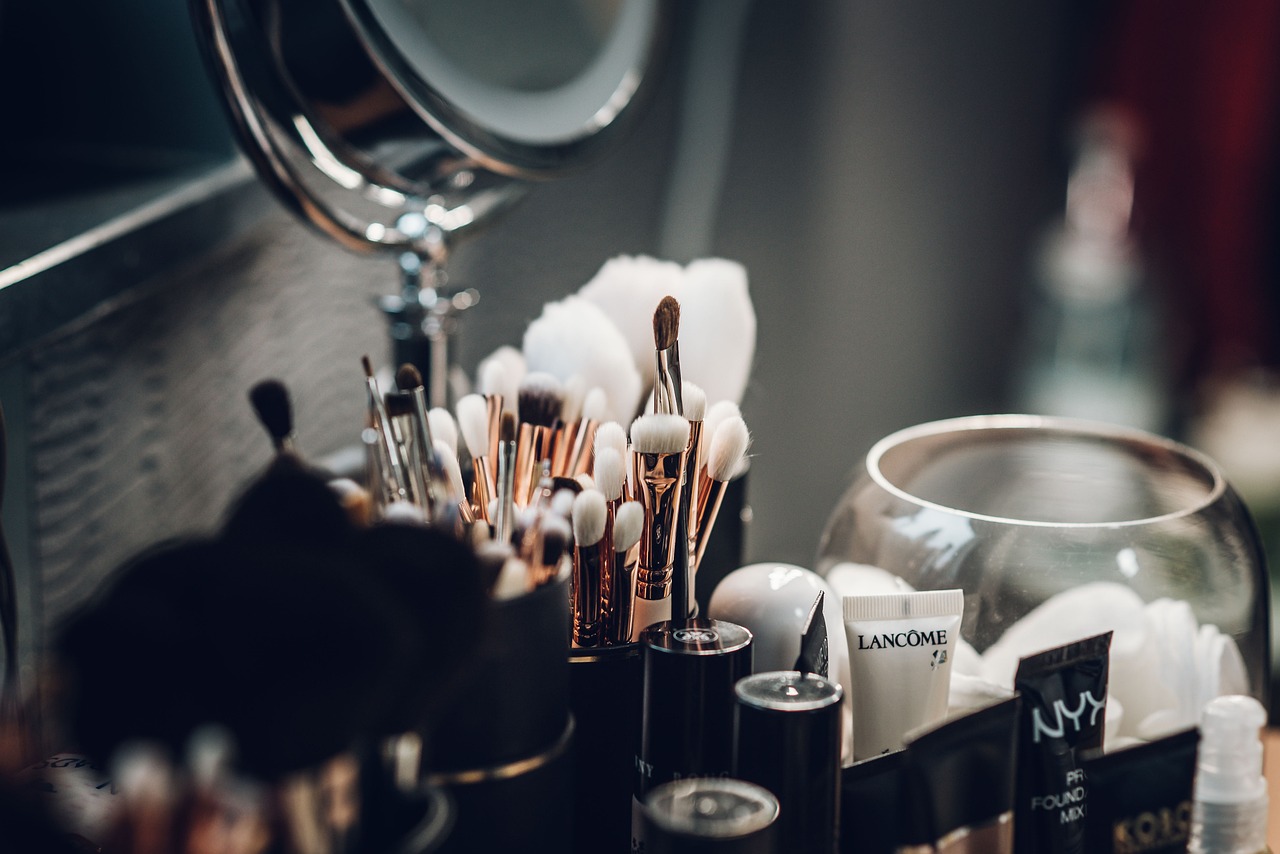
When it comes to organizing your art studio, is a game-changer. Imagine stepping into a space where every brush, paint tube, and canvas is in its rightful place, ready for you to unleash your creativity. It’s not just about tidiness; it’s about creating an environment that fuels inspiration and makes the artistic process smoother. Start by categorizing your supplies into groups that make sense for your workflow. For instance, you might have sections for paints, brushes, drawing tools, and mixed media materials. This categorization allows you to quickly grab what you need without sifting through piles of clutter.
Consider using a simple color-coding system for your supplies. For example, you could use red labels for acrylic paints, blue for watercolors, and green for drawing tools. This visual cue not only makes it easier to find what you’re looking for but also adds a splash of color to your studio, making it feel more vibrant and alive. Additionally, you can create a
| Category | Item | Quantity | Location |
|---|---|---|---|
| Paints | Acrylic | 12 | Top shelf |
| Brushes | Round | 10 | Drawer |
| Drawing Tools | Pencils | 20 | Pencil case |
Another effective method for sorting is to use clear containers or bins. These allow you to see what you have at a glance and keep similar items together. Label each container with its contents, so you can easily find what you need. For example, you might have a bin for charcoal and another for pastels. This not only keeps your studio organized but also encourages you to use a variety of mediums, enhancing your creative exploration.
Finally, don’t forget to regularly reassess your supplies. As you create and experiment, your needs may change. Make it a habit to go through your supplies every few months, discarding expired or unused items and reorganizing as necessary. This practice not only keeps your studio functional but also ensures that you’re always ready to dive into your next artistic endeavor with enthusiasm.
Storage Solutions
When it comes to organizing your art studio, play a pivotal role in maintaining a tidy and efficient workspace. Imagine walking into your studio and instantly feeling a wave of inspiration wash over you, all because everything is in its rightful place. The right storage can transform chaos into creativity, allowing you to focus on what you love most—creating art.
First and foremost, consider the type of materials you use. Different supplies require different storage approaches. For instance, paints and brushes need to be easily accessible, while larger canvases and paper might require more substantial storage options. Open shelving is a fantastic way to display your supplies while keeping them within reach. You can arrange your paints by color or type, creating a visually appealing and functional display that invites creativity.
In addition to open shelving, storage bins can be a game-changer. They come in various sizes and can be stacked, allowing you to maximize vertical space. Use clear bins to easily see what's inside, or opt for decorative boxes that enhance your studio's aesthetic. You might even consider using a rolling cart for your most-used supplies. This way, you can easily move your materials wherever you need them, making your workflow smoother and more enjoyable.
Another innovative solution is to utilize magnetic strips for metal tools like scissors or palette knives. Attaching these strips to the wall keeps your tools visible and accessible, reducing clutter on your work surfaces. Plus, it adds a unique touch to your studio's decor.
Lastly, don't underestimate the power of labeling. A well-organized studio is only as good as its labeling system. Use a label maker or simply write on masking tape to create clear labels for your bins and shelves. This will not only help you find what you need quickly but also encourage you to maintain the organization you've established.
In summary, the right storage solutions can elevate your art studio from a cluttered space to an inspiring haven. By incorporating open shelving, storage bins, rolling carts, and magnetic strips, along with a solid labeling system, you'll create an environment that not only enhances your creativity but also makes your artistic process more enjoyable.
- What are the best types of storage for an art studio? Open shelving, storage bins, rolling carts, and magnetic strips are all effective options.
- How can I maximize space in a small art studio? Utilize vertical space with shelves and stacking bins, and consider multi-functional furniture like rolling carts.
- Is labeling really necessary? Yes! A good labeling system helps maintain organization and makes finding supplies quick and easy.
- Can I use regular household items for storage? Absolutely! Items like jars, baskets, and even old furniture can be repurposed for creative storage solutions.

Labeling Systems
Creating an effective labeling system in your art studio is not just about organization; it’s a game changer for your creative process. Imagine walking into your studio and instantly knowing where to find your favorite brushes or that specific shade of blue paint you love. A well-implemented labeling system can reduce frustration and save time, allowing you to focus on what truly matters—your art!
First, consider the different categories of supplies you have. You might have paints, brushes, canvases, and various tools. By categorizing these items, you can create a labeling system that makes sense for your workflow. For instance, you could use a simple color-coded system where each category is assigned a specific color. This not only looks visually appealing but also makes it easy to identify where everything belongs at a glance.
Next, think about the materials you’ll need for your labels. You can use anything from basic masking tape and a permanent marker to more sophisticated label makers. If you’re feeling crafty, consider using decorative washi tape or printed labels that match your studio's aesthetic. Here’s a quick table to help you decide on the best labeling materials:
| Labeling Material | Pros | Cons |
|---|---|---|
| Masking Tape | Inexpensive, customizable | May peel off over time |
| Permanent Marker | Easy to use, versatile | Can smudge if not allowed to dry |
| Label Maker | Professional look, durable | More expensive, requires batteries |
| Washi Tape | Decorative, easy to remove | Not as durable for long-term use |
Once you’ve decided on your materials, it’s time to get labeling! Start with your most-used items. For example, if you frequently use a specific set of brushes, label the container they’re in with a clear, bold label. You might write “Brushes” in large letters and even include a small drawing of a brush for visual appeal. This way, even on your busiest days, you’ll know exactly where to reach for what you need.
Another effective strategy is to label your storage areas. If you have bins or drawers, label them with what’s inside. You might consider a system that includes both the category and specific contents, such as “Acrylic Paints - Warm Colors” or “Mixed Media Tools.” This not only helps you find what you’re looking for but also encourages you to keep things organized. Remember, the goal is to create a space that inspires you, so don’t hesitate to get creative with your labels!
Finally, make it a habit to update your labels as your supplies change. If you buy new materials or change your organization system, don’t let outdated labels clutter your space. Regularly revisiting your labeling system keeps your studio fresh and functional, ultimately leading to a more productive and inspiring creative environment.

Creating Functional Zones
When it comes to organizing your art studio, is like setting the stage for a spectacular performance. Imagine walking into a space that effortlessly guides you through different creative activities, each area designed to inspire and facilitate your artistic flow. By designating specific zones for various tasks, you can enhance your focus and productivity, allowing your creativity to flourish without interruption.
First, consider the activities you engage in most frequently. Do you spend hours painting, sketching, or perhaps working on mixed media projects? Identifying these core activities will help you determine how to best allocate your space. For instance, you might want to create a dedicated painting zone equipped with an easel, a palette, and a variety of brushes and paints. This area should be well-lit, possibly near a window where natural light floods in, infusing your work with vibrancy and energy.
Next, think about your drawing or sketching area. This zone could feature a comfortable chair, a sturdy table, and all your drawing materials at arm's reach. You might even consider a vertical space, such as a wall-mounted corkboard, to pin up inspiration, sketches, or reference images. This way, your creative thoughts are always visible, sparking new ideas as you work.
Additionally, don’t forget about a crafting or mixed media zone if that’s part of your artistic repertoire. This area can be a bit more chaotic, so it’s essential to have surfaces that can handle glue, scissors, and other crafting tools. Using a rolling cart can make it easy to move supplies around as needed, keeping everything organized yet accessible.
To visualize this, here’s a simple layout idea:
| Zone | Purpose | Essential Items |
|---|---|---|
| Painting Zone | For creating paintings | Easel, paints, brushes, palette |
| Drawing Zone | For sketching and drawing | Sketchbooks, pencils, markers |
| Crafting Zone | For mixed media projects | Glue, scissors, various materials |
Lastly, it’s vital to maintain a flow between these zones. You don’t want to feel like you’re moving from one island to another; instead, create a seamless transition that feels natural. Perhaps a small cart can serve as a bridge between your painting and crafting zones, allowing you to transport supplies easily. By thoughtfully designing your studio with functional zones, you create a sanctuary that not only inspires creativity but also enhances your overall artistic experience.
- What are functional zones in an art studio? Functional zones are designated areas within your studio that are tailored for specific artistic activities, such as painting, drawing, or crafting.
- How do I decide where to place each zone? Assess your workflow and the activities you engage in most often. Place your zones in a way that allows for easy access and a natural flow between them.
- Can I combine zones for different activities? Absolutely! Many artists combine zones, especially if space is limited. Just ensure that the combined areas remain organized and functional.

Incorporating Inspiration
When it comes to nurturing your creativity, the environment in which you create plays a pivotal role. into your art studio is not just about aesthetics; it's about creating a space that resonates with your artistic soul. Think of your studio as a blank canvas, waiting to be filled with elements that spark joy and motivation. Surrounding yourself with inspiring elements can significantly enhance your artistic process, making each stroke of the brush or pencil feel like a dance of creativity.
One effective way to infuse inspiration into your studio is by showcasing your artwork. Imagine walking into a space where your own creations are displayed prominently. This not only serves as a reminder of your capabilities but also acts as a motivational force. You could create a dedicated wall or a specific area where you rotate your pieces regularly, allowing your latest works to shine. This dynamic display can keep your creative juices flowing, reminding you of your artistic journey and encouraging you to push your boundaries.
Additionally, consider the colors and textures around you. The psychology of color is profound; different hues can evoke various emotions and stimulate creativity. For example, vibrant reds and yellows can energize, while calming blues and greens can bring tranquility. You might want to paint an accent wall in your studio or use colorful curtains and rugs to create a stimulating atmosphere. By incorporating textures that resonate with you—be it the roughness of canvas, the smoothness of wood, or the coziness of fabric—you can create a tactile environment that invites exploration and experimentation.
Furthermore, personal touches can transform your studio into a sanctuary of creativity. Think about adding items that reflect your personality and artistic journey. This could include:
- Framed photographs of your travels or moments that inspired you.
- Quotes from artists that resonate with you, displayed on the walls.
- Unique artifacts or souvenirs that tell your story.
These elements not only personalize your space but also serve as constant reminders of your artistic aspirations and the experiences that shape your work.
In conclusion, incorporating inspiration into your art studio is about more than just decoration; it's about creating an environment that fuels your creativity. By showcasing your work, carefully selecting colors and textures, and adding personal touches, you can cultivate a space that not only inspires you but also encourages you to explore new artistic horizons. Remember, your studio is a reflection of you—make it a place where creativity thrives!
Q: How can I make my art studio more inspiring?
A: Start by showcasing your artwork, using colors that resonate with you, and adding personal touches that reflect your journey.
Q: What colors should I use in my art studio?
A: Choose colors based on the mood you want to create. Bright colors can energize, while softer tones can bring calmness.
Q: How often should I change the display of my artwork?
A: Regularly rotating your artwork can keep your studio feeling fresh and continuously inspire you.

Art Displays
Creating an engaging art display in your studio is not just about showcasing your work; it’s about creating an environment that fuels your creativity and reminds you of your artistic journey. Think of your art display as a gallery that speaks volumes about who you are as an artist. It should be a reflection of your style, your inspirations, and the evolution of your craft. When you walk into your studio and see your own artwork proudly displayed, it can serve as a powerful motivator. It’s like having a cheerleader in the room, encouraging you to push boundaries and explore new ideas.
To create a captivating art display, consider using a variety of presentation methods. You might choose to use frames that complement your artwork or opt for a more eclectic look with clipboards and washi tape. The key is to mix and match different styles and textures to create a visually stimulating environment. For instance, you could hang a large canvas on one wall, while using smaller pieces or sketches on shelves or easels. This not only adds depth to your display but also keeps the eye moving around the room, sparking new ideas and connections.
Another fantastic way to enhance your art display is by incorporating lighting. Good lighting can transform how your artwork is perceived. Soft, warm lights can create an inviting atmosphere, while brighter lights can highlight the details and colors in your pieces. Consider using adjustable lamps or even fairy lights to create a magical ambiance. Remember, the right lighting can make your art pop and draw attention to your best pieces, making them the stars of your studio.
Lastly, don’t forget the emotional aspect of your art display. Surround yourself with pieces that resonate with you personally. This could be artwork that inspires you, pieces that remind you of your journey, or even works created by artists you admire. By curating your display with intention, you create a space that not only showcases your talent but also nurtures your creativity. It’s like having a personal muse that whispers ideas and encouragement every time you step into your studio.
In summary, an effective art display is a blend of personal expression, thoughtful arrangement, and functional design. It should inspire you daily, reminding you of your artistic path while encouraging you to explore new avenues of creativity. So go ahead, unleash your imagination, and let your art display tell your story!
Personal Touches
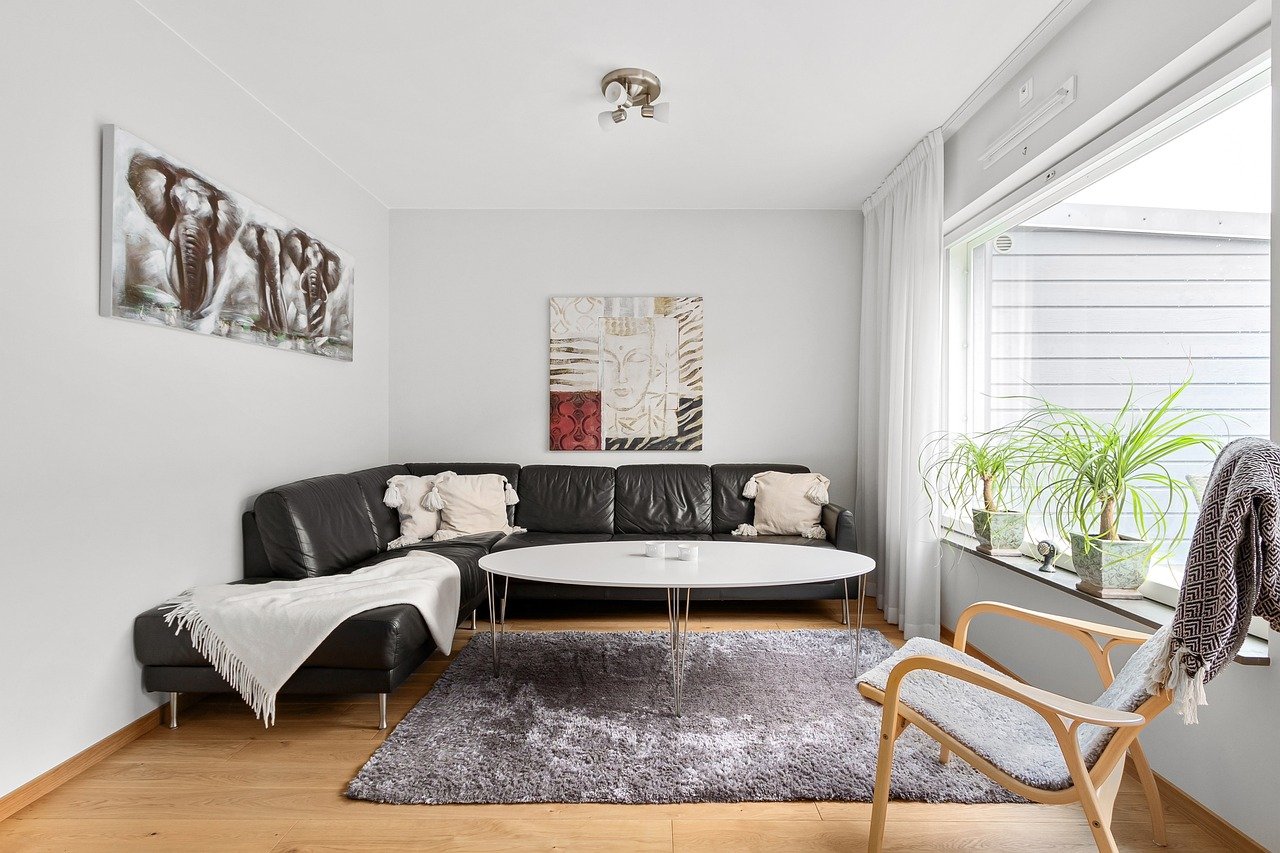
Creating a truly inspiring art studio goes beyond just organizing supplies and designating work zones; it’s about infusing your unique personality into the space. Think of your studio as a blank canvas, waiting for your personal brushstrokes to bring it to life. Adding can transform your studio from a mere workspace into a sanctuary of creativity, where every corner resonates with your artistic spirit.
One of the best ways to add these personal elements is by displaying items that hold special meaning to you. This could include photographs of loved ones, travel souvenirs, or even pieces of art that inspire you. Imagine walking into your studio and being greeted by a vibrant collage of memories and inspirations; it’s like having a personal cheer squad that motivates you every time you step in!
Another great idea is to incorporate colors and textures that resonate with you. Perhaps you adore the calming effect of blues and greens, or maybe you thrive in a space filled with warm, bold colors. Consider painting an accent wall, using colorful curtains, or adding textured fabrics to your seating area. These elements not only enhance the aesthetics but also create an atmosphere that feels inviting and energizing.
Additionally, you might want to include a dedicated area for inspirational quotes or artwork. This could be a simple corkboard or a magnetic board where you pin up your favorite sayings or images that spark your creativity. You could even rotate these items regularly to keep the inspiration fresh. Imagine the power of walking past a quote that resonates with your current artistic journey—it can be a game-changer!
Don't forget about the importance of lighting in your studio. Natural light can greatly influence your mood and creativity, so if possible, position your workspace near a window. If natural light isn't an option, consider investing in some stylish lamps that not only illuminate your space but also add to the decor. A well-lit studio can make all the difference, turning a dreary workspace into a vibrant haven.
Lastly, consider adding some plants to your studio. Not only do they purify the air, but they also bring a touch of nature indoors, which can be incredibly inspiring. Choose low-maintenance plants like succulents or peace lilies if you’re not a seasoned plant parent. The presence of greenery can boost your mood and creativity, making your studio feel more alive.
In summary, personal touches are what will make your art studio feel like your own. By surrounding yourself with items that inspire you, using colors that energize you, and creating a space that reflects your personality, you’ll foster an environment that not only boosts your creativity but also makes your artistic practice more enjoyable. Remember, your studio is a reflection of you—make it a place where you can truly thrive!
- What are some easy ways to personalize my art studio?
Consider adding photographs, artwork, or quotes that inspire you, as well as incorporating colors and textures that resonate with your style. - How can lighting affect my creativity in the studio?
Natural light can enhance your mood and productivity, while stylish lamps can create a warm atmosphere, making your workspace more inviting. - Are plants beneficial in an art studio?
Yes! Plants can purify the air and add a touch of nature, which can boost your mood and creativity.
Frequently Asked Questions
- How can I assess my art studio space effectively?
Start by evaluating the layout of your studio. Take note of the available space and how you currently use it. Identify areas that feel cluttered or uninviting, and think about how you can rearrange or repurpose those areas to enhance functionality and creativity.
- What are some effective decluttering techniques?
One great method is the "one in, one out" rule: for every new item you bring in, consider removing an old one. Additionally, set aside time each week to go through your supplies and remove anything you no longer use. This helps keep your space fresh and inspiring!
- How should I sort my art supplies?
Organize your supplies by category—paints, brushes, canvases, etc. This not only streamlines your workflow but also makes it easier to find what you need when creativity strikes. You could even color-code your storage for a fun visual element!
- What storage solutions work best for an art studio?
Consider using shelves, bins, and rolling carts to maximize your space. Open shelving can display your supplies while keeping them accessible, and bins can help keep smaller items contained and organized. Think of your studio as a canvas—how can you arrange these elements to create a masterpiece of organization?
- How can I implement a labeling system?
Creating clear labels is simple and effective! Use a label maker or write on stickers to clearly mark your supplies. This not only helps you find materials quickly but also encourages you to maintain organization over time.
- What are functional zones, and how do I create them?
Functional zones are designated areas for specific activities, like painting or drawing. To create them, simply arrange your studio so that each zone has the tools and materials needed for that particular activity. This helps you stay focused and can spark creativity as you switch between tasks.
- How can I incorporate inspiration into my studio?
Surround yourself with elements that inspire you! This could be artwork you love, colors that resonate with you, or textures that spark your creativity. Think of your studio as a reflection of your artistic journey—fill it with things that motivate you to create!
- What are some ideas for showcasing my artwork?
Consider creating a dedicated art display wall where you can hang your finished pieces. This not only serves as motivation but also creates a beautiful focal point in your studio. You could also rotate your displays regularly to keep the inspiration fresh!
- How can I add personal touches to my art studio?
Infuse your personality into your studio by adding personal items, such as photographs, souvenirs, or decor that resonates with you. These touches create a unique atmosphere that nurtures your creativity and makes the space feel truly yours.


