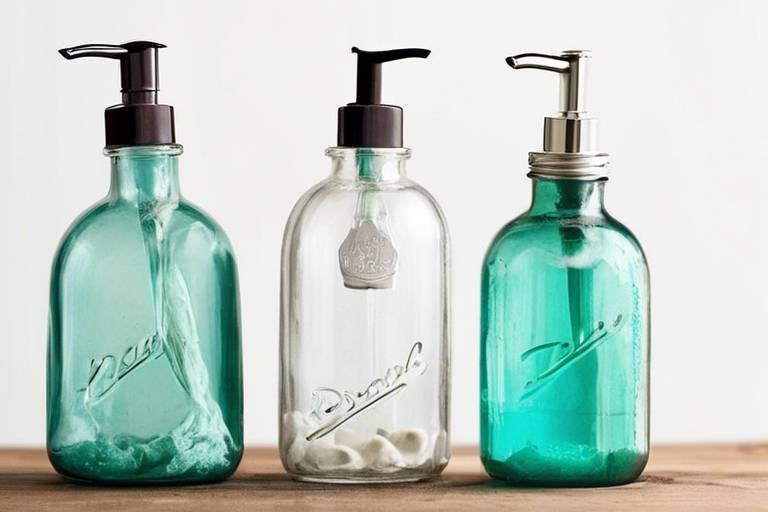
Reinvent Empty Glass Bottles into DIY Soap Dispensers
Have you ever looked at an empty glass bottle and thought, “What a waste!”? Well, it’s time to flip that thought on its head! Reinventing empty glass bottles into stylish and functional DIY soap dispensers not only breathes new life into what would otherwise be trash but also adds a personal touch to your home decor. Imagine transforming a simple bottle into a stunning piece that not only serves a purpose but also showcases your creativity. Plus, it’s a fantastic way to contribute to sustainability and reduce waste in your household. In this article, we’ll dive into the exciting world of DIY soap dispensers and explore how you can easily create your own unique designs. So, roll up those sleeves, and let’s get started on this fun and fulfilling project!
Selecting the perfect glass bottle is crucial for your DIY soap dispenser project. You want a bottle that is not only functional but also visually appealing. Consider factors like size, shape, and design. For instance, a tall, slender bottle can add elegance to your bathroom, while a round, sturdy bottle might be perfect for the kitchen. Think about where you plan to use your dispenser; this will guide your choice. If you’re aiming for a rustic look, vintage soda bottles or old olive oil containers can be fantastic options. On the other hand, if you prefer a modern aesthetic, sleek, minimalist bottles will do the trick. Ultimately, the right bottle can set the tone for your entire DIY project!
Before diving into the creative process, it’s essential to gather all the necessary tools and materials. This will not only streamline your DIY process but also save you from any last-minute trips to the store. Here’s a quick rundown of what you’ll need:
- Glass bottles: Choose the ones you want to repurpose.
- Pump mechanism: You can find these at craft stores or online.
- Cutting tools: A glass cutter or a strong pair of scissors may come in handy.
- Adhesives: Strong glue or silicone sealant works well for securing the pump.
- Paints and finishes: If you plan to decorate your dispenser.
Having everything ready at hand makes the process smoother and more enjoyable. Plus, it gives you the freedom to let your creativity flow without interruptions!
Now that you have your materials, it’s time to clean and prepare your glass bottle. Properly cleaning your bottle is essential for achieving that polished look you desire. Start by removing any labels and residues. You want a clean canvas for your masterpiece! Here’s a step-by-step guide to get your bottle ready:
Removing stubborn labels can be a pain, but fear not! There are several techniques you can try:
- Soaking: Fill your sink with warm, soapy water and let the bottle soak for a while. This often loosens the adhesive.
- Adhesive removers: Commercial products can work wonders on tough labels.
- Scraping: For any leftover residue, a gentle scrape with a razor blade can do the trick.
With a bit of patience, you’ll have a clean surface ready for your soap dispenser!
Once the labels are off, it’s crucial to disinfect your bottle to ensure it’s safe for use. A simple solution of vinegar and water can do wonders. Just mix equal parts and give your bottle a thorough rinse. Alternatively, you can use a mild bleach solution—just make sure to rinse it well afterward! This step is vital, especially if you plan to use the dispenser for liquid soap or other products.
Incorporating a pump mechanism is key to functionality. You want to make sure that your DIY soap dispenser is easy to use. There are various types of pumps available, from simple plastic ones to more elegant stainless steel options. When attaching the pump, make sure it fits snugly in the bottle opening. You can use a strong adhesive or silicone sealant to secure it in place. This is where your dispenser starts to take shape, and you’ll see all your hard work begin to pay off!
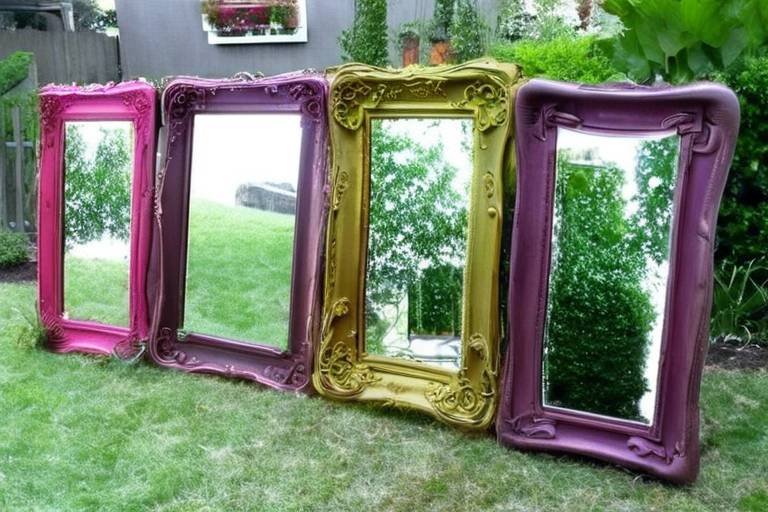
Now comes the fun part—personalizing your DIY soap dispenser! This is your chance to let your creativity shine. There are countless decorative techniques you can explore, such as painting, wrapping with twine, or even adding labels. Each method adds a unique charm to your dispenser, making it a true reflection of your style.
When it comes to painting your glass soap dispenser, you have a variety of options. Acrylic paints are a popular choice due to their versatility and ease of use. You can create beautiful designs or even go for a solid color for a minimalist look. Don’t forget to seal your paint with a clear finish to protect it from moisture and make cleaning easier!
Labeling your soap dispenser not only adds a personal touch but also helps identify contents. You can use chalkboard labels, vinyl stickers, or even hand-painted designs. Get creative! Consider using a fun font or a quirky phrase that makes you smile every time you wash your hands. It’s these little details that make your DIY project truly special.
To ensure your DIY soap dispenser lasts, regular maintenance is key. Here are some practical tips:
- Clean the dispenser regularly to prevent soap buildup.
- Refill the soap when it’s running low to keep it functional.
- Store it in a dry place to prevent moisture damage.
By following these simple maintenance tips, you can keep your DIY soap dispenser looking fresh and functional for years to come!
Q: Can I use any type of glass bottle?
A: While most glass bottles can be repurposed, it's best to choose bottles that have a wide enough opening for the pump mechanism and are sturdy enough to handle daily use.
Q: How do I ensure the pump fits my bottle?
A: Measure the opening of your bottle before purchasing a pump. Most craft stores will have a variety of pumps that can fit different bottle sizes.
Q: What kind of paint should I use on glass?
A: Acrylic paint is a great option, but make sure to seal it with a clear coat to protect it from moisture.
Q: How can I remove stubborn soap residue from the dispenser?
A: Using a mixture of vinegar and water, or a mild dish soap, can help dissolve soap residue. Make sure to rinse thoroughly afterward!

Choosing the Right Bottle
When it comes to creating your very own DIY soap dispenser, the first step is selecting the right glass bottle. This choice is crucial, as it not only affects the functionality of your dispenser but also its overall aesthetic appeal in your home. Imagine walking into your bathroom or kitchen and seeing a stylish, uniquely crafted soap dispenser that reflects your personal taste. Isn’t that a delightful thought?
So, what should you look for in a bottle? Here are a few key factors to consider:
- Size: The size of your bottle should correspond to the amount of soap you intend to use. A larger bottle is ideal for frequent use, while a smaller one can be perfect for decorative purposes or limited space.
- Shape: The shape of the bottle can significantly influence its usability and style. Tall, slender bottles may fit well on a countertop, while rounder options might be more stable and less prone to tipping over.
- Design: Look for bottles that have interesting designs or textures. A bottle with a beautiful pattern or color can serve as a stunning centerpiece in your bathroom or kitchen.
Additionally, don’t forget to consider the material of the bottle. While glass is the primary focus here, some bottles come with different finishes or coatings that can enhance their durability and visual appeal. Think about how the bottle will look with the soap you plan to use. For instance, a clear glass bottle allows the color of the soap to shine through, while a frosted or colored bottle can add a touch of elegance.
Another important aspect is the neck size of the bottle. You’ll want to ensure that it can accommodate a pump mechanism comfortably. A neck that’s too narrow may not fit standard pumps, while a wider neck could lead to spills and messes. So, measure twice and cut once—or, in this case, pump once!
In summary, choosing the right bottle for your DIY soap dispenser is all about finding a balance between functionality and style. Take your time to explore different options, and don’t hesitate to think outside the box. Remember, this is not just a soap dispenser; it’s a reflection of your creativity and a chance to add a personal touch to your home.

Essential Tools and Materials
When embarking on your journey to transform empty glass bottles into stylish DIY soap dispensers, having the right tools and materials is absolutely crucial. Think of this as your treasure map; without the right items, you might find yourself lost in a sea of missed opportunities! First and foremost, you'll need a clean glass bottle that you’ve chosen for your project. It could be anything from an elegant wine bottle to a quirky soda bottle—just make sure it has a sturdy neck to hold the pump mechanism securely.
Next, let’s talk about the essential tools. You’ll want a glass cutter or a drill with a glass bit to create a hole for the pump. If you’re going with a drill, ensure you have water on hand to keep the glass cool while you work. Nobody wants a shattered masterpiece, right? Additionally, a measuring tape will come in handy to ensure that your pump fits perfectly. Don’t forget a marker to mark where you’ll cut or drill, and a pair of gloves to protect your hands during the process.
Now, let’s not overlook the adhesives! Depending on the pump you choose, you may need a strong adhesive like epoxy resin or silicone sealant to ensure a watertight seal. These materials will help you avoid any leaks—because we all know that a soap dispenser should dispense soap, not a mini waterfall! If you’re feeling extra crafty, a hot glue gun can also be a great alternative for securing your pump, especially if you’re using a lightweight bottle.
As for decorative elements, you might want to gather some paints, brushes, and possibly even some vinyl stickers if you’re planning to label your dispenser. A clear sealant is also a good idea to protect your artwork from water damage. And let’s not forget about the soap! Choose your favorite liquid soap to fill your new dispenser once it’s all set up.
To summarize, here’s a quick overview of the essential tools and materials you’ll need:
| Item | Purpose |
|---|---|
| Glass Cutter or Drill | To create an opening for the pump |
| Measuring Tape | To ensure proper fit for the pump |
| Marker | To mark cutting/drilling points |
| Gloves | To protect your hands |
| Adhesives (Epoxy/Silicone) | To secure the pump |
| Paints and Brushes | For decoration |
| Clear Sealant | To protect your design |
With these tools and materials at your disposal, you’re well on your way to creating a functional and aesthetically pleasing DIY soap dispenser. Remember, the key to a successful project is preparation and creativity, so gather your supplies and let your imagination run wild!

Cleaning and Preparing the Bottle
Before diving into the creative process of transforming an empty glass bottle into a chic soap dispenser, it's essential to start with a clean slate. Cleaning and preparing your bottle is not just about aesthetics; it ensures that your new dispenser is safe and functional. The first step is to gather your supplies. You’ll need warm water, dish soap, a sponge, and possibly some adhesive remover if your bottle has stubborn labels.
Begin by soaking the bottle in warm, soapy water for about 30 minutes. This will help loosen any residue and make label removal much easier. After soaking, use a sponge to scrub the surface gently. Pay special attention to the neck and bottom of the bottle, where grime tends to accumulate. If your bottle has a label that refuses to budge, don’t fret! There are several techniques you can employ:
- Soaking Method: Fill the bottle with warm water and a few drops of dish soap, letting it sit for a few hours. The label should peel off easily.
- Adhesive Remover: Apply a commercial adhesive remover or a mixture of baking soda and cooking oil to the label. Let it sit for about 10 minutes before scraping it off.
- Rubbing Alcohol: For stubborn residue, rubbing alcohol can be effective. Apply it to a cloth and rub the sticky area until clean.
Once you've successfully removed the labels, it’s time to disinfect the bottle. This step is crucial, especially if you plan to use the dispenser for liquid soap. A simple mixture of vinegar and water can serve as an effective disinfectant. Fill the bottle with this solution and let it sit for 15-20 minutes. Afterward, rinse thoroughly with warm water to ensure no vinegar smell remains.
After cleaning and disinfecting, allow the bottle to air dry completely. This is important because any moisture left inside could dilute the soap when you fill it. If you’re in a hurry, you can use a clean towel to dry the interior, but be gentle to avoid any scratches. Once your bottle is dry, you’re ready to move on to the next exciting phase of your DIY project—adding that stylish pump mechanism!
Q: Can I use any type of glass bottle?
A: Yes, you can use various types of glass bottles, but ensure they have a wide enough neck to accommodate a pump mechanism.
Q: What if my bottle has a strong odor?
A: If your bottle retains an odor after cleaning, try soaking it in a mixture of baking soda and water overnight before rinsing it out.
Q: Is it safe to use adhesive removers on glass?
A: Most adhesive removers are safe for glass, but always test a small area first to ensure it doesn’t damage the surface.

Removing Labels
When embarking on your DIY soap dispenser project, the first step is to remove any labels from your glass bottles. This process may seem straightforward, but it can be a bit tricky, especially if the labels are stubborn or have left behind sticky residue. Fortunately, there are several effective methods you can use to achieve a clean and label-free surface.
One of the most popular techniques is the soaking method. Start by filling a basin or your sink with warm, soapy water. Submerge the bottle in the water and let it soak for about 30 minutes. The warm water will help loosen the adhesive, making it easier to peel off the label. After soaking, gently scrape the label off with your fingernail or a plastic scraper. If any residue remains, you can use a cloth dipped in warm soapy water to wipe it away.
If soaking doesn’t do the trick, you might want to try using an adhesive remover. There are various commercial products available, but you can also create a DIY solution using common household items. Here’s a simple recipe:
| Ingredients | Instructions |
|---|---|
| 1 cup of vinegar | Mix with 1 cup of water in a spray bottle. |
| 2 tablespoons of baking soda | Sprinkle over the label, then spray the vinegar solution. |
| Cloth | Wipe away the label after a few minutes. |
Simply spray the solution onto the label and let it sit for a few minutes before attempting to peel it off. The combination of vinegar and baking soda works wonders in breaking down the adhesive, making it much easier to remove the label.
Additionally, for those who prefer a more natural approach, you can use cooking oil or olive oil. Apply a small amount to the label and let it sit for about 10-15 minutes. The oil seeps into the adhesive, making it easier to scrape off the label without damaging the glass. Just be sure to wash the bottle thoroughly afterward to remove any oily residue.
After you've successfully removed the labels, it’s essential to thoroughly clean the bottle to ensure it’s ready for its new life as a soap dispenser. This not only enhances its appearance but also prepares it for safe use. So, roll up your sleeves and get ready to transform those empty glass bottles into stunning and functional decor!

Disinfecting the Bottle
After you've successfully removed the labels from your glass bottle, the next crucial step is disinfecting it. You want to ensure that your soap dispenser is not just pretty but also safe for use. Think of it this way: would you serve a delicious meal on a dirty plate? Of course not! The same principle applies here. When you’re repurposing bottles, you need to treat them with care and ensure they’re free from any bacteria or residues that could compromise your soap.
To disinfect your bottle effectively, you’ll need a few common household items. A mixture of warm water and white vinegar is a fantastic natural disinfectant. Here’s how you can do it:
- Step 1: Fill the bottle with a mixture of one part white vinegar to three parts warm water.
- Step 2: Let it sit for about 15-20 minutes. This allows the vinegar to work its magic, breaking down any lingering grime.
- Step 3: After soaking, use a bottle brush to scrub the inside thoroughly. This is your chance to really get into those hard-to-reach areas!
- Step 4: Rinse the bottle well with warm water to ensure all vinegar and any debris are removed.
If you prefer a stronger disinfectant, you can also use a diluted bleach solution. Mix one tablespoon of bleach with a quart of water, fill your bottle, and let it sit for about 10 minutes. Afterward, rinse thoroughly with water to remove any bleach residue. Just remember, bleach can be harsh, so it’s essential to rinse well!
Once your bottle is clean and disinfected, let it air dry completely. This is important because any moisture left inside could lead to mold growth, which is the last thing you want in your beautiful DIY soap dispenser. Think of it as giving your bottle a fresh start, ready to hold your favorite liquid soap!
So, there you have it! Disinfecting your glass bottle is a simple yet vital step that sets the foundation for a stylish and functional soap dispenser. It’s all about creating a safe space for your soap, ensuring that every pump is as fresh as it can be.
Q: Can I use any type of glass bottle for my soap dispenser?
A: Yes, you can use various types of glass bottles, but make sure they are sturdy and have a suitable opening for attaching a pump mechanism.
Q: How often should I clean and disinfect my soap dispenser?
A: It's a good idea to clean and disinfect your soap dispenser every few weeks, especially if you frequently refill it with different soaps.
Q: What if I can't find a pump that fits my bottle?
A: You can find universal pump mechanisms at craft stores or online, or you can repurpose a pump from an old soap dispenser that fits your bottle's opening.

Adding a Pump Mechanism
Incorporating a pump mechanism into your DIY soap dispenser is not just a matter of functionality; it's about creating a seamless user experience that complements your home's aesthetic. When you think about it, a pump is like the heart of your dispenser, pumping out just the right amount of soap with each press. But how do you choose the right one? There are several types of pumps available, and understanding their differences can help you make an informed decision.
First off, consider the size of the pump. You want it to fit snugly into the neck of your glass bottle without any gaps. Most pumps come in standard sizes, but it's wise to measure the opening of your bottle before making a purchase. Check out the following common pump sizes:
| Pump Size | Neck Size Compatibility |
|---|---|
| Small (28/400) | Most standard bottles |
| Medium (24/410) | Medium-sized bottles |
| Large (38/400) | Wide-neck bottles |
Next, think about the material of the pump. Plastic pumps are lightweight and often come in a variety of colors, making them a popular choice for many DIY projects. However, if you're aiming for a more elegant look, consider using a metal pump. These tend to be more durable and can add a touch of sophistication to your soap dispenser.
Once you've selected your pump, the next step is to securely attach it to your glass bottle. This is crucial, as a poorly attached pump can lead to leaks or even breakage. To ensure a strong bond, you can use a high-quality adhesive or silicone sealant. Here's a quick guide on how to attach the pump:
- Make sure the bottle opening is clean and dry.
- Apply a small amount of adhesive around the neck of the bottle.
- Insert the pump into the neck, ensuring it fits tightly.
- Allow the adhesive to cure according to the manufacturer's instructions.
After attaching the pump, it's time to fill your dispenser with soap. Choose a soap that complements your decor and offers a pleasant scent. Remember, the pump's design not only serves a functional purpose but also enhances the overall look of your DIY soap dispenser. With a little creativity and attention to detail, you can transform a simple glass bottle into a stunning piece of decor that is both practical and beautiful.
Q: Can I use any type of soap with my DIY dispenser?
A: Yes, most liquid soaps will work, but ensure they are not too thick, as this may clog the pump.
Q: How do I clean the pump mechanism?
A: You can disassemble the pump and rinse it under warm water. For a deeper clean, use a small brush to remove any residue.
Q: Are there any safety concerns when using glass bottles?
A: Always handle glass with care to avoid breakage. If you have children or pets, consider placing the dispenser in a safe location.

Decorative Techniques
When it comes to personalizing your DIY soap dispenser, the sky's the limit! Adding a decorative touch not only enhances the aesthetic appeal of your dispenser but also makes it a unique piece of art in your home. Imagine transforming a simple glass bottle into a stunning focal point in your bathroom or kitchen. The beauty of using glass bottles is that they can be dressed up in countless ways, allowing you to express your creativity while being environmentally friendly.
One of the most popular methods to decorate your soap dispenser is through painting. You can use acrylic paints, which adhere well to glass and come in a variety of colors. Before you start painting, make sure to clean the surface thoroughly to ensure the paint sticks properly. You can create a chic, modern look by opting for a sleek, monochromatic design, or go for a more rustic vibe with earthy tones and textures. For a fun twist, consider using a sponge or brush to create a marbled effect. Just remember to seal your masterpiece with a clear coat to protect it from moisture!
Another fantastic way to enhance your DIY soap dispenser is by wrapping it with natural materials. Think about using twine, jute, or even fabric to give your bottle a cozy, farmhouse feel. Wrapping the bottle can also provide a better grip when dispensing soap, which is a practical bonus! You can create a simple knot or bow for an added touch of charm. If you're feeling adventurous, why not try decoupage? Using decorative paper or fabric, you can create beautiful patterns and designs that reflect your personality.
Labeling your soap dispenser is not only functional but also adds a personal touch. You can use chalkboard paint to create a label area where you can write the contents of the bottle, or you can opt for adhesive labels that come in various designs. This is particularly useful if you have multiple dispensers for different soaps, such as hand soap, dish soap, or even lotion. Choose fonts and colors that complement the overall design of your dispenser. This small detail can make a significant impact on the overall look!
Lastly, let’s not overlook the power of accessories. Adding embellishments like beads, ribbons, or even small charms can elevate your soap dispenser from simple to stunning. You can attach these accessories to the pump or around the neck of the bottle for a playful touch. The key is to keep it balanced—too many decorations can make it look cluttered, while just a few well-placed accents can create a harmonious look.
In summary, the decorative techniques you choose for your DIY soap dispenser can truly transform it into a piece that reflects your style and enhances your home decor. Whether you prefer painting, wrapping, labeling, or accessorizing, each method offers a unique way to express your creativity. So, roll up your sleeves, gather your materials, and let your imagination run wild!
Q: Can I use any type of paint on glass bottles?
A: It's best to use acrylic paints specifically designed for glass to ensure proper adhesion and durability.
Q: How do I prevent paint from chipping off my soap dispenser?
A: Sealing your painted dispenser with a clear coat will help protect it from moisture and wear.
Q: What is the best way to remove labels from glass bottles?
A: Soaking the bottles in warm, soapy water or using adhesive removers can effectively remove stubborn labels.
Q: Can I use fabric to decorate my soap dispenser?
A: Yes! Fabric can be wrapped around the bottle or used in decoupage for a unique look.
Q: How often should I clean my DIY soap dispenser?
A: Regular cleaning is essential; aim to clean it every few weeks to maintain hygiene and appearance.

Painting and Finishing Options
When it comes to transforming your empty glass bottles into stunning DIY soap dispensers, painting and finishing options play a pivotal role in enhancing both aesthetics and functionality. The right choice of paint not only beautifies your dispenser but also ensures it withstands daily use. So, let’s dive into the vibrant world of colors and finishes that can turn your simple glass bottle into a stylish decor piece!
First and foremost, consider using acrylic paint. This type of paint is ideal for glass surfaces because it adheres well and is available in a plethora of colors. When applying acrylic paint, it’s important to start with a clean and dry surface. You can use a brush or a spray can for application, depending on the design you envision. If you’re feeling adventurous, why not try a ombre effect? Simply blend two or more colors for a gradient look that adds depth and character to your soap dispenser.
Another fantastic option is chalk paint, which offers a matte finish that can give your glass bottle a rustic, vintage feel. This paint is easy to work with and provides excellent coverage, making it perfect for those who want a more subdued, artisanal look. After applying chalk paint, you might want to seal it with a clear wax or a polyurethane finish to protect it from moisture and wear. This step is crucial, especially for a soap dispenser that will be exposed to water regularly.
Additionally, if you’re looking for something truly unique, consider using glass paint. This type of paint is specifically designed for glass surfaces and comes in both transparent and opaque varieties. Glass paint can create beautiful stained-glass effects, allowing light to pass through while adding a splash of color. Just remember to follow the manufacturer’s instructions for curing the paint to ensure it adheres properly and lasts over time.
Beyond paint, you can also explore different finishing techniques. For instance, adding a glossy finish can elevate the look of your soap dispenser, making it shine and stand out. On the other hand, a matte finish can provide a more subdued and modern appearance. You can find spray finishes that are easy to apply and can be used to achieve the desired look without the hassle of brushes or rollers.
Lastly, don’t forget about the power of stencils or decals! These can add intricate designs or personal touches to your dispenser without the need for advanced painting skills. Whether you want to add a floral pattern, geometric shapes, or even a fun quote, stencils can help you achieve a professional-looking finish. Just make sure to use paint that is compatible with the type of stencil you choose to avoid any smudging or bleeding.
In summary, painting and finishing your DIY soap dispenser is not just about making it look pretty; it’s about creating a functional piece that reflects your personal style. With the right materials and techniques, you can turn an ordinary glass bottle into a stunning addition to your home decor. So grab your paintbrushes, unleash your creativity, and let your imagination run wild!
- Can I use regular paint on glass bottles? - While you can use regular paint, it’s best to use paint specifically designed for glass to ensure durability and adherence.
- How do I ensure the paint lasts on my soap dispenser? - Sealing your painted dispenser with a clear coat can help protect it from moisture and wear.
- Can I use a dishwasher to clean my painted soap dispenser? - It’s recommended to hand wash your painted soap dispenser to avoid damaging the paint.

Labeling Your Dispenser
Labeling your DIY soap dispenser is not just a fun way to express your creativity; it also serves a practical purpose. Imagine walking into your bathroom or kitchen and instantly knowing which dispenser holds liquid soap, lotion, or even dish soap. A well-labeled dispenser can save you time and prevent any mix-ups, especially if you have multiple dispensers around your home.
When it comes to labeling, the options are endless! You can choose from various materials and methods to create labels that resonate with your personal style. Here are some popular labeling ideas:
- Chalkboard Labels: These are perfect for a rustic look. You can easily write and erase as needed, allowing for versatility in what you store.
- Vinyl Stickers: Durable and available in countless designs and fonts, vinyl stickers can add a modern touch to your dispenser. Plus, they’re waterproof!
- Handwritten Tags: If you prefer a more personal touch, consider using thick paper or cardstock to create tags. You can tie them to the pump with twine or ribbon for a charming look.
Another creative approach is to use stencils and spray paint. This technique allows you to create a clean, professional-looking label directly on the bottle. Simply place the stencil on your glass bottle and spray over it with a color of your choice. Once dried, you’ll have a beautifully labeled soap dispenser that looks store-bought!
Don’t forget to consider the theme of your space when choosing label designs. For a minimalist bathroom, simple black and white labels might work best, while a colorful kitchen could benefit from vibrant and playful fonts. The goal is to create harmony between your dispenser and your home decor.
Finally, think about the contents of each dispenser. If you’re filling one with a specific type of soap, consider labeling it accordingly to avoid any confusion. You might even want to get creative and add fun names or quotes related to the product inside. For example, a dispenser filled with lavender soap could be labeled “Relax & Unwind” for a soothing touch.
Q: What materials are best for making labels?
A: The best materials for labels depend on your style. Chalkboard labels are great for flexibility, while vinyl stickers offer durability. Handwritten tags can add a personal touch.
Q: How can I ensure my labels last?
A: If you're using paper labels, consider laminating them or using waterproof materials like vinyl to protect them from moisture and wear.
Q: Can I change the labels later?
A: Absolutely! If you use removable labels or chalkboard paint, you can easily update your dispensers to reflect new contents or a change in decor.

Maintenance Tips
Maintaining your DIY soap dispenser is crucial for ensuring its longevity and functionality. Just like any other item in your home, your glass bottle dispenser requires a bit of care to keep it looking fresh and working efficiently. First and foremost, regular cleaning is essential. You want to avoid any soap residue buildup that can make your dispenser look grimy and uninviting. A simple mixture of warm water and mild dish soap can do wonders. Use a soft cloth or sponge to gently wipe down the exterior and interior of the bottle, ensuring you reach all corners where soap might accumulate.
When it comes to refilling your soap dispenser, be mindful of the type of soap you use. Some soaps can be thicker or more viscous, which might clog the pump mechanism over time. To prevent this, look for liquid soaps that are specifically designed for dispensers. If you find that your pump is getting clogged, try running hot water through it to clear out any blockages. Additionally, consider using a funnel during refills to avoid spills and messes, making the process smoother and more efficient.
Another important aspect of maintenance is checking the pump mechanism itself. Over time, pumps can wear out or become less effective. If you notice that the pump is not dispensing soap properly, it might be time to replace it. Most pumps are relatively inexpensive and can be found at craft or home improvement stores. When replacing the pump, ensure that it fits snugly into the bottle neck to prevent leaks.
To help you remember the essential maintenance tasks, here’s a quick reference table:
| Maintenance Task | Frequency | Notes |
|---|---|---|
| Clean the dispenser | Weekly | Use warm water and mild soap |
| Check pump functionality | Monthly | Replace if clogged or malfunctioning |
| Refill soap | As needed | Use a funnel to avoid spills |
Lastly, don’t forget to give your dispenser a little TLC every now and then. If you notice any scratches or scuffs on the glass, consider using a glass polish to restore its shine. And if you’re feeling creative, you can even change up the decorative elements from time to time to keep things fresh and exciting in your bathroom or kitchen. Remember, a well-maintained DIY soap dispenser not only functions better but also enhances your home decor, making it a win-win situation!
Here are some common questions people have about maintaining their DIY soap dispensers:
- How often should I clean my soap dispenser? It's best to clean your dispenser at least once a week to prevent any soap buildup.
- What type of soap should I use? Opt for liquid soaps that are designed for dispensers to avoid clogging the pump.
- Can I use any glass bottle for this project? Yes, but ensure the bottle has a compatible neck size for the pump you choose.
- How can I remove stubborn soap residue? Soak the bottle in warm soapy water for a few hours and scrub with a soft sponge.
Frequently Asked Questions
- What types of glass bottles are best for DIY soap dispensers?
When choosing glass bottles for your DIY soap dispensers, consider bottles that have a wide mouth for easy filling and cleaning. Bottles from products like olive oil, vinegar, or even old perfume bottles can work wonderfully. Just make sure the bottle is sturdy and has a shape that you find appealing for your decor!
- How do I remove labels from glass bottles?
Removing labels can be a bit tricky, but there are several effective methods. You can soak the bottle in warm, soapy water for a few hours, which usually loosens the adhesive. If that doesn't work, try using a mixture of baking soda and cooking oil to scrub off the residue. For stubborn labels, commercial adhesive removers can also do the trick!
- Do I need to disinfect the bottle before using it as a soap dispenser?
Absolutely! Disinfecting your bottle is essential to ensure it’s safe for use. You can use a mixture of vinegar and water or a mild bleach solution to thoroughly clean the inside of the bottle. Rinse well and let it dry completely before adding your soap.
- What types of pump mechanisms can I use?
There are various types of pump mechanisms available, such as plastic or metal pumps. Make sure to choose a pump that fits the neck of your bottle snugly. You can often find these at craft stores, online, or even repurpose one from an old soap dispenser. Just ensure it’s compatible with your bottle's size!
- Can I paint my glass soap dispenser?
Yes, you can definitely paint your glass soap dispenser! Use glass paint or acrylic paint that is suitable for glass surfaces. Make sure to apply a sealer afterward to protect the paint from wear and tear. This way, your dispenser will not only look fabulous but will also last a long time!
- How can I label my soap dispenser creatively?
Labeling can be a fun part of the process! You can use chalkboard paint for a reusable label, print out custom labels using adhesive paper, or even use decorative washi tape. Just be sure that whatever you choose is waterproof, especially if it’s going to be near water!
- What maintenance do I need to perform on my DIY soap dispenser?
Maintaining your DIY soap dispenser is pretty straightforward. Regularly clean the bottle and pump to prevent soap buildup. Refill it with soap when necessary, and occasionally check for any leaks around the pump mechanism. With a little care, your dispenser can last for years!