
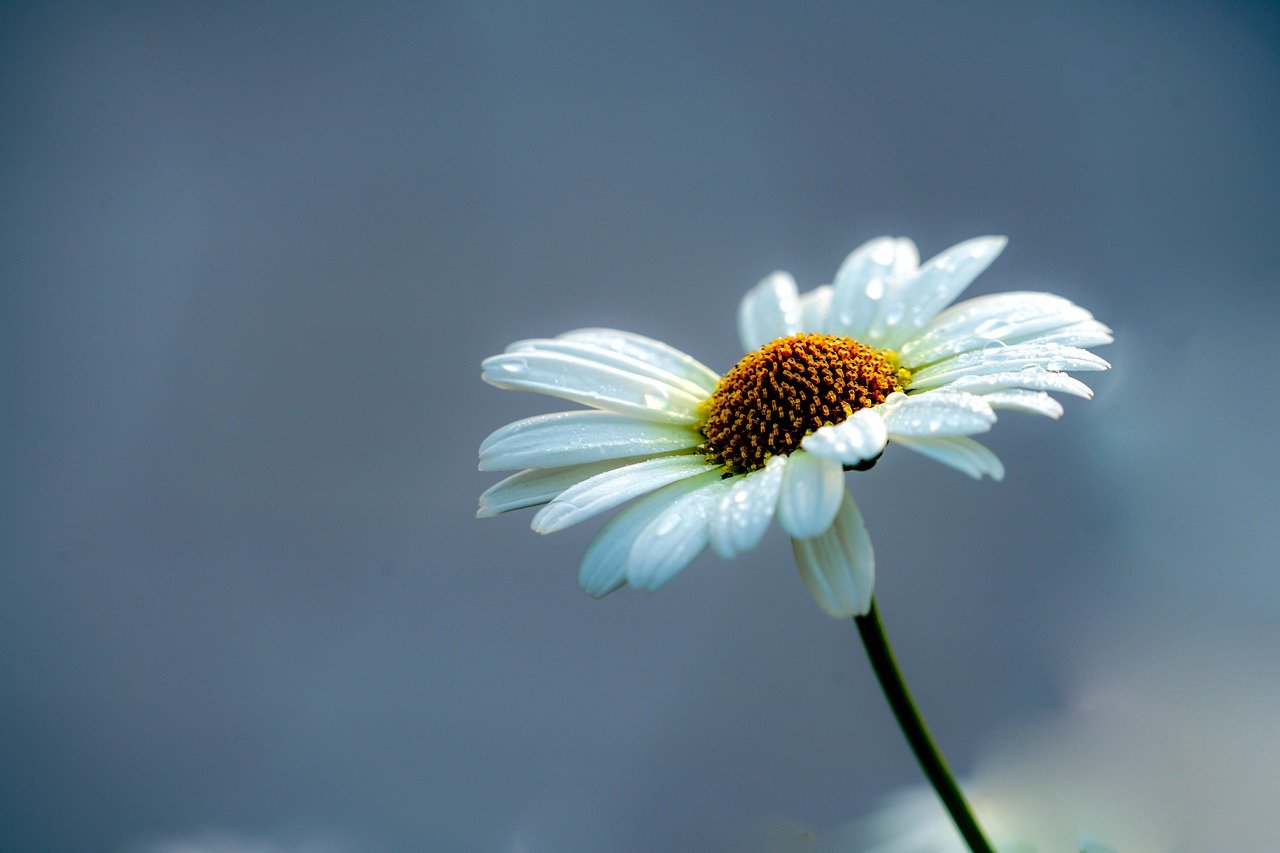
How to Paint Abstract Flowers: Step-By-Step Guide
Welcome to the vibrant world of abstract flower painting! If you're here, you're likely eager to unleash your creativity and explore the fascinating techniques that can transform a blank canvas into a stunning floral masterpiece. This guide will take you through the essential steps, from selecting your materials to adding those final touches that make your artwork pop. So, grab your brushes and let's get started!
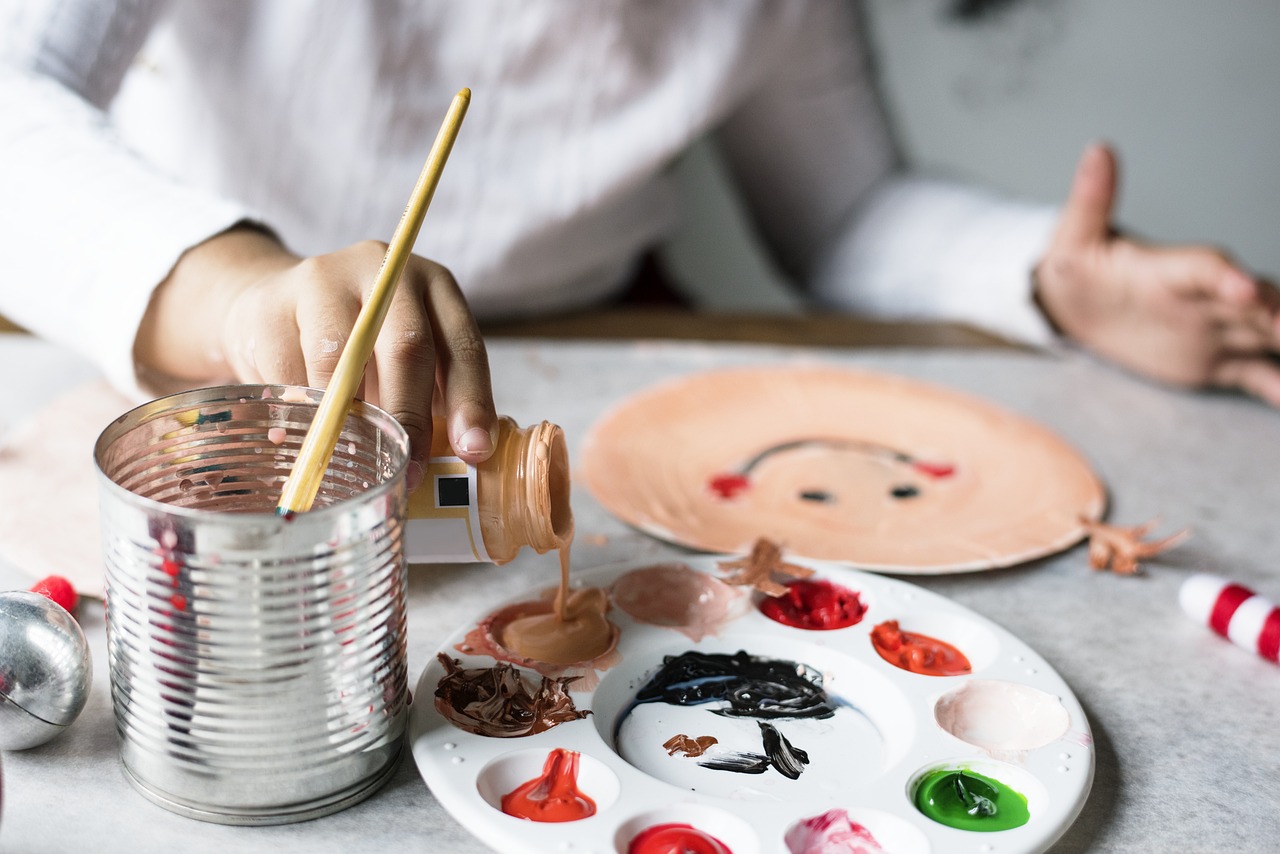
Before you dive into painting, it's crucial to gather the right materials. The quality of your supplies can significantly influence the outcome of your artwork. Here are some essentials that you should consider:
- Paints: Acrylics are popular for abstract painting due to their vibrant colors and quick drying time. Watercolors can also be used for softer effects.
- Brushes: A variety of brushes, including flat, round, and filbert, will help you achieve different textures and shapes.
- Canvas: Choose a canvas that suits your style—stretched canvases or canvas boards are great options.
- Palette: A mixing palette is essential for blending colors effectively.
Having these materials on hand will set the stage for a successful painting session. Remember, the right tools can make a world of difference!
Color theory is the backbone of any painting, especially in abstract art where colors convey emotions and set the mood. Understanding how colors interact can elevate your floral compositions to new heights. Let's break it down:
Primary colors—red, blue, and yellow—are the building blocks of all other colors. By mixing these, you create secondary colors (green, orange, and purple). Knowing how to balance these colors in your palette is key to creating visually appealing art. For instance, pairing complementary colors can create striking contrasts that draw the viewer's eye.
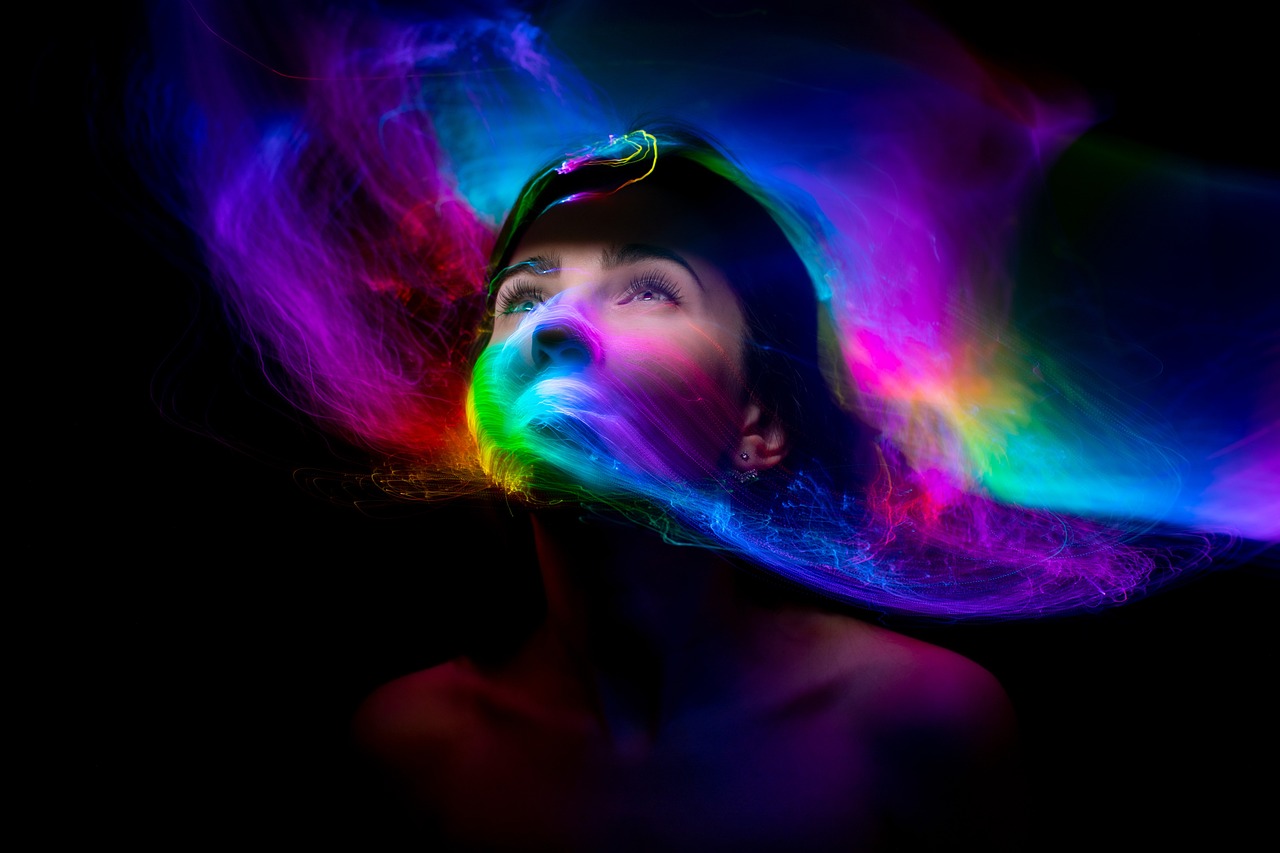
Colors can be categorized as warm (reds, oranges, yellows) or cool (blues, greens, purples). Warm colors tend to evoke feelings of energy and passion, while cool colors can create a calming effect. When painting abstract flowers, consider the mood you want to convey. Do you want your artwork to feel lively and vibrant, or calm and serene? The choice of warm or cool colors will help you achieve that.
A cohesive color palette is essential for a harmonious painting. Start by selecting a few colors that resonate with you and experiment with different combinations. You might want to create a palette that includes:
- One dominant color
- Two to three accent colors
- A neutral color to balance the composition
This approach not only enhances the visual appeal but also helps in maintaining consistency throughout your artwork.
Blending is a crucial technique in abstract painting that adds depth and dimension. There are several ways to blend colors effectively:
- Wet-on-Wet: Apply wet paint on top of wet paint for seamless transitions.
- Dry Brushing: Use a dry brush to create texture and soft edges.
- Glazing: Apply a thin layer of transparent paint over a dry layer to modify its color.
Experimenting with these techniques will help you discover your unique style in abstract flower painting.
Before you start painting, sketching your design can be incredibly beneficial. It acts as a roadmap for your artwork, helping you visualize the final piece. Take your time with this step; it’s all about planning and setting a solid foundation.
Incorporating guidelines can maintain proportions and balance in your artwork. You might want to lightly draw lines to indicate where the main elements will go. This will help you stay focused and organized as you paint.
On the other hand, freehand sketching allows for spontaneity and creativity. Don’t be afraid to let your hand flow freely; sometimes the best designs come from unplanned strokes. This approach can lead to unique shapes and forms that are truly one-of-a-kind.
Now that you have your sketch, it’s time to apply paint using various techniques. Different methods can dramatically alter the appearance of your abstract flowers and add unique effects to your artwork.
Layering is a fantastic way to add depth to your painting. Start with a base layer and gradually build up colors and textures. This technique allows you to create rich, complex compositions that draw the viewer in.
Don’t forget about texture tools! Items like sponges, palette knives, and even your fingers can create interesting textures on your canvas. Experimenting with these tools can enhance the tactile quality of your painting, making it more engaging.
As you near completion, the final touches can elevate your painting from good to great. Take a step back and evaluate your work critically. Look for areas that might need more color or texture, and don’t hesitate to make adjustments.
When assessing your abstract flowers, consider the overall balance of colors and shapes. Ask yourself if the piece conveys the emotion you intended. Sometimes, a small adjustment can make a significant difference!
Lastly, incorporating highlights and shadows can add dimension and realism to your abstract flowers. Use lighter colors to create highlights and darker shades for shadows. This technique can make your flowers pop off the canvas and create a sense of depth.
Q: What type of paint is best for beginners?
A: Acrylic paint is often recommended for beginners due to its ease of use and quick drying time.
Q: Do I need to have drawing skills to paint abstract flowers?
A: Not necessarily! Abstract painting allows for creativity and expression, so focus more on color and texture than on perfect shapes.
Q: How can I find my unique style in abstract painting?
A: Experiment with different techniques and materials. Over time, you’ll discover what resonates with you and develop your own unique style.
With these tips and techniques, you’re well on your way to creating beautiful abstract flower paintings. Remember, the key is to enjoy the process and let your creativity flow!
Choosing the Right Materials
When it comes to painting abstract flowers, the materials you choose can make all the difference in the world. Think of your paints, brushes, and canvases as your toolkit; each item plays a crucial role in bringing your creative vision to life. Start with the paints—acrylics are a popular choice due to their versatility and quick drying time, but don’t shy away from oils or watercolors if they resonate with your style. Each medium has its own unique properties that can elevate your artwork in unexpected ways.
Next up, let’s talk brushes. A variety of brush shapes and sizes can help you achieve different effects. For instance, flat brushes are fantastic for bold strokes and filling in larger areas, while round brushes are ideal for intricate details. Additionally, consider using palette knives for a more textured finish. The right tools can transform your approach to painting and allow for greater expression. Here’s a quick overview of essential materials:
| Material | Purpose |
|---|---|
| Acrylic Paints | Versatile and quick-drying, great for layering |
| Oil Paints | Rich colors and longer drying time, ideal for blending |
| Watercolors | Light and translucent, perfect for soft washes |
| Brushes | Different shapes for various techniques (flat, round, fan) |
| Palette Knives | For texture and unique effects |
| Canvas or Paper | Surface to paint on; choose based on your medium |
Don’t forget about your canvas! The choice between stretched canvas, canvas boards, or watercolor paper can significantly affect your final piece. If you’re aiming for vibrant colors and thick textures, a primed canvas is your best bet. On the other hand, if you prefer a more delicate touch, watercolor paper can provide a beautiful backdrop for softer hues.
Finally, consider your workspace. A well-organized area with good lighting can inspire creativity and make the painting process much more enjoyable. Gather all your materials in one place, and don’t hesitate to add some fun extras like sponges, rags, or even spray bottles for a unique flair. Remember, the journey of creating abstract flowers is as much about the materials you use as it is about the ideas you bring to life.
Understanding Color Theory
Color theory is the backbone of any artistic endeavor, especially when it comes to painting abstract flowers. It’s not just about slapping on colors; it’s about understanding how they interact, how they can evoke emotions, and how they can transform a simple canvas into a breathtaking masterpiece. When you grasp the fundamentals of color theory, you unlock a treasure trove of possibilities for your floral artwork. Think of it like a secret language that allows you to communicate feelings, moods, and ideas through your art.
At its core, color theory revolves around the color wheel, which organizes colors in a way that illustrates their relationships. The wheel consists of primary, secondary, and tertiary colors. Understanding these categories is essential for creating a balanced and harmonious palette. For instance, primary colors—red, blue, and yellow—cannot be created by mixing other colors, while secondary colors—green, orange, and purple—are formed by mixing two primary colors. Tertiary colors, on the other hand, are created by mixing a primary color with a secondary color, adding even more depth to your palette.
When you’re painting abstract flowers, the significance of primary and secondary colors cannot be overstated. They are the building blocks of your color palette, providing the foundation upon which you can create stunning floral compositions. For example, imagine a vibrant bouquet of abstract flowers painted with bold primary colors. The energy and excitement they bring can be captivating! Conversely, using softer secondary colors can evoke a sense of calm and tranquility, perfect for creating a serene garden scene.
Another critical aspect of color theory is the distinction between warm and cool colors. Warm colors, such as reds, oranges, and yellows, tend to evoke feelings of warmth, passion, and energy. They can make your abstract flowers appear lively and full of vigor. On the flip side, cool colors like blues, greens, and purples can create a sense of calmness and relaxation. When combined thoughtfully, these colors can create a dynamic tension in your artwork, drawing the viewer’s eye and evoking a range of emotions.
Now that you have a grasp on primary and secondary colors, as well as warm and cool tones, it’s time to talk about creating a cohesive color palette. A well-thought-out color palette is essential for achieving harmony in your artwork. Start by selecting a few colors that resonate with the mood you want to convey. Here’s a simple process to create your palette:
- Choose a dominant color that will set the tone for your piece.
- Pick two or three complementary colors to add depth and interest.
- Incorporate an accent color to create focal points and draw attention.
Remember, the key is to maintain balance and cohesion throughout your painting. Experiment with different combinations and trust your instincts. The beauty of abstract art lies in its freedom to explore and express!
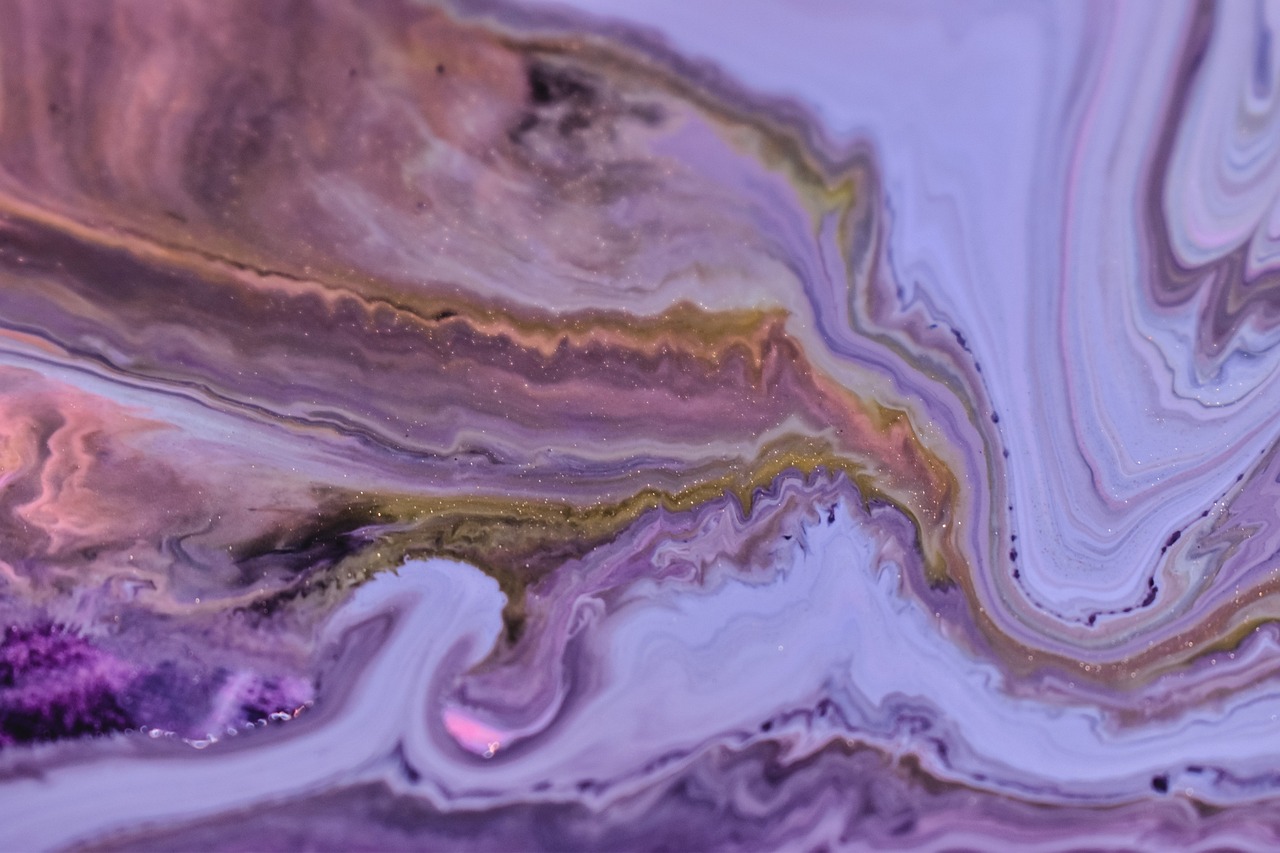
Once you have your colors selected, blending techniques become crucial for achieving depth and dimension in your abstract flower paintings. Blending allows you to create smooth transitions between colors, enhancing the overall aesthetic of your artwork. Techniques such as wet-on-wet blending, where you apply wet paint onto wet paint, can produce stunning gradients that mimic the natural flow of petals and leaves. Alternatively, dry brushing can add texture and create a more dynamic visual experience.
Q: What are the best colors to use for abstract flowers?
A: There are no strict rules! However, consider using a mix of warm and cool colors for a balanced look. Bright colors can evoke energy, while softer hues can create a calming effect.
Q: How do I know if my color palette is working?
A: Step back and evaluate your painting. Does it evoke the emotion you intended? If not, don’t hesitate to adjust your colors until you achieve the desired effect.
Q: Can I use colors that clash?
A: Absolutely! Abstract art thrives on experimentation. Clashing colors can create tension and intrigue, making your piece more dynamic and engaging.
Primary and Secondary Colors
Understanding primary and secondary colors is essential for creating a balanced and harmonious palette in your abstract flower paintings. Primary colors—red, blue, and yellow—are the building blocks of all other colors. When mixed together, they can produce an array of vibrant shades that can evoke various emotions and atmospheres in your artwork. For instance, combining red and blue creates purple, a color often associated with creativity and imagination. This is particularly relevant when painting abstract flowers, as the right mix can breathe life and emotion into your floral compositions.
Secondary colors, on the other hand, are derived from mixing two primary colors together. These include:
- Green (blue + yellow)
- Orange (red + yellow)
- Purple (red + blue)
When you understand how to utilize both primary and secondary colors, you can create a dynamic color palette that enhances the visual interest of your artwork. For example, if you want to create a sense of tranquility in your abstract flower painting, consider using cool colors like blue and green. Alternatively, warm colors like red and orange can evoke feelings of energy and passion. The interplay between these colors can transform a simple composition into a mesmerizing piece that captures the viewer's attention.
Moreover, it’s crucial to remember that not all colors work well together. The concept of color harmony comes into play here. You can achieve harmony by selecting colors that complement each other and create a visually appealing balance. This is where the color wheel becomes an invaluable tool. It helps you see which colors are complementary (opposite each other on the wheel) and which are analogous (next to each other on the wheel). By strategically choosing colors based on their relationships, you can create stunning abstract floral arrangements that resonate with viewers.
In conclusion, the significance of primary and secondary colors in abstract flower painting cannot be overstated. They serve as the foundation for your color choices and can dramatically influence the mood and impact of your artwork. So, the next time you sit down to create, take a moment to consider how you can mix and match these colors to bring your abstract flowers to life!
- What are primary colors? Primary colors are red, blue, and yellow. They cannot be created by mixing other colors.
- What are secondary colors? Secondary colors are green, orange, and purple, which are created by mixing primary colors.
- How can I create a harmonious color palette? Use the color wheel to find complementary and analogous colors that work well together.
- Why is color theory important in painting? Color theory helps artists understand how to mix colors and create emotional responses through their artwork.

Warm vs. Cool Colors
When it comes to painting abstract flowers, understanding the difference between warm and cool colors is essential. Colors can evoke emotions, set the mood, and create a sense of depth in your artwork. Warm colors, such as reds, oranges, and yellows, are often associated with energy, passion, and warmth. These hues can make your flowers appear vibrant and lively, drawing the viewer's eye and creating a sense of excitement. Imagine a field of sunflowers basking in the golden light of a summer day; that’s the kind of warmth these colors can convey.
On the other hand, cool colors, including blues, greens, and purples, tend to evoke feelings of calmness, tranquility, and serenity. Think about a peaceful garden at dawn, where soft bluebells and lavender sway gently in the breeze. These colors can create a soothing atmosphere in your painting, allowing the viewer to feel a sense of peace. When you blend warm and cool colors in your abstract flower paintings, you can achieve a stunning contrast that adds depth and intrigue.
To effectively use warm and cool colors in your artwork, consider the following:
- Balance: Strive for a balance between warm and cool tones to create harmony in your composition.
- Contrast: Use warm colors to highlight certain elements of your flowers, while cool colors can serve as a backdrop, enhancing the overall visual appeal.
- Layering: Experiment with layering warm and cool colors to see how they interact with each other, creating unique effects and textures.
Understanding how to manipulate warm and cool colors will not only enhance your abstract flower paintings but also allow you to express emotions and themes more effectively. So, next time you pick up your brush, think about the mood you want to convey and how the colors you choose can help tell that story.
- What are warm colors? Warm colors include reds, oranges, and yellows, which evoke feelings of energy and warmth.
- What are cool colors? Cool colors consist of blues, greens, and purples, often associated with calmness and tranquility.
- How can I use both warm and cool colors in my painting? You can balance and contrast these colors to create depth, highlight specific areas, and enhance the overall mood of your artwork.
Creating a Color Palette
When it comes to painting abstract flowers, creating a color palette is not just about picking pretty colors; it's about crafting an entire emotional experience on your canvas. A well-thought-out color palette can transform your artwork from mundane to mesmerizing. Imagine walking through a vibrant garden; the way the colors blend and contrast can evoke feelings of joy, calm, or even nostalgia. This is the magic you want to capture in your abstract floral art.
To start, consider the **mood** you want to convey. Are you aiming for a **cheerful** and **bright** piece that radiates happiness? Or perhaps a more **serene** and **calming** composition that invites tranquility? Understanding the emotional impact of colors is crucial. For instance, warm colors like reds, oranges, and yellows can create feelings of warmth and excitement, while cool colors such as blues and greens often evoke calmness and relaxation.
Next, it's essential to think about **color harmony**. This concept refers to how well colors work together. You can achieve harmony through various color schemes:
- Analogous Colors: These are colors that sit next to each other on the color wheel, such as blue, blue-green, and green. They create a serene and comfortable design.
- Complementary Colors: Colors that are opposite each other on the color wheel, like red and green. This scheme can create a vibrant look, perfect for making your flowers pop.
- Triadic Colors: This scheme involves three colors that are evenly spaced on the color wheel, such as red, yellow, and blue. It offers a balanced yet vibrant palette.
Once you've determined the mood and color harmony, it's time to start experimenting! Don't hesitate to mix colors on your palette to see how they interact. A good tip is to create a small test piece where you can play around with different combinations before committing them to your main canvas. This practice not only helps in refining your palette but also boosts your confidence as you see how colors blend and react with one another.
Remember that your palette should have a mix of **light**, **medium**, and **dark** shades. This variation adds depth and dimension to your artwork. For instance, if your primary color is a bright yellow, consider adding a deeper gold and a light pastel yellow to your palette. This will allow you to create highlights and shadows, making your abstract flowers appear more lifelike and dynamic.
Finally, keep in mind that your color palette can evolve throughout your painting process. Sometimes the colors you initially choose may not work as you envisioned. That's perfectly okay! Embrace the journey of painting and let your intuition guide you. After all, abstract art is about expression and creativity. So, grab your brushes and let your colors flow!
Blending Techniques
When it comes to painting abstract flowers, mastering can truly transform your artwork, giving it depth and dimension that captures the eye. Blending is not just about mixing colors; it’s about creating a seamless transition between hues, allowing your flowers to burst with life and vibrancy. Imagine a garden where the colors of the petals softly merge into one another, creating a beautiful symphony of shades. This is the magic that blending can bring to your canvas!
One popular method is the wet-on-wet technique, where you apply wet paint onto wet paint. This technique allows colors to blend effortlessly, creating soft edges and a dreamy effect. It’s like watching a watercolor painting come to life! To try this, simply prepare your canvas with a thin layer of water or a medium, then apply your colors while they are still wet. The key is to work quickly and be gentle with your brush strokes.
Another effective technique is dry brushing, which involves using a dry brush to apply paint. This method creates a textured look and can add a sense of movement to your flowers, reminiscent of a gentle breeze rustling through petals. To achieve this, lightly dip your brush into paint and then wipe off most of it on a paper towel. Then, lightly drag the brush across your canvas, allowing the texture of the canvas to show through. It’s a fantastic way to add depth without overwhelming your composition!
For those looking to experiment further, blending with a palette knife can yield stunning results. Using a palette knife allows for bold strokes and unique textures that brushes simply can’t achieve. You can scrape colors together, create sharp lines, or even spread paint across the canvas for a more abstract feel. This technique is perfect for those who want to break away from traditional methods and add a bit of edge to their floral compositions.
Don’t forget about the importance of layering when blending. By applying multiple layers of paint, you can build up color and texture gradually. Start with a base layer and let it dry before adding more colors on top. This not only enhances the depth of your flowers but also allows for more intricate blending as you work with dried layers. It’s like constructing a flower petal, one layer at a time!
In conclusion, blending techniques are essential for creating captivating abstract flowers. Whether you prefer the softness of wet-on-wet, the texture of dry brushing, or the boldness of a palette knife, experimenting with these methods will undoubtedly enhance your artistic skills and bring your floral visions to life. So grab your brushes, let your imagination run wild, and watch as your canvas transforms into a vibrant garden of abstract flowers!
- What is the best technique for blending colors in abstract painting?
The wet-on-wet technique is often preferred for its ability to create soft transitions between colors. However, dry brushing and palette knife techniques also offer unique blending effects. - How can I achieve depth in my abstract flower paintings?
Layering colors and using different blending techniques can significantly enhance the depth and dimension of your artwork. - Do I need special brushes for blending?
While specific brushes can help, you can achieve great results with regular brushes as long as you focus on the technique and practice.
Sketching Your Design
Before diving into the vibrant world of painting abstract flowers, it’s essential to lay down a solid foundation through sketching your design. Think of sketching as the blueprint of a building; without it, your masterpiece might end up a chaotic jumble of colors and shapes. A well-planned sketch not only guides your brush strokes but also helps in visualizing the final outcome. By taking a moment to sketch, you can explore different compositions and arrangements, ensuring that your creative vision is effectively translated onto the canvas.
One important aspect of sketching is the use of guidelines. These invisible lines can help maintain proportions and balance, acting as a compass to navigate your artistic journey. For instance, if you’re aiming to create a bouquet of abstract flowers, lightly sketching the stems and general shapes can provide a sense of structure. You might want to consider the following when using guidelines:
- Establish the central focal point of your composition.
- Determine the overall shape and flow of your floral arrangement.
- Mark the placement of each flower to ensure a balanced distribution across the canvas.
On the other hand, freehand sketching offers a delightful sense of spontaneity and creativity. It allows you to break free from the constraints of rigid guidelines, letting your imagination run wild. Imagine yourself dancing with your pencil, creating whimsical forms that capture the essence of flowers without being confined to realism. This technique can lead to unique abstract designs that are truly your own, embodying your artistic voice. The beauty of freehand sketching is that it encourages you to embrace imperfections, transforming them into delightful quirks that add character to your artwork.
As you sketch, don’t shy away from experimenting with different shapes and sizes. Abstract flowers can be anything from exaggerated petals to swirling forms that evoke a sense of movement. Consider using shapes that resonate with you, whether they’re bold and angular or soft and flowing. Each stroke of your pencil or brush can reflect your mood and emotions, making the artwork a personal expression of who you are.
Once you’ve completed your sketch, take a moment to step back and evaluate your design. Ask yourself questions like: Does the composition feel balanced? Are there areas that seem too crowded or too empty? This critical evaluation is vital as it sets the stage for the next steps in your painting process. Remember, sketching is not just a preparatory step; it’s an integral part of your artistic journey that can significantly influence the outcome of your abstract floral masterpiece.
Q: How detailed should my sketch be?
A: Your sketch can be as detailed or as loose as you prefer. The goal is to establish a foundation for your painting, so focus on capturing the essence of your design rather than getting caught up in minute details.
Q: Can I erase parts of my sketch?
A: Absolutely! Sketching is a flexible process. If something doesn’t feel right, don’t hesitate to adjust or erase parts of your sketch until you’re satisfied with the composition.
Q: Do I need to use a specific type of pencil for sketching?
A: While any pencil can work, using a softer pencil (like a 2B or 4B) allows for smoother lines and easier erasing, making it ideal for sketching your design.
Using Guidelines
When it comes to painting abstract flowers, is an essential step that many artists overlook. Think of guidelines as the scaffolding of your artwork; they provide structure and support, allowing you to create a balanced and visually appealing composition. By establishing a clear framework before you start applying paint, you can ensure that your flowers won't end up looking lopsided or chaotic. So, how do you incorporate guidelines into your creative process?
First, consider the overall shape and size of your flowers. Using a light pencil or charcoal, sketch out the basic outline of your design. This doesn’t have to be overly detailed; rather, focus on the large forms and how they interact with each other. For instance, if you're painting a bouquet, you might want to map out where each flower will sit in relation to the others. This step is crucial because it allows you to visualize the final piece before committing to paint.
Next, you can create a grid or use simple geometric shapes to help maintain proportions. For example, if you want to ensure that one flower doesn’t dominate the canvas, you could draw circles to represent each flower's space. This technique not only helps with size but also gives you a sense of balance across the entire canvas. Here’s a quick breakdown of how you can set up your guidelines:
- Choose Your Canvas: Decide on the size of your canvas first, as this will determine how you lay out your flowers.
- Sketch Lightly: Use a pencil to lightly outline the main shapes of your flowers and their positions.
- Use Shapes for Structure: Incorporate circles, ovals, or rectangles to define the space each flower will occupy.
- Adjust as Needed: Don’t hesitate to erase and modify your guidelines until you are satisfied with the layout.
Once your guidelines are in place, you can start painting with greater confidence. They serve as a roadmap, allowing you to focus on the colors and textures without worrying about the overall composition. As you paint, you can gradually erase or paint over these guidelines, letting your creativity shine through while still having that initial structure to guide you.
Remember, the goal of using guidelines is not to stifle your creativity but to enhance it. It’s like having a safety net—one that allows you to take artistic risks while ensuring that your final piece remains cohesive and engaging. So, the next time you sit down to paint, consider using guidelines as your secret weapon to create stunning abstract flower art!
Q: Do I have to use guidelines for every abstract painting?
A: Not necessarily! Guidelines are particularly helpful for beginners or when you're aiming for a specific composition. As you gain experience, you might find that you can paint more freely without them.
Q: Can I paint over my guidelines?
A: Absolutely! The idea is to use them as a foundation. Once you’re satisfied with the placement and proportions, feel free to paint over them as you develop your artwork.
Q: What if I make a mistake while sketching guidelines?
A: No worries! Just erase the part you don’t like and adjust it as needed. Art is all about experimentation, and mistakes can often lead to new ideas!
Freehand Sketching
Freehand sketching is an exhilarating way to express your creativity and capture the essence of abstract flowers without the constraints of precision. Imagine standing before a blank canvas, your heart racing with the possibilities that lie ahead. There's no ruler to bind you, no grid to restrict your imagination; just you, your tools, and a world of color waiting to burst forth. This method encourages spontaneity, allowing your hand to move freely as your mind wanders through the vibrant landscapes of your imagination.
One of the most significant advantages of freehand sketching is that it fosters a genuine connection between the artist and the artwork. As you draw, you can feel the energy of the lines and shapes flowing from your fingertips. This connection can lead to unique designs that might not have emerged through more rigid sketching methods. Think of it as a dance between your mind and hand, where every stroke tells a story and every curve reveals a hidden emotion.
To get started with freehand sketching, consider the following tips:
- Relax and Let Go: The key to successful freehand sketching is to relax. Don't stress about making mistakes; instead, embrace them as part of the creative process.
- Visualize Your Flowers: Before you start, take a moment to visualize the flowers you want to create. Picture their shapes, colors, and the emotions they evoke.
- Use Light Pencil Strokes: Start with light pencil strokes to outline your flowers. This way, you can easily adjust or erase any lines that don’t fit your vision.
- Focus on Shapes and Forms: Instead of getting bogged down in details, concentrate on the overall shapes and forms of your flowers. This abstraction will help create a more dynamic composition.
Remember, freehand sketching is all about exploration. Allow yourself to experiment with different styles and techniques. You might find that your sketches evolve into something entirely unexpected and beautiful. As you become more comfortable with this approach, you'll notice your unique artistic voice beginning to emerge, transforming your abstract flowers into truly original pieces.
Incorporating freehand sketching into your artistic process not only enhances your creativity but also serves as a warm-up exercise before diving into the painting phase. It’s like stretching before a workout; it prepares your mind and hand for the more intricate work ahead. So grab your sketchbook, let your imagination run wild, and see where the journey of freehand sketching takes you!
Q: Do I need to be good at drawing to freehand sketch?
A: Not at all! Freehand sketching is about expressing yourself and exploring your creativity. It's perfectly fine to start with basic shapes and gradually develop your skills.
Q: What materials do I need for freehand sketching?
A: You can start with just a pencil and paper. As you progress, you might want to experiment with different types of pencils, erasers, and sketchbooks.
Q: How can I improve my freehand sketching skills?
A: Practice is key! Try sketching regularly, and don’t be afraid to experiment with different styles. Observing real flowers and sketching them can also help improve your skills.
Applying Paint Techniques
When it comes to painting abstract flowers, the techniques you choose can dramatically alter the outcome of your artwork. Think of these techniques as the spices in a recipe; each one adds its unique flavor, creating something truly delightful. In this section, we'll explore a variety of methods such as layering, splattering, and dry brushing that can help you achieve unique effects and bring your floral creations to life.
One of the most effective techniques is layering. This method involves applying multiple layers of paint to build depth and complexity in your artwork. Imagine the petals of a flower; they’re not just flat colors but consist of various shades and hues that catch the light differently. By layering colors, you can create a sense of dimension that makes your flowers pop off the canvas. To get started with layering:
- Begin with a light base layer to establish the main shapes of your flowers.
- Once dry, add darker shades to create shadows and depth.
- Finish with highlights using lighter colors to mimic light reflecting off the petals.
Another exciting technique is splattering. This method can add an element of surprise and spontaneity to your work. It’s like throwing confetti at a party; it adds energy and excitement! To incorporate splattering into your abstract flower painting:
- Load your brush with paint and flick it onto the canvas.
- Experiment with different brush sizes for varied splatter effects.
- Use contrasting colors to make the splatters stand out and create visual interest.
Finally, let’s talk about dry brushing. This technique involves using a dry brush with minimal paint to create soft textures and delicate details. It’s perfect for adding subtle highlights or creating the illusion of fine petals. Think of it as whispering to the canvas rather than shouting. To master dry brushing:
- Choose a stiff-bristled brush and dip it lightly in paint.
- Wipe off excess paint on a paper towel.
- Gently brush over the surface of your painting to create soft lines and textures.
Incorporating these techniques into your painting process can not only enhance your abstract flower art but also provide you with a deeper understanding of how different methods can interact. As you practice, don’t be afraid to mix and match these techniques; the beauty of abstract art lies in its freedom and the unique expressions it allows. Let your creativity flow, and watch as your flowers bloom on the canvas!
Q: What materials do I need to start painting abstract flowers?
A: You will need acrylic or oil paints, various brushes, a canvas or paper, and optional tools like palette knives and sponges for texture.
Q: Can I use any colors for my abstract flowers?
A: Absolutely! Abstract art is all about expression. Feel free to experiment with any colors that inspire you, but understanding color theory can help enhance your compositions.
Q: How do I know when my painting is finished?
A: It often comes down to personal preference. Step back and evaluate your work. If you feel it captures the emotion you intended, it may be time to call it done!
Layering for Depth
Layering is one of the most exciting techniques in abstract painting, especially when it comes to creating depth in your floral masterpieces. Imagine a garden where each flower stands out yet harmonizes with the others; that’s the magic of layering! By applying multiple layers of paint, you can achieve a rich, textured look that draws the viewer in and adds an element of intrigue to your artwork. So, how do you get started with layering? Let’s dive into some essential tips and techniques.
First off, it’s important to understand that layering is not just about slapping on paint one after another. It’s about creating a sense of dimension and movement in your artwork. Start with a solid base layer, which can be a simple wash of color that sets the tone for your painting. This base layer acts like the foundation of a house; it supports everything that comes after it. You can use a wide brush or even a sponge to apply this initial layer, ensuring it’s evenly distributed.
Once your base layer is dry, it’s time to add the first layer of flowers. Here, you can use a slightly darker or lighter shade of the same color to create the illusion of depth. For instance, if your base is a soft lavender, try adding a deeper purple for the flowers. This contrast will make them pop! Remember, the key is to let each layer dry before applying the next one. This not only prevents colors from muddying but also allows you to see how the layers interact with one another.
As you continue to layer, consider using different techniques to add texture. For example, you can dry brush to create a soft, wispy effect or use a palette knife for a more dramatic, impasto look. Each technique can contribute to the overall feel of your painting. Here’s a quick breakdown of some layering techniques you might find useful:
- Glazing: Applying a thin, transparent layer of paint over a dry layer to alter the color and create depth.
- Scumbling: A technique where a dry brush is used to apply a thin layer of lighter paint over a darker layer, creating a textured effect.
- Wet-on-wet: Applying wet paint onto wet paint, allowing for beautiful blending and soft edges.
Another tip is to play with transparency. Using transparent paints can help you build layers without overwhelming the underlying colors. This is especially effective in floral paintings where you want to maintain a sense of lightness and airiness. Think of it like creating a beautiful stained glass window; each layer should enhance the one beneath it, allowing colors to shine through.
Finally, don’t forget about the importance of contrast in your layers. Using lighter colors over darker ones can create striking visual interest and help your flowers stand out. It’s like adding a sprinkle of salt to a dish; it enhances the flavors and brings everything together. So, as you layer, take a step back and evaluate how the colors interact. Are they harmonizing? Do they evoke the emotions you want to convey? Adjust as necessary, and don’t be afraid to experiment!
In conclusion, layering is a powerful technique that can elevate your abstract flower paintings from good to extraordinary. It’s about building depth, creating texture, and allowing your creativity to flow. So grab your brushes, mix those colors, and start layering your way to stunning floral art!
1. How many layers should I use in my painting? There’s no strict rule! It depends on the effect you want to achieve. Start with a few and add more as needed.
2. Can I layer different types of paint? Yes! Just make sure to check the drying times and compatibility of the paints you are using.
3. What should I do if my colors become muddy? If your colors start to look muddy, let the layers dry completely before adding more. You can also use glazing techniques to adjust the color without disturbing the underlying layers.
Using Texture Tools
When it comes to painting abstract flowers, texture is your best friend. It adds a whole new dimension to your artwork, making it not just visually appealing but also inviting to touch. Think of texture as the secret ingredient in a recipe—it can transform a simple dish into a gourmet experience. In the world of abstract painting, texture can be created using a variety of tools and techniques that allow your flowers to leap off the canvas.
One effective way to create texture is by using palette knives. These versatile tools enable you to apply paint in thick layers, creating bold strokes and interesting patterns. Imagine spreading frosting on a cake; that’s how you can use a palette knife to manipulate paint. You can scrape, layer, and even mix colors directly on the canvas, producing a unique look that brushes alone simply can’t achieve.
Another popular method is to use sponges. Sponges can create soft, organic textures that mimic the delicate petals of flowers. By dabbing paint onto the canvas with a sponge, you can achieve a more subtle and blended effect. This technique is particularly useful for creating backgrounds or for layering colors to give your flowers depth. You might even consider using natural sponges, which can add an even more authentic feel to your work.
Don’t overlook the potential of textured rollers as well. These tools can be rolled over wet paint to create consistent patterns, adding an element of rhythm and flow to your artwork. Think of it as rolling out dough; the more you roll, the more defined your patterns become. You can also experiment with various materials on the rollers—like fabric or even leaves—to create unique effects that can enhance your floral designs.
Here’s a quick summary of some effective texture tools you can use:
| Tool | Effect |
|---|---|
| Palette Knife | Thick layers and bold strokes |
| Sponges | Soft textures and blended effects |
| Textured Rollers | Consistent patterns and rhythm |
| Brushes | Varied strokes and detailed textures |
Finally, don’t forget about traditional brushes. Different brush types can create varied textures, from fine details to broad strokes. Experiment with different sizes and shapes to see how they affect your flower painting. Remember, the key to mastering texture is experimentation; don’t be afraid to try out new tools and techniques. The beauty of abstract art is that there are no rules—only possibilities!
- What are the best materials for creating texture in abstract flower paintings? The best materials include palette knives, sponges, textured rollers, and a variety of brushes. Each tool offers unique effects that can enhance your artwork.
- Can I use household items to create texture? Absolutely! Items like plastic wrap, cardboard, or even your fingers can create interesting textures. Get creative with what you have at home!
- How do I know which texture tool to use? It often depends on the effect you want to achieve. If you’re looking for bold and dramatic textures, a palette knife is ideal. For softer, more blended textures, sponges work best.
- Is it possible to overdo texture in my painting? Yes, while texture can enhance your artwork, too much can overwhelm the viewer. Balance is key, so use texture thoughtfully to complement your flowers.
Final Touches and Enhancements
When it comes to painting abstract flowers, the final touches can truly make all the difference between a piece that feels complete and one that still seems unfinished. After investing time and energy into your artwork, taking a step back to evaluate and refine it is essential. This stage is where you can transform your painting from something good into something extraordinary. So, how do you go about this? Let’s dive into some practical tips and techniques!
First and foremost, evaluating your work is crucial. Step away from your canvas and look at it from a distance. This perspective allows you to see the overall composition and identify any areas that might need adjustment. Sometimes, a painting can feel off-balance or lacking in harmony, and recognizing these elements is the first step toward improvement. Consider asking yourself questions like:
- Does the color palette feel cohesive?
- Are there areas that feel too crowded or too empty?
- Do the shapes and forms flow well together?
Once you've assessed your artwork, it’s time to think about adding highlights and shadows. These elements are essential for creating depth and dimension in your abstract flowers. Highlights can draw attention to certain areas, making them pop, while shadows can add a sense of realism and grounding to your composition. To effectively incorporate these elements, consider using a lighter shade of your base color for highlights and a darker shade for shadows. This technique will not only enhance the visual appeal but also create a more dynamic interaction between the colors on your canvas.
Another effective method for enhancing your painting is through the use of texture. Adding texture can elevate your artwork by providing a tactile quality that draws the viewer in. You can achieve this by experimenting with different tools, such as palette knives, sponges, or even your fingers! Each tool can create unique effects, so don’t be afraid to play around and see what resonates with you. For instance, using a palette knife can create sharp, defined edges, while a sponge can produce softer, more blended textures.
Finally, don’t forget about the importance of signature elements in your artwork. Adding your personal touch, whether it’s a specific color, a unique brushstroke, or even a hidden symbol, can make your abstract flowers distinctly yours. This not only adds character to your work but also gives it a sense of authenticity that viewers can appreciate.
In conclusion, the final touches and enhancements are where your abstract flower painting truly comes to life. By evaluating your work critically, adding highlights and shadows, incorporating texture, and adding your signature elements, you can refine your artwork into something that truly stands out. Remember, art is a personal journey, and the final touches are your chance to express your unique vision. So grab your brushes and have fun with it!
Here are some common questions regarding the final touches and enhancements in abstract flower painting:
- What should I look for when evaluating my painting? Look for balance, color harmony, and overall composition. Stepping back can help you see these elements clearly.
- How can I effectively create depth in my painting? Use highlights and shadows strategically to add dimension. Experiment with different shades to find what works best.
- What tools can I use to add texture to my artwork? Try using palette knives, sponges, or even your fingers to create various textures.
- Should I always add a signature element to my paintings? While it's not mandatory, adding a personal touch can make your artwork feel more authentic and unique.
Evaluating Your Work
Evaluating your work is an essential step in the artistic process that can often be overlooked. It's like stepping back from a painting to see the bigger picture; it allows you to assess not only the technical aspects but also the emotional impact of your abstract flowers. Start by taking a break after completing your painting. This distance gives you a fresh perspective and helps you to view your work with a critical eye. As you look at your painting, ask yourself some important questions:
- Does the composition feel balanced?
- Are the colors harmonious and do they evoke the desired emotions?
- Is there enough depth and dimension in the piece?
- Do the shapes and forms convey the essence of flowers as intended?
When evaluating your work, it’s also helpful to gather feedback from others. Sometimes, we can become too attached to our creations and overlook areas that need improvement. Share your painting with friends, family, or fellow artists and ask for their honest opinions. Constructive criticism can provide valuable insights and inspire new ideas. Remember, the goal is not to please everyone but to gain perspectives that can help you grow as an artist.
Another effective method for evaluation is to compare your current work with past pieces. This can highlight your progress and areas where you might still need to improve. Create a simple table to track your development over time:
| Artwork | Date | Strengths | Areas for Improvement |
|---|---|---|---|
| Abstract Flowers I | January 2022 | Vibrant colors, good composition | Lack of depth |
| Abstract Flowers II | March 2022 | Improved texture, better blending | Inconsistent color harmony |
| Abstract Flowers III | July 2022 | Balanced composition, emotional impact | Need more dynamic shapes |
Lastly, don’t forget to have fun during the evaluation process! Art is about expression and creativity, so embrace the journey. Use this time to reflect on your artistic voice and how you can push it further in future projects. Remember, every painting is a stepping stone towards honing your skills and discovering your unique style. So grab that paintbrush, evaluate your work, and let your creativity bloom!
Q: How can I tell if my painting is finished?
A: A painting is often considered finished when it feels complete to you. Trust your instincts and consider whether you have achieved the emotional and visual impact you desired.
Q: Should I always seek feedback on my work?
A: While feedback can be beneficial, it’s important to balance it with your own vision. Use feedback as a tool for growth, but don’t let it overshadow your artistic intuition.
Q: What should I focus on when evaluating my abstract flowers?
A: Focus on composition, color harmony, depth, and emotional resonance. These elements will help you gauge the effectiveness of your painting.
Q: How can I improve my evaluation skills?
A: Practice regularly and take the time to analyze both your work and the work of others. Consider keeping a journal to document your thoughts and progress.
Adding Highlights and Shadows
When it comes to painting abstract flowers, adding highlights and shadows is like giving your artwork a breath of life. These elements create depth, making your flowers appear more three-dimensional and dynamic. Imagine looking at a flower in the sunlight; the way it glows with vibrant colors and casts soft shadows on the petals is exactly what you want to replicate in your painting. But how do you get there?
First, let’s talk about highlights. Highlights are the areas where light hits your flowers, making them look shiny and vibrant. To effectively add highlights, you might want to use a lighter shade of the color you’ve already applied. For instance, if you’re working with a rich red, consider using a soft pink or even white to create those glowing spots. Apply these highlights sparingly; too much can overwhelm the viewer and detract from the overall composition. A good rule of thumb is to think of highlights as the icing on the cake—just enough to make it appealing without overshadowing the base.
Now, onto shadows. Shadows play a crucial role in grounding your flowers and providing context. They create an illusion of depth and can dramatically change the mood of your painting. To add shadows, you can use a darker version of your base color, or even mix in a touch of complementary color. For example, adding a bit of green to your red flowers can give a more natural shadow effect. When placing shadows, consider the light source in your painting. If the light is coming from the left, then the shadows should be on the right side of the petals. This simple understanding of light direction can make your artwork more realistic.
To effectively incorporate highlights and shadows into your abstract flowers, consider the following tips:
- Layering: Build up your highlights and shadows gradually. Start with a base layer and then add lighter and darker tones in thin layers to achieve a smooth transition.
- Blending: Use a soft brush to blend your highlights and shadows into the base colors. This will help create a more cohesive look and avoid harsh lines.
- Experimentation: Don’t be afraid to play around! Try different colors and techniques to see what works best for your style. Abstract art is all about personal expression.
Lastly, take a step back and evaluate your work. Sometimes, the best way to see if you’ve achieved the right balance of highlights and shadows is to look at your painting from a distance. This can help you identify areas that may need more contrast or subtlety. Remember, the goal is to enhance your flowers, not to overshadow them. With practice, you’ll find the perfect balance that brings your abstract floral art to life!
Q: How do I know where to place highlights and shadows?
A: Consider the direction of your light source. Highlights should be on the side facing the light, while shadows should be on the opposite side.
Q: Can I use white for highlights?
A: Yes, but use it sparingly! Sometimes a lighter version of your base color works better for a more cohesive look.
Q: What if my shadows look too harsh?
A: If your shadows appear too strong, try blending them with a soft brush or adding a lighter color to soften the edges.
Frequently Asked Questions
- What materials do I need to paint abstract flowers?
To start painting abstract flowers, you'll need basic materials such as acrylic or oil paints, a variety of brushes (flat, round, and detail brushes), a canvas or watercolor paper, and a palette for mixing colors. Additionally, having texture tools like sponges or palette knives can enhance your artwork.
- How does color theory apply to abstract flower painting?
Color theory is crucial in abstract painting as it helps you understand how colors interact with each other. By knowing how to mix primary and secondary colors, you can create a balanced palette. Using warm and cool colors strategically can evoke different emotions and enhance the overall mood of your floral compositions.
- Do I need to sketch my design before painting?
While it's not mandatory, sketching your design can provide a solid foundation for your artwork. It helps in planning the composition and maintaining proportions. You can use guidelines for more structure or freehand sketch for spontaneity, allowing your creativity to flow.
- What are some effective paint techniques for abstract flowers?
There are several techniques you can use, such as layering to build depth, splattering for dynamic effects, and dry brushing for texture. Experimenting with different methods can lead to unique and captivating abstract floral pieces that stand out.
- How can I add the final touches to my painting?
Final touches can significantly elevate your artwork. Assess your painting critically to identify areas that need improvement. Adding highlights and shadows can also enhance dimension and realism, making your abstract flowers pop. It's all about those little details that make a big difference!


