
How to Use a Drawing Tablet for Digital Art
Digital art has revolutionized the way artists express their creativity, and a drawing tablet is one of the most powerful tools in this new realm. If you've ever watched a digital artist effortlessly sketching away on a tablet, you might have wondered how they do it. Well, it's not just magic; it’s a combination of the right tools, techniques, and a sprinkle of practice. In this article, we will explore essential techniques and tips for utilizing a drawing tablet effectively, enhancing your digital art skills, and maximizing creativity in your artistic endeavors.
Selecting a drawing tablet can be overwhelming, especially with the myriad of options available on the market. It's not just about picking the most expensive model; you need to consider several key features to ensure you make an informed choice. First off, think about the size of the tablet. A larger drawing area can provide more freedom to create, but it may also be less portable. On the other hand, a compact tablet fits easily into a backpack but might feel restrictive. Additionally, pressure sensitivity is crucial; this feature allows you to vary the thickness and opacity of your strokes based on how hard you press down on the stylus. Lastly, check for compatibility with your preferred art software. Not all tablets work seamlessly with every program, so doing your homework can save you a lot of headaches down the line.
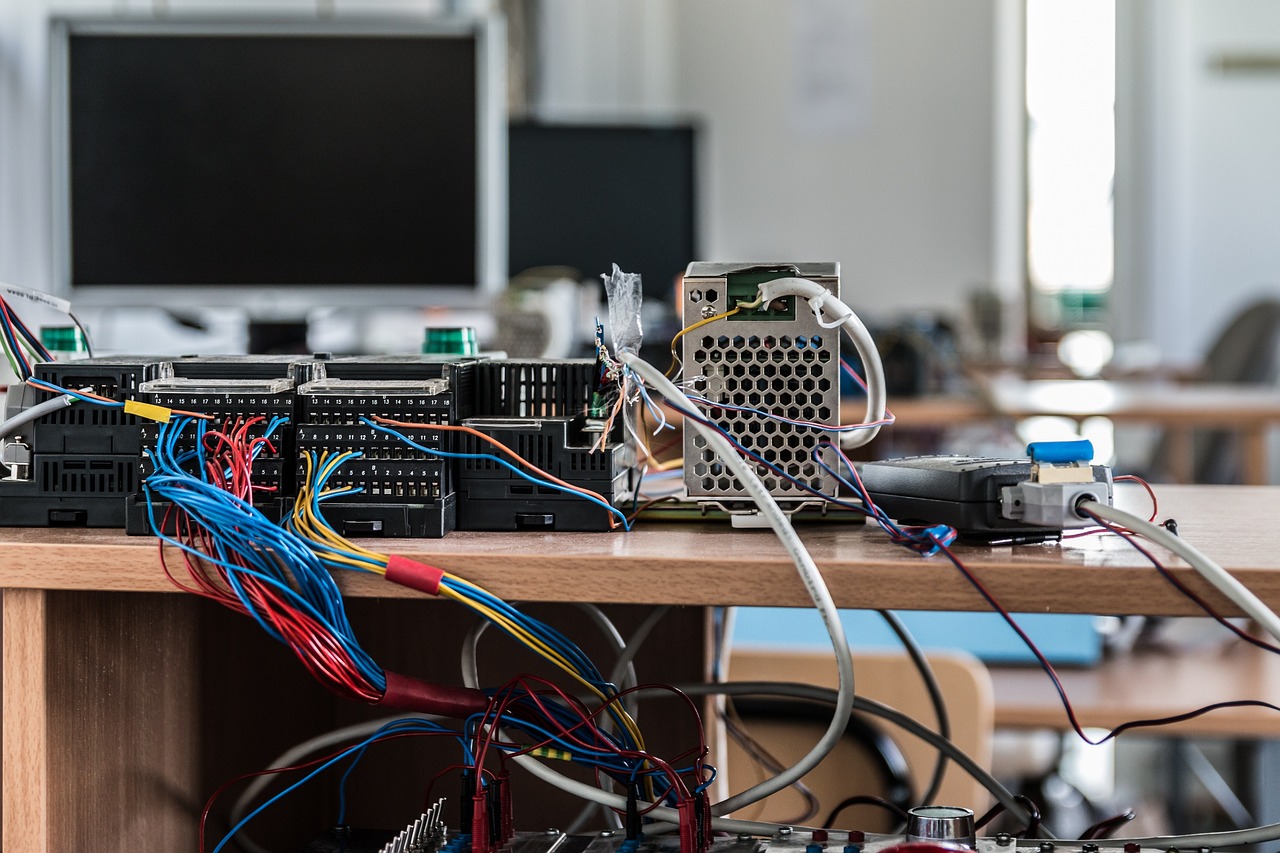
Once you've chosen your drawing tablet, proper setup is crucial for a smooth experience. You want to hit the ground running, right? Here’s how you can get started:
Installing the correct drivers ensures your tablet functions seamlessly. Most manufacturers provide a driver download on their website. Simply follow these steps:
- Visit the manufacturer's website.
- Navigate to the support or downloads section.
- Find your tablet model and download the appropriate drivers.
- Run the installer and follow the on-screen instructions.
After installation, adjusting tablet settings can enhance your drawing experience. For example, customizing pressure sensitivity can help you achieve the desired effect in your artwork. Also, don’t overlook the shortcut buttons; these can significantly speed up your workflow. You can set them to perform functions like undo, redo, or switch between tools, making your art process much more efficient.
Now that your tablet is set up, it’s time to connect it to your favorite art software. Compatibility issues can arise, so it's essential to ensure that your tablet works well with programs like Adobe Photoshop or Corel Painter. Most tablets come with easy-to-follow instructions on how to integrate with these programs, so just follow along and you’ll be painting in no time!
Brush tools are essential for digital painting. Different brush types serve various purposes, from soft blending to sharp lines. Understanding how to customize these brushes can take your artwork to the next level. Experiment with settings like opacity, flow, and texture to find the perfect brush that complements your artistic style.
Before diving into complex projects, mastering basic techniques is vital. Think of it as building a house; you need a solid foundation before you can add the intricate details. Fundamental skills such as sketching, inking, and coloring will provide you with the tools you need to create stunning digital art.
Sketching is the first step in any artwork. Techniques like gesture drawing can help you capture movement and form quickly. Creating dynamic poses will add life to your characters. Remember, your sketches don’t have to be perfect; they’re just a way to get your ideas down on paper (or tablet!) before refining them.
Inking adds depth and definition to your sketches. Different inking methods, such as using a hard brush for clean lines or a soft brush for more organic looks, can dramatically change the feel of your artwork. The goal is to achieve clean, professional-looking lines that enhance your sketches, so practice is key.
Once you grasp the basics, advancing your skills is essential. This is where the fun really begins! Techniques like layering, blending, and creating textures can elevate your artwork from good to great.
Understanding layers is crucial for digital art. Layers allow you to work on different elements of your artwork without affecting others. This means you can adjust, edit, and enhance your work without starting from scratch. Use layers for organization and to make adjustments easily.
Textures add realism to your art. Whether it’s the roughness of a tree bark or the softness of a cloud, textures can bring your digital creations to life. Explore various methods for creating textures and special effects, such as using custom brushes or blending modes. The possibilities are endless!
- What is the best drawing tablet for beginners? - Look for a tablet that balances affordability with essential features like pressure sensitivity and compatibility with art software.
- Do I need a stylus to use a drawing tablet? - Yes, a stylus is necessary for precision and control when drawing.
- Can I use my drawing tablet for purposes other than art? - Absolutely! Drawing tablets can also be used for photo editing, graphic design, and even note-taking.

Choosing the Right Drawing Tablet
When it comes to diving into the world of digital art, one of the first and most crucial decisions you'll make is . With so many options on the market, it can feel like trying to find a needle in a haystack. However, understanding a few key features can make this process not only easier but also more enjoyable. First, consider the size of the tablet. A larger surface area can give you more freedom to express your creativity, akin to having a larger canvas to paint on. Yet, if you're often on the move, a smaller tablet might be more practical for portability.
Another important feature to look for is pressure sensitivity. This refers to how well the tablet can detect the pressure of your stylus. A tablet with high pressure sensitivity allows for more nuanced strokes, enabling you to create everything from delicate lines to bold, thick marks with ease. Think of it as the difference between using a fine brush for detail work versus a broad brush for sweeping strokes. Most tablets range from 2048 to 8192 levels of pressure sensitivity, so aim for one that suits your style.
Compatibility with software is also a vital aspect to consider. Not all tablets work seamlessly with every art program, so it's essential to check if your chosen tablet is compatible with popular software like Adobe Photoshop, Corel Painter, or Clip Studio Paint. Doing a little research here can save you a lot of headaches down the road. Additionally, some tablets come with their own software, which can be a great bonus for beginners.
To further assist you in making an informed decision, here’s a quick comparison table of popular drawing tablets:
| Tablet Model | Size | Pressure Sensitivity | Compatibility |
|---|---|---|---|
| Wacom Intuos Pro | Medium/Large | 8192 levels | Windows, macOS |
| Huion Kamvas Pro | 13.3"/16.7" | 8192 levels | Windows, macOS |
| XP-Pen Artist Pro | 15.6"/24" | 8192 levels | Windows, macOS |
| Apple iPad Pro | 11"/12.9" | 4096 levels | iOS |
In summary, when choosing your drawing tablet, keep in mind factors like size, pressure sensitivity, and software compatibility. By doing your homework and understanding what each feature offers, you can confidently select a tablet that not only meets your needs but also enhances your digital art journey. Remember, the right tool can make all the difference, transforming your ideas into stunning visuals with just a few strokes!

Setting Up Your Drawing Tablet
Proper setup is crucial for a smooth experience with your drawing tablet. Imagine trying to paint a masterpiece with a brush that just won't cooperate—frustrating, right? That's why getting your tablet connected and configured correctly is your first step towards unleashing your creativity. The process might seem daunting at first, but with a little guidance, you'll be up and running in no time!
First things first, you'll need to connect your tablet to your computer. Most modern tablets use a USB connection, which is as simple as plugging it into a port on your device. However, some tablets offer wireless connectivity, allowing you to draw without the hassle of cords. If you're going for wireless, make sure your tablet is charged and follow the manufacturer's instructions to pair it with your computer.
Once your tablet is connected, the next step involves installing the necessary drivers. Drivers are like the translators between your tablet and your computer, ensuring they can communicate effectively. Head over to the manufacturer’s website to download the latest drivers for your specific tablet model. Installation is typically straightforward, but be sure to follow the prompts carefully. If you encounter any issues, don’t hesitate to consult the FAQ section or support forums for assistance.
After you've downloaded the drivers, it's time to install them. This process usually involves:
- Opening the downloaded file and following the installation wizard.
- Restarting your computer if prompted.
- Connecting your tablet again to ensure the drivers are recognized.
Once the drivers are installed, you might also want to download any additional software that came with your tablet. Many brands offer drawing software that works seamlessly with their devices, providing you with tools specifically designed for your tablet's features.
With your tablet connected and the drivers installed, it’s time to customize your settings. This is where the magic happens! Adjusting the pressure sensitivity can significantly enhance your drawing experience. You can usually find this option in the tablet’s settings menu. A good starting point is to set the pressure sensitivity to around 50-70%, but feel free to experiment until you find what feels right for you.
Additionally, many tablets come with customizable shortcut buttons. These buttons can be programmed to execute specific commands, allowing you to work more efficiently. For instance, you can set one button to undo your last action or another to switch between tools. This can save you a lot of time and make your workflow much smoother.
Once everything is set up, it's time to connect your drawing tablet to your favorite art software. Popular programs like Adobe Photoshop, Corel Painter, and Procreate are widely used in the digital art community. Ensure your tablet is recognized by the software by checking the preferences or settings menu. If you run into compatibility issues, look for updates for both your tablet drivers and the art software to ensure everything works harmoniously.
In conclusion, setting up your drawing tablet is an essential step that can make or break your digital art experience. By following these steps—connecting your tablet, installing drivers, configuring settings, and integrating with art software—you'll be well on your way to creating stunning digital artwork. Remember, the more comfortable you are with your tools, the more you can focus on what truly matters: your creativity!
Q1: What should I do if my tablet is not recognized by my computer?
A1: Ensure that the tablet is properly connected and that you've installed the correct drivers. If the issue persists, try connecting to a different USB port or restarting your computer.
Q2: How do I adjust pressure sensitivity on my tablet?
A2: Open the tablet settings on your computer, and look for the pressure sensitivity option. Adjust the slider to your preferred level and test it in your art software.
Q3: Can I use my drawing tablet with any art software?
A3: Most drawing tablets are compatible with a wide range of art software, but it's always best to check the manufacturer's website for a list of supported programs.

Installing Drivers and Software
Installing the correct drivers and software for your drawing tablet is essential for ensuring that it functions seamlessly with your computer. Think of drivers as the bridge between your tablet and your operating system; without them, your device may not respond as expected, leaving you frustrated and unable to unleash your creative potential. Here’s how to get everything set up smoothly.
First things first, you need to identify your tablet model. Most manufacturers provide specific drivers tailored for each model, so it’s crucial to visit the official website of your tablet’s brand. Once there, navigate to the support or downloads section. This is where you can find the latest drivers compatible with your operating system.
After downloading the driver, locate the file on your computer. Typically, it's in your Downloads folder. Double-click the file to initiate the installation process. Follow the on-screen instructions carefully. It’s like following a recipe; if you skip a step, you might end up with something that doesn’t work. Make sure to restart your computer if prompted, as this will help the new drivers integrate properly.
In addition to drivers, you’ll also want to install any accompanying software that may enhance your drawing experience. Many drawing tablets come with bundled software or offer recommendations for compatible art programs. For example, software like Adobe Photoshop or Corel Painter can take your digital artwork to the next level. After installing these programs, ensure they recognize your tablet. You can usually check this in the settings or preferences menu of the software.
Lastly, it’s important to keep your drivers and software updated. Manufacturers frequently release updates to improve functionality and fix bugs. You can check for updates through the manufacturer’s website or directly within the software, ensuring that your drawing tablet is always performing at its best.
In summary, the process of installing drivers and software may seem daunting at first, but by following these steps, you can set yourself up for a smooth and enjoyable digital art experience. Remember, just like in traditional art, the right tools and preparation can make all the difference!
- How do I know if my tablet drivers are up to date?
You can check the manufacturer's website for the latest drivers or use the software that came with your tablet to check for updates. - What should I do if my tablet is not recognized by my computer?
Ensure that the drivers are installed correctly and that the tablet is connected properly. Try restarting your computer or reconnecting the tablet. - Can I use my drawing tablet without installing drivers?
While some basic functionalities may work, you won't be able to utilize all features of your tablet without the correct drivers.
Configuring Tablet Settings
Configuring your drawing tablet settings is like tuning a musical instrument; it ensures that your creative expression flows smoothly and effortlessly. When you first start using your tablet, it’s essential to dive into the settings menu and tailor the experience to fit your unique style. The right configuration can dramatically enhance your drawing experience, making it feel more natural and responsive. So, let’s break down the critical aspects of tablet configuration that will help you get the most out of your device.
One of the first things you should adjust is pressure sensitivity. This feature allows your strokes to vary in opacity and thickness depending on how hard you press the stylus against the tablet surface. To configure this setting:
- Open your tablet's driver software.
- Locate the pressure sensitivity settings.
- Experiment with different pressure levels to find what feels comfortable for you.
Finding the right balance is crucial—too much sensitivity can make your lines wobbly, while too little can make your strokes feel rigid and unresponsive. Think of it like finding the perfect grip on a paintbrush; it should feel just right!
Next, let’s talk about shortcut buttons. Most drawing tablets come equipped with customizable buttons that can be programmed to perform various functions, such as undoing an action or switching between tools. Configuring these buttons can significantly streamline your workflow. Here’s how to set them up:
- Access the button settings in your tablet’s driver software.
- Select a button and choose a function from the dropdown menu.
- Repeat this process for each button until you have a setup that feels intuitive.
Imagine having your most-used tools at your fingertips, allowing you to focus solely on your creativity without fumbling through menus. It’s like having a personal assistant dedicated to your art!
Another important aspect to consider is display preferences. If your tablet has a screen, adjusting the display settings can enhance your visual experience. You may want to tweak the brightness, contrast, and color settings to ensure that what you see on the tablet matches what you envision in your mind. Here’s a quick guide:
- Go to the display settings in your tablet’s software.
- Adjust the brightness to a comfortable level that reduces eye strain.
- Experiment with color calibration to ensure accurate color representation.
Think of this step as setting the stage for your artwork; the right lighting can make all the difference in how your piece comes to life.
Finally, don't forget to save your settings! Once you’ve configured everything to your liking, make sure to save these preferences so you won’t have to repeat the process every time you start a new project. This is your personalized setup, and it’s essential to keep it intact for future creations.
By taking the time to configure your tablet settings, you’re setting yourself up for success. It’s like preparing the canvas before painting; the better the preparation, the more seamless and enjoyable the creative process will be. So go ahead, dive into those settings, and watch your digital art journey flourish!
Q: How do I reset my tablet settings?
A: Most tablet driver software includes an option to reset to default settings. Look for a 'Reset' button in the settings menu.
Q: Can I use my drawing tablet with multiple computers?
A: Yes, you can use your tablet on multiple computers, but you may need to install the drivers on each one.
Q: What should I do if my tablet is not responding?
A: First, check the connections, ensure the drivers are installed correctly, and restart both your tablet and computer.
Connecting to Art Software
Connecting your drawing tablet to art software is a crucial step in unleashing your creativity. Whether you're a seasoned artist or just starting, ensuring that your tablet integrates smoothly with your favorite programs can make a world of difference. First and foremost, it's essential to check the compatibility of your tablet with the software you plan to use. Most modern drawing tablets are designed to work with a variety of applications, but it's always good to double-check. Popular programs like Adobe Photoshop, Corel Painter, and Clip Studio Paint are widely used in the digital art community and generally offer excellent support for drawing tablets.
Once you've confirmed compatibility, the next step is to install the necessary drivers. These drivers act as a bridge between your tablet and the software, ensuring they communicate effectively. To do this, visit the manufacturer's website and download the latest drivers for your specific tablet model. After downloading, follow these simple steps:
- Locate the downloaded driver file on your computer.
- Double-click the file to initiate the installation process.
- Follow the on-screen instructions to complete the installation.
- Restart your computer if prompted to ensure the changes take effect.
With the drivers installed, it's time to dive into your art software. Open the program of your choice and navigate to the settings or preferences menu. Here, you should find options to configure your tablet settings. This might include adjusting pressure sensitivity, mapping shortcut buttons, and customizing brush settings to suit your artistic style. The goal is to create a setup that feels intuitive and comfortable for you.
Additionally, some software offers specific tablet settings that can enhance your experience. For example, in Adobe Photoshop, you can access the Brush Settings panel to adjust how your brushes react to your pen pressure. This feature allows you to create a more personalized drawing experience, giving you greater control over your artwork.
If you encounter any issues during this process, don't hesitate to refer to the support sections of the software or your tablet manufacturer's website. They often provide troubleshooting guides and forums where you can find solutions to common problems. Remember, the goal is to achieve a seamless connection between your tablet and software, allowing you to focus on what you love most—creating stunning digital art!
- What if my tablet isn't recognized by the software? Make sure you have installed the latest drivers and restarted your computer. Check the manufacturer's website for troubleshooting tips.
- Can I use my drawing tablet with multiple art programs? Yes! Most tablets are compatible with various software, but ensure you configure the settings for each program individually.
- How do I adjust pressure sensitivity in my art software? Look for the brush settings in your software, where you can customize how your brushes respond to pressure.
Understanding Brush Tools
When diving into the world of digital art, one of the most exciting aspects is the variety of brush tools available to you. Much like a painter selecting their brushes from a palette, digital artists have a wide range of options at their fingertips. Each brush tool brings its own unique characteristics and effects, allowing you to express your creativity in countless ways. Understanding these tools is essential for anyone looking to enhance their digital art skills.
Brush tools can be categorized into several types, each serving different artistic purposes. For instance, you have the traditional round brush, great for general painting and blending, and the textured brush, which adds depth and dimension to your artwork. Additionally, there are specialty brushes like the watercolor or oil brushes that mimic real-life painting techniques. The key is to experiment with these various brushes to discover which ones resonate with your personal style.
Moreover, customizing your brushes can significantly enhance your workflow and artistic expression. Most art software allows you to modify parameters such as size, opacity, and flow. For example, you can create a brush that mimics the delicate strokes of a pencil or a bold, thick line reminiscent of a marker. This customization gives you the power to tailor your tools to your specific needs, making your digital canvas feel more personal and intuitive.
Here are some common brush types you might encounter:
- Round Brush: Versatile and great for general use.
- Flat Brush: Ideal for bold strokes and filling in larger areas.
- Textured Brush: Adds depth and dimension to your artwork.
- Watercolor Brush: Mimics the behavior of real watercolor paint.
- Specialty Brushes: These can include anything from fur to foliage, offering unique effects.
In addition to understanding the types of brushes, it's crucial to learn how to effectively use them in your projects. For example, layering different brush strokes can create stunning visual effects and depth. You might start with a base layer using a large, soft brush and then add details with a smaller, sharper brush. This layering technique is akin to building a sandwich; each layer adds flavor and texture, resulting in a delicious final product.
Finally, don't forget about the importance of pressure sensitivity when using your drawing tablet. Many digital brushes respond to the pressure you apply, allowing for dynamic line work that can vary in thickness and opacity. This feature can transform your artwork from flat to rich and engaging, much like how varying your brush strokes in traditional painting adds life to a canvas.
In summary, understanding and mastering brush tools is a fundamental step in your journey as a digital artist. By exploring different types of brushes, customizing them to fit your style, and utilizing techniques like layering and pressure sensitivity, you can elevate your digital artwork to new heights. So, grab your tablet, experiment with these tools, and unleash your creativity!
Q: What is the best brush for beginners?
A: The round brush is typically the best choice for beginners due to its versatility. It can be used for various techniques, making it a great starting point.
Q: Can I create my own brushes?
A: Yes! Most digital art programs allow you to create custom brushes. Experiment with settings to design brushes that fit your unique style.
Q: How do I adjust pressure sensitivity?
A: You can adjust pressure sensitivity in the settings of your drawing software. Check the preferences menu for options related to your tablet.
Mastering Basic Techniques
Before you embark on your journey into the vibrant world of digital art, it’s essential to build a solid foundation by mastering the basic techniques. Think of these skills as the building blocks of your artistic expression. Just as a musician must learn scales before composing a symphony, you too need to grasp fundamental skills such as sketching, inking, and coloring. Each of these techniques plays a crucial role in enhancing your overall artistry and creativity.
Let’s begin with sketching, which is the first step in any artwork. It’s like laying down the framework of a house; without it, everything else can crumble. To improve your sketching skills, consider incorporating techniques such as gesture drawing. This method encourages you to capture the essence of a subject quickly, allowing you to focus on movement and form rather than getting bogged down in details. You might find it helpful to set a timer for one or two minutes and create quick sketches of various poses. This practice not only sharpens your hand-eye coordination but also boosts your confidence in your drawing abilities.
Next up is inking. Once you’ve laid down your sketches, inking adds depth and definition to your work. It’s akin to outlining a map; without those lines, the details can easily get lost. Different inking methods can yield various effects, from bold and striking to soft and subtle. You might want to experiment with tools like digital brushes that mimic traditional ink pens or brushes. Here are a few tips to achieve clean, professional-looking lines:
- Use a steady hand and practice controlling your pressure for varying line thickness.
- Zoom in on your canvas to create detailed lines, then zoom out to see the overall effect.
- Take your time. Rushing through the inking process often leads to mistakes.
Finally, let’s talk about coloring. This is where your artwork truly comes to life! Color can evoke emotions, set the mood, and even tell a story. When coloring digitally, it’s essential to understand color theory and how different colors interact with one another. You might want to explore the use of layers to separate your colors, which allows for easier adjustments without affecting the entire piece. Remember, the beauty of digital art is that you can always undo your mistakes!
To wrap it all up, mastering these basic techniques—sketching, inking, and coloring—will empower you to tackle more complex projects with confidence. Think of it as building a sturdy ship before sailing into uncharted waters. Each stroke of your stylus is a step closer to becoming the artist you aspire to be. So grab your drawing tablet, put on some music, and let your creativity flow!
Q1: How long does it take to master basic techniques in digital art?
A1: The time it takes varies from person to person. With consistent practice, you can see significant improvement in just a few weeks!
Q2: Do I need a fancy drawing tablet to get started?
A2: Not at all! While high-end tablets offer more features, many affordable options can still provide a great experience for beginners.
Q3: Can I use traditional art skills in digital art?
A3: Absolutely! Many traditional art techniques translate beautifully into the digital realm, enhancing your overall skill set.

Sketching Fundamentals
Sketching is the heart and soul of any artwork, serving as the foundation upon which your creative visions are built. Think of it as the blueprint for a house; without a solid plan, the final structure may crumble. To enhance your sketching skills, it’s essential to grasp a few fundamental techniques that can significantly elevate your art. One of the most effective methods is gesture drawing, which focuses on capturing the essence and movement of a subject quickly. This technique helps artists develop a keen sense of proportion and fluidity, allowing your sketches to breathe life.
Another vital aspect of sketching is understanding dynamic poses. Whether you're sketching a figure in motion or an object in space, capturing the right angle can make all the difference. To practice this, try using reference images or even sketching live models. This not only improves your observational skills but also helps you become more confident in your strokes. Remember, the goal is not perfection but rather the ability to express your ideas effectively on paper.
Additionally, consider incorporating basic shapes into your sketches. Almost everything can be broken down into simple forms like circles, squares, and triangles. By starting with these shapes, you can build more complex structures without getting overwhelmed. For instance, when sketching a human figure, begin with an oval for the head, rectangles for the torso and limbs, and circles for joints. This method allows you to maintain proportion and balance throughout your work.
When practicing sketching, it’s also beneficial to keep a sketchbook handy. This can be your personal playground where you can experiment without the pressure of creating a masterpiece. Doodle, draw from life, or even recreate your favorite characters—whatever inspires you! The more you sketch, the more your skills will improve, and you’ll find your unique style emerging naturally.
Lastly, don't forget to embrace mistakes. Every artist has had their fair share of less-than-stellar sketches, and that’s perfectly okay. Instead of viewing these as failures, consider them valuable lessons that guide your growth. Reflect on what didn’t work and how you can improve next time. Remember, every stroke is a step closer to mastering your craft!
- What materials do I need for sketching? While a simple pencil and paper will suffice, you can also explore using charcoal, markers, or digital tools to enhance your sketches.
- How often should I practice sketching? Consistency is key! Aim to sketch daily, even if it’s just for a few minutes. This will help you build muscle memory and improve your skills over time.
- Can I sketch from photographs? Absolutely! Using reference photos is a great way to practice, but try to combine this with live observation for the best results.

Inking Techniques
Inking is where your digital sketches truly come to life, transforming rough outlines into polished pieces of art. It’s like the moment a caterpillar becomes a butterfly—there's a magical transformation that occurs. To achieve that crisp, professional look, mastering various inking techniques is essential. Whether you’re using a stylus on a tablet or a traditional pen on paper, understanding how to apply ink effectively can elevate your artwork significantly.
One of the first techniques to consider is line weight variation. This involves changing the thickness of your lines to create depth and interest. Thicker lines can be used to emphasize the foreground or important elements, while thinner lines can suggest details or elements that are further away. Think of it as a way to guide the viewer's eye through your artwork. A well-placed thick line can act like a spotlight on the focal point of your piece.
Another crucial aspect of inking is the stroke technique. You can choose to use smooth, continuous strokes for a clean look, or you can experiment with a more textured approach. For instance, a scratchy or broken line can convey a sense of movement or energy. Here’s a quick overview of some common stroke techniques:
| Technique | Description |
|---|---|
| Smooth Stroke | Creates clean, uninterrupted lines for a polished finish. |
| Textured Stroke | Uses varied pressure or angle to create a rough, dynamic line. |
| Cross-Hatching | Layering lines in different directions to create shading and depth. |
Additionally, pressure sensitivity plays a significant role in digital inking. Most drawing tablets allow you to adjust the pressure sensitivity settings, which can dramatically affect how your lines appear. By pressing harder, you can produce thicker lines, while lighter pressure yields thinner lines. This feature is particularly useful when you're trying to achieve a more organic feel in your artwork. It’s akin to how a painter uses varying brush strokes to evoke different emotions and textures.
Don't forget about brush settings! Most digital art software offers a plethora of brush options that can mimic traditional inking tools. Experiment with different brushes to find the ones that best suit your style. For example, a brush that replicates a fountain pen may offer a different texture than one that simulates a paintbrush. Finding your perfect brush can be a game-changer in your inking process.
Finally, practice is key. The more you ink, the more you’ll develop your own style and techniques. Try replicating the work of artists you admire, or set challenges for yourself, such as inking a sketch in under a certain time limit. As you continue to push your boundaries, you'll discover new methods and refine your skills.
In summary, inking is not just about outlining; it’s about bringing your artwork to life with intention and creativity. By mastering line weight, stroke techniques, pressure sensitivity, and brush settings, you can create stunning pieces that resonate with your audience. So grab your tablet, unleash your creativity, and let your ink flow!
- What is the best tablet for inking? It depends on your preference, but tablets with high pressure sensitivity and a responsive stylus are generally recommended.
- Can I use a drawing tablet for traditional art techniques? Absolutely! Many artists use drawing tablets to replicate traditional techniques like inking, painting, and sketching.
- How do I improve my inking skills? Practice regularly, experiment with different techniques, and study the work of artists you admire.
Exploring Advanced Techniques
Once you've grasped the basics of digital art, it's time to elevate your skills and explore more advanced techniques that can truly transform your artwork. Think of this stage as the point where your artistic journey evolves from merely applying paint to a canvas to mastering the craft of digital storytelling. Advanced techniques not only enhance your creativity but also allow you to express your unique vision in ways that are both compelling and impactful.
One of the most crucial aspects of advanced digital art is understanding the use of layers. Layers are like transparent sheets stacked on top of one another, allowing you to separate different elements of your artwork for easier manipulation. By mastering layering strategies, you can organize your work more efficiently, make adjustments without affecting the entire piece, and enhance your overall workflow. For instance, you might have one layer for your background, another for your main subjects, and yet another for details like highlights and shadows. This separation not only keeps your workspace tidy but also gives you the freedom to experiment without the fear of ruining your progress.
Another exciting area to explore is creating textures and effects. Textures can add depth and realism to your digital paintings, making them feel more tangible. You can achieve textures through various methods, such as using custom brushes, applying filters, or even importing texture images. For example, if you're painting a forest scene, you might want to create a bark texture for the trees or a soft, grainy texture for the ground. By layering these textures, you can create a rich, immersive environment that draws viewers into your artwork.
To help you better understand these concepts, here’s a simple table summarizing some advanced techniques you can incorporate into your digital art practice:
| Technique | Description |
|---|---|
| Layering | Using multiple layers to separate elements for better organization and flexibility. |
| Texturing | Applying textures to give depth and realism to your artwork. |
| Blending | Smoothing transitions between colors and layers for a more cohesive look. |
| Special Effects | Utilizing filters and custom brushes to create unique visual effects. |
As you dive deeper into these advanced techniques, remember that practice is key. Don’t hesitate to experiment with different methods and tools. Each artist has a unique style, and exploring various techniques will help you discover what resonates with you. It's like cooking; you might follow a recipe at first, but soon enough, you’ll start adding your own spices and flavors to create something truly original.
In conclusion, exploring advanced techniques in digital art opens up a world of possibilities. By mastering layering strategies and learning how to create textures and effects, you'll not only enhance your skills but also enrich your artistic expression. So grab your drawing tablet, unleash your creativity, and let your imagination run wild!
Q: What are some good resources to learn advanced digital art techniques?
A: There are numerous online platforms like YouTube, Skillshare, and Udemy that offer courses specifically tailored to advanced techniques in digital art. Additionally, joining online communities or forums can provide valuable feedback and inspiration.
Q: How can I practice blending techniques effectively?
A: Start with simple gradients and gradually increase complexity. Use soft brushes and adjust opacity to see how colors interact. Practicing on a variety of subjects will help you understand how to blend different textures and colors smoothly.
Q: Are there specific brushes I should use for texturing?
A: Yes! Many art programs offer custom brushes designed specifically for texturing. Look for brushes labeled as “texture,” “grunge,” or “pattern” to achieve the effects you want. You can also create your own brushes for a more personalized touch.

Layering Strategies
When it comes to digital art, understanding layers is not just a skill; it's an absolute game-changer. Think of layers as the building blocks of your artwork. Each layer can hold different elements, allowing you to manipulate them independently without affecting the rest of your masterpiece. This flexibility is crucial when you want to make adjustments or experiment with different styles without starting from scratch. So, how do you effectively utilize layers in your digital art workflow?
First, let's talk about organization. Keeping your layers organized is essential for maintaining clarity in your project. You can start by naming your layers according to their purpose, such as “Background,” “Character,” or “Shadows.” This way, you can quickly locate and edit specific elements without wasting time searching through a long list of unnamed layers. Additionally, consider grouping related layers together. Most art software allows you to create folders for layers, making it easy to hide or show entire sections of your artwork with just a click.
Next, you should explore the different types of layers available in your software. For instance, you can use:
- Adjustment Layers: These layers allow you to apply color corrections or effects without altering the original artwork. They are non-destructive, meaning you can tweak them at any point.
- Texture Layers: Use these to add depth and realism to your work. You can overlay textures to create interesting effects, giving your art a more tactile feel.
- Clipping Masks: These are fantastic for applying effects or colors to specific areas without affecting the entire layer. They help keep your artwork clean and precise.
Now, let’s dive into some practical . One effective method is to work from the background to the foreground. Start with your background layer, then build up your composition by adding layers for mid-ground and foreground elements. This approach not only enhances depth but also allows you to focus on each part of your artwork individually.
Another strategy is to use layer opacity and blending modes. Adjusting the opacity of a layer can create subtle effects, such as fading elements into the background. Blending modes, on the other hand, can dramatically change how layers interact with one another. For example, using the “Multiply” blending mode on a shadow layer can create a more realistic shadow effect, as it darkens the underlying colors.
Lastly, don't hesitate to experiment! Layering is one of those areas where trial and error can lead to amazing discoveries. Try different combinations of layers, blending modes, and opacities to see what works best for your style. You might find that a simple change in layer order can transform your artwork in unexpected ways.
In summary, mastering layering strategies is essential for any aspiring digital artist. By keeping your layers organized, understanding the different types of layers, and experimenting with various techniques, you can enhance your workflow and take your digital art to the next level.
Q: What are the benefits of using layers in digital art?
A: Layers allow artists to work non-destructively, meaning you can make changes without affecting the original artwork. They also help in organizing different elements, making it easier to edit and adjust specific parts of your piece.
Q: How can I improve my layering skills?
A: Practice is key! Experiment with different layer types and blending modes. Try to create artworks focusing on specific techniques, such as using adjustment layers or clipping masks to see how they affect your work.
Q: Is there a limit to how many layers I can use?
A: Most art software has a limit to the number of layers you can create, but it's often quite high. However, keep in mind that using too many layers can slow down your system, so it's best to use them wisely and keep your project organized.
Creating Textures and Effects
When it comes to digital art, textures and effects can transform a flat image into a vibrant masterpiece. Think of textures as the seasoning in a dish; they add depth and flavor that can make your work stand out. Whether you're aiming for a gritty, realistic feel or a smooth, ethereal vibe, mastering the art of creating textures is essential for any digital artist.
One of the most effective ways to create textures is through the use of brush settings. Most digital art software, like Adobe Photoshop or Corel Painter, comes equipped with a variety of brushes that can simulate real-world textures, such as canvas, watercolor, or even rough surfaces. To create a unique texture, you can customize these brushes by adjusting settings such as opacity, flow, and spacing. For example, increasing the spacing can create a dotted effect, while lowering the opacity allows for more subtle layering.
Another technique to consider is layering. By using multiple layers, you can build up textures gradually, allowing you to experiment without permanently altering your base artwork. Start with a solid color layer, then add texture layers on top. You can use blending modes to merge these layers in creative ways. For instance, using the Multiply blending mode can darken textures, while Screen can lighten them. This method not only enhances depth but also gives you the flexibility to adjust or remove textures without affecting the underlying artwork.
Additionally, don't underestimate the power of photo textures. You can take high-resolution photos of various surfaces—like stone, wood, or fabric—and overlay them onto your digital canvas. By adjusting the opacity and blending modes, you can create stunning effects that add realism to your art. Just be sure to use textures that complement your color palette and overall composition.
Lastly, consider using filters and effects available in your software. Filters can quickly add depth and dimension to your work. For example, applying a noise filter can give your artwork a gritty feel, while a blur filter can create a dreamy atmosphere. Remember, less is often more; subtlety can lead to a more refined look.
In summary, creating textures and effects in digital art is about experimentation and creativity. By combining different techniques—such as brush customization, layering, photo textures, and filters—you can unlock a world of possibilities. The key is to practice regularly and not be afraid to push boundaries. So grab your drawing tablet, unleash your imagination, and let your artwork come to life!
- What are the best brushes for creating textures?
It depends on your style, but brushes that mimic natural media like watercolor or oil can be great for textures. Experiment with different settings to find what works for you.
- Can I use real-world textures in my digital art?
Absolutely! Using high-resolution photos of textures can add realism and depth to your work. Just make sure to adjust them to fit your art style.
- How do I know when to stop adding textures?
Trust your instincts! If the texture enhances your artwork without overwhelming it, you’re on the right track. Sometimes, stepping away for a bit can help you see it with fresh eyes.
Frequently Asked Questions
- What should I consider when choosing a drawing tablet?
When selecting a drawing tablet, think about factors like size, pressure sensitivity, and compatibility with your favorite software. A larger tablet might give you more space to create, while higher pressure sensitivity allows for more nuanced strokes. Make sure the tablet works well with programs like Adobe Photoshop or Corel Painter to avoid any headaches later!
- How do I set up my drawing tablet?
Setting up your drawing tablet is pretty straightforward! First, connect it to your computer via USB or Bluetooth. Then, download and install the necessary drivers from the manufacturer's website. Finally, configure the tablet settings to match your preferences, like pressure sensitivity and shortcut buttons, for an optimal drawing experience.
- What are the best brush tools for digital art?
The best brush tools depend on your artistic style! Most art software comes with a variety of brushes, including pencils, inks, and textures. Experiment with customizing these brushes to achieve the effects you want. For instance, adjusting the opacity and flow can give your work a unique touch!
- How can I improve my sketching skills?
Improving your sketching skills takes practice! Start with gesture drawing to capture movement and form quickly. Try sketching from reference images or life to develop your eye for proportions and details. The more you sketch, the more confident you'll become!
- What are some tips for inking my digital sketches?
When inking your sketches, use a steady hand and consider varying your line thickness for added depth. Zoom in for detailed work and experiment with different inking brushes to find what suits your style best. Don't forget to use layers to keep your ink separate from your sketches!
- How do I create textures in my digital art?
Creating textures can really bring your artwork to life! You can use textured brushes or layer images with blending modes to achieve different effects. Experiment with filters and adjustments to create the perfect look for your piece. Remember, practice makes perfect!
- Why is understanding layers important in digital art?
Understanding layers is crucial because they allow you to organize your artwork and make adjustments without affecting the entire piece. You can work on different elements separately, which gives you more control and flexibility. Think of layers as sheets of transparent paper stacked on top of each other!


