Capture Someone's Likeness: A Guide to Portrait Drawing
Portrait drawing is more than just putting pencil to paper; it's about capturing the very essence of a person. Whether you're a seasoned artist or just starting out, the journey of creating a portrait can be both exciting and daunting. Imagine being able to freeze a moment in time, to encapsulate not just the physical features of someone, but their personality, emotions, and spirit. This guide is designed to take you through the essential techniques, tips, and tools that will help you improve your portrait drawing skills and ultimately, capture the likeness of your subjects with confidence.
Throughout this article, we'll dive deep into the foundational aspects of portrait drawing, starting with the crucial understanding of facial proportions. Knowing how to measure and relate different features will set the groundwork for any successful portrait. Next, we’ll explore the various materials available, from graphite pencils to charcoal, and how each can bring a unique flair to your artwork. We'll also discuss the importance of selecting the right paper, as it can profoundly affect the outcome of your portrait.
But wait, it doesn't stop there! Sketching techniques will be covered extensively, highlighting methods to capture likeness quickly and effectively. You'll discover the magic of gesture drawing and how blocking in shapes can simplify your approach to complex forms. As we progress, we’ll delve into the art of conveying expression and emotion—after all, a portrait is not just about likeness; it’s about telling a story. You'll learn how to render realistic eyes that speak volumes and mouths that reflect the subject's mood.
Finally, we'll wrap up with the finishing touches that can elevate your portrait from good to extraordinary. Effective shading techniques will add depth and dimension, while thoughtful framing and display options will ensure your artwork stands out. So, whether you're drawing a loved one or a stranger, this guide will equip you with the skills and knowledge to truly capture someone's likeness on paper.
- What materials do I need to start portrait drawing? To begin, you will need a set of graphite pencils, quality drawing paper, an eraser, and perhaps some charcoal or colored pencils for added depth and color.
- How do I improve my sketching skills? Regular practice is key! Try gesture drawing and blocking in shapes to quickly capture the essence of your subject.
- What are the best techniques for capturing emotion in a portrait? Focus on the eyes and mouth, as these features are crucial in expressing feelings. Observe your subject closely and translate those subtleties onto paper.
- How can I make my portraits more realistic? Pay attention to shading and proportions. Use different grades of pencils for detail, and experiment with various shading techniques to add depth.
- What should I consider when framing my artwork? Choose a frame that complements your portrait and consider the color and material to enhance the overall presentation.

Understanding Facial Proportions
Grasping the fundamental proportions of the human face is crucial in portrait drawing. Understanding these proportions is like having a secret map that guides you through the intricate landscape of facial features. When you know where to place the eyes, nose, and mouth, your portraits will not only look more realistic but also capture the essence of your subject in a way that resonates with viewers. So, let's dive into the key measurements and relationships that will help you create a balanced and lifelike representation.
One of the most effective methods for establishing facial proportions is the Rule of Thirds. Imagine dividing the face into three horizontal sections. The first line runs across the forehead, the second line just above the eyebrows, and the third line at the bottom of the chin. This division helps you place the eyes, which should generally sit on the second line, while the nose typically falls around the first line, and the mouth aligns closer to the third line. This simple framework can dramatically enhance your accuracy.
Additionally, consider the width of the face. The ideal human face is often described as being approximately five eye widths wide. This means that the space between the eyes is roughly equal to the width of each eye. By measuring the distance between the eyes, you can easily determine where to position the outer edges of the face. This technique allows you to maintain symmetry, which is a vital component of realistic portraiture.
Another essential aspect is the placement of the ears. Generally, the top of the ears aligns with the eyebrows, while the bottom aligns with the bottom of the nose. Understanding these relationships can help you create a more cohesive and believable portrait. Remember, the face is not just a collection of features; it’s a harmonious composition of shapes and lines that interact with one another.
To further illustrate these concepts, here’s a simple table that summarizes the key facial proportions:
| Feature | Proportion |
|---|---|
| Eyes | On the second horizontal line |
| Nose | On the first horizontal line |
| Mouth | On the third horizontal line |
| Width of Face | Approximately five eye widths |
| Ears | Top aligns with eyebrows, bottom aligns with nose |
By keeping these proportions in mind, you’ll find that your ability to capture the likeness of your subject improves significantly. Remember, practice is key! Sketching from life or photographs and applying these proportions will help solidify your understanding. Don't be afraid to make adjustments as you go along; art is a fluid process, and sometimes the best results come from intuitive changes.
In conclusion, understanding facial proportions is not just about memorizing measurements. It's about developing an eye for detail and a sense of balance that will elevate your portrait drawing skills. So grab your sketchbook, and start practicing these techniques to see the transformation in your artwork!

Choosing the Right Materials
When it comes to portrait drawing, the materials you choose can make a world of difference. Think of your drawing tools as the paintbrushes of a painter; they can either elevate your work or hold you back. So, what should you look for? First, consider the drawing mediums that best suit your style. Each medium has its unique characteristics that can significantly influence the final outcome of your portrait. For instance, graphite pencils are widely used for their versatility and precision. They allow you to create fine details and subtle shading, making them a favorite among many artists.
Now, let’s dive a little deeper into the different types of materials you might want to consider:
| Medium | Characteristics | Best For |
|---|---|---|
| Graphite Pencils | Variety of hardness, smooth application | Detail and shading |
| Charcoal | Rich texture, deep blacks | Dramatic effects, expressive lines |
| Colored Pencils | Vibrant colors, blending capabilities | Adding life to portraits |
In addition to choosing the right medium, selecting the appropriate paper is crucial. The texture and weight of the paper can greatly affect how your medium behaves. For example, smooth paper is ideal for fine details with graphite, while textured paper works beautifully with charcoal, allowing for a more dynamic range of tones. Always consider the weight of the paper as well; heavier paper can handle more layers and erasing, which is a lifesaver during the drawing process.
When selecting your tools, think about the specific needs of your portrait. Do you want to capture intricate details or create bold, sweeping strokes? Each medium offers different advantages:
- Graphite Pencils: Available in various grades, from hard (H) to soft (B), allowing for a range of shading effects.
- Charcoal: Offers a unique texture and depth, perfect for creating dramatic effects.
- Colored Pencils: Great for adding vibrancy and life, especially when blended correctly.
Lastly, don’t forget about your tools for application. A good eraser, blending stumps, and sharpener can enhance your drawing experience significantly. Each of these items plays a role in refining your work, allowing you to achieve the precision and depth you desire. So, before you start your next portrait, take a moment to gather your materials and ensure you have everything you need to bring your artistic vision to life!

Graphite Pencils
Graphite pencils are a staple in the world of portrait drawing, and for good reason! Their versatility and ease of use make them a favorite among artists of all skill levels. When you pick up a graphite pencil, you're not just choosing a tool; you're opting for a medium that allows for a wide range of expression and detail. The beauty of graphite lies in its ability to create everything from the softest shadows to the sharpest highlights, making it an essential part of your artistic toolkit.
One of the first things to understand about graphite pencils is the grading system. Pencils are graded on a scale that ranges from H (hard) to B (black), with F (fine point) in between. The H pencils produce lighter lines and are excellent for fine details, while B pencils are softer and darker, perfect for shading and creating depth. Here's a quick breakdown of the grades:
| Grade | Characteristics | Best Uses |
|---|---|---|
| H | Hard, light lines | Fine details, light sketches |
| F | Fine point | General use |
| B | Soft, dark lines | Shading, bold strokes |
Choosing the right pencil for your portrait is crucial. For instance, if you're working on capturing the intricate details of your subject's eyes, a 2H pencil might be your best bet. It allows for precision without being too harsh on the paper. On the other hand, when you want to create those deep shadows on the cheekbones, a 6B pencil will give you that rich darkness that brings your drawing to life.
It's also important to consider your drawing technique when using graphite pencils. Techniques such as hatching and cross-hatching can add texture and depth to your work. Hatching involves drawing parallel lines, while cross-hatching uses intersecting lines to create a shaded effect. Both techniques can be incredibly effective in portrait drawing, allowing you to convey the subtleties of form and light.
Moreover, don't forget about the importance of blending. Using a blending stump or your finger can help soften those harsh lines and create a smoother transition between light and shadow. This is particularly useful in areas like the forehead and cheeks, where the skin naturally has a softer texture. Remember, the key to a stunning portrait is all in the details!
In conclusion, graphite pencils are not just tools; they are your artistic allies. By understanding their characteristics and how to use them effectively, you can elevate your portrait drawing to new heights. So, grab your pencils, experiment with different grades, and let your creativity flow!
- What pencil grade is best for beginners? A good starting point is a HB pencil, which offers a balance between hardness and softness.
- How do I maintain my graphite pencils? Keep them sharpened and store them in a protective case to prevent breakage.
- Can I use colored pencils for portraits? Absolutely! Colored pencils can add a unique vibrancy and depth to your work.
Charcoal Techniques
When it comes to portrait drawing, charcoal is a medium that can truly elevate your artwork with its rich textures and deep contrasts. Unlike graphite, charcoal allows for a more expressive and fluid approach, making it ideal for capturing the essence of your subject. One of the most exciting aspects of using charcoal is its versatility; you can create everything from soft, subtle lines to bold, dramatic strokes. But how do you harness this power effectively? Let's dive into some key techniques that can help you make the most of your charcoal drawings.
First, it's essential to understand the different types of charcoal available. There are primarily two types: vine charcoal and compressed charcoal. Vine charcoal is lighter and easier to erase, making it perfect for initial sketches and light shading. On the other hand, compressed charcoal is darker and more pigmented, which is excellent for adding depth and detail. Knowing when to use each type can significantly impact your drawing's outcome.
One of the most effective techniques to master is the blending technique. This involves using your fingers, a blending stump, or even a soft cloth to smudge and blend the charcoal on the paper. This technique can create smooth transitions and soft shadows, giving your portrait a more lifelike quality. However, be cautious not to over-blend, as this can lead to a muddy appearance. Instead, aim for a balance that maintains the integrity of the charcoal's texture.
Another important technique is hatching and cross-hatching. This involves drawing parallel lines (hatching) and then layering another set of lines at an angle (cross-hatching) to build up darker areas. This method is particularly useful for creating depth in facial features, such as the cheeks and forehead. You can also experiment with varying the pressure on your charcoal stick to achieve different line weights, which adds further dimension to your work.
Additionally, don’t underestimate the power of negative space. While it may seem counterintuitive, focusing on the spaces around your subject can help you define shapes and proportions more accurately. By observing the negative space, you can better understand how to place the features of the face in relation to one another, leading to a more harmonious composition.
Lastly, always remember to fix your work once you're satisfied with your portrait. Charcoal is prone to smudging, so using a fixative spray can help preserve your artwork and prevent it from becoming a blurry mess. Just make sure to apply it in a well-ventilated area and follow the manufacturer's instructions for the best results.
In summary, mastering charcoal techniques can open up a new world of possibilities in your portrait drawing journey. By understanding the types of charcoal, practicing blending and hatching, paying attention to negative space, and preserving your work, you can create stunning portraits that truly capture the essence of your subjects. So grab your charcoal and let your creativity flow!
- What is the best type of paper for charcoal drawing?
Textured paper, such as charcoal paper or watercolor paper, works best as it helps grip the charcoal and allows for better blending.
- Can I use charcoal on canvas?
Yes, but it's advisable to use a fixative to prevent smudging and to ensure that your artwork lasts longer.
- How do I erase charcoal without damaging my paper?
Using a kneaded eraser is the best option, as it lifts the charcoal without tearing the paper.
Colored Pencils
When it comes to adding a splash of life and vibrancy to your portraits, are a fantastic medium to consider. Unlike graphite, which can sometimes feel a bit flat, colored pencils allow you to infuse your artwork with a spectrum of hues that can truly bring your subject to life. But how do you achieve that realistic skin tone or that captivating eye color? It all starts with understanding blending techniques and color selection.
One of the first steps in using colored pencils effectively is to select the right colors. A well-curated palette can make all the difference in achieving lifelike results. Typically, artists will use a combination of warm and cool tones to mimic the natural variations in skin. Here’s a quick guide to some essential colors you might want to have in your arsenal:
| Color | Use |
|---|---|
| Peach | Base skin tone |
| Burnt Sienna | Shadows and depth |
| White | Highlights |
| Blush Pink | Cheeks and warmth |
Once you have your colors ready, the next step is mastering blending techniques. Blending is the key to achieving smooth transitions and realistic textures in your portraits. Here are a few methods you can try:
- Layering: Start with a light base layer, then gradually build up color by layering different shades. This technique allows for greater depth and richness in your work.
- Burnishing: Use a white or light-colored pencil to press down hard on your colored layers, which will blend them into a smooth finish.
- Blending Solutions: Consider using a blending solution like odorless mineral spirits or blending stumps for a more painterly effect.
Another important aspect to consider is the application technique. Use different strokes to create texture; for instance, short, circular motions can help in achieving a more natural look for skin. Don’t hesitate to experiment with pressure as well; lighter pressure can yield softer colors, while heavier pressure can produce vibrant, bold tones.
Finally, always remember to take a step back and observe your work from a distance. This will help you see if the colors are harmonizing well and if the overall likeness is being captured. With practice and patience, you’ll find that colored pencils can be an incredibly rewarding medium for portrait drawing, allowing you to express your artistic vision in vivid detail.
As you embark on your journey with colored pencils, keep in mind that the key to mastery lies in practice. Don’t be afraid to make mistakes; each one is a stepping stone to improvement. Happy drawing!
- What type of paper is best for colored pencils? Look for paper that has a bit of texture, like bristol or mixed media paper, which can hold the pigment well.
- Can I use colored pencils over graphite? Yes, but make sure to use a light hand with the graphite to prevent smudging.
- How do I fix mistakes made with colored pencils? You can often lift some color with a kneaded eraser or by applying a lighter color over the mistake.

Paper Selection
When it comes to portrait drawing, the type of paper you choose is just as vital as the tools you use. Think of paper as the canvas for your artistic expression; it can either elevate your work or hinder it. Different papers have unique textures, weights, and finishes, which can significantly affect how your medium interacts with the surface. For instance, a smooth paper may be perfect for graphite work, allowing for fine details, while a textured paper might be ideal for charcoal, helping to capture depth and richness.
Here are some key factors to consider when selecting paper for your portrait drawings:
- Weight: Heavier papers (typically 200 gsm and above) can handle more layers of medium without warping. This is especially important for techniques that require blending or layering, such as charcoal or colored pencils.
- Texture: The texture of the paper can greatly affect the outcome of your drawing. Smooth papers are great for fine detail, while textured papers can add character and depth to your work.
- Color: While most artists default to white paper, colored papers can provide interesting backgrounds and enhance the overall tone of your portrait. For example, a toned paper can help in creating shadows and highlights more effectively.
To help you make the best choice, here’s a simple table summarizing common types of paper used in portrait drawing:
| Paper Type | Best For | Texture | Weight |
|---|---|---|---|
| Graphite Paper | Fine details | Smooth | 180-300 gsm |
| Charcoal Paper | Blending and depth | Textured | 200-400 gsm |
| Colored Paper | Backgrounds and tonal work | Varies | 160-250 gsm |
Ultimately, the best paper for your portrait drawing will depend on your chosen medium and personal preference. It’s always a good idea to experiment with different types of paper to see how they interact with your techniques. Remember, the right paper can be the secret ingredient that takes your portrait from ordinary to extraordinary!
Q: What weight of paper is best for portrait drawing?
A: Generally, papers that are 200 gsm and above are recommended for portrait drawing, as they can withstand multiple layers and techniques without warping.
Q: Can I use watercolor paper for pencil drawings?
A: Yes, watercolor paper can be used for pencil drawings, especially if you prefer a textured surface. Just keep in mind that it may not provide the same smooth finish as dedicated drawing paper.
Q: How do I choose between smooth and textured paper?
A: It depends on your style! If you focus on fine details, smooth paper is beneficial. If you enjoy blending and creating depth, textured paper might be the better choice.
Sketching Techniques
Effective sketching is the foundation of a successful portrait. It’s like the blueprint of a building; without a solid plan, the final structure may crumble. To capture the likeness of your subject accurately, you need to develop a keen eye for detail and a strong understanding of proportions. In this section, we will outline methods for capturing the likeness and proportions of your subject through initial sketches, emphasizing that practice is key to improvement.
One of the most valuable techniques in portrait sketching is gesture drawing. This method focuses on capturing the essence and movement of the subject quickly. Imagine trying to catch a fleeting moment, like a dancer in motion; you want to convey the energy and flow of their movements. Gesture drawing helps you do just that by encouraging you to observe and render the subject's posture and expression in a short amount of time, typically ranging from 30 seconds to a few minutes. This practice not only enhances your ability to capture dynamic poses but also trains your hand to move fluidly across the paper.
Another essential technique is blocking in shapes. Think of it as laying down the framework for your portrait. By simplifying complex forms into basic shapes—such as circles, ovals, and rectangles—you can establish the overall composition of the portrait more easily. For instance, the head can be represented as an oval, while the neck can be depicted as a rectangle. This method allows you to focus on proportions without getting bogged down in details too early in the process. Once you have your basic shapes in place, you can gradually refine them into more detailed forms.
To illustrate the importance of these techniques, consider the following table that highlights the differences between gesture drawing and blocking in shapes:
| Technique | Focus | Duration | Purpose |
|---|---|---|---|
| Gesture Drawing | Movement and energy | 30 seconds - 2 minutes | Capture the essence of the subject |
| Blocking In Shapes | Proportions and structure | 5 - 15 minutes | Establish overall composition |
Incorporating both techniques into your practice will not only enhance your sketching skills but also improve your overall portrait drawing capabilities. It’s essential to remember that every artist has their rhythm and style; thus, experimenting with these techniques will help you find what works best for you. As you practice, try to blend the fluidity of gesture drawing with the structural foundation of blocking in shapes. This hybrid approach will lead to more dynamic and lifelike portraits.
- How long should I spend on gesture drawings? It's recommended to spend anywhere from 30 seconds to 2 minutes on each gesture drawing to keep the practice quick and focused.
- Can I use blocking in shapes for other types of drawing? Absolutely! This technique is versatile and can be applied to various forms of drawing, including landscapes and still life.
- What should I do if my sketches don't look right? Don't get discouraged! Keep practicing and consider revisiting the fundamentals of proportions and shapes to improve your accuracy.
Gesture Drawing
Gesture drawing is an essential skill that every artist should master, especially when it comes to portrait drawing. It’s like the warm-up before the big game, allowing you to loosen up and get into the flow of capturing your subject’s essence. This technique focuses on the overall movement and posture of the subject rather than getting bogged down in minute details. Think of it as capturing the fleeting moments of life—the quick smiles, the subtle shifts in posture, and those little quirks that make someone uniquely them.
When you engage in gesture drawing, you're training your eye and hand to work together swiftly. The goal is to create a series of quick sketches that encapsulate the subject's position and energy. These sketches are often completed in just a few minutes, pushing you to rely on your instincts and intuition. You might be surprised at how liberating it feels to let go of perfection and embrace the spontaneity of the moment.
To get started with gesture drawing, consider the following techniques:
- Timed Sessions: Set a timer for 1-5 minutes and draw your subject within that time frame. This will help you focus on the essence of the pose rather than the details.
- Use Simple Shapes: Break down the body into basic shapes like circles and rectangles. This will simplify the process and allow you to capture the overall form quickly.
- Focus on Movement: Pay attention to the lines of action in your subject's pose. These are the invisible lines that guide the movement of the body and can create a sense of dynamism in your drawings.
One of the best ways to practice gesture drawing is to observe live models or even friends. You can also use online resources that offer timed poses. As you practice, you'll notice that your ability to capture likeness and expression improves significantly. The beauty of gesture drawing is that it encourages you to see beyond the surface and tap into the emotional core of your subject.
Incorporating gesture drawing into your routine can be a game-changer. It’s not just about creating a quick sketch; it’s about developing a deeper understanding of movement, proportion, and the human form. So grab your sketchbook, set a timer, and let those lines flow!
What is gesture drawing?
Gesture drawing is a technique that involves sketching the basic form and movement of a subject quickly, focusing on capturing the essence and energy rather than details.
How long should I spend on each gesture drawing?
Typically, gesture drawings are done in short sessions ranging from 1 to 5 minutes. This encourages quick thinking and spontaneity.
Can I use gesture drawing for portraits?
Absolutely! Gesture drawing is particularly beneficial for portraits as it helps you capture the subject's unique posture and expression in a dynamic way.
What materials do I need for gesture drawing?
All you need is some paper and a pencil or charcoal. The simplicity of the materials allows you to focus on the drawing itself without distractions.
How often should I practice gesture drawing?
Regular practice is key. Aim for a few sessions each week to develop your skills and improve your ability to capture likeness and emotion in your portraits.
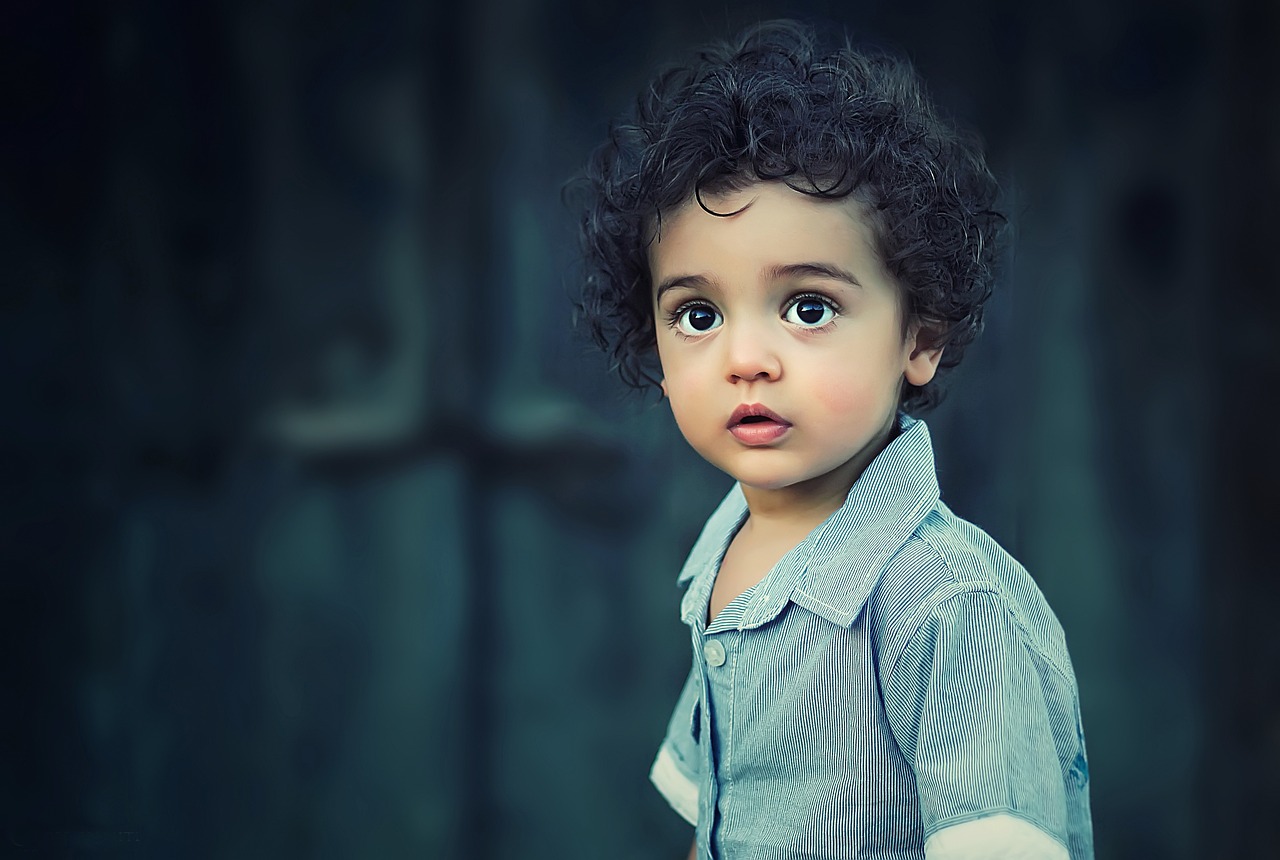
Blocking In Shapes
When it comes to portrait drawing, is an essential technique that can significantly enhance your ability to capture likeness and proportion. Think of it as laying down the framework of a house before you start decorating the walls. By simplifying complex forms into basic shapes, you can create a solid foundation that will guide your drawing process. This method allows you to focus on the overall composition and relationships between different elements of the face without getting bogged down in intricate details too early in the drawing.
To effectively block in shapes, begin by observing your subject and identifying the major shapes that make up the head and facial features. For instance, the head can often be represented as an oval, while the jawline might be depicted as a triangle or rectangle, depending on the subject's face shape. The eyes can be simplified into circles or ovals, and the nose can be represented by a combination of triangular and rectangular shapes. This approach not only helps in achieving accurate proportions but also ensures that the overall structure of the portrait remains balanced.
Here’s a quick breakdown of the steps to consider when blocking in shapes:
- Start with Light Sketches: Use a light hand to outline the basic shapes. This makes it easier to adjust proportions as needed.
- Focus on Relationships: Pay attention to the distances between features. For example, the distance between the eyes should generally be about the width of one eye.
- Refine the Shapes: Once you have the basic shapes in place, begin refining them to more closely resemble your subject. This is where you can start adding curves and angles to represent the unique features of the face.
Blocking in shapes not only aids in achieving a proportionate likeness but also helps in establishing the overall composition of your portrait. It’s like sketching out a blueprint before you start building. Once you have your shapes in place, you can gradually add detail and shading to bring your portrait to life. Remember, the key is to be patient and allow yourself the freedom to make adjustments as you go. The more you practice this technique, the more intuitive it will become, allowing you to create stunning portraits that truly capture the essence of your subjects.
Q: Why is blocking in shapes important in portrait drawing?
A: Blocking in shapes is crucial because it helps establish the overall structure and proportions of the face before diving into details. It allows artists to focus on relationships between features, making it easier to achieve a balanced and accurate representation.
Q: What are some common shapes used in blocking in shapes?
A: Common shapes include ovals for the head, triangles for the jawline, circles for the eyes, and rectangles for the nose. These simplify the complex forms of the face, making it easier to sketch accurately.
Q: How can I improve my blocking in shapes technique?
A: Practice is key! Spend time observing faces and sketching them using simple shapes. Try drawing from photographs or live models, and don’t hesitate to make adjustments as needed. Over time, you’ll develop a better eye for proportions and shapes.

Capturing Expression and Emotion
When it comes to portrait drawing, is the heartbeat of your artwork. It’s not just about replicating a face; it’s about translating the soul of your subject onto paper. Think of it this way: a portrait that lacks emotion is like a song without melody. It may look good, but it won’t resonate with anyone. So, how do you breathe life into your portraits? The key lies in observing the subtle nuances of facial expressions and understanding how to convey them through your drawings.
First off, let’s talk about the eyes. Often deemed the windows to the soul, the eyes are crucial in expressing feelings. When drawing eyes, pay attention to their shape, size, and the way light interacts with them. A slight change in the angle of the eyebrow or the curve of the eyelid can completely alter the emotion conveyed. For instance, wide-open eyes can suggest surprise or excitement, while narrowed eyes might indicate suspicion or anger. To master this, practice drawing eyes from different angles and under various lighting conditions. Here’s a quick guide:
| Expression | Eye Characteristics |
|---|---|
| Surprise | Wide open, raised eyebrows |
| Happiness | Bright, slightly squinted, with crinkles at the corners |
| Sadness | Droopy eyelids, less visible sclera |
| Anger | Narrowed, intense gaze with furrowed brows |
Next, let’s delve into the mouth and smile. The mouth is a powerful tool for expressing emotions. A genuine smile can light up a face, while a frown can cast a shadow. When drawing lips, focus on their shape and how they interact with the surrounding facial features. Are the lips slightly parted, revealing a hint of teeth? Or are they pressed together in a tight line? Each variation tells a different story. To capture these details, observe your subject closely during conversations or while they’re immersed in thought. You might even want to take quick sketches to practice the different forms of smiles:
- Genuine Smile: The corners of the mouth are raised, and the eyes sparkle.
- Half Smile: One side of the mouth lifts, often signaling playfulness or sarcasm.
- Frown: The lips turn downward, indicating sadness or disapproval.
Finally, remember that the context in which your subject is situated can greatly influence their expression. A person laughing at a joke will look different than the same person lost in thought. Consider the environment and the subject's body language as you draw. This holistic approach will not only enhance the emotional depth of your portrait but also create a more engaging narrative.
In summary, capturing expression and emotion in portrait drawing is about keen observation and thoughtful execution. By focusing on the eyes, mouth, and context, you can create portraits that resonate with viewers on a deeper level. So, grab your pencil and start practicing these techniques. Who knows? You might just create a masterpiece that tells a story all on its own!
Q: How can I practice capturing expressions effectively?
A: One effective method is to engage in quick gesture drawing sessions where you focus on capturing the essence of your subject within a limited time frame. This forces you to prioritize the most expressive elements of their face.
Q: What should I do if I struggle to depict emotions accurately?
A: It can be helpful to study photographs or videos of people expressing different emotions. Try sketching from these references to understand how facial features change with different feelings.
Q: Are there specific artists I should study for emotional portrait techniques?
A: Absolutely! Artists like John Singer Sargent and Lucian Freud are renowned for their ability to capture emotion in their portraits. Analyzing their work can provide valuable insights into effective techniques.

Eye Details
When it comes to portrait drawing, the eyes are often regarded as the most crucial aspect of capturing a person's likeness. They are, after all, the windows to the soul. This means that getting the details right can make or break your portrait. So, how do you render those captivating eyes that truly reflect emotion and depth? Let's dive into some essential techniques that will help you master this vital feature.
First off, it's important to understand the anatomy of the eye. The eye is not just a simple circle; it consists of multiple components that contribute to its overall appearance. Here’s a quick breakdown:
| Eye Component | Description |
|---|---|
| Iris | The colored part of the eye that can vary in hue. |
| Pupil | The black circular opening that allows light to enter the eye. |
| Sclera | The white outer coating of the eyeball, which can show reflections. |
| Eyebrow | Frames the eye and can express emotion through its shape. |
Understanding these components will help you create a more realistic representation. For instance, the iris often has variations in color and texture, which can be highlighted using different shading techniques. To add depth, consider using a gradient effect; darker shades around the edges can create a more three-dimensional look, while lighter tones can be used to depict highlights.
Next, let’s talk about the pupil. It’s common for pupils to appear larger in dim light, which can convey a sense of emotion or intensity. When drawing, make sure to capture this change by adjusting the size of the pupil based on the lighting conditions you want to portray. This can significantly enhance the emotional impact of your portrait.
Don't forget the sclera! While it may seem straightforward, the sclera can show various subtle shades of color, especially when light reflects off its surface. Use a soft pencil or blending tool to create these nuances, which will make your drawing more lifelike. Additionally, adding tiny reflections in the sclera can give the eyes a sparkling quality, making them appear more engaging.
Another crucial element is the eyebrow. The shape, thickness, and angle of the brow can drastically change the expression of your subject. A furrowed brow can indicate concern, while an arched brow can suggest surprise. Pay attention to these details, as they can add layers of meaning to your portrait.
Finally, practice is essential. Spend time observing different eyes, whether in photographs or real life. Try sketching them from various angles and in different lighting. The more you practice, the better you’ll become at capturing the intricate details that make each pair of eyes unique.
In summary, mastering the art of eye details in portrait drawing involves understanding anatomy, practicing shading techniques, and paying close attention to expression. By focusing on these elements, you’ll be able to create portraits that truly resonate with viewers.
- How can I make my eye drawings look more realistic? Focus on the details of the iris, pupil, sclera, and eyebrows. Use shading techniques to create depth and highlights.
- What materials are best for drawing eyes? Graphite pencils and colored pencils work well. Charcoal can also be effective for dramatic effects.
- Should I use reference photos when drawing eyes? Yes, reference photos can help you understand the nuances of eye anatomy and expression.
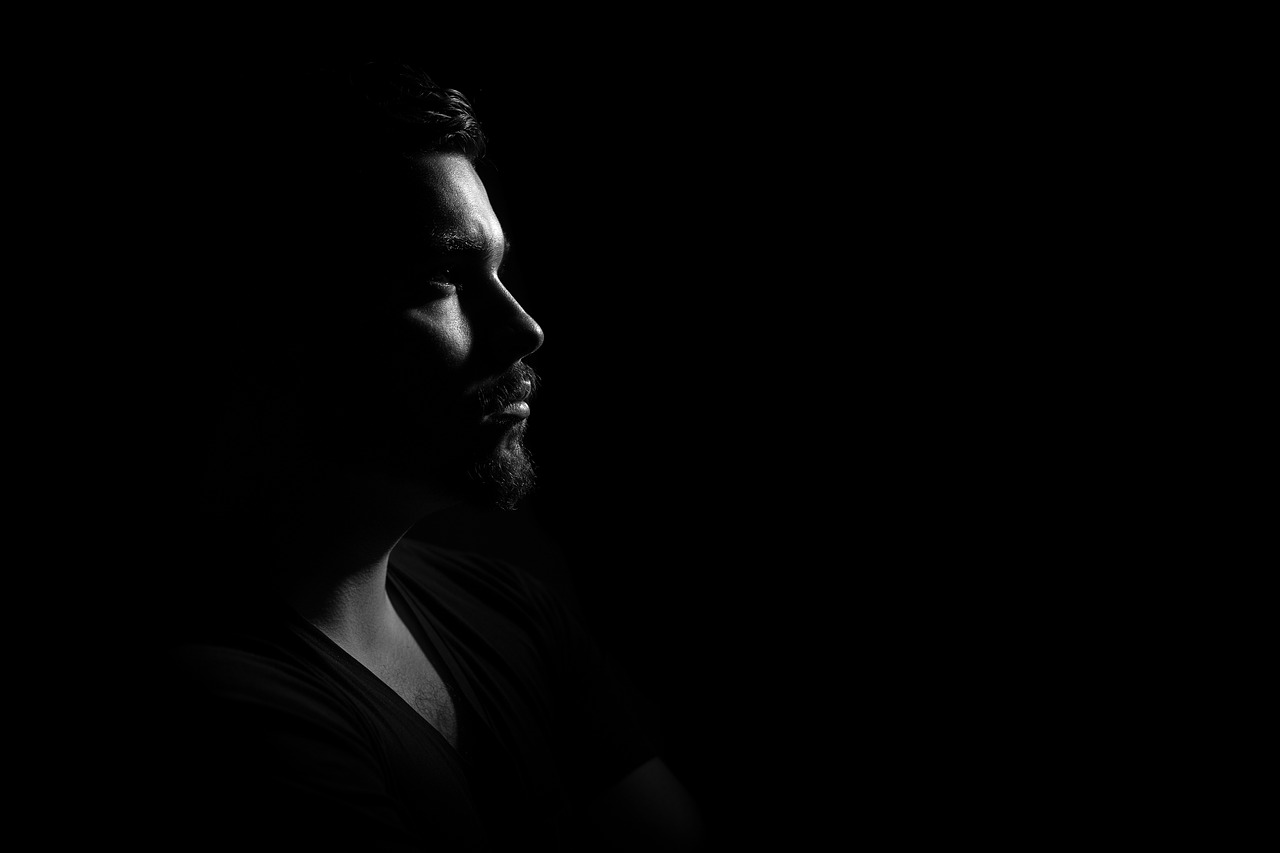
Mouth and Smile
When it comes to portrait drawing, capturing the mouth and smile is essential for conveying the subject's personality and emotional state. The mouth is not just a feature; it's a dynamic element that can express a myriad of feelings, from joy to sadness, and everything in between. To draw a mouth effectively, you need to understand its structure and the subtle nuances that make it come alive on paper.
Start by observing the shape of the lips. The upper lip typically has a more defined curve, while the lower lip is fuller and rounder. Pay attention to how the lips interact with the rest of the face. For instance, when someone smiles, the corners of the mouth lift, and the shape of the lips changes. This is where your observational skills come into play. Take a moment to study your subject, whether it's a live model or a photograph, and note the unique characteristics that define their smile.
Another crucial aspect to consider is the subtlety of expression. A smile can be broad and cheerful, or it can be soft and shy. The key to capturing these variations lies in the details. For example, when drawing a broad smile, you might notice the way the skin stretches around the mouth, creating tiny lines and shadows. Conversely, a subtle smile might require you to focus on the gentle curves of the lips without exaggerating their shape. This attention to detail will help you create a more lifelike representation.
In addition to the shape and expression, don't forget about the surrounding features. The mouth doesn't exist in isolation; it interacts with the cheeks, chin, and even the eyes. When someone smiles, their cheeks often rise, creating a more rounded appearance. This is an important detail that adds depth to your portrait. Consider using light shading to indicate this interaction. Shading can enhance the three-dimensionality of the mouth and make it appear more realistic.
To practice drawing mouths effectively, consider the following tips:
- Study References: Use photographs or live models to observe different types of smiles and mouth shapes.
- Practice Different Expressions: Spend time sketching various emotions, from laughter to contemplation, to understand how the mouth changes with each feeling.
- Focus on Light and Shadow: Use shading to create depth around the lips and enhance the overall look of the mouth.
By honing your skills in drawing the mouth and smile, you will not only improve the accuracy of your portraits but also enrich the emotional depth of your artwork. Remember, a well-drawn mouth can tell a story, and it’s your job as an artist to capture that narrative with precision and heart.
Q: What are the best techniques for drawing realistic lips?
A: To draw realistic lips, focus on their shape and the way they interact with the surrounding facial features. Use shading to add depth, and pay close attention to the subtle curves and lines that define the lips.
Q: How can I practice drawing smiles?
A: Practice by sketching a variety of smiles from different angles and expressions. Use references to help you understand how the mouth changes with emotion, and don’t hesitate to experiment with different styles.
Q: Should I use color when drawing lips?
A: While it’s not necessary, adding color can enhance the realism of your portraits. Use soft, blended colors to achieve natural-looking lips, and remember to consider the lighting in your composition.
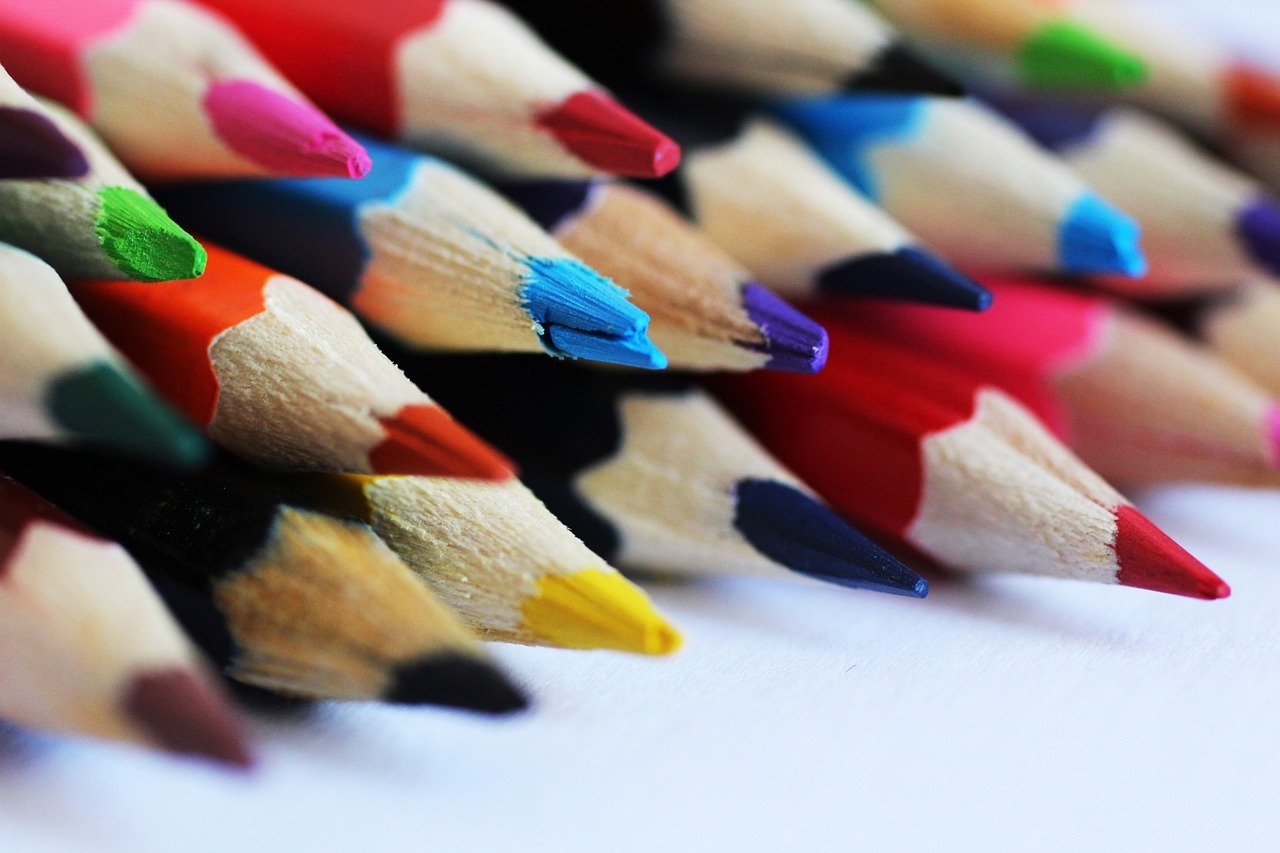
Final Touches and Presentation
When it comes to portrait drawing, the final touches can make all the difference between a piece that merely looks good and one that truly captivates its audience. After spending hours sketching, shading, and refining, it’s crucial to step back and assess your work with a critical eye. This is the moment to add those finishing details that will elevate your portrait from ordinary to extraordinary. Whether it's enhancing the highlights in the eyes or adding a soft gradient to the background, these subtle adjustments can bring your artwork to life.
One of the key aspects of final touches is shading techniques. Shading is not just about adding darkness; it’s about creating dimension and depth. For instance, consider using a combination of hatching, cross-hatching, and blending to create a more realistic representation. Each technique has its own unique effect on the texture and feel of the portrait. You might find that a soft, blended shade gives a more lifelike quality to skin, while sharper, more defined lines can add drama and intensity to features.
Next, let’s talk about the importance of framing and displaying your work. A well-chosen frame can not only protect your artwork but also enhance its overall presentation. When selecting a frame, consider the style of your portrait. For example, a classic wooden frame may complement a traditional style, while a sleek, modern frame might be perfect for contemporary pieces. Additionally, think about the colors and materials that will best highlight your artwork. A good frame should act as a supportive backdrop, drawing attention to your portrait without overwhelming it.
Moreover, the way you display your artwork can significantly impact how it’s perceived. If you’re showcasing your portraits in a gallery or at home, consider the lighting. Proper lighting can make colors pop and textures stand out. You might want to experiment with different angles and intensities of light to find the perfect setup. Also, think about the placement of your artwork. Hanging it at eye level and ensuring it’s not crowded by other pieces will allow viewers to appreciate it fully.
Finally, don't underestimate the power of presentation. Whether you’re presenting your work to friends, family, or a wider audience, how you talk about your art matters. Share the story behind your portrait, the emotions you aimed to capture, and the techniques you used. This not only engages your audience but also gives them a deeper appreciation for your work. Remember, a portrait is not just a representation of a person; it’s a window into their soul, and your passion for your art can make that connection even stronger.
- What are some common mistakes to avoid in portrait drawing? One common mistake is not paying attention to proportions. Always measure and compare facial features to maintain accuracy.
- How can I improve my shading techniques? Practice different shading methods, such as hatching and blending, and experiment with various pencils and pressures to see how they affect your shading.
- What type of frame is best for my portrait? The best frame depends on your style. Classic portraits may benefit from ornate frames, while modern pieces look great in minimalist designs.
- How do I choose the right paper for my portrait? Choose paper that suits your medium. For graphite, a smooth surface is ideal, while textured paper works well for charcoal.
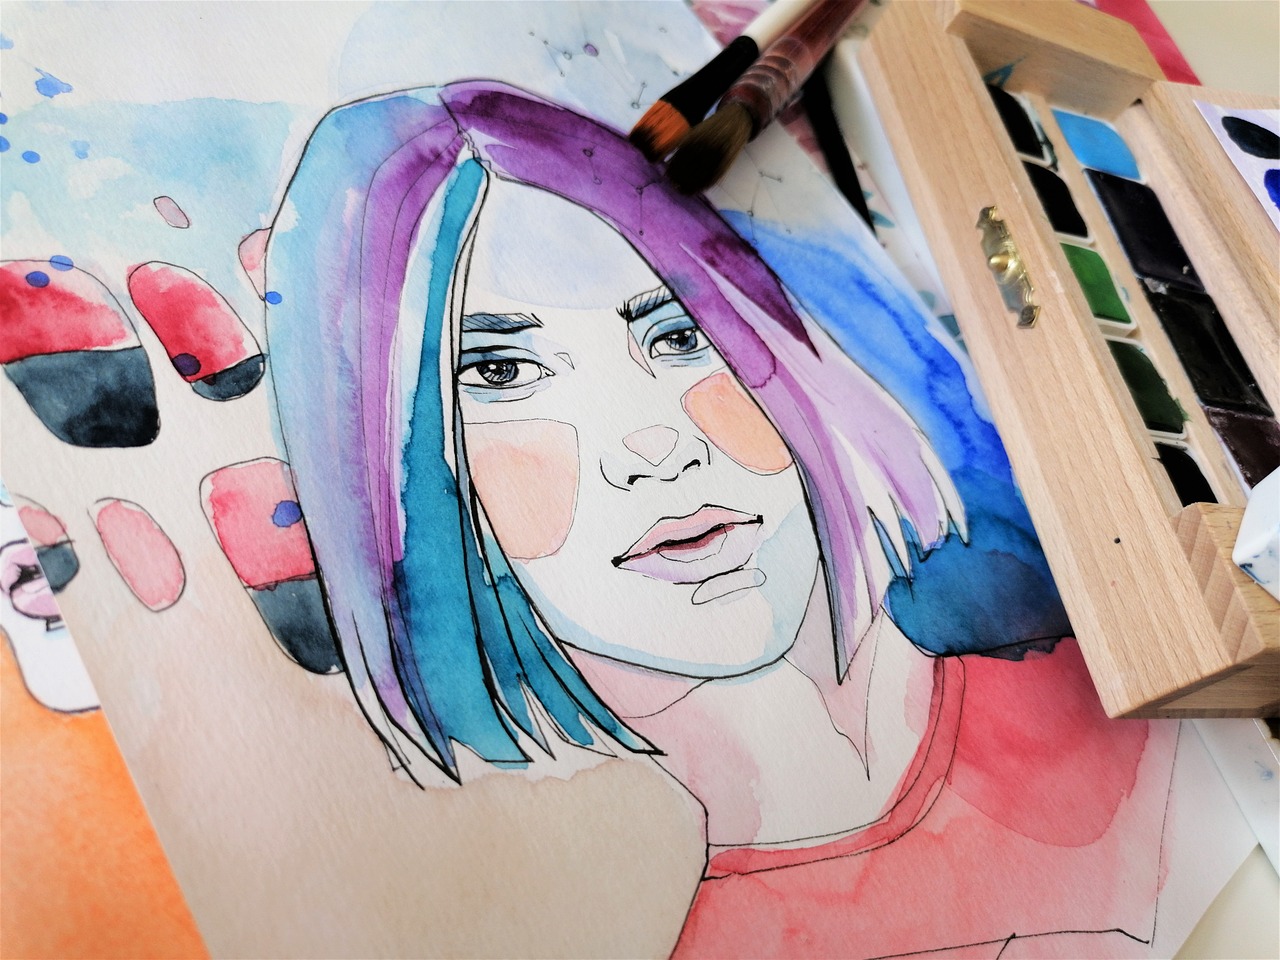
Shading Techniques
Shading is where the magic happens in portrait drawing; it transforms a flat image into a three-dimensional representation that breathes life into your subject. Understanding different shading techniques is essential for adding depth and realism to your artwork. When you think about shading, imagine the way sunlight dances on a surface, creating highlights and shadows that define form. The goal is to replicate this effect on paper, making your portrait not just a drawing, but a captivating piece of art that tells a story.
One of the most fundamental techniques is the use of hatching and cross-hatching. Hatching involves drawing parallel lines close together to create areas of shadow. The closer the lines are, the darker the area will appear. On the other hand, cross-hatching takes it a step further by layering another set of parallel lines on top of the first, intersecting them at an angle. This technique is particularly effective for building up darker areas without losing the texture of your drawing. For beginners, practicing these techniques on a separate sheet can help you get a feel for how they affect your overall composition.
Another effective method is the blending technique. This involves using tools such as blending stumps, your fingers, or even a soft cloth to smooth out the pencil strokes, creating a softer transition between light and dark areas. The beauty of blending is that it can produce a very realistic skin texture, especially in areas like the cheeks and forehead. However, be cautious not to over-blend; sometimes, leaving a bit of texture can add character to your portrait. Experimenting with different pressures while blending can also yield varied results, so don’t hesitate to try it out!
To illustrate the importance of shading techniques, consider the following table that summarizes the different methods and their effects:
| Technique | Description | Best Used For |
|---|---|---|
| Hatching | Drawing parallel lines to create shadow. | Initial shadow layers. |
| Cross-Hatching | Intersecting lines for deeper shadows. | Adding depth and texture. |
| Blending | Smoothing pencil strokes for soft transitions. | Realistic skin tones and soft features. |
| Stippling | Creating texture with small dots. | Fine details and textures. |
Finally, don’t underestimate the power of stippling, which involves creating shadows through tiny dots. This technique can be particularly useful for achieving fine details, like the texture of hair or the subtle shadows around the eyes. It requires patience but can yield stunning results, giving your portrait a unique flair. As you practice these techniques, remember that shading is not just about darkness; it’s about creating a balance of light and shadow that brings your portrait to life.
Q: What is the best pencil for shading?
A: Generally, softer pencils like 2B to 6B are preferred for shading because they allow for darker marks and smoother blending.
Q: How can I improve my shading skills?
A: Practice regularly with different techniques, study the light and shadow in real life, and experiment with various materials to find what works best for you.
Q: Should I use an eraser while shading?
A: Yes, a kneaded eraser can help lift highlights and refine details without damaging the paper, making it a valuable tool in your shading toolkit.
Framing and Displaying Your Work
When it comes to showcasing your portrait drawings, the way you frame and display your artwork can make a significant difference in how it is perceived. Think of your portrait as a gem; without the right setting, it may not shine as brightly as it could. Proper framing not only protects your art but also enhances its visual appeal, drawing the viewer's eye to the details and emotions you've captured. So, let’s delve into some essential tips on framing and displaying your work effectively.
First, consider the type of frame that best complements your artwork. The frame should harmonize with the style and colors of your portrait. For instance, a sleek, modern frame might work beautifully with a contemporary portrait, while a more ornate frame could enhance the charm of a classic piece. Here are a few frame styles to consider:
- Wooden Frames: These add warmth and can be stained or painted to match your artwork.
- Metal Frames: Ideal for a minimalist look, they provide a clean edge that can highlight the portrait.
- Floating Frames: These create a unique effect, making it seem like your artwork is suspended within the frame.
Next, think about the matting. Using a mat can create a visual buffer between your artwork and the frame, enhancing the overall presentation. A well-chosen mat color can draw attention to your portrait and provide contrast that makes the colors pop. When selecting a mat, consider the following:
- Choose a color that complements the dominant tones in your portrait.
- Ensure the mat is of archival quality to prevent degradation over time.
- Consider the width of the mat; a wider mat can create a more dramatic effect.
Once your portrait is framed, think about where and how to display it. Lighting plays a crucial role in showcasing your artwork. Natural light can enhance the colors and details, but be cautious of direct sunlight, as it can fade your work over time. Instead, consider using:
- Spotlights: These can highlight your artwork effectively, especially in a gallery setting.
- LED lights: These are energy-efficient and can provide a soft glow that enhances the viewing experience.
Finally, don't underestimate the power of a well-thought-out display arrangement. Whether you're showcasing a single portrait or a series of works, consider the flow and balance of the space. Grouping similar pieces together can create a cohesive look, while varying the sizes and orientations can add interest. Additionally, consider the height at which you hang your artwork; ideally, the center of the piece should be at eye level for the best viewing experience.
In conclusion, framing and displaying your portrait drawings are just as crucial as the drawing itself. The right frame and presentation can elevate your artwork, making it not just a piece to admire, but a story to be told. So, take the time to choose wisely, and let your portraits shine in their best light!
Q: What type of frame is best for pencil drawings?
A: For pencil drawings, a simple wooden or metal frame is often best, as it allows the artwork to be the focal point. Choose a mat to protect the drawing and add visual interest.
Q: How can I prevent my framed artwork from fading?
A: To prevent fading, use UV-protective glass or acrylic in your frame and avoid placing your artwork in direct sunlight.
Q: Should I use a mat for all my portraits?
A: While not necessary for every piece, mats can enhance the presentation of your portraits and provide protection. It’s a personal choice based on the style of the artwork and your aesthetic preference.
Frequently Asked Questions
-
What are the essential facial proportions I should know for portrait drawing?
Understanding facial proportions is crucial for capturing a realistic likeness. The general rule is that the face can be divided into equal thirds: from the hairline to the eyebrows, from the eyebrows to the bottom of the nose, and from the nose to the chin. Additionally, the eyes are typically positioned halfway down the head, and the width of the face is about five eye widths across.
-
Which materials are best for portrait drawing?
Choosing the right materials can significantly affect your portrait's quality. Popular choices include graphite pencils for their versatility, charcoal for its depth and texture, and colored pencils for adding life and vibrancy. Paper selection also matters; opt for smooth paper for fine details or textured paper for more expressive strokes.
-
How can I improve my sketching techniques for portraits?
Improving your sketching techniques involves practice and understanding. Start with gesture drawing to quickly capture the essence of your subject. Then, practice blocking in shapes to simplify complex forms into basic structures. This foundational work helps create a more accurate and balanced portrait.
-
What techniques can I use to capture expression and emotion in my portraits?
To effectively convey expression, pay close attention to the eyes and mouth, as they are key to emotion. Observe your subject's subtle facial movements and practice rendering realistic eyes and lips. Experiment with different angles and lighting to capture the mood you want to express.
-
What are some final touches I can add to enhance my portrait?
Final touches can elevate your artwork significantly. Focus on refining details, such as highlights in the eyes or softening harsh lines. Effective shading adds dimension, so explore various techniques like hatching or blending. Lastly, consider how you frame and display your work, as this can greatly impact how it is perceived.


