Learning to Draw: How to Create Accurate Proportions
Drawing is an incredible form of expression, a way to capture the world around us, and a skill that can be honed with practice and patience. One of the most critical aspects of drawing is achieving accurate proportions. Whether you're sketching a still life, a portrait, or even a landscape, understanding how different elements relate to each other in size and shape is essential. Think of proportions as the backbone of your artwork; without them, your drawings can end up looking distorted or unbalanced. But fear not! This article is here to guide you through various techniques and tips that will help you master the art of proportions, making your drawings not only more realistic but also more engaging to the viewer.
So, what exactly are proportions? In the simplest terms, proportions refer to the relationship between the sizes of different parts of a subject. Imagine you're trying to draw a human figure; the size of the head in relation to the body is crucial. If the head is too big or too small, the entire figure will look off. Understanding these relationships is vital for achieving accuracy and balance in your drawings. It's akin to building a house: if the foundation is shaky, the entire structure is at risk. In drawing, proportions serve as that foundation. By grasping the basics of proportions, you set yourself up for success in creating art that resonates.
To help you achieve those perfect proportions, various tools can assist you in measuring. Some of these tools include rulers, calipers, and grids. Each of these tools has its unique advantages, and knowing how to use them effectively can significantly improve your drawing accuracy. For instance, a ruler can help you measure straight lines and angles, while calipers can give you precise measurements of curved surfaces. Grids, on the other hand, allow you to break down complex images into manageable sections, making it easier to maintain proportions throughout your drawing.
The grid method is one of the most popular techniques for achieving accurate proportions. This involves overlaying a grid on your reference image and your drawing surface. By doing this, you can break down the complex image into smaller, more manageable sections. It’s like solving a jigsaw puzzle: once you tackle each piece, the whole picture starts to come together. The beauty of this method lies in its simplicity and effectiveness.
To create a grid, start by dividing your reference image into equal squares. You can do this on paper or digitally. This method aids in maintaining the correct proportions while transferring the image to your drawing paper. As you fill in each square, focus on replicating what you see, and before you know it, you'll have a well-proportioned drawing that closely resembles your reference.
In today’s digital age, artists can utilize software or apps to create customizable grids that enhance their drawing process. These tools allow for easy adjustments and can be particularly useful for artists working on digital platforms. Imagine having the ability to resize your grid on the fly, making it easier to adapt to different images and styles!
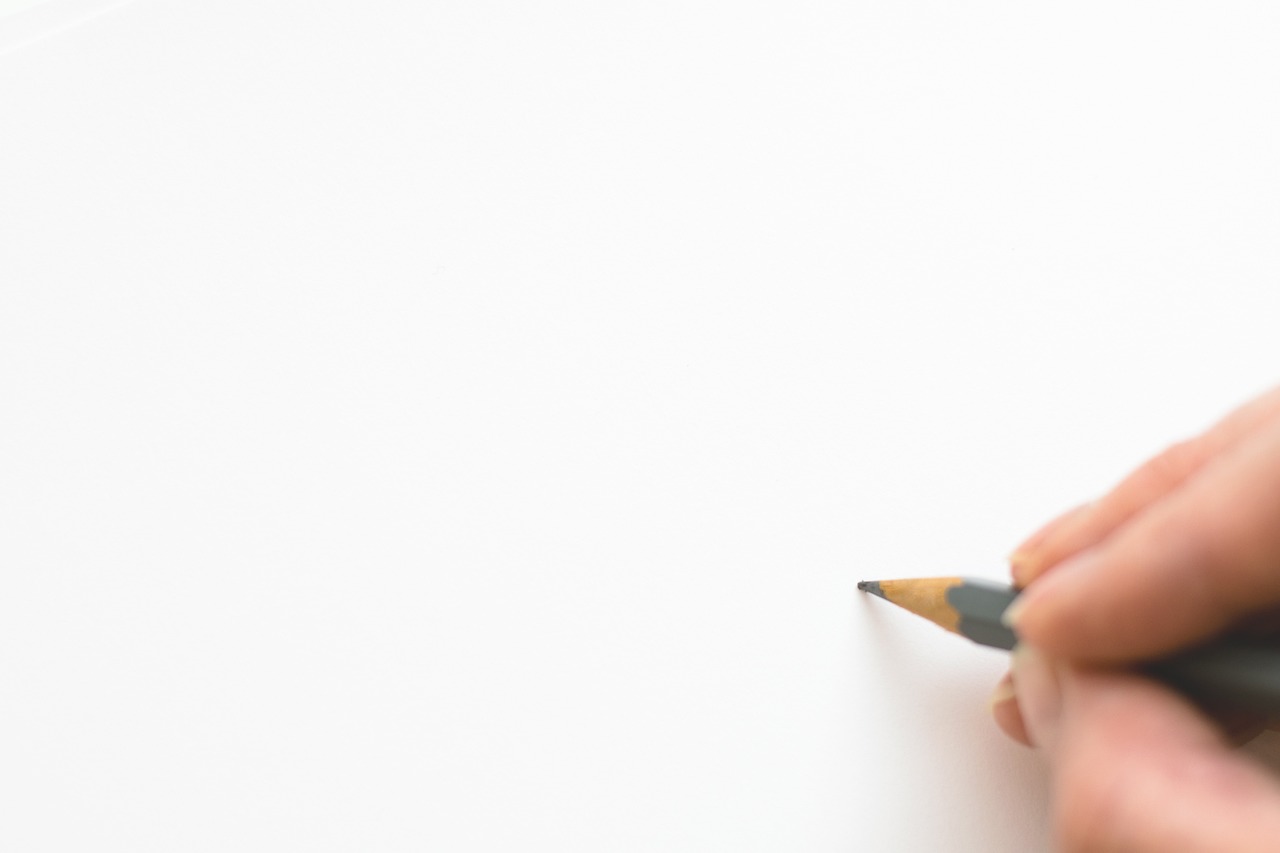
Another classic technique involves using your pencil as a measuring tool. Hold your pencil at arm's length and use it to gauge proportions and angles. This technique is straightforward yet incredibly effective. By aligning the pencil with different parts of your subject, you can get a better sense of how everything fits together. It's like having an extra pair of eyes that can help you see the relationships between different elements more clearly.
Regular practice is essential for mastering proportions. Engaging in exercises that focus on drawing from life can help improve your observational skills and accuracy over time. Think of it as training for a sport: the more you practice, the better you become. Consistent practice not only reinforces your skills but also builds confidence in your drawing abilities.
Participating in life drawing sessions is a fantastic way for artists to practice capturing the human form accurately. These sessions provide valuable experience in observing and translating proportions onto paper. You'll learn to see the subtle nuances of the human body, from the curve of the shoulder to the angle of the wrist, and how each part relates to the whole.
In addition to life drawing, self-directed exercises—such as sketching everyday objects—can enhance your understanding of proportions. Whether it's a coffee cup or a fruit bowl, the goal is to observe and replicate what you see. This kind of practice helps reinforce your skills and builds confidence in your ability to draw accurately.
Even the most seasoned artists can fall into traps when it comes to proportions. Identifying and correcting common mistakes can elevate your artwork significantly. Awareness of these pitfalls allows artists to focus on improving their techniques and achieving better results. Remember, every mistake is an opportunity to learn!
A frequent mistake is misjudging head size in relation to the body. Understanding the average proportions of the human figure can help artists avoid this common error. For example, the average human head is about 1/8th of the total height of the body. Keeping this in mind can guide you in creating more balanced figures.
Finally, failing to account for perspective can lead to distorted proportions. Recognizing how distance affects size is crucial for creating depth and realism in your drawings. Think about how objects appear smaller as they recede into the background; capturing this illusion is key to making your artwork feel three-dimensional.
- How can I improve my proportion skills? Regular practice, studying anatomy, and using measuring tools can greatly enhance your skills.
- What tools should I use for measuring proportions? Rulers, calipers, and grids are excellent tools for measuring proportions accurately.
- Is it necessary to draw from life? While not mandatory, drawing from life helps develop observational skills that are crucial for understanding proportions.
Understanding Proportions
This article explores techniques and tips for achieving accurate proportions in drawing, helping artists of all levels enhance their skills and create more realistic representations of their subjects.
Proportions refer to the relationship between the sizes of different parts of a subject. Think of proportions as the invisible strings that connect various elements of your drawing, ensuring everything fits together harmoniously. When you grasp these relationships, your drawings will not only look more realistic but also feel more balanced. Imagine trying to build a house without a blueprint; you might end up with a lopsided structure. The same principle applies to drawing—understanding proportions is your blueprint.
To illustrate this concept further, consider the human body. The average adult human is typically about seven to eight heads tall. This means that if you can accurately measure the size of the head, you can use that as a reference to determine the height of the rest of the body. Here’s a quick breakdown of some common proportions:
| Body Part | Proportion |
|---|---|
| Head | 1 unit |
| Torso | 2-3 units |
| Legs | 4 units |
| Arms | 2.5 units |
Understanding these proportions can help you create figures that are not just accurate but also dynamic and lifelike. Additionally, it's important to remember that proportions can vary between individuals. For instance, some people may have longer legs or shorter torsos. This variability is what makes each subject unique and adds character to your drawings.
Another aspect to consider is the relationship between foreground and background elements. When drawing a scene, objects that are closer to the viewer appear larger, while those further away seem smaller. This perspective adds depth to your artwork and can dramatically affect how proportions are perceived. For example, if you’re drawing a person standing in front of a building, the person should appear larger in proportion to the building to create a sense of realism.
To sum up, understanding proportions is essential for any artist aiming to create realistic and engaging artwork. By studying the relationships between different elements, using reference points, and considering perspective, you can elevate your drawing skills and produce work that resonates with viewers.
- What are proportions in drawing? Proportions in drawing refer to the relative sizes of different parts of a subject, which are crucial for achieving accuracy and balance.
- How can I practice my understanding of proportions? Regular practice through life drawing sessions and sketching everyday objects can significantly enhance your understanding of proportions.
- What tools can help me with measuring proportions? Tools such as rulers, calipers, grids, and even a simple pencil can assist in measuring and maintaining accurate proportions in your drawings.
Tools for Measuring Proportions
When it comes to drawing, measuring proportions accurately is essential for creating realistic representations of your subjects. Whether you're a beginner or a seasoned artist, having the right tools at your disposal can make all the difference in your artwork. There are several tools that can assist you in this process, each with its own unique advantages. Let's dive into some of the most effective tools you can use to measure proportions accurately.
One of the most common tools is the ruler. A simple ruler can help you measure distances and compare sizes between different parts of your subject. However, it’s essential to remember that rulers can sometimes be limiting, especially when dealing with curved lines or organic shapes. For those who want more precision, calipers can be a fantastic option. These tools allow you to measure the distance between two opposite sides of an object, making it easier to gauge proportions accurately.
Another effective method is the use of grids. A grid can help you break down complex images into smaller, manageable sections, allowing you to focus on one part at a time. By overlaying a grid on your reference image and your drawing surface, you can ensure that each section is proportionate to the others. This method is particularly helpful for beginners who may struggle with visualizing proportions in a more abstract way.
For those who prefer digital methods, software and apps are available that provide customizable grids and measurement tools. These digital resources can make the process even more straightforward, allowing you to adjust the grid size according to your needs. Whether you are using traditional or digital methods, understanding how to utilize these tools effectively can significantly enhance your drawing accuracy.
To summarize, here are the primary tools for measuring proportions:
- Ruler - Best for straight lines and simple measurements.
- Calipers - Ideal for measuring depth and width accurately.
- Grid Method - Helps break down complex images into manageable sections.
- Digital Tools - Offers customizable grids and measurement features for ease of use.
In conclusion, whether you choose traditional tools like rulers and calipers or modern digital solutions, the key is to practice using these tools consistently. The more you familiarize yourself with them, the more accurate your proportions will become, leading to more realistic and captivating artwork.
Q: What is the best tool for beginners to measure proportions?
A: For beginners, a simple ruler and the grid method are often the best starting points. They are easy to use and can significantly improve your understanding of proportions.
Q: Can I use my phone as a measuring tool?
A: Yes! Many apps are available that can help you measure distances and overlay grids on images, making your phone a handy tool for artists.
Q: How often should I practice measuring proportions?
A: Regular practice is essential. Aim to incorporate measuring proportions into your daily drawing routine for the best results.
The Grid Method
The Grid Method is a powerful technique that can transform the way you approach drawing. Imagine you're trying to replicate a stunning photograph or a complex scene; it can feel overwhelming at first. This is where the grid comes in handy! By overlaying a grid on both your reference image and your drawing surface, you effectively break down the daunting task into smaller, more manageable sections. Think of it as a roadmap for your artistic journey. Instead of getting lost in the details, you can focus on one square at a time, ensuring that every part of your drawing maintains accurate proportions.
To get started with the grid method, you first need to create your grid. This involves dividing your reference image into equal squares, which can be done using either traditional methods or digital tools. Here’s a simple way to visualize it:
| Step | Description |
|---|---|
| 1 | Select your reference image and decide how many squares you want to divide it into. |
| 2 | Overlay a grid on the image, ensuring that each square is equal in size. |
| 3 | Draw a corresponding grid on your drawing paper, maintaining the same number of squares. |
| 4 | Start drawing the contents of each square one at a time, focusing on transferring the details accurately. |
Using a digital grid can also streamline this process. Many artists today take advantage of software or apps that allow them to create customizable grids that can be easily adjusted to fit their needs. This digital approach not only saves time but also enhances precision, allowing for a more seamless drawing experience. Imagine being able to zoom in and out, adjusting the grid size with just a click—it's a game changer!
Now, when you're using the grid method, remember that the key is to maintain your focus on each individual square. It’s easy to get caught up in the overall image, but by concentrating on one section at a time, you can ensure that your proportions remain accurate throughout the entire drawing. This technique is particularly beneficial for beginners who might feel intimidated by the prospect of drawing complex subjects. By simplifying the process, you can build your confidence and skills over time.
In conclusion, the grid method is not just a technique; it's a valuable tool that can help you unlock your potential as an artist. Whether you're a seasoned professional or just starting out, mastering this method will enhance your ability to create stunning, proportionally accurate artwork. So grab your pencil, set up your grid, and let your creativity flow!
- What is the grid method? The grid method is a drawing technique that involves overlaying a grid on a reference image and your drawing surface to help maintain accurate proportions.
- Can I use a digital grid? Yes! Many artists use software or apps to create customizable grids that can enhance their drawing process.
- Is the grid method suitable for beginners? Absolutely! It is particularly helpful for beginners as it simplifies complex images into manageable sections.
- How do I maintain accuracy while using the grid method? Focus on one square at a time and ensure that the details in each square are transferred accurately to your drawing.
Creating Your Grid
Creating a grid is one of those magical techniques that can transform your drawing experience from daunting to delightful. Imagine you're trying to replicate a stunning photograph or a complex scene, and it feels like you're staring at a massive puzzle with no idea where to start. This is where the grid method comes to the rescue! By breaking down your reference image into smaller, manageable squares, you can focus on one section at a time, making the whole process less overwhelming.
To get started, you'll want to divide your reference image into equal squares. The size of these squares can vary based on your preference and the complexity of the image. For instance, if you’re working with a highly detailed subject, smaller squares might be beneficial. Conversely, larger squares can work well for simpler images. Let’s say you have a photograph that measures 12 inches by 12 inches; you might divide it into a grid of 3x3 squares, each measuring 4 inches. This allows you to concentrate on one square at a time, ensuring that you capture the proportions accurately.
Here's a simple step-by-step guide to creating your grid:
- Step 1: Measure your reference image and decide how many squares you want to create.
- Step 2: Use a ruler to draw the grid lines on your reference image. Make sure the lines are light enough to be erased later if needed.
- Step 3: Prepare your drawing surface by drawing a corresponding grid. This will help you transfer the shapes and proportions accurately from the reference image.
- Step 4: Start drawing! Focus on one square at a time, translating what you see in that section onto your drawing paper.
If you prefer a more modern approach, consider using digital tools. Many artists today utilize software or apps that allow for customizable grid overlays on their reference images. This can be particularly handy if you're working on a tablet or digital canvas. You can adjust the size and number of squares with just a few clicks, which not only saves time but also enhances the precision of your work.
In summary, creating a grid is an invaluable skill for artists at any level. It simplifies the drawing process and helps maintain accurate proportions, allowing you to focus on the creative aspects of your artwork without getting bogged down by complexity. So, next time you sit down to draw, remember this technique, and watch your confidence soar as you create stunningly accurate representations of your subjects!
Using a Digital Grid
In today's digital age, artists have access to a plethora of tools that can enhance their drawing techniques, and one of the most effective among them is the digital grid. Utilizing software or applications that allow you to overlay grids on your reference images can make a world of difference in your drawing accuracy. Imagine having a virtual assistant that helps you break down complex subjects into manageable sections—this is precisely what a digital grid does!
To get started, you can choose from various applications specifically designed for artists. Popular options include Procreate, Adobe Photoshop, and ArtRage, all of which offer customizable grid overlays. These tools not only allow you to adjust the grid size but also enable you to manipulate the transparency, making it easier to see your reference image beneath the grid. This feature is particularly useful when you're working on intricate details, as it helps maintain focus on proportions while ensuring that the overall composition remains intact.
When using a digital grid, you can follow these simple steps to maximize its effectiveness:
- Select Your Reference Image: Choose a clear and high-resolution image that you want to draw.
- Overlay the Grid: Use your chosen software to apply a grid over the image. Adjust the grid size based on the complexity of the subject.
- Begin Your Drawing: Start sketching on a separate layer, using the grid as a guide to maintain accurate proportions.
One of the most exciting aspects of using a digital grid is the ability to easily modify it. If you find that certain sections of your drawing aren't aligning as you'd hoped, you can adjust the grid without any hassle. This flexibility allows for a more dynamic drawing process, enabling you to experiment with proportions and perspectives without the fear of making irreversible mistakes.
Moreover, digital grids can be particularly beneficial for artists who are transitioning from traditional to digital mediums. It provides a sense of familiarity while also introducing new techniques that can elevate your artistic skills. By integrating a digital grid into your workflow, you are not just improving your accuracy; you are also embracing the evolution of art in the digital space.
In conclusion, the digital grid is not just a tool; it's a game-changer for artists looking to enhance their drawing accuracy. By leveraging technology, you can simplify the complex task of proportioning and focus more on your creative expression. So, whether you are a beginner or an experienced artist, consider incorporating a digital grid into your drawing practice and watch as your skills flourish!
1. What is a digital grid?
A digital grid is an overlay of lines that can be applied to a reference image using software or apps, helping artists maintain accurate proportions while drawing.
2. Which applications are best for using a digital grid?
Popular applications include Procreate, Adobe Photoshop, and ArtRage, all of which offer customizable grid features.
3. Can I adjust the grid size in digital applications?
Yes, most digital art applications allow you to adjust the grid size and transparency to suit your drawing needs.
4. Is using a digital grid only for beginners?
No, artists of all skill levels can benefit from using a digital grid as it helps improve accuracy and confidence in drawing.
Measuring with a Pencil
Using a pencil as a measuring tool is a time-honored technique that many artists swear by. It’s not just about drawing; it’s about understanding your subject and translating that understanding onto paper. Imagine holding your pencil out at arm's length, aligning it with a part of your subject. This simple act can help you gauge proportions and angles with surprising accuracy. The best part? You don’t need fancy tools to get started; just your trusty pencil and a keen eye!
When you’re measuring with a pencil, consider the following steps:
- Align Your Pencil: Hold your pencil vertically at arm's length, aligning it with the part of the subject you want to measure.
- Mark the Length: Use your thumb to mark the point on the pencil that corresponds with the measurement.
- Transfer the Measurement: Without changing the angle of your pencil, bring it back to your drawing surface and replicate the measurement.
This method allows you to maintain a consistent scale while you work. It’s particularly useful when drawing from life or when you’re trying to capture the nuances of a complex form. But remember, it’s not just about precision; it’s also about developing your observational skills. The more you practice, the more intuitive this process becomes, and soon, you’ll find yourself drawing with a newfound confidence.
Moreover, it’s essential to be mindful of your grip and the distance you hold your pencil from your eye. A slight change in angle or distance can dramatically alter your perception of size and proportion. So, make it a habit to experiment with different distances and grips until you find what feels comfortable for you. This exploration will not only enhance your measuring technique but also deepen your understanding of spatial relationships in your artwork.
Ultimately, measuring with a pencil is about finding balance in your drawings. It’s a tool that bridges the gap between observation and representation, allowing you to create art that resonates with viewers. So, grab your pencil and start measuring—your artistic journey is just beginning!
Q: How can I improve my measuring skills with a pencil?
A: Regular practice is key! Try measuring different objects and gradually increase the complexity of your subjects. Also, consider joining life drawing sessions to enhance your observational skills.
Q: Are there any specific techniques to remember when measuring with a pencil?
A: Yes! Always keep your pencil at arm's length and be consistent with the angle you use. Mark your measurements clearly, and don’t hesitate to adjust as needed while you draw.
Q: Can I use this technique for digital drawing?
A: Absolutely! The principles of measuring with a pencil can be applied to digital drawing as well. Use your stylus in a similar manner to gauge proportions on your digital canvas.

Practicing Proportions
When it comes to mastering the art of drawing, is like laying the foundation for a sturdy house. Without a solid base, everything else can crumble. Regular practice is essential for honing your skills, especially when it comes to accurately representing the size relationships between different elements in your artwork. So, how do you go about this? Well, engaging in exercises that emphasize drawing from life can significantly enhance your observational skills and accuracy over time. Imagine trying to sketch a bustling street scene or a serene park; the ability to perceive and replicate the proportions of various objects and figures is key to creating a captivating composition.
One of the best ways to practice proportions is through life drawing sessions. These sessions are invaluable for artists eager to capture the human form accurately. They provide a unique opportunity to observe live models, allowing you to translate the dynamic proportions of the human body onto paper. During these sessions, you can experiment with different poses and angles, which helps you understand how proportions can shift and change in real-time. Not only do you get to refine your skills, but you also develop a deeper appreciation for the intricacies of human anatomy.
But what if you can't attend a life drawing session? No worries! You can still improve your proportion skills through self-directed exercises. For instance, try sketching everyday objects around your home. Whether it's a coffee mug, a plant, or even your pet, these items provide excellent practice for understanding proportions in a more casual setting. Set a timer and challenge yourself to capture the essence of these objects within a limited timeframe. This exercise not only sharpens your observational skills but also builds your confidence as you see your progress over time.
Additionally, consider setting up a weekly drawing challenge. You can focus on a specific theme, such as "fruits," "furniture," or "people in motion." By consistently practicing with a theme in mind, you create a structured environment that encourages growth. Here’s a simple idea for a weekly drawing challenge:
| Day | Theme | Focus |
|---|---|---|
| Monday | Still Life | Fruits |
| Tuesday | Figures | Human Form |
| Wednesday | Landscapes | Buildings |
| Thursday | Animals | Pets |
| Friday | Abstract | Shapes |
| Saturday | Portraits | Facial Features |
| Sunday | Free Day | Anything Goes! |
By following this simple yet effective structure, you'll find that your understanding of proportions will improve dramatically. Remember, the key to mastering proportions lies in the dedication to practice. Each time you pick up your pencil, you're not just drawing; you're training your eye and mind to see the world in a new light. So don’t be afraid to make mistakes along the way; they’re just stepping stones on your journey to becoming a proficient artist.
Q1: How often should I practice drawing to improve my proportions?
A1: Ideally, try to practice drawing at least a few times a week. Consistency is key, so even short daily sessions can be beneficial.
Q2: What are some common mistakes when practicing proportions?
A2: Some common mistakes include misjudging the size of the head in relation to the body and ignoring perspective. Being aware of these can help you improve.
Q3: Can I use digital tools to practice proportions?
A3: Absolutely! Digital tools can be incredibly helpful. Many drawing apps offer features like grids and overlays that can assist you in measuring proportions accurately.
Q4: Is life drawing necessary for improving proportions?
A4: While it's highly beneficial, it's not strictly necessary. You can improve your skills through self-directed exercises and by drawing from photographs as well.

Life Drawing Sessions
Participating in is one of the most enriching experiences an artist can have. These sessions provide a fantastic opportunity to observe and capture the human form in real-time, enhancing your understanding of proportions and anatomy. Imagine standing in a studio, surrounded by fellow artists, with a live model striking various poses. The atmosphere is electric, filled with creativity and inspiration. This dynamic setting allows you to practice not just your technical skills but also your ability to interpret movement and emotion through your drawings.
What makes life drawing so special? For starters, it challenges you to think critically about proportions. You’ll learn to measure the distances between body parts and how they relate to each other. For example, did you know that the average adult human figure is about 7.5 heads tall? Understanding such relationships can drastically improve your accuracy. You’ll also get to experiment with different mediums, from charcoal to graphite, which can affect how you perceive and render shapes.
During these sessions, it’s essential to keep a few things in mind:
- Focus on Gesture: Start with quick sketches to capture the essence and movement of the pose. This will help you loosen up and get in tune with the model's form.
- Break Down Shapes: Rather than getting bogged down in details, simplify the figure into basic shapes. This approach allows you to maintain proper proportions while building your drawing.
- Practice Different Poses: Models often switch poses every few minutes. Use this to your advantage by practicing a variety of angles and perspectives.
Life drawing sessions are not just for seasoned artists; they are beneficial for anyone looking to improve their drawing skills. Whether you're a beginner or an experienced artist, the experience can be transformative. You’ll find that the more you practice, the more confident you become in your ability to render proportions accurately. Plus, the feedback from instructors and peers can be invaluable, providing insights that you might not have considered before.
So, if you’re looking to elevate your art, consider joining a life drawing class. It’s a commitment that pays off in spades, offering you the chance to refine your skills while enjoying the process of creation. Remember, every stroke you make brings you one step closer to mastering the art of proportion!
Q: What should I bring to a life drawing session?
A: Typically, you'll want to bring your preferred drawing materials, such as sketchbooks, pencils, charcoal, or pastels. If you're unsure, check with the session organizer for any specific requirements.
Q: How long do life drawing sessions usually last?
A: Most sessions last between 2 to 3 hours, with breaks in between for longer poses. Each pose can vary in length, from quick gestures to longer, more detailed studies.
Q: Do I need to have advanced skills to join a life drawing class?
A: Absolutely not! Life drawing is for artists of all skill levels. Beginners are welcome, and many classes cater to those just starting out.
Q: Will there be a model? Can I choose the poses?
A: Yes, life drawing sessions typically feature a live model. The poses are usually selected by the instructor or the model, but you can often suggest poses for longer sessions.
Self-Directed Exercises
Engaging in is a fantastic way to hone your drawing skills, particularly when it comes to mastering proportions. These exercises allow you to explore your creativity while reinforcing your understanding of how different elements relate to one another in size and scale. Think of it as a personal gym session for your artistic muscles! You don’t need a fancy studio; all you need is a sketchbook, some everyday objects, and a little bit of time to practice.
One effective method is to choose a few common objects from your surroundings, such as a cup, a book, or a fruit. Start by observing the object closely, taking note of its dimensions, angles, and how it relates to other objects nearby. For instance, if you're drawing a cup next to a book, pay attention to how the height of the cup compares to the thickness of the book. This practice will sharpen your observational skills and help you translate what you see onto paper.
Another great exercise is to set up a simple still life arrangement. Gather a few items, such as a vase, some flowers, and a piece of fruit, and arrange them in a way that interests you. Spend some time sketching the arrangement from different angles. This not only challenges your ability to capture proportions but also encourages you to think about composition and perspective. You might be surprised at how much your understanding of proportions improves when you actively engage with your subject matter!
Additionally, consider using the following techniques in your self-directed exercises:
- Timed Sketches: Set a timer for 5-10 minutes and sketch an object as quickly as possible. This encourages you to focus on the overall proportions rather than getting caught up in details.
- Blind Contour Drawing: Without looking at your paper, draw the outline of an object. This exercise helps you connect your hand-eye coordination and forces you to really observe the subject.
- Scale Comparisons: Use a pencil or a piece of string to measure the height and width of your subjects. This can help you grasp their proportions relative to one another more effectively.
Remember, the goal of these exercises is not perfection but rather progress. Each time you sketch, you're building a foundation for better understanding proportions. Over time, you'll notice that your confidence grows, and you'll start to see improvements in your work. Just like any skill, the more you practice, the better you become!
Q: How often should I practice self-directed exercises?
A: Aim for at least a few times a week. Consistent practice will yield the best results.
Q: Do I need expensive materials to practice?
A: Not at all! You can use any paper and pencil you have on hand. The focus should be on practice, not materials.
Q: What if I feel frustrated with my progress?
A: Frustration is a normal part of the learning process. Take breaks, revisit your goals, and remember that improvement takes time.
Q: Can I practice proportions with digital tools?
A: Absolutely! Digital drawing apps often have features that can help you measure and adjust proportions easily.
Common Proportion Mistakes
When it comes to drawing, one of the most frustrating hurdles artists face is the issue of proportions. It's all too easy to get caught up in the details and overlook the fundamental relationships between different parts of your subject. One common mistake is overlooking head size. Many artists misjudge the size of the head in relation to the body, leading to figures that look awkward or out of balance. For example, if you're drawing a human figure, the head should generally be about 1/8th of the total height. Understanding this average can help you maintain a more realistic depiction.
Another frequent pitfall is ignoring perspective. This is crucial, especially when drawing objects or figures in a three-dimensional space. If you fail to account for how distance affects size, you may end up with distorted proportions that don't make sense. Imagine standing next to a tall building; it appears much larger than a small house down the street. Recognizing these shifts in size is essential for creating depth and realism in your artwork. Take a moment to observe how objects change in size as they recede into the background. It’s like looking through a window; the closer things appear larger, while those further away seem smaller.
In addition to these mistakes, artists often struggle with symmetry and balance. When drawing figures or objects, it’s vital to ensure that both sides are proportionate. If one arm is significantly larger than the other, it can create an unbalanced look. A simple way to check for symmetry is to step back and view your drawing from a distance. This technique can help you spot discrepancies that might not be visible up close.
Lastly, neglecting to measure can lead to a host of proportion issues. Many artists rely solely on their intuition, which can be a slippery slope. Instead, consider using tools like a ruler or a simple pencil measurement to gauge the sizes of different elements in your drawing. By consistently measuring as you work, you can catch mistakes before they become ingrained in your piece. Remember, even the most seasoned artists make mistakes; the key is to learn from them and continuously improve your skills.
- What are the best tools for measuring proportions in drawing? Rulers, calipers, and even your pencil can serve as effective measuring tools.
- How can I improve my understanding of proportions? Regular practice, especially through life drawing sessions and self-directed exercises, can significantly enhance your skills.
- What should I do if I notice a proportion mistake in my drawing? Take a step back, reassess your work, and make adjustments as needed. Don’t be afraid to erase and redraw!
Overlooking Head Size
When it comes to drawing the human figure, one of the most common pitfalls artists encounter is . It's astonishing how a simple miscalculation in the size of the head can throw off the entire proportion of your drawing. Think of the head as the foundation of your figure; if the foundation is shaky, everything built on top of it will be askew. The average human head is about 1/8th of the total height of the body, but this ratio can vary depending on the pose and perspective.
To avoid this mistake, it's essential to familiarize yourself with the relationships between head size and body proportions. For instance, when drawing a standing figure, you might find that the head can be used as a unit of measurement. By measuring the body in "heads," you can maintain consistent proportions. For example, an average adult figure typically measures about 7 to 8 heads tall. Here’s a quick breakdown of how you can visualize this:
| Body Part | Proportion (in heads) |
|---|---|
| Head | 1 |
| Torso (from neck to waist) | 2 to 3 |
| Legs (from waist to feet) | 3 to 4 |
Incorporating these measurements into your practice can help you achieve a more realistic representation. However, it’s not just about numbers; it's about observation too. Spend some time studying the human figure in real life or from reference images. Notice how the size of the head relates to the rest of the body in various poses. This practice will sharpen your observational skills and help you understand how to adjust proportions dynamically.
Another useful tip is to use a mirror or take a selfie while posing. This can give you a fresh perspective on how your head size compares to your body—sometimes, seeing yourself in a different light can reveal surprising insights about proportion. Remember, the goal is to create a harmonious balance in your artwork, and that starts with getting the head size just right. So, next time you pick up your pencil, keep that head size in check!
- What is the average size of a human head in proportion to the body? The average human head is about 1/8th of the total height of the body.
- How can I practice measuring head sizes? Use a pencil or your fingers to measure the head and compare it to the body while drawing.
- Why is head size important in figure drawing? The head acts as a foundational reference point for the rest of the body, ensuring overall proportions are accurate.
Ignoring Perspective
When it comes to drawing, one of the biggest blunders an artist can make is . It’s like trying to bake a cake without measuring the ingredients; you might end up with something that looks good from a distance but falls apart upon closer inspection. Perspective is essential because it helps create the illusion of depth and space in your artwork. If you neglect to consider how objects appear smaller as they recede into the background, your drawing can end up looking flat and unconvincing.
To truly grasp the concept of perspective, think of it as a set of rules that guide how we perceive the world around us. When you look down a long road, the sides seem to converge at a point in the distance, right? That’s a basic principle of linear perspective, and it can be applied to your drawings. If you’re sketching a scene with buildings, trees, or even people, understanding how these elements relate to one another in terms of distance is crucial.
Here are a few key points to keep in mind when considering perspective in your drawings:
- Vanishing Points: These are the points on the horizon where parallel lines seem to converge. Identifying these can help you accurately place objects in your drawing.
- Horizon Line: This is the eye level in your drawing. Everything above this line will appear to recede into the distance, while everything below will seem closer.
- Foreshortening: This technique involves depicting an object or figure in a picture in depth. For instance, if you’re drawing an arm reaching towards the viewer, it will appear larger than the rest of the body to create a sense of depth.
Another common mistake artists make is neglecting the scale of objects in relation to one another. For example, if you draw a person standing next to a tree but fail to account for the size difference, the tree might look like a mere shrub! Paying attention to how objects relate to each other in size and space can significantly enhance the realism of your drawings.
Incorporating perspective into your work doesn’t have to be daunting. Start with simple exercises, like sketching a room from different angles or drawing a series of boxes diminishing in size. As you practice, you’ll find that your ability to render depth and realism will improve, making your artwork more engaging and lifelike.
Ultimately, the secret to mastering perspective lies in observation. Take a moment to look around you. Notice how the world shifts and changes as you move. By training your eye to recognize these changes, you’ll be able to translate that understanding onto paper, creating stunning, three-dimensional representations of your subjects.
- What is perspective in drawing?
Perspective is the technique used to represent three-dimensional objects on a two-dimensional surface, creating the illusion of depth and space. - How can I improve my understanding of perspective?
Practice sketching simple shapes and scenes from various angles. Study real-life objects and how they appear in relation to one another. - What are vanishing points?
Vanishing points are points on the horizon line where parallel lines appear to converge, helping to create depth in your drawings. - Is perspective important for all types of drawing?
Yes, perspective is crucial for achieving realism in any drawing, whether it's a landscape, portrait, or still life.
Frequently Asked Questions
- What are proportions in drawing?
Proportions in drawing refer to the relationship between the sizes of different parts of a subject. Understanding these relationships is essential for creating accurate and balanced representations in your artwork.
- How can I measure proportions effectively?
There are several tools you can use to measure proportions, including rulers, calipers, and grids. Each tool has its own advantages, and learning how to use them properly can significantly enhance your drawing accuracy.
- What is the grid method?
The grid method involves overlaying a grid on your reference image and your drawing surface. This technique helps you break down complex images into manageable sections, making it easier to maintain accurate proportions while drawing.
- Can I create a digital grid for my drawings?
Absolutely! Many digital tools and apps allow you to create customizable grid overlays for your reference images. This can be a fantastic way to assist in your drawing process, especially if you prefer working digitally.
- How do I practice drawing proportions?
Regular practice is key! Engaging in life drawing sessions or self-directed exercises, like sketching everyday objects, can greatly improve your observational skills and understanding of proportions over time.
- What common mistakes should I watch out for?
Some frequent mistakes include misjudging head size in relation to the body and ignoring perspective. Being aware of these pitfalls can help you focus on improving your techniques and achieving better results in your artwork.
- Why is perspective important in drawing?
Perspective is crucial because it affects how we perceive size and distance. Ignoring perspective can lead to distorted proportions, so recognizing how distance impacts size is essential for creating depth and realism in your drawings.


