
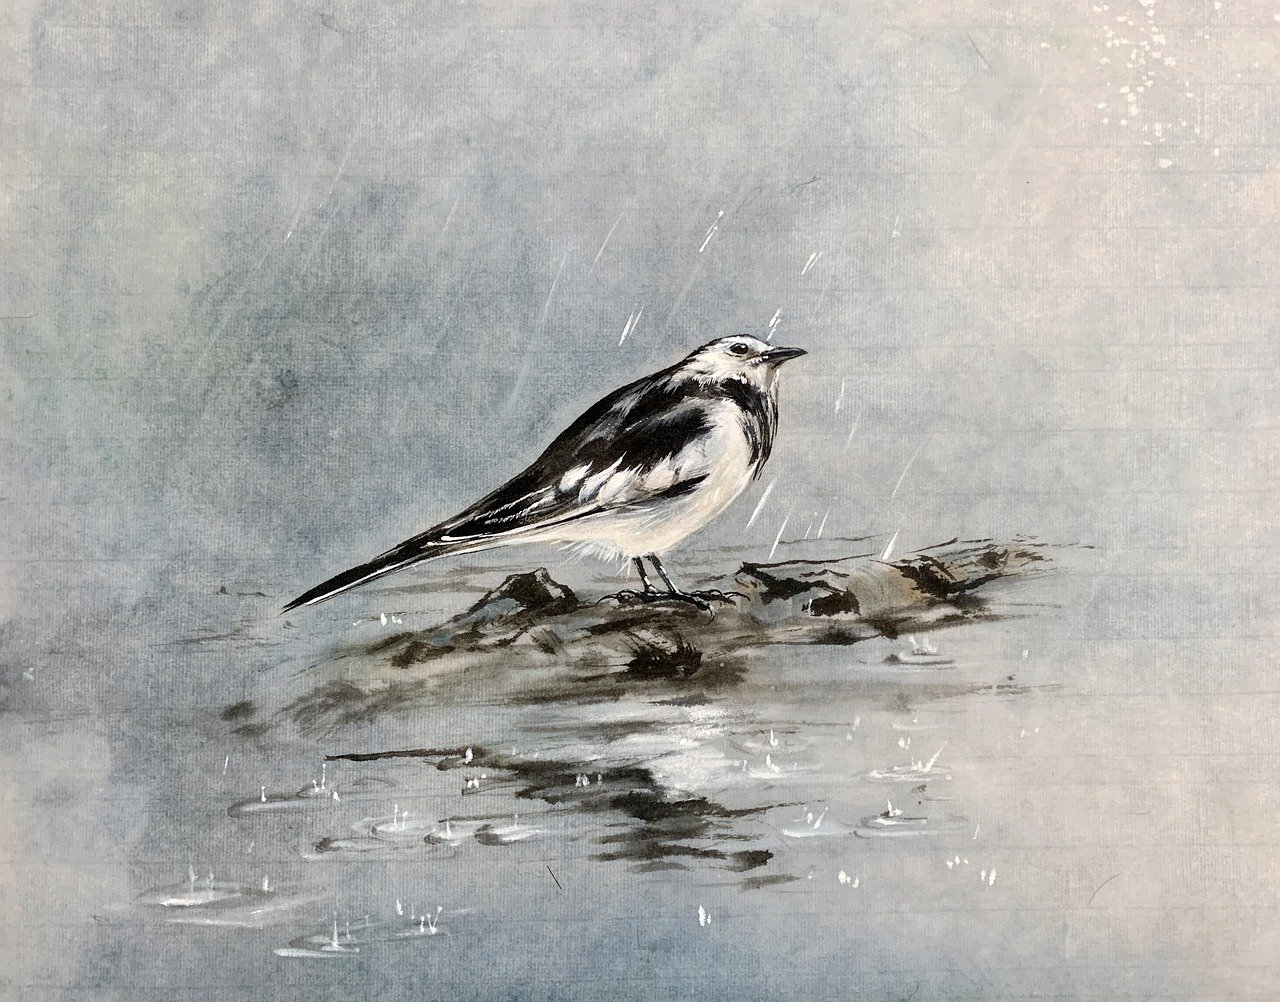
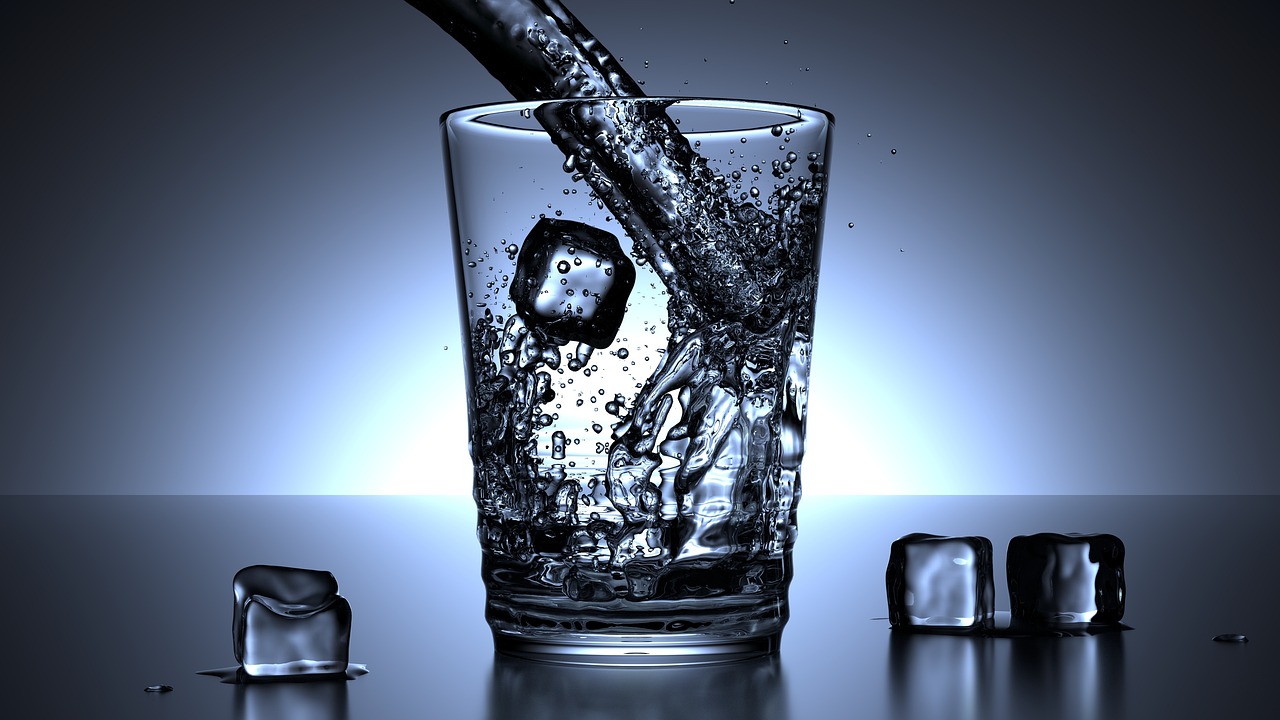
How to Paint a Hyper-Realistic Glass of Water
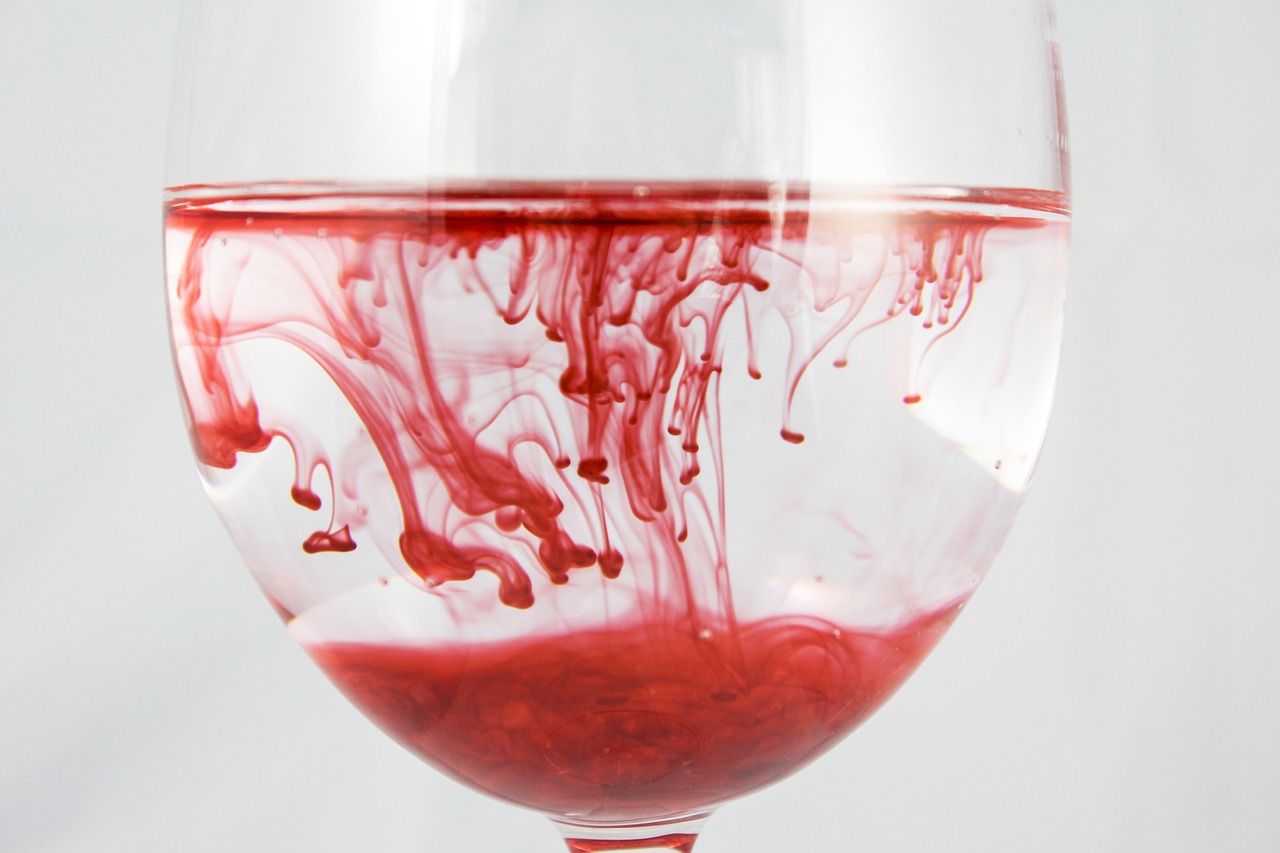
Creating a hyper-realistic painting of a glass of water can be both an exhilarating and challenging endeavor. The beauty of a glass filled with water lies in its transparency and the way it interacts with light. When you look at a glass of water, you see not just the liquid inside but also the reflections and distortions created by the glass itself. This article will guide you through the techniques and tips necessary to capture this stunning effect on canvas, focusing on the essential elements of reflections, transparency, and the intricate dance of light and shadow.
To master the art of painting a glass of water, you must first understand the concept of transparency. Transparency in painting refers to the ability of light to pass through an object, allowing you to see what's behind it. When it comes to glass, this means that the surface reflects light while also allowing you to see the water inside. To effectively represent transparency in your artwork, consider the following:
- Use layers of paint to build depth.
- Incorporate colors that mimic the real-life hues of glass and water.
- Pay attention to how light refracts through the glass.
By carefully blending colors and using varying degrees of opacity, you can create the illusion of depth and clarity, making your painting come alive.
The materials you select for your painting can significantly impact the final result. Here’s a breakdown of the essential tools you’ll need for painting a hyper-realistic glass of water:
Understanding the differences between paint types is crucial. Here’s a quick overview:
| Paint Type | Characteristics | Best For |
|---|---|---|
| Oil Paint | Rich colors, slow drying time | Detailed blending and layering |
| Acrylic Paint | Fast drying, versatile | Quick applications and mixed media |
| Watercolor Paint | Translucent, fluid | Soft, delicate effects |
Each type of paint offers unique advantages, so choose one that aligns with your artistic style and the effect you want to achieve.
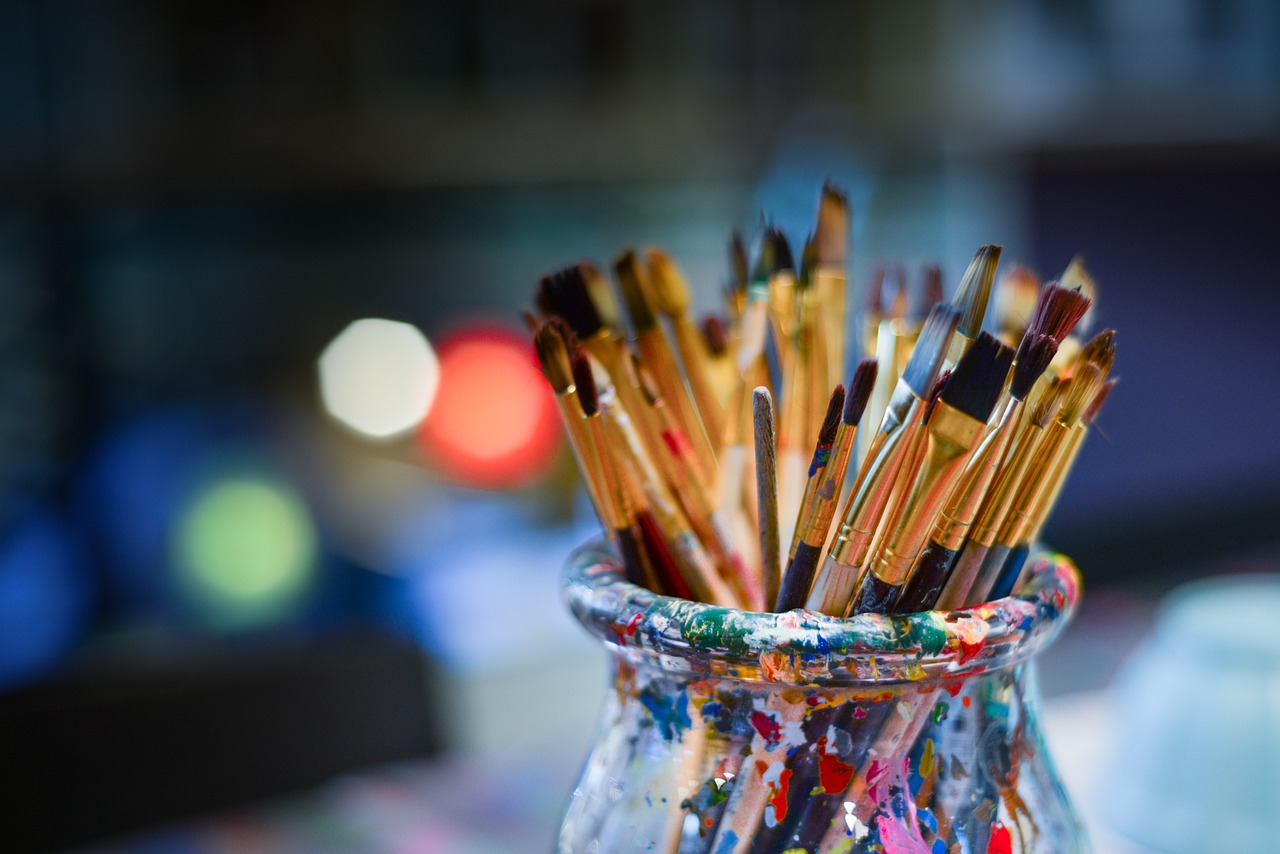
The right brushes can make all the difference in capturing the delicate details of glass. Use fine-tipped brushes for intricate work and broader brushes for larger areas. A mix of round and flat brushes will help you achieve both precision and smooth textures in your painting.
Preparing your painting surface is just as important as selecting your materials. A smooth canvas or panel will allow for better paint application, enhancing the overall appearance of your artwork. Make sure to prime your surface properly to avoid any unwanted texture that could detract from the realism of your glass of water.
Reflections are key to achieving a hyper-realistic effect in your glass painting. Observe how light bounces off the surface of the glass and creates patterns. Use lighter shades to depict highlights and darker tones for the shadows within the reflections. This technique will bring your painting to life, making viewers feel as if they could reach out and touch the glass.
Light and shadow play a significant role in creating depth in your artwork. Understanding how to manipulate these elements can elevate your painting from ordinary to extraordinary.
Applying highlights effectively is crucial for emphasizing the reflective qualities of glass. Use a lighter color than your base to create these highlights, focusing on areas where light hits the glass directly. This technique will make your glass appear three-dimensional and more realistic.
Strategic shadow placement is equally important. Shadows can ground your glass in the scene and add to the realism. Observe where the light source is coming from and place shadows accordingly to create a cohesive look in your artwork.
As you near completion, don’t forget to add those final touches that can elevate your painting to a professional level. Detailing the edges, applying a protective varnish, and choosing the right presentation method can make a significant difference. These finishing touches not only enhance the visual appeal but also protect your artwork for years to come.
Q1: What is the best paint for beginners?
A: Acrylic paint is often recommended for beginners due to its versatility and quick drying time.
Q2: How can I improve my painting skills?
A: Practice regularly and consider taking classes or watching tutorials to learn new techniques.
Q3: What is the best way to clean brushes after painting?
A: Clean brushes immediately after use with soap and water, or the appropriate solvent for the type of paint used.
With these tips and techniques, you're now equipped to tackle the exciting challenge of painting a hyper-realistic glass of water. So grab your materials and let your creativity flow!
Understanding Transparency
When it comes to painting a hyper-realistic glass of water, transparency is one of the most crucial elements to master. You might wonder, what exactly does transparency mean in the context of art? Well, it's the ability of an object to allow light to pass through it, which in turn affects how we perceive colors and shapes. Think of it like looking through a clear window; the glass is there, but it doesn't obstruct your view. In your painting, achieving this effect can make the glass of water feel as if it’s a real object sitting right in front of the viewer.
To effectively represent transparency, you need to understand how light interacts with both glass and water. Glass is inherently reflective, meaning it will bounce light off its surface, while water can distort images due to its fluid nature. When you look at a glass filled with water, you’re not just seeing the glass; you’re seeing the reflections of the surroundings, the way the water bends light, and the subtle variations in color. This interplay creates a complex visual experience. Therefore, capturing this complexity requires a keen eye and a careful approach.
Here are a few key points to consider when representing transparency in your artwork:
- Layering: Use thin layers of paint to build up the colors gradually. This technique mimics the way light penetrates glass and water, allowing for a more realistic finish.
- Color Selection: Choose lighter colors for the highlights and slightly darker hues for the deeper areas. This contrast will help create the illusion of depth.
- Observation: Spend time observing real glass and water. Notice how light refracts and reflects, and try to replicate that in your painting.
Additionally, remember that transparency is not just about the glass or water itself; it also involves the background and foreground elements. The way these components interact can greatly influence the overall perception of transparency. For example, if you have a colorful tablecloth underneath the glass, the colors will subtly show through the water, adding to the realism. So, don’t forget to consider the entire composition when working on your piece.
Ultimately, mastering transparency in your painting will take time and practice. Don’t be discouraged if your first few attempts don’t turn out as expected. Just like any skill, it improves with experience. Keep experimenting with different techniques and observing real-life examples, and soon you’ll find yourself creating stunningly realistic paintings that capture the essence of a glass of water.
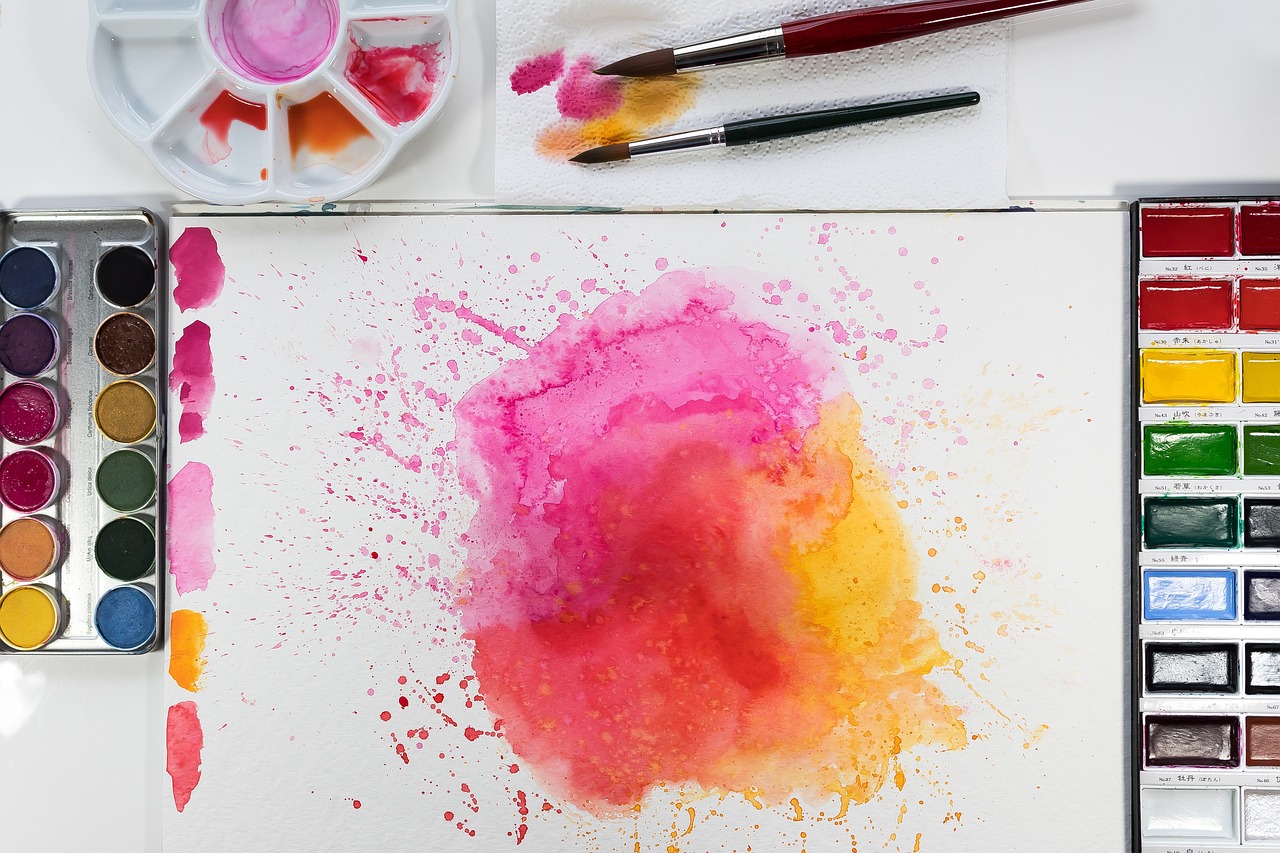
Choosing the Right Materials
When it comes to painting a hyper-realistic glass of water, the materials you choose can make all the difference. Just like a chef knows that the right ingredients can elevate a dish, an artist understands that quality supplies can enhance their artwork. So, let’s dive into the essential materials you’ll need to create a stunning piece that captures the essence of transparency and light.
First and foremost, you need to consider the type of paint you want to use. There are three primary types that artists often choose from: oil, acrylic, and watercolor. Each of these has its own unique properties that can dramatically affect the look of your painting:
| Type of Paint | Characteristics | Best For |
|---|---|---|
| Oil | Slow drying, rich colors, blends well | Creating depth and texture |
| Acrylic | Fast drying, versatile, water-soluble | Quick layering and vibrant colors |
| Watercolor | Transparent, fluid, delicate | Soft effects and subtle washes |
Next, let’s talk about brush selection. The right brushes are crucial for achieving fine details and smooth textures in your painting. A variety of brush shapes and sizes will give you the flexibility to create intricate reflections and subtle gradients. For instance, a fine-tipped round brush is perfect for delicate highlights, while a flat brush can help you cover larger areas and create smooth transitions. Don’t be afraid to invest in a few high-quality brushes; they can last for years and significantly impact your work.
Now, onto surface preparation. The surface you choose to paint on can greatly influence the final outcome of your artwork. Whether you opt for canvas, wood panels, or watercolor paper, make sure to prepare your surface properly. For acrylics and oils, priming your canvas with gesso can provide a smooth base that helps the paint adhere better and enhances the vibrancy of your colors. If you’re using watercolors, a high-quality watercolor paper will allow for better absorption and control of the paint.
Finally, don’t overlook the importance of having a good palette and mixing tools. A clean and organized palette allows you to mix colors effectively and keep your workspace tidy. You might find that a glass or ceramic palette works best for acrylics and oils, while a plastic palette can be suitable for watercolors. Having a few palette knives on hand can also help you mix paints and create textures that add depth to your glass of water painting.
In summary, choosing the right materials is essential for creating a hyper-realistic glass of water. From selecting the appropriate type of paint to ensuring your brushes and surfaces are up to par, each element plays a crucial role in achieving stunning results. So, take the time to gather your materials thoughtfully, and you'll be well on your way to capturing the beauty of transparency and light in your artwork.
- What type of paint is best for beginners? Acrylic paint is often recommended for beginners due to its versatility and quick drying time.
- How do I clean my brushes after painting? Use soap and water for acrylics, and a solvent like turpentine for oils. Always reshape the bristles after cleaning.
- Can I use regular paper for watercolor painting? No, it’s best to use watercolor paper specifically designed to handle the water and pigment without warping.
Paint Types
When it comes to painting a hyper-realistic glass of water, the choice of paint is crucial. Each type of paint brings its own unique characteristics, which can significantly influence the way your artwork turns out. Let's dive into the three primary types of paint you might consider: oil paints, acrylic paints, and watercolors.
Oil paints are renowned for their rich colors and smooth blending capabilities. They take longer to dry, allowing artists ample time to work on details and make adjustments. This extended drying time can be particularly beneficial when capturing the subtle variations of light and shadow in a glass of water. However, the downside is that oil paints require specific solvents for cleaning and can have a strong odor, which some artists might find off-putting.
Acrylic paints, on the other hand, are fast-drying and versatile. They can mimic the appearance of oil paints when mixed with a medium that slows drying time, giving you the best of both worlds. Acrylics can also be thinned with water for a more transparent effect, which is essential when depicting the clarity of water and glass. The downside? Once they dry, they can be challenging to rework, so it’s essential to plan your layers carefully.
Watercolors offer a completely different approach. They are perfect for creating delicate, transparent effects that mimic the fluidity of water. The challenge, however, lies in their unpredictability; the colors can shift as they dry, and layering can be tricky. But, when mastered, watercolors can produce stunningly vibrant and ethereal representations of glass and water.
| Paint Type | Drying Time | Characteristics | Best For |
|---|---|---|---|
| Oil Paints | Slow | Rich colors, smooth blending | Detailed work, depth |
| Acrylic Paints | Fast | Versatile, water-soluble | Layering, vibrant colors |
| Watercolors | Varies | Transparent, fluid | Delicate, ethereal effects |
In conclusion, the choice of paint type can make or break your hyper-realistic glass of water painting. Each type has its strengths and weaknesses, so consider your personal style and the effects you wish to achieve. Experimenting with different paints can also be a fun way to discover what works best for you. So, grab your brushes and get ready to create some magic!
Q: Can I mix different types of paint?
A: While it’s generally not recommended to mix different types of paints (like oil and acrylic), you can use them in layers as long as you follow the correct order. Always apply water-based paints over oil-based paints, never the other way around.
Q: What is the best paint for beginners?
A: Acrylic paints are often recommended for beginners due to their ease of use, quick drying time, and versatility. They can mimic the qualities of both oil and watercolor paints with the right techniques.
Q: How do I clean my brushes after using oil paints?
A: It’s essential to clean your brushes with a solvent like turpentine or mineral spirits right after use to prevent the paint from hardening. Follow up with soap and water to remove any remaining residue.
Brush Selection
Choosing the right brushes for painting a hyper-realistic glass of water is crucial to achieving the level of detail and finesse that will make your artwork pop. The brushes you select can significantly influence the final outcome, so let’s dive into the types of brushes that will serve you best in this endeavor. First and foremost, you’ll want to consider the size and shape of your brushes. For painting glass, fine detail brushes are your best friends. A good set of round brushes in various sizes will allow you to create intricate details, while flat brushes are excellent for broader strokes and smooth applications.
When it comes to materials, synthetic brushes tend to hold their shape well and are perfect for achieving the crisp lines that are essential in glass painting. However, don’t discount natural hair brushes, such as those made from sable or squirrel hair, as they can provide a softness that is ideal for blending and creating subtle transitions in your painting. You might find yourself reaching for a mix of both types to get the most out of your artwork.
Another important factor is the bristle stiffness. Softer brushes are great for delicate work and blending, while stiffer brushes can help lay down paint more effectively, especially when working on the background or larger areas. Here’s a quick overview of the types of brushes you might consider:
| Brush Type | Best Use |
|---|---|
| Round Brushes | Detail work and fine lines |
| Flat Brushes | Wider strokes and smooth applications |
| Filbert Brushes | Soft edges and blending |
| Fan Brushes | Texture and special effects |
Ultimately, the key to mastering brush selection lies in experimentation. Don’t hesitate to try different brushes and see how they feel in your hand. Each brush will give you a unique texture and finish, allowing you to express your artistic vision more effectively. Remember, the goal is to create a piece that not only reflects reality but also resonates with your personal style.
As you progress in your painting journey, keep a journal of the brushes you use and the effects they produce. This practice will help you refine your technique and make informed decisions in future projects. So, grab your brushes, and let’s create some magic on the canvas!
- What type of brushes are best for beginners? Round and flat brushes in various sizes are great for beginners, as they are versatile and easy to use.
- Can I use watercolor brushes for acrylic painting? Yes, but keep in mind that synthetic brushes are often better for acrylics due to their durability.
- How do I clean my brushes properly? Rinse your brushes in water immediately after use, and use soap to clean them thoroughly to maintain their shape.
Surface Preparation
When it comes to painting a hyper-realistic glass of water, the is a crucial step that can significantly affect the outcome of your artwork. Think of your canvas as the foundation of a house; without a solid base, everything built on top will be shaky. Start by selecting the right surface material. A smooth, primed canvas or a high-quality wood panel is ideal for achieving the fine details and smooth textures necessary for a glass painting.
Before diving into the actual painting process, it’s essential to prepare your surface properly. Begin by ensuring that your chosen surface is clean and free of any dust or debris. This can be achieved by gently wiping it down with a soft, lint-free cloth. If you're using a canvas, consider applying a layer of gesso. Gesso not only provides a good grip for the paint but also helps to seal the canvas, preventing the colors from soaking in too much and losing their vibrancy. Here’s a quick overview of the steps involved:
- Choose your surface: Canvas, wood panel, or acrylic board.
- Clean the surface: Remove dust and debris.
- Apply gesso: A thin layer will do; let it dry completely.
- Sand if necessary: For an ultra-smooth finish, lightly sand the gesso once dry.
Once your surface is prepared, consider the size and scale of your painting. A larger canvas allows for more intricate details, but it also requires more skill to maintain proportions. If you’re a beginner, starting with a smaller size may help you focus on the nuances of light and shadow without feeling overwhelmed. Remember, the goal is to create a piece that draws the viewer in, making them feel as if they could reach out and touch the glass.
Lastly, think about the background of your painting. A simple, unobtrusive background can enhance the focus on the glass of water, allowing the reflections and transparency to take center stage. You might want to consider a gradient or a soft color wash that complements the colors of the water and glass without competing for attention. This thoughtful preparation not only sets the stage for your painting but also helps you maintain a cohesive look throughout the artwork.
In summary, proper surface preparation is a vital step in creating a hyper-realistic painting of a glass of water. By choosing the right materials and taking the time to prepare your surface, you set yourself up for success. So, grab your canvas, get that gesso ready, and let your creativity flow!
Here are some common questions that artists often have regarding surface preparation for painting a hyper-realistic glass of water:
- Do I need to use gesso on a pre-stretched canvas?
It’s not necessary, but applying gesso can enhance the paint's adherence and vibrancy. - Can I use regular paper for this type of painting?
While you can use paper, it may not hold the paint as well as canvas or wood, leading to less realistic results. - What if I make a mistake on my prepared surface?
Don’t worry! You can always paint over it or use a wet cloth to gently wipe away any errors before the paint dries.
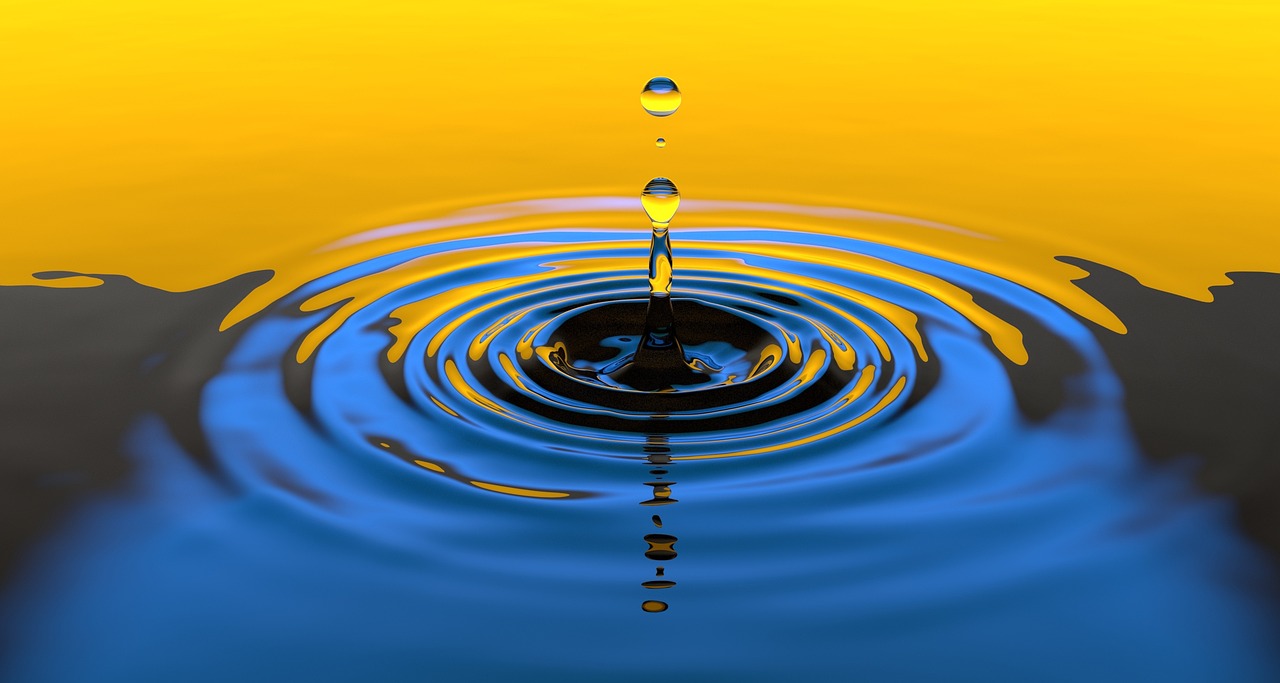
Creating Realistic Reflections
When it comes to painting a hyper-realistic glass of water, capturing realistic reflections is absolutely crucial. Think of reflections as the soul of your painting; they breathe life into the glass and make it appear as though it’s truly there, shimmering under the light. So, how do you achieve this effect? Well, let’s dive into some techniques that will help you master the art of reflection.
First off, it’s important to understand the nature of light and how it interacts with transparent surfaces. When light hits a glass of water, it doesn’t just bounce off in one direction. Instead, it refracts and reflects, creating a complex play of light that can be quite mesmerizing. To replicate this, you need to observe your subject closely. Take a moment to really look at the glass and notice how the light dances on its surface. Are there bright spots where the light is hitting directly? Are there softer, more diffused areas where the light spreads out? These observations will be your guiding stars.
Next, let’s talk about the technique of layering. When painting reflections, it’s not just about slapping on some white paint and calling it a day. Instead, you want to build up your reflections in layers. Start with a base layer that captures the general shape and tone of the reflection. Use a soft brush to gently blend the paint, creating a smooth transition. Once you have that down, begin adding in the details—highlights, darker areas, and any color shifts you see. This layering approach will give your reflections a depth that is often missing in more rushed paintings.
Another key aspect is the use of color. Yes, reflections are often white or light, but they can also contain subtle hues that reflect their surroundings. For example, if you have a blue tablecloth underneath the glass, you might see a slight blue tint in the reflection. Don’t be afraid to experiment with colors! Mixing in a tiny bit of complementary color can add vibrancy and realism to your reflections. Remember, nature is never just black and white; it’s a spectrum of colors.
Lastly, don’t forget about the background. The surface beneath the glass can significantly influence how reflections appear. If you’re painting a clear glass of water on a patterned table, the reflection will include elements of that pattern. Take the time to sketch out the background and incorporate those details into your reflections. This not only enhances realism but also ties the entire composition together, making your artwork feel cohesive.
To summarize, creating realistic reflections in your painting involves:
- Observing the interplay of light and shadow on the glass.
- Layering your paint to build depth and detail.
- Incorporating subtle colors that reflect the surroundings.
- Considering the background and how it affects the reflections.
By focusing on these elements, you’ll elevate your painting from a simple depiction of a glass of water to a stunning piece of art that captivates viewers. Remember, practice makes perfect, so don’t hesitate to experiment and refine your techniques as you go. Happy painting!
Q: How do I choose the right colors for reflections?
A: Start by closely observing your subject. Look for subtle hues in the surroundings and use those colors in your reflections. Mixing a bit of complementary color can also enhance realism.
Q: Is it necessary to paint in layers?
A: Yes! Layering helps create depth and allows you to build up the details gradually, which is essential for achieving realistic reflections.
Q: What type of brush should I use for painting reflections?
A: A soft brush is ideal for blending and creating smooth transitions. However, you may want to use finer brushes for detailing specific highlights.
Q: How can I practice painting reflections?
A: Start with simple objects and gradually work your way up to more complex scenes. Use photographs as references, and don’t be afraid to experiment!
Light and Shadow Techniques
When it comes to painting a hyper-realistic glass of water, mastering the interplay of light and shadow is absolutely essential. Think of it this way: light is like the maestro of an orchestra, guiding every element of your artwork to create a harmonious masterpiece. Without the right balance of light and shadow, even the most meticulously painted glass can appear flat and lifeless. So, how do we bring our glass to life? Let’s dive into some techniques that will illuminate your path!
First off, understanding highlights is crucial. Highlights are those bright spots where light hits the glass directly, creating a dazzling effect that catches the viewer's eye. To apply highlights effectively, start by observing your reference image closely. Notice how the light interacts with the glass surface. Use a lighter shade of your base color or even pure white for the most intense highlights. Remember, less is more! A few well-placed highlights can make your glass look three-dimensional and vibrant.
Next up, we have the shadows. Shadows add depth and dimension to your painting, acting like the supporting actors in our light and shadow play. To create realistic shadows, consider the source of your light. Is it coming from above, below, or the side? This will dictate where your shadows fall. For a glass of water, shadows tend to be soft and diffused, rather than harsh and dark. Use a slightly darker version of your base color to paint the shadow, and blend it outwards for a smooth transition. This technique not only enhances realism but also ties the entire composition together.
Now, let’s talk about the placement of shadows. Strategic shadow placement can dramatically enhance the overall realism of your painting. For instance, if your glass is sitting on a table, it will cast a shadow on the surface underneath. Pay attention to the shape and direction of this shadow; it should mimic the contours of the glass. Additionally, consider the surrounding environment. If there are other objects nearby, they can reflect light and create secondary shadows that add complexity to your scene.
Lastly, don’t forget about the ambient light! This subtle form of light can soften the harshness of direct highlights and shadows, creating a more cohesive look. Ambient light is the light that fills the space around your subject, often coming from indirect sources. To incorporate this into your painting, use a very light tint of your base color to create a gentle wash over the areas where the light is less direct. This technique can unify your painting and give it a polished, professional finish.
In summary, effectively using light and shadow in your painting of a glass of water is like setting the stage for a grand performance. By paying attention to highlights, shadows, and ambient light, you can create a stunning, hyper-realistic representation that captivates your audience. So grab your brushes and let the magic of light and shadow transform your artwork!
- What type of paint is best for achieving hyper-realistic effects? While all paint types can be used, oil paints are often preferred for their blending capabilities, allowing for smoother transitions between light and shadow.
- How can I practice my light and shadow techniques? A great way to practice is by setting up a still life with a glass of water and observing how light interacts with it at different times of the day.
- Do I need expensive materials to create a realistic painting? Not necessarily! While high-quality materials can enhance your work, skill and technique are far more important than the price tag of your supplies.
Highlighting Techniques
When it comes to painting a hyper-realistic glass of water, mastering the art of highlighting is essential. Highlights are the bright spots on your glass, where light hits and reflects, creating that stunning, lifelike effect. Think of highlights as the sparkle in your glass; they’re the magic that brings your artwork to life! To achieve this, you need to understand not just where to place your highlights, but also how to apply them effectively to create depth and dimension.
First, consider the source of light in your painting. Is it coming from the left, right, or directly above? This will dictate where your highlights should be placed. For instance, if the light source is on the left, the highlights will appear on the left side of the glass. This is where you can have some fun experimenting with different angles and intensities of light. It’s like playing a game of hide and seek with your brush—finding the perfect spots to make your glass shine!
When applying highlights, the color you choose is just as important as the placement. A common mistake is to use pure white for highlights, which can often look unnatural. Instead, consider mixing a bit of the color from the glass or the water into your highlight. For example, if your glass has a slight blue tint, adding a touch of blue to your highlight can create a more cohesive look. This technique not only enhances realism but also ties the entire painting together.
Another critical aspect of highlighting is the brush technique. Using a fine, soft brush allows you to create smooth, delicate edges that mimic the way light interacts with glass. A dry brush technique can also be beneficial for creating soft highlights, as it allows for a more subtle transition between light and shadow. You might find it helpful to practice on a separate piece of paper before applying highlights to your main painting. This way, you can get a feel for how much pressure to apply and how the paint behaves.
Here's a quick reference table to summarize the key aspects of highlighting:
| Aspect | Details |
|---|---|
| Light Source | Determine the direction of your light for accurate placement of highlights. |
| Color Choice | Mix highlights with the glass color for a more natural effect. |
| Brush Technique | Use a fine, soft brush for smooth edges; consider dry brushing for softer highlights. |
Finally, don’t forget to step back and observe your painting from a distance. This can help you see whether the highlights are too harsh or too subtle. You want them to enhance the glass’s appearance without overwhelming the overall composition. Like the finishing touch on a gourmet dish, the right highlights can elevate your painting to a whole new level, making it not just a representation of a glass of water but a stunning piece of art that captures the viewer's attention.
- What type of paint is best for highlighting? Acrylics and oils are both excellent choices, but acrylics dry faster, which can be beneficial for quick touch-ups.
- How do I know if my highlights are too bright? Step back and evaluate your painting from a distance. If the highlights draw too much attention away from the glass, consider toning them down.
- Can I use a palette knife for highlights? Yes, a palette knife can create interesting textures and sharp highlights, but practice is key to mastering this technique.

Shadow Placement
When it comes to painting a hyper-realistic glass of water, the placement of shadows is absolutely crucial. Shadows do more than just provide contrast; they add depth and dimension, making your artwork feel alive. Imagine standing in a room filled with natural light, and you see how shadows fall and shift based on the light source. That same principle applies to your painting. The trick is to observe how shadows interact with the glass and the water inside it. They can make or break the realism of your piece.
To start, consider the light source. Is it coming from above, the side, or even behind the glass? The direction of the light will dictate where the shadows are cast. For instance, if the light is coming from the left, you can expect the right side of the glass and the surface beneath to be shaded. This not only creates a sense of volume but also enhances the transparency of the glass. A well-placed shadow can give the illusion that the glass is sitting on a surface rather than floating in mid-air.
Now, let’s talk about the types of shadows you might want to include. There are generally two types: cast shadows and form shadows. Cast shadows are those that are projected onto a surface, while form shadows are the darker areas on the object itself. To illustrate this, imagine a glass of water sitting on a table. The glass will cast a shadow onto the table, while the areas on the glass itself that are not directly hit by light will also appear darker. Understanding this distinction is key to achieving a hyper-realistic effect.
Here’s a simple way to think about it:
- Cast Shadows: These are the shadows that the glass creates on the surface below it. They are typically darker and more defined.
- Form Shadows: These are subtler and exist on the glass itself, giving it shape and volume.
When painting, use a combination of soft and hard edges for your shadows. Soft edges can create a more natural look, while hard edges can make certain areas pop. For example, the shadow where the glass meets the table might have a sharper edge, while the shadow cast by the rim of the glass could be softer, blending gently into the surrounding area. This variation helps mimic the way light behaves in reality.
Another technique to enhance your shadow placement is to consider the color temperature. Shadows are not just black or gray; they can have hues that complement the colors around them. For example, a warm shadow might have hints of brown or purple, while a cooler shadow could lean towards blue. This subtlety can elevate your painting and make it feel more cohesive. As you paint, don’t be afraid to experiment with different colors for your shadows. You might be surprised at how much life they can add to your artwork.
In conclusion, mastering shadow placement in your hyper-realistic glass of water painting is all about observation and practice. By paying attention to the light source, understanding the types of shadows, and experimenting with edges and colors, you can create a stunning piece that captures the beauty of transparency and reflection. Remember, shadows are not just an afterthought; they are an integral part of your composition that can transform a flat image into a captivating work of art.
- What is the best light source for painting glass?
Natural light is often the best option, as it provides a range of highlights and shadows that can enhance the realism of your painting. - Can I use any type of paint for glass painting?
Yes, but oil paints tend to give a richer texture, while acrylics dry faster and allow for quick layering. Watercolors can also work well for a more fluid look. - How do I know where to place my shadows?
Observe a real glass in a similar light setting and take note of where the shadows fall. Practice sketching these observations before you start painting.
Final Touches
As you approach the finish line of your hyper-realistic glass of water painting, the are where the magic truly happens. This is your opportunity to refine your work, adding those small details that elevate your painting from good to breathtaking. Think of it as the icing on the cake; without it, your masterpiece might not reach its full potential. So, what should you focus on during these final stages? Let's dive in!
First, it's essential to revisit the areas where you’ve applied highlights and shadows. These elements are crucial for creating depth, and a little more finesse can make all the difference. Take a step back and observe your painting from a distance. Are the highlights bright enough to suggest the glass's reflective surface? Are the shadows deep enough to give the glass a sense of weight? Adjusting these aspects can significantly enhance the realism of your piece.
Next, consider adding detailing to your painting. This could involve fine-tuning the edges of the glass or adding subtle textures to the water inside. Sometimes, a tiny brush can work wonders in bringing out the details that might have been overlooked. Use a fine-tipped brush to add those last-minute touches, ensuring that every inch of your painting is engaging and captivating.
After detailing, it’s time to think about varnishing. Applying a protective layer can not only enhance the vibrancy of your colors but also shield your artwork from dust and UV damage. There are various types of varnishes available, so choose one that complements your medium. If you used acrylics, a water-based varnish would be ideal, while oils might benefit from a solvent-based option. Be sure to apply it evenly, using a clean, soft brush to avoid any streaks.
Finally, presentation is key. How you display your artwork can influence the viewer's perception. Consider framing your painting under glass to protect it while allowing the beauty of the glass and water to shine through. You might also want to add a mat board to give it a polished look. Remember, the way you present your work can enhance its overall appeal, making it more striking and professional.
- What type of varnish should I use for my painting? It depends on the medium used. Acrylics work well with water-based varnishes, while oils benefit from solvent-based options.
- How do I know when my painting is finished? Step back and assess your work from a distance. If everything looks cohesive and you feel satisfied with the highlights and shadows, it might be time to finalize it.
- Can I add details after varnishing? It's generally not recommended, as adding details after varnishing can disturb the surface and compromise the finish.
Frequently Asked Questions
- What materials do I need to paint a hyper-realistic glass of water?
To create a stunning hyper-realistic glass of water, you'll need high-quality paints such as oil, acrylic, or watercolor, depending on your preference. Additionally, select a variety of brushes, including fine detail brushes for intricate work, and a suitable surface like canvas or watercolor paper. Don't forget a palette for mixing colors and a jar of water or solvent for cleaning your brushes!
- How do I achieve realistic transparency in my painting?
Understanding transparency is key! Start by layering thin washes of color to build depth gradually. Use lighter shades for the areas where light hits the glass, and darker tones for the shadows. Observing real-life glass can help you replicate the way light interacts with it, making your painting more lifelike.
- What techniques can I use to create reflections on glass?
Capturing reflections is all about observation and technique. Look closely at how light reflects off the surface of the glass and replicate that in your painting. Use a mix of lighter and darker colors to create the illusion of depth. Remember, the angle of your light source will greatly affect the reflections, so adjust accordingly!
- How can I effectively use light and shadow in my painting?
Light and shadow are your best friends when painting glass! Start by identifying your light source, then apply highlights to the areas where the light hits the glass. For shadows, consider where the glass sits and how it casts shadows on surfaces. This contrast will add a three-dimensional feel to your artwork.
- What are the final touches I should consider for my painting?
After completing your painting, take a step back and assess it. You may want to add final details to enhance realism, such as tiny reflections or highlights. Once satisfied, consider applying a varnish to protect your work and give it a polished finish. Presentation is key, so think about how you'll frame or display your masterpiece!


