How to Draw Different Hair Types
Drawing hair can be one of the most challenging yet rewarding aspects of creating realistic portraits or character illustrations. Hair is not just a collection of strands; it's an intricate part of a person's identity and style. In this article, we’ll explore various techniques and styles for drawing different hair types, providing you with tips and tricks to enhance your artistic skills and achieve realistic representations of hair in your artwork. Whether you're aiming to capture the sleekness of straight hair, the bounce of curls, or the flow of waves, understanding the fundamentals will set you on the right path.
To draw hair effectively, it’s essential to understand its structure, including the hair shaft, roots, and how hair grows. Hair is composed of three main parts: the cuticle, cortex, and medulla. The cuticle is the outer layer that protects the hair, the cortex gives hair its strength and color, and the medulla is the innermost layer, which is often absent in finer hair types. This knowledge will help you create more realistic hair representations in your drawings. Remember, hair grows in different directions, and understanding these directions can add depth and realism to your artwork.
Choosing the right materials and tools is crucial for achieving the desired effects when drawing hair. The right pencil can make a significant difference in texture and depth. You’ll want to experiment with various types of pencils, papers, and techniques that can enhance your hair-drawing process.
Different pencils can create various textures and depths in hair drawings. Here’s a quick overview of some pencil types:
| Pencil Type | Best For |
|---|---|
| HB | General sketching and light shading |
| 2B | Medium shading and softer lines |
| 4B-8B | Deep shading and rich textures |
Using softer pencils like 4B or 6B can help you achieve the depth needed for darker hair, while harder pencils are excellent for fine details and lighter shades.
Graphite pencils are great for monochrome hair, allowing for a classic and timeless look. However, colored pencils can add vibrancy and life to your hair drawings. When using colored pencils, layering different shades can create a more realistic effect. Think of it like painting with light; the more layers you apply, the more depth and dimension your hair will have.
Blending tools like tortillons and stumps can smooth out pencil strokes, creating a more realistic hair texture. These tools help you blend colors seamlessly, which is especially useful for achieving softer transitions between light and dark areas in hair. Practice using these tools to see how they can enhance your drawings.
The choice of paper can significantly affect the outcome of your hair drawings. Smooth paper is excellent for fine details, while textured paper can add a unique quality to your work. Experiment with different types to find what suits your style best. Remember, the right paper can make your pencils glide effortlessly, allowing for smoother strokes and more defined textures.
Straight hair has its unique flow and texture. When drawing straight hair, focus on creating long, flowing lines that mimic the natural fall of the hair. Start with light strokes to outline the general shape before adding details. Use varying pencil pressures to create depth and dimension. Remember, straight hair can appear flat if you don’t add volume, so consider the light source and how it interacts with the hair.
Adding volume to straight hair can make it appear more lifelike. You can achieve this by using layered strokes and varying your pencil pressure. Think of straight hair as a curtain; it has folds and waves that can catch the light. Work on creating these subtle curves to give your hair drawings a sense of movement.
Proper shading is key to realistic hair. Use techniques like cross-hatching or stippling to create texture. Pay attention to where the light hits the hair and where shadows fall. This contrast will help your hair look three-dimensional and dynamic. Don't be afraid to experiment with different shading methods to see what works best for your style.
- What materials do I need to start drawing hair? You will need a range of pencils (HB to 8B), blending tools, and quality paper.
- How do I create realistic highlights in hair? Use lighter shades and leave some areas untouched to represent light reflecting off the hair.
- Can I draw hair with markers or digital tools? Absolutely! Many artists use markers or digital software to create vibrant hair effects.
- How can I practice drawing hair? Quick sketches, studying references, and experimenting with different hair types can greatly improve your skills.
Understanding Hair Structure
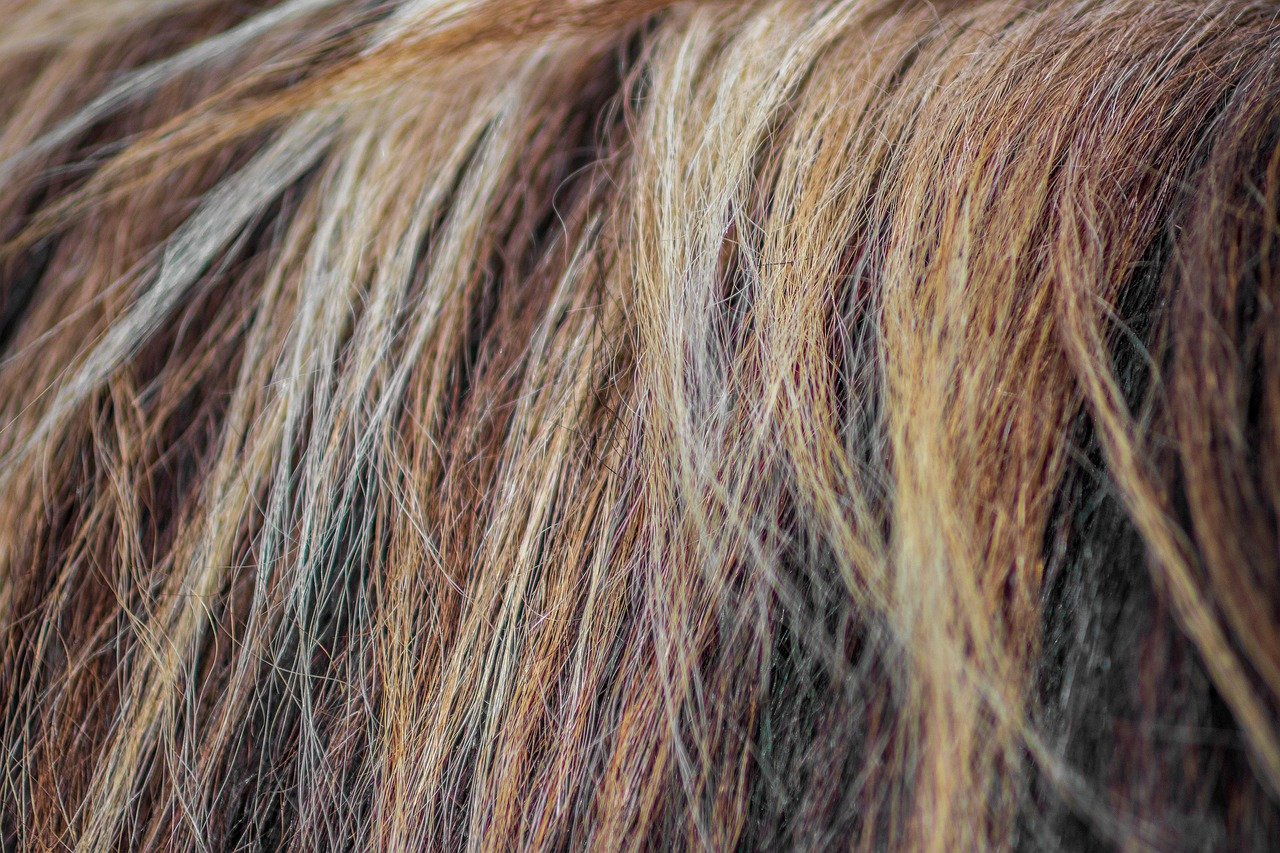
To draw hair effectively, it’s essential to understand its structure. Hair is not just a simple mass of strands; it consists of various components that contribute to its overall appearance and behavior. The primary parts of hair include the hair shaft, the roots, and the follicles. Each of these elements plays a crucial role in how hair grows and how it can be represented in your artwork.
The hair shaft is the visible part of the hair that extends from the scalp. It is composed of three layers: the cuticle, the cortex, and the medulla. The cuticle is the outermost layer, made up of overlapping cells that protect the inner structure. The cortex, which lies beneath the cuticle, contains the pigment that gives hair its color and contributes to its strength and elasticity. The medulla is the innermost layer, which is often absent in finer hair types. Understanding these layers can help you depict the texture and shine of hair more accurately.
The roots of the hair are embedded in the scalp and are not visible. They play a vital role in hair growth, as they receive nutrients from the bloodstream. The hair follicle, which surrounds the root, is responsible for the growth cycle of hair. It is important to understand that hair grows in cycles, which can affect how you draw hair in different styles. For instance, hair that is freshly cut will have a different texture and appearance compared to hair that has grown out for several months.
When drawing hair, it’s also essential to consider how it falls and flows. Hair is influenced by gravity, and different styles will have distinct patterns of movement and shape. For example, straight hair tends to fall in sleek lines, while curly hair forms loops and spirals. By studying the structure of hair, you can better capture these movements in your drawings.
To visualize the structure of hair, consider the following table that summarizes the key components:
| Hair Component | Description |
|---|---|
| Hair Shaft | The visible part of the hair, consisting of cuticle, cortex, and medulla. |
| Roots | Embedded in the scalp, responsible for hair growth. |
| Follicles | Surround the roots and play a role in the hair growth cycle. |
By understanding these aspects of hair structure, you'll be able to create more realistic and dynamic hair representations in your artwork. Remember, the more you know about how hair behaves and is structured, the better you can depict it on paper. So, grab your pencils and start exploring the fascinating world of hair!
- What is the best way to practice drawing hair? - The best way to practice is to study real-life references and try different techniques for various hair types.
- Should I use colored pencils or graphite for hair? - It depends on your style! Graphite is great for monochrome, while colored pencils can add vibrancy.
- How can I create more volume in my hair drawings? - Focus on layering your strokes and using shading techniques to enhance the depth of the hair.
Materials and Tools
When it comes to drawing hair, the right can make a world of difference. Imagine trying to paint a masterpiece with a broken brush; it simply won't yield the desired results. Similarly, using the appropriate tools allows you to express the intricate details of hair with finesse and precision. So, let’s dive into the essential materials that every aspiring artist should consider when embarking on their hair-drawing journey.
First and foremost, pencils are the backbone of any drawing. The choice of pencil can affect the texture and depth of your artwork significantly. For instance, harder pencils like H and 2H are great for fine lines and details, while softer pencils such as 2B and 4B are perfect for shading and creating depth. Here’s a quick look at how different pencil grades can be utilized:
| Pencil Grade | Best For |
|---|---|
| H | Fine lines and details |
| HB | General use |
| 2B | Shading and darker lines |
| 4B | Deep shadows and rich textures |
Next up, let’s talk about blending tools. These are essential for achieving a smooth, realistic texture in hair. Tools like tortillons and blending stumps can help you blend pencil strokes seamlessly, creating a soft look that mimics the natural flow of hair. Using these tools effectively can elevate your drawings from simple sketches to stunning representations of hair. You might be wondering how to use them—just gently rub the blending tool over your pencil strokes to soften the lines and create a more cohesive look.
Now, let’s not forget about paper selection. The type of paper you choose can drastically influence the final outcome of your hair drawings. For instance, smooth papers work well with graphite pencils, allowing for cleaner lines, while textured papers can enhance the depth and richness of colored pencil drawings. Here are a few types of paper you might consider:
- Smooth Bristol Board: Ideal for detailed pencil work.
- Textured Watercolor Paper: Great for colored pencils, providing a unique texture.
- Sketch Paper: Useful for quick sketches and practice.
By carefully selecting your materials and tools, you can significantly improve your ability to draw hair. The right combination of pencils, blending tools, and paper will not only enhance your artistic skills but also help you achieve more realistic and visually appealing hair representations in your artwork. Remember, the journey of mastering hair drawing is as much about the tools you use as it is about your technique and creativity.
Q: What type of pencil should I start with for drawing hair?
A: Starting with an HB pencil is a good choice as it provides a balance between hardness and softness, making it versatile for both fine lines and shading.
Q: Can I use regular sketch paper for detailed hair drawings?
A: While you can use sketch paper, it's best to opt for smoother paper if you're aiming for detailed work, as it allows for cleaner lines and better blending.
Q: How can I create realistic highlights in hair drawings?
A: To create realistic highlights, leave areas of the paper blank or use an eraser to lift graphite. You can also use a white pencil or gel pen to add highlights after your drawing is complete.
Types of Pencils
When it comes to drawing hair, the type of pencil you choose can significantly influence the texture and depth of your artwork. Different pencils produce varying effects, and understanding these differences can elevate your hair-drawing skills to the next level. Generally, pencils are categorized based on their hardness and softness, which is indicated by a grading scale. The scale ranges from H (hard) to B (black), with F (fine point) in between. For hair drawing, artists often gravitate towards a blend of these types to achieve the desired look.
Here’s a quick breakdown of the pencil types you might consider:
- HB Pencils: These are versatile and great for general sketching. They offer a balanced hardness that allows for both fine lines and smooth shading, making them a good starting point for drawing hair.
- 2B and 4B Pencils: Softer pencils like these are perfect for adding depth and shading to hair. They produce darker lines and can create rich, full textures that mimic the natural look of hair strands.
- H Pencils: If you want to create sharp, fine lines, these harder pencils are your best bet. They are less forgiving when it comes to shading, but can be useful for adding detail to the edges of hair.
By mixing and matching these pencil types, you can create a range of effects. For instance, starting with an HB pencil for the base outline, then transitioning to a 2B for deeper shadows, and finishing with an H pencil to add crisp highlights can yield a stunning result. This layering technique not only gives dimension to your hair drawings but also allows for a more realistic representation.
Moreover, the choice of pencil is not just about the hardness; it's also about the medium. Some artists prefer using graphite pencils for a monochrome look, while others might choose colored pencils to bring vibrancy to their illustrations. Each medium has its own unique properties and can be used to portray different hair colors and styles effectively.
Ultimately, the best approach is to experiment with various pencil types and see which combination works best for your style. Remember, practice makes perfect! As you become more comfortable with different pencils, you’ll find that your ability to represent hair with realism and flair will improve significantly.
Graphite vs. Colored Pencils
When it comes to drawing hair, the choice between graphite and colored pencils can significantly impact the final result. Each medium has its unique characteristics and advantages, making it essential to understand their differences before diving into your artwork. Graphite pencils are known for their ability to create stunning monochrome effects, allowing artists to focus on shading, texture, and depth. The smooth gradients achievable with graphite can make hair appear soft and realistic, capturing the subtle nuances of light and shadow.
On the other hand, colored pencils bring a vibrant touch to your hair illustrations. They allow for a broader spectrum of colors, enabling you to experiment with different shades and tones that can represent various hair colors, from rich chestnuts to bright blondes. When using colored pencils, you can layer colors to create depth and dimension, making the hair look lively and dynamic. This layering technique is particularly useful for achieving highlights and lowlights, which add to the realism of your drawing.
Moreover, the blending capabilities of both mediums vary. Graphite can blend seamlessly with tools like blending stumps or tortillons, creating smooth transitions that mimic the natural flow of hair. In contrast, colored pencils require a different approach; blending can be achieved through layering and burnishing, which can produce a rich, textured appearance. Depending on your artistic style and the effect you want to achieve, you might find yourself gravitating towards one medium over the other.
To help you decide which medium suits your needs, here’s a quick comparison:
| Feature | Graphite Pencils | Colored Pencils |
|---|---|---|
| Color Range | Monochrome | Wide range of colors |
| Blending Technique | Use blending tools for smooth gradients | Layering and burnishing for texture |
| Realism | Excellent for shading and depth | Great for vibrant, colorful effects |
| Ease of Use | Simple to control | Requires practice for blending |
In conclusion, whether you choose graphite or colored pencils largely depends on the effect you wish to achieve in your hair drawings. If you’re aiming for a classic, realistic look with a focus on shading, graphite may be your go-to. However, if you want to explore a world of color and creativity, colored pencils will provide you with the tools to do so. Experimenting with both mediums can also enhance your skills, allowing you to combine their strengths for truly stunning hair representations.
- Can I use both graphite and colored pencils in the same drawing?
Absolutely! Many artists combine both mediums to take advantage of their unique properties, creating depth with graphite and vibrant colors with colored pencils. - Which medium is better for beginners?
Graphite pencils are often recommended for beginners due to their ease of use and straightforward blending techniques. - How do I choose the right colored pencils?
Look for high-quality colored pencils that offer a good range of colors and blend well. Brands like Prismacolor and Faber-Castell are popular among artists.
Blending Tools
When it comes to achieving that realistic texture in hair drawings, blending tools are your best friends. They help you transition between different shades and create a smooth, cohesive look that mimics the natural flow of hair. Among the most popular blending tools are tortillons, stumps, and even your fingers, each offering unique advantages.
Tortillons, which are tightly rolled paper, are perfect for blending smaller areas and achieving fine details. They allow for precise control, making them ideal for the delicate strands of hair. On the other hand, stumps are similar but are made of a softer material, which can cover larger areas more effectively. They are particularly useful when you want to blend out larger sections of hair without losing the texture.
But let’s not forget the age-old technique of using your fingers! While it might get a bit messy, it can provide a beautiful, organic blend that’s hard to replicate with tools. Just remember to keep your fingers clean to avoid smudging unwanted colors into your drawing.
Here’s a quick overview of these blending tools:
| Tool | Best For | Advantages |
|---|---|---|
| Tortillons | Small areas | Precision control |
| Stumps | Larger areas | Soft blending |
| Fingers | Organic blends | Natural texture |
To use these tools effectively, start by applying your base layer of hair color. Once you have your initial shades down, take your blending tool and gently rub over the areas where you want to create a smooth transition. The key is to use light pressure; too much force can remove the pencil marks altogether. Instead, think of it as a gentle caress that softly merges colors together.
Another tip is to blend in the direction of the hair growth. This technique not only enhances the realism of your drawing but also helps maintain the flow and movement of the hair. Remember, practice makes perfect! So, don’t hesitate to experiment with different tools and techniques to find what works best for you.
Q1: Can I use blending tools with colored pencils?
Yes, blending tools work wonderfully with colored pencils! They can help smooth out the colors and create a more polished look.
Q2: How do I clean my blending tools?
For tortillons and stumps, you can simply rub them on a scrap piece of paper to remove any excess graphite or color. If you’re using your fingers, just wash them with soap and water.
Q3: Can I achieve a good blend without these tools?
While it’s possible to blend using just your pencils, blending tools can significantly enhance the quality of your work. They help achieve a level of smoothness that can be challenging to replicate otherwise.
Paper Selection
When it comes to drawing hair, the choice of paper is not merely a matter of preference; it's a crucial factor that can significantly influence the quality and appearance of your artwork. Different types of paper have unique textures and weights, which can either enhance or hinder your ability to render hair realistically. For instance, smooth papers are excellent for fine details and precise lines, while textured papers can add an interesting dimension to your work, allowing for more expressive strokes and blending.
Generally, you want to select paper that can handle the medium you are using, whether it’s graphite, colored pencils, or even ink. Here are some key attributes to consider when choosing the right paper for your hair-drawing projects:
- Weight: Heavier papers (typically 200gsm or more) can withstand multiple layers of pencil or color, making them ideal for detailed work.
- Texture: Smooth papers are perfect for fine details, while textured papers can add depth and character to your hair illustrations.
- Color: While white paper is the standard, experimenting with colored paper can yield interesting results, especially when drawing lighter hair shades.
To give you a clearer idea of the best paper options for hair drawing, here’s a comparison table:
| Paper Type | Best For | Medium Compatibility |
|---|---|---|
| Smooth Bristol Board | Fine details | Graphite, colored pencils |
| Textured Watercolor Paper | Expressive strokes | Colored pencils, ink |
| Mixed Media Paper | Versatility | Graphite, colored pencils, ink, watercolor |
| Sketch Paper | Quick studies | Graphite, colored pencils |
In conclusion, the right paper can elevate your hair drawing skills by providing the appropriate texture and weight for your chosen medium. Experimenting with different types of paper will not only help you discover what works best for your style but will also enhance your overall artistic expression. So, don't hesitate to try out various papers and see how they affect the way you capture the beauty and complexity of hair in your drawings!
Q: What type of paper is best for beginners?
A: For beginners, smooth Bristol board or sketch paper is recommended as they are easy to work with and forgiving for mistakes.
Q: Can I use watercolor paper for pencil drawings?
A: Yes, watercolor paper can be used for pencil drawings, especially if you enjoy a textured finish in your artwork.
Q: How do I know what weight of paper to choose?
A: Generally, the heavier the paper (measured in gsm), the more layers it can handle. For detailed work, look for paper that is at least 200gsm.
Q: Is colored paper a good choice for drawing hair?
A: Colored paper can be a fun choice, especially for lighter hair colors. It can create interesting contrasts and enhance the overall look of your drawing.
Drawing Straight Hair
When it comes to drawing straight hair, the key lies in understanding its unique flow and texture. Straight hair often appears sleek and smooth, with a natural luster that can be challenging to capture. To start, you'll want to focus on the direction of the hair strands. Each strand should be drawn in a way that reflects the way hair falls from the scalp, which typically means following the natural parting. A good tip is to visualize the hair as a series of flowing lines that create an overall shape, rather than getting bogged down in every single strand.
Next, consider the volume of the hair. Straight hair can often look flat if not given enough depth. Think of it like drawing a landscape; you want to create layers to give the illusion of dimension. One effective technique is to draw the outer layers of hair first, which will frame the face and then fill in the inner layers. This layering technique can help achieve that full, luscious look that many seek when drawing straight hair.
Shading is another crucial aspect of making straight hair look realistic. The way light interacts with hair can create stunning highlights and shadows that add depth. When shading, remember that the light source will determine where the highlights and shadows fall. For instance, if the light is coming from the left, the right side of the hair will have darker shading. Use a variety of pencil grades to create these effects, from softer pencils for deeper shadows to harder pencils for fine details. It's this contrast that will make your hair look vibrant and alive.
To help you visualize the process, here's a simple breakdown of the steps involved in drawing straight hair:
- Step 1: Sketch the general outline and flow of the hair.
- Step 2: Add in the details of the strands, keeping the direction consistent.
- Step 3: Layer the hair to create volume.
- Step 4: Begin shading, keeping in mind the light source.
- Step 5: Refine the details and add highlights to enhance realism.
In addition to these techniques, remember that practice is essential. The more you draw, the better you'll understand the nuances of straight hair. Don't hesitate to experiment with different styles and techniques. Each attempt will bring you closer to mastering the art of hair drawing!
Q: What tools are best for drawing straight hair?
A: The best tools are high-quality graphite or colored pencils, along with blending tools like tortillons for smoothing out lines. Different grades of pencils will allow you to achieve various textures.
Q: How can I make my straight hair drawings look more realistic?
A: Focus on the flow and volume of the hair, use proper shading techniques, and pay attention to light sources. Adding highlights can also enhance the realism of your drawings.
Q: Should I use references when drawing hair?
A: Absolutely! Using references can help you understand the structure and movement of hair better, leading to more accurate representations in your artwork.

Creating Volume
When it comes to drawing straight hair, is essential to make your artwork come alive. Think of hair as a beautiful flowing fabric; it has layers, movement, and depth. To achieve that realistic volume, you need to focus on several key techniques that can transform flat strands into a luscious mane. First, remember that hair isn’t just a series of lines; it has a three-dimensional quality. To illustrate this, imagine how a wave moves; it rises and falls, creating peaks and valleys. Your challenge is to capture that essence on paper.
One effective method to create volume is to use layering. Start by drawing the base shape of the hair, keeping it loose and flowing. Then, gradually add more strands on top, varying the length and direction. This layering technique not only adds depth but also mimics the natural fall of hair. You can achieve this by:
- Drawing the outer layers first to frame the face.
- Adding inner strands to fill in gaps and create fullness.
- Adjusting the angles and curves to reflect how hair naturally flows.
Another tip is to incorporate shading effectively. Shading not only gives the hair depth but also enhances its volume. Use softer pencils for shading, and remember that light and shadow play a crucial role in how we perceive volume. For instance, areas where light hits will be lighter, while shadows will recede, creating the illusion of fullness. Experiment with different shading techniques, such as:
- Cross-hatching for texture.
- Blending for smooth transitions.
- Using a kneaded eraser to lift highlights.
Finally, don’t forget about movement. Hair is dynamic, so show that by drawing strands that curve and sway. Think of how wind might tousle hair or how it moves when a person turns their head. To capture this, practice drawing hair in various poses and angles. Your goal is to convey a sense of life and energy in your drawings, making the hair feel like it could move at any moment.
Q: What materials are best for creating volume in hair drawings?
A: Use high-quality pencils for shading, blending tools like tortillons, and textured paper to enhance the overall effect.
Q: How can I practice creating volume in hair?
A: Try quick sketches of hair in different styles and focus on layering and shading techniques to see what works best for you.
Q: Should I focus on details or overall shape first?
A: It’s often helpful to start with the overall shape and flow of the hair before adding finer details. This approach helps maintain the volume and movement.

Shading Techniques
When it comes to drawing hair, are your best friends. They can transform a flat, lifeless sketch into a vibrant and realistic portrayal of hair. Understanding how to apply light and shadow is crucial in achieving depth and texture. Think of shading as the magic wand that brings your drawing to life!
To begin with, consider the direction of your light source. This will dictate where the highlights and shadows fall on the hair. For instance, if the light is coming from above, the top strands will be lighter, while the underneath layers will be darker. This creates a natural gradient that mimics the way light interacts with real hair.
Here are some effective shading techniques to enhance your hair drawings:
- Layering: Start with light strokes and gradually build up the darker tones. This method allows for a more controlled transition between shades.
- Cross-Hatching: Use intersecting lines to create shadow. This technique is particularly effective for adding texture to curly or wavy hair.
- Blending: Smooth out your pencil strokes using blending tools like tortillons or your fingers to achieve a soft, natural look.
- Stippling: For a more textured appearance, try using tiny dots to create shadows. This can be especially useful for depicting the fine details in hair.
Furthermore, you can use a combination of these techniques to achieve even more realistic results. For example, you might start with layering for the base color, then add cross-hatching for texture, and finish with blending for a smooth transition. Remember, practice makes perfect! The more you experiment with these techniques, the more you'll find your unique style.
It’s also essential to pay attention to contrast. Strong contrasts between light and dark areas can emphasize the shape and movement of the hair. You can enhance this effect by using a darker pencil for shadows and a lighter one for highlights. This contrast will draw the viewer’s eye and give your artwork a dynamic feel.
In summary, mastering shading techniques is vital for any artist looking to depict hair realistically. By understanding light sources, utilizing various shading methods, and practicing regularly, you can elevate your hair drawings from basic sketches to stunning works of art. So grab your pencils, and let those strands flow!
Q: What is the best pencil for shading hair?
A: A softer pencil, such as a 2B or 4B, is ideal for shading as it allows for smoother transitions and richer darks.
Q: How can I make my hair drawings look more realistic?
A: Focus on the direction of light, use a variety of shading techniques, and pay attention to the unique texture of the hair type you are drawing.
Q: Should I use colored pencils or graphite for hair?
A: It depends on the effect you want to achieve. Graphite is excellent for monochrome hair, while colored pencils can add vibrancy and realism to your drawings.
Q: How can I practice my hair drawing skills?
A: Try quick sketching exercises, study hair references, and experiment with different shading techniques to improve your skills.
Drawing Curly Hair
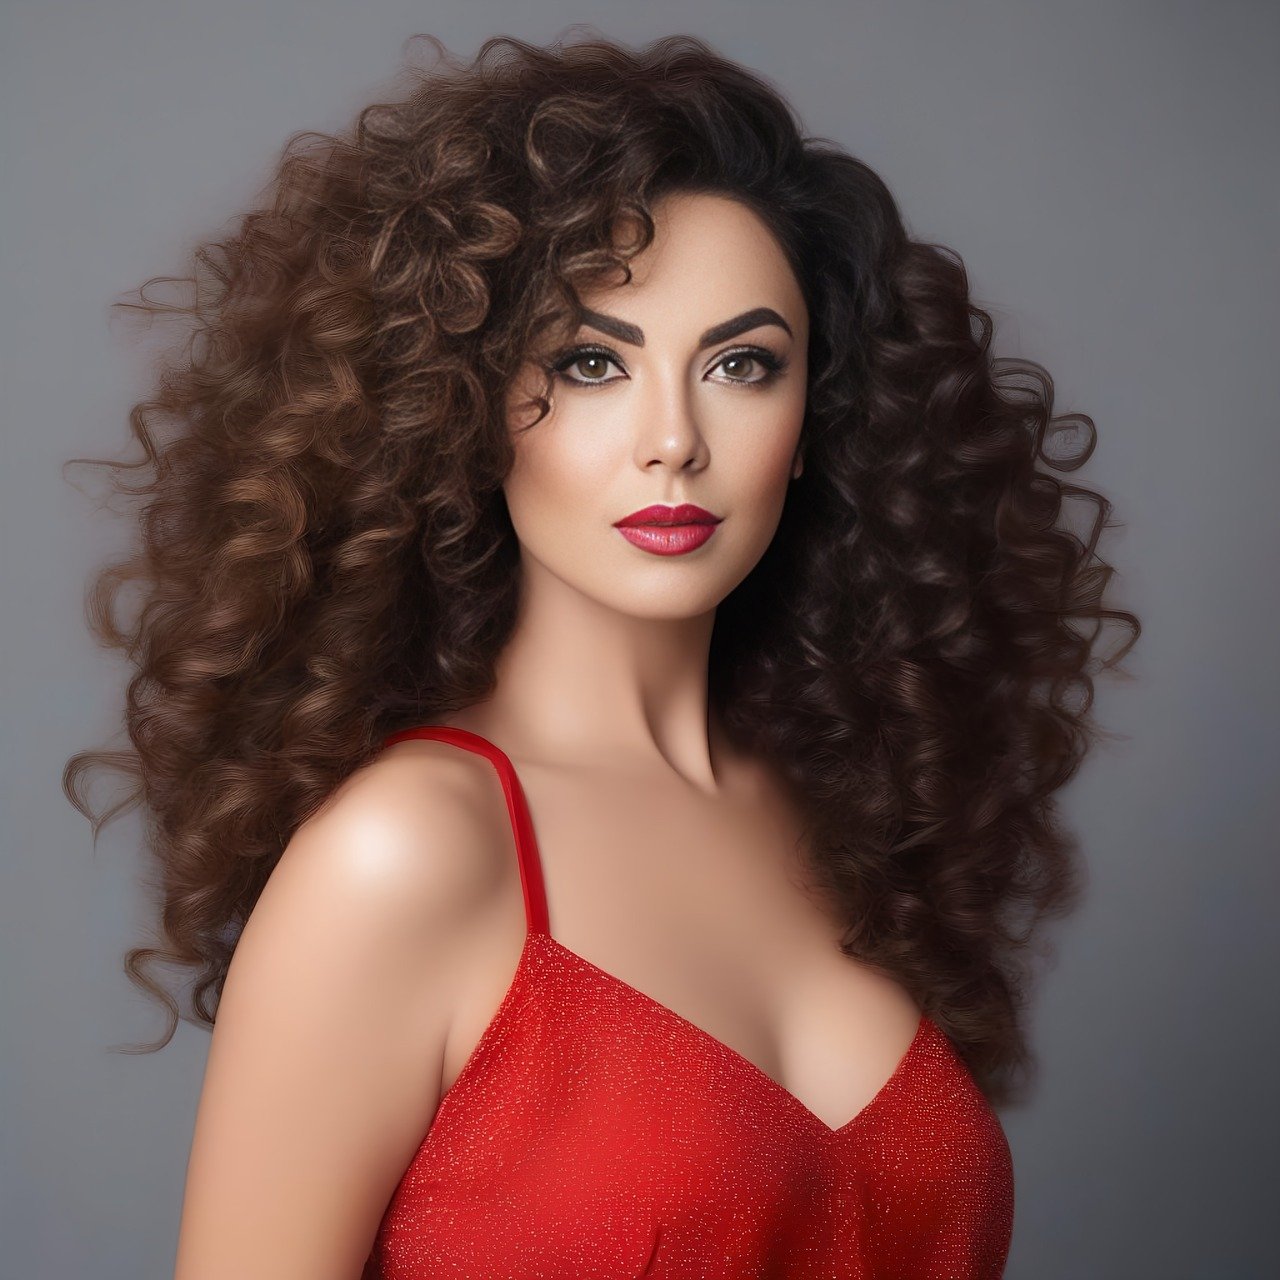
Curly hair is one of the most fascinating types to draw, but it also presents its own unique set of challenges. To truly capture the essence of curls, you need to understand their anatomy and flow. Think of curly hair as a vibrant dance of spirals and loops, each with its own rhythm. This section will guide you through the techniques that will help you represent curly hair in all its glory.
First and foremost, understanding how curls form is crucial. Curls are not just random spirals; they have a natural pattern that can often be categorized into different types. For instance, some curls are tight and springy, while others are loose and flowing. This variety means that you should always analyze the specific type of curly hair you are drawing. Observing how the hair falls, the direction of the curls, and the overall volume can make a world of difference in your artwork.
When you start drawing, consider the following tips to effectively represent curly hair:
- Start with the Shape: Begin by sketching the overall shape of the hairstyle. Use light, loose lines to outline the volume and direction of the curls.
- Layer Your Curls: Curly hair often has multiple layers. Make sure to differentiate between the foreground and background curls to create depth.
- Focus on Highlights and Shadows: Curly hair can look flat without proper shading. Pay attention to where the light hits the curls and where shadows fall. This contrast will give your drawing a three-dimensional look.
Next, let’s dive into the importance of highlighting and shadowing. Properly placed highlights can make curls appear shinier and more vibrant, while shadows can add depth and dimension. When you're highlighting, think about how light interacts with the hair. The top surfaces of the curls will catch the light, so use a lighter pencil or a white gel pen to add those shiny spots. Conversely, the undersides of the curls will be darker, which you can achieve through shading with a softer pencil.
Here’s a quick technique to consider: use a blending tool to smooth out your pencil strokes. This can help in creating the soft transitions between light and shadow, which are essential for realistic curls. Remember, curly hair is often full of life, so don’t be afraid to exaggerate the curls slightly to capture that energy.
Finally, practice is key! Spend time observing real curly hair, whether on friends, family, or even online references. Try to replicate what you see, focusing on the unique characteristics that make each curl special. As you practice, you’ll find your own style and technique for drawing curly hair, making it an enjoyable and rewarding experience.
Q: What are the best tools for drawing curly hair?
A: The best tools include a range of pencils (from H to B grades), blending stumps, and erasers for highlights. Colored pencils can also be useful for adding vibrancy.
Q: How can I make my curly hair drawings look more realistic?
A: Focus on the flow and volume of the curls. Use highlights and shadows to create depth, and don’t forget to observe real-life references for accuracy.
Q: Should I draw curly hair differently depending on its type?
A: Yes! Different types of curls have unique characteristics. Spend time understanding the specific type you are drawing to capture its essence accurately.

Understanding Curls
When it comes to drawing curly hair, understanding the anatomy of curls is essential for capturing their unique beauty. Curls are not just random spirals; they have a structure and flow that can be broken down into specific components. Each curl has a root, which is where it originates from the scalp, and a shaft, which is the visible part that gives curls their character. Curls can vary significantly in size and shape, and this diversity is what makes them so fascinating to draw.
One of the key aspects of curly hair is its volume. Unlike straight hair that tends to hang down, curls have a tendency to bounce and create a three-dimensional effect. This means that when you’re drawing curls, you should focus on how they interact with light and shadow. The way curls clump together can create areas of both highlight and shadow, which adds depth to your artwork. Understanding how to represent these areas is crucial for achieving a realistic look.
To effectively draw curls, consider the following elements:
- Shape: Curls can be tight, loose, or somewhere in between. Observe the reference closely to capture the specific shape of the curls.
- Direction: Curls do not all fall in the same direction. Pay attention to how they twist and turn around each other.
- Texture: The texture of curls can vary from smooth to coarse. This affects how you apply shading and highlights.
Additionally, the way curls are styled can influence how they appear in your drawings. For instance, some curls may be more defined and bouncy, while others may be relaxed and loose. This is where your observational skills come into play. By studying different hairstyles and how they interact with the environment, you can better understand how to replicate those effects in your drawings.
Remember, drawing curly hair is not just about replicating the shapes; it’s also about conveying the movement and energy that curls possess. Think of curls as a dance, where each strand has its own rhythm and flow. By embracing the dynamic nature of curls, you’ll be able to create more engaging and lively representations in your artwork.
Highlighting and Shadowing
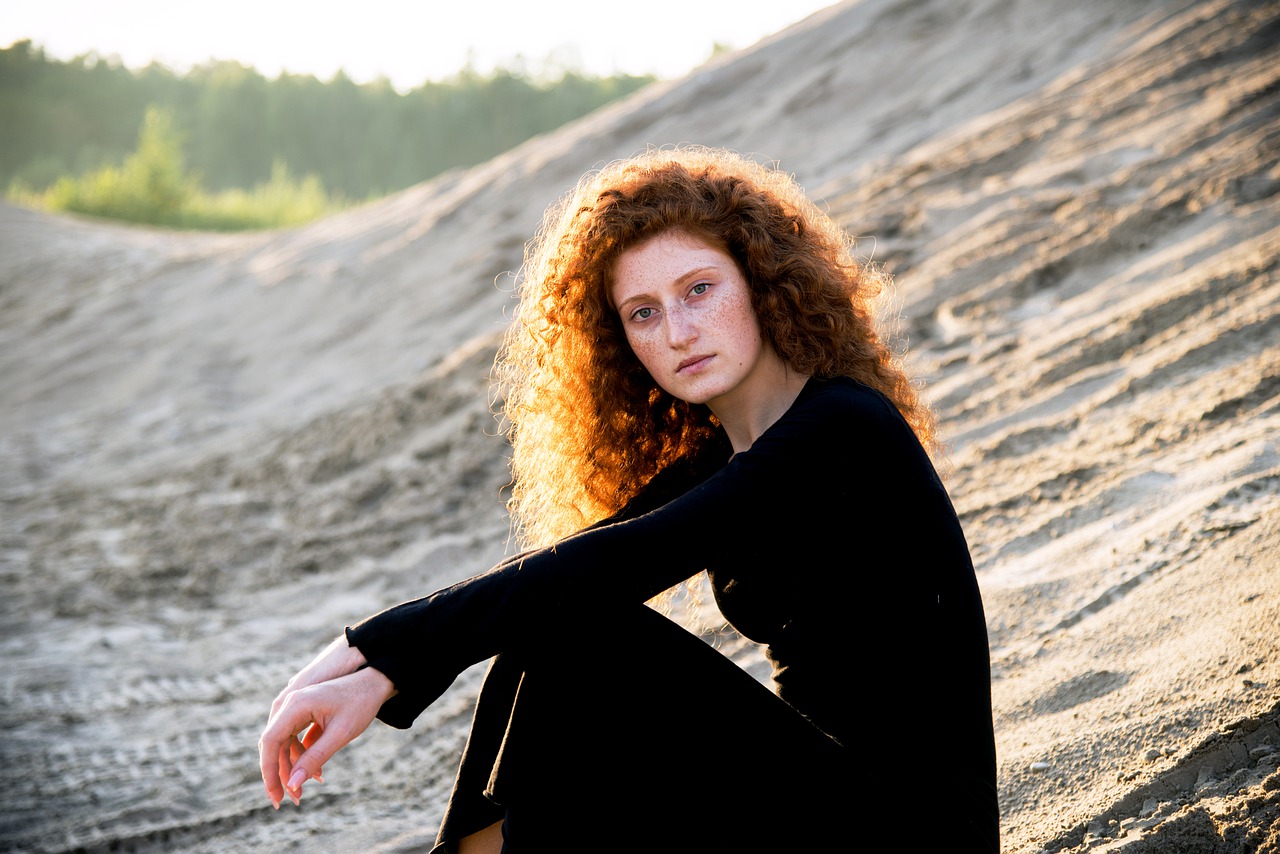
When it comes to drawing curly hair, highlighting and shadowing are essential techniques that can dramatically enhance the depth and realism of your artwork. The way light interacts with curls creates a dynamic play of highlights and shadows, which can add a three-dimensional quality to your drawings. To effectively capture this, you need to understand where the light source is coming from, as it will dictate where you place your highlights and shadows.
Start by observing real-life curly hair under different lighting conditions. Notice how some curls catch the light, creating bright spots, while others fall into shadow. This observation will help you replicate that effect in your artwork. Generally, the tops of the curls will reflect more light, while the undersides will be darker. To create a natural look, use a combination of soft and hard edges in your highlights and shadows. Soft edges can help blend the colors seamlessly, while hard edges can define the curl shapes.
When applying highlights, consider using a lighter shade of your base color or even a white pencil to create those bright spots. Be careful not to overdo it; the goal is to mimic the natural shine of hair without making it look unnatural. For shadows, you can use a slightly darker tone to add depth. The key is to build up layers gradually. Start with light strokes and then increase the intensity as needed, allowing for more control over the final look.
To give you a clearer understanding, here’s a quick comparison of how to approach highlighting and shadowing in curly hair:
| Technique | Description | Tip |
|---|---|---|
| Highlighting | Use lighter shades to emphasize areas where light hits the curls. | Focus on the tops of curls for the brightest highlights. |
| Shadowing | Apply darker shades to the undersides of curls to create depth. | Blend shadows gradually to avoid harsh lines. |
In summary, the interplay of light and shadow is crucial for achieving realistic curly hair in your drawings. By carefully observing real-life examples and applying the right techniques, you can create stunning representations that truly capture the beauty and complexity of curly hair.
- What materials do I need for highlighting and shadowing?
Typically, a good set of pencils, blending tools, and quality paper will suffice. You might also want colored pencils for added vibrancy. - How do I know where to place highlights and shadows?
Understanding your light source is key. Observe how light interacts with hair in real life to inform your choices. - Can I use digital tools for highlighting and shadowing?
Absolutely! Digital art programs offer various brushes and tools that can help replicate these techniques effectively. - How can I practice these techniques?
Try quick sketches focusing solely on highlights and shadows without worrying about the overall shape or detail of the hair.
Drawing Wavy Hair
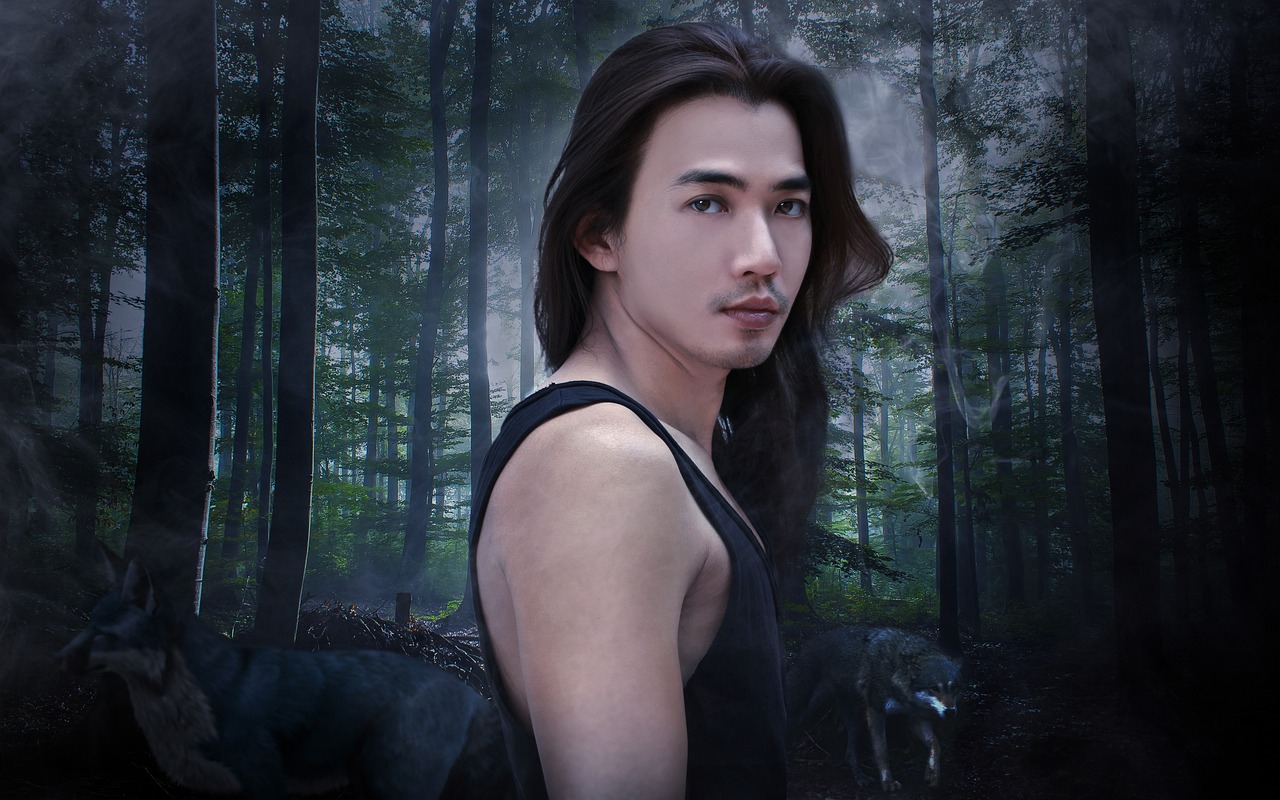
Wavy hair is a beautiful blend of straight and curly textures, often embodying a sense of movement and flow that can be both captivating and challenging to capture on paper. When drawing wavy hair, it’s essential to pay close attention to its unique characteristics, which include the gentle curves and the way the strands interact with each other. Think of wavy hair as a dance; each wave and curl has its rhythm, and your task is to translate that into your artwork. To effectively depict this hairstyle, you need to focus on creating smooth, flowing lines that mimic the natural movement of the waves.
One of the key aspects of drawing wavy hair is understanding how to create flow. This involves using long, sweeping strokes to illustrate the way the hair falls and moves. Start by sketching the overall shape of the hair, allowing your lines to curve gracefully. As you work, think about how the hair would respond to gravity and movement. This is where your artistic intuition comes into play. Imagine how the hair would sway if the person were to turn their head or walk. Incorporating this sense of motion will add life to your drawing.
Next, let’s talk about texturing those waves. Wavy hair is not just about the overall shape; it’s also about the fine details that give it depth and dimension. To achieve a realistic look, you can use various techniques such as cross-hatching or stippling to create texture. For instance, you might want to focus on the areas where the waves overlap, as these spots often create shadows. Use a softer pencil to add shading in these regions, which will help to enhance the three-dimensional quality of the hair. Remember, the goal is to make the hair appear as if it’s flowing and alive.
When it comes to highlights, don’t shy away from using them to add contrast and vibrancy to your wavy hair drawing. Highlights can be applied to the crest of the waves, where the light naturally hits. This not only makes the hair look shinier but also emphasizes the movement of the waves. A good tip here is to use a white pencil or gel pen to apply highlights after you’ve established your base colors. This technique can really make your artwork pop!
Finally, practice is key to mastering the art of drawing wavy hair. Spend time observing real hair, whether it’s on friends, family, or even in photographs. Take note of how the light interacts with the hair, how the strands fall, and the overall texture. The more you practice, the more confident you’ll become in your ability to depict wavy hair realistically. Remember, every artist has their unique style, so don’t be afraid to experiment and find what works best for you!
- What are the best techniques for drawing wavy hair? Focus on using long, flowing lines and pay attention to the texture and movement of the waves. Shading and highlighting are also crucial for creating depth.
- How can I make my wavy hair drawings look more realistic? Observe real wavy hair and practice regularly. Use a variety of pencil techniques to create texture and don’t forget to incorporate highlights.
- Should I use colored pencils or graphite for wavy hair? It depends on your desired effect. Colored pencils can add vibrancy, while graphite can provide a classic, monochrome look.

Creating Flow
When it comes to drawing wavy hair, is essential for capturing its natural movement and elegance. Think of wavy hair as a gentle breeze; it sways and shifts, creating beautiful curves and waves that can be mesmerizing to the eye. To achieve this fluidity in your drawings, you need to focus on a few key techniques that will help you convey the softness and dynamism of wavy hair.
First, start with the foundation lines. These are the initial strokes that outline the general shape and direction of the hair. Use long, sweeping lines to represent the flow of the waves. Avoid short, choppy strokes, as they can make the hair look stiff and unnatural. Instead, let your pencil glide across the paper, mimicking the way hair falls and moves. This approach will not only give your drawing a sense of movement but also establish a rhythm that guides the viewer's eye along the strands.
Next, consider the direction of the waves. Wavy hair doesn’t just flow in one direction; it has a life of its own, curling and twisting in various ways. Pay attention to how the waves interact with each other and the overall shape of the hairstyle. You can enhance this effect by varying the thickness of your lines. Thicker lines can represent the more prominent waves, while thinner lines can depict finer strands that add detail and complexity to your drawing.
Another important aspect to consider is layering. Just like a painter uses layers of paint to create depth, you can use layers of pencil strokes to build up the texture of wavy hair. Start with your foundation lines, then gradually add more lines to create the illusion of volume and movement. This technique not only adds realism but also allows you to play with light and shadow, giving your drawing a three-dimensional quality.
To further enhance the flow, you might want to incorporate highlights and shadows. Highlights can be added to the areas where the light hits the hair directly, giving it a shiny, healthy appearance. Shadows, on the other hand, can be placed in the dips and troughs of the waves, adding depth and contrast. This interplay of light and dark is crucial for making the hair look alive and dynamic.
Finally, practice is key. The more you draw wavy hair, the better you’ll understand how to create that coveted flow. Try sketching from photographs or observing real-life hair to see how it moves and behaves. With each stroke, you'll get closer to mastering the art of depicting wavy hair, transforming your drawings into stunning representations of this beautiful hair type.
- What is the best way to start drawing wavy hair?
Begin with light, sweeping lines to establish the flow and direction of the hair. Focus on the overall shape before adding details. - How can I make my wavy hair drawings look more realistic?
Incorporate highlights and shadows to create depth. Use varied line thickness and layering techniques to enhance texture. - Should I use colored pencils for drawing wavy hair?
Colored pencils can add vibrancy and realism to your drawings, especially when blending colors for highlights and shadows. - How can I practice drawing wavy hair effectively?
Sketch from references, both photos and real life, and focus on capturing the movement and flow in your practice sessions.
Texturing Waves
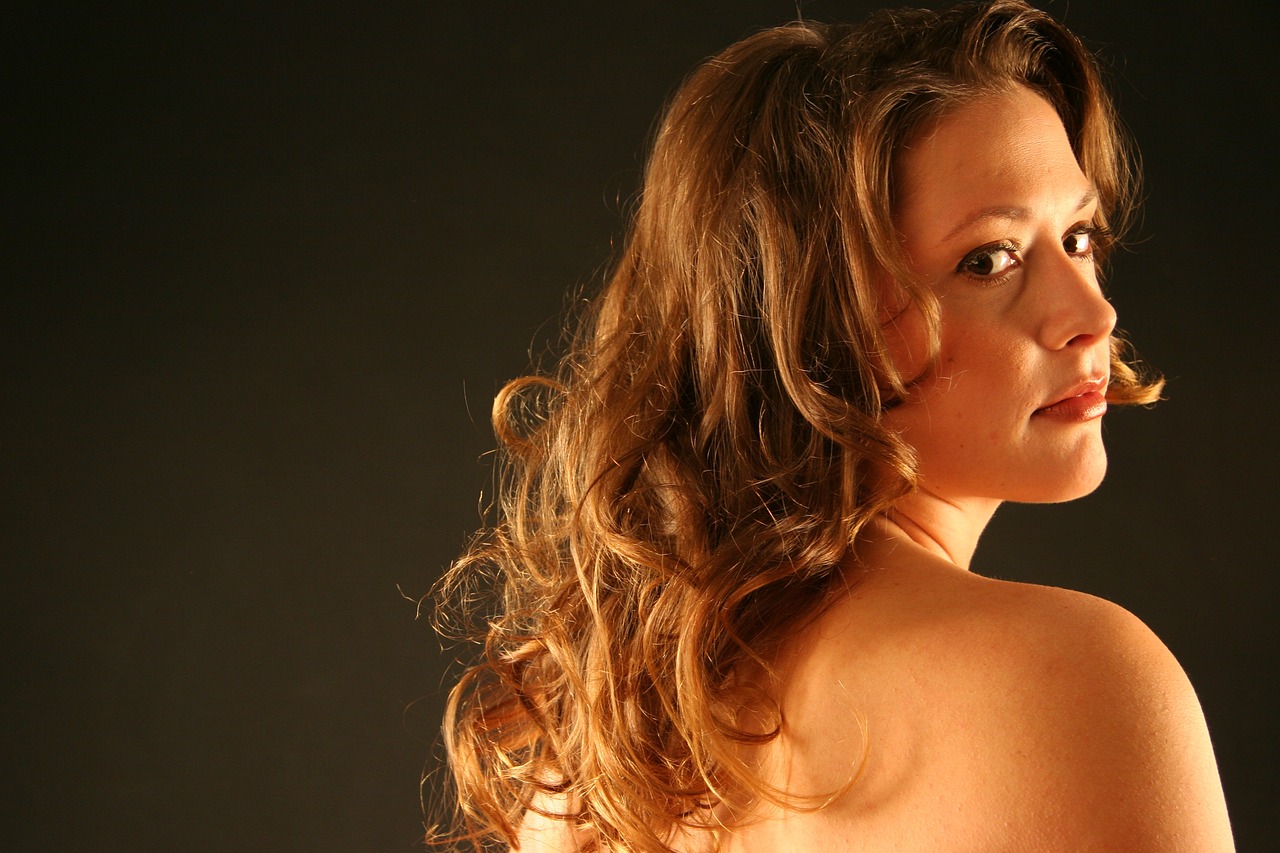
When it comes to texturing wavy hair, the goal is to capture the natural movement and flow that defines this hair type. Unlike straight hair, which tends to fall in sleek lines, wavy hair has a playful, dynamic quality that can be both challenging and rewarding to draw. To achieve a realistic representation, you need to focus on the curves and bends that create the wave pattern. Start by sketching the overall shape of the hair with light, flowing lines that mimic the natural waves. Think of it as drawing a series of gentle hills, where each peak and valley represents the undulations of the hair.
Once you have the basic shape, it’s time to add texture. Texturing wavy hair involves creating depth and dimension, which can be achieved through various techniques. One effective method is to use cross-hatching or stippling to indicate the light and shadow on the waves. This technique allows you to build up layers gradually, giving the hair a more realistic appearance. Remember, the direction of your strokes is crucial; follow the wave pattern to enhance the flow and movement.
In addition to traditional pencil techniques, consider incorporating blending tools like tortillons or blending stumps. These tools can help smooth out harsh lines and create a softer, more cohesive look. When using a blending tool, apply light pressure and work in the direction of the hair’s flow. This technique will help to soften the texture and make the waves appear more natural.
Another important aspect of texturing is the use of highlights and shadows. The interplay between light and dark is what gives hair its dimension. For wavy hair, highlights should be placed on the peaks of the waves, where light naturally hits, while shadows should be added in the valleys. This contrast not only enhances the texture but also adds a sense of volume. A common mistake is to apply highlights too uniformly; instead, aim for a more random, natural distribution to mimic how light interacts with real hair.
As you practice texturing wavy hair, keep in mind that every head of wavy hair is unique. Experiment with different styles and wave patterns to find what works best for you. Whether you’re drawing loose beachy waves or tighter, more defined curls, understanding the underlying structure and flow is key. With patience and practice, you’ll be able to create stunning, lifelike representations of wavy hair that truly capture its beauty.
- What are the best tools for texturing wavy hair? Blending stumps, tortillons, and various pencil grades are excellent for achieving texture in wavy hair.
- How do I create realistic highlights in wavy hair? Place highlights on the peaks of the waves and use a lighter pencil or blending technique to create a natural look.
- Is it necessary to use color for texturing? While color can enhance the realism, it’s not necessary. You can achieve great texture using just graphite with effective shading techniques.
Adding Color to Hair
Color can dramatically change the appearance of hair, transforming a simple drawing into a vibrant masterpiece. When you think about hair color, it’s essential to consider not just the shade but also the depth and dimension that color can bring to your artwork. The right hues can breathe life into your illustrations, making them pop off the page and capturing the viewer's attention. Whether you’re aiming for a natural look or a more fantastical palette, understanding how to apply color effectively is key.
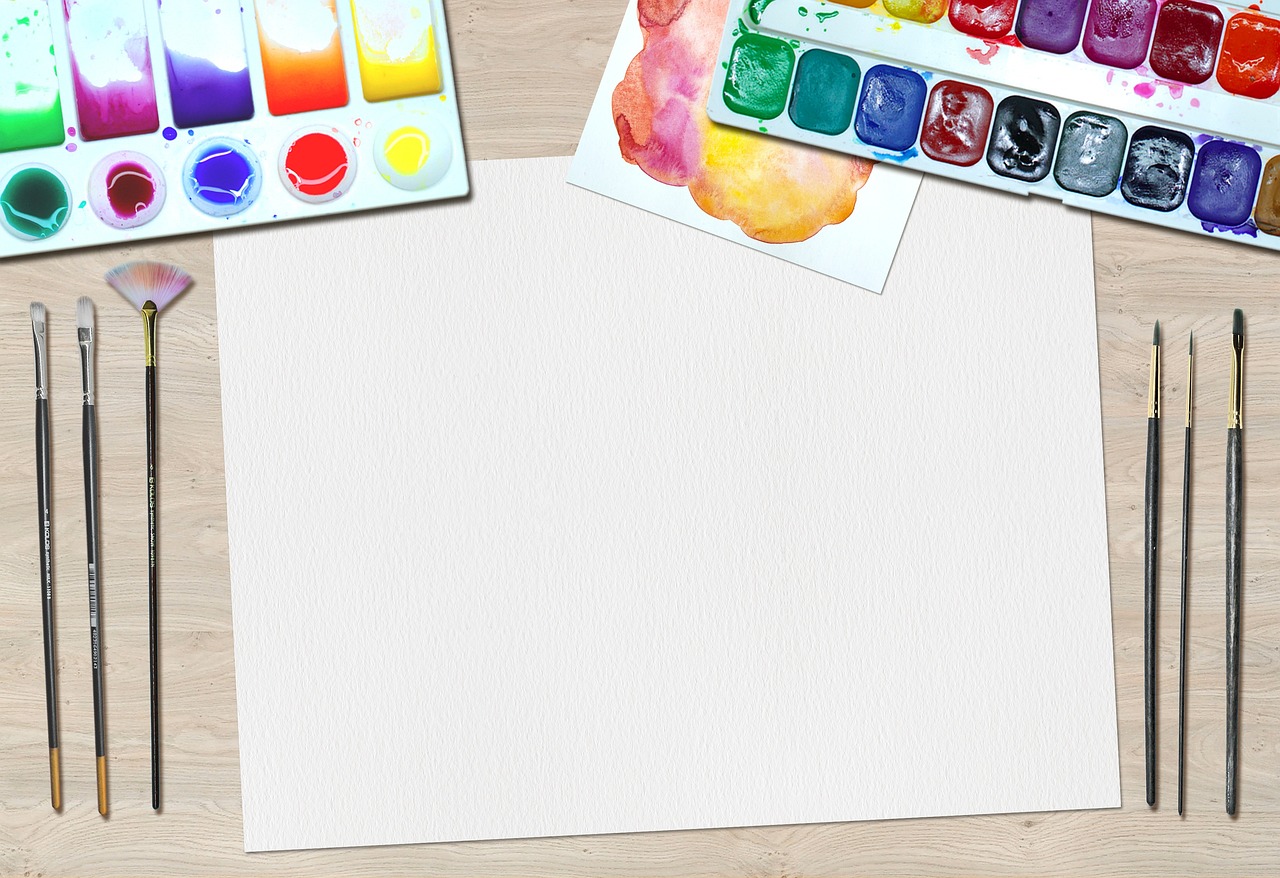
One of the first steps in adding color to hair is selecting the right medium. Colored pencils, markers, and digital tools each have their unique characteristics. For instance, colored pencils allow for intricate layering and blending, while markers can deliver bold, vibrant colors quickly. When choosing your medium, think about the style you want to achieve and how you can use color to enhance it.
When it comes to applying color, the technique you use can make a significant difference. Here are a few techniques to consider:
- Layering: Start with a light base color and gradually build up darker shades. This method helps create a more realistic look, allowing the colors to blend seamlessly.
- Blending: Utilize blending tools or your fingers to merge colors together. This technique softens harsh lines and creates a smooth transition between shades.
- Highlighting: Adding highlights can make hair appear shinier and more dimensional. Focus on areas where light naturally hits, such as the top of the head and the tips of the hair.
Another important aspect of coloring hair is understanding color theory. Mixing complementary colors can create depth, while analogous colors can produce a harmonious look. For example, if you're drawing blonde hair, you might consider using a mix of yellows, light browns, and even a hint of white for highlights. On the other hand, if you're illustrating dark hair, deep browns and blacks with subtle hints of red or blue can add richness and dimension.
To further enhance your understanding of hair coloring, let’s take a look at a simple table illustrating common hair colors and their complementary shades:
| Hair Color | Complementary Shades |
|---|---|
| Blonde | Light Brown, White |
| Brown | Dark Brown, Gold |
| Black | Dark Blue, Deep Purple |
| Red | Orange, Yellow |
Finally, don’t forget about the importance of practice! Experimenting with different colors and techniques is the best way to discover what works for you. Try drawing hair in various styles and colors, and don’t hesitate to step outside your comfort zone. After all, art is about exploration and expression!
Q: What are the best tools for coloring hair?
A: The best tools can vary based on your preferred style, but colored pencils, markers, and digital drawing tools are popular choices. Each has its strengths, so it’s worth experimenting to find what you like best.
Q: How can I create realistic highlights in hair?
A: To create realistic highlights, focus on areas where light naturally hits the hair. Use lighter shades or even white to add highlights, and blend them well with the base color for a seamless look.
Q: Is it necessary to understand color theory to color hair effectively?
A: While it’s not strictly necessary, having a grasp of color theory can greatly improve your coloring skills. Understanding how colors interact can help you make better choices for shading and highlights.
Realistic Color Blending
When it comes to drawing hair, is a game-changer. It can transform a flat drawing into a vibrant, lifelike representation that captures the viewer's attention. To achieve this, you need to understand how colors interact and how to layer them effectively. Think of it like mixing paint; just as a painter combines hues to create depth, you can blend colors in your hair drawings to enhance realism.
Start with a base color that reflects the general shade of the hair. For instance, if you're drawing blonde hair, you might begin with a light yellow or beige. Once you have your base, gradually introduce darker shades to add depth and dimension. This is where layering comes into play. Instead of applying a single color, build up layers of different shades to create a more complex and rich appearance.
One effective technique is to use a circular motion when applying colors, which helps to blend them seamlessly. This motion mimics the way light reflects off hair, creating a more natural look. Additionally, consider using a blending tool, such as a tortillon or a soft brush, to further smooth out the transitions between colors. This can help eliminate harsh lines and create a soft, flowing effect that resembles real hair.
Another tip is to pay attention to the light source. The way light hits hair can significantly affect how colors appear. For instance, highlights should be applied where the light hits the hair most directly, while shadows should be placed in areas that are less exposed. This not only adds dimension but also enhances the overall realism of your drawing.
To illustrate the concept of color blending, consider the following table that outlines a simple process for blending colors in hair:
| Step | Description |
|---|---|
| 1 | Choose a base color for the hair. |
| 2 | Add darker shades to create depth. |
| 3 | Use circular motions to apply color. |
| 4 | Blend with a tool for smoother transitions. |
| 5 | Apply highlights and shadows based on light source. |
In summary, mastering realistic color blending is essential for bringing hair to life in your artwork. By layering colors, using the right techniques, and considering the light, you can create stunning hair illustrations that truly stand out. So grab your pencils and start experimenting with color blending—your artistic journey is just beginning!
- What materials do I need for color blending? You will need quality colored pencils or markers, blending tools like tortillons, and good quality paper to achieve the best results.
- Can I blend colors digitally? Absolutely! Digital art software often has blending tools that mimic traditional techniques, allowing for seamless color transitions.
- How do I know which colors to blend? Study color theory, and consider the natural colors found in hair. Look at references to see how different shades work together.
- Is it necessary to use a blending tool? While it's not mandatory, blending tools can greatly enhance the smoothness of your color transitions and overall finish.

Using Highlights
When it comes to drawing hair, highlights play a crucial role in creating depth and dimension. They can turn a flat depiction into a vibrant representation that captures the viewer's eye. Highlights are essentially the lighter areas of hair that reflect light, giving it a sense of shine and movement. To effectively use highlights in your hair drawings, you need to consider a few key factors.
First and foremost, think about the light source. Understanding where the light is coming from will help you determine where to place your highlights. For instance, if the light is coming from above, the top parts of the hair strands will catch the most light, while the underside will remain darker. This contrast is what gives hair its realistic appearance.
Next, consider the color of the hair you are drawing. Highlights should be a few shades lighter than the base color of the hair. For example, if you are drawing dark brown hair, your highlights could be a warm caramel or golden shade. On the other hand, if you are working with blonde hair, using white or very light yellow can create stunning effects. The key is to ensure that your highlights complement the base color rather than overpower it.
In addition to color, texture is also vital. Different hair types reflect light differently. For straight hair, highlights may be more linear, following the flow of the strands. In contrast, curly hair might have more scattered highlights, reflecting the chaotic nature of curls. To achieve this, you can use a variety of techniques, such as:
- Blending: Blend your highlight colors with the base color to create a seamless transition.
- Layering: Apply multiple layers of color to build up the highlight effect gradually.
- Using a white pencil: After laying down your colors, a white pencil can be used to add final touches of light.
Lastly, don't forget to step back and evaluate your work. Sometimes, highlights may need adjustments. They should enhance the overall look without drawing too much attention away from the hair's natural flow. Remember, highlights are there to accentuate, not to dominate. By carefully considering the light source, hair color, and texture, you can create stunning highlights that bring your hair drawings to life.
Q: How do I know where to place highlights on hair?
A: The placement of highlights depends on the light source. If the light is coming from above, the top of the hair will have the most highlights, while the underside will be darker. Observing real-life hair under different lighting conditions can also help.
Q: Can I use white for highlights on all hair colors?
A: While white can be used for highlights, it's important to choose colors that complement the base hair color. For darker hair, lighter shades like caramel or gold often work better than pure white.
Q: How can I make my highlights look more realistic?
A: Blending and layering colors are key techniques for achieving realistic highlights. Using a blending tool can help smooth out transitions, while layering allows for depth and richness in color.

Common Mistakes to Avoid
Even the most seasoned artists can stumble when it comes to drawing hair. It’s a complex subject, and there are several common pitfalls that can derail your progress. One major mistake is overcomplicating the process. Many artists, especially beginners, tend to add too much detail too soon. Instead of focusing on the overall shape and flow of the hair, they get bogged down in individual strands. This can lead to a cluttered appearance that lacks the natural flow of hair. Remember, simplicity is key! Start with the basic shapes and gradually build up the details.
Another frequent error is ignoring light sources. Light plays a crucial role in how we perceive hair, affecting its color and texture. When artists neglect to consider where the light is coming from, their hair drawings can end up looking flat and unrealistic. To avoid this, always plan your light sources ahead of time. Use highlights and shadows effectively to create depth. For example, if the light source is coming from the left, the right side of the hair should be darker, while the left side should have more highlights.
Additionally, many artists make the mistake of using the same technique for all hair types. Each hair type has its own unique characteristics, and applying a one-size-fits-all approach can lead to disappointing results. For instance, curly hair requires a different treatment than straight hair. Make sure to observe the specific qualities of the hair type you're drawing and adapt your techniques accordingly. Practice is essential in mastering these distinctions.
Lastly, it's vital to avoid the trap of rushing your work. Hair requires patience and careful observation. Take your time to study how hair behaves in different situations. Whether it’s flowing in the wind or resting naturally, understanding these dynamics will help you create more convincing representations. If you find yourself getting frustrated, step back and take a break. Sometimes, a little distance can provide clarity and a fresh perspective.
In summary, here are some common mistakes to avoid when drawing hair:
- Overcomplicating the process by focusing too much on details.
- Ignoring the impact of light sources on the hair's appearance.
- Applying the same techniques across different hair types.
- Rushing through the drawing process without proper observation.
Q: What is the best way to practice drawing hair?
A: The best way to practice is by studying references and doing quick sketches. Focus on different hair types and their unique characteristics.
Q: How can I improve my shading techniques for hair?
A: Experiment with different pencils and blending tools. Practice layering your shades to create depth and texture.
Q: Should I always use a reference when drawing hair?
A: While it’s beneficial to use references, it’s also important to practice drawing from memory to develop your skills. Balance both methods for the best results.
Q: What tools do I need to draw hair effectively?
A: You’ll need a variety of pencils, blending tools like tortillons, and quality paper to achieve the best results in your hair drawings.
Overcomplicating the Process
When it comes to drawing hair, one of the biggest traps artists fall into is . It's easy to get caught up in the intricate details and lose sight of the overall form and flow of the hair. Remember, hair is not just a collection of strands; it's a dynamic part of the character or subject you are depicting. Instead of becoming overwhelmed by the minutiae, focus on the big picture. Start with the basic shapes and gradually build up the details. This approach not only simplifies the process but also allows you to maintain a sense of movement and life in your artwork.
To help you avoid this common mistake, consider the following tips:
- Break It Down: Start with simple shapes to represent the hair's overall form before adding details.
- Use Reference Images: Studying real hair can help you understand its natural flow and texture, making it easier to replicate.
- Limit Your Focus: Concentrate on one section of hair at a time rather than trying to capture the entire head of hair all at once.
Another aspect to consider is the importance of light and shadow. Many artists tend to overcomplicate their shading techniques, which can lead to a muddled appearance. Instead, observe how light interacts with hair in real life. Notice how it creates highlights and shadows, and try to replicate this in your drawings. By simplifying your shading process, you can achieve a more realistic representation of hair without the unnecessary complications.
Lastly, don't be afraid to embrace imperfections. Hair is inherently messy and chaotic, and that’s part of its beauty. Instead of striving for perfection, aim for a natural look. Allow some strands to fall out of place or overlap; it can add character and authenticity to your drawing. Remember, the goal is to capture the essence of hair, not to create an exact replica. By keeping your approach simple and intuitive, you’ll find that you not only enjoy the process more but also produce more compelling artwork.
Ignoring Light Sources
When it comes to drawing hair, one of the most common pitfalls artists encounter is . This oversight can lead to hair that looks flat and lifeless, stripping away the vibrancy and realism that every artist strives for. Just like in photography, where lighting can make or break a shot, the same principle applies to your drawings. Understanding how light interacts with hair is crucial for creating depth and dimension.
To illustrate this concept, consider the way sunlight plays on a person’s hair. When light hits hair, it creates a play of highlights and shadows that can drastically alter its appearance. For instance, straight hair may reflect light differently than curly hair, resulting in a unique texture and sheen. When you fail to account for the light source, your hair can end up looking uniform and dull, missing out on the rich variations that make it visually appealing.
Here are a few key points to remember about light sources when drawing hair:
- Identify the Light Source: Before you begin, determine where the light is coming from. Is it natural sunlight, a lamp, or perhaps a flash? This will guide your shading and highlighting decisions.
- Observe the Highlights: Look closely at how light reflects off the hair. Areas closest to the light source will be brighter, while those further away will be darker. Pay attention to the direction and intensity of the light.
- Consider the Hair Texture: Different hair types interact with light in unique ways. For example, glossy straight hair may have sharper highlights compared to the softer, diffused highlights found in curly hair.
Incorporating these elements into your drawings can transform a simple hairstyle into a stunning representation. Remember, the goal is to create a sense of realism that captivates your audience. So, next time you sit down to draw hair, take a moment to consider the light sources around you. This small adjustment can lead to significant improvements in your artwork.
In conclusion, never underestimate the power of light in your drawings. By being mindful of how light interacts with hair, you can elevate your artistic skills and produce more lifelike representations. It’s all about creating that dynamic interplay between light and shadow, which ultimately brings your artwork to life.
- Why is understanding light sources important in hair drawing?
Understanding light sources is crucial because it helps create depth and realism in your artwork. It allows you to accurately depict how light interacts with different hair textures. - How can I practice drawing hair with light in mind?
Start by observing real-life examples of hair under various lighting conditions. Try sketching from photographs where the light source is clear, and practice adding highlights and shadows accordingly. - What tools can help in achieving realistic hair highlights?
Blending tools like tortillons, colored pencils for highlights, and even white gel pens can help you achieve realistic highlights in your hair drawings.

Practice Exercises
Practicing is essential for mastering the intricate techniques involved in drawing hair. Whether you are a novice artist or someone with more experience, engaging in specific exercises can significantly enhance your skills. Think of these exercises as your workout routine for artistic muscles—consistent practice leads to improvement and greater confidence in your abilities!
One effective way to refine your hair-drawing techniques is through quick sketching. This exercise encourages you to capture the essence of hair shapes swiftly, allowing you to focus on the overall form rather than getting bogged down in details. Set a timer for a few minutes and try to sketch different hair types, such as straight, curly, and wavy. This will not only help you improve your speed but also enhance your ability to observe and replicate the unique characteristics of each hair type.
Another beneficial practice involves studying references. Look for high-quality images of various hairstyles and analyze them closely. Pay attention to how light interacts with the hair, the direction of the strands, and how volume is created. You can create a reference board—either digitally or on paper—that showcases different hair types, colors, and styles. This visual aid will serve as a valuable resource when you sit down to draw.
To further enhance your skills, consider incorporating the following exercises into your routine:
- Daily Sketching: Dedicate at least 15 minutes each day to sketch hair. Focus on different styles and textures to diversify your practice.
- Texture Studies: Choose a specific hair type and create a series of studies focusing solely on texture. Experiment with various shading techniques to see how they affect the overall look.
- Copying Masters: Find artwork from artists you admire and try to replicate their hair-drawing techniques. This can provide insights into different styles and methods.
By regularly engaging in these exercises, you'll find that your understanding of hair drawing deepens, and your ability to depict it realistically improves. Remember, the key to success in art is patience and persistence. Don't get discouraged by initial challenges; instead, view them as stepping stones to mastery.
Q: How often should I practice drawing hair?
A: Aim for daily practice, even if it's just for a short time. Consistency is crucial for improvement.
Q: What are some common mistakes to avoid when drawing hair?
A: Common mistakes include overcomplicating the process and ignoring the effects of light and shadow.
Q: Can I use digital tools for practicing hair drawing?
A: Absolutely! Digital tools can offer unique advantages, such as undo options and layers for experimenting with different techniques.
Q: How do I know if my hair drawings are improving?
A: Regularly compare your recent work with older pieces. You should notice more confidence in your strokes and a better understanding of hair structure and texture.
Quick Sketching
Quick sketching is an invaluable practice for artists looking to improve their ability to capture the essence of different hair types swiftly and accurately. When you engage in quick sketches, you're not just doodling; you're training your eye and hand to work in harmony, allowing you to grasp the fundamental shapes and dynamics of hair without getting bogged down in details. This method is akin to a musician practicing scales—it's all about building muscle memory and understanding the flow of your subject.
To get started with quick sketching, set a timer for yourself. This could be anywhere from 30 seconds to 5 minutes per sketch, depending on your skill level and comfort. The key is to focus on the overall shape and movement of the hair rather than the individual strands. Think of it as capturing the spirit of the hair rather than the nitty-gritty details. Here are some tips to keep in mind:
- Use a light hand: When sketching quickly, use light strokes to outline the hair's general shape. This will allow you to make adjustments easily.
- Focus on flow: Pay attention to how the hair flows and falls. Try to visualize the movement and direction of the strands.
- Limit your tools: Stick to a few basic tools, like a pencil and eraser. This keeps the process simple and helps you focus on the sketching itself.
After your quick sketches, take a moment to review your work. Analyze what worked and what didn’t. Did you capture the volume? Was the flow of the hair realistic? This reflective practice is crucial for growth. You might even consider keeping a sketchbook dedicated to these quick exercises, allowing you to track your progress over time.
Incorporating quick sketching into your routine can dramatically enhance your artistic skills, particularly in drawing hair. Think of it as a warm-up exercise before diving into more detailed work. As you become more comfortable with the shapes and movements of hair, you'll find that your ability to draw more complex hairstyles will improve significantly.
Q: How long should I spend on each quick sketch?
A: It depends on your comfort level, but starting with 30 seconds to 2 minutes is a good range. As you get more skilled, you can increase the time to 5 minutes.
Q: What should I focus on during quick sketching?
A: Focus on the overall shape, flow, and movement of the hair rather than the intricate details. Capture the essence of the hairstyle.
Q: Can I use digital tools for quick sketching?
A: Absolutely! Digital sketching can be very effective for quick sketches, allowing for easy adjustments and experimentation with different styles.
Q: How can I track my progress in quick sketching?
A: Keep a dedicated sketchbook for your quick sketches. Review your earlier sketches to see improvement over time and identify areas for further development.
Studying References
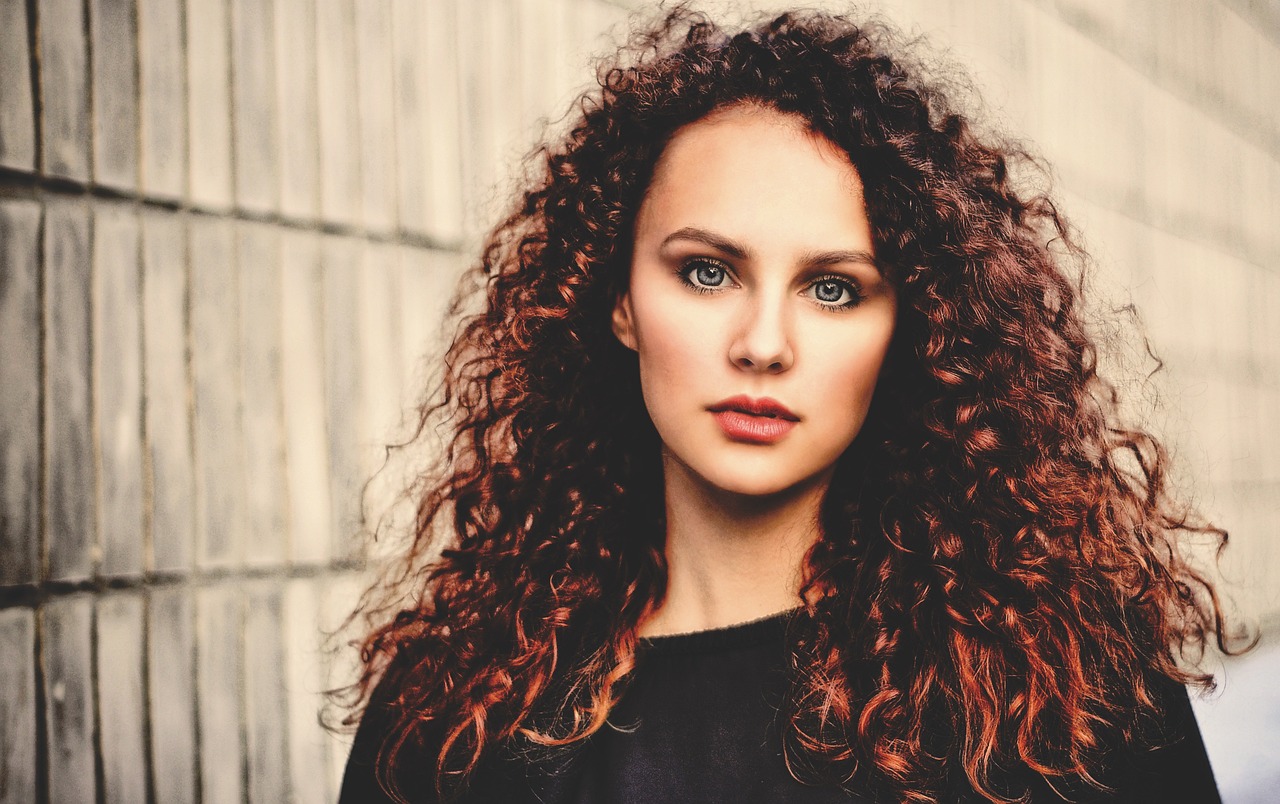
When it comes to mastering the art of drawing hair, is an invaluable practice that can elevate your skills to new heights. Just like a chef perfects their recipes by studying culinary techniques, artists can refine their craft by observing the intricacies of hair in various styles. Whether it’s the sleekness of straight hair, the bounce of curls, or the flow of waves, references provide a visual guide that can help you understand the nuances of hair more deeply.
One effective way to approach studying hair references is to gather a variety of images that showcase different hair types and styles. You can find these references in magazines, online galleries, or even by taking your own photographs. By creating a collection of images, you can analyze how light interacts with hair, the way it falls, and the unique textures that different hair types possess. This practice not only helps you understand the physical characteristics of hair but also inspires your creativity.
While studying your references, consider the following aspects:
- Lighting: Observe how light reflects off the hair. Notice where the highlights and shadows fall, and how they contribute to the overall shape and volume.
- Texture: Pay attention to the texture of the hair. Is it smooth and shiny, or frizzy and voluminous? Understanding these textures will help you replicate them in your drawings.
- Movement: Hair is dynamic; it moves with the wind or the motion of the head. Look for references that capture this movement, as it will add life to your artwork.
Another great exercise is to create study sheets where you can sketch out different hair types based on your references. This can be as simple as drawing quick outlines or as detailed as rendering full portraits. The key is to focus on capturing the essence of the hair rather than getting caught up in the minutiae. By regularly practicing with these references, you will develop a better eye for detail and a more intuitive understanding of how to portray hair in your art.
Finally, don't hesitate to compare your drawings with the references side by side. This comparison can reveal areas where you excel and aspects that may need improvement. Remember, the goal is not to copy but to learn and apply those lessons to your own unique style. So, gather your references, study them closely, and watch as your hair-drawing skills blossom!
Frequently Asked Questions
- What materials do I need to draw different hair types?
To effectively draw hair, you'll need a variety of materials, including different grades of pencils (like HB, 2B, and 6B), blending tools such as tortillons or stumps, and quality drawing paper. Each material contributes to achieving the desired texture and depth in your hair illustrations.
- How can I create realistic volume in straight hair?
Creating volume in straight hair involves using light, flowing lines to depict the natural fall of the hair. You can also add shading beneath layers to give the illusion of fullness. Remember to vary your pencil pressure for a more dynamic look!
- What are the best techniques for drawing curly hair?
When drawing curly hair, focus on the unique shapes and spirals of the curls. Start by sketching the overall form, then add details by working on individual curl shapes. Highlighting and shadowing are key—place highlights on the tops of curls and shadows in the valleys to create depth.
- Can I use colored pencils for hair drawing?
Absolutely! Colored pencils can bring vibrancy to your hair drawings. Use them to layer colors for a more realistic effect, blending different shades to mimic natural highlights and lowlights. Experiment with blending techniques to achieve smooth transitions!
- What common mistakes should I avoid when drawing hair?
One common mistake is overcomplicating the hair structure. Keep it simple and focus on the flow and direction of the hair. Also, don’t forget to consider your light source; ignoring it can result in flat and unrealistic hair representations.
- How can I practice drawing hair effectively?
Practice is crucial! Try quick sketching exercises to capture hair shapes rapidly, and study references to understand different hair types better. This will not only build your confidence but also enhance your skills in drawing various hairstyles.


