
Tips for Creating a Mixed Media Artwork
Creating mixed media artwork is like throwing a wild party for your imagination, where every material gets to dance and express itself in unique ways. If you've ever felt the urge to combine paint, fabric, paper, and even found objects into a single piece, then you’re in for a treat! In this article, we’ll explore essential strategies and techniques that will help you craft stunning mixed media artworks that not only showcase your creativity but also tell a story. So, grab your supplies, roll up your sleeves, and let’s dive into the colorful world of mixed media art!
Mixed media art is a fascinating blend of various artistic mediums, including but not limited to paint, collage, and found objects. Imagine it as a rich tapestry woven from different threads, each adding its own color and texture. The beauty of mixed media lies in its versatility; artists can freely experiment and innovate, leading to unique creations that reflect their personal style. Historically, mixed media has roots in the early 20th century, where artists like Pablo Picasso and Georges Braque began incorporating different materials into their work, pushing the boundaries of traditional art forms. Understanding the significance of mixed media can elevate your artistic practice, allowing you to express complex ideas and emotions through a variety of textures and visuals.
When it comes to mixed media art, the materials you choose can make all the difference. Think of your materials as the ingredients in a recipe; the right combination can lead to a masterpiece, while the wrong ones might leave you feeling unsatisfied. You’ll want to consider options such as paper, fabric, and paint, as each can dramatically influence the final piece. For instance, using vibrant acrylics can bring life to your artwork, while soft pastels can add a gentle touch. Don’t forget about found objects, which can add a personal touch and tell a story through their inclusion. The key is to experiment! Try mixing different types of materials to see how they interact with one another.
The choice between paper and canvas is crucial in mixed media art. Each surface has its own advantages and disadvantages that can affect your artwork's outcome. Paper is often more affordable and comes in various textures and weights, making it a great option for experimentation. On the other hand, canvas provides a sturdy base that can hold heavier materials and paint layers. When deciding, consider the following:
- Paper: Great for sketching, collage, and lighter applications.
- Canvas: Ideal for heavier mediums and long-lasting durability.
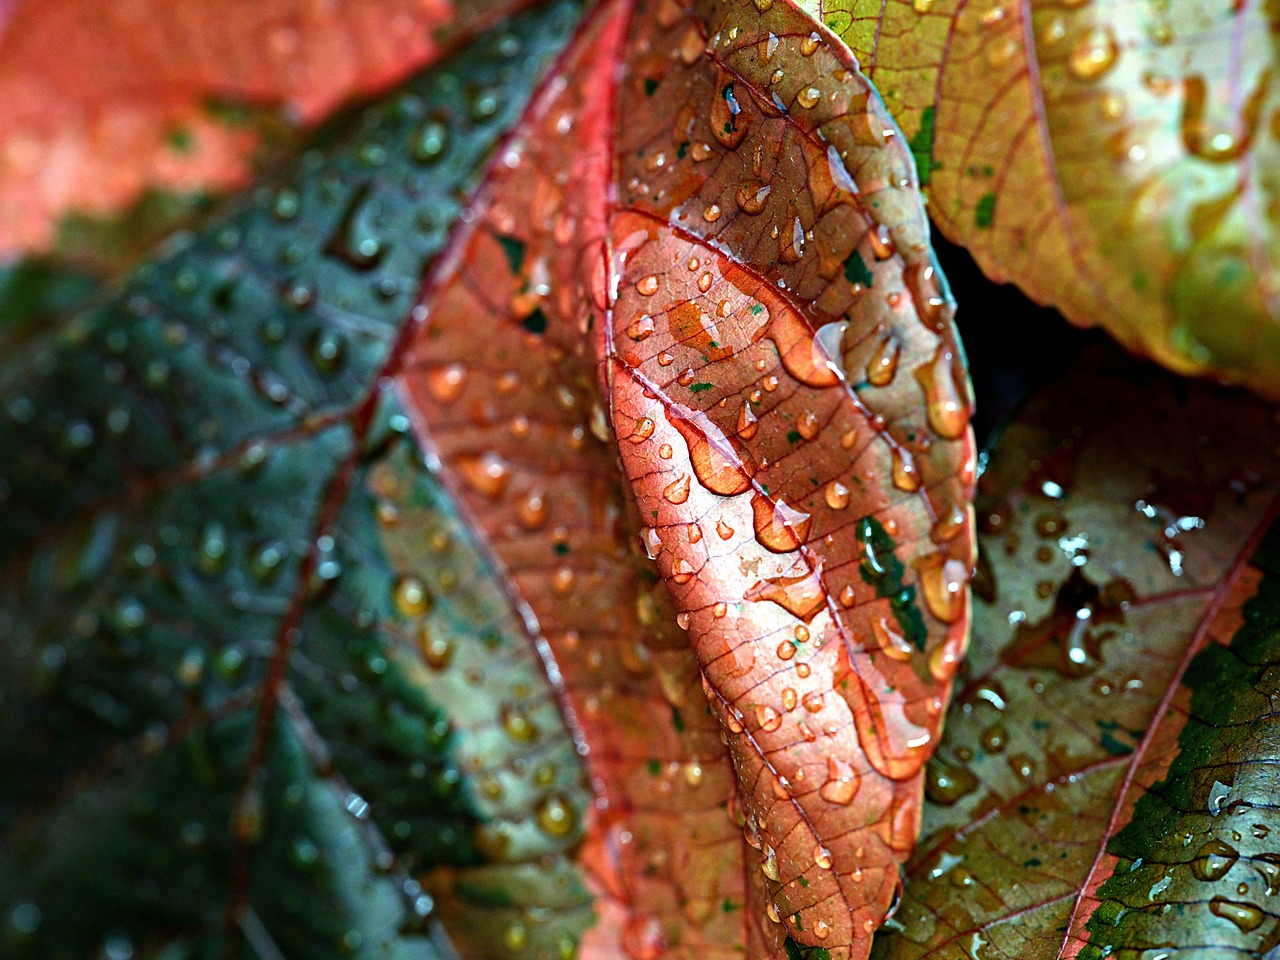
Textured papers can add depth and interest to your mixed media artwork. Think of them as the secret ingredient that elevates your dish from good to gourmet. There are various types of textured papers available, such as handmade papers, watercolor papers, and even specialty papers with unique finishes. These can be incorporated effectively by layering them under or over other materials, creating a dynamic interplay of textures that draws the viewer's eye. Consider experimenting with different textures to see how they can enhance your overall composition.
Understanding the different types of canvas can significantly enhance your mixed media projects. Stretched canvas is perfect for paintings and can handle a variety of materials, while canvas boards are more rigid and can be easier to work with for detailed projects. When choosing your canvas, consider what type of finish you want to achieve and how you plan to layer your materials. Each type of canvas offers unique qualities that can complement your artistic vision.
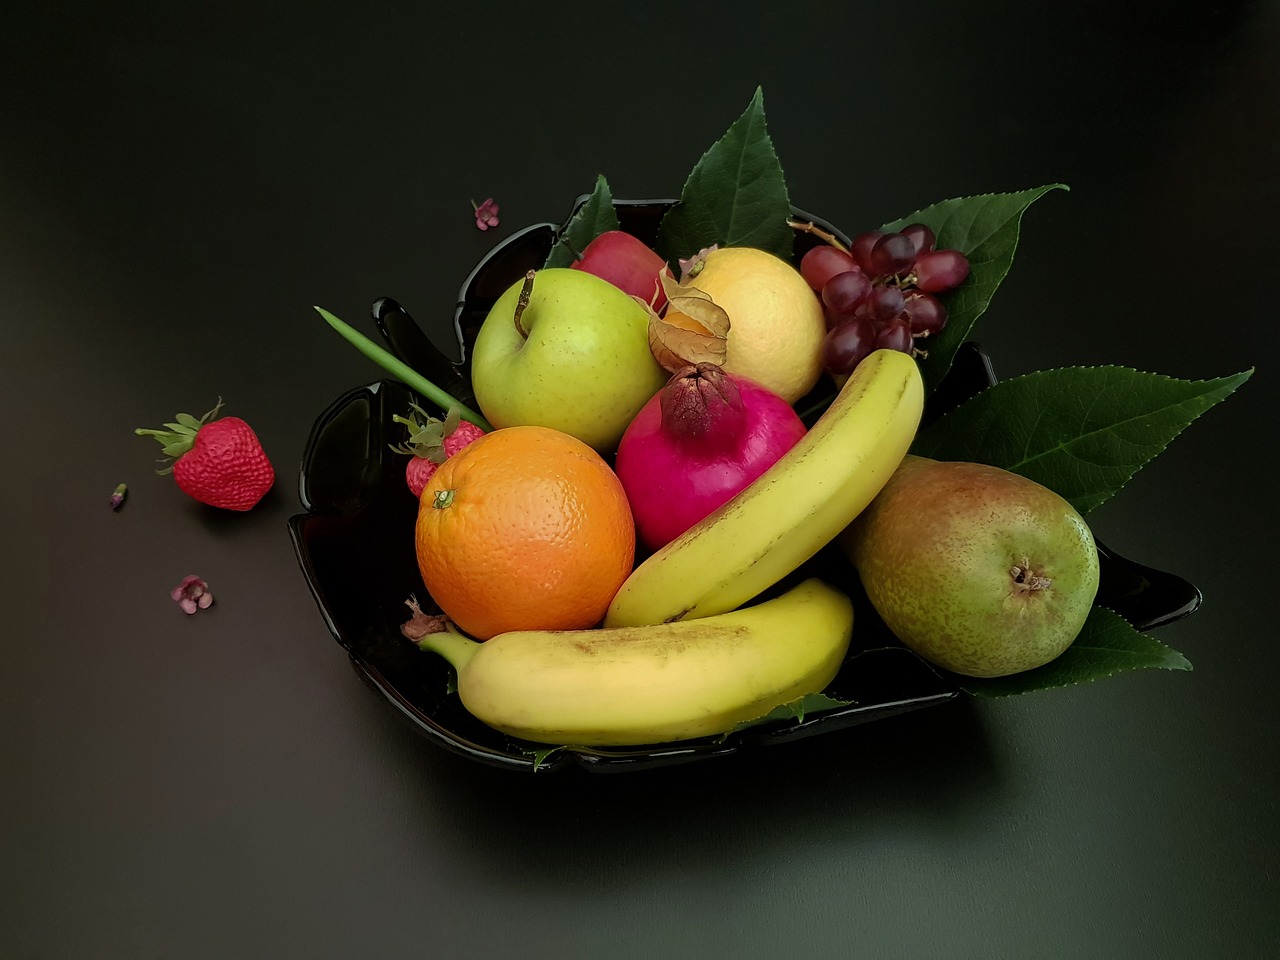
Incorporating found objects into your mixed media art can truly add a personal touch. These items, which can range from buttons and fabric scraps to natural elements like leaves or stones, can tell a story or evoke a memory. The process of sourcing these objects can be an adventure in itself! Visit thrift stores, rummage through your attic, or take a walk in nature to find inspiration. Once you have your treasures, think about how to integrate them into your artwork. They can be used as focal points, background elements, or even as a means to create texture.
Layering is a fundamental technique in mixed media art that adds depth and intrigue to your work. It’s like building a sandwich; each layer contributes to the overall flavor. Start with a base layer, which could be a wash of paint or a collage of paper, and then build upon it with additional materials. The key is to allow each layer to dry before adding the next; this prevents unwanted blending and allows for clearer definitions between elements. Don’t be afraid to experiment with different layering techniques, as this can lead to unexpected and exciting results!
Collage is a popular method in mixed media art, and it can significantly enhance the storytelling aspect of your artwork. You can use various techniques, such as tearing or cutting images from magazines, to create a visually compelling narrative. Consider using a mix of images, textures, and colors to evoke emotion and draw the viewer in. The beauty of collage lies in its ability to transform mundane materials into something extraordinary. So, let your imagination run wild!
Painting over existing layers can transform your artwork and unify various elements into a cohesive piece. It’s like adding a finishing glaze to a cake; it brings everything together beautifully. Use transparent washes to allow underlying textures and colors to peek through, or opt for opaque paints to create bold contrasts. This technique can also help in softening harsh lines and blending different materials, making your mixed media piece feel more harmonious.
Texture is the secret sauce that adds dimension and interest to mixed media artworks. It invites viewers to touch and feel the artwork, creating a more immersive experience. There are various techniques for creating texture, such as using gels, pastes, or layering materials. Experiment with different mediums to see how they interact with each other and how they can enhance the overall composition.
Gel mediums can create a variety of textures in your artwork, acting as both adhesive and texture enhancer. They come in different finishes, such as matte or glossy, allowing you to customize the look of your piece. You can use gel mediums to create raised textures, add depth, or even create a smooth surface for painting. The versatility of gel mediums makes them an essential tool in any mixed media artist's toolkit.
Incorporating 3D elements can elevate your mixed media art to new heights. Think of adding objects like small boxes, fabric swatches, or even natural materials like twigs or stones. These elements can create visual impact and intrigue, inviting viewers to explore your work more closely. When integrating 3D components, consider how they relate to the overall composition and how they can enhance the narrative of your piece.
The final details can make or break a mixed media artwork. Think of them as the icing on the cake; they enhance the overall presentation and protect your hard work. Essential finishing techniques include sealing your piece with a varnish or protective spray to ensure its longevity and framing it for display. A well-framed piece not only protects your artwork but also elevates its aesthetic appeal, making it a stunning addition to any space.
Q: What is mixed media art?
A: Mixed media art combines various artistic mediums, such as paint, collage, and found objects, to create unique and expressive works.
Q: Can I use any materials for mixed media art?
A: Yes! You can use a wide range of materials, including paper, fabric, paint, and found objects. The key is to experiment and find what works best for your vision.
Q: How do I start a mixed media project?
A: Begin by gathering your materials and sketching out your ideas. Don’t be afraid to layer and experiment as you create your artwork!
Q: What are some common mistakes to avoid?
A: Avoid overworking your piece, which can lead to muddiness. Also, be cautious with adhesives; make sure they are appropriate for the materials you’re using.
Q: How can I protect my finished artwork?
A: Seal your artwork with a varnish or protective spray to enhance its longevity and consider framing it for added protection and display.

Understanding Mixed Media
Mixed media art is like a vibrant conversation between different artistic forms, where the boundaries of creativity are blurred and the possibilities are endless. This fascinating genre combines a variety of artistic mediums—think paint, collage, fabric, and found objects—into a single cohesive piece. Imagine creating a stunning visual narrative that speaks to the viewer not just through color and form, but also through texture and material. The history of mixed media art is rich and diverse, with roots tracing back to early 20th-century movements that sought to break away from traditional art forms. Artists like Pablo Picasso and Kurt Schwitters experimented with collage and assemblage, laying the groundwork for what we now celebrate as mixed media.
The significance of mixed media art lies in its ability to convey complex emotions and ideas. By incorporating various materials, artists can create a rich tapestry of textures and visuals that invite the viewer to explore deeper meanings. Each layer, each material tells its own story, contributing to the overall narrative of the artwork. This multifaceted approach not only enhances creativity but also allows for personal expression in ways that traditional media often cannot. Whether you’re a seasoned artist or a curious beginner, understanding the essence of mixed media can open up new avenues for self-expression and artistic exploration.
In the realm of mixed media, the options are virtually limitless. You can combine paint with newspaper clippings, fabric with photographs, or even natural materials like leaves and twigs. The key is to experiment and let your imagination run wild. As you dive into this exciting world, remember that the process is just as important as the final product. Embrace the unexpected, and don't be afraid to make mistakes; they often lead to the most interesting discoveries!
As you embark on your mixed media journey, consider the following elements that define this art form:
- Variety of Materials: The use of diverse materials is a hallmark of mixed media art, allowing for unique combinations that can surprise and engage the viewer.
- Layering Techniques: Layering different mediums creates depth and complexity, making each piece a rich visual experience.
- Personal Expression: Mixed media art is a canvas for personal storytelling, where artists can infuse their work with their own narratives and emotions.
In conclusion, understanding mixed media is about embracing a world of possibilities. It’s an invitation to play, to explore, and to express yourself in ways that are as unique as you are. So grab your supplies, let your creativity flow, and see where this exciting journey takes you!
Choosing Your Materials
When it comes to mixed media art, the materials you choose can make or break your creative vision. Think of your materials as the ingredients in a recipe; the right combination can lead to a masterpiece, while the wrong choices might leave you feeling unsatisfied. So, how do you select the best materials for your mixed media projects? It’s all about understanding the unique qualities of each medium and how they can complement one another. From paper to paint, and everything in between, let’s dive into the world of mixed media materials!
First off, paper and canvas are two foundational surfaces that you’ll often encounter. Each has its own set of advantages and disadvantages, which can significantly influence the outcome of your artwork. For instance, paper can be more versatile and easier to manipulate, while canvas offers a sturdier base that can withstand heavier materials. Imagine paper as a soft, inviting bed where your ideas can rest, while canvas stands tall like a robust wall ready to bear the weight of your creativity.
Choosing between paper and canvas often comes down to the specific look and feel you want to achieve. If you’re looking for a delicate, intricate design, paper might be your best bet. On the other hand, if you’re planning to layer heavy materials or work with thick paints, canvas would be more suitable. Here’s a quick comparison:
| Material | Pros | Cons |
|---|---|---|
| Paper |
|
|
| Canvas |
|
|
Next up, let’s talk about textured papers. These beauties add depth and interest to your artwork, transforming a simple piece into something truly captivating. Think of textured papers as the secret spice in your dish that elevates it from ordinary to extraordinary. You can find various types of textured papers, including handmade, embossed, and even patterned options. They can be used as backgrounds, layering elements, or focal points, depending on your artistic vision.
Incorporating textured papers into your mixed media projects can create a tactile experience for your audience. Imagine running your fingers over a piece of art and feeling the different surfaces; it’s an invitation to engage more deeply with your work. When selecting textured papers, consider their weight and durability, as well as how they will interact with other materials.
Now, let’s not forget about the different types of canvas available. You can choose between stretched canvas, canvas boards, and even watercolor canvas. Each type brings its own flavor to the table. Stretched canvas is perfect for those who want a traditional look and feel, while canvas boards provide a more portable option. It’s like choosing between a cozy home and a chic apartment—both have their perks, but the choice depends on your lifestyle and artistic needs.
Finally, let’s not overlook the importance of found objects. These treasures can add a personal touch and a story to your mixed media art. Whether it’s a piece of vintage jewelry, a broken toy, or even natural elements like leaves and twigs, incorporating found objects allows you to create a unique narrative within your artwork. Imagine how a simple piece of driftwood can evoke memories of a beach vacation, or how an old button can tell the story of a cherished garment. The possibilities are endless!
In conclusion, choosing the right materials for your mixed media artwork is a crucial step in the creative process. By understanding the unique properties of paper, canvas, textured papers, and found objects, you can make informed decisions that will enhance your artistic expression. So, gather your materials, let your imagination run wild, and get ready to create something extraordinary!
Paper and Canvas
When diving into the world of mixed media art, one of the most critical decisions you'll face is choosing between paper and canvas. Each surface offers its own unique set of characteristics that can dramatically influence the outcome of your artwork. Think of it like choosing the right stage for a performance; the venue can enhance or detract from the overall experience. So, let’s explore the pros and cons of both options to help you make an informed choice.
Paper is often favored for its versatility and the myriad of textures available. From smooth, glossy surfaces to rough, textured sheets, paper can provide a rich foundation for your mixed media creations. You can easily layer paints, pastels, and even collage elements on paper, allowing for a wide range of artistic expression. However, keep in mind that not all papers are created equal. Some may buckle or warp when wet mediums are applied, while others may not hold up well under heavy layering. It’s essential to select a high-quality, acid-free paper that can withstand your artistic process.
On the other hand, canvas is like the sturdy backbone of your artwork. It’s durable and can handle a variety of mediums, including heavy paints, gels, and even 3D elements. Stretched canvas is particularly popular because it can be hung directly on the wall without needing a frame, giving your artwork a professional finish. However, canvas can be more expensive than paper, and its texture can sometimes overpower finer details in your work. If you’re looking for a more refined surface for intricate designs, you might want to consider using canvas boards, which offer a smooth finish and are often more affordable.
To help you visualize the differences between these two surfaces, here’s a quick comparison table:
| Feature | Paper | Canvas |
|---|---|---|
| Texture Variety | High | Moderate |
| Durability | Low to Moderate | High |
| Cost | Generally Lower | Generally Higher |
| Ease of Use with Wet Mediums | Varies | Good |
| Portability | High | Moderate |
Ultimately, the choice between paper and canvas depends on your artistic goals and preferences. If you enjoy experimenting with different textures and layering techniques, paper might be the way to go. However, if you’re looking for a more robust surface that can support a range of materials, canvas could be your best bet. Just like choosing the right ingredients for a recipe, selecting your surface can set the tone for your entire artistic journey. So, take the time to explore both options and see which one resonates with your creative vision!
- Can I use both paper and canvas in the same artwork?
Absolutely! Mixing surfaces can create intriguing contrasts and enhance the depth of your piece. - What type of paper is best for mixed media?
Look for heavyweight, acid-free paper designed for mixed media, as it can handle various mediums without warping. - How do I prepare my canvas for mixed media?
Priming your canvas with gesso will create a better surface for paint and other materials, ensuring they adhere well.
Textured Papers
When it comes to mixed media art, the choice of materials can greatly influence the overall impact of your piece. One of the most exciting options available is textured paper. This type of paper not only adds a unique visual appeal, but it also introduces an array of tactile experiences that can elevate your artwork to new heights. Imagine running your fingers over the surface and feeling the grooves and bumps that tell a story of their own! Textured papers come in various forms, including handmade, embossed, and patterned varieties, each offering distinct qualities to experiment with.
Using textured papers can create a sense of depth and dimension that flat surfaces simply can't achieve. For instance, consider incorporating handmade papers that are often irregular in shape and thickness, providing a raw, organic feel to your compositions. Alternatively, embossed papers can add a sophisticated touch, with designs that catch the light beautifully. The key is to think about how these textures can complement the other elements in your artwork. For example, if you're layering paint over textured paper, the paint will interact with the surface in unexpected ways, creating a dynamic interplay between color and texture.
Here are some popular types of textured papers you might want to explore:
- Handmade Papers: Unique and often eco-friendly, these papers can vary greatly in texture and color.
- Watercolor Paper: With its heavy weight and texture, it’s perfect for mixed media techniques.
- Textured Cardstock: Great for adding rigidity and can be easily found in various colors.
- Fabric-Infused Papers: These papers include threads or fabric, adding an extra layer of interest.
When integrating textured papers into your mixed media projects, consider the following tips:
- Experiment with layering different textures to create rich visual narratives.
- Use adhesives that are suitable for both paper and other materials to ensure a strong bond.
- Don’t be afraid to cut, tear, or manipulate the paper to fit your vision; sometimes, the imperfections lead to the most striking results.
In conclusion, textured papers are more than just a backdrop for your artwork; they are an integral part of the storytelling process. By thoughtfully selecting and incorporating these materials, you can transform your mixed media creations into captivating pieces that invite viewers to touch, explore, and connect with your artistic vision.
Q1: What are the best types of textured papers for beginners?
A1: For beginners, I'd recommend starting with watercolor paper or textured cardstock. These are easy to find and work with, allowing you to experiment without feeling overwhelmed.
Q2: Can I create my own textured paper?
A2: Absolutely! You can make your own textured paper by using materials like fabric, leaves, or even crumpled newspaper. Just mix these with a pulp or use them as a collage base.
Q3: How do I adhere textured papers to my artwork?
A3: Use a strong adhesive like gel medium or mod podge. These not only bond well but can also enhance the texture of your papers.
Q4: Can textured papers be painted over?
A4: Yes! Painting over textured papers can create beautiful effects. Just be mindful of the type of paint you use, as some may alter the texture.

Canvas Types
When it comes to creating mixed media artworks, the choice of canvas can significantly influence the overall aesthetic and structural integrity of your piece. There are several types of canvases available, each with its unique characteristics that cater to different artistic needs. The most common options include stretched canvas, canvas boards, and canvas panels. Understanding the differences between these types can help you make an informed decision based on your project requirements.
Stretched canvas is perhaps the most popular choice among artists. This type consists of a piece of canvas that is stretched over a wooden frame, creating a taut surface that is ready for painting. The beauty of stretched canvas lies in its ability to hold paint exceptionally well, allowing for vibrant colors and detailed brushwork. Additionally, it can be hung directly on the wall without the need for framing, giving your artwork a professional finish. However, it's important to note that stretched canvases can be more expensive and may warp if exposed to moisture.
On the other hand, canvas boards are made by adhering canvas to a rigid board, which provides a sturdy surface for your mixed media creations. This type of canvas is often more affordable and lightweight, making it a great option for artists who want to experiment without breaking the bank. Canvas boards are also less prone to warping, making them ideal for works that require heavy layering of materials. However, they may not offer the same depth of texture as stretched canvases.
Lastly, we have canvas panels, which are similar to canvas boards but typically come in a thinner format. They are perfect for artists who prefer to work on a lightweight surface that can be easily transported. Canvas panels are excellent for sketching, practicing techniques, or creating smaller pieces of art. However, due to their thinness, they may require framing for display to ensure durability and protection.
In summary, the choice of canvas type can greatly affect your mixed media artwork. Here’s a quick comparison table to help you visualize the differences:
| Canvas Type | Pros | Cons |
|---|---|---|
| Stretched Canvas | Vibrant colors, professional finish | More expensive, can warp |
| Canvas Boards | Affordable, sturdy, less prone to warping | Less texture depth |
| Canvas Panels | Lightweight, great for practice | Thin, may require framing |
Ultimately, your choice of canvas should align with your artistic vision and the techniques you plan to employ. Whether you opt for the luxurious feel of stretched canvas or the practicality of canvas boards, each type offers unique opportunities for creativity. Don’t hesitate to experiment with different surfaces to discover what works best for your mixed media masterpieces!
Q: Can I use acrylic paint on all types of canvas?
A: Yes, acrylic paint works well on all types of canvas, but it's essential to ensure that the surface is primed properly to achieve the best results.
Q: Is it necessary to frame my artwork on canvas panels?
A: While it's not strictly necessary, framing canvas panels can help protect them and enhance their presentation, especially if the artwork is larger or more intricate.
Q: How do I prevent my stretched canvas from warping?
A: To prevent warping, keep your stretched canvas in a climate-controlled environment, away from direct sunlight and moisture.

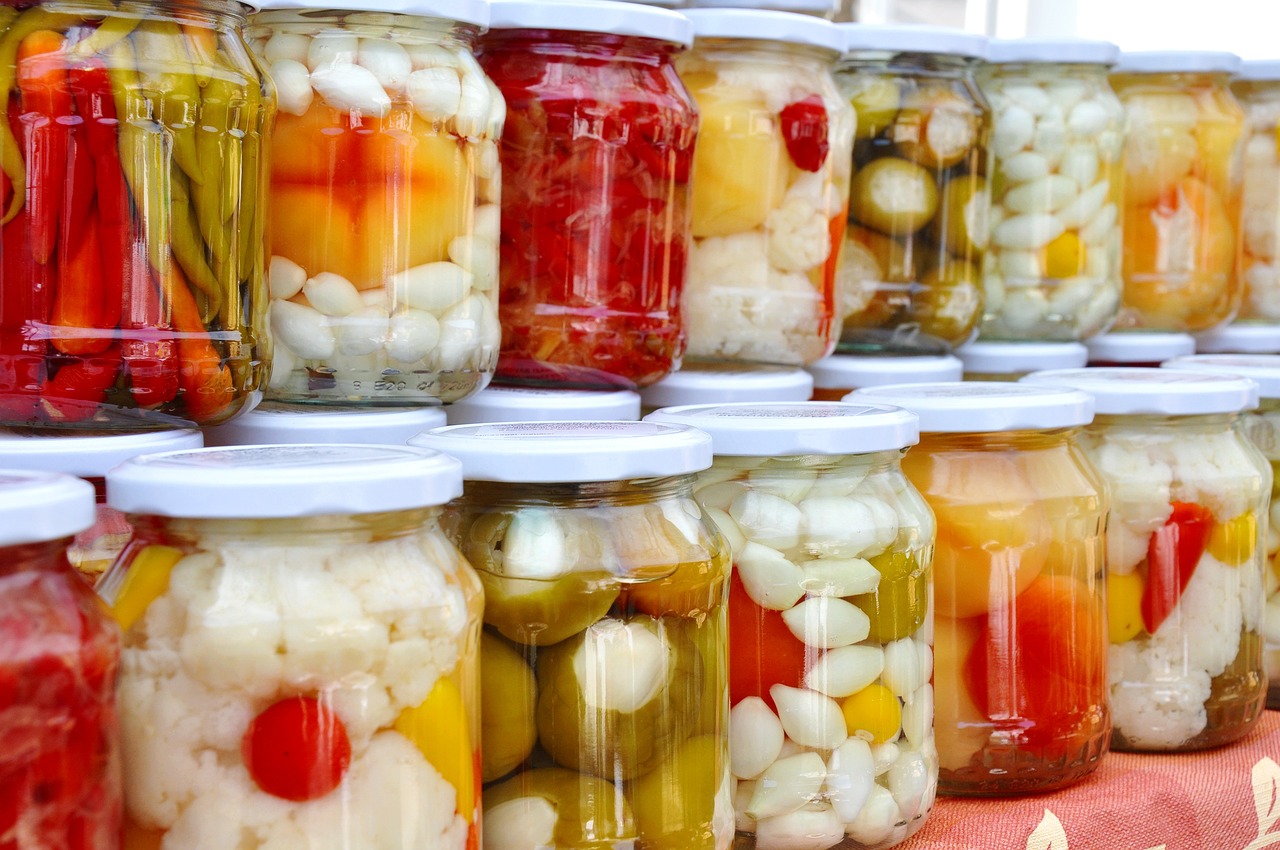
Found Objects
In the vibrant world of mixed media art, play a pivotal role in adding a unique and personal touch to your creations. These are items that you can discover in your everyday environment—think of old buttons, bits of fabric, discarded toys, or even natural elements like leaves and stones. The beauty of incorporating found objects lies in their ability to tell a story, evoke memories, and spark curiosity in the viewer. Imagine transforming a mundane object into a focal point of your artwork; that’s the magic of mixed media!
When sourcing found objects, keep your eyes peeled everywhere you go. Flea markets, thrift shops, and even your own home can be treasure troves of inspiration. You might find an antique key that reminds you of a childhood adventure or a piece of broken jewelry that adds a splash of color. Once you start looking, you’ll be amazed at how many items can be repurposed into stunning works of art.
Integrating these objects into your artwork can be as simple or as complex as you desire. Here are a few techniques to consider:
- Adhesion: Use strong adhesives like gel mediums or hot glue to secure your found objects in place. Make sure they are firmly attached to withstand the test of time.
- Layering: Don’t be afraid to layer found objects with paints or other materials. This can create depth and intrigue, making your artwork come alive.
- Contrast: Use found objects that contrast with your primary materials. For instance, pairing rough, natural elements with smooth, painted surfaces can create a captivating visual journey.
Moreover, consider the emotional connection your found objects may evoke. Each piece has its own history, and when incorporated into your artwork, it can create a dialogue between the viewer and the piece. For example, a rusty old tool might remind someone of their grandfather’s workshop, while a faded photograph could stir nostalgia for a bygone era. By thoughtfully selecting and integrating these objects, you not only enhance the visual appeal but also enrich the narrative of your artwork.
In conclusion, found objects are more than just materials; they are gateways to stories and memories. Embrace the unexpected and let your creativity flow as you explore the limitless possibilities that these treasures offer. Remember, every piece you choose adds a layer of meaning to your mixed media masterpiece!
Q: What types of found objects can I use in my mixed media art?
A: You can use almost anything! Common found objects include old photographs, buttons, fabric scraps, natural elements (like stones and leaves), and even broken toys. The key is to choose items that resonate with you and fit the theme of your artwork.
Q: How do I attach found objects to my artwork?
A: Strong adhesives such as gel mediums, hot glue, or even epoxy can work well. Make sure to choose an adhesive that is suitable for the materials you are working with to ensure a secure bond.
Q: Can I paint over found objects?
A: Absolutely! Painting over found objects can create a cohesive look in your artwork. Just make sure to use appropriate paint types that adhere well to the surface of the object.
Q: How do found objects enhance the storytelling aspect of my artwork?
A: Found objects carry their own histories and meanings, which can evoke emotions and memories in viewers. By incorporating them into your art, you create a narrative that invites others to engage with your work on a deeper level.
Techniques for Layering
Layering is not just a technique; it’s the heartbeat of mixed media art. It’s what breathes life into your creations, giving them depth and complexity. Imagine your artwork as a beautiful sandwich, where each layer contributes to the overall flavor. The first step in mastering layering is understanding how different materials interact with each other. For instance, when you layer paint over paper, the translucency of the paint can create stunning effects that reveal the textures and colors beneath. This interplay can turn a simple piece into a mesmerizing visual experience.
One effective method for layering is to start with a base layer that sets the tone for your artwork. This could be a wash of color, a textured background, or even a collage of images. Once you establish this foundation, you can gradually add more layers, each one building upon the last. Don’t be afraid to experiment! Try using different mediums, such as acrylics, watercolors, or even inks, to see how they blend and contrast with each other. The beauty of mixed media is in its unpredictability; sometimes the best results come from happy accidents.
When layering, consider the visual hierarchy of your artwork. What do you want the viewer to notice first? By strategically placing your elements, you can guide the eye through your piece. For example, lighter colors tend to come forward while darker shades recede, so use this to your advantage. You might start with a vibrant, eye-catching element at the center of your canvas, then gradually introduce darker, muted colors around it to create a sense of depth.
Another technique to enhance your layering is through the use of collage techniques. Collage allows you to incorporate various materials, such as magazine clippings, fabric, or even natural elements like leaves or twigs. These items can provide not only visual interest but also texture. Consider creating a collage layer first, then painting over it to unify the elements. This can create a cohesive look while still allowing the unique characteristics of each item to shine through.
As you build your layers, remember to give each one time to dry before adding the next. This is crucial, especially when working with wet mediums. Rushing this process can lead to muddy colors and unwanted textures. Patience is key in layering; it’s all about allowing the materials to interact and settle into their own space. You might even want to use a heat gun to speed up the drying process, but be cautious as too much heat can warp your materials.
Finally, don’t forget to step back and assess your work as you go. Sometimes, it’s easy to get lost in the details, but taking a moment to view your piece from a distance can help you see how the layers are coming together. Ask yourself: Does it feel balanced? Is there enough contrast? Are the layers adding to the story you want to tell? By continuously evaluating your work, you can make adjustments that enhance its overall impact.
- What is the best medium for layering? It depends on your project! Acrylics and watercolors are popular choices, but don’t shy away from experimenting with inks, pastels, or even mixed materials.
- How do I prevent my layers from blending too much? Allow each layer to dry completely before adding the next. You can also use mediums that create barriers, such as gel mediums or varnishes.
- Can I use 3D elements in my layers? Absolutely! Incorporating 3D elements like beads, fabric, or found objects can add incredible depth and interest to your artwork.

Collage Techniques
Collage is not just a technique; it's a vibrant language of its own in the realm of mixed media art. When you think about it, creating a collage is like telling a story through visuals. Each piece you select serves as a word in your narrative, adding layers of meaning and emotion. Whether you’re using photographs, magazine clippings, or textured papers, the possibilities are endless. The beauty of collage lies in its ability to transform the mundane into the extraordinary, giving new life to forgotten items and materials.
To start your journey into collage techniques, consider the following approaches that can elevate your artwork:
- Layering Images: Begin by selecting a base layer, such as a canvas or sturdy paper. Then, layer images and materials on top, allowing some elements to peek through. This creates depth and intrigue, drawing the viewer's eye across the piece.
- Mixed Textures: Combine different textures to create a tactile experience. For instance, pair smooth photographic prints with rough, torn paper or fabric. This contrast can evoke emotions and engage the viewer's senses.
- Color Harmony: Pay attention to the colors in your collage. Using a cohesive color palette can unify disparate elements, making your artwork feel intentional and well-thought-out. Try to balance bold colors with muted tones to create visual interest.
- Storytelling: Think about the story you want to tell. Arrange your images in a way that guides the viewer through your narrative. Consider the placement of each element and how it interacts with the others.
Another exciting technique is the incorporation of text into your collages. Words can serve as powerful visual elements, adding context or emotion to your artwork. You might use snippets from books, newspapers, or even your own handwritten notes. The juxtaposition of text and imagery can create a dialogue that resonates with the viewer.
As you experiment with these collage techniques, remember that there are no strict rules. Allow your creativity to flow freely. Sometimes, the most unexpected combinations yield the most striking results. Don’t be afraid to take risks—after all, art is all about exploration and expression!
Q: What materials are best for collage?
A: You can use a variety of materials for collage, including paper, fabric, photographs, and found objects. The key is to choose items that resonate with you and fit the theme of your artwork.
Q: How do I ensure my collage has depth?
A: Layering different materials and textures is essential for creating depth. Use both flat and three-dimensional elements to give your collage a dynamic quality.
Q: Can I mix different artistic styles in my collage?
A: Absolutely! Mixing styles can lead to unique and engaging artworks. Don’t hesitate to combine techniques from painting, drawing, and photography within your collage.
Q: How do I adhere my collage elements?
A: Use a strong adhesive like gel medium or craft glue to ensure your elements stay in place. Be mindful of the drying time, especially when working with heavier materials.
Painting Over Layers
When it comes to mixed media art, painting over layers is like adding the final brush strokes to a symphony; it brings everything together in a harmonious way. Imagine starting with a foundation of vibrant collages, textured papers, or even found objects, and then introducing paint to create depth and unity. This technique allows artists to explore new dimensions, transforming their work into something truly unique. But how do you effectively paint over layers without losing the essence of what you've created? Let’s dive into some essential tips!
First off, it’s crucial to understand the importance of transparency in your paint choices. Using transparent or semi-transparent paints can allow the underlying layers to show through, adding richness to your artwork. Think of it like glazing in traditional painting; it’s all about building up color gradually. On the other hand, if you prefer a more opaque look, make sure to balance it by using lighter applications to prevent overwhelming the intricate details below.
Another vital aspect to consider is the order of application. Start with the lighter colors and gradually work towards darker shades. This approach not only helps maintain the visibility of your layers but also adds a beautiful gradient effect that can enhance the overall composition. For instance, if you have a bright yellow base, layering a soft orange or peach over it can create a stunning glow that draws the eye.
Now, let’s talk about brush techniques. Different brushes can yield different effects. A stiff brush can create bold strokes, while a soft brush can help blend colors seamlessly. Additionally, don’t shy away from experimenting with unconventional tools! Sponges, palette knives, or even your fingers can add unique textures and marks to your painting. It’s all about finding what resonates with your artistic vision.
Lastly, remember that painting over layers isn’t just about color; it’s also about texture. You can use techniques like dry brushing or stippling to add dimension and interest. These methods allow you to create contrast between the smoothness of the paint and the texture of the underlying materials. For example, applying a dry brush technique over a heavily textured surface can produce a stunning visual effect that captivates the viewer.
In summary, painting over layers in mixed media art is an exciting way to enhance your work. By choosing the right paints, applying them thoughtfully, and experimenting with various techniques, you can create a piece that is not only visually appealing but also rich in story and emotion. So grab your brushes and let your creativity flow!
- What types of paint are best for mixed media? Acrylic paints are popular for mixed media due to their versatility and quick drying time. However, watercolors and oil paints can also be used effectively, depending on the desired effect.
- Can I use spray paint in mixed media? Absolutely! Spray paint can add a dynamic element to your artwork, allowing for smooth coverage and unique textures.
- How do I protect my mixed media artwork? Sealing your artwork with a varnish or a fixative can help protect it from dust and damage while enhancing the colors.
- Is it necessary to prime my surface before painting? Priming can help create a better surface for paint adhesion, especially on non-porous materials. It’s often recommended but not always necessary.

Incorporating Texture
When it comes to mixed media art, texture is one of the most powerful tools at your disposal. It’s not just about adding visual interest; texture can evoke emotions, create depth, and draw viewers into your artwork. Imagine running your fingers over a piece of art and feeling the roughness of sandpaper or the smoothness of a gel medium. This tactile experience can transform a flat image into a multi-dimensional journey. So, how do you effectively incorporate texture into your mixed media creations? Let’s dive into some techniques that can elevate your work.
One of the most exciting ways to add texture is through the use of gel mediums. These versatile substances can be mixed with paint or used alone to create a range of effects. For instance, a thick gel medium can be applied with a palette knife to form peaks and ridges, while a thinner medium can be brushed on to create a smooth, glossy finish. The beauty of gel mediums lies in their adaptability; you can use them to adhere materials together or to build up layers of texture that catch the light beautifully.
Additionally, consider adding 3D elements to your artwork. This could be anything from small objects like buttons and beads to larger items like pieces of wood or metal. By integrating these elements, you not only create a visual feast but also invite viewers to engage with your art on a physical level. Think of your artwork as a landscape where each 3D element is a mountain, tree, or river, inviting exploration and interaction.
Incorporating texture can also be achieved through the use of various materials. For example, you might layer different types of paper, fabric, or even natural elements like leaves and twigs. Each material brings its own unique texture, and when layered together, they can create a stunning visual narrative. Consider the following materials that can enhance texture in your artwork:
- Textured Papers: These can range from handmade papers with embedded fibers to patterned scrapbook papers. They can add depth and variety to your layers.
- Fabric Scraps: Incorporating textiles can introduce softness and warmth to your work. Think about using lace, burlap, or even denim for a unique touch.
- Natural Elements: Items like sand, leaves, or stones can provide an organic feel and add a story to your piece. They can also connect your art to nature in a profound way.
Moreover, don’t forget about the power of technique in creating texture. Techniques like stenciling, stamping, or even using household items like sponges can add interesting patterns and surfaces to your work. For example, using a sponge to dab paint onto your canvas can create a soft, textured background that serves as a perfect foundation for your mixed media layers. Each technique you choose will contribute to the overall feel of your artwork, so experiment to find what resonates with you.
In conclusion, incorporating texture into your mixed media art is not just an option; it’s a necessity for creating engaging, dynamic pieces that speak to the viewer. By experimenting with gel mediums, 3D elements, and various materials and techniques, you can transform your artwork into a tactile experience that captivates and inspires. Remember, the journey of creating art is as important as the finished piece, so enjoy the process of layering textures and discovering new ways to express your creativity!
Q: What are some easy ways to start incorporating texture into my artwork?
A: Start with simple materials like textured papers or fabric scraps. Experiment with layering them and see how they interact with your paints and other mediums.
Q: Can I use everyday objects to create texture?
A: Absolutely! Items like sponges, combs, or even your fingers can be great tools for creating unique textures in your artwork.
Q: How do I ensure that the textures I add don’t overwhelm my artwork?
A: Balance is key. Start with a few textured elements and gradually build up. Step back frequently to assess how the textures work together and adjust as needed.
Using Gel Mediums
When it comes to mixed media art, gel mediums are your secret weapon. These versatile substances can do wonders for your artwork, allowing you to create a variety of textures and effects that can elevate your piece to a whole new level. Whether you’re looking to add depth, enhance adhesion, or create stunning surface finishes, gel mediums have got you covered. They come in various formulations, including gloss, matte, and even textured options, each offering unique benefits for your creative process.
One of the most exciting aspects of using gel mediums is their ability to act as both an adhesive and a texture creator. For instance, if you’re working on a collage, you can use a gel medium to secure your paper elements while simultaneously adding a glossy finish that makes your colors pop. Imagine layering vibrant papers and then applying a clear gel over the top to create a cohesive look that ties everything together. It’s like giving your artwork a protective shell while enhancing its visual appeal!
Another fantastic feature of gel mediums is their versatility. You can mix them with various paints, pigments, and even powders to achieve different effects. For example, combining a gel medium with acrylic paint can thicken the paint, allowing you to create textured brush strokes or even sculptural elements in your artwork. This is especially useful if you want to build up layers and create a sense of dimension in your piece. Imagine painting a smooth layer and then adding a thick, textured layer on top to create a striking contrast!
When working with gel mediums, it’s essential to experiment and find out what works best for your style. Here’s a quick overview of some common types of gel mediums and their uses:
| Type of Gel Medium | Characteristics | Best Used For |
|---|---|---|
| Gloss Gel Medium | Creates a shiny finish and enhances colors. | Collages and photo transfers. |
| Matte Gel Medium | Provides a non-reflective surface. | Layering and texturing without shine. |
| Heavy Gel Medium | Thick consistency for building texture. | Creating impasto effects and 3D elements. |
| Textured Gel Medium | Contains granules for added texture. | Adding dimension and interest to surfaces. |
To get the most out of your gel mediums, consider the following tips:
- Layering: Start with a thin layer of gel medium and gradually build up thickness for more pronounced textures.
- Mixing: Experiment with blending gel mediums with different types of paint to discover new textures and finishes.
- Application: Use various tools, such as brushes, palette knives, or even your fingers, to apply the gel medium and create unique effects.
In conclusion, gel mediums are a fantastic addition to any mixed media artist's toolkit. They not only enhance the visual appeal of your work but also provide endless opportunities for experimentation and creativity. So grab some gel mediums, unleash your imagination, and watch your mixed media artworks come to life in ways you never thought possible!
Q: What is a gel medium?
A: A gel medium is a versatile substance used in mixed media art that can act as an adhesive, a paint extender, and a texture creator.
Q: Can I mix gel mediums with paint?
A: Yes! Mixing gel mediums with paint can enhance the texture and finish of your artwork.
Q: How do I apply gel mediums?
A: You can apply gel mediums with brushes, palette knives, or even your fingers, depending on the effect you want to achieve.
Adding 3D Elements
In the vibrant world of mixed media art, can truly elevate your creations, transforming them from flat images into dynamic experiences. Imagine walking through a gallery where the artwork seems to reach out to you, inviting you to interact with it. That's the power of three-dimensional components! By integrating objects that pop out from the surface, you can create a sense of depth that captivates viewers and encourages them to explore your work more closely.
So, how do you go about incorporating these exciting elements? First, consider the materials you want to use. Found objects, such as buttons, fabric scraps, or even natural elements like twigs and stones, can be fantastic additions. These items not only add physical dimension but also bring personal stories and textures to your artwork. You might think of them as the cherries on top of your artistic sundae, making each piece uniquely yours.
When integrating 3D elements, it's essential to keep balance in mind. You don’t want your artwork to feel cluttered or chaotic. Instead, aim for a harmonious composition where the three-dimensional objects complement the two-dimensional layers. For example, if you’ve painted a serene landscape, adding a small, textured tree branch could enhance the natural feel without overwhelming the viewer's eye. Less is often more when it comes to 3D additions.
Another technique to consider is layering the 3D elements with your existing materials. You can use gel mediums or heavy-bodied paints to adhere objects securely, ensuring they stay in place. Additionally, think about how these elements interact with light. Shadows cast by protruding components can create intriguing effects, adding yet another layer of depth to your artwork.
Lastly, don't forget about the finishing touches. Once your 3D elements are in place, sealing your artwork with a protective varnish can help preserve both the flat and dimensional aspects. This step is crucial, especially if you’ve used organic materials that might degrade over time. A good seal will not only protect your work but also enhance the vibrancy of the colors and textures.
To summarize, adding 3D elements to your mixed media artwork can significantly enrich the viewer's experience. By carefully selecting materials, maintaining balance, and considering the interplay of light and texture, you can create pieces that are not just seen but felt. So, unleash your creativity and let those three-dimensional components breathe life into your art!
Finishing Touches
When it comes to mixed media artwork, the are what truly elevate your piece from good to extraordinary. Just like a chef adds a sprinkle of salt to enhance the flavors of a dish, these final details can make a significant difference in the overall presentation and longevity of your creation. So, let’s dive into some essential techniques that will help you seal the deal on your masterpiece!
First and foremost, sealing your artwork is crucial. It protects your piece from dust, moisture, and fading. Depending on the materials you've used, you might opt for a spray varnish or a brush-on sealer. Each method has its own unique benefits:
| Sealing Method | Pros | Cons |
|---|---|---|
| Spray Varnish | Even coverage, quick drying | Can be difficult to control, requires outdoor use |
| Brush-On Sealer | More control, can be applied indoors | May leave brush strokes, longer drying time |
Next up is varnishing. This step not only offers protection but also adds a beautiful finish to your artwork. You can choose between a matte, satin, or glossy finish, depending on the look you want to achieve. A glossy finish can enhance colors and give a vibrant look, while a matte finish can create a more subdued, sophisticated appearance. Think of it like choosing the right outfit for an occasion; the finish you select can set the tone for how your artwork is perceived.
Now, let's talk about framing. A well-chosen frame can complement your mixed media piece, drawing attention to its unique features. When selecting a frame, consider the colors, textures, and overall aesthetic of your artwork. For instance, a rustic wooden frame might beautifully contrast with a vibrant, abstract piece, while a sleek metal frame could enhance a modern artwork. Remember, the frame is like the icing on the cake; it should enhance the artwork, not overshadow it.
Finally, don’t overlook the importance of presentation. Whether you’re displaying your artwork in a gallery or your living room, the way it’s presented can affect how it’s received. Consider using lighting to highlight your piece, or arrange it alongside other artworks to create a cohesive display. Just like a well-set table enhances a meal, a thoughtful presentation can elevate your mixed media art.
In summary, the finishing touches of your mixed media artwork are more than just afterthoughts; they are essential steps that can significantly impact the final outcome. By sealing, varnishing, framing, and presenting your art thoughtfully, you ensure that your creation not only looks stunning but also stands the test of time.
- What type of sealer should I use for my mixed media artwork?
It depends on the materials used. A spray varnish is great for quick application, while a brush-on sealer offers more control. - Can I use any frame for my artwork?
While you can technically use any frame, it's best to choose one that complements the colors and style of your artwork. - How do I choose the right finish for varnishing?
Consider the overall look you want to achieve; glossy finishes enhance colors, while matte finishes offer a more subdued appearance.
Frequently Asked Questions
- What is mixed media art?
Mixed media art is a creative expression that combines various artistic mediums, such as paint, collage, and found objects. It allows artists to explore different textures and visuals, resulting in unique and dynamic artworks.
- How do I choose the right materials for my mixed media project?
Selecting materials depends on the effect you want to achieve. Consider using a mix of paper, fabric, and paint. Experimenting with different combinations can lead to surprising results and enhance your creativity.
- What are the benefits of using textured papers in mixed media?
Textured papers can add depth and visual interest to your artwork. They create unique surfaces that can interact with other materials, making your piece more engaging and dynamic.
- Can I use found objects in my mixed media art?
Absolutely! Incorporating found objects can add a personal touch and a story to your artwork. Look for items that resonate with you and experiment with integrating them into your pieces.
- What are some effective layering techniques in mixed media?
Layering is key in mixed media art. You can use techniques like collage, painting over existing layers, and adding textures to create depth. Each layer can tell a part of the story, enhancing the overall impact of your work.
- How do I create texture in my mixed media artwork?
Texture can be achieved through various methods such as using gel mediums, pastes, or incorporating 3D elements. These techniques can elevate your artwork and make it more visually appealing.
- What are the finishing touches I should consider for my mixed media art?
Finishing touches are crucial for presentation. Consider sealing your artwork with varnish, framing it properly, and ensuring it’s well-protected. These details can enhance the longevity and visual appeal of your piece.


