
Easy Tutorial: Drawing a Realistic Human Face
Drawing a lifelike human face might seem daunting at first, but with the right techniques and a bit of practice, anyone can master this art form. This guide is designed for both beginners and advanced artists, providing step-by-step instructions that will transform your drawing skills. Whether you’re doodling in a sketchbook or working on a more serious project, understanding the fundamentals of facial proportions, materials, and shading is crucial. Are you ready to unleash your creativity and bring your portraits to life? Let’s dive into the fascinating world of realistic face drawing!
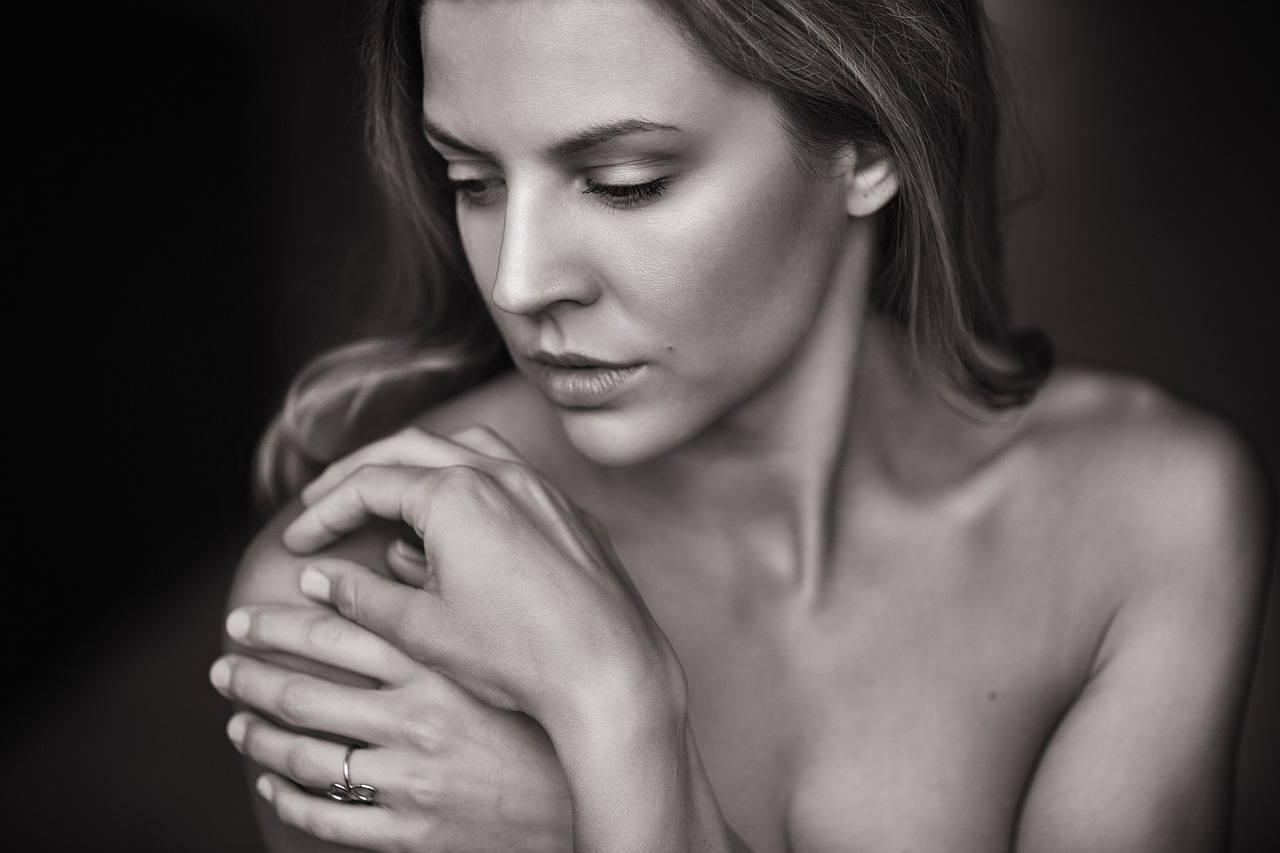
Before you even pick up a pencil, it’s essential to grasp the proportions of the human face. These proportions serve as the backbone of your drawing, ensuring that features are placed correctly and harmoniously. For instance, did you know that the eyes are typically positioned halfway down the head? This kind of knowledge is invaluable as it helps you create a balanced and realistic representation. The face can be divided into thirds, with the first third being from the hairline to the eyebrows, the second from the eyebrows to the base of the nose, and the last from the nose to the chin. Understanding these divisions will help you maintain accuracy in your sketches.
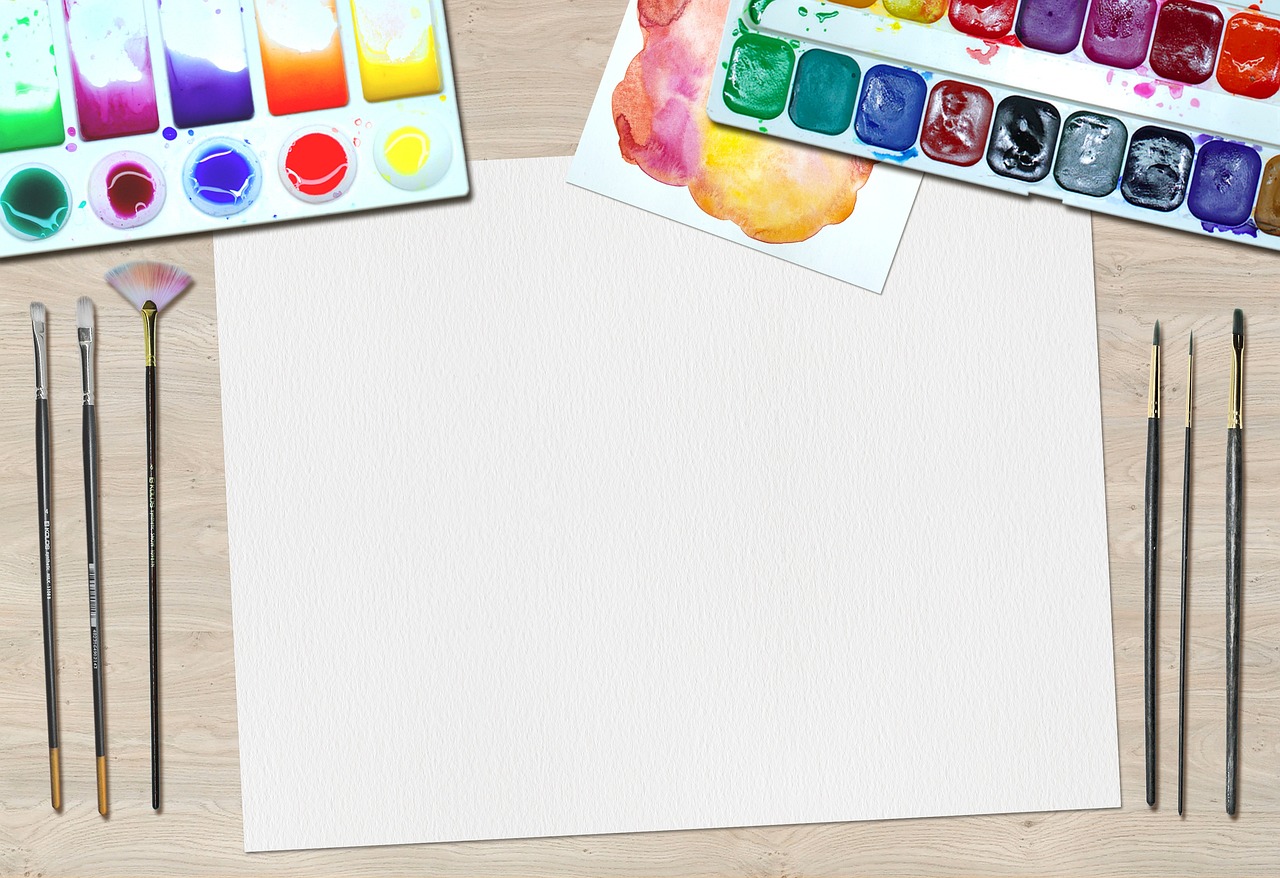
Now that you have a grasp of facial proportions, let’s talk about the materials you’ll need. The right tools can make a significant difference in your drawing experience and the quality of your work. Here’s a quick overview of what you might consider:
- Pencils: Different grades of pencils can help you achieve various effects. Hard pencils (H) are great for fine lines, while softer pencils (B) are perfect for shading.
- Paper: The texture and weight of the paper can influence your drawing. Smooth paper is ideal for detailed work, while textured paper can add depth.
- Erasers: A good kneaded eraser can help you lift graphite without damaging the paper.
With the right materials in hand, you’ll be well on your way to creating stunning portraits.
When it comes to pencil grades, understanding the difference between them is key to achieving the desired effects in your drawing. Here’s a quick breakdown:
| Pencil Grade | Characteristics | Uses |
|---|---|---|
| H (Hard) | Produces lighter lines | Fine details, initial sketches |
| B (Soft) | Creates darker, richer lines | Shading, darker areas |
| HB | Medium hardness | General purpose, outlines |
Another decision you’ll face is whether to use graphite or charcoal. Graphite is excellent for fine details and smooth shading, while charcoal can create rich, deep blacks and dramatic contrasts. If you’re looking for a softer, more expressive style, charcoal might be your best bet. On the other hand, if precision is your goal, stick with graphite.
The type of paper you choose can dramatically affect your drawing. For instance, smooth paper is great for detailed work, while textured paper can add an interesting dimension to your shading. Consider the weight of the paper as well; heavier paper can withstand more erasing and layering, which is perfect for refining your portrait.
Shading is where your drawing comes to life. To achieve smooth transitions and realistic textures, consider using tools like blending stumps and tortillons. These tools help you blend pencil strokes seamlessly, creating soft shadows and highlights that add depth to your work. A kneaded eraser can also be invaluable for lifting graphite to create highlights.
Once you have your materials ready, it’s time to sketch the basic outline of the face. Start by lightly drawing the shape of the head, then add guidelines to help you place the features accurately. This initial outline is crucial; it sets the stage for everything else. Don’t be afraid to make adjustments as you go along—drawing is a process!
Using guidelines is a fantastic way to ensure that your features are positioned correctly. Draw horizontal lines to indicate where the eyes, nose, and mouth will go. This method helps create a balanced look and prevents you from getting lost in the details too early.
After establishing your guidelines, take a step back and refine your outline. Adjust the shapes and proportions as needed, ensuring everything looks harmonious. This is your chance to make your drawing feel more like the person you’re trying to capture.
Now comes the fun part—adding the facial features! Each feature has its unique characteristics that can bring your portrait to life. Let’s break it down:
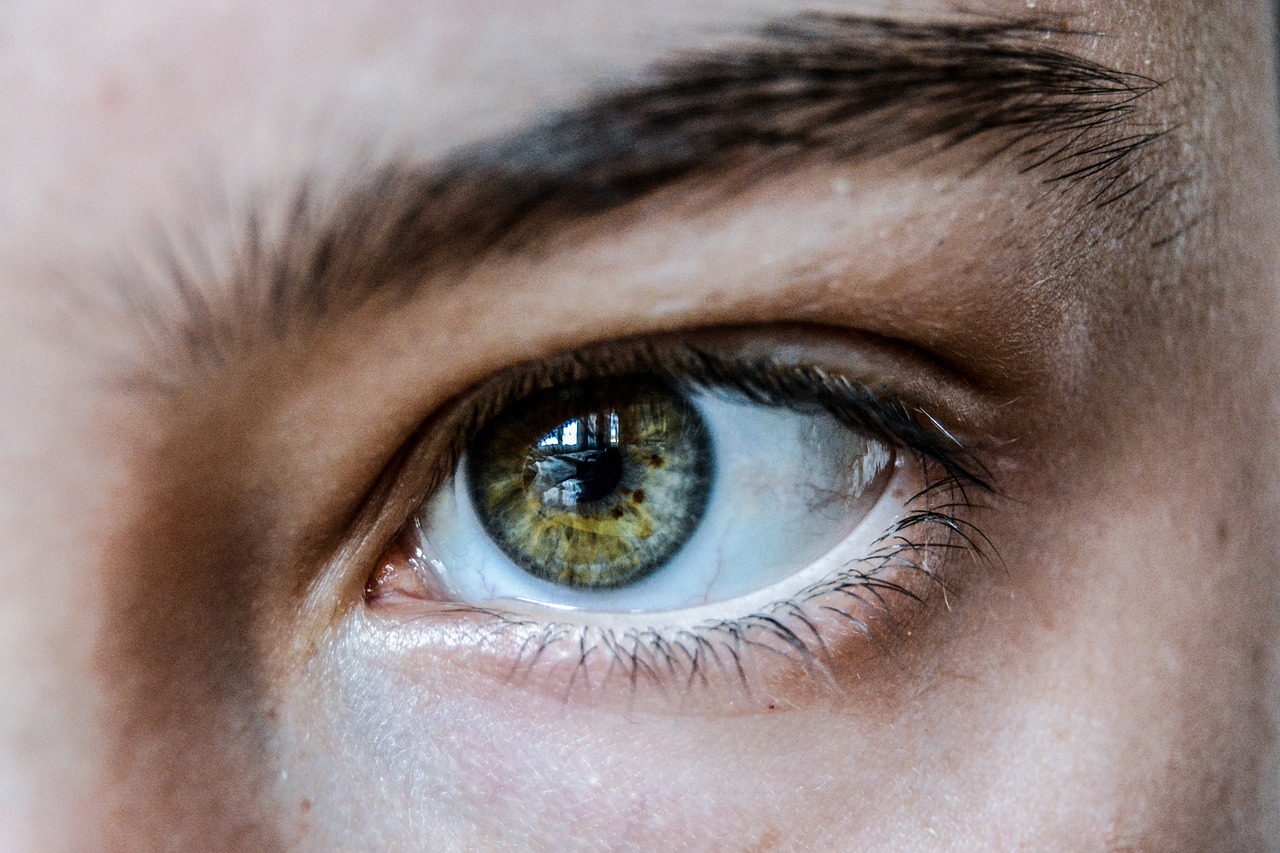
The eyes are often considered the windows to the soul, so it’s essential to get them right. Pay attention to the iris texture and reflections to create depth and emotion. A well-drawn eye can convey a range of feelings, making your portrait truly expressive.
The nose is another critical feature. Understanding the subtle curves and shadows that define different nose shapes will help you render this feature accurately. Experiment with different styles to find what works best for your drawing.
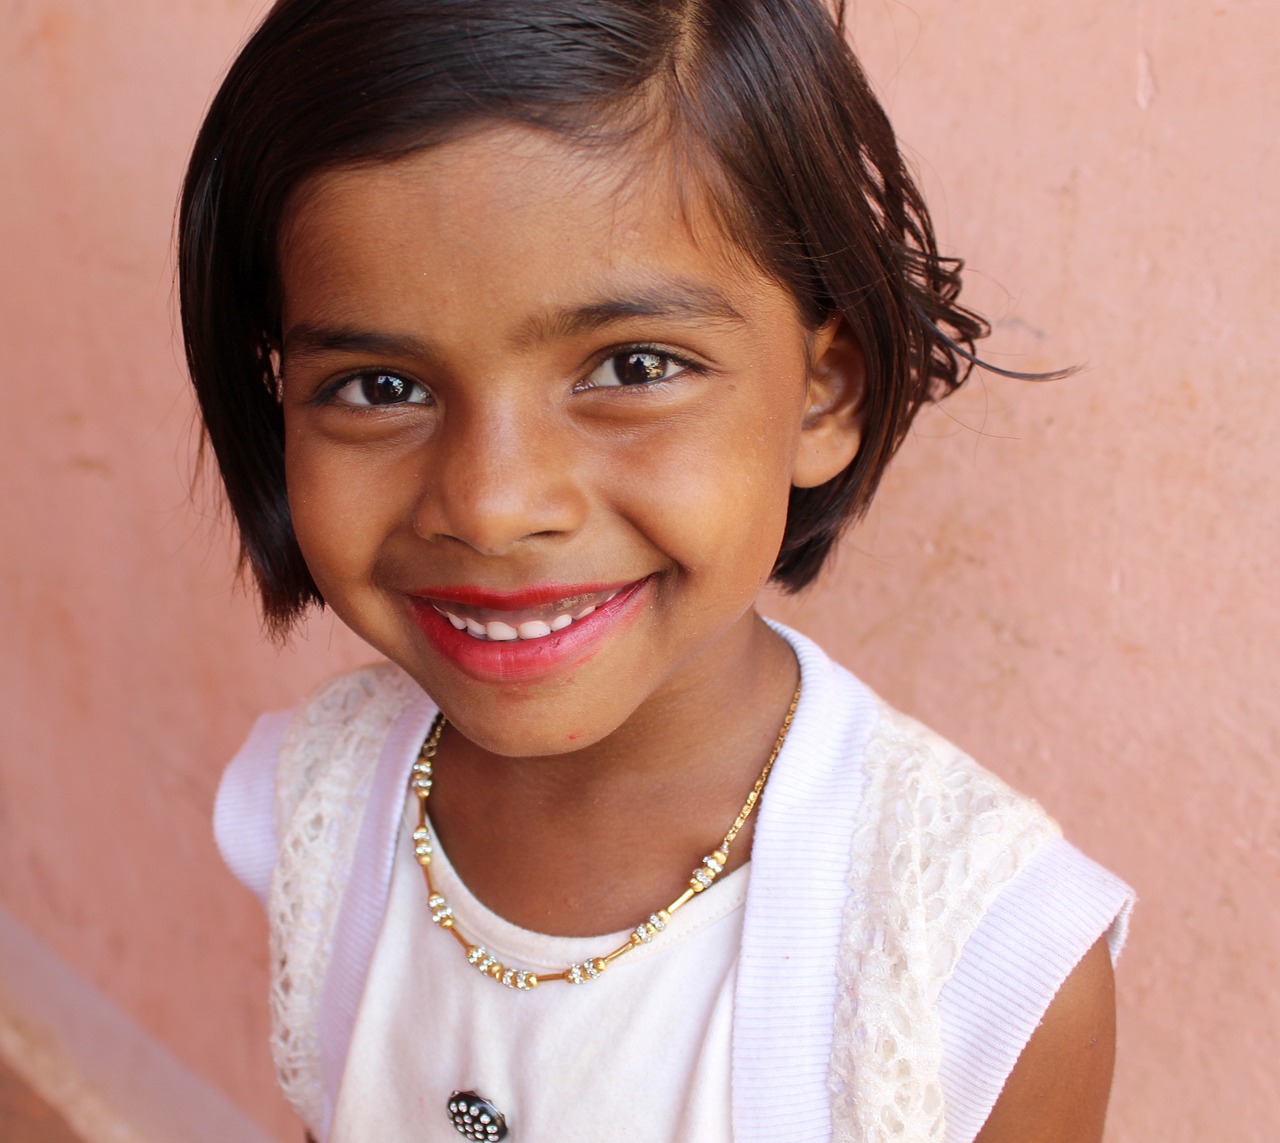
The mouth can convey a vast array of emotions, from joy to sadness. Focus on the lip shapes and how they interact with the rest of the face. A slight curve can change the entire expression of your portrait, so take your time with this feature.
Shading is where your drawing can truly come alive. By adding depth and dimension, you can create a three-dimensional appearance that draws the viewer in. Understanding how to manipulate light and shadow is key to achieving this effect.
Identifying your light source is crucial. The way light interacts with the face will determine where you place your highlights and shadows. Keep this in mind as you work; it will guide your shading process and enhance the realism of your portrait.
Mastering blending techniques is essential for achieving smooth transitions in your shading. Techniques like smudging and layering can help create realistic textures and depth. Practice these methods to see what works best for your style.
The finishing touches can make or break your drawing. After you’ve completed your portrait, take a moment to step back and assess your work. Are there areas that need more depth or highlights? This is your opportunity to refine your piece and elevate it to a professional level.
Focus on highlighting key areas of the face, such as the cheekbones and the bridge of the nose. These highlights can enhance realism and draw attention to the focal points of your portrait.
Finally, don’t underestimate the importance of a thorough review. Look for any inconsistencies or areas that may need correction. This step ensures that your drawing is polished and ready for presentation.
Q: What materials do I need to start drawing a human face?
A: You’ll need pencils (preferably a range of grades), quality paper, erasers, and optional blending tools like stumps or tortillons.
Q: How can I improve my facial proportions?
A: Practice sketching from reference photos and use guidelines to help maintain accurate proportions.
Q: What is the best way to add depth to my drawing?
A: Use shading techniques and consider the light source to create realistic highlights and shadows.
Q: How important are the final touches in my drawing?
A: Final touches are crucial as they can significantly enhance the overall quality and realism of your portrait.
Understanding Facial Proportions
When it comes to drawing a realistic human face, is absolutely crucial. The human face is a complex structure, and getting the proportions right can make the difference between a lifelike portrait and a flat, cartoonish representation. So, what exactly are these proportions? Well, let’s break it down!
First off, the face can be divided into three main sections—the forehead, the middle section (which includes the eyes and nose), and the lower part (where the mouth and chin are located). A common method to visualize this is by using a simple grid or guideline. Imagine drawing a vertical line down the center of the face, then adding horizontal lines to mark the placement of the eyes, nose, and mouth. Here’s a quick reference:
| Facial Feature | Proportion |
|---|---|
| Eyes | About halfway down the head |
| Nose | Bottom of the nose is typically one-third of the way down from the eyes to the chin |
| Mouth | Usually one-third of the way down from the nose to the chin |
Another crucial aspect is the distance between the features. For example, the distance between the eyes should be roughly the same as the width of one eye. This creates a balanced look and helps maintain symmetry in your drawing. Symmetry is key when you want to achieve a realistic appearance, so don’t skip this step!
Additionally, the shape of the face plays a significant role in achieving realism. Different face shapes—oval, round, square, and heart-shaped—have unique proportions that define their characteristics. Understanding these shapes will help you adapt your drawing techniques to capture the essence of the individual you are portraying.
Lastly, remember that while these guidelines are useful, every face is unique. Practice is essential. Use photographs or live models to observe how these proportions vary in real life. As you draw, always be willing to adjust and refine your understanding of these proportions. The more you practice, the more intuitive it will become!
- What are the basic proportions of the human face? The face is typically divided into thirds: forehead to eyebrow, eyebrow to bottom of the nose, and bottom of the nose to chin.
- How can I improve my understanding of facial proportions? Regular practice with live models and photographs can help. Additionally, studying anatomy books or online resources can provide valuable insights.
- Are there any tools to help with proportions? Yes! You can use grid methods, proportional dividers, or even software that overlays grids on images to help guide your drawing.

Choosing the Right Materials
When it comes to drawing a realistic human face, the materials you choose can make all the difference. Just like a chef needs the right ingredients to create a delicious meal, an artist must have the right tools to bring their vision to life. First and foremost, you’ll want to select high-quality pencils. These come in various grades, each serving a unique purpose. For instance, harder pencils (like H and 2H) are fantastic for fine lines and detailed work, while softer pencils (like B and 2B) are perfect for shading and creating depth.
But pencils are just the beginning. The type of paper you use can significantly impact your artwork. Different papers have different textures, weights, and finishes, which can either enhance or hinder your drawing process. For example, a smooth paper allows for clean lines, making it easier to sketch details, while textured paper can add a beautiful depth to your shading. It’s essential to experiment with various types to find what works best for your style.
Additionally, let’s not forget about erasers. A good artist knows that erasing is just as important as drawing. A kneaded eraser is a versatile tool that can help you lift graphite without damaging the paper, while a standard vinyl eraser is excellent for making precise corrections. Together, these materials create a solid foundation for your drawing.
Understanding the different types of pencils can elevate your drawing skills. Here’s a quick breakdown:
| Pencil Grade | Characteristics | Best Use |
|---|---|---|
| H | Hard, light marks | Fine details |
| B | Soft, dark marks | Shading and depth |
| HB | Medium hardness | General drawing |
By selecting the right pencil grade for your specific needs, you can achieve a range of effects that will bring your portrait to life. Whether you’re adding delicate features or bold shadows, understanding your tools is key.
Now, let’s dive into the debate of graphite versus charcoal. Both mediums have their unique characteristics and can be used to create stunning portraits. Graphite is known for its smooth application and fine details, making it a favorite among artists who enjoy precision. On the other hand, charcoal offers a rich, dark texture that can create dramatic contrasts and depth. It’s perfect for those who want to explore a more expressive style. Ultimately, the choice between graphite and charcoal boils down to your personal preference and the effect you wish to achieve.
When selecting paper, consider the following factors:
- Texture: Smooth papers are great for detailed work, while textured papers add depth to shading.
- Weight: Heavier papers can withstand more erasing and layering, ideal for detailed portraits.
- Finish: A matte finish reduces glare, allowing for better visibility of your work.
Experimenting with different papers can help you find the perfect match for your drawing style. Remember, the right paper can enhance the overall quality of your artwork.
Finally, let’s talk about essential tools for shading. Blending stumps and tortillons are fantastic for achieving smooth transitions between light and dark areas. These tools help you manipulate the graphite or charcoal, allowing for a more realistic portrayal of depth. Additionally, a kneaded eraser can be your best friend for creating highlights and correcting mistakes without damaging your paper.

Types of Pencils
When it comes to drawing a realistic human face, the type of pencil you choose can significantly impact the quality of your artwork. Pencils are graded based on their hardness and darkness, which are denoted by a combination of letters and numbers. Understanding these grades will help you select the right pencil for your drawing needs. Generally, pencils are divided into two main categories: hard and soft.
Hard pencils, labeled with an "H" (for example, H, 2H, 4H), produce lighter marks and are excellent for creating fine lines and detailed work. These pencils are ideal for sketching the initial outlines of your face, as they allow for precise control without leaving heavy marks on the paper. On the other hand, soft pencils, marked with a "B" (like B, 2B, 4B), create darker and richer lines, making them perfect for shading and adding depth to your portrait. The softer the pencil, the more pigmented the mark, which can help in achieving those dramatic contrasts necessary for a lifelike appearance.
Here’s a quick breakdown of pencil grades:
| Grade | Type | Use |
|---|---|---|
| H | Hard | Fine lines, detailed sketches |
| HB | Medium | General purpose, versatile |
| B | Soft | Shading, richer tones |
In addition to the hardness grading, you might also want to consider the texture of the pencil lead. Some artists prefer a smoother application, while others may enjoy the rougher texture that can provide a unique character to their drawings. Experimenting with different grades will not only enhance your skills but also help you discover your personal style.
Ultimately, the right pencil can be a game-changer in your artistic journey. So, whether you’re just starting or looking to refine your skills, remember that the pencil is your primary tool for translating your vision onto paper. Don't hesitate to try out various types until you find the perfect match for your drawing style!
- What pencil is best for beginners? - An HB pencil is often recommended for beginners as it provides a good balance between hardness and softness, making it versatile for various drawing techniques.
- Can I use colored pencils for realistic portraits? - Yes, colored pencils can be used to add color to portraits, but they require different techniques than graphite pencils.
- How do I choose the right paper for pencil drawing? - Look for paper that has a slight texture (like sketch paper) to help grip the pencil, and ensure it’s thick enough to handle shading without bleeding through.

Graphite vs. Charcoal
When it comes to drawing realistic human faces, the choice between graphite and charcoal can significantly affect your artwork's outcome. Each medium has its unique characteristics, and understanding these can help you decide which one is best suited for your style and the effects you want to achieve. Graphite, often found in traditional pencils, is known for its smooth application and fine detail capability. It allows for precise lines and subtle shading, making it an excellent choice for capturing intricate features like the delicate lines around the eyes or the soft curves of the lips.
On the other hand, charcoal offers a richer, darker tone that can create dramatic contrasts and bold expressions. This medium is particularly useful for achieving deep shadows and can be easily blended to create soft transitions. Charcoal can be messy, but it rewards artists with a dynamic range of textures and depths that are hard to replicate with graphite. To give you a clearer picture, here’s a quick comparison:
| Feature | Graphite | Charcoal |
|---|---|---|
| Texture | Smooth | Rough, varied |
| Shading | Fine details, subtle | Bold, dramatic |
| Control | High precision | Less control, more expressive |
| Ease of Blending | Moderate | High |
| Cleanliness | Less messy | Messy, requires care |
Ultimately, the choice between graphite and charcoal boils down to personal preference and the specific look you want to achieve. If you’re aiming for fine details and a polished finish, graphite might be your best bet. However, if you’re looking to create an expressive, moody portrait, charcoal could be the way to go. Experimenting with both mediums can also be beneficial; many artists find that combining the two can yield stunning results, allowing for both detailed precision and bold, expressive shading.
- Can I use both graphite and charcoal in the same drawing? Absolutely! Many artists blend the two to take advantage of their unique qualities.
- Which medium is better for beginners? Graphite is often recommended for beginners due to its ease of use and control.
- How do I fix mistakes in charcoal drawings? You can use a kneaded eraser to lift off charcoal or blend it to soften any errors.
- Is one medium more expensive than the other? Generally, both mediums are affordable, but high-quality charcoal can sometimes be pricier.
Paper Selection
When it comes to drawing a realistic human face, the type of paper you choose can significantly impact your artwork. Not all papers are created equal, and understanding the nuances of each can elevate your drawing experience. Think of paper as the canvas for your creativity; it can either enhance your work or hinder it. So, what should you consider when selecting the right paper for your portrait?
First off, the texture of the paper plays a crucial role in how your pencil interacts with it. Papers come in various textures, such as smooth, medium, and rough. A smooth paper is fantastic for fine details and allows for crisp lines, making it ideal for detailed facial features. On the other hand, a rough texture can add character to your drawing, lending itself well to expressive strokes and shading. It’s akin to choosing between a fine-tipped pen and a broad brush; each serves a different purpose in your artistic journey.
Next, consider the weight of the paper. The weight is measured in grams per square meter (gsm), and it affects how the paper holds up against multiple layers of pencil or charcoal. For detailed portraits, a heavier paper (around 200 gsm or more) is recommended as it can handle erasing and blending without warping. If you're using softer pencils or charcoal, heavier paper will prevent tearing and allow for smoother transitions in shading.
Finally, don’t overlook the finish of the paper. There are different finishes available, such as cold-pressed (textured) and hot-pressed (smooth). Cold-pressed paper is perfect for those who enjoy a bit of texture in their work, while hot-pressed paper is suited for detailed, clean lines. Each finish can dramatically change the way your pencil glides over the surface, affecting the final outcome of your drawing.
In summary, selecting the right paper is not just a trivial decision; it’s a fundamental step in your drawing process. Here’s a quick recap of key points to consider:
- Texture: Choose smooth for details, rough for expressive strokes.
- Weight: Opt for heavier paper (200 gsm+) for durability.
- Finish: Cold-pressed for texture, hot-pressed for clean lines.
By understanding these characteristics, you can select the perfect paper that complements your drawing style and helps you create a stunning, lifelike portrait. Remember, the right paper can be the difference between a good drawing and a great one!
Q: What type of paper is best for beginners?
A: For beginners, a medium-textured, heavyweight drawing paper (around 180-200 gsm) is ideal as it balances detail and durability.
Q: Can I use regular printer paper for drawing?
A: While you can use printer paper, it’s not recommended for detailed work, as it tends to warp and tear easily. Investing in proper drawing paper will yield better results.
Q: How does paper texture affect shading?
A: Paper texture affects how the pencil interacts with the surface. Smoother paper allows for finer shading, while textured paper can create interesting effects but may require more effort to achieve smooth transitions.
Essential Tools for Shading
When it comes to creating depth and dimension in your drawings, having the right tools for shading is absolutely crucial. While a simple pencil can do wonders, incorporating additional tools can elevate your artwork to new heights. One of the most valuable instruments in your shading toolkit is the blending stump. This handy tool, typically made from tightly rolled paper, allows you to blend pencil marks seamlessly, creating smooth transitions between light and dark areas. Imagine it as your magic wand that transforms harsh lines into soft shadows!
Another essential tool is the tortillon, which is similar to a blending stump but is often finer and can be used for more detailed work. It’s perfect for those intricate areas of your drawing where precision is key. You might also want to consider a kneaded eraser. Although it’s primarily used for corrections, this versatile tool can also be employed to lift graphite and create highlights in your shading. Its unique texture allows for gentle adjustments that can enhance the realism of your portrait.
In addition to these tools, having a variety of pencils at your disposal is important. Different pencil grades—from hard (H) to soft (B)—offer varying degrees of darkness and can be used strategically to achieve different effects in your shading. For example, using a softer pencil can create rich, dark shadows, while a harder pencil can help define the lighter areas. This interplay of light and dark is what makes a drawing come alive!
To give you a clearer understanding of these tools, here’s a quick comparison:
| Tool | Purpose |
|---|---|
| Blending Stump | For blending and smoothing out pencil marks |
| Tortillon | For detailed blending and precision work |
| Kneaded Eraser | For corrections and creating highlights |
Finally, don’t overlook the importance of good quality paper. The texture and weight of your paper can significantly impact how well your shading techniques work. A heavier paper with a bit of texture can hold more graphite and allow for richer shading, while smoother paper can help achieve finer details. So, before you dive into your next portrait, make sure you have the right tools on hand. They can make all the difference in transforming a basic sketch into a stunning piece of art!
Q1: What is the best pencil grade for shading?
A1: The best pencil grade depends on the effect you want to achieve. Softer pencils (B grades) are great for dark shadows, while harder pencils (H grades) are ideal for lighter areas and fine details.
Q2: Can I use my fingers to blend instead of tools?
A2: While using your fingers can work in a pinch, it’s often less effective than using blending tools. Tools like blending stumps provide more control and can produce cleaner blends.
Q3: How do I choose the right paper for shading?
A3: Look for heavier paper with a bit of texture, as it can hold more graphite and allow for richer shading. Experimenting with different types can help you find what works best for your style.
Sketching the Basic Outline
When it comes to drawing a realistic human face, the first step is to master the art of sketching the basic outline. This is where your journey begins! Think of this stage as laying the foundation of a house; if the foundation is shaky, the entire structure will be compromised. So, grab your pencil and let’s dive into the world of proportions and placements.
To start, it’s crucial to utilize guidelines. These are not just arbitrary lines; they are your roadmap to achieving a balanced and proportionate face. Begin by lightly sketching a vertical line down the center of your paper. This line will serve as the axis for aligning the features of the face. Next, draw a horizontal line across the center of the vertical line. This will help you position the eyes accurately. The eyes are typically located about halfway down the head, so this guideline is essential.
Now, let’s break down the proportions further. The human face can be divided into thirds: the top third is from the hairline to the eyebrows, the middle third from the eyebrows to the bottom of the nose, and the bottom third from the nose to the chin. To visualize this, you can create horizontal guidelines at these points. This method helps in maintaining symmetry and ensures that each feature is placed correctly. Don't hesitate to use a ruler if you need to; precision is key!
Next, it’s time to refine your outline. Look at your initial sketch and assess the proportions. Are the eyes too far apart? Is the nose too long? This is your opportunity to make adjustments. Use an eraser to lightly remove any lines that need correction, and redefine the shapes of the face, jawline, and hairline. Remember, the goal here is to create a solid blueprint that will guide you as you add more details later.
As you sketch, keep in mind that the human face is not a perfect geometric shape. It has curves, angles, and unique characteristics that make each person distinct. Use your observation skills to capture these nuances. For example, the width of the mouth should align with the center of the eyes, and the nose should sit comfortably between them. This attention to detail will pay off when you begin adding features.
Once you’re satisfied with your basic outline, take a step back and review your work. Does everything look proportional? Are the features aligned correctly? This moment of reflection is crucial as it allows you to catch any mistakes before you move on to the next steps. Remember, the outline is the backbone of your drawing, and a strong outline will lead to a more lifelike portrait.
Finally, don’t forget to keep your lines light! The initial sketch should be barely visible, as you’ll be building upon it with details and shading later. Think of your outline as a whisper of what’s to come, rather than a shout. This will make it easier to erase and refine as you progress in your drawing journey.
- How do I know if my proportions are correct? The best way to ensure correct proportions is to frequently measure against your guidelines and compare the distances between features.
- What if I make a mistake on my outline? Mistakes are part of the learning process! Use an eraser to gently remove any errors and adjust your lines as needed.
- Should I use a mechanical pencil or a traditional pencil? Both have their advantages! Mechanical pencils offer precision, while traditional pencils allow for softer lines and shading.
Starting with Guidelines
When it comes to drawing a realistic human face, starting with guidelines is absolutely crucial. Think of these guidelines as the scaffolding of a building; they provide the necessary support and structure for your masterpiece. By establishing a solid foundation, you can ensure that all the facial features are accurately positioned and proportionate, which is key to achieving that lifelike quality.
To begin, you'll want to lightly sketch a vertical line down the center of your page. This line serves as the central axis of the face, helping you maintain symmetry. Next, draw a horizontal line across the middle of the vertical line. This intersection point will be the location of the eyes, which are typically positioned about halfway down the head. You might wonder, "Why is this so important?" Well, the placement of the eyes can make or break the realism of your portrait.
From there, you can add more horizontal lines to indicate the placement of other features:
- **Eyebrows** should be drawn slightly above the eye line.
- **The bottom of the nose** typically sits about one-third of the way down from the eye line to the chin.
- **The mouth** is usually positioned about one-third of the way down from the nose to the chin.
After establishing these key points, you can outline the shape of the face. Most faces have an oval or heart shape, but you might want to adjust based on your subject's unique characteristics. Use soft, light strokes for your outline; this way, it's easier to make adjustments as you refine your drawing.
Another helpful tip is to visualize the face as divided into sections. Imagine a grid where each section corresponds to a feature. This method can help you maintain proportion and ensure that the features align correctly. For instance, the distance between the eyes should be roughly equal to the width of one eye. Sounds simple, right? But this attention to detail is what elevates your work from amateur to professional.
As you sketch, don’t hesitate to step back and assess your work from a distance. This gives you a fresh perspective and can highlight any areas that may need adjustments. Remember, art is not just about putting pencil to paper; it’s about observing and understanding the subject you are depicting.
In summary, starting with guidelines is a fundamental step in drawing a realistic human face. By carefully plotting out the proportions and placements of facial features, you lay the groundwork for a successful portrait. So grab your pencil, take a deep breath, and let those guidelines guide you toward creating something truly remarkable!
Q: Why are guidelines important in drawing a face?
A: Guidelines help to maintain proper proportions and symmetry, making it easier to position facial features accurately.
Q: How do I know if my proportions are correct?
A: A good rule of thumb is that the distance between the eyes should equal the width of one eye, and the bottom of the nose is typically one-third down from the eye line.
Q: Can I erase the guidelines after I'm done?
A: Yes, once you're satisfied with your final drawing, you can gently erase the guidelines to leave only the detailed features.
Q: What if I make a mistake while drawing?
A: Mistakes are part of the learning process! Use an eraser to correct them, and remember that practice makes perfect.

Refining the Outline
Once you have your basic outline sketched out, it's time to dive into the exciting process of refining that outline. This step is crucial because it sets the stage for all the details and depth you will add later. Think of this phase as sculpting a block of clay; you start with a rough shape, but the magic happens when you begin to carve out the finer details.
Start by stepping back and assessing your initial sketch. Are the proportions correct? Do the features align well with each other? It’s important to keep the overall structure in mind. You might want to use a mirror or take a photo of your drawing to see it from a different perspective. This can help you spot any discrepancies that may not be obvious when you’re looking at it up close.
As you refine the outline, focus on the following key aspects:
- Proportions: Make adjustments to ensure that the eyes, nose, and mouth are accurately placed. Remember, the eyes are typically positioned halfway down the head, and the distance between them is roughly the width of one eye.
- Shapes: Pay attention to the shapes of the features. For example, the nose can vary greatly in shape; some are more angular while others are softer. Capture these nuances to bring your drawing to life.
- Symmetry: While human faces are not perfectly symmetrical, they should have a sense of balance. Ensure that both sides of the face reflect this balance, making adjustments as necessary.
Refining the outline is also about adding character to your drawing. Consider the unique attributes of the person you’re drawing. Perhaps they have prominent cheekbones or a distinctive jawline. Emphasizing these traits will add personality and realism to your portrait.
Don't hesitate to erase and redraw as needed. This is part of the process! Use your eraser liberally to correct any mistakes or to lighten areas that need to be adjusted. A kneaded eraser can be particularly useful for this, as it allows you to lift graphite without damaging the paper.
Once you’re satisfied with the refined outline, lightly darken the lines that you want to keep. This will help you to distinguish between the areas that are finalized and those that are still in flux. Remember, refining the outline is not about perfection; it’s about creating a solid foundation for the details that will follow.
Q: How do I know if my proportions are correct?
A: A good rule of thumb is to compare your drawing to reference images or use a grid method to ensure accuracy. You can also measure distances between features against each other.
Q: What should I do if I make a mistake?
A: Mistakes are a natural part of the drawing process. Use an eraser to correct errors, or simply adjust your drawing by refining the outline as needed.
Q: How can I make my drawing more expressive?
A: Focus on the unique features of the person you're drawing and try to capture their emotions through subtle expressions in the eyes and mouth.

Adding Features: Eyes, Nose, and Mouth
When it comes to drawing a realistic human face, the features—eyes, nose, and mouth—are the stars of the show. Each element plays a pivotal role in conveying emotion and personality. So, let’s dive into the techniques that will help you capture these features with precision and life. Are you ready to bring your portrait to life?
The eyes are often said to be the windows to the soul, and for good reason. They can express a range of emotions, from joy to sorrow, and everything in between. To draw realistic eyes, start by understanding their anatomy. Pay attention to the shape of the eyelids, the curvature of the iris, and the reflection of light that gives the eye its sparkle. A well-placed highlight can make the eyes appear more lifelike. Don't forget to consider the eyelashes and eyebrows, as they frame the eyes and add to their expressiveness. Remember, the placement of the eyes should be about halfway down the head, and they should be roughly one eye's width apart.
Next up is the nose, which is often considered one of the more challenging features to draw. Its shape can vary widely from person to person, so it’s important to observe the unique characteristics of the nose you’re drawing. Start with a basic structure; sketch the bridge, nostrils, and tip. Then, focus on the subtle curves and shadows that define its shape. The nose can cast shadows that add depth, so be sure to use shading techniques to highlight these areas. A well-drawn nose can serve as the anchor for your entire portrait, so take your time to get it right.
Finally, let’s talk about the mouth. The mouth is not just a line on the face; it’s a dynamic feature that can change dramatically with emotion. When drawing the mouth, pay attention to the shapes of the lips and how they interact with the surrounding facial structure. The upper lip is typically thinner than the lower lip, and the corners of the mouth can rise or fall depending on the expression. To convey emotion, consider how the lips curve and the subtle lines that can form around them. Adding details like the texture of the lips and the shadows created by the chin can elevate your drawing significantly.
In summary, capturing the features of the face requires a keen eye and a steady hand. Here’s a quick recap:
- Eyes: Focus on anatomy, highlights, and framing.
- Nose: Observe unique shapes, shadows, and curves.
- Mouth: Pay attention to lip shapes and expressions.
By understanding the intricacies of these features, you can create a portrait that not only looks realistic but also resonates with emotion. So grab your pencils, and let’s get to work on making those features shine!
Q: What is the best way to practice drawing facial features?
A: The best way to practice is by studying real faces. Take photographs or use a mirror to observe different angles and expressions. Sketch regularly to improve your skills.
Q: How can I make my drawings look more lifelike?
A: Focus on details like shading, highlights, and the unique characteristics of each feature. Use reference images to guide your proportions and placement.
Q: What materials do I need to start drawing faces?
A: You’ll need a good set of pencils, quality paper, and erasers. Optional tools like blending stumps can help with shading.
Q: Is it necessary to draw guidelines when sketching a face?
A: Yes, guidelines are essential for maintaining proper proportions and ensuring that facial features are positioned accurately.

Drawing Realistic Eyes
When it comes to , capturing the intricate details and unique expressions can truly elevate your portrait. Eyes are often referred to as the "windows to the soul," and for good reason! They convey a wide range of emotions and can bring your artwork to life. To achieve this lifelike quality, it's essential to focus on the anatomy, texture, and reflections within the eyes.
Start by studying the basic structure of the eye, which consists of several key components:
- Iris: The colored part of the eye that gives it personality.
- Pupil: The black circular opening that allows light to enter.
- Cornea: The clear layer that covers the front of the eye.
- Eyebrow: The arch above the eye that adds expression and shadow.
To draw realistic eyes, begin with a light sketch of the eye's shape. Use soft, gentle strokes to outline the eyelids and the basic shape of the iris and pupil. Remember, the shape of the eye can vary significantly between individuals, so observe your reference closely. Once you have the basic outline, pay attention to the details that make each eye unique. This includes the way light reflects off the surface, the texture of the iris, and the subtle shadows around the eyelids.
Next, focus on the iris. The texture of the iris can be quite complex, with various lines and patterns. Use a combination of hard and soft pencils to create depth. Start with a medium pencil to sketch the overall shape and then use a softer pencil to add details and shading. Don't forget to include highlights! A small white dot or a tiny reflection can make the eye appear more lifelike.
As you move on to the pupil, make sure it's perfectly round and dark. The pupil should contrast sharply with the lighter iris, giving it a sense of depth. A common mistake is to make the pupil too large or too small, so always compare it to your reference image.
Finally, the eyelids and surrounding areas should not be overlooked. Pay attention to the folds and shadows that create depth. The upper eyelid typically casts a shadow on the eye, while the lower eyelid can reflect light. Use a blending tool or your finger to smooth out any harsh lines, creating a more natural transition between light and shadow.
In summary, drawing realistic eyes involves a keen observation of their structure and a delicate touch to capture their essence. With practice, you’ll find that your ability to portray emotion and character through the eyes will improve dramatically. Remember, the key is to take your time and pay attention to the small details that make each eye unique. Happy drawing!
Q1: How can I make my drawn eyes look more expressive?
A1: To make your drawn eyes more expressive, focus on the shape and angle of the eyelids, the size of the pupils, and the placement of highlights. Adjusting these elements can convey different emotions effectively.
Q2: What materials are best for drawing realistic eyes?
A2: A range of materials can work well, but many artists prefer using graphite pencils for fine details and charcoal for deeper shadows. Blending stumps or tortillons are great for smoothing out transitions.
Q3: How do I practice drawing eyes?
A3: Start by sketching from photographs or real-life references. Focus on different eye shapes and expressions. Regular practice and studying the anatomy will significantly improve your skills.
Capturing Nose Shape
When it comes to drawing a realistic human face, capturing the shape of the nose is crucial. The nose is a central feature that can significantly influence the overall likeness of your portrait. To achieve this, it's essential to understand the various shapes and structures that noses can take. Each nose has its unique characteristics, from the bridge to the tip, and these details can convey a lot about a person's identity and emotions.
Start by observing the anatomy of the nose. Notice how it is composed of different parts: the bridge, nostrils, and tip. Each of these elements can vary in size and shape, and they are affected by the angle at which you are viewing the face. For instance, a nose seen from below will appear different than one viewed from above. To help you visualize this, consider the following types of nose shapes:
- Straight Nose: Characterized by a straight bridge and a defined tip.
- Curved Nose: Features a slight curve along the bridge, often giving it a softer appearance.
- Flat Nose: Has a lower bridge and wider nostrils, commonly found in certain ethnicities.
- Hooked Nose: Exhibits a noticeable curve or hook at the tip, adding character to the face.
To accurately render the nose, start with a basic outline. Sketch a light shape that represents the nose's overall form, using simple geometric shapes as guides. For instance, you might begin with a triangle for the tip and rectangles for the bridge. Once you have the basic outline, refine it by adding curves and details that reflect the unique features of the nose you are drawing.
Next, focus on the shading to give your nose depth. Light and shadow play a significant role in how we perceive the nose's shape. Identify your light source and determine where the highlights and shadows will fall. Typically, the bridge of the nose is highlighted, while the sides and nostrils may be darker. Use smooth transitions in your shading to create a realistic effect. Blending techniques, like using a blending stump or your finger, can help achieve this.
Finally, don’t forget to add the nostrils. They often get overlooked but are essential for realism. Pay attention to their shape and how they connect to the tip of the nose. Nostrils can vary widely; some are round, while others are more oval or even slightly flared. Capturing these nuances will elevate your drawing and make it more lifelike.
In summary, capturing the shape of the nose is about observation and practice. By understanding its anatomy, practicing different shapes, and mastering shading techniques, you can create a nose that not only looks realistic but also adds character to your portrait. Remember, practice makes perfect, so keep sketching and refining your skills!
Q1: How can I improve my nose drawing skills?
A1: The best way to improve is through consistent practice. Study different nose shapes, practice sketching from references, and pay attention to light and shadow.
Q2: What materials are best for drawing noses?
A2: Use pencils with varying hardness for detailed work. Graphite is excellent for fine lines, while charcoal can provide richer shadows.
Q3: Should I focus on the nose before other facial features?
A3: It’s often best to sketch the entire face lightly first. Once you have the proportions right, you can focus on the nose and other features.
Expressive Mouth Techniques
When it comes to drawing a human face, the mouth is one of the most expressive features that can convey a wide range of emotions. Whether it's a subtle smile or a broad grin, capturing the essence of the mouth requires a keen eye for detail and a solid understanding of its structure. Start by observing how the lips curve and how they interact with the surrounding facial features. The mouth is not just a flat line; it has depth and volume that can be enhanced with thoughtful shading and line work.
To effectively draw a mouth, consider the following key aspects:
- Lip Shape: Lips come in various shapes and sizes. Some are full and plump, while others are thin and delicate. Pay attention to the unique characteristics of the lips you are drawing. For instance, the upper lip typically has a pronounced cupid's bow, while the lower lip is often fuller.
- Expression: The mouth changes shape depending on the emotion being expressed. A smile will stretch the lips outward, while a frown will pull them down. Practice sketching different expressions to understand how the mouth transforms with emotion.
- Details: Focus on the subtle details that make the mouth realistic. This includes the texture of the lips, the way light reflects off them, and the shadows created by the curves of the mouth. These details can be achieved through shading techniques that add depth and dimension.
One effective technique for drawing the mouth is to start with a simple outline. Begin by sketching the basic shape of the lips, ensuring that you maintain proportionality with the rest of the face. Once the outline is in place, gradually add details such as the texture of the lips and the subtle changes in their shape as they express different emotions.
Another important aspect to consider is the relationship between the mouth and other facial features. The position of the mouth should complement the eyes and nose, creating a harmonious balance. For example, when drawing a smiling face, the corners of the mouth should rise slightly, and the eyes should reflect that joy, perhaps with a slight squint or sparkle.
Shading plays a crucial role in bringing the mouth to life. Using a variety of shading techniques, such as hatching, cross-hatching, and blending, can create the illusion of volume. Pay special attention to the highlights on the lips, as they can accentuate their fullness and make them appear more lifelike. Remember that the light source will influence where the shadows and highlights fall, so always consider this when shading.
In conclusion, mastering expressive mouth techniques requires practice and observation. Spend time studying photographs or real-life subjects to understand how the mouth behaves in different situations. With dedication and a focus on the details, you can create mouth expressions that truly resonate with the viewer, adding depth and emotion to your portraits.
Q: How can I make my mouth drawings look more realistic?
A: To enhance realism, focus on the details such as the texture of the lips, the play of light and shadow, and the subtle nuances of expression. Practice drawing from life or reference photos to capture these elements accurately.
Q: What materials are best for drawing lips?
A: Graphite pencils are excellent for detailed work, while colored pencils or pastels can add vibrancy to your drawings. Experiment with different mediums to find what works best for your style.
Q: How do I practice drawing different expressions?
A: A great way to practice is to look at reference images of people showing various emotions. Try to replicate those expressions in your sketches, paying close attention to how the mouth changes shape with each emotion.

Shading Techniques for Depth
When it comes to drawing a realistic human face, shading is your best friend. It’s the magic that transforms a flat sketch into a lifelike portrait, adding depth and dimension that can truly captivate your audience. To master shading, you need to understand how light interacts with the features of the face. Think of light as a sculptor, carving out the contours of the cheeks, the bridge of the nose, and the hollows under the eyes. By mastering shading techniques, you can create that illusion of three-dimensionality that makes your drawing pop off the page.
First and foremost, you must identify your light source. This is crucial because it dictates where the highlights and shadows will fall. Imagine the sun shining on your face; it creates bright spots on the forehead and cheekbones while casting shadows in the eye sockets and under the chin. To practice, you might want to set up a simple still life with a lamp positioned at various angles. Observe how the light affects the shapes and textures, and try to replicate that in your drawing.
Next, let’s dive into some effective blending techniques that can help you achieve a smooth and realistic transition between light and shadow. Here are a few methods you can experiment with:
- Smudging: Using your fingers, a tissue, or a blending stump, gently smudge the graphite or charcoal to create soft edges.
- Layering: Build up your shadows gradually by layering multiple strokes of pencil. Start with a light touch and increase pressure as needed.
- Cross-hatching: This technique involves drawing intersecting lines to create texture and depth. The closer the lines, the darker the area will appear.
Each of these techniques can be used individually or in combination to create the desired effect. For example, you might start with layering to establish your shadows and then use smudging to soften harsh lines. Remember, the key to effective shading is to keep your strokes light and controlled, gradually building up the depth rather than going straight for the dark tones.
To further enhance the realism of your drawing, pay attention to the textures of the skin. Different areas of the face have varying textures, from the smoothness of the forehead to the rougher skin around the nose. Use your pencil to mimic these textures; for instance, you can create tiny dots or short strokes to represent pores and fine lines. This level of detail can significantly elevate the realism of your portrait.
Finally, don’t forget to take a step back and evaluate your work. Sometimes, after hours of shading, it’s easy to lose perspective. Look at your drawing from a distance to see if the shadows and highlights are balanced. Adjust as necessary, and don’t be afraid to erase and redefine areas that need more contrast. This final review process is essential in achieving a polished and professional-looking portrait.
Q: What is the best pencil for shading?
A: Generally, softer pencils (like 2B to 6B) are better for shading as they produce darker marks, while harder pencils (like H to 2H) are great for fine details and lighter areas.
Q: How do I know where to place shadows?
A: Observe where your light source is coming from. Shadows will fall on the opposite side of the light source, typically in the eye sockets, under the chin, and along the sides of the nose.
Q: Can I use colored pencils for shading?
A: Absolutely! Colored pencils can add a unique depth and vibrancy to your portraits, especially when layering colors to create shadows and highlights.

Understanding Light Sources
When it comes to drawing a realistic human face, is absolutely crucial. Light can dramatically alter the way we perceive shapes, textures, and even emotions in a portrait. Think of light as the artist's best friend—it can enhance the beauty of your work or, if misunderstood, can lead to flat and lifeless drawings. So, how do we harness this powerful tool? Let's dive in!
First off, it's important to identify the primary light source in your drawing. This could be natural light coming from a window, or artificial light like a lamp. The position of the light source will dictate where the highlights and shadows fall on the face. For example, if the light is coming from above, the forehead will be highlighted while the under-eye area may cast a shadow. This interplay creates depth and dimension, making your drawing feel more three-dimensional.
Next, consider the quality of light. Is it soft and diffused, or harsh and direct? Soft light, like that on a cloudy day, creates gentle shadows and smooth transitions, perfect for achieving a realistic look. On the other hand, harsh light can create stark contrasts and sharp shadows, which can add drama and intensity to your portrait. Each type of light has its own unique effects on the face, so experimenting with different lighting conditions can be a great way to discover what works best for your style.
As you continue to refine your understanding of light sources, remember to observe how they affect various facial features. For instance, the nose often casts a shadow on the upper lip, while the cheekbones may catch the light, creating a beautiful highlight. Pay attention to these subtle nuances; they can significantly enhance the realism of your drawing. To help visualize this, consider the following table:
| Light Source Position | Effect on Features |
|---|---|
| Above | Highlights on forehead, shadows under chin |
| Side | Strong shadows on opposite side of the face |
| Below | Unusual highlights, can create a dramatic effect |
Finally, practice is key! Try setting up a still life with a face model or a photograph under different lighting conditions. Observe how the light shapes the features, and then replicate that in your drawing. Remember, the more you practice, the better you’ll become at capturing the essence of light in your artwork.
In summary, understanding light sources is not just about knowing where the light comes from—it's about recognizing how it interacts with the human face to create depth, emotion, and realism. So grab your pencil, set up your light, and start experimenting. Your portraits will thank you!
- What is the best light source for drawing? Natural light is often preferred for its softness, but artificial light can also work well depending on the effect you want to achieve.
- How can I practice understanding light? Set up a simple still life with a light source and draw it from different angles to see how light affects the shapes.
- Should I always draw with the same light source? Not necessarily! Experimenting with different light sources can help you learn how to adapt your drawing technique.

Blending Techniques
Blending techniques are essential for creating smooth transitions and realistic textures in your drawings, especially when it comes to shading the human face. The goal is to make your artwork look lifelike, and mastering blending can take your skills to the next level. Imagine trying to create the soft shadows on a cheek or the delicate highlights on the nose; without effective blending, these features can appear harsh and unrealistic. So, let’s dive into some of the most effective blending techniques that can enhance your portrait drawing.
One of the most popular methods of blending is using your fingers. This technique allows for a natural, organic feel as you smudge the graphite or charcoal into the paper. However, it’s crucial to remember that using your fingers can sometimes lead to oily residue on the paper, which may affect the final outcome. To avoid this, consider using blending stumps or tortillons. These tools are essentially tightly rolled paper that can help you achieve a smoother finish without the risk of smudging your hands. They are perfect for reaching those intricate areas around the eyes and nose where precision is key.
Another effective blending technique involves layering. Start by applying a light layer of pencil or charcoal and gradually build up the intensity. This method not only adds depth but also allows for more control over the shading process. As you layer, remember to blend each layer before adding the next one. This creates a seamless transition between tones, giving your face drawing a three-dimensional effect. You might find that using a soft brush can also help in this layering process, as it can gently blend the materials without disturbing the underlying layers.
To illustrate these techniques, consider the following table that summarizes the various blending methods and their applications:
| Blending Technique | Application | Tips |
|---|---|---|
| Fingers | Creating soft shadows | Use sparingly to avoid residue |
| Blending Stumps | Detail work around features | Keep clean for best results |
| Layering | Building depth and dimension | Blend each layer before adding more |
| Soft Brush | Smoothing transitions | Use light strokes to avoid over-blending |
In addition to these techniques, it’s vital to understand the role of light in your blending process. The direction of your light source will dictate where highlights and shadows fall on the face. As you blend, keep an eye on how the light interacts with the features. For instance, the cheekbone will catch more light, requiring less blending in that area, while the shadows beneath the chin may need more attention to create depth.
Finally, practice is the key to mastering blending techniques. Spend time experimenting with different methods and materials to find what works best for you. Don’t hesitate to mix and match techniques; the beauty of art lies in its flexibility and personal expression. As you become more comfortable, you’ll find that blending can transform your drawings from flat sketches into dynamic, lifelike portraits.
Q: What is the best tool for blending?
A: It depends on your preference! Fingers, blending stumps, and soft brushes are all excellent options. Experiment to see which feels best for your style.
Q: Can I use regular paper for blending?
A: While you can use regular paper, choosing a textured paper can enhance your blending experience, as it holds the medium better and provides more control.
Q: How do I prevent smudging while blending?
A: To minimize smudging, consider using a fixative spray after completing layers or using a clean blending stump to avoid transferring excess graphite.
Final Touches and Refinements
When it comes to creating a realistic human face in your drawing, the final touches are where the magic truly happens. This is the stage where you get to elevate your artwork from a simple sketch to a stunning portrait that captures the essence of your subject. It’s not just about adding a few highlights here and there; it’s about refining every detail until it resonates with life. Think of it as the final coat of varnish on a beautifully crafted piece of furniture—it’s what brings out the richness of the wood and highlights the craftsmanship.
One of the most important aspects of this process is to highlight key areas of the face. Areas such as the cheekbones, the bridge of the nose, and the brow bone naturally catch the light and should be accentuated to add dimension and realism. You can achieve this by gently applying a lighter shade or using a kneaded eraser to lift graphite or charcoal, creating a soft glow. Remember, the goal is to enhance the features without making them look unnatural. A subtle touch can go a long way in making your portrait pop.
After you've highlighted the key areas, it’s time for a final review and corrections. This step is crucial, as it allows you to step back and assess your work from a distance. Look for any inconsistencies in proportions, shadows, or highlights. Sometimes, taking a break and coming back with fresh eyes can help you spot areas that need adjustment. Don't hesitate to make corrections; even the best artists often tweak their work right up until the last moment. It’s all part of the creative process!
To guide you through this final phase, here’s a quick checklist of things to consider:
- Are the proportions accurate?
- Do the highlights and shadows create a sense of depth?
- Is there enough contrast to make the features stand out?
- Have you captured the unique expressions and personality of your subject?
Once you’ve gone through this checklist, you might find areas that need a bit more focus. Perhaps the eyes need a touch more detail, or the lips could use a slight adjustment in shape. This is the time to make those final tweaks that will truly make your portrait shine. Remember, every artist has their own style, and what works for one might not work for another. Trust your instincts and don’t be afraid to experiment!
In conclusion, the final touches and refinements are where your drawing transforms into a lifelike representation. By carefully highlighting key areas and making necessary corrections, you can achieve a level of realism that not only impresses but also resonates emotionally with viewers. So grab your tools, take a deep breath, and let your creativity flow as you put those finishing touches on your masterpiece!
Here are some common questions that aspiring artists often have when it comes to drawing realistic human faces:
- How long should I spend on the final touches? It varies by artist, but typically, dedicating a few hours to refining your work can lead to significant improvements.
- Can I use colored pencils for the final touches? Absolutely! Colored pencils can add vibrancy and depth to your portrait if used correctly.
- What if I make a mistake during the final touches? Don't worry! Mistakes can often be corrected with careful erasing or by layering additional materials.
- Should I sign my artwork? Yes! Signing your artwork is a great way to claim your creation and showcase your talent.
Highlighting Key Areas
Highlighting key areas of the face is a crucial step in transforming a simple drawing into a realistic portrait. When you add highlights, you create a sense of depth and dimension that draws the viewer's eye to the most expressive parts of the face. Think of it as the finishing touch that brings your artwork to life, much like the final brushstrokes on a beautiful painting. But where should you focus your highlighting efforts?
First and foremost, the cheekbones are a fantastic place to start. These areas naturally catch light, giving the face a more sculpted look. To effectively highlight the cheekbones, use a lighter pencil or a blending tool to gently apply a soft glow along the top of the bones. This technique not only adds realism but also emphasizes the structure of the face.
Next, consider the bridge of the nose. This area also benefits from highlights, as it helps to define the nose's shape and adds a three-dimensional quality. Use a fine pencil to create a soft line down the bridge, and blend it lightly to avoid harsh contrasts. A well-highlighted nose can significantly enhance the overall appearance of your portrait.
Additionally, the forehead and the chin are areas that can also be highlighted. The forehead, especially near the hairline, can catch light, giving the face a youthful glow. Similarly, the chin can be highlighted to accentuate the jawline, providing balance to the facial features. Remember, the goal is to create a harmonious look, so use highlights sparingly and strategically.
As you work on highlighting, it's essential to keep in mind the light source in your drawing. The direction and intensity of the light will determine where the highlights should be placed. For example, if the light is coming from the left, the right side of the face will naturally have less light and therefore require less highlighting. This understanding will help you create a more cohesive and realistic portrait.
Finally, don’t forget to step back and assess your work. Sometimes, the best way to see if you’ve achieved the desired effect is to view your drawing from a distance. This can help you identify areas that may need additional highlights or adjustments. Remember, highlighting is not just about adding light; it’s about enhancing the overall expression and emotion of your portrait.
- What materials are best for highlighting? Soft pencils or blending tools like tortillons work well for creating smooth highlights.
- How do I know where to place highlights? Always consider your light source; highlights should be placed where the light naturally hits the face.
- Can I use erasers for highlighting? Yes! Kneaded erasers can be used to lift graphite and create highlights, especially in softer areas.

Final Review and Corrections
As you reach the final stages of your drawing, it's crucial to take a step back and engage in a thorough review of your work. This process is not just about looking at your portrait; it’s about critically assessing each element to ensure that every detail contributes to the overall realism and expressiveness of the face. Consider this your opportunity to make adjustments that can transform a good drawing into a great one.
Start by examining the proportions of your drawing. Are the features aligned correctly? Is the spacing between the eyes, nose, and mouth accurate? Sometimes, stepping away from your work for a few minutes can provide a fresh perspective, allowing you to spot discrepancies that may have gone unnoticed. You might find it helpful to use a mirror to view your drawing from a different angle, which can highlight areas needing correction.
Next, focus on the details. Look closely at the textures and shadows you’ve created. Are the highlights in the right places? Do the shadows add depth and dimension? You can use a kneaded eraser to lift some graphite for highlights or darken areas with a softer pencil to enhance contrasts. This technique can significantly elevate the three-dimensional quality of your portrait.
Additionally, pay attention to the emotional expression conveyed by the facial features. Does the mouth reflect the intended emotion? Are the eyes engaging and lifelike? Sometimes, slight adjustments to the curvature of the lips or the angle of the eyes can dramatically change the expression. Remember, the goal is to breathe life into your drawing, making it resonate with the viewer.
Lastly, don't underestimate the importance of final touches. These can include refining edges, enhancing highlights, and adding small details that make a big difference. Use a fine-tipped pencil for intricate details, such as eyelashes or the texture of the skin. This meticulous attention to detail can elevate your work from a simple drawing to a stunning piece of art.
In summary, your final review and corrections are essential steps in the drawing process. They allow you to refine your work, ensuring that every element harmonizes to create a lifelike representation of the human face. Embrace this stage as an opportunity to enhance your artistic expression and produce a portrait that truly captivates.
- How do I know if my proportions are correct? Use reference images to compare and adjust the proportions of your drawing, focusing on the distances between features.
- What should I look for during my final review? Check for alignment, detail accuracy, emotional expression, and depth of shading.
- Can I make corrections after I think I'm done? Absolutely! It's common to make adjustments even after you think the drawing is complete.
- What tools are best for final touches? Use fine-tipped pencils for details, kneaded erasers for highlights, and blending tools for smooth transitions.
Frequently Asked Questions
- What are the essential proportions of the human face?
The human face is typically divided into sections to maintain proportions. The eyes are usually positioned halfway down the head, while the distance between the eyes is roughly the width of one eye. The bottom of the nose is about halfway between the eyes and the chin, and the mouth sits a third of the way down from the nose to the chin. Understanding these proportions is key to achieving a realistic likeness.
- What materials do I need to draw a realistic human face?
To create a lifelike portrait, you'll need a range of materials. Essential items include high-quality pencils (both hard and soft), various types of paper (smooth for detailed work and textured for depth), and erasers for corrections. Additionally, tools like blending stumps and tortillons can help you achieve smooth shading and transitions.
- How do I start sketching the basic outline of a face?
Begin by lightly sketching the basic shape of the head using simple geometric forms. Use guidelines to mark the placement of the eyes, nose, and mouth, ensuring everything is proportional. This foundational step is crucial as it sets the stage for refining your outline and adding details later on.
- What techniques can I use to draw realistic eyes?
When drawing eyes, focus on their anatomy. Pay attention to the iris texture, reflections, and the eyelids' shape. Use shading to create depth, making the eyes appear more lifelike. Remember, the eyes are often considered the windows to the soul, so capturing their expression is vital!
- How can I add depth to my drawing with shading?
To add depth, identify your light source and understand how it interacts with the facial features. Use various shading techniques like smudging, layering, and cross-hatching to create realistic highlights and shadows. This will help your drawing pop and give it a three-dimensional feel.
- What are the final touches I should consider for my portrait?
Final touches can make or break your drawing! Focus on highlighting key areas such as cheekbones and the bridge of the nose to enhance realism. Don’t forget to review your work for any corrections or adjustments, ensuring that every detail is polished before you consider it complete.


