
Acrylic Pour Art: A Comprehensive Guide
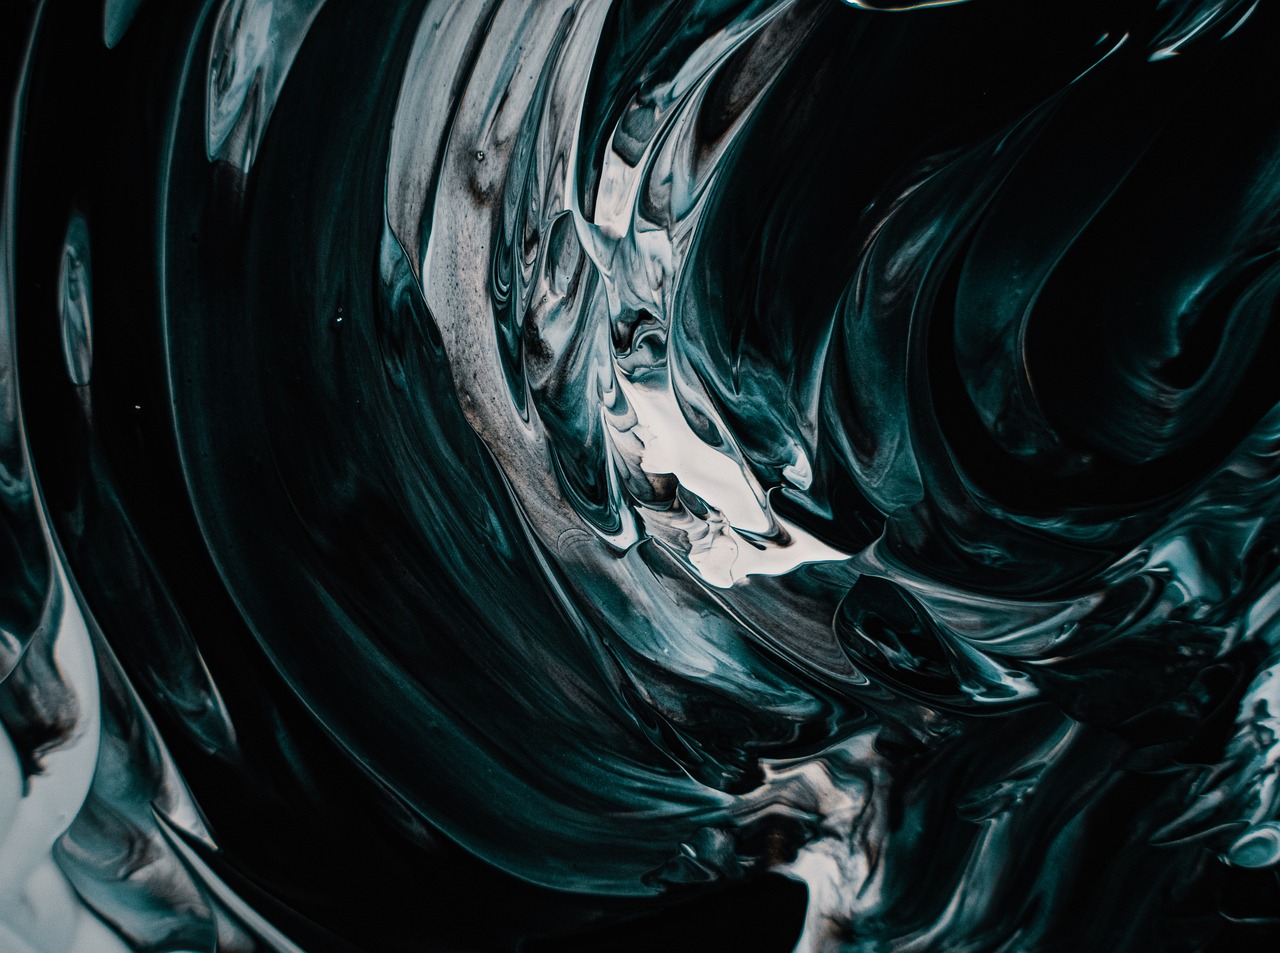
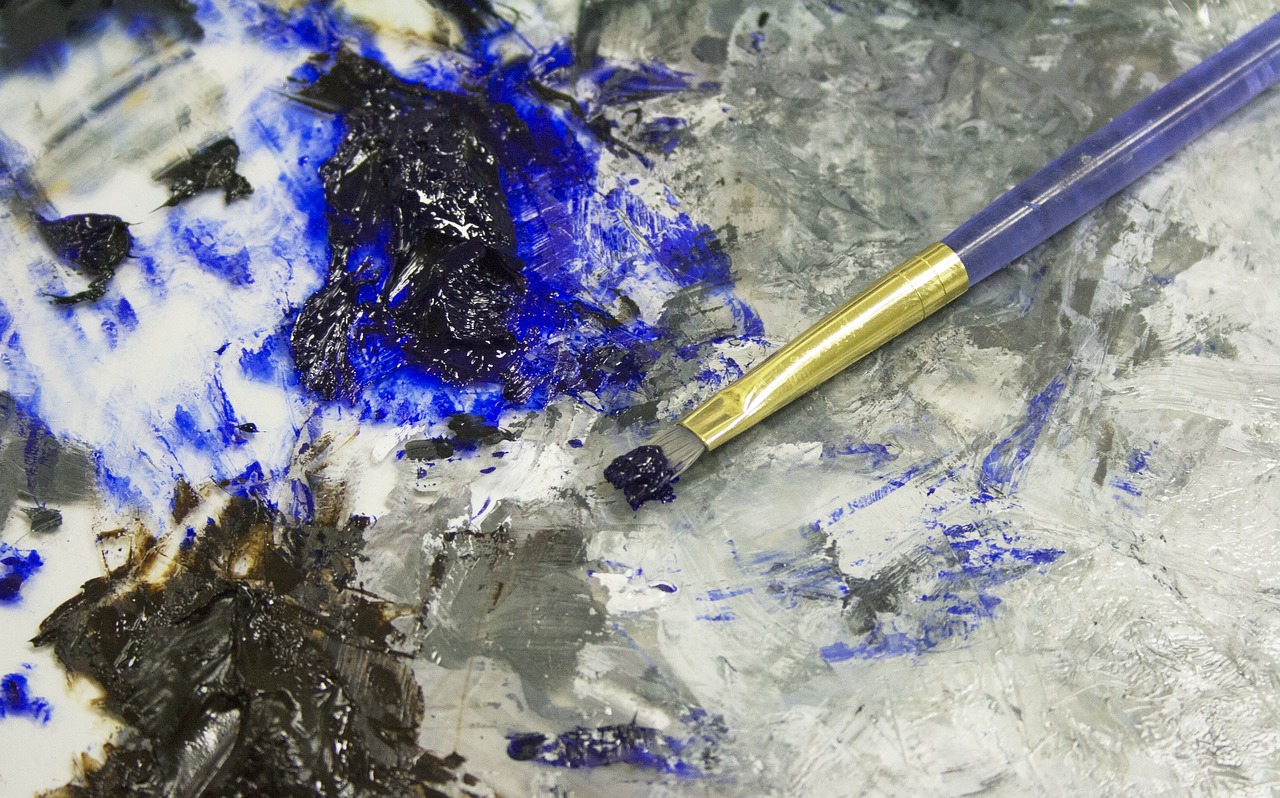
Acrylic pour art is not just a trend; it’s a vibrant explosion of color and creativity that has captivated artists and hobbyists alike. Imagine a canvas coming to life with swirling hues and mesmerizing patterns, each piece telling its own unique story. This art form allows anyone, regardless of skill level, to create stunning fluid paintings that evoke emotion and wonder. Whether you're a seasoned artist or a complete beginner, the world of acrylic pouring offers a thrilling journey into the realm of abstract art.
In this guide, we will dive deep into the techniques, materials, and tips you need to embark on your acrylic pouring adventure. From understanding the various pouring methods to selecting the right paints and tools, we’ll cover it all. With a splash of creativity and a dash of experimentation, you’ll be able to produce artwork that not only captivates the eye but also inspires your inner artist.
Are you ready to explore this colorful universe? Let’s pour our way through the essential elements of acrylic pour art, ensuring you have all the knowledge and inspiration to create your masterpieces. So grab your paints, prepare your canvas, and let’s make some magic!
Acrylic pouring encompasses a variety of techniques that can produce different effects and styles. Each method has its own charm and can dramatically alter the outcome of your artwork. Some popular techniques include:
- Dirty Pour: This technique involves mixing multiple colors in a single cup before pouring them onto the canvas, resulting in a beautiful blend of colors.
- Flip Cup: In this method, you fill a cup with layers of paint, then flip it onto the canvas, allowing the paint to flow out and create unique patterns.
- Puddle Pour: This technique focuses on pouring paint directly onto the canvas in puddles, allowing each color to interact with the others, creating stunning effects.
Understanding these differences is crucial for achieving successful results in your acrylic pouring projects. Experimenting with these techniques will enable you to discover what resonates with your artistic vision.
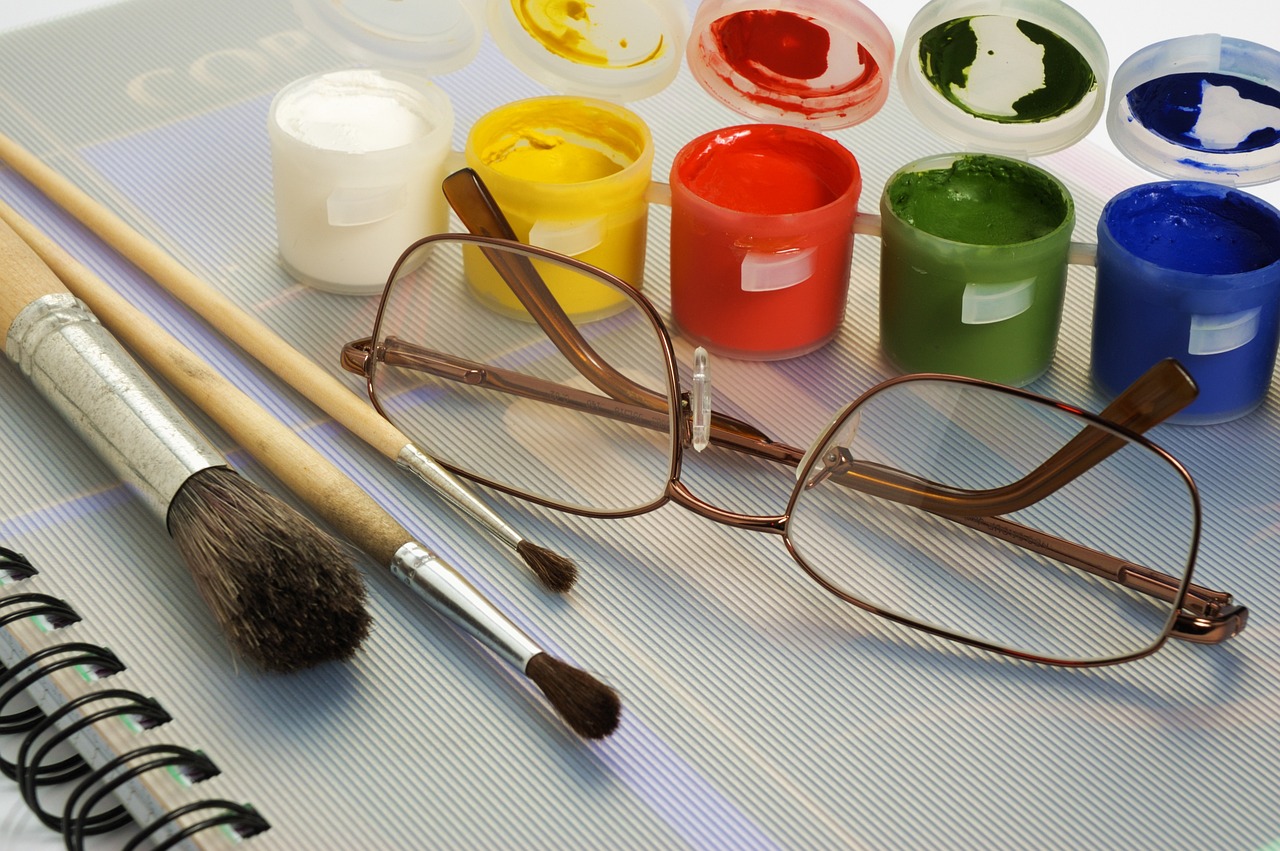
To create breathtaking acrylic pour art, you’ll need to gather a few essential materials. The right combination of paints, pouring mediums, and tools will set you up for success. Here’s a breakdown of what you’ll need:
Selecting the right acrylic paints is critical for achieving the desired effects in your artwork. There are various brands and types available, each with different viscosities and color options. When choosing your paints, consider the following:
- Viscosity: Thicker paints may require more pouring medium to achieve the right flow, while fluid acrylics are ready to pour.
- Opacity: Transparent colors can create stunning layering effects, while opaque paints provide bold coverage.
- Color Palette: Choose a harmonious color scheme that excites you and complements your artistic style.
Pouring mediums are essential for enhancing the flow and finish of your artwork. They allow the paint to move smoothly across the canvas and help prevent cracking as the paint dries. Some popular pouring mediums include:
- Liquitex Pouring Medium: Known for its excellent flow and clarity.
- Floetrol: A paint conditioner that can also be used as a pouring medium.
- Glue and Water Mixture: A DIY option that can work well for beginners.
Having the right tools can significantly improve your pouring experience. Here are some must-have items:
- Canvas or Wood Panel: Your chosen surface to pour on.
- Cups for Mixing: Use plastic or paper cups for easy cleanup.
- Stir Sticks: Essential for mixing your paints and mediums.
- Drop Cloths: To protect your workspace from spills.
A well-organized workspace is crucial for acrylic pouring. Setting up your area to minimize mess and optimize your creative process will make a world of difference. Consider these tips:
- Cover your work surface with a drop cloth or plastic sheeting.
- Have all your materials within reach to avoid interruptions.
- Ensure good ventilation, especially if using silicone or other additives.
Once you’ve mastered the basics, it’s time to explore various techniques that can lead to stunning and original results. One such method is the swipe technique, where you use a tool to swipe across the paint, creating beautiful textures. Additionally, incorporating silicone oil can help form captivating cells in your artwork.
Silicone oil can create beautiful cells in your artwork, adding depth and intrigue. To use it effectively, add a few drops to your paint mixture and stir gently to avoid breaking the surface tension. The right amounts and techniques will help you achieve the best results, allowing those mesmerizing cells to emerge as your painting dries.
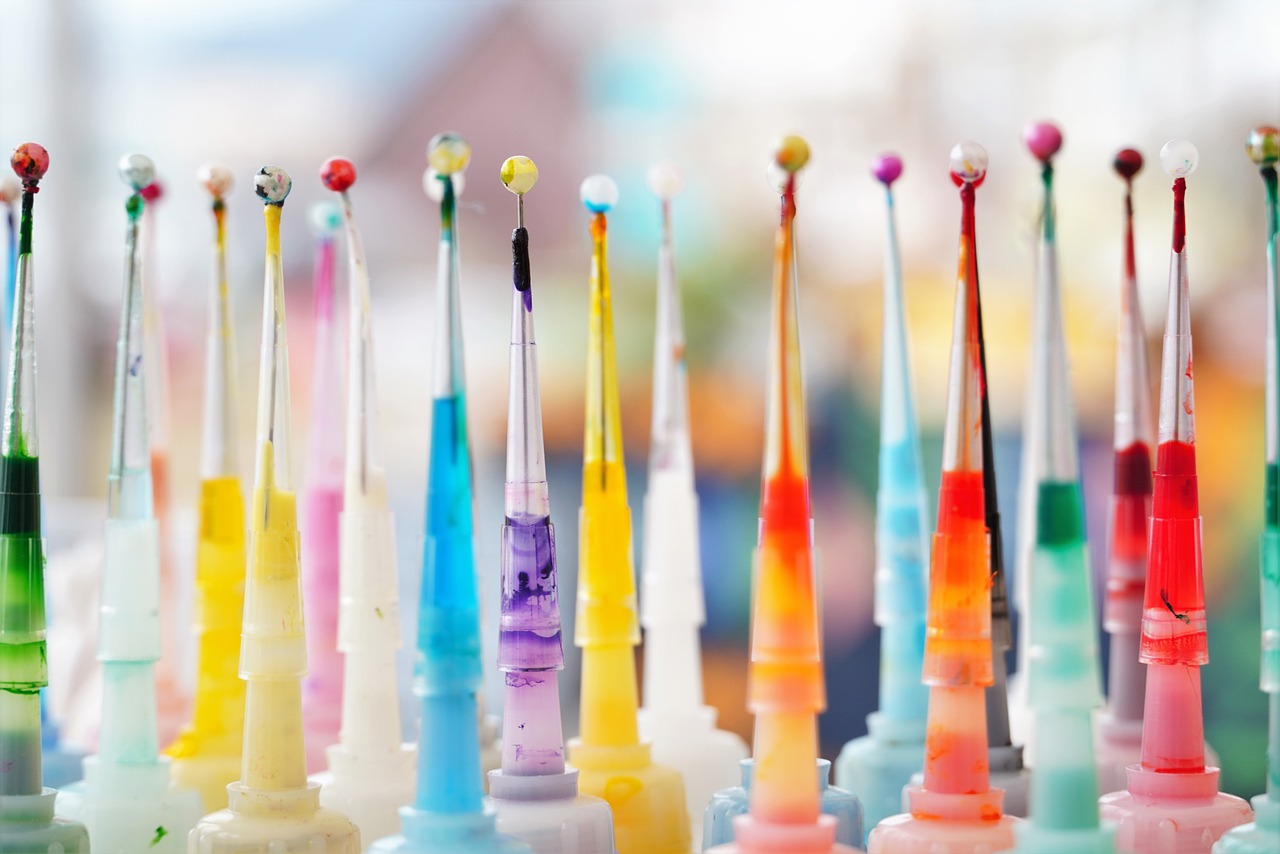
Color choice is fundamental in acrylic pour art. Experimenting with different color combinations can lead to harmonious or contrasting palettes that enhance the visual appeal of your fluid paintings. Try to balance warm and cool colors, or use complementary colors to create striking contrasts that draw the viewer's eye.
After pouring, it’s essential to finish and preserve your artwork properly. Allow your piece to dry completely, which can take anywhere from a few hours to several days, depending on the thickness of the paint. Once dry, consider applying a varnish to protect the surface and enhance the colors. Store your artwork in a cool, dry place, away from direct sunlight, to ensure it remains vibrant and intact for years to come.
Q: How long does it take for acrylic pour art to dry?
A: Drying time can vary based on the thickness of the paint and environmental conditions, but typically it can take anywhere from 24 hours to a week.
Q: Can I use regular acrylic paint for pouring?
A: Yes, but you may need to mix it with a pouring medium to achieve the desired consistency and flow.
Q: What surfaces can I pour on?
A: You can pour on canvases, wood panels, ceramic tiles, and even glass, as long as the surface is prepared appropriately.
Q: How do I clean up after pouring?
A: Clean up immediately while the paint is still wet. Use soap and water for tools and surfaces, and dispose of any used materials responsibly.
Understanding Acrylic Pouring Techniques
Acrylic pouring is not just a technique; it's a mesmerizing dance of colors and creativity that invites you to explore a world of fluid artistry. Each method brings its own flair, allowing artists to create unique masterpieces that captivate the eye. Whether you're a seasoned artist or a curious beginner, understanding these techniques is essential for achieving stunning results. Let's dive into some of the most popular methods, including the dirty pour, flip cup, and puddle pour.
The dirty pour technique involves mixing multiple colors directly in a single cup before pouring it onto your canvas. This method creates beautiful, swirling patterns as the colors blend and interact. Imagine pouring a rainbow into a puddle; the vibrant hues merge together, creating a stunning visual effect. The key here is to layer your colors carefully in the cup, starting with the heavier pigments at the bottom and the lighter ones on top. This way, when you pour, the colors will flow out in a captivating cascade.
Next up is the flip cup technique, which is like flipping a pancake but with paint! You start by filling a cup with your chosen colors, then place your canvas on top and flip the whole thing over. When you lift the cup, the paint spills out in a beautiful explosion of color. This technique can produce some of the most unpredictable and dynamic results, making each piece truly one-of-a-kind. To enhance this effect, consider adding a little silicone oil to your paints, which can create stunning cells as the paint dries.
Lastly, we have the puddle pour technique, where you pour different colors in puddles on the canvas without mixing them in a cup first. This method allows the colors to remain distinct, creating a layered effect that can be incredibly striking. Picture a serene pond with vibrant lily pads floating on top; that's the kind of beauty you can achieve with a puddle pour. The trick is to pour gently and control the flow to maintain those beautiful layers.
In addition to these core techniques, there are countless variations and combinations you can explore. For instance, you can try the swipe technique, where you use a tool like a spatula or a piece of cardboard to drag across the surface of the paint, creating stunning patterns and effects. The possibilities are endless, and that's what makes acrylic pouring so exciting!
As you experiment with these techniques, remember that practice is key. Each pour will teach you something new, and over time, you'll develop your own style and preferences. Don't be afraid to make mistakes; they often lead to the most beautiful surprises. Embrace the process, and let your creativity flow!
- What is the best surface for acrylic pouring? - Canvas is the most popular choice, but you can also use wood, ceramic tiles, or even glass.
- Can I use any acrylic paint for pouring? - It's best to use high-quality, fluid acrylic paints designed for pouring to achieve the best results.
- How do I prevent my paint from cracking as it dries? - Ensure you use the right pouring medium and allow your artwork to dry in a dust-free environment.
Essential Materials for Acrylic Pouring
To embark on your acrylic pour art journey, it's crucial to gather the essential materials that will set the foundation for your creative expression. Think of these materials as the ingredients in a recipe; without the right ones, your masterpiece might not turn out as expected. The good news is that most of these supplies are readily available and can be easily sourced from art supply stores or online retailers.
First and foremost, you'll need acrylic paints. The choice of paint is vital, as different brands and formulations can yield varied results. Look for paints that are specifically designed for pouring, as they tend to have a smoother consistency. It's advisable to experiment with a few different brands to find the ones that you enjoy working with the most. Keep an eye out for the following:
- Viscosity: The thickness of the paint can affect how it flows and interacts with other colors.
- Color Options: A wide palette allows for more creativity. Consider buying primary colors and mixing them to create unique shades.
Next up is the pouring medium. This magical substance is what transforms your regular acrylic paint into a fluid masterpiece. Pouring mediums help to enhance the flow and drying time of your paints, allowing for smoother application and more vibrant colors. Some popular pouring mediums include Liquitex Pouring Medium and Floetrol. These mediums can be mixed with your acrylic paint to achieve the desired consistency, which is typically around the viscosity of heavy cream.
Now, let’s talk about the tools you'll need to effectively mix, pour, and manipulate your paints. Here’s a brief rundown of the essential tools:
| Tool | Purpose |
|---|---|
| Mixing Cups | For combining paints and mediums. |
| Stir Sticks | For mixing your paint thoroughly. |
| Drop Cloth | To protect your workspace from spills. |
| Canvas or Wood Panel | The surface on which you'll pour your paint. |
| Heat Gun or Torch | To pop bubbles and create cells. |
Having the right tools can significantly enhance your pouring experience, making it smoother and more enjoyable. Once you have your paints, pouring mediums, and essential tools ready, it’s time to prepare your workspace. A well-organized area will help you focus on your creativity while minimizing mess and distractions.
In conclusion, gathering these essential materials is your first step toward creating stunning acrylic pour art. With the right paints, mediums, and tools at your disposal, you're well on your way to unleashing your inner artist. So, roll up your sleeves, and let the magic of acrylic pouring begin!
Q: What is the best type of acrylic paint for pouring?
A: Look for acrylic paints specifically labeled for pouring. They usually have a smoother consistency and better flow.
Q: Can I use regular acrylic paint for pouring?
A: Yes, but you'll need to mix it with a pouring medium to achieve the right viscosity for optimal results.
Q: How do I store leftover paint?
A: Store leftover paint in airtight containers to prevent it from drying out. Make sure to label them for future use!
Q: What surfaces can I use for acrylic pouring?
A: You can use canvases, wood panels, or even glass. Just make sure the surface is primed if necessary.
Q: How long does it take for acrylic pour art to dry?
A: Drying times can vary, but typically it takes 24 to 72 hours for your artwork to dry completely, depending on the thickness of the paint.
Choosing the Right Acrylic Paints
When diving into the vibrant world of acrylic pour art, one of the most critical decisions you'll make is choosing the right acrylic paints. The choice of paint can significantly affect the fluidity, color richness, and overall outcome of your artwork. It’s like picking the right ingredients for a recipe; the quality and type of paint can make or break your masterpiece!
First off, it's essential to understand that not all acrylic paints are created equal. There are various brands, each offering different viscosities and finishes. Some paints are thicker and provide more texture, while others are fluid and ideal for pouring. For beginners, it's often recommended to start with student-grade paints, which are more affordable but still deliver decent results. As you become more experienced, you might want to experiment with professional-grade paints that offer a wider range of colors and better pigmentation.
When selecting your paints, consider the following factors:
- Viscosity: This refers to how thick or thin the paint is. Thinner paints flow better for pouring, while thicker paints can create interesting textures.
- Color Options: Look for brands that offer a variety of colors, including metallics and iridescents, which can add an extra layer of depth to your artwork.
- Lightfastness: This is the paint's ability to resist fading when exposed to light. A higher lightfastness rating means your artwork will maintain its vibrancy over time.
One popular choice among acrylic pour artists is Liquitex Basics for its affordability and decent quality. Another excellent option is Golden Heavy Body Acrylics, known for their rich pigments and buttery consistency. If you’re looking for something more fluid, Fluid Acrylics from brands like Golden or Amsterdam can provide the perfect pourable consistency.
Ultimately, the best way to find your ideal paint is to experiment. Purchase a few different brands and types, and try them out in small batches. You might be surprised by how different each paint can behave during the pouring process. Remember, pouring art is all about exploration and creativity, so don’t be afraid to mix and match until you find what resonates with your artistic style!
Understanding Pouring Mediums
When it comes to acrylic pour art, pouring mediums are the unsung heroes that transform your paint into a fluid masterpiece. These mediums not only influence the flow of your paint but also affect the finish and drying time of your artwork. Understanding the different types of pouring mediums available can help you achieve the stunning effects you desire in your fluid paintings.
One of the most popular pouring mediums is liquid acrylic medium. This medium is designed to create a smooth, consistent flow, making it easier to achieve the desired effects in your pour. It reduces the viscosity of the paint, allowing it to spread more easily across the canvas. Moreover, it helps to maintain the vibrancy of your colors, preventing them from dulling as they dry.
Another common choice is gloss medium, which not only enhances the flow of the paint but also adds a beautiful glossy finish once dry. This can be particularly appealing if you want your artwork to have that extra shine, making colors pop and adding depth to your piece. On the other hand, if you're looking for a more matte finish, you might consider using a matte medium instead. This can be particularly useful if you plan to add additional layers or details to your artwork later on.
For those who want to experiment with texture, gel mediums can be an exciting option. These mediums can thicken your paint while still allowing for a pourable consistency, resulting in a more textured surface. They can also be mixed with pouring mediums to create unique effects. Additionally, some artists love to incorporate silicone oil into their pouring mediums to create stunning cells and lacing effects in their artwork.
It's essential to remember that the ratio of paint to pouring medium can significantly affect your results. A common starting point is a 1:1 ratio, but this can be adjusted based on the specific medium and desired effect. Experimentation is key! Don't be afraid to mix different mediums to find the perfect blend that works for you.
To give you a clearer idea, here's a simple table that outlines some popular pouring mediums and their characteristics:
| Pouring Medium | Finish | Texture | Best For |
|---|---|---|---|
| Liquid Acrylic Medium | Glossy | Smooth | General pouring |
| Gloss Medium | Glossy | Smooth | Vibrant colors |
| Matte Medium | Matte | Smooth | Layering |
| Gel Medium | Varies | Textured | Textured effects |
| Silicone Oil | Glossy | Creates cells | Cell formation |
In conclusion, the right pouring medium can be the difference between a mediocre piece and a breathtaking work of art. As you dive deeper into the world of acrylic pouring, take the time to explore and experiment with various mediums. You'll be amazed at how they can elevate your artwork and unleash your creativity!
- What is the best pouring medium for beginners? Liquid acrylic medium is often recommended for beginners due to its ease of use and versatility.
- Can I make my own pouring medium? Yes! You can create a DIY pouring medium using a mix of water, glue, and a flow improver.
- How do I prevent my paint from cracking as it dries? Ensure you're using the right ratio of paint to pouring medium and allow your artwork to dry in a stable environment.
Essential Tools for Pouring
When diving into the mesmerizing world of acrylic pour art, having the right tools can make all the difference in your creative journey. Imagine trying to paint a masterpiece with a broken brush; it just wouldn't work, right? Similarly, using the correct tools will not only enhance your pouring experience but also elevate the quality of your artwork. Here’s a rundown of the essential tools you’ll need to get started.
First and foremost, you’ll need a selection of mixing cups. These are crucial for combining your paints and pouring mediums. Opt for clear plastic cups so you can easily see the colors you’re working with. Make sure to have a variety of sizes on hand; small cups for mixing smaller amounts and larger ones for bigger projects. Additionally, consider investing in some stir sticks or even old paintbrushes for mixing your concoctions thoroughly. The last thing you want is to have clumps of unmixed paint ruining your beautiful pour.
Next up are pouring containers. These could be anything from plastic cups to squeeze bottles. The choice largely depends on the technique you plan to use. For instance, if you're going for a flip cup technique, a sturdy plastic cup will do wonders. On the other hand, if you’re experimenting with a dirty pour, a container that allows for easy pouring and control is key. You might even want to have a few funnels handy to help guide your paint into specific areas of your canvas.
In addition to mixing and pouring tools, protective gear is essential. Acrylic paint can be quite messy, and you don’t want to ruin your favorite shirt or your workspace. Consider wearing an old shirt or an apron, and don’t forget gloves! They’ll keep your hands clean and allow you to focus on the art rather than the mess.
Last but certainly not least, you’ll want to have a selection of canvas or painting surfaces. Whether you choose traditional canvas, wood panels, or even acrylic sheets, make sure they are primed and ready for your artistic expression. The choice of surface can significantly impact the final outcome of your artwork, so experiment with different textures and materials to find what works best for you.
In summary, the right tools can transform your acrylic pouring experience from a simple endeavor into a captivating artistic journey. Here’s a quick overview of the essential tools you’ll need:
| Tool | Purpose |
|---|---|
| Mixing Cups | For combining paints and mediums |
| Stir Sticks | For mixing paint thoroughly |
| Pouring Containers | For pouring paint onto the canvas |
| Protective Gear | To keep clothes and hands clean |
| Canvas or Surfaces | For the final artwork |
With these tools at your disposal, you're well-equipped to unleash your creativity and dive into the world of acrylic pour art. So, gather your supplies, set up your workspace, and let your imagination run wild!
Q: Do I need to use a specific type of acrylic paint for pouring?
A: While any acrylic paint can work, it's best to use paints specifically designed for pouring, as they have the right viscosity for fluid art.
Q: Can I use regular water to thin my paint?
A: It's not recommended to use water as it can break down the paint's binder. Instead, opt for a pouring medium.
Q: How can I prevent my paint from drying too quickly?
A: Using a slow-drying pouring medium can help extend the working time of your paints, allowing you to manipulate them longer.
Preparing Your Workspace
Creating stunning acrylic pour art begins long before you even pick up a brush or pour your first drop of paint. One of the most critical steps in this artistic journey is . A well-organized area not only enhances your creativity but also minimizes mess and potential disasters. Imagine trying to paint a masterpiece in a cluttered environment—it's like trying to cook a gourmet meal in a chaotic kitchen!
First and foremost, choose a space that you can dedicate to your art. Ideally, this should be a well-ventilated area where spills won’t cause you to lose your mind. You might want to consider setting up in a garage, basement, or even outdoors if the weather permits. Keep in mind that acrylic paints can be quite messy, so protecting your surfaces is paramount. Lay down a plastic drop cloth or an old tablecloth to catch any rogue drips and splashes.
Next, gather all your materials and tools before you start pouring. This includes your acrylic paints, pouring mediums, silicone oil, and any tools you might need, such as cups, stir sticks, and a heat gun. Having everything within arm's reach allows you to focus on your creative process instead of running around looking for supplies. You might even want to create a workspace checklist to ensure you have everything ready:
- Acrylic paints
- Pouring mediums
- Mixing cups and stir sticks
- Silicone oil
- Protective gloves and apron
- Plastic drop cloth
- Heat gun or torch (for bubbles)
Consider lighting as well; natural light can significantly enhance your color perception, but if you're working indoors, ensure you have good artificial lighting to avoid any shadows that might distort your view. You want to see the true colors of your paints as you mix and pour.
Lastly, don’t forget about safety! While acrylic paints are generally non-toxic, it’s still wise to wear gloves and an apron to protect your skin and clothing. If you’re using silicone oil or other additives, ensure you’re in a well-ventilated space to avoid inhaling any fumes. Your health is just as important as your art!
By taking the time to prepare your workspace thoughtfully, you set yourself up for a successful and enjoyable acrylic pouring experience. So, roll up your sleeves, grab your materials, and let your creativity flow like the vibrant colors of your paint!
Q: What is the best surface to pour on?
A: Canvas, wood panels, and even ceramic tiles work well for acrylic pouring. Just ensure the surface is primed for optimal adhesion.
Q: How long does it take for acrylic pour art to dry?
A: Drying times can vary, but generally, your artwork will be touch-dry in about 24 hours. However, it may take several weeks to fully cure.
Q: Can I use regular acrylic paint for pouring?
A: Yes, but it's best to use paints specifically designed for pouring to achieve the best flow and consistency.
Q: How do I clean up after pouring?
A: Clean your tools and workspace with warm, soapy water while the paint is still wet. Once it dries, it can be more challenging to remove.
Techniques for Creating Unique Effects
Acrylic pour art is not just about pouring paint onto a canvas; it's about unleashing your creativity and exploring a world of unique effects. One of the most thrilling aspects of this art form is the ability to manipulate your materials to create stunning visuals that capture the imagination. Whether you're a seasoned artist or a beginner, experimenting with different techniques can lead to breathtaking results that are truly one-of-a-kind.
One popular method to achieve mesmerizing effects is the swipe technique. This technique involves applying a base layer of paint and then using a tool—like a spatula or a piece of cardboard—to swipe another color across the surface. The result? A beautiful blend of colors that creates depth and movement in your artwork. Imagine a gentle breeze sweeping across a field of wildflowers; that's the kind of fluidity you can achieve with this method. It's essential to practice your swiping motion to get a feel for how much paint to use and the angle of your swipe, as this can dramatically alter the outcome.
Another exciting technique is the use of silicone oil to create cells. Silicone oil is a game-changer in the world of acrylic pouring. When mixed into your paint, it reacts with the other colors to create those stunning, organic shapes that resemble bubbles or cells. To use silicone effectively, add a few drops to your paint mixture before pouring. The key is to find the right balance; too much silicone can overwhelm your artwork, while too little may not yield the desired effect. Think of it like seasoning a dish; a little can enhance the flavor, but too much can ruin it.
When it comes to color combinations, the choices you make can significantly impact the overall look of your piece. Experimenting with different color palettes can yield astonishing results. For instance, using complementary colors can create a striking contrast that draws the eye, while analogous colors can produce a more harmonious and calming effect. Don't be afraid to mix unexpected colors together; sometimes, the most beautiful pieces emerge from happy accidents. To help you visualize your options, consider creating a color wheel to see how different hues interact with one another.
In addition to these techniques, layering your pours can add another dimension to your artwork. By allowing each layer to dry partially before adding the next, you can create depth and texture that will make your piece stand out. Think of it like building a cake; each layer adds to the overall flavor and texture, creating a delightful experience for the viewer. Just remember to keep an eye on the drying times, as this can vary depending on the materials you’re using.
Finally, don’t underestimate the power of tools in your acrylic pouring journey. Tools like straws, blow torches, and even your breath can manipulate the paint after it's poured, creating unique swirls and patterns. Using a straw to blow air across the paint can create delicate wisps, while a blow torch can bring out hidden colors by popping air bubbles. It’s all about finding the right technique that resonates with you and your artistic vision.
As you dive deeper into the world of acrylic pouring, you may have some questions. Here are a few frequently asked questions that can help guide you on your artistic journey:
- What is the best type of canvas for acrylic pouring? - A pre-stretched canvas or a wood panel works best as they can handle the weight of the paint without warping.
- Can I use regular acrylic paint for pouring? - Yes, but make sure to mix it with a pouring medium to achieve the right consistency.
- How do I fix a painting that didn't turn out as expected? - You can always pour another layer of paint on top or use a technique like the swipe to cover up imperfections.
- What should I do if my paint dries too quickly? - Consider using a slower-drying pouring medium or working in a cooler environment.
Using Silicone for Cells
When it comes to creating those mesmerizing cells in your acrylic pour art, silicone oil is your best friend. Imagine your canvas as a vast ocean, and the silicone as the wind that stirs the waves into beautiful patterns. The right application of silicone can transform your artwork from a simple pour into a captivating masterpiece that draws the viewer in. But how do you achieve that perfect effect? Let’s dive into the details!
First off, it’s essential to understand how silicone interacts with acrylic paints. When mixed into your paint, silicone creates a reaction that allows for the formation of cells. These cells are the little pockets of color that pop up as your paint dries, adding depth and interest to your work. The key is to use just the right amount of silicone. Too little, and you won’t see any cells; too much, and your artwork may become chaotic and lose its intended design.
Here’s a simple guideline to help you use silicone effectively:
- Type of Silicone: Use a silicone oil specifically designed for art, such as silicone spray or silicone for hair. These are often lighter and mix better with paint.
- Mixing Ratio: Start with a ratio of about 1-2 drops of silicone per ounce of paint. This is a good starting point, but feel free to adjust based on your desired outcome.
- Mixing Method: Gently fold the silicone into your paint rather than stirring vigorously. This keeps the bubbles to a minimum and ensures a more controlled reaction.
Once you’ve mixed your paint with silicone, the next step is pouring. You can use various techniques, such as the dirty pour or flip cup method, to create unique patterns. As you pour, you’ll start to notice the cells forming almost instantly. It's like watching magic unfold right before your eyes! To enhance the cell formation, you can also torch the surface after pouring. A quick pass with a heat gun or a kitchen torch will help release any trapped air bubbles and encourage more cells to develop.
However, be cautious with the heat; too much can cause your paint to dry too quickly or even burn. Aim for a gentle wave of heat that encourages the cells without overwhelming the paint. Once you’ve achieved the desired effect, allow your artwork to dry completely before moving it. This drying time is crucial, as it allows the cells to settle and the colors to meld beautifully.
In summary, using silicone for cells in acrylic pour art is an exciting way to elevate your pieces. With a little practice and experimentation, you can create stunning visuals that will leave your audience in awe. So grab your paints, mix in that silicone, and let your creativity flow!
Q: Can I use any type of silicone for cells?
A: It's best to use silicone oil specifically designed for art, as it mixes better with acrylic paints and helps create the desired effects.
Q: How do I know if I've added too much silicone?
A: If your artwork appears overly chaotic or lacks a clear design, you may have used too much silicone. Start with a small amount and adjust as needed.
Q: Is it necessary to use heat after pouring?
A: While not strictly necessary, using a heat source can enhance cell formation by releasing trapped air bubbles. Just be careful not to overheat your paint.
Experimenting with Color Combinations
When it comes to acrylic pour art, the magic often lies in the colors you choose. Imagine standing in front of a vibrant sunset, the hues blending seamlessly into one another; that’s the kind of effect you want to achieve on your canvas. But how do you get there? The secret is in experimenting with different color combinations. Start by understanding the basics of color theory. Complementary colors, for instance, can create stunning contrasts, while analogous colors can provide a sense of harmony. Think of complementary colors like a perfect dance pair – they highlight each other’s strengths and create a dynamic visual experience.
As you dive into the world of color combinations, consider using a color wheel as your guide. This handy tool can help you identify which colors work well together. You might find yourself drawn to a monochromatic scheme, where different shades of a single color come together to create depth and interest. Alternatively, you could opt for a triadic scheme, which involves three colors evenly spaced on the color wheel. The result? A vibrant and eye-catching piece that’s sure to turn heads!
Don’t be afraid to play around with colors! One of the most exciting aspects of acrylic pouring is the element of surprise. You might mix a bright yellow with a deep blue and find that the result is a stunning green that you never expected. To help you get started, here’s a simple table outlining some effective color combinations:
| Color Combination | Effect |
|---|---|
| Blue & Orange | Dynamic contrast that energizes the piece |
| Red & Yellow | Warm and inviting, reminiscent of sunsets |
| Green & Purple | Rich and luxurious, often associated with nature |
| Pink & Gold | Soft and elegant, perfect for a romantic feel |
As you mix your paints, remember that the consistency of the paint can also affect how colors interact on the canvas. Thicker paints might hold their shape better, while thinner paints will blend more easily. Adjusting the viscosity can lead to unexpected outcomes, so don’t shy away from testing different mixtures. And here’s a tip: if you’re unsure about a color combination, try pouring a small test piece first. This way, you can see how the colors react without committing to a larger canvas.
Lastly, keep in mind that the beauty of acrylic pouring is that there are no strict rules. Your artwork is a reflection of your creativity, so let your instincts guide you. Whether you’re creating a serene landscape or an abstract explosion of colors, the journey of experimenting with color combinations is where the real fun begins. So grab those paints, let your imagination run wild, and see where the colors take you!
- What type of acrylic paints are best for pouring? Look for paints that are fluid and have a good consistency. Brands like Liquitex and Golden are popular choices.
- How do I create cells in my acrylic pour? Using silicone oil is a great way to create cells. Add a few drops to your paint before pouring.
- Can I use any type of canvas for pouring? Yes, but it’s recommended to use a canvas that is specifically designed for acrylic paints to ensure the best results.
- How long does it take for acrylic pour art to dry? Drying times can vary, but typically, it takes about 24 to 48 hours for the paint to dry completely.
Finishing and Preserving Your Artwork
Once you've poured your masterpiece, the next step is to ensure it remains as stunning as the moment it was created. Properly finishing and preserving your acrylic pour art is crucial for maintaining its vibrancy and longevity. First and foremost, allow your artwork to dry completely. This can take anywhere from 24 to 72 hours, depending on the thickness of the paint and the environmental conditions. Be patient! Rushing this process can lead to smudges or uneven finishes.
After your artwork has dried, it's time to think about how to protect it. One of the best ways to do this is by applying a varnish. Varnishing not only enhances the colors but also provides a protective layer against dust, UV light, and scratches. You can choose between a glossy, matte, or semi-gloss finish, depending on the effect you want. Here's a quick comparison of varnish types:
| Varnish Type | Finish | Best For |
|---|---|---|
| Glossy | Shiny | Enhancing colors and depth |
| Matte | Non-reflective | Softening colors and reducing glare |
| Semi-Gloss | Moderate shine | Balanced look between glossy and matte |
When applying varnish, use a clean, soft brush or a spray varnish for an even coat. Be sure to follow the manufacturer's instructions for drying times between coats. Typically, two to three coats are recommended for optimal protection.
Now, let’s talk about storage. If you plan to display your artwork, consider framing it under glass to protect it from dust and direct sunlight. If you’re storing your artwork, keep it in a cool, dry place away from direct sunlight. Lay it flat or hang it vertically to avoid any damage. You might also want to use a protective layer, such as a piece of cardboard or bubble wrap, to prevent scratches.
Finally, if you’re looking to sell or gift your artwork, consider including a care card. This card can inform the recipient about how to care for the piece, including recommendations for cleaning and displaying it. A little extra thought goes a long way in ensuring your art is appreciated and preserved.
- How long should I wait before varnishing my acrylic pour art?
It’s best to wait at least 24-72 hours until your artwork is completely dry before applying varnish. - Can I use regular acrylic paint for pouring?
While regular acrylic paint can be used, it's advisable to use pouring acrylics or mix your paint with a pouring medium for better flow. - What should I do if my paint cracks after drying?
Cracking can occur due to rapid drying. To prevent this, ensure you’re working in a controlled environment and avoid drafts. - Is it necessary to use a pouring medium?
Yes, a pouring medium helps to achieve the right consistency and flow for your paints, which is essential for a successful pour.
Frequently Asked Questions
-
What is acrylic pour art?
Acrylic pour art is a fascinating painting technique that involves pouring acrylic paints onto a canvas to create stunning, fluid designs. The beauty of this art form lies in its unpredictability; each pour can yield unique patterns and colors, making every piece a one-of-a-kind masterpiece!
-
What materials do I need to start acrylic pouring?
To embark on your acrylic pouring journey, you'll need a few essential materials including acrylic paints, pouring mediums, a canvas or surface to pour on, and various tools like cups, stir sticks, and a heat gun. Don't forget to wear old clothes and protect your workspace—things can get messy!
-
What techniques are commonly used in acrylic pouring?
There are several popular techniques in acrylic pouring, such as the dirty pour, flip cup, and puddle pour. Each technique creates different effects, so it's worth experimenting to find which one resonates with your artistic style!
-
How do I choose the right acrylic paints?
Selecting the right acrylic paints is crucial for achieving your desired effects. Look for paints with a good viscosity that will flow well when poured. It's also helpful to experiment with different brands and colors to see which combinations create the most captivating results!
-
What is a pouring medium and why is it important?
A pouring medium is a special additive that enhances the fluidity of your acrylic paints, allowing them to flow and blend more easily. It also helps to control drying time and can improve the final finish of your artwork, making it essential for successful acrylic pouring.
-
Can I use silicone oil in my pours?
Absolutely! Silicone oil is a popular additive in acrylic pouring that helps create beautiful cells in your artwork. Just remember to use it sparingly; a little goes a long way. Too much can lead to unwanted results, so experiment to find the right balance!
-
How do I preserve my finished acrylic pour art?
To preserve your artwork, it's important to let it dry completely first. After drying, you can apply a varnish to protect the surface and enhance the colors. Store your pieces in a cool, dry place away from direct sunlight to keep them looking vibrant for years to come!
-
What should I do if my pour doesn't turn out as expected?
Don’t worry if your pour doesn’t turn out exactly as planned! Art is all about experimentation and discovery. You can always try to incorporate your piece into a new project, or simply embrace the happy accidents that can lead to unexpected beauty!


