
How to Draw a Face: A Step-by-Step Guide
Drawing a face can seem like a daunting task, but with the right guidance, it becomes an exciting and fulfilling experience. Whether you're a beginner picking up a pencil for the first time or an experienced artist looking to refine your skills, this comprehensive guide will help you navigate the intricacies of facial drawing. From understanding facial proportions to mastering shading techniques, each step is designed to build your confidence and creativity. So, grab your materials and let's dive into the world of face drawing!
Mastering facial proportions is crucial for accurate representation. The human face is a complex structure, and understanding its proportions can significantly enhance your drawing skills. Generally, the face can be divided into equal thirds: the top third from the hairline to the eyebrows, the middle third from the eyebrows to the bottom of the nose, and the bottom third from the nose to the chin. By adhering to these guidelines, you can achieve a more realistic likeness. Remember, practice makes perfect!
Choosing the right materials is essential for drawing. A good artist knows that the tools they use can greatly influence the outcome of their work. Here are some materials that you might consider:
- Pencils: A range of pencils from H (hard) to B (soft) for different shading effects.
- Paper: High-quality sketch paper that can handle erasing and blending.
- Erasers: A kneaded eraser for subtle corrections and a regular eraser for more significant changes.
- Blending Stumps: Useful for creating smooth transitions in shading.
Having the right tools not only enhances your drawing experience but also allows you to express your artistic vision more effectively.
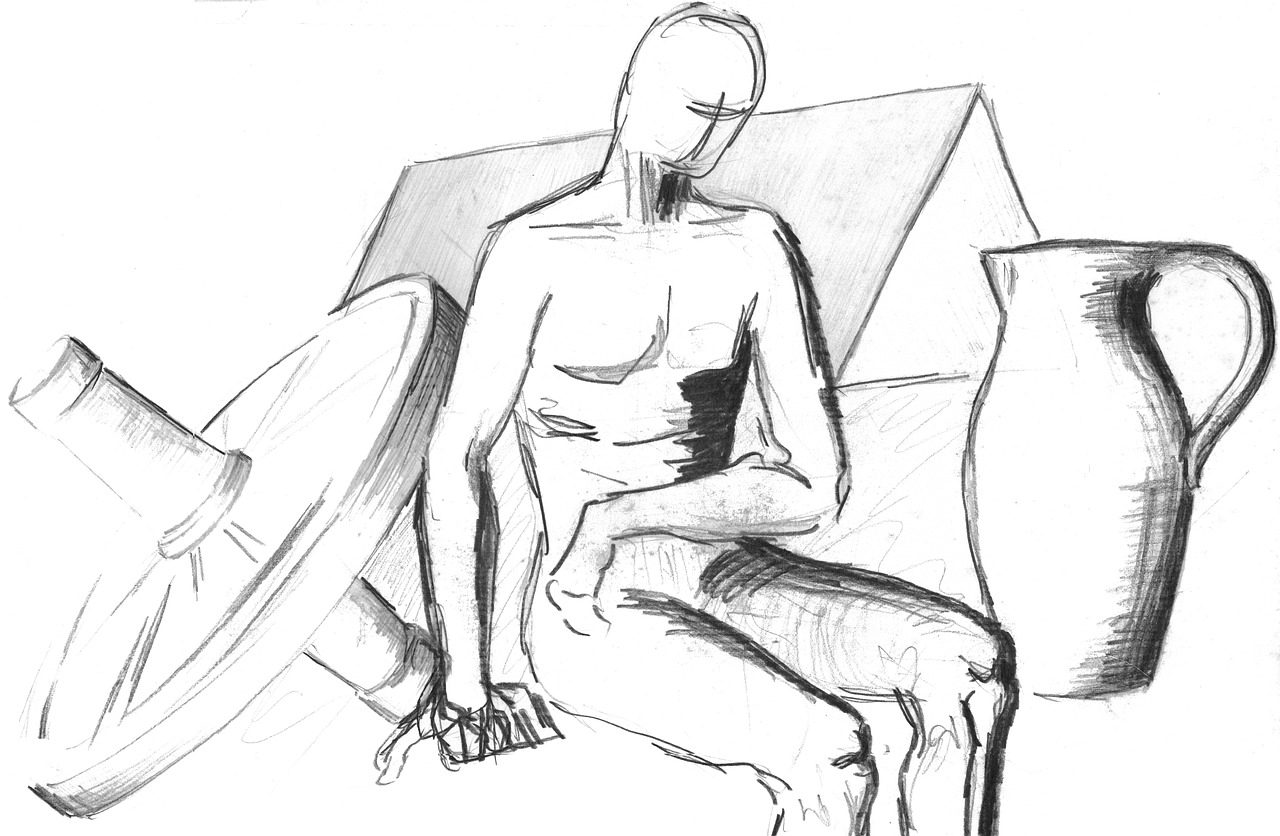
Before adding details, it's important to sketch the basic shape of the face. Start with a simple oval or circle to represent the head. This foundational shape will guide you in placing the facial features accurately. Don’t worry about getting it perfect on the first try; think of it as a rough draft. Once you’re satisfied with the head shape, you can begin to refine it. Use light strokes so that you can easily erase and adjust as needed.
Learn how to create a balanced head outline by focusing on the overall shape and size. The head can be wider at the top and slightly narrower at the chin. This shape is crucial as it sets the foundation for your drawing. Think of the head as an egg; the wider end represents the forehead, while the narrower end represents the chin. By keeping this in mind, you’ll create a more natural and proportionate head outline.
Once you have the head outline, it’s time to place the key features. The eyes should be positioned about halfway down the head, while the bottom of the nose typically falls at the halfway point between the eyes and the chin. The mouth is usually situated a third of the way down from the nose to the chin. These guidelines help ensure that the features align correctly and maintain the proportions established earlier. Alignment is key!
With the basic shape established, it's time to add details. Start with the eyes, as they are often considered the most expressive feature. When drawing eyes, pay attention to their shape and size; they can vary significantly from person to person. Next, move on to the nose, which can also differ in appearance. Focus on the nostrils and bridge, as these are crucial for realism. Finally, draw the mouth, ensuring that it reflects the emotion you want to convey.
Eyes are the windows to the soul, and capturing their essence is vital. To create realistic eyes, consider the following tips:
- Use highlights to give the eyes depth.
- Vary the shading around the iris to create dimension.
- Pay attention to the eyelashes; they can enhance the expression.
By focusing on these aspects, you can create eyes that are not only realistic but also full of character.
The nose can vary greatly in shape and size, making it a unique feature to draw. Whether it’s a small button nose or a long, elegant one, the techniques remain similar. Start by sketching the basic shape of the nose, then add details like the nostrils and the bridge. Remember to observe how light interacts with the nose, as shading can greatly enhance its three-dimensionality.
Shading adds dimension to your drawing and can transform a flat image into a lifelike representation. There are various techniques you can employ, such as hatching, cross-hatching, and blending. Each technique offers a different texture and depth, so experiment to find what works best for your style. Remember, shadows are just as important as highlights in creating a realistic face.
Identifying common pitfalls can improve your drawing skills significantly. Here are a few mistakes to watch out for:
- Misplacing features: Always double-check the alignment of your facial features.
- Ignoring proportions: Stick to the guidelines for a more realistic outcome.
- Overworking details: Sometimes less is more; don’t rush to add too much detail too soon.
By being aware of these mistakes, you can refine your technique and produce better results.
Continuous practice is key to improvement. Set aside time each day to draw faces, and consider keeping a sketchbook dedicated to this purpose. Try different styles and techniques, and don’t be afraid to make mistakes; they are part of the learning process. Additionally, studying photographs or real-life models can provide valuable insights into facial structures and expressions.
Q: What materials do I need to start drawing faces?
A: Basic materials include pencils, erasers, sketch paper, and blending stumps. As you progress, you can explore other tools like charcoal or ink.
Q: How can I improve my understanding of facial proportions?
A: Practice drawing from life or photographs, and use guidelines to help you maintain accurate proportions.
Q: Is it necessary to draw every feature in detail?
A: Not at all! Focus on capturing the essence of the face rather than getting every detail perfect.
Q: How often should I practice?
A: Aim for daily practice, even if it's just for a few minutes. Consistency is key to improvement.

Understanding Facial Proportions
Mastering facial proportions is crucial for accurate representation. Whether you're a budding artist or someone looking to improve your skills, understanding how to measure and position facial features can make a world of difference in your drawings. Think of facial proportions as the skeleton of your artwork; without a solid foundation, even the most detailed work can fall flat.
To get started, let’s break down the face into manageable parts. The average human face can be divided into equal sections, which serve as guidelines for placing the features. A common method is to use the five-eye rule. This rule states that the width of the face is approximately equal to five eye widths. So, if you measure the distance between the eyes, you can use that measurement to help define the width of the face.
Here’s a quick breakdown of some essential measurements:
| Feature | Measurement |
|---|---|
| Width of the Face | 5 Eye Widths |
| Eyes | 1 Eye Width Apart |
| Nose | Width of the Eyes |
| Mouth | Width of the Nose |
These measurements are not absolute, but they provide a solid framework for creating a balanced face. When you sketch, it’s helpful to lightly draw guidelines that indicate where each feature should go. This will help ensure that everything is aligned and proportionate. For instance, the eyes should sit about halfway down the head, while the bottom of the nose is typically located about halfway between the eyes and the chin. The mouth usually aligns with the center of the eyes. By following these guidelines, you’ll find it easier to achieve a realistic representation of the human face.
Another important aspect of facial proportions is understanding the differences between various face shapes. Faces can be categorized into several shapes, such as oval, round, square, and heart-shaped. Each shape has its unique characteristics that affect the placement and proportion of features. For example, a round face may have softer, fuller cheeks, while a square face might have a more pronounced jawline. Recognizing these differences can add depth and realism to your drawings.
In conclusion, understanding facial proportions is not just about following rules; it's about developing an eye for detail and learning to see the world as an artist. As you practice, you'll start to internalize these measurements, allowing you to draw faces with confidence and accuracy. Remember, every artist has their unique style, so don't be afraid to experiment with proportions as you find what works best for you!

Gathering Your Materials
When it comes to drawing, the right materials can make all the difference. Think of your tools as the paintbrushes of a painter; they can either enhance your creativity or hinder it. So, what do you really need to get started on your journey of drawing faces? First, consider the medium you want to work with. Are you leaning towards pencil, charcoal, or perhaps digital drawing? Each medium has its unique qualities and can produce different effects. For instance, pencils allow for fine details and shading, while charcoal can create bold and dramatic lines.
Next, let’s talk about the essential tools you should gather. Here’s a quick overview:
- Pencils: A range of pencils from 2H to 8B will give you the versatility to create soft lines and deep shadows.
- Erasers: A kneaded eraser is perfect for lifting graphite without damaging the paper, while a regular eraser is great for correcting mistakes.
- Paper: Choose a sketchbook with good quality paper that can handle various mediums. Look for something with a weight of at least 200gsm for best results.
- Blending Stumps: These are great for smoothing out pencil marks and creating softer shadows.
Once you have your basic tools, you might want to explore some additional materials to enhance your drawing experience. For instance, colored pencils can add a new dimension to your portraits, while ink pens can be used for outlining and adding intricate details. If you’re working digitally, investing in a good drawing tablet can be a game-changer. It allows for greater precision and offers a plethora of tools and effects that traditional mediums may not provide.
Lastly, don’t forget about inspiration. Surround yourself with references—whether that’s photographs, art books, or even live models. Having visual aids can help you understand proportions and features better, making your drawing process smoother. Remember, the journey of learning to draw faces is not just about the materials; it’s about how you use them to express your creativity. So gather your tools, find your inspiration, and get ready to bring your artistic vision to life!

Sketching the Basic Shape
When it comes to drawing a face, the first step is to sketch the basic shape. Think of this as laying the foundation for a house; without a solid base, everything else will be off-kilter. The goal here is to create a simple outline that captures the overall proportions and structure of the face. Start by drawing an oval or an egg shape, which will represent the head. This is your canvas, so don't be afraid to adjust it as you go along.
Next, imagine dividing this shape into sections. Just like a pizza, where each slice represents a different feature, you want to create guidelines that will help you place the facial features accurately. Use light pencil strokes to mark the centerline and horizontal lines where the eyes, nose, and mouth will go. These guidelines are crucial because they help maintain symmetry and proportion, which are key to achieving a realistic look.
When sketching the head outline, consider the following tips:
- Proportions Matter: The eyes are typically located halfway down the head, with the bottom of the nose about halfway between the eyes and the chin. The mouth usually sits about one third of the way down from the nose to the chin.
- Adjust for Style: Depending on the style you want to achieve—realistic, cartoonish, or abstract—feel free to modify the shapes and proportions. Art is all about personal expression!
- Keep it Light: Use a light hand when sketching these initial lines. You can always darken them later, but it's easier to erase light lines than heavy ones.
After establishing the basic shape and guidelines, it's time to place the key features. Start with the eyes, as they are often considered the most expressive part of the face. Position them along the horizontal line you drew earlier, ensuring they are evenly spaced apart. A good rule of thumb is that the space between the eyes should be roughly the width of one eye.
Next, move on to the nose. The bottom of the nose should align with the centerline you've created, while the width of the nose can be gauged by the distance between the inner corners of the eyes. Finally, sketch the mouth, which should be placed below the nose. Remember, the corners of the mouth typically align with the pupils of the eyes. This method of placement helps maintain harmony in your drawing.
As you sketch, take a step back occasionally to assess your work. This will help you see any disproportionate features or misalignments. Just like a sculptor chiseling away at a block of stone, you want to refine your drawing until it starts to resemble the face you envision. Don't rush this process; the more time you spend on the basic shape, the easier it will be to add details later on.
In conclusion, sketching the basic shape is a vital step in drawing a face. It lays the groundwork for everything that follows. By focusing on proportions, using guidelines, and keeping your lines light, you set yourself up for success. So grab your pencil, take a deep breath, and let your creativity flow!
Q: How do I know if my proportions are correct?
A: A good way to check proportions is to measure with your pencil. Hold your pencil at arm's length and use it to compare distances between features. This technique can help you see if everything is aligned properly.
Q: What if I make a mistake while sketching?
A: Mistakes are part of the learning process! Use an eraser to gently correct any errors, or embrace them as part of your artistic journey. Sometimes, a mistake can lead to a happy accident!
Q: Can I use digital tools for sketching?
A: Absolutely! Digital drawing tools offer flexibility and ease of editing. Many artists find that using software allows for smoother lines and cleaner sketches.
Drawing the Head Outline
When it comes to , think of it as the skeleton of your artwork. Just like a house needs a solid foundation, your drawing requires a well-defined outline to support all the features you’ll add later. Start by visualizing the overall shape of the head. Most heads can be simplified into basic geometric forms. For instance, you might begin with an oval or a circle for the top of the head, tapering it down to create the chin. This basic shape will serve as your guide, ensuring that everything else fits together harmoniously.
To get the proportions right, consider the following key points:
- The width of the head is typically about two-thirds of its height.
- The forehead should be roughly one-third of the total height.
- The chin should be placed at the bottom of your oval, balancing the overall shape.
Once you have your basic shape in place, it’s time to refine it. Use light, smooth strokes to sketch the outline; this way, you can easily erase and adjust as needed. Pay attention to the jawline and hairline, as these details can significantly affect the character of your drawing. For instance, a strong jawline can convey confidence, while a softer jawline may suggest gentleness. Don’t be afraid to experiment with different shapes until you find one that resonates with the expression you want to capture.
Next, consider the placement of the guidelines for facial features. Lightly draw a vertical line down the center of your head shape, followed by a horizontal line that divides the head into equal halves. These lines will help you align the eyes, nose, and mouth accurately. Remember, the eyes are generally positioned halfway down the head, while the bottom of the nose usually falls about halfway between the eyes and the chin. These proportions can vary based on the individual, so always be ready to adjust!
As you work on your head outline, it can be helpful to refer to a reference image. Look for images that showcase different head shapes and angles. This practice not only helps you understand variations but also builds your confidence as you start to see how different elements come together to form a cohesive whole. Drawing the head outline is an essential skill that sets the stage for creating expressive and realistic faces.
Q: How do I know if my head outline is accurate?
A: One way to check is by comparing your outline to reference images. Look for alignment in the features and overall proportions.
Q: Should I use a pencil or pen for the initial outline?
A: It’s best to start with a pencil, as it allows for easy adjustments. Once you’re satisfied with the outline, you can go over it with a pen or darker pencil.
Q: What if I struggle with proportions?
A: Practice makes perfect! Use tools like a ruler or a grid method to help you visualize and maintain proportions.

Placing Key Features
When it comes to drawing a face, placing the key features correctly is akin to laying the foundation of a house. If the foundation is off, everything else will be too. So, how do you ensure that your eyes, nose, mouth, and ears are positioned just right? Let's break it down!
First, start by visualizing the face as a simple geometric shape. Imagine a vertical line running down the center of the face; this line is your guide for symmetry. The eyes should be placed along this line, typically one eye-width apart. This means that the distance between the inner corners of the eyes should equal the width of one eye. By keeping this in mind, you’ll avoid the common mistake of having eyes that are too far apart or too close together.
Next, let’s talk about the nose. The bottom of the nose usually aligns with the bottom of the ears, so if you can picture a straight line from the top of the ear to the bottom of the nose, you’re on the right track. This is a helpful reference point that ensures your nose doesn’t end up too high or low on the face.
The mouth, on the other hand, is generally positioned about halfway between the nose and the chin. When drawing the mouth, remember that it should also align with the pupils of the eyes. This alignment creates a natural look and helps maintain the facial proportions you've already established. If you want to add a little flair, consider the curvature of the lips; they can convey a range of emotions from happiness to sadness.
Lastly, don’t forget about the ears! They typically start at the same height as the eyes and end at the bottom of the nose. This guideline is crucial for achieving a realistic portrayal. When you place the ears, think of them as extensions of the head, rather than isolated features. They should blend seamlessly into the overall structure of the face.
To summarize, here’s a quick reference for placing the key features:
| Feature | Placement Guidelines |
|---|---|
| Eyes | One eye-width apart, aligned on the vertical centerline |
| Nose | Bottom aligns with the bottom of the ears |
| Mouth | Halfway between the nose and chin, aligned with pupils |
| Ears | Start at eye height, end at the bottom of the nose |
By carefully considering these placement guidelines, you’ll be well on your way to creating a face that not only looks realistic but also full of character. Remember, practice makes perfect! So grab your pencil and start sketching!
- What is the best way to practice placing facial features? Try sketching faces from different angles and using reference photos to improve your understanding of proportions.
- How can I make my drawings look more realistic? Focus on shading and texture, and pay attention to the unique characteristics of each face you draw.
- What tools do I need for drawing faces? Basic tools include pencils, erasers, and sketch paper. As you progress, you might want to experiment with charcoal or colored pencils for added depth.

Adding Facial Features
Once you've laid down the basic shape of the face, the next exciting step is to add facial features. This is where your drawing truly starts to come to life! Think of it like putting the finishing touches on a masterpiece; every detail matters. The key to achieving a realistic representation lies in the proportions and placement of the features. You want to ensure that they not only look good individually but also harmonize with the overall structure of the face.
Let’s break down the process of adding these features, starting with the eyes. The eyes are often referred to as the windows to the soul, and rightly so! They convey emotions and depth, making them a crucial aspect of your drawing. To draw realistic eyes, pay close attention to the shape and size. Start by sketching an almond shape for the eye, then add the iris and pupil. Remember, the positioning of the eyes should be about one eye-width apart, which is a common proportion in many faces.
Next, let’s move on to the nose. The nose can significantly vary in shape and size, which is what makes it so fascinating to draw. To create a lifelike nose, begin by outlining the bridge and tip. Depending on the type of nose you're drawing, you might want to include details like the nostrils and the bridge's width. For instance, a wider nose will require a broader bridge, while a more delicate nose will be narrower. Here’s a quick table summarizing different nose shapes and their characteristics:
| Nose Shape | Characteristics |
|---|---|
| Straight | Evenly proportioned with a straight bridge. |
| Hooked | Curved at the bridge, giving a distinctive profile. |
| Flat | Short and wide, often with a broad bridge. |
| Pointed | Narrow bridge with a tapered tip. |
Now that we have the eyes and nose in place, let’s talk about the mouth. The mouth can express a wide range of emotions, from joy to sadness, so capturing its shape is essential. Start by drawing a simple line to mark the center of the mouth, then create the upper and lower lips. Remember, the corners of the mouth should align with the pupils of the eyes for proper placement. You can add subtle curves to the lips to give them a more realistic appearance.
Don’t forget about the ears! While they might seem less important, they play a vital role in framing the face. Ears typically align with the eyes and the bottom of the nose. Start by sketching an oval shape and then refine the contours to match the specific ear shape you’re aiming for. The more detail you add, like the inner folds and curves, the more lifelike your drawing will become.
Incorporating these features into your drawing is like assembling a puzzle. Each piece must fit perfectly with the others to create a cohesive image. As you practice, you’ll develop a better understanding of how to adjust proportions and placements based on different face shapes and angles. Remember, the goal is to capture the essence of the person you’re drawing, so don’t shy away from making adjustments as needed!
- How do I know if my facial features are proportionate?
Use a ruler or your pencil to measure distances between features. Familiarize yourself with standard proportions. - What if my drawing looks off?
Don't be discouraged! Take a step back, observe, and make adjustments. Practice is key! - Can I draw facial features in different styles?
Absolutely! Experimenting with styles can help you find your unique artistic voice.

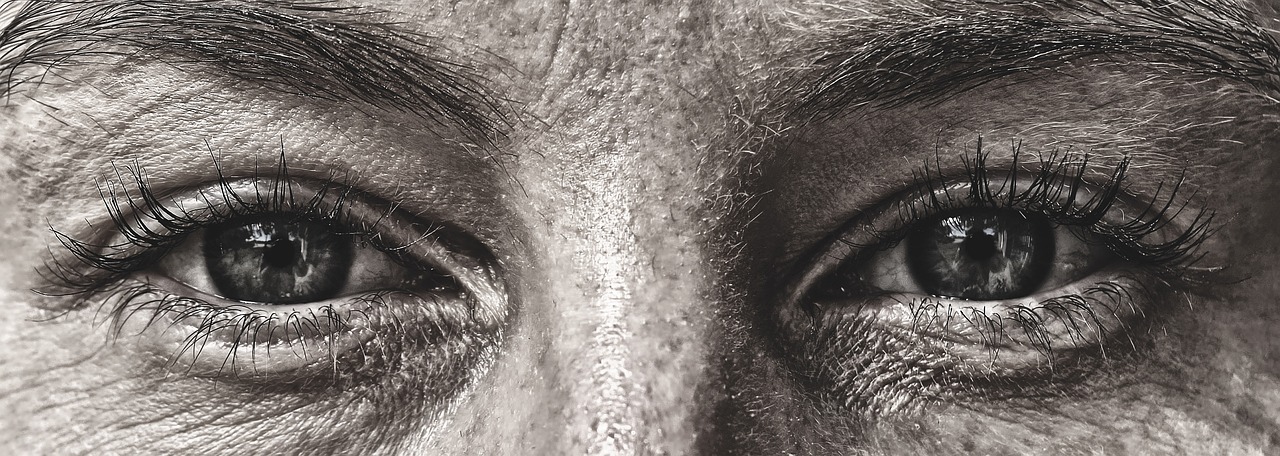
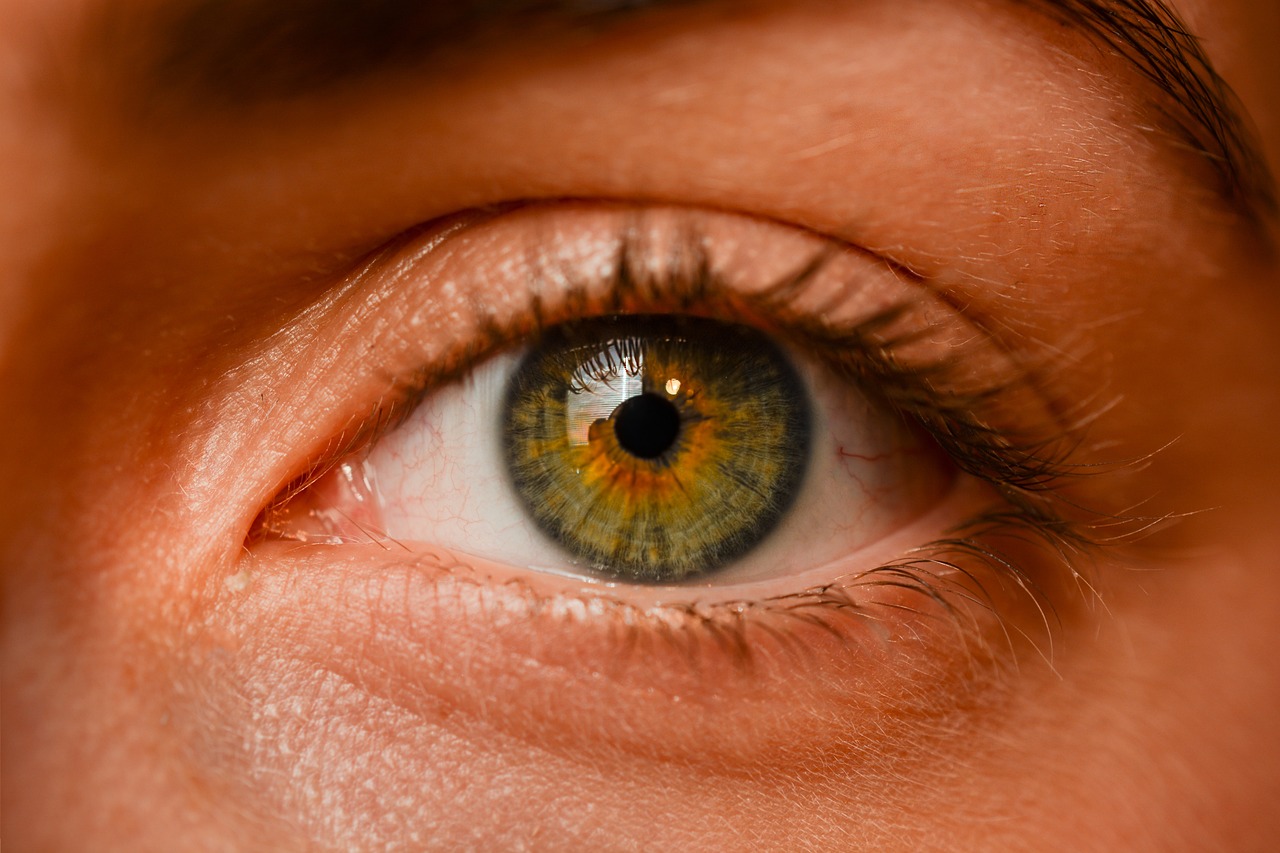
Drawing Realistic Eyes
When it comes to drawing, eyes are often regarded as the windows to the soul. They can convey a myriad of emotions, from joy to sadness, and capturing their essence is crucial for any artist. To draw realistic eyes, you need to focus on several key elements that contribute to their lifelike appearance. First, let’s talk about the shape. The human eye is not a simple oval; it has a unique structure that includes the eyelid, iris, and pupil. Understanding these components will help you create a more accurate representation.
Start by sketching the basic outline of the eye. The upper lid typically has a gentle curve, while the lower lid is slightly flatter. Once you have the outline, move on to the iris and pupil. The iris is often a vibrant color, while the pupil, which is usually black, should be centered within the iris. A common mistake is to make the pupil too small or too large, so be mindful of proportions.
Next, let's add some details. The highlights in the eye are crucial for realism. They provide depth and create the illusion of moisture, which makes the eye appear alive. You can achieve this by leaving a small white spot in the iris when coloring or shading. Additionally, the eyelashes and eyebrows frame the eyes and add character. Pay attention to their direction and length; eyelashes tend to curve upwards and are denser towards the outer corners of the eyes.
Another important aspect is the shading around the eye. The area around the eyes can have subtle shadows that enhance their three-dimensionality. Use a soft pencil or blending tool to create these shadows, particularly in the crease of the eyelid and the corners of the eye. Remember, the key to drawing realistic eyes lies in the details. Take your time to observe real eyes, and don’t hesitate to practice by looking at photos or even drawing from life.
Here are some tips to keep in mind while drawing realistic eyes:
- Observe Real Eyes: Spend time looking at different eye shapes and colors. Each person’s eyes are unique, and studying them will improve your understanding.
- Practice Different Expressions: Try drawing eyes that express different emotions—happiness, surprise, sadness, and anger. This will help you understand how the shape and positioning change.
- Use References: Don’t shy away from using reference images to guide your drawings. They can provide insight into the intricate details of the eye.
In conclusion, drawing realistic eyes is an art that requires patience and practice. By focusing on the shape, details, and shading, you can create eyes that not only look real but also convey emotion. Remember, every artist has their own style, so don’t be afraid to experiment and find what works best for you!
Q: How can I improve my eye-drawing skills?
A: Practice is key! Try sketching eyes from different angles and in various expressions. Use references and study how light interacts with the eyes.
Q: What materials should I use for drawing eyes?
A: A good set of pencils ranging from hard to soft (H to B) will help. You may also want blending stumps and erasers for shading and highlights.
Q: Can I draw eyes without a reference?
A: While it's possible, using references will greatly enhance your accuracy and understanding of eye anatomy. It's a good practice to use them, especially when starting out.

Creating a Lifelike Nose
When it comes to drawing a face, the nose is a crucial feature that can greatly influence the overall likeness and expression. It’s not just a simple shape; it’s a three-dimensional structure that varies significantly from person to person. To capture this complexity, you need to focus on both the shape and the shading of the nose. A well-drawn nose can bring your portrait to life, so let’s dive into the techniques that will help you create a lifelike representation.
First, consider the basic shapes that form the nose. Start by visualizing it as a combination of geometric forms. The bridge of the nose can be likened to a rectangular prism, while the nostrils can be thought of as rounded shapes. This foundational understanding will help you sketch the nose more accurately. When you begin to outline, remember that the width of the nose typically aligns with the inner corners of the eyes, which is a crucial proportion to keep in mind.
Next, let’s talk about the nostrils. They can vary widely in appearance. Some are more pronounced, while others are subtle. To capture this, pay attention to the curvature and depth of the nostrils. You can achieve this by gently curving the lines that define their edges. A common mistake is to draw nostrils too flat or too wide; instead, aim for a natural, rounded look that reflects how they appear in real life.
Now, let’s move on to shading. This is where your nose starts to gain dimension. Use a soft pencil or charcoal to create shadows along the sides of the nose and beneath the bridge. These shadows will help to define the contours and bring out the three-dimensionality. Remember, light typically hits the bridge of the nose, creating highlights that contrast with the darker areas. To create these highlights, you can leave certain areas of your drawing lighter or use an eraser to lift graphite, giving it a more realistic sheen.
For a more detailed approach, consider using a blending tool or your finger to smooth out the shading. This technique can help to create a more realistic transition between light and shadow. Additionally, don’t forget to observe your reference closely. Every nose has unique characteristics, and capturing those details will elevate your drawing from ordinary to extraordinary.
Finally, it’s essential to practice drawing noses from different angles. Each perspective will present new challenges and opportunities to refine your skills. You might find it helpful to create a small sketchbook dedicated solely to nose studies. This way, you can experiment with various styles and techniques without the pressure of completing a full portrait.
In summary, creating a lifelike nose requires a combination of understanding its structure, observing real-life references, and mastering shading techniques. With practice, you’ll be able to draw noses that not only look realistic but also convey emotion and personality, enhancing the overall impact of your portraits.
- What materials are best for drawing noses? A soft pencil, charcoal, and blending tools work well for creating realistic noses.
- How can I practice drawing noses effectively? Focus on drawing noses from various angles and make quick sketches to improve your understanding of different shapes.
- Should I use reference photos? Yes, using reference photos can greatly enhance your ability to capture realistic details.
Shading and Texturing Techniques
When it comes to drawing faces, shading and texturing are the magic ingredients that can transform a flat image into a lifelike representation. Think of shading as the artist's way of adding depth, much like how a sculptor chisels away at a block of stone to reveal the form within. It’s not just about filling in dark areas; it’s about understanding how light interacts with the curves and planes of the face.
To start, let’s break down the basic principles of shading. The first step is to identify your light source. This is crucial because it dictates where the highlights and shadows will fall. Imagine the sun shining down on a face—one side will be brightly lit, while the other will be in shadow. By observing real-life subjects or using reference photos, you can develop an eye for how light behaves. Once you have your light source established, you can begin to apply shading techniques.
One effective technique is known as hatching, where you create a series of parallel lines to indicate shadow. The closer the lines are together, the darker the area will appear. In contrast, cross-hatching adds another layer by crossing lines over each other, providing even more depth. This method is especially useful for areas like the cheeks and under the chin, where shadows can be more pronounced.
Another technique to consider is blending. This involves using tools like blending stumps or even your fingers to smooth out the lines and create a more seamless transition between light and dark areas. Blending can help in achieving a soft, realistic look, especially around delicate features like the eyes and lips. However, be careful not to over-blend; a little texture can add character to your drawing.
Texture is equally important in making your drawing come alive. Different facial features have distinct textures—skin can be smooth, while hair can be coarse. To convey this, you can use various pencil strokes or even different mediums. For example, using a softer pencil for skin can create a gentle, smooth effect, while a harder pencil can mimic the sharpness of hair strands.
Here’s a quick table summarizing some common shading techniques:
| Technique | Description |
|---|---|
| Hatching | Using parallel lines to create shadows. |
| Cross-hatching | Layering lines in different directions for depth. |
| Blending | Smoothing out lines to create seamless transitions. |
| Stippling | Using dots to create texture and shading. |
As you practice these techniques, remember to keep experimenting. Each artist has their unique style, and what works for one might not work for another. Don’t be afraid to mix techniques or even develop your own. The goal is to find what resonates with you and enhances your ability to portray the human face with all its complexities.
In conclusion, mastering shading and texturing is a journey that requires patience and practice. By understanding the principles of light and shadow, and by experimenting with various techniques, you'll be well on your way to creating stunning, lifelike portraits that capture the essence of your subjects. Remember, every stroke counts, and with each drawing, you are not just creating art; you are telling a story.
- What materials do I need for shading? You can use pencils of various hardness, blending stumps, and even charcoal for more dramatic effects.
- How do I know where to place shadows? Observing your light source and studying reference images can help you determine where shadows naturally fall.
- Can I use color for shading? Absolutely! Colored pencils or markers can add an extra dimension to your artwork.
- How do I practice shading techniques? Regularly sketching from life or photographs and focusing specifically on shading can help improve your skills.
Common Mistakes to Avoid
When it comes to drawing faces, even the most seasoned artists can fall into traps that hinder their progress. Understanding these common mistakes is crucial for anyone looking to improve their skills. One of the biggest pitfalls is neglecting the importance of facial proportions. Many beginners rush into detailing features without ensuring they’re correctly placed. This can lead to a face that looks distorted or unrealistic. Remember, the face is a complex structure, and getting the proportions right is like laying a strong foundation for a house; without it, everything else crumbles.
Another frequent mistake is failing to observe light and shadow. Shading is what brings your drawing to life, giving it depth and dimension. A common error is using flat, uniform shading without considering the light source. Instead, think of your face as a three-dimensional object. Where would the light hit? Where would the shadows fall? This understanding can transform a flat drawing into something that pops off the page.
Additionally, many artists overlook the importance of reference images. While it may be tempting to draw from memory, this often leads to inaccuracies. Using photographs or even live models can provide invaluable insight into the subtleties of facial features. If you’re unsure where to start, consider creating a simple table to compare your drawing with a reference image. This can help you spot discrepancies in proportions, angles, and details.
| Common Mistake | Solution |
|---|---|
| Neglecting facial proportions | Use guidelines and reference images to maintain correct proportions. |
| Ignoring light and shadow | Study how light interacts with faces and practice shading techniques. |
| Relying solely on memory | Always use reference images for accuracy. |
Moreover, many artists often forget to practice regularly. Drawing is a skill that improves with consistent practice. It’s easy to get discouraged if you don’t see immediate results, but remember that even the greats had to start somewhere. Set aside time each week to focus on drawing faces, experimenting with different techniques and styles. This dedication will pay off in the long run.
Lastly, one of the most detrimental mistakes is being overly critical of your work. It’s easy to get caught up in the details and focus on what’s wrong rather than celebrating what you’ve achieved. Remember, every artist has their unique style and journey. Embrace the learning process, and don’t be afraid to make mistakes; they are often the best teachers.
Q: How can I improve my facial proportions?
A: Use guidelines to map out the basic shapes before detailing. Study reference images to understand how features align.
Q: What materials should I use for drawing faces?
A: Start with basic pencils and paper, then experiment with charcoal, colored pencils, or digital tools as you progress.
Q: How important is shading in facial drawings?
A: Shading is crucial for adding depth and realism. Practice different shading techniques to enhance your drawings.
Q: Is it okay to draw from photographs?
A: Absolutely! Using photographs as references can greatly improve your accuracy and understanding of facial features.

Practicing and Improving Your Skills
When it comes to drawing faces, practice truly makes perfect. It's like learning to ride a bike; the more you do it, the more natural it becomes. To improve your skills effectively, you need a structured approach that combines both practice and reflection. Here are some strategies to help you elevate your face-drawing game.
First off, set aside dedicated time for practice. Think of it as your personal art gym. Just like you wouldn't skip leg day, you shouldn't skip your drawing sessions. Aim for at least 30 minutes a day, but feel free to extend that time if you're feeling inspired. During these sessions, focus on different aspects of the face. One day, you might concentrate solely on eyes, while another day could be all about noses. This focused practice will help you grasp the nuances of each feature.
Another effective technique is to use reference images. Whether it’s photographs, sketches, or even live models, having something to look at can significantly improve your accuracy. Try to analyze the proportions and shapes of the features in these references. You can even create a reference board where you collect images that inspire you. This will not only serve as a visual guide but will also motivate you to keep practicing.
Additionally, consider joining a community of artists. Platforms like Instagram, DeviantArt, or even local art groups can provide a wealth of knowledge and support. Sharing your work and receiving constructive feedback can be invaluable. Plus, seeing others' progress can ignite your own creativity and push you to try new techniques.
Don’t forget to keep a sketchbook handy. This will be your personal playground where you can experiment without the pressure of perfection. Allow yourself to make mistakes; they are often the best teachers. You might even want to dedicate a page to each feature—eyes, noses, mouths, and so forth—so you can track your progress over time.
Finally, remember that improvement comes with patience. It’s easy to get frustrated when things don’t turn out the way you envision. Instead of giving up, take a step back and evaluate your work. Ask yourself what you can do differently next time. This reflective practice will help you develop a keen eye for detail and a stronger understanding of facial anatomy.
In summary, to practice and improve your face-drawing skills, you should:
- Set aside dedicated practice time each day.
- Use reference images for accuracy.
- Engage with a community of artists for feedback and inspiration.
- Keep a sketchbook to experiment and track progress.
- Be patient and reflective about your work.
By implementing these strategies, you'll find yourself not just drawing faces, but truly capturing the essence of each individual you portray. Remember, the journey of an artist is never-ending, and every stroke of your pencil brings you one step closer to mastery.
Q: How often should I practice drawing faces?
A: Aim for at least 30 minutes a day, but feel free to extend that time if you're inspired. Consistency is key!
Q: Where can I find good reference images?
A: You can find reference images on sites like Pinterest, Unsplash, or even by taking your own photographs. Just ensure they are clear and well-lit.
Q: What should I do if I get frustrated with my progress?
A: Take a break, reflect on what you can improve, and remember that every artist goes through phases of frustration. Be patient with yourself!
Frequently Asked Questions
- What materials do I need to start drawing a face?
To kick off your face-drawing journey, you'll need some essential materials. Grab a good quality sketchbook, a set of pencils (ranging from H to B), an eraser, and a sharpener. If you're feeling adventurous, consider adding charcoal or colored pencils for some flair!
- How do I understand facial proportions?
Facial proportions are like the blueprint of your drawing. A common rule is to divide the face into equal sections. For instance, the eyes are typically halfway down the head, while the bottom of the nose sits about halfway between the eyes and the chin. Mastering these proportions will help you create a more realistic face.
- What are some tips for drawing realistic eyes?
Eyes are the windows to the soul, right? To make them pop, focus on the shape and size. Remember to include the iris and pupil, and don’t forget about the highlights! A little reflection can add depth and emotion, making your drawing come alive.
- How can I avoid common mistakes when drawing faces?
We all stumble, especially when learning! Some common mistakes include misplacing features or neglecting shading. To avoid these, always double-check your proportions and practice shading techniques to add dimension. And remember, practice makes perfect!
- How often should I practice drawing faces?
Consistency is key! Try to draw faces a few times a week. Even short sessions can lead to improvement. Set aside time for focused practice, and explore different styles and techniques to keep things fresh and exciting!
- Can I use digital tools for drawing faces?
Absolutely! Digital art offers a fantastic platform for creating faces. Programs like Procreate or Adobe Fresco allow for easy corrections and experimentation with colors and textures. So, if you love the digital realm, go for it!


