
How to Create an Impressive Portrayal of the Human Eye
Creating an impressive portrayal of the human eye is not just about replicating what you see; it’s about capturing the essence and emotion that the eye conveys. The eye is often referred to as the "window to the soul," and when you manage to depict it accurately, you can evoke a powerful response from your audience. Whether you are a seasoned artist or just starting out, understanding the intricacies of the eye can elevate your artwork to new heights. In this article, we will explore various techniques and tips that will help you enhance your artistic skills and achieve a lifelike representation of the human eye in different mediums.
Before you can effectively portray the human eye, it is vital to have a foundational understanding of its anatomy. The eye is a complex organ made up of several parts, each playing a crucial role in how we perceive the world around us. Key components include the cornea, iris, pupil, lens, and retina. Each of these parts interacts with light in unique ways, creating the stunning visuals we often take for granted.
For artists, grasping the nuances of eye anatomy allows for a more accurate representation. For instance, the iris is not just a flat color; it has textures, gradients, and variations that can change based on light and emotion. Similarly, the pupil can dilate or constrict, reflecting changes in light and mood. Understanding these elements will help you play with light and shadow, enhancing the realism of your artwork.
When it comes to creating eye portraits, the medium you choose can significantly impact your final result. Each medium has its own unique characteristics that can either enhance or hinder your artistic expression. Below, we will discuss some popular mediums and their pros and cons to help you make an informed decision:
| Medium | Pros | Cons |
|---|---|---|
| Graphite Pencils | Precision, control, easily erasable | Limited color range |
| Watercolors | Vibrant colors, soft effects | Less control, can be difficult to layer |
| Digital Tools | Endless possibilities, easy to edit | Requires technology and software |
By weighing the pros and cons of each medium, you can select the one that aligns best with your artistic style and the effect you want to achieve.
Graphite pencils are a favorite among artists for their precision and control. They allow for detailed sketches that can capture the fine nuances of the human eye. When working with graphite, it’s essential to master shading techniques to create realistic textures. Shading can bring depth and dimension to your drawing, making the eye appear more lifelike.
Blending is a crucial technique in pencil drawing, particularly for achieving smooth transitions in the eye's colors and shadows. You can use tools like blending stumps or even your fingers to soften harsh lines and create a more natural look. Experimenting with different blending techniques can help you find your unique style.
Understanding how to apply highlights and shadows is key to creating depth in your eye illustrations. Identify the light source in your artwork and consider how it interacts with the eye. The cornea should reflect light, giving it a shiny appearance, while the iris can have darker areas that suggest depth. Mastering this interplay will make your eye portrayals pop.
Watercolors are another fantastic medium for portraying the human eye. They can produce vibrant effects and allow for soft transitions that mimic the natural look of the eye. Layering colors is essential in watercolor painting; start with lighter washes and gradually build up to darker shades. This technique can create the illusion of transparency, enhancing the complexity of your eye depiction.
The human eye is a powerful communicator, capable of conveying a wide range of emotions. To truly capture the essence of the eye, you must pay attention to subtle changes in shape, color, and light. A slight tilt of the eyebrow or a change in the pupil's size can dramatically alter the expression being portrayed.
Reference images are invaluable tools for artists. They provide a guide for accuracy and help you understand how light and shadow interact with the eye. When selecting reference photos, look for images that showcase different angles, lighting conditions, and emotional expressions to broaden your understanding.
Finally, consistent practice and experimentation are essential for honing your skills. Don’t be afraid to try different styles or techniques, as this will help you discover your unique representation of the human eye. Remember, every artist has a different approach, and finding yours can be an exciting journey!
- What is the best medium for beginners? Graphite pencils are often recommended for beginners due to their ease of use and control.
- How can I improve my eye drawing skills? Practice regularly and use reference images to guide your work.
- Are there specific techniques for capturing emotions in the eye? Yes, focusing on the shape of the eye and the surrounding features can help convey different emotions.

Understanding Eye Anatomy
When diving into the world of eye portrayal, understanding the intricate anatomy of the human eye is crucial. The eye is not just a simple organ; it’s a complex structure that plays a vital role in how we perceive the world around us. By grasping the various parts of the eye and their functions, you can enhance your artistic skills and create more lifelike representations.
The human eye consists of several key components, each contributing to its overall function. Here’s a quick breakdown of the main parts:
| Part of the Eye | Function |
|---|---|
| Cornea | The transparent front layer that refracts light. |
| Iris | The colored part of the eye that controls the size of the pupil. |
| Pupil | The opening that allows light to enter the eye. |
| Lens | Focuses light onto the retina. |
| Retina | Converts light into neural signals for the brain. |
| Optic Nerve | Transmits visual information to the brain. |
Understanding these components is vital for artists, as each part contributes to the overall appearance of the eye. For instance, the cornea has a glossy surface that reflects light, while the iris can exhibit a range of colors and patterns. Observing these details can significantly enhance your artwork.
Furthermore, it's essential to consider how light interacts with these structures. The way light reflects off the cornea and casts shadows on the iris can create depth and realism in your drawings. By studying how light behaves in different environments, you can replicate these effects in your art. Think of it as capturing a fleeting moment in time, where the eye not only sees but also expresses emotion.
Additionally, the eye's anatomy varies from person to person, adding another layer of complexity to your artistic endeavor. Some eyes may have more pronounced veins or unique color patterns, while others might display a distinct shape or size. This variability provides a rich canvas for exploration and creativity. By practicing with different subjects, you’ll learn to appreciate these nuances and incorporate them into your work.
In conclusion, a solid understanding of eye anatomy is the foundation for creating impressive portrayals of the human eye. By recognizing the different parts and how they interact with light, you can elevate your artistic skills and produce striking representations that resonate with viewers. So, the next time you pick up a pencil or brush, remember: you are not just drawing an eye; you are capturing a world of emotion and detail.
Choosing the Right Medium
When it comes to portraying the intricate details of the human eye, the choice of medium can significantly impact the final outcome of your artwork. Each medium has its unique characteristics, advantages, and challenges, and understanding these can help you make an informed decision that aligns with your artistic vision. So, let’s dive into the world of artistic mediums and explore how they can enhance your eye portrayal!
First off, let’s talk about graphite pencils. If you're looking for precision and control, graphite pencils might just be your best friend. They allow you to create fine details and subtle textures, which are essential for capturing the delicate features of the eye. With a variety of hardness levels, you can achieve everything from soft, gentle lines to sharp, defined edges. The beauty of graphite lies in its ability to blend seamlessly, making it perfect for shading and creating lifelike gradients. The control you have with a pencil can make the difference between a flat representation and a dynamic, three-dimensional eye.
Now, if you're feeling adventurous, watercolors might be the way to go. Watercolors can bring a vibrant and ethereal quality to your artwork that is hard to replicate with other mediums. The fluid nature of watercolor allows for beautiful layering techniques, giving you the ability to create depth and complexity in your eye illustrations. However, they do require a certain level of skill and understanding of how water interacts with pigment. If you can master the art of transparency and layering, your portrayal of the human eye can take on a life of its own, shimmering with color and emotion.
Another exciting option is digital tools. With the rise of technology, digital art has opened up a whole new world of possibilities for artists. Programs like Adobe Photoshop or Procreate offer a plethora of brushes and effects that can mimic traditional mediums while allowing for quick adjustments and endless experimentation. The ability to work with layers means you can easily add highlights, shadows, and intricate details without the fear of making irreversible mistakes. Plus, you can easily share your work online, reaching a broader audience and receiving instant feedback!
To help you weigh the pros and cons of each medium, here’s a quick comparison:
| Medium | Pros | Cons |
|---|---|---|
| Graphite Pencils | Precision, control, great for detailed work | Can be time-consuming, limited color range |
| Watercolors | Vibrant colors, soft effects, great for layering | Less control, requires practice to master |
| Digital Tools | Versatile, easy to edit, endless possibilities | Can be overwhelming due to options, requires technology |
Ultimately, the choice of medium comes down to your personal style and the effect you wish to achieve. Some artists even find success in combining different mediums to create a unique representation of the human eye. For instance, starting with a pencil sketch and then enhancing it with watercolors or digital effects can yield stunning results. The key is to experiment and find what resonates with you.
So, whether you’re a pencil aficionado, a watercolor wizard, or a digital dynamo, remember that the medium you choose is just a tool to express your artistic vision. Dive into your chosen medium with an open mind, and let your creativity flow as you capture the mesmerizing beauty of the human eye!
- What is the best medium for beginners? Graphite pencils are often recommended for beginners due to their ease of use and the control they offer.
- Can I mix mediums? Absolutely! Many artists find that combining different mediums can create unique effects and enhance their artwork.
- How do I choose the right colors for my eye portrayal? Studying reference images can help you understand the natural colors of the eye and guide your color choices.

Graphite Pencils
Graphite pencils are the unsung heroes of the art world, offering a blend of precision and control that can elevate your eye drawings to a whole new level. When you think of capturing the intricate details of the human eye, these pencils become your best friends. With a range of hardness levels, from the soft, dark B pencils to the hard, light H pencils, you can manipulate the depth and texture of your artwork with ease. The beauty of graphite lies in its versatility; whether you're sketching the delicate lines of the iris or the subtle shadows that give the eye its lifelike quality, these tools can help you achieve stunning results.
To get started, you need to understand a few fundamental techniques that can significantly enhance your portrayal of the eye. One of the most important aspects is shading. The way you apply graphite can create a sense of dimension and realism. For instance, using a lighter touch with your pencil can produce soft, gradual transitions, while applying more pressure can yield darker, more pronounced areas. This variation is essential in depicting the nuances of the eye, such as the reflective highlights on the cornea or the depth in the sclera.
Another key technique is blending. Mastering blending can transform your pencil strokes into smooth gradients that mimic the natural appearance of the eye. You can use a blending stump or even your fingers to gently smudge the graphite, creating a seamless transition between light and shadow. This technique is particularly effective when rendering the subtle curves of the eyelid or the soft texture of the eyelashes. The goal is to make your drawing feel alive, as if the eye could blink at any moment.
To illustrate the importance of these techniques, consider the following table that summarizes the different pencil grades and their uses:
| Pencil Grade | Characteristics | Best Used For |
|---|---|---|
| H (Hard) | Light marks, fine lines | Initial sketches, details |
| B (Soft) | Dark marks, rich shading | Shading, depth |
| HB | Medium hardness | General use, outlines |
Understanding how to apply highlights and shadows is crucial in eye portrayal. You should always consider your light source when drawing. For example, if the light is coming from the top left, the upper part of the eye will likely be lighter, while the lower part will be darker. This contrast adds depth and dimension to your artwork, making it more lifelike. Pay close attention to the reflections in the eye, as they can convey emotion and add a touch of realism that captures the viewer's attention.
In conclusion, mastering the use of graphite pencils for eye drawings involves understanding the tools at your disposal, practicing shading and blending techniques, and being mindful of light and shadow. With time and dedication, you can create eye portraits that not only capture the intricate details but also evoke emotion and intrigue. So grab your pencils, find a reference image, and start bringing those stunning eyes to life!
Q: What type of paper is best for graphite pencil drawings?
A: A smooth, high-quality drawing paper is ideal for graphite pencil work, as it allows for better blending and shading.
Q: How do I keep my graphite pencils sharp?
A: Use a sharpener designed for art pencils, and consider using a craft knife for a finer point.
Q: Can I mix different pencil grades in one drawing?
A: Absolutely! Mixing grades can add depth and interest to your artwork, especially in detailed areas like the eye.

Blending Techniques
Blending techniques are crucial when it comes to achieving a smooth and lifelike representation of the human eye in your artwork. Think of blending as the magic wand that transforms your rough sketches into stunningly realistic portrayals. It’s not just about applying color; it’s about creating a seamless transition between shades and textures that mimic the natural beauty of the eye. Whether you’re working with graphite pencils, watercolors, or digital tools, mastering blending can elevate your artwork to new heights.
When working with graphite, one of the best ways to blend is by using a blending stump or tortillon. These tools are perfect for smoothing out pencil strokes and creating soft gradients. Start by applying a light layer of graphite to the area you want to blend. Then, gently rub the blending stump over the area in circular motions. This technique allows the graphite to spread evenly, creating a soft, natural look. Remember, less is often more; it’s easier to add more graphite than to remove it!
Another technique involves using your fingers for blending. While this method can be a bit messier, it can also yield fantastic results. The warmth of your fingers can help to soften the graphite, allowing for a more organic blend. Just be cautious not to smudge other areas of your drawing. To keep your hands clean, consider using a finger cot or a piece of tissue to shield your fingers while still allowing for that tactile blending effect.
For those working with watercolors, blending takes on a different form. The key here is to understand wet-on-wet and wet-on-dry techniques. With wet-on-wet, you apply wet paint onto a wet surface, allowing colors to flow and merge beautifully. This technique is especially effective for creating the soft, transparent look of the eye's iris. On the other hand, wet-on-dry involves applying wet paint onto a dry surface, which allows for more control and precision. This method is great for adding details, such as the tiny reflections that give the eye its sparkle.
Additionally, layering is an essential part of watercolor blending. Start with a light wash and gradually build up darker tones. This gradual approach prevents the colors from becoming muddy and helps maintain the vibrancy of your artwork. It’s like constructing a delicate cake; each layer adds depth and flavor, resulting in a masterpiece that’s both complex and appealing.
In digital art, blending can be achieved through various brushes and tools available in software like Adobe Photoshop or Procreate. Utilizing the soft brush tool can help you create smooth transitions between colors. Adjusting the opacity and flow settings allows for even more control, enabling you to layer colors and achieve that coveted realism. Don't forget to experiment with different brush types; sometimes, a textured brush can add an unexpected depth that enhances your eye portrayal.
Lastly, regardless of the medium you choose, practice is paramount. Spend time experimenting with different blending techniques and tools to discover what works best for you. Remember, blending is an art in itself, and like any skill, it improves with time and patience. So grab your supplies, put on some music, and let your creativity flow!
- What is the best medium for blending techniques? Each medium has its strengths. Graphite and colored pencils are great for detailed blending, while watercolors excel in soft transitions. Digital tools offer endless possibilities for blending styles.
- How can I avoid muddy colors when blending? To avoid muddy colors, always start with lighter washes or layers and gradually build up darker tones. Clean brushes and tools also help maintain color integrity.
- Can I blend with my fingers when using watercolors? It’s not common to blend with fingers in watercolor painting, as it can lead to unwanted smudging. Instead, use brushes or wet techniques for better control.
Highlighting and Shadows
When it comes to creating a lifelike portrayal of the human eye, understanding highlights and shadows is absolutely crucial. These elements not only add depth but also bring your artwork to life, transforming a flat image into a dynamic representation. Think of highlights as the sparkle in the eye, capturing light and drawing the viewer's attention, while shadows provide the necessary contrast that gives the eye its form and dimension.
To effectively incorporate highlights and shadows, you first need to identify the light source in your composition. Is it natural light coming from a window, or is it artificial lighting from a lamp? The direction and intensity of the light will significantly influence how you portray these elements. For instance, a strong overhead light will create stark shadows and bright highlights, while a softer, diffused light will produce gentler transitions.
Once you have established the light source, it’s time to analyze how it interacts with the eye. The cornea, for example, often has a shiny surface that reflects light, creating bright spots. These highlights can be painted or drawn as small, white or light-colored shapes on the eye's surface. On the other hand, the sclera (the white part of the eye) may have subtle shadows that give it a rounded appearance. By carefully observing these details, you can replicate them in your artwork.
Here are some techniques to help you master the application of highlights and shadows:
- Layering: Start with a base color and gradually build up layers of darker shades for shadows and lighter shades for highlights. This method creates a more realistic effect.
- Blending: Use tools like blending stumps or soft brushes to smooth out transitions between light and dark areas, making them appear more natural.
- Contrast: Don’t shy away from using stark contrasts. Sometimes, a bold highlight or shadow can create a dramatic effect that enhances the overall composition.
As you practice, remember that every eye is unique. Different eyes will reflect light differently based on their shape, color, and even the surrounding environment. So, take the time to study various eyes and experiment with how you represent highlights and shadows. It’s all about finding the right balance that captures the essence of the eye you are portraying.
In conclusion, mastering highlights and shadows is an essential skill for any artist looking to create stunning and realistic eye portrayals. By understanding how light interacts with the eye and applying the right techniques, you can elevate your artwork from ordinary to extraordinary.
- What is the best way to practice highlighting and shadowing techniques?
Experiment with different light sources and practice drawing or painting various eye shapes. Use reference images to guide your understanding of how light interacts with the eye. - Can I use digital tools for highlighting and shadows?
Absolutely! Digital art software often includes blending tools and layers that can make it easier to manipulate highlights and shadows. - How do I know when to add more highlights or shadows?
Trust your instincts and continuously assess your work. If an area feels flat or lacks dimension, consider adding more contrast.
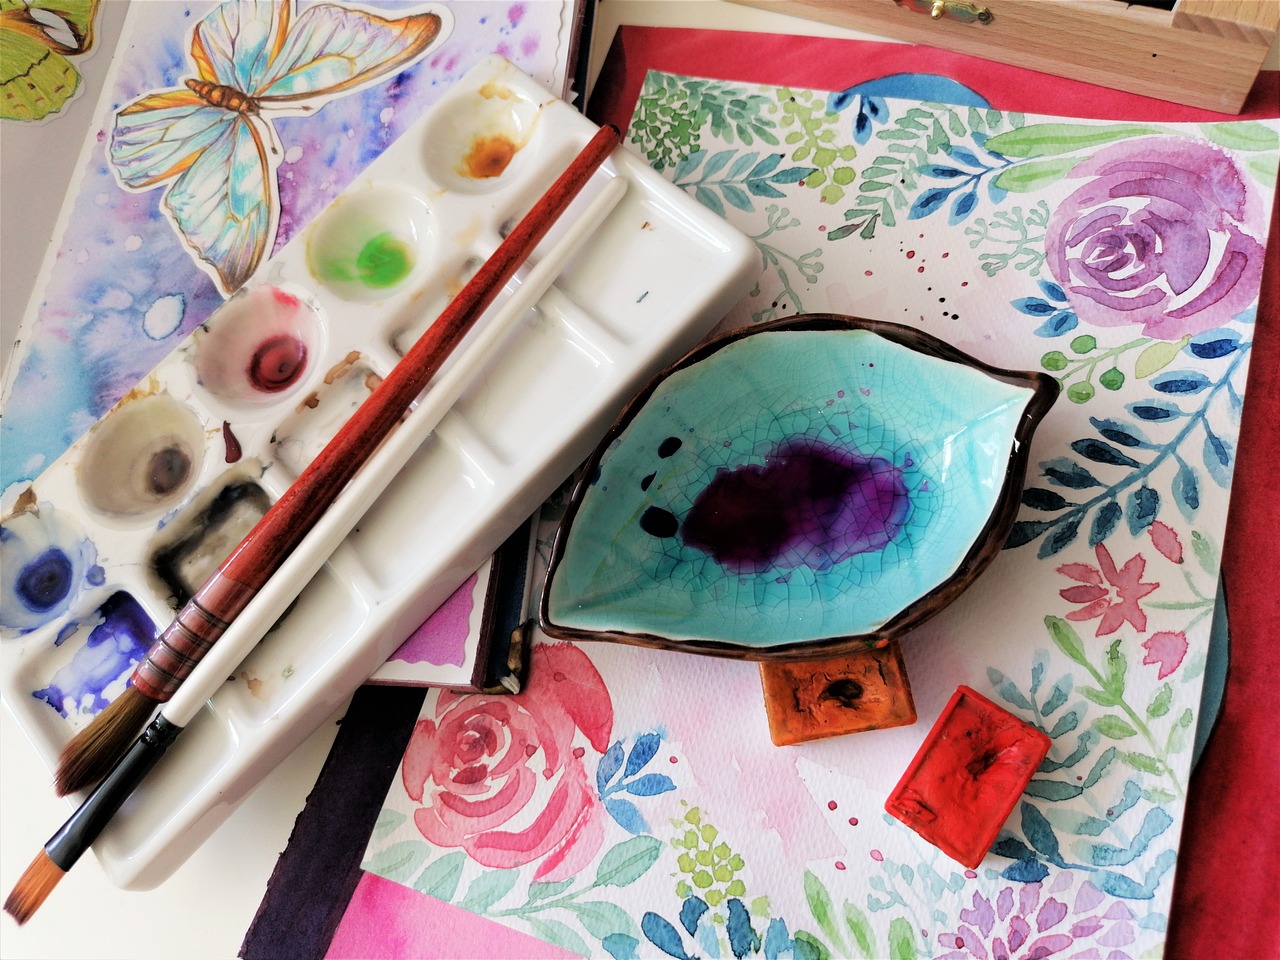
Watercolor Techniques
Watercolor painting is like dancing with colors; it’s fluid, unpredictable, and oh-so-beautiful when done right. The vibrant and delicate nature of watercolors allows artists to capture the intricate details of the human eye in a way that feels alive. To truly master watercolor techniques, it’s essential to embrace the unique properties of this medium. One key aspect is understanding how to layer colors effectively. By applying washes of color in thin, transparent layers, you can build depth and complexity, much like constructing a multi-layered cake. This layering technique is particularly useful for depicting the subtle variations in the iris and sclera of the eye.
Another important technique in watercolor is the use of wet-on-wet and wet-on-dry methods. The wet-on-wet technique involves applying wet paint onto a wet surface, allowing colors to blend and flow into one another, creating soft edges and ethereal effects. This method is perfect for capturing the gentle transitions of light and shadow across the eye's surface. On the other hand, the wet-on-dry technique involves painting wet paint onto a dry surface, which produces sharper edges and more defined shapes. This is particularly useful for adding details like eyelashes and reflections in the eye.
Moreover, mastering the art of lifting is crucial in watercolor painting. Lifting refers to the technique of removing paint from the paper, which can be achieved using a damp brush or sponge. This allows you to create highlights and add dimension to your work, especially in the reflective areas of the eye. Imagine the sparkle of light dancing on the surface of the iris; that’s what lifting can help you achieve!
Don’t forget about the importance of color mixing. Understanding how to create a range of skin tones and the various colors found in the eye can elevate your artwork significantly. For instance, the whites of the eye are not just white; they contain subtle hues of blue, gray, or even yellow. Experimenting with color mixing can help you replicate these nuances, making your portrayal of the human eye more realistic.
As you practice these techniques, remember that watercolors can be unpredictable. Embrace the surprises that come with this medium. Sometimes, the most stunning effects arise from happy accidents. So, grab your brushes, let your creativity flow, and enjoy the journey of bringing the human eye to life on paper!
Q: What is the best paper to use for watercolor painting?
A: Choosing a high-quality watercolor paper is essential. Look for paper that is at least 200gsm (grams per square meter) to prevent warping. Cold-pressed paper is great for texture, while hot-pressed paper offers a smooth surface for detailed work.
Q: How do I prevent my watercolors from becoming muddy?
A: To avoid muddy colors, always clean your brush between colors and use a limited palette. Start with lighter colors and gradually build up to darker shades. This keeps your colors vibrant and fresh.
Q: Can I use watercolor pencils for eye portrayal?
A: Absolutely! Watercolor pencils can offer precision and control. You can use them dry for fine details and then activate them with water for a more painterly effect.

Capturing Expression
When it comes to portraying the human eye, one of the most fascinating aspects is its ability to convey a wide range of emotions. Have you ever noticed how just a slight change in the shape of an eyelid or a subtle shift in color can transform a blank stare into a look of joy or sadness? This is the magic of the human eye, and understanding how to capture that essence can elevate your artwork from mere representation to a powerful emotional statement.
To effectively capture expression, it's essential to focus on several key elements. First, consider the shape of the eye. The curvature of the eyelids and the positioning of the eyelashes can dramatically alter the perceived emotion. For instance, raised eyebrows and wide-open eyes often signify surprise or excitement, while drooping lids can indicate fatigue or sorrow. Paying close attention to these details can help you create a more lifelike portrayal that resonates with viewers.
Next, let's talk about color. The human eye is not just a simple shade of brown, blue, or green; it is a complex mix of hues, tones, and undertones. Subtle variations in color can convey different feelings. For example, a bright, vibrant iris can evoke feelings of happiness, while darker, muted tones might suggest melancholy. To achieve this in your artwork, consider using a variety of shades and blending techniques that reflect the true essence of the eye you’re portraying.
Light also plays a crucial role in expressing emotion. The way light hits the eye can create dramatic effects that enhance its emotional depth. For instance, a well-placed highlight can bring the eye to life, making it appear more vibrant and engaging. Conversely, shadows can add a sense of mystery or sadness. Understanding how to manipulate light and shadow will allow you to add layers of meaning to your artwork.
Incorporating reference images can be an invaluable tool for capturing expression. By studying photographs that showcase a range of emotions, you can analyze how different features come together to create a specific feeling. Look for images where the eyes are the focal point, and take note of the subtle changes that occur with different expressions. This practice will not only enhance your accuracy but will also deepen your understanding of how to portray emotion effectively.
Lastly, don't forget the importance of practice and experimentation. The more you draw and paint eyes, the better you'll become at understanding the nuances of expression. Try working with various styles and techniques to find what resonates with you. You might discover that a certain approach allows you to convey emotion more effectively than others. Remember, art is a journey, and each piece you create is a stepping stone towards mastering the intricate portrayal of the human eye.
- What are the best techniques for capturing emotion in the eye?
Focus on the shape, color, and light in your portrayal. Subtle changes can convey a wide range of feelings. - How important are reference images?
Reference images are crucial for accuracy. They help you understand how different features contribute to emotional expression. - Can I use digital tools to enhance my eye portrayals?
Absolutely! Digital tools offer unique advantages, such as easy color adjustments and layering techniques that can enhance the emotional depth of your artwork.

Using Reference Images
When it comes to creating an impressive portrayal of the human eye, is not just a suggestion; it's a necessity. Think of reference images as your artistic compass, guiding you through the intricate maze of details that make the eye so captivating. Without them, you might find yourself lost in a world of guesswork, which can lead to frustrating results. So, how do you effectively utilize these images to enhance your artwork?
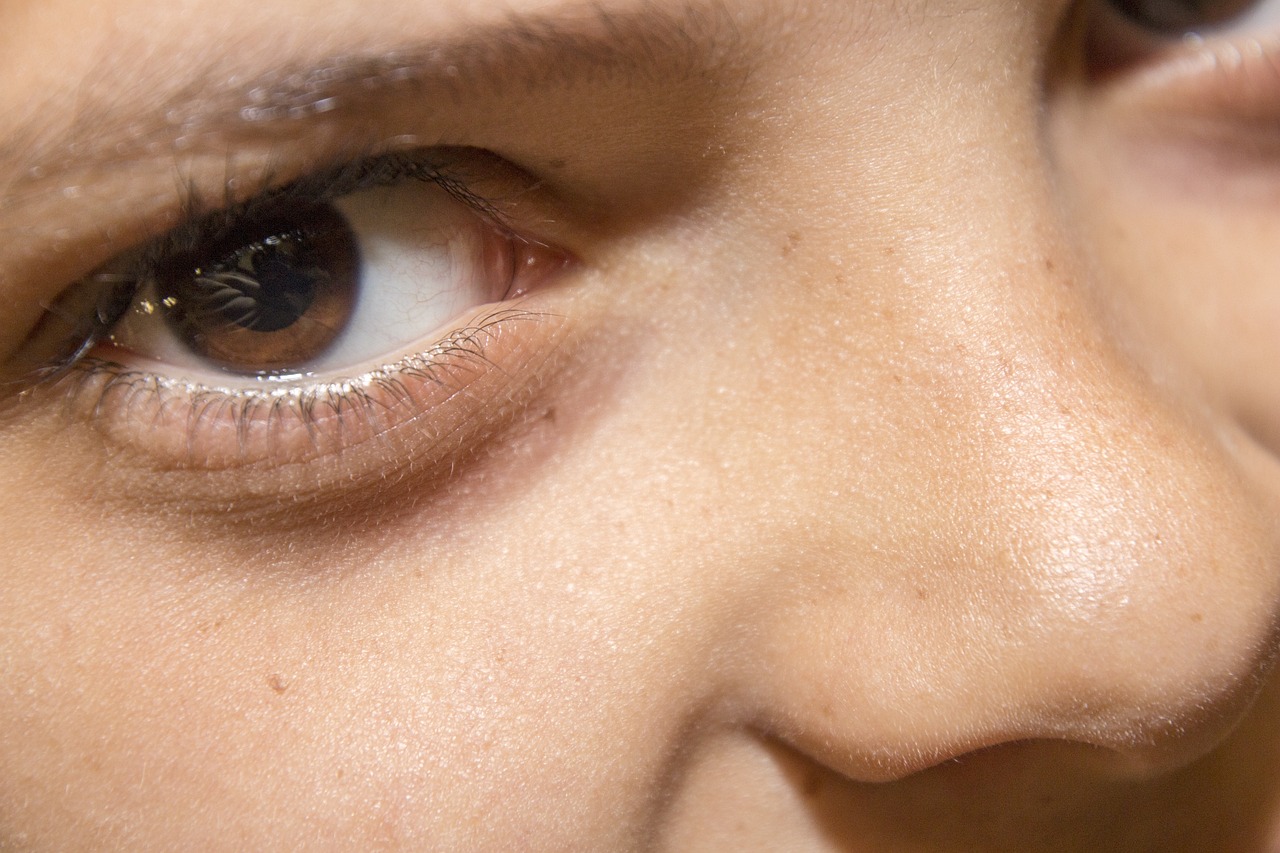
First and foremost, selecting the right reference image is crucial. You want to choose images that showcase the eye in various lighting conditions, angles, and expressions. This will give you a well-rounded understanding of how light interacts with the eye's surface and how different shapes can convey emotions. For instance, a close-up shot can reveal the subtle textures of the iris and pupil, while a more distant image might show how the eye fits into the overall facial structure.
Once you have your reference images, it's time to analyze them. Take a moment to really look at the details. What colors are present in the iris? Is there a noticeable reflection of light on the surface of the eye? Are there any shadows that add depth? By breaking down these elements, you can start to understand how to replicate them in your own work. It’s like being a detective, piecing together clues to solve the mystery of creating a lifelike eye.
Moreover, consider creating a mood board with your reference images. This can be a physical board or a digital collection, but the idea is to have all your inspirations in one place. You can include different styles, colors, and lighting effects that resonate with you. This not only serves as a visual guide but also sparks creativity, helping you to visualize how you want to approach your artwork.
Another tip is to use a grid method when working from your reference images. By overlaying a grid on your reference photo and your drawing surface, you can focus on capturing the proportions and details more accurately. This technique breaks down the complexity into manageable sections, making it easier to replicate the intricate features of the eye.
Finally, don’t forget to compare your work with the reference image regularly. Step back and assess your progress. Is the shape of the eye consistent with your reference? Are the colors matching up? This constant comparison will help you to stay on track and make adjustments as needed, ensuring that your final piece is as lifelike as possible.
In summary, using reference images effectively can elevate your artistic skills to new heights. They provide a wealth of information and inspiration, guiding you to capture the human eye's beauty and complexity. So, embrace the power of reference images and watch your artistic journey flourish!
- What types of reference images are best for eye drawing? Look for high-resolution images that showcase different lighting, angles, and expressions for the most comprehensive understanding.
- Can I use digital reference images? Absolutely! Digital images can be easily manipulated and zoomed in for better detail, making them a great resource.
- How do I avoid copying from reference images? Use them as a guide rather than a template. Focus on understanding the elements rather than replicating them exactly.
- Is it necessary to use reference images for every piece? While it's not mandatory, reference images can significantly improve the accuracy and quality of your work, especially for complex subjects like the human eye.

Practice and Experimentation
When it comes to mastering the art of portraying the human eye, practice and experimentation are your best friends. Just like a musician perfects their craft through repeated play, an artist hones their skills by diving deep into the intricate world of eye representation. Don't be afraid to make mistakes; they are often the stepping stones to greatness! Each stroke of your pencil or brush is a chance to learn something new about the nuances of light, shadow, and color.
One of the most exciting aspects of art is the opportunity to explore various styles and techniques. Have you ever tried creating an eye with a completely different medium? For instance, you might start with traditional graphite sketches, then venture into vibrant watercolors, or even digital tools. Each medium has its own unique characteristics that can dramatically change the way your eye portrayal comes to life. By experimenting, you’ll discover what resonates with your artistic voice and enhances your representation of the human eye.
Consider setting up a regular practice schedule. Just like athletes train for their sport, artists should dedicate time to refine their skills. Here’s a simple framework you might follow:
| Day | Focus Area | Medium |
|---|---|---|
| Monday | Shading Techniques | Graphite |
| Tuesday | Color Theory | Watercolor |
| Wednesday | Digital Sketching | Digital Tablet |
| Thursday | Texture Creation | Colored Pencils |
| Friday | Expression Capture | Mixed Media |
This table serves as a guideline, and you can adjust it according to your interests and progress. The key is consistency! Each week, reflect on what you’ve learned and where you can improve. Perhaps you found a particular technique that clicked with you, or maybe a specific medium that felt more natural. Embrace that discovery and allow it to guide your future practice sessions.
Additionally, consider collaborating with other artists. Sharing your work and receiving feedback can provide invaluable insights. You might even find inspiration in their unique approaches to eye portrayal. Online forums, local art groups, or social media platforms can be great places to connect with fellow artists who share your passion.
Finally, remember that art is a journey, not a destination. The more you practice and experiment, the more your style will evolve. So grab your tools, unleash your creativity, and enjoy the process of creating stunning representations of the human eye!
- How often should I practice drawing eyes? Aim for at least a few times a week to see significant improvement.
- What is the best medium for beginners? Graphite pencils are great for beginners due to their ease of use and control.
- Can I use reference images? Absolutely! Reference images are essential for understanding proportions and details.
- How do I know if I'm improving? Keep a portfolio of your work over time to compare your progress.
Frequently Asked Questions
- What are the essential parts of the human eye to understand for drawing?
To accurately portray the human eye, it's crucial to understand its anatomy, including the iris, pupil, sclera, and eyelashes. Each part plays a vital role in how light interacts with the eye, affecting the overall look and depth of your artwork.
- Which medium is best for capturing the details of the eye?
The best medium depends on your personal style and the effect you wish to achieve. Graphite pencils are great for precision, while watercolors can add vibrancy and softness. Experimenting with digital tools can also provide unique results.
- How can I improve my blending techniques in eye drawings?
Improving your blending techniques involves practicing with different tools, such as blending stumps or your fingers, and understanding how to layer colors gradually. Focus on creating smooth transitions between light and shadow for a more lifelike appearance.
- What role do highlights and shadows play in eye portrayal?
Highlights and shadows are essential for adding depth and dimension to your eye illustrations. Identifying the light source and applying highlights where the light hits the eye, as well as shadows in the recessed areas, can create a more realistic effect.
- How can I capture different expressions through my eye drawings?
Capturing expressions involves subtle adjustments in the shape and color of the eye. Pay attention to the positioning of the eyelids, the size of the pupil, and the overall tension in the eye area to convey emotions effectively.
- Are reference images necessary for improving eye drawings?
Yes, reference images are invaluable for achieving accuracy in your artwork. They help you analyze proportions, colors, and details that you might overlook, leading to a more realistic portrayal of the human eye.
- How often should I practice to improve my eye drawing skills?
Consistency is key! Aim to practice several times a week. The more you draw, the more you'll develop your unique style and improve your skills. Don't be afraid to experiment with different techniques and mediums.


