
How to Draw Various Textures: A Complete Guide
This guide explores different techniques and methods for drawing textures, helping artists enhance their skills and create more realistic and engaging artwork. Discover how to convey depth and detail through texture.
Texture adds depth and realism to artwork, transforming a simple drawing into a captivating visual experience. Think of texture as the skin of your artwork; it’s what invites the viewer to reach out and touch it, even if it’s just with their eyes. The concept of texture is not just about what we see, but also about what we feel. It plays a crucial role in how we perceive a piece of art, influencing our emotional response and engagement.
In visual art, texture can evoke sensations of warmth, coolness, softness, or roughness. It can lead the viewer’s eye around the composition, creating a sense of movement and flow. By understanding the importance of texture, artists can manipulate it to guide the viewer’s perception and enhance the overall impact of their work.
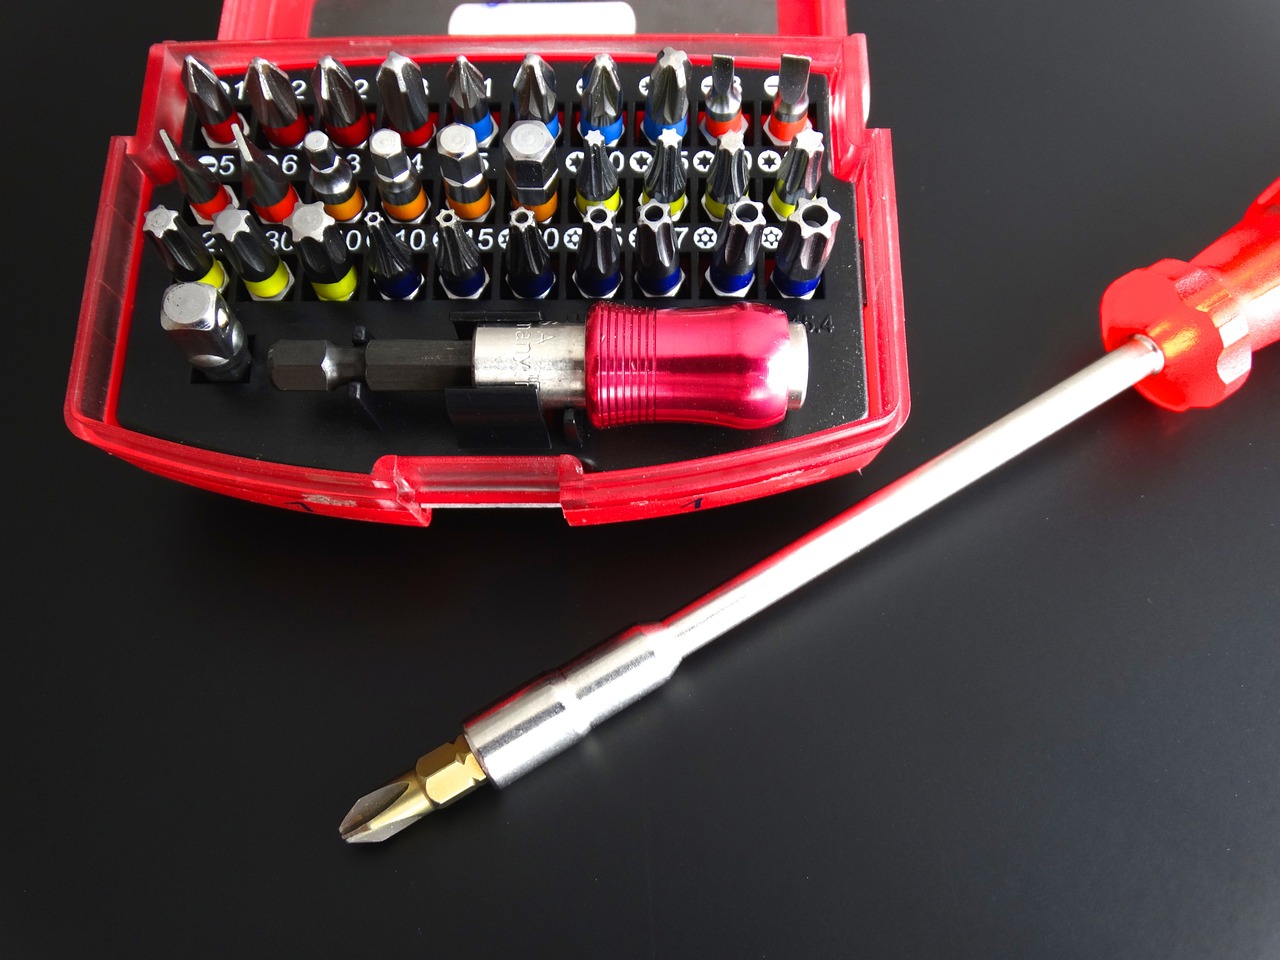
Selecting the right tools is crucial for achieving various textures. Artists have a plethora of options at their disposal, and each tool can create a different effect. Here’s a quick overview of some essential materials:
| Tool | Texture Created |
|---|---|
| Pencil | Fine lines and shading |
| Charcoal | Soft, rich textures |
| Ink Pen | Sharp, defined textures |
| Pastels | Soft, blended textures |
Each of these tools can be used in various ways to create a range of textures. For example, a pencil can be used for delicate lines, while charcoal can provide a bold, dramatic effect.
Different techniques can be employed to create textures, and mastering these methods can elevate your artwork significantly. Two popular techniques are cross-hatching and stippling. By experimenting with these techniques, artists can discover how to achieve the desired effects in their work.
Cross-hatching is a popular technique for creating texture and shading. It involves drawing intersecting sets of parallel lines to build depth and dimension. The closer the lines are to each other, the darker the area appears, while wider spacing gives a lighter effect. This method is not just about filling in shadows; it’s about creating a rich tapestry of lines that suggest the surface quality of the object being drawn. Imagine the way light dances across a surface; your lines should mimic that playfulness!
Stippling involves using tiny dots to create texture. This technique can be incredibly effective for conveying different textures and tones in your artwork. The density of the dots determines the darkness or lightness of the area; more dots create a darker shade, while fewer dots allow the paper to show through, resulting in a lighter tone. Think of stippling like a starry night sky—each dot contributes to the overall picture, and together, they create a beautiful, cohesive image.
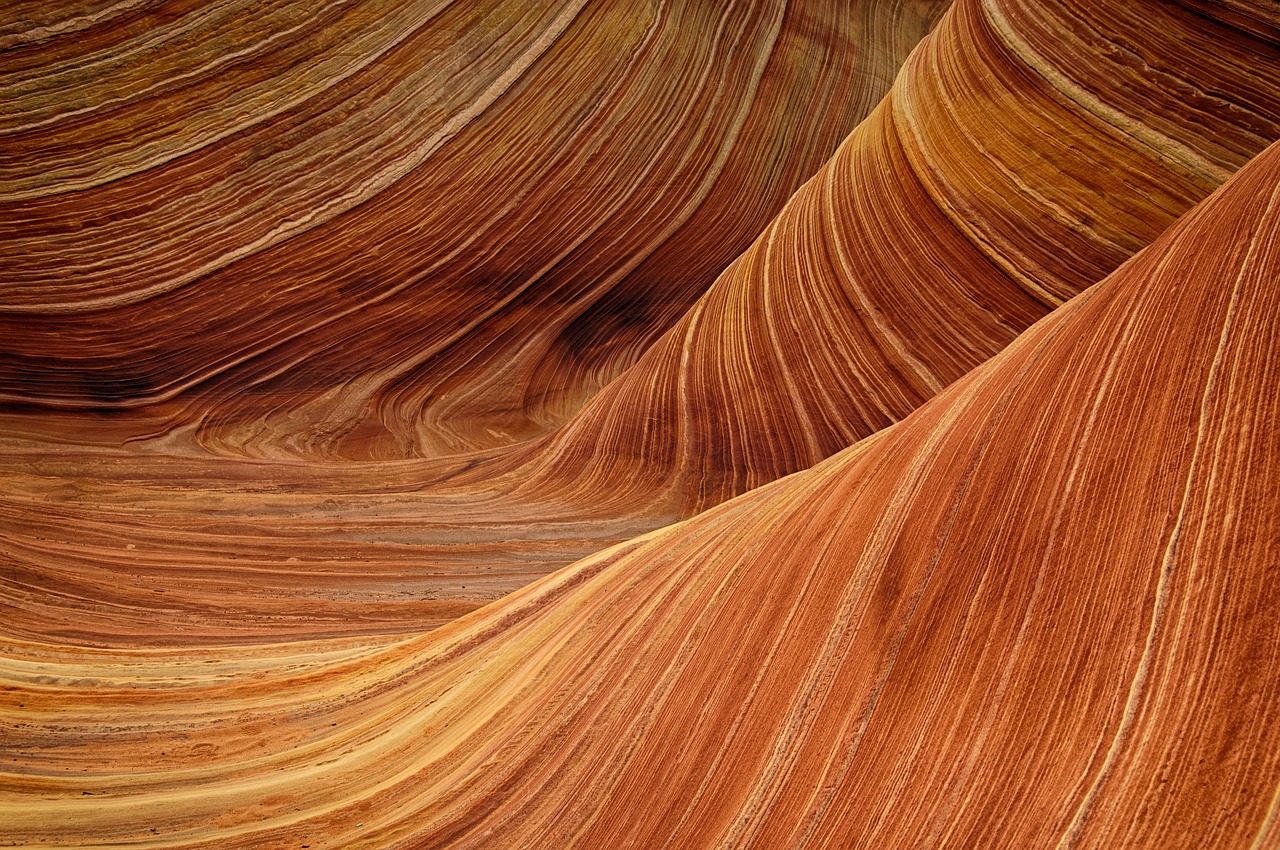
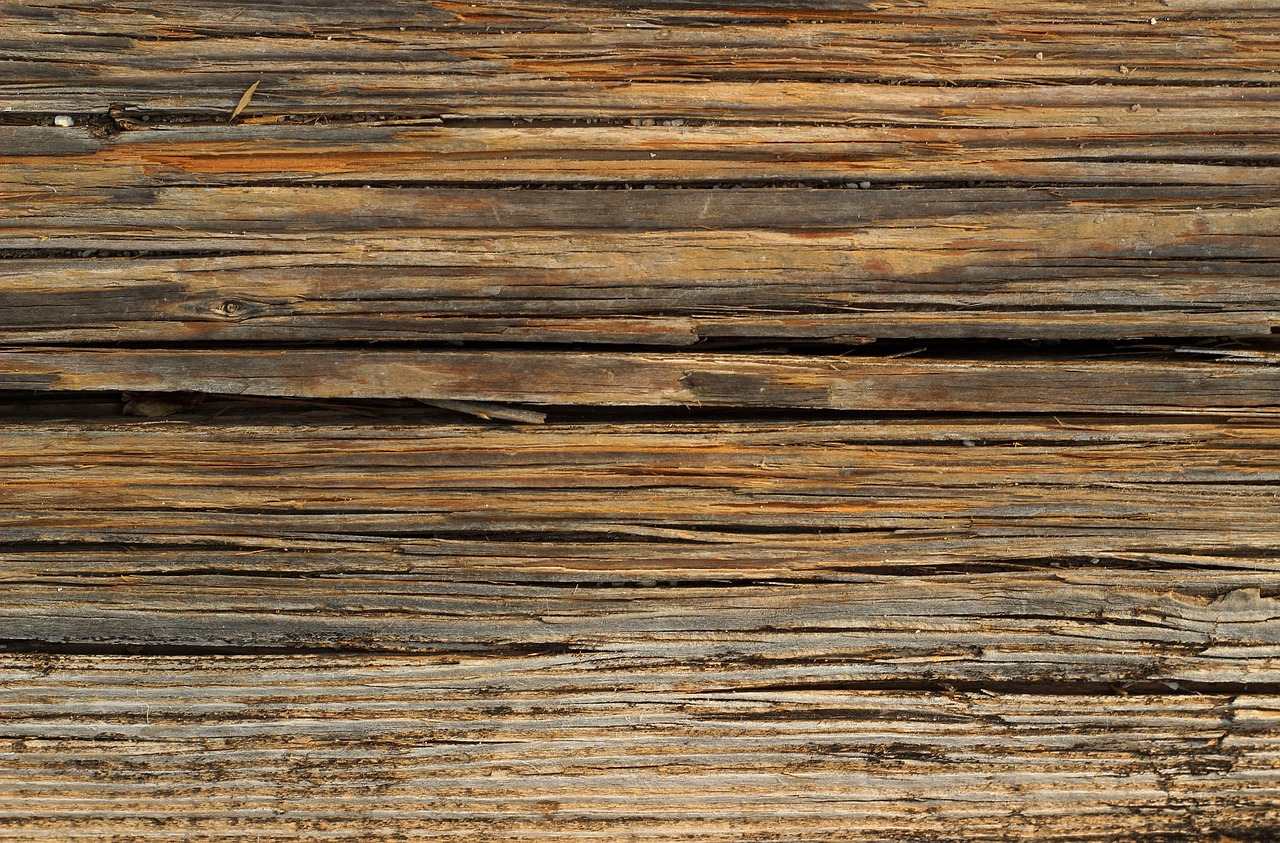
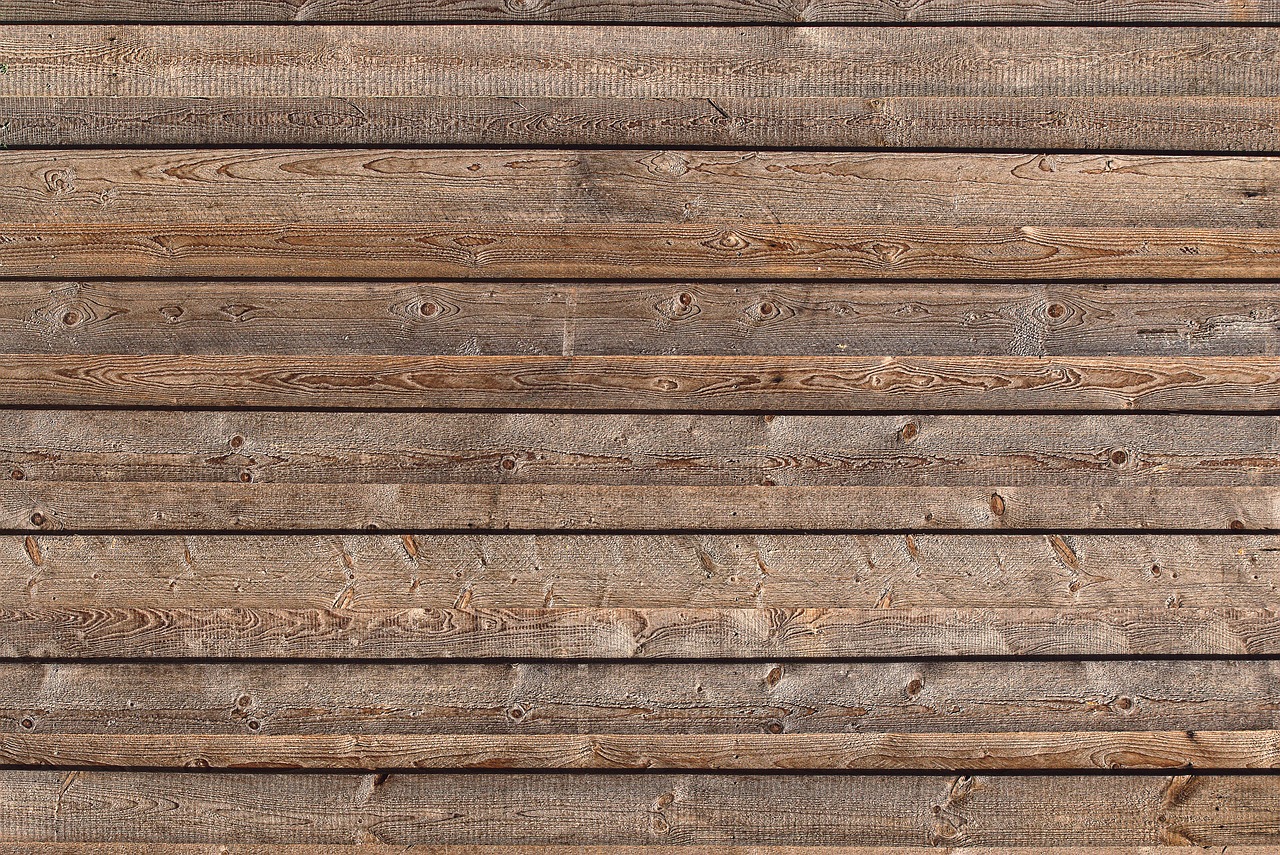
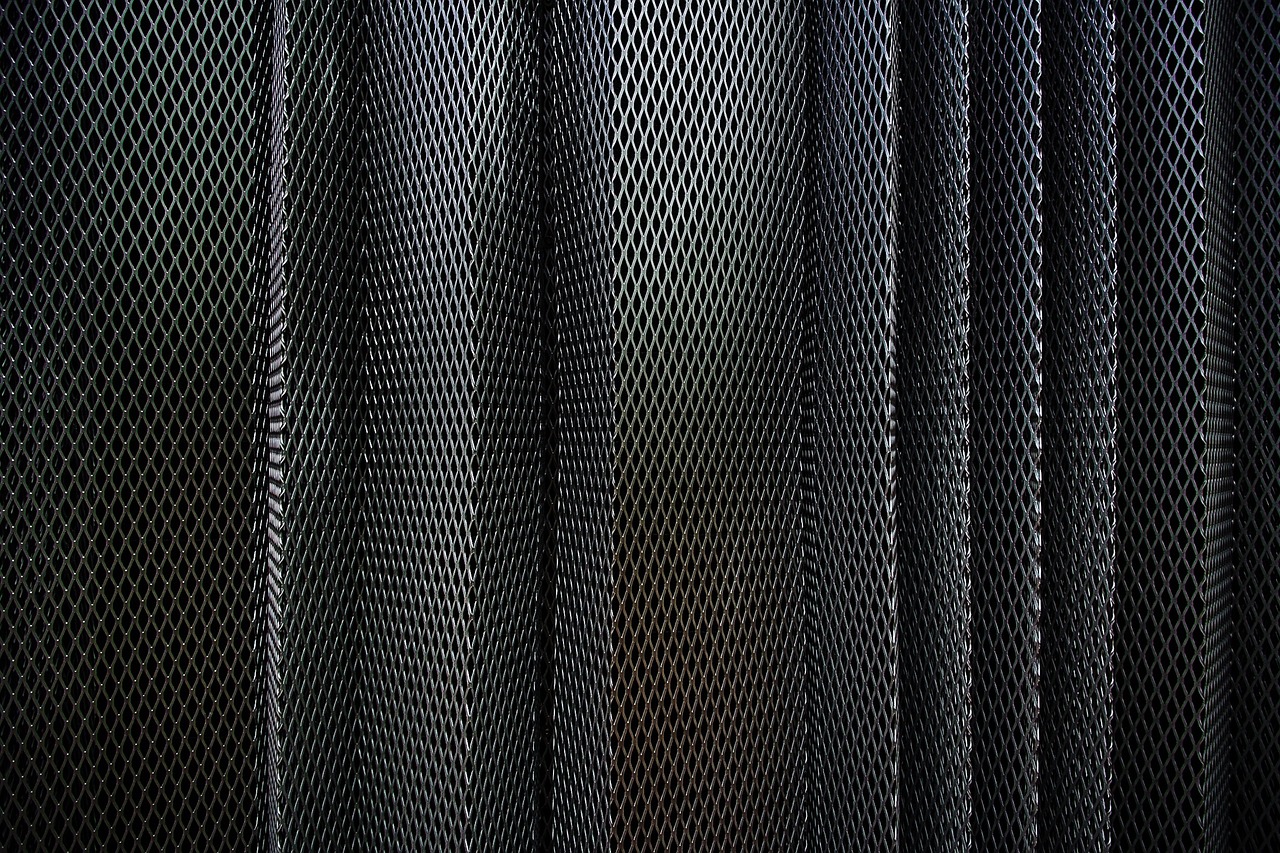
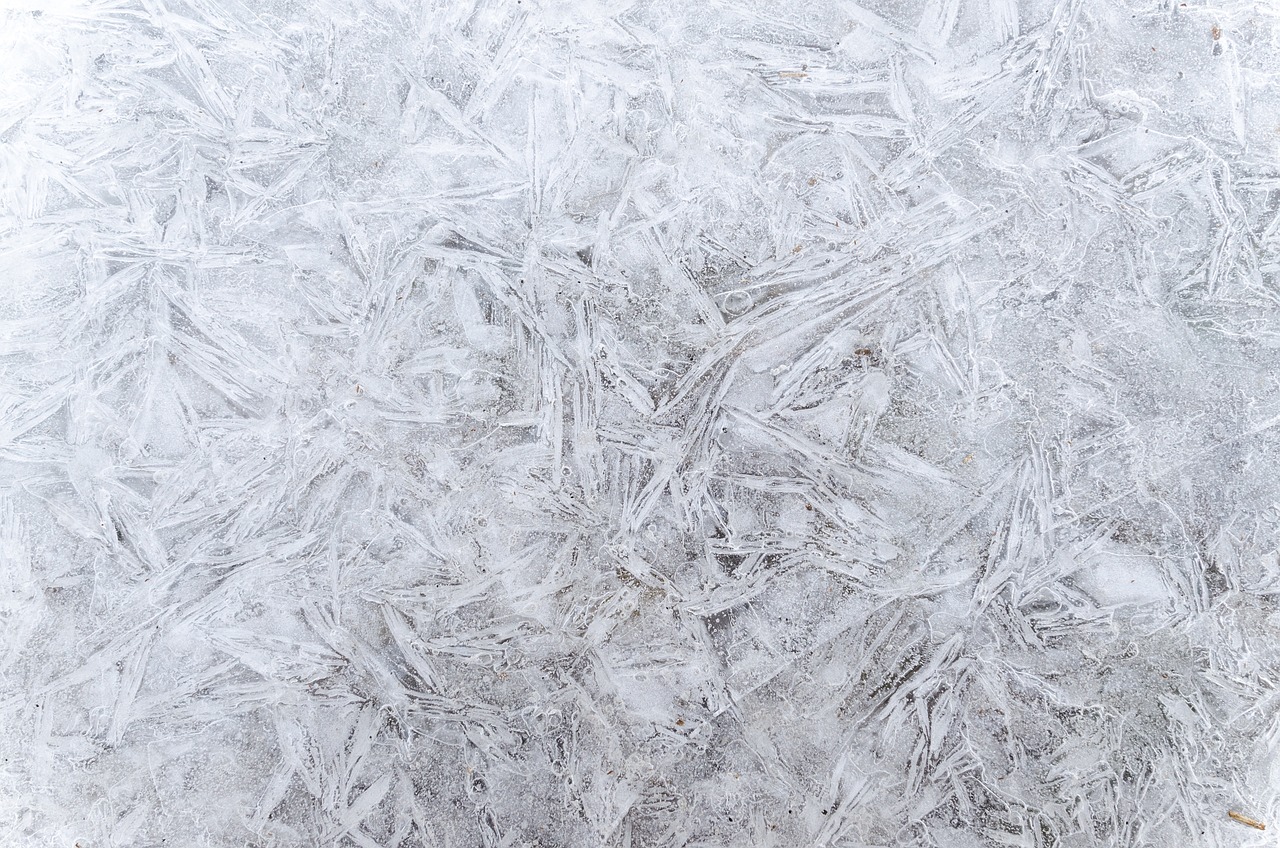
Nature offers a wealth of textures to study and replicate. From the rugged bark of a tree to the delicate veins in a leaf, the natural world is a treasure trove of inspiration. Observing and drawing these textures can significantly enhance your skills. Take a walk outside, and look closely at the surfaces around you. How does the light interact with different materials? How do they feel? By capturing these observations in your drawings, you can bring a sense of realism to your work.
Fabric textures can be challenging yet rewarding to draw. Each type of fabric has its unique qualities that can be captured through careful observation and technique. For instance:
- Silk: Smooth and reflective, silk requires light, flowing lines to convey its softness.
- Wool: This texture is often depicted with a combination of soft curves and rough strokes to suggest its warmth.
- Denim: The ruggedness of denim can be illustrated through sharp lines and shading to mimic its durability.
By understanding the characteristics of various fabrics, you can create more convincing representations in your artwork.
Digital art offers new possibilities for creating textures. With software like Adobe Photoshop and Procreate, artists can experiment with brushes and effects that mimic traditional textures. Techniques such as layering, blending modes, and custom brushes allow for incredible detail and realism. The digital canvas can be as versatile as your imagination, enabling you to explore textures in ways that were previously unimaginable. Whether you're creating a digital painting or an illustration, the tools available can enhance your artistic toolkit.
Q: What is the best tool for beginners to practice texture drawing?
A: Pencils and charcoal are great starting points for beginners as they offer control and versatility.
Q: How can I improve my texture drawing skills?
A: Regular practice, studying from life, and experimenting with different techniques will greatly improve your skills.
Q: Are there specific textures that are harder to draw?
A: Yes, textures like fur and intricate fabric patterns can be more challenging due to their complexity.
Understanding Texture in Art
Texture is one of the most crucial elements in the realm of visual art. It plays a significant role in how we perceive and interpret a piece of artwork. Think of texture as the third dimension in your drawings; while color and form provide the first two, texture adds that extra layer of depth that can make an image come alive. Have you ever looked at a painting and felt as though you could reach out and touch it? That’s the magic of texture!
In art, texture can be both visual and tactile. Visual texture refers to the illusion of texture created through artistic techniques, while tactile texture is the actual surface quality of the artwork. For instance, a thick application of paint (impasto) creates a tactile texture that you can feel, whereas a smooth watercolor wash provides a visual texture that appears soft and delicate. Understanding these distinctions is essential for artists who want to convey a specific mood or feeling through their work.
The importance of texture extends beyond mere aesthetics; it can profoundly influence the viewer's emotional response. For example, rough textures might evoke feelings of chaos or ruggedness, while smooth textures can convey calmness and serenity. This emotional connection is what makes texture a powerful tool in the artist's arsenal. To illustrate this, consider the following examples of textures and their potential emotional impacts:
| Texture Type | Emotional Impact |
|---|---|
| Rough | Chaos, ruggedness, tension |
| Smooth | Calmness, serenity, comfort |
| Soft | Warmth, tenderness, intimacy |
| Sharp | Danger, alertness, excitement |
Moreover, texture can guide the viewer's eye across the artwork. By using varying textures, artists can create a visual pathway that draws attention to specific areas. For instance, a highly textured foreground can contrast with a smooth background, leading the viewer's gaze toward the focal point of the piece. This technique not only enhances the overall composition but also adds a layer of intrigue, making the viewer want to explore every detail of the artwork.
To truly master texture in art, it’s essential to observe and analyze the world around you. Nature is an incredible source of inspiration, offering a myriad of textures, from the rough bark of a tree to the soft petals of a flower. By studying these natural textures, artists can learn to replicate them in their drawings, adding realism and depth to their work. So, the next time you step outside, take a moment to really look at the textures around you. What can you learn from them?
In conclusion, understanding texture is fundamental for any artist aiming to create engaging and realistic artwork. It is not merely a decorative element; it is a vital aspect that can enhance the emotional depth, guide the viewer's eye, and bring your artwork to life. So grab your sketchbook, experiment with different textures, and watch as your art transforms into something truly extraordinary!
- What is the difference between visual and tactile texture?
Visual texture is the illusion of texture created through artistic techniques, while tactile texture is the actual surface quality you can feel. - How can I practice drawing textures?
Start by observing textures in your environment, then try to replicate them in your sketches using various techniques. - What materials are best for creating different textures?
Experiment with various tools such as pencils, charcoal, and brushes. Each tool can produce unique textures.
Tools and Materials for Texture Drawing
When it comes to creating stunning textures in your artwork, having the right tools and materials is essential. Think of your drawing tools as the instruments in a musician's orchestra; each one plays a unique role in bringing your artistic vision to life. Whether you're sketching the delicate veins of a leaf or the rugged surface of a tree bark, the materials you choose can make all the difference.
First and foremost, let’s talk about pencils. Graphite pencils come in a range of hardness levels, from 9H (very hard) to 9B (very soft). Softer pencils, like 4B or 6B, are fantastic for creating rich, dark textures, while harder pencils are perfect for fine lines and details. A good set of pencils can help you achieve a variety of textures, from smooth gradients to sharp contrasts.
In addition to pencils, charcoal is another fantastic medium for texture drawing. Its deep blacks and rich tones allow you to create dramatic contrasts and expressive textures. Charcoal can be blended for soft shadows or used in a more controlled manner for detailed work. Don't forget to have a blending stump on hand, as it helps to smooth out the charcoal and create a more realistic texture.
For artists who enjoy color, colored pencils and pastels can add a whole new dimension to your textures. Colored pencils allow for layering, which can create intricate textures and depth. On the other hand, pastels offer a softer, more painterly approach. With pastels, you can smudge and blend colors to achieve a soft texture, perfect for depicting fabrics or organic materials.
When it comes to paper, the choice is equally important. Textured paper, like cold-pressed watercolor paper or toothy sketch paper, can enhance the texture of your drawing. The surface of the paper interacts with your medium, creating unique effects. For instance, a rough surface can catch more pigment, resulting in a more textured appearance, while smooth surfaces are ideal for fine details.
Lastly, let’s not overlook the importance of erasers. A kneaded eraser is invaluable for lifting graphite or charcoal without damaging the paper, allowing you to create highlights and refine your textures. Regular vinyl erasers can also be useful for correcting mistakes or adding sharp edges to your textures.
To sum it all up, here’s a quick overview of the essential tools and materials for texture drawing:
| Material | Purpose |
|---|---|
| Graphite Pencils | For fine lines and shading |
| Charcoal | For deep blacks and dramatic textures |
| Colored Pencils | For layering colors and textures |
| Pastels | For soft, painterly textures |
| Textured Paper | Enhances the drawing's texture |
| Erasers | For correcting and highlighting |
With these tools and materials at your disposal, you're well on your way to mastering the art of texture drawing. Remember, practice makes perfect, so don’t hesitate to experiment with different combinations to find what works best for you!
Q: What type of pencil is best for drawing textures?
A: Softer pencils like 4B or 6B are great for creating rich textures, while harder pencils are better for fine details.
Q: Can I use regular paper for texture drawing?
A: While you can use regular paper, textured or specialty papers can enhance the effects of your textures.
Q: How do I create a realistic texture with colored pencils?
A: Layering colors and blending them can help achieve realistic textures with colored pencils.

Techniques for Drawing Textures
When it comes to drawing textures, the techniques you choose can make all the difference in how your artwork is perceived. Texture is not just about filling in space; it’s about creating an experience for the viewer. Imagine walking through a forest and feeling the rough bark of a tree or the soft petals of a flower—these sensations can be replicated on paper with the right techniques. In this section, we’ll dive into several methods that can elevate your drawing game, making your textures not just visible, but almost tangible.
One of the most popular techniques for creating texture is cross-hatching. This method involves drawing closely spaced parallel lines and then layering additional lines in different directions. The density and angle of these lines can create a variety of textures and shades. For instance, if you want to depict the roughness of a rock, you might use more tightly packed lines, while softer textures like skin can be achieved with lighter, more spaced-out lines. It’s like building a fabric; the more layers you add, the richer the texture becomes.
Another effective technique is stippling. This method uses dots to build up texture and tone. By varying the density of the dots, you can create everything from soft shadows to stark contrasts. Think of stippling as a pointillist painting but on a smaller scale. It’s a meticulous process, but the results can be stunning. For example, if you want to convey the texture of a fluffy cloud, you would use lighter, more spaced-out dots, whereas a rough surface like gravel would require denser dots. The beauty of stippling is in its precision and the way it invites the viewer to get closer to appreciate the details.
Blending is yet another technique that can add depth and realism to your textures. This involves smudging or rubbing the medium (like pencil or charcoal) to create smooth transitions between light and shadow. It’s akin to painting with a brush, where you mix colors to achieve a desired effect. Blending can be particularly effective when drawing skin or fabric, where you want to mimic the subtle shifts in light and shadow. You can use tools like blending stumps or even your fingers to achieve a soft, seamless look.
To summarize, here are some key techniques for drawing textures:
- Cross-Hatching: Layering parallel lines in different directions.
- Stippling: Using dots to create texture and tone.
- Blending: Smudging to create smooth transitions.
Each of these techniques can be combined to create unique textures that breathe life into your artwork. For example, you might start with a base layer of stippling, then add cross-hatching for depth, and finish with blending for smooth transitions. The possibilities are endless, and the only limit is your imagination!
As you practice these techniques, remember that experimentation is key. Don’t be afraid to mix methods or even invent your own. The more you explore, the more you’ll discover what works best for you and your artistic style. So grab your pencils, get your hands dirty, and let’s make some textured masterpieces!
Q1: Can I use these techniques with digital art?
A1: Absolutely! Many of these techniques can be adapted for digital platforms. Software like Photoshop or Procreate offers tools that mimic traditional methods, allowing you to create stunning textures digitally.
Q2: How do I know which technique to use for a specific texture?
A2: It often depends on the effect you want to achieve. For instance, use stippling for fine details, cross-hatching for shadows, and blending for smooth surfaces. Experimenting will help you find the right fit!
Q3: Is there a specific tool I should use for each technique?
A3: While there are recommended tools, such as fine liners for stippling or blending stumps for blending, the best tool is the one you feel comfortable with. Try different tools and see what works best for you!
Cross-Hatching Techniques
Cross-hatching is a powerful technique that artists have been using for centuries to create texture and depth in their drawings. It involves drawing closely spaced parallel lines that intersect, forming a grid-like pattern. This method can evoke a range of textures, from the soft, subtle feel of fabric to the hard, rugged surface of stone. The beauty of cross-hatching lies in its versatility and the control it gives artists over shading and tone.
To master cross-hatching, it’s essential to understand the relationship between the density of the lines and the darkness of the resulting shade. The more lines you add, the darker the area becomes. This can be likened to layering paint on a canvas; just as more paint creates a bolder color, more lines deepen the shade. As you practice, you’ll start to see how the angle and spacing of your lines can dramatically change the texture and mood of your piece.
Here are a few tips to help you refine your cross-hatching technique:
- Vary your line weight: Use different pencil pressures to create lines of varying thickness. Thicker lines can suggest shadow, while thinner lines can indicate light.
- Experiment with angles: Changing the angle of your lines can produce different textures. For instance, diagonal lines can create a sense of movement, while horizontal lines may evoke calmness.
- Practice layering: Start with a light layer of hatching, then build up additional layers to create depth. This gradual approach can help you avoid overworking a section.
Cross-hatching can also be combined with other techniques, such as stippling or blending, to achieve even more complex textures. For example, you might use cross-hatching to define the form of an object and then add stippling to suggest a rough surface. This interplay between techniques allows for greater expression and realism in your artwork.
As you explore cross-hatching, don’t forget to observe the world around you. Look at how light interacts with different surfaces—how it casts shadows and highlights. This observation will not only improve your understanding of texture but also inspire your creativity. Remember, every artist has their unique style, so feel free to adapt these techniques to fit your voice. With practice, you’ll be able to create stunning textures that breathe life into your drawings.
Q: What is the best pencil to use for cross-hatching?
A: A range of pencils can be used, but many artists prefer using softer pencils (like 2B to 6B) for darker lines and harder pencils (like H to 2H) for lighter lines. Experiment to find what works best for you!
Q: Can cross-hatching be used in digital art?
A: Absolutely! Many digital art programs offer brushes that mimic traditional cross-hatching techniques, allowing you to create similar effects on a digital canvas.
Q: How can I improve my cross-hatching skills?
A: Practice is key! Try drawing different objects and focus on varying the density and angle of your lines. Additionally, studying the work of artists who use cross-hatching can provide valuable insights and inspiration.
Stippling for Texture Effects
Stippling is a fascinating technique that utilizes dots to create texture and depth in artwork. It's like painting with a thousand tiny brushes, each dot contributing to the overall image, allowing artists to convey a range of textures and tones. Imagine creating a lush landscape or a detailed portrait using just dots; it’s a mesmerizing process that can yield stunning results. This method not only enhances the visual interest of your work but also invites viewers to engage more deeply, as they start to notice the intricate details that make the artwork come alive.
To get started with stippling, you’ll need some basic materials. A fine-tipped pen or a pencil with a sharp point is ideal for creating those delicate dots. As you begin, think about the density of your dots. The closer they are together, the darker the area will appear, while more spaced-out dots will create lighter tones. This principle is similar to how a newspaper image is printed; it’s all about the spacing and size of the dots. By varying these factors, you can achieve a wide range of textures—from the soft fuzz of a peach to the rough bark of a tree.
When practicing stippling, it’s helpful to observe real-life textures closely. Try to replicate the way light interacts with different surfaces. For instance, when drawing a leaf, notice how the light creates shadows in the crevices and highlights on the edges. You can use stippling to mimic these effects by placing more dots in shadowed areas and fewer in the highlights. This technique not only enhances realism but also adds a dynamic quality to your drawings.
Here’s a simple exercise to help you master stippling:
- Choose an object with a clear texture, like a fruit or a piece of fabric.
- Start by lightly sketching the outline of your object.
- Begin stippling from one area, gradually building up density as you move into shadowed regions.
- Keep your hand relaxed and allow the dots to flow naturally, varying the pressure to create different dot sizes.
As you gain confidence, try experimenting with different subjects and styles. Stippling can be used in various applications, from creating intricate illustrations to adding texture to graphic designs. The versatility of this technique is one of its greatest strengths, enabling artists to explore their creativity in unique ways.
In conclusion, stippling is more than just a technique; it’s a way to express your artistic vision through dots. Whether you're aiming to create realistic textures or abstract designs, mastering stippling can significantly enhance your drawing skills. So, grab your pen, start dotting, and watch your artwork transform into a textured masterpiece!
- What is stippling? Stippling is a drawing technique that uses small dots to create texture and shading in artwork.
- What materials do I need for stippling? You can use fine-tipped pens, pencils, or even brushes to create stippling effects.
- How can I improve my stippling technique? Practice by observing real-life textures and experimenting with dot density and spacing.
- Can stippling be used in digital art? Absolutely! Many digital art programs have tools that mimic stippling effects.

Natural Textures: Drawing from Nature
When it comes to drawing, nature is one of the most incredible sources of inspiration. The world around us is filled with a myriad of textures that can transform a simple drawing into a breathtaking piece of art. Whether it's the roughness of tree bark, the delicate veins of a leaf, or the fluid ripples of water, each texture tells its own story. But how do you capture these intricate details on paper? Let's dive into the process of observing and replicating natural textures.
First and foremost, observation is key. Spend time outdoors, taking note of the textures you see. Bring a sketchbook along and make quick sketches of different surfaces. Focus on the following elements:
- Contrast: Notice how light interacts with surfaces. Is it shiny or matte? Are there highlights and shadows that create depth?
- Pattern: Look for repeating patterns in nature, such as the scales on a fish or the arrangement of petals in a flower.
- Variation: Observe the subtle differences in textures, like the roughness of a stone compared to the smoothness of a pebble.
Once you've gathered your observations, it’s time to translate them into your artwork. Start by choosing your medium—pencil, charcoal, or ink can all work wonders for texture drawing. For instance, if you're trying to capture the roughness of tree bark, using a hard pencil for sharp lines and a soft pencil for shading can create a stunning effect. Don't hesitate to experiment with different mark-making techniques!
For a more structured approach, consider breaking down the textures into basic shapes. For example, when drawing leaves, start with an outline, then add the central vein and smaller veins branching out. This method not only helps in achieving the correct proportions but also allows you to focus on the texture without getting overwhelmed.
Another technique is to use layering. Begin with a light base layer and gradually build up darker tones and details. This can be particularly effective for drawing water, where the play of light and shadow creates a dynamic texture. By layering different shades, you can achieve a sense of movement and depth, making your drawing feel alive.
Don't forget to take advantage of reference photos if you're unable to observe textures in person. High-quality images can provide a wealth of detail that you can study and replicate in your drawings. Just remember to keep the essence of the texture in mind, rather than copying it verbatim.
Lastly, practice is essential. The more you draw from nature, the more you'll understand how to convey different textures effectively. Set aside time each week to focus on drawing natural textures, and over time, you'll notice a significant improvement in your skills. Embrace the challenge, and let nature be your guide!
Q: How can I improve my observation skills for drawing textures?
A: Spend time sketching outdoors and practice drawing the same texture multiple times. Focus on different angles and lighting conditions to enhance your observation skills.
Q: What tools are best for capturing natural textures?
A: Pencils, charcoal, and ink are great for texture drawing. Experiment with different hardness levels of pencils to achieve various effects.
Q: Can I use digital tools to draw natural textures?
A: Absolutely! Digital art software offers brushes and effects that can replicate natural textures, allowing for even more creativity in your work.
Creating Fabric and Textile Textures
When it comes to drawing, fabric and textile textures can be some of the most challenging yet rewarding elements to capture. Think about it: every piece of clothing or fabric has its own unique characteristics that define how it looks and feels. From the soft, flowing nature of silk to the rough, sturdy texture of denim, understanding these qualities is key to bringing your artwork to life. By mastering the art of drawing fabric textures, you can elevate your illustrations and make them more realistic and engaging.
To start, it's essential to observe the way light interacts with different fabrics. For instance, silk has a natural sheen that reflects light beautifully, while wool tends to absorb light, giving it a more matte appearance. This difference in light reflection can be depicted through shading techniques. When you draw, consider how shadows fall on the fabric and how they create depth. Use lighter and darker tones to suggest folds and creases, mimicking the way fabric behaves in real life.
Another crucial aspect is the pattern and weave of the fabric. Different textiles have unique patterns that can add an extra layer of detail to your drawings. For example, a plaid pattern can be illustrated by using a combination of straight lines and cross-hatching techniques. On the other hand, the intricate weave of linen can be suggested with fine stippling or short, delicate strokes. Pay attention to these details, as they can significantly enhance the overall texture of your artwork.
Here’s a quick reference table to help you understand some common fabrics and their characteristics:
| Fabric Type | Texture Characteristics | Drawing Techniques |
|---|---|---|
| Silk | Shiny, smooth, flowing | Blending, light hatching |
| Wool | Rough, warm, textured | Stippling, cross-hatching |
| Denim | Sturdy, slightly rough | Short strokes, shading |
| Linen | Natural, textured | Fine lines, stippling |
As you practice, remember that layering is your friend. Start with a light base and gradually build up the texture and details. This technique allows you to control the intensity of the texture, giving you the flexibility to adjust as you go. Don't be afraid to experiment with different tools, such as blending stumps or even your fingers, to create softer edges and more realistic effects.
Finally, always keep in mind the context of your drawing. The way fabric falls and drapes can change based on the pose of the subject or the environment. For instance, a dress flowing in the wind will have a very different texture representation than a tightly fitted shirt. Observing real-life examples and practicing with different fabrics will only enhance your skills further.
- What materials do I need to start drawing fabric textures? You can start with basic pencils, erasers, and paper. As you progress, consider investing in blending tools and high-quality colored pencils or markers.
- How can I practice drawing fabric textures effectively? Observe various fabrics in real life, take reference photos, and practice drawing them. Try sketching from life to understand how light and shadow play on different textures.
- What are some common mistakes to avoid when drawing fabrics? Avoid overcomplicating textures. Start simple and gradually add details. Also, be mindful of proportions and how fabric drapes on the body.
Digital Tools for Texture Drawing
In today's digital age, artists are increasingly turning to digital tools to create stunning textures in their artwork. The flexibility and versatility of digital platforms allow for a level of experimentation that traditional methods may not easily afford. Imagine having a palette of endless possibilities at your fingertips—this is what digital tools offer. With software like Adobe Photoshop, Procreate, and Corel Painter, artists can not only replicate traditional textures but also invent new ones that push the boundaries of creativity.
One of the primary advantages of using digital tools is the ability to easily manipulate textures. For instance, you can adjust the opacity, blend modes, and layering techniques to achieve the desired effect without the fear of making irreversible mistakes. This freedom to experiment is akin to having a safety net while performing a daring stunt; it encourages risk-taking and innovation. Additionally, many digital art programs come equipped with brushes specifically designed for texture creation, allowing artists to mimic the appearance of natural materials like wood, stone, or fabric with just a few strokes.
When it comes to creating textures digitally, understanding the various tools and features at your disposal is crucial. Below is a brief overview of some essential digital tools that can help you achieve realistic textures:
| Tool/Software | Description | Key Features |
|---|---|---|
| Adobe Photoshop | A powerful image editing software widely used for digital painting and texture creation. | Layering, blending modes, custom brushes, and texture filters. |
| Procreate | A user-friendly app for iPad that offers a wide range of brushes and tools for artists. | Real-time brush customization, layering, and intuitive touch controls. |
| Corel Painter | A digital art software that simulates traditional painting techniques. | Natural media brushes, texture synthesis, and paper textures. |
In addition to these tools, many artists find it beneficial to incorporate textures from real life into their digital work. This can be done by scanning or photographing textures, which can then be imported into your digital canvas. This technique not only adds authenticity but also enriches your artwork by blending the real with the digital. Think of it as combining the best of both worlds—traditional textures meeting modern technology.
Furthermore, don't overlook the power of community and resources available online. There are countless tutorials, forums, and social media groups where artists share their techniques and tips for texture drawing. Engaging with these communities can provide invaluable insights and inspire new ideas. It's like having a virtual art class at your disposal, where you can learn from peers and seasoned professionals alike.
As you delve into the world of digital texture drawing, remember that practice is key. The more you experiment with different tools and techniques, the more you'll discover your unique style. So, grab your digital brush, unleash your creativity, and let the textures flow!
Q: What is the best software for beginners in digital texture drawing?
A: For beginners, Procreate is highly recommended due to its intuitive interface and wide range of brushes. Adobe Photoshop is also a great option if you're looking for more advanced features.
Q: Can I create textures without a graphics tablet?
A: Yes! While a graphics tablet can enhance your experience, you can still create textures using a mouse or touchpad, especially with software that supports touch gestures.
Q: How do I incorporate real-life textures into my digital artwork?
A: You can scan or photograph real textures and import them into your digital art software. Use layering and blending modes to integrate them seamlessly into your artwork.
Frequently Asked Questions
- What is texture in art, and why is it important?
Texture in art refers to the surface quality of a piece, which can be perceived visually or through touch. It's crucial because it adds depth, interest, and realism to artwork, influencing how viewers engage with a piece. Think of it like the frosting on a cake; without it, the cake might look plain, but with it, it becomes enticing and appealing!
- What tools do I need to draw different textures?
To create a variety of textures, you'll need some essential tools. These include pencils (various grades), charcoal, ink pens, and blending stumps. Don't forget about paper types; rough paper can enhance texture effects. It’s like having a toolbox; each tool serves a different purpose, helping you craft your masterpiece!
- Can you explain cross-hatching and its benefits?
Cross-hatching is a technique where you draw intersecting lines to create shading and texture. It's beneficial because it allows for depth and dimension without needing color. Imagine building a brick wall; each line adds another layer, making your drawing feel more solid and three-dimensional!
- What is stippling, and how do I use it effectively?
Stippling involves using dots to create texture and shading. To use it effectively, vary the density of the dots based on the shadow or highlight needed. It’s like creating a pointillist painting; the closer the dots, the darker the area appears, giving your artwork a unique feel!
- How can I draw natural textures from nature?
To draw natural textures, observe the elements around you—like bark, leaves, or water. Use reference photos or sketch directly from nature. Pay attention to details, patterns, and light. It’s akin to being a detective; the more you observe, the better your drawings will reflect the beauty of nature!
- What techniques can I use to capture fabric textures?
When capturing fabric textures, focus on the characteristics of the material. For instance, silk has a smooth sheen, while wool has a more textured surface. Techniques like shading, cross-hatching, and blending can help convey these qualities. Think of it like dressing a doll; every fabric tells a different story!
- What digital tools can help in creating textures?
For digital texture drawing, software like Adobe Photoshop, Procreate, or Corel Painter is excellent. They offer brushes and tools that mimic traditional techniques. It’s like having a magic wand; you can create stunning textures with just a click!


