
How to Paint Water: Easy Techniques to Try
Painting water can be both an exciting and challenging endeavor for artists of all skill levels. Whether you're a beginner picking up a brush for the first time or an experienced painter looking to refine your skills, understanding how to depict water effectively is crucial. Water is not just a flat surface; it's a dynamic element that reflects light, captures colors, and flows with movement. In this article, we will explore various techniques to help you create stunning water scenes that evoke emotion and realism.
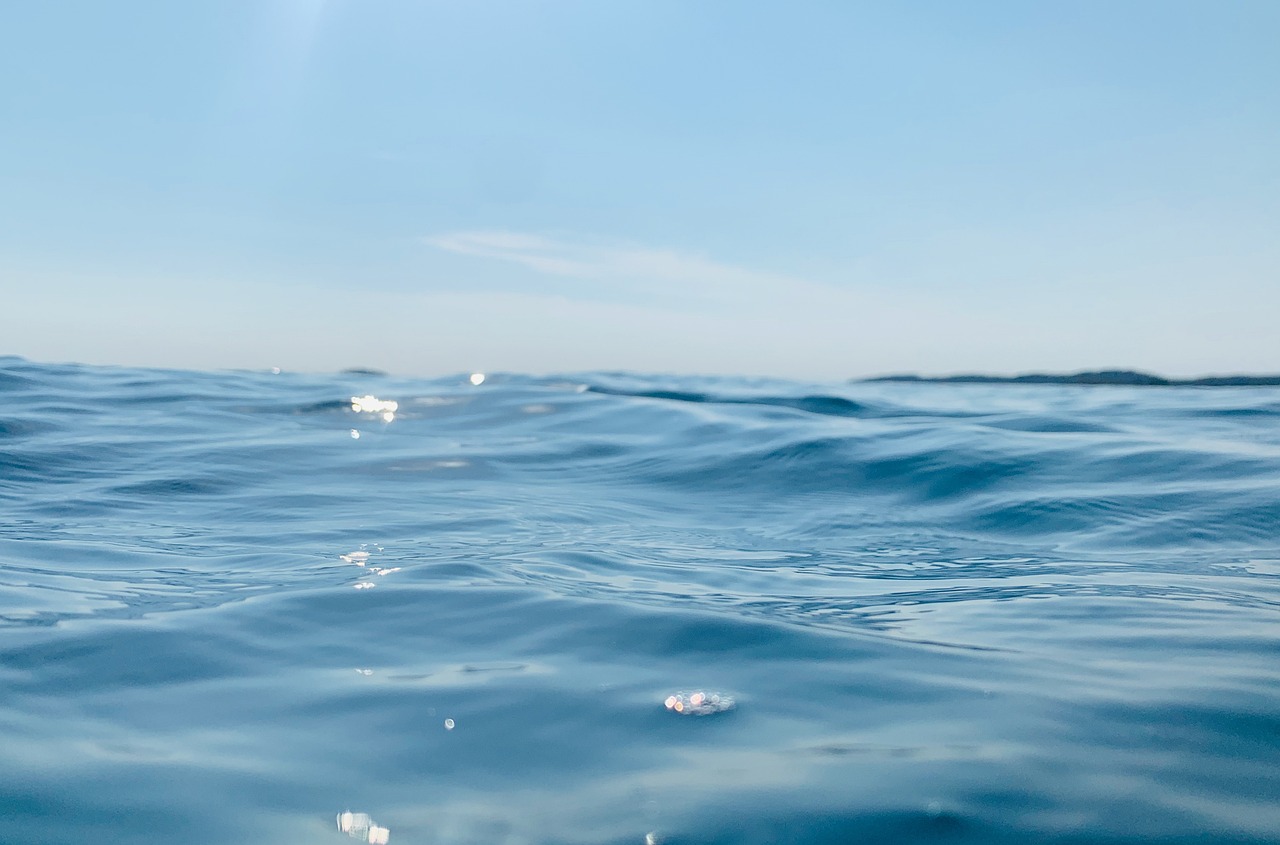
To paint water convincingly, you first need to grasp its unique characteristics. Water's surface is a complex interplay of reflections, ripples, and transparency. Each of these elements plays a vital role in how water appears in different settings. For instance, a calm lake might reflect the surrounding landscape like a mirror, while a turbulent ocean displays chaotic waves and splashes. By studying these features, you'll enhance your ability to depict water in a way that resonates with viewers. Remember, observation is key. Spend time looking at real water before putting brush to canvas; this will inform your color choices and brush techniques.
Color selection is crucial when painting water. The hues you choose can set the mood and tone of your artwork. For serene lakes, you might lean towards soft blues and greens, while for stormy seas, darker, more turbulent colors like deep navy or emerald can convey a sense of drama. Here are some essential tips for color selection:
- Analyze the Environment: Look at the colors in the surroundings of the water body you are painting.
- Consider the Time of Day: Different times of day can drastically change the color palette.
- Mixing Blues and Greens: Understanding how to blend these colors will help you capture the essence of various water bodies.
Mixing blues and greens can be an art in itself. To achieve the perfect shade for your water, consider the following:
| Water Type | Color Mix |
|---|---|
| Clear Lake | Light Blue + White |
| Turbulent Ocean | Dark Blue + Green + Black |
| Shallow River | Turquoise + Yellow |
By experimenting with these combinations, you can create a diverse palette that reflects the water's natural beauty.
To give your water paintings a three-dimensional appearance, layering colors and varying saturation is essential. Start with a base layer of your chosen color, then gradually build up the depth by adding darker shades where the water is deeper and lighter shades where it catches the light. This technique not only adds realism but also invites the viewer to explore the depths of your artwork.
Highlights are the secret ingredient to achieving that shimmering effect on water. Using white paint strategically can enhance the reflective quality of your water scenes. Apply white sparingly to areas where light hits the water, such as the crest of a wave or the surface of a calm lake. The key is to blend it seamlessly with your base colors, creating a natural look that draws the eye.
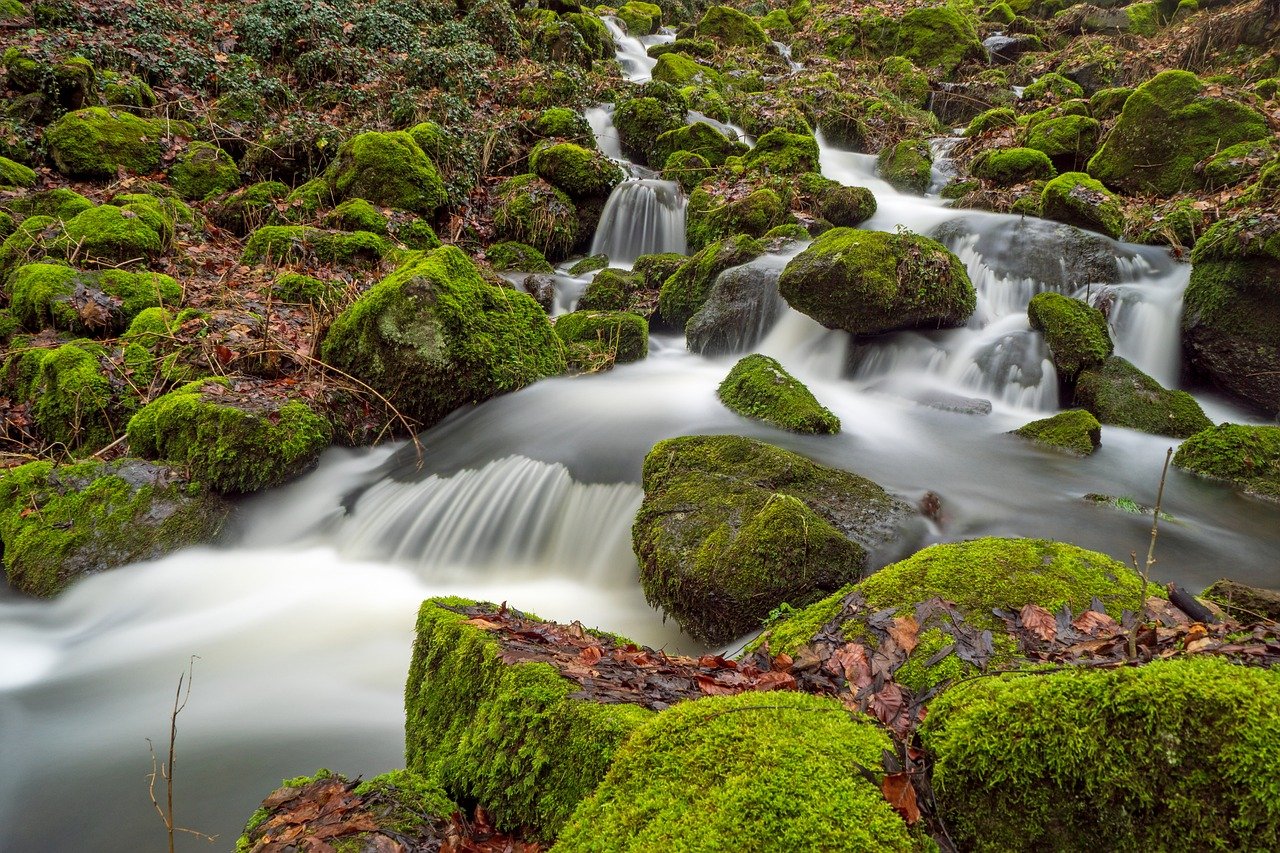
Water is rarely still, and capturing its movement is essential for a realistic portrayal. Whether you're painting a gentle stream or a roaring waterfall, the flow of water can be conveyed through deliberate brush strokes. Use long, sweeping motions to represent flowing water, while quick, short strokes can depict splashes and ripples. Remember, the movement of water tells a story; let your brushwork reflect that narrative.
The right brush technique can dramatically affect the portrayal of water. Different strokes can create various textures, mimicking the fluidity and surface tension of water. Here are two techniques to try:
The dry brush technique is fantastic for adding texture to your water surfaces. By using a brush with minimal paint, you can create a scratchy, uneven texture that resembles ripples and waves. This technique works best when painting the surface of water, as it captures the light and movement beautifully.
The wet-on-wet technique allows colors to blend seamlessly, creating soft transitions that mimic the flow of water. Apply wet paint onto a wet surface to achieve this effect. This method is particularly useful for painting soft, flowing water, such as the gentle currents of a river or the mist of a waterfall.
- What type of paint is best for painting water? Acrylics and watercolors are popular choices due to their versatility and ease of blending.
- How can I make my water paintings look more realistic? Focus on color mixing, layering techniques, and studying real-life water to enhance realism.
- Is it necessary to use a specific brush for painting water? While certain brushes can help achieve specific textures, experimenting with different brushes can yield unique results.
Understanding Water's Surface
When it comes to painting water, one of the most fascinating aspects to consider is its surface. Water is not just a flat, blue expanse; it’s a dynamic element that constantly interacts with its environment. To truly capture the essence of water in your artwork, you need to understand the unique characteristics of its surface, including reflections, ripples, and the way light dances upon it. Imagine standing by a serene lake at dawn—the soft hues of the sky reflected in the water, the gentle ripples caused by a light breeze, and the way the sunlight creates sparkling highlights. These elements are crucial for creating realistic water paintings and can greatly enhance your artistic expression.
Reflections are one of the most striking features of water. They can transform an ordinary scene into something magical. When painting reflections, consider the following:
- Color Matching: The colors in the reflection should mimic those in the surrounding environment. For example, a sunset will cast warm oranges and pinks onto the water's surface.
- Distortion: Water can distort images, especially when there are ripples. This means that objects reflected in the water may appear elongated or wavy.
- Clarity: The clarity of the water affects how reflections appear. Clear water will show sharper reflections, while murky water will create softer, diffused images.
Ripples add another layer of complexity to your water paintings. They can convey movement and life, turning a static image into something vibrant. To depict ripples effectively, observe how they interact with light and color. The peaks of the ripples often catch the light, creating highlights, while the troughs may appear darker. Experimenting with different brush techniques can help you achieve this effect. For instance, using a dry brush technique can create the texture of small ripples, while a wet-on-wet approach can give a smoother, flowing appearance to larger waves.
Additionally, the color of the water itself can vary greatly depending on several factors, including depth, surrounding landscape, and weather conditions. For instance, a shallow lagoon might showcase vibrant greens and blues due to the sandy bottom and vegetation, while a deep ocean might appear darker and more mysterious. By understanding these nuances, you can choose the right colors and techniques to represent the specific type of water you wish to paint.
In summary, grasping the characteristics of water's surface is essential for any artist looking to create stunning water scenes. By focusing on reflections, ripples, and the inherent colors of water, you'll be well on your way to capturing its beauty on canvas. So, take a moment to observe and appreciate the water around you; it’s a world of inspiration waiting to be painted!

Choosing the Right Colors
When it comes to painting water, color selection is not just important; it's absolutely crucial. The colors you choose can evoke different moods and atmospheres, transforming a simple canvas into a breathtaking scene. Imagine standing by a tranquil lake at dawn, the soft blues and greens reflecting the early morning light, or picturing the deep, tumultuous blues of a stormy ocean. Each water body has its own personality, and your color palette should capture that essence.
To effectively represent different types of water, you need to consider the following factors:
- Location: Freshwater bodies like lakes and rivers often have a different color palette compared to saltwater bodies like oceans.
- Time of Day: The lighting conditions can dramatically alter the appearance of water. For instance, water at sunset may reflect warm oranges and reds, while midday water is often a cooler blue.
- Weather Conditions: Overcast skies can mute colors, making water appear darker and more subdued, while sunny days can enhance brightness and vibrancy.
When mixing colors, it's essential to have a variety of shades to work with. For example, if you're aiming to paint a serene lake, you might want to use a palette that includes soft blues, pale greens, and hints of white to capture the light reflecting off the surface. Conversely, if you're depicting a raging sea, consider deeper, richer blues mixed with darker greens and grays to convey the water's power and depth.
To help you visualize the different color palettes, here's a simple table that outlines various water types and their corresponding color suggestions:
| Water Type | Color Palette |
|---|---|
| Calm Lake | Soft Blues, Pale Greens, White |
| Raging Ocean | Deep Blues, Dark Greens, Grays |
| Clear River | Turquoise, Light Browns, Whites |
| Muddy Water | Dark Browns, Olive Greens, Grays |
Mixing blues and greens is an art in itself. The key is to experiment with different ratios and observe how they interact on your canvas. This is similar to cooking; sometimes, adding a pinch of this or a dash of that can create the perfect flavor. Don’t be afraid to play around and see what combinations resonate with your vision. You might want to keep a color journal, where you can jot down your mixtures and the results, allowing you to refer back to successful combinations in future projects.
As you work on your water paintings, remember that the emotional impact of color can elevate your artwork from ordinary to extraordinary. The right colors can draw viewers in, making them feel as if they can hear the gentle lapping of waves or the rush of a waterfall. So, take your time to select your colors thoughtfully, and let your creativity flow like the water you’re trying to capture.
Mixing Blues and Greens
When it comes to painting water, the right blend of blues and greens can make all the difference. Think of water as a chameleon; it changes its colors based on the surroundings, the time of day, and even the weather. Whether you're capturing the tranquil surface of a lake or the vibrant depths of the ocean, mastering the art of mixing these colors is essential for creating realistic water scenes. So, how do you achieve those perfect shades?
First, consider the type of water you want to depict. For a calm lake, you might want to lean towards softer, muted blues and greens, while a turbulent ocean calls for deeper, more vibrant hues. A great starting point is to create a color palette that reflects the natural environment. Here’s a quick breakdown:
| Water Type | Suggested Colors |
|---|---|
| Calm Lake | Sky Blue, Seafoam Green |
| Ocean | Deep Blue, Teal, Turquoise |
| River | Emerald Green, Cobalt Blue |
To achieve the perfect shade, start by mixing a base color of blue with a touch of green. You can use different ratios to create various shades. For instance, a higher ratio of blue will give you a cooler, deeper hue, while more green will produce a warmer, more vibrant tone. Don't be afraid to experiment! Water is rarely a single color, so adding just a hint of yellow or gray can create depth and realism.
Another important aspect to consider is the lighting. The way light interacts with water can drastically alter its appearance. For instance, during sunrise or sunset, the water may reflect warm oranges and pinks, which can be achieved by mixing a bit of red or yellow with your blues and greens. This is where your creativity can shine—play around with different combinations and see what works best for your scene.
Lastly, remember that practice makes perfect. Set aside some time to experiment on a scrap piece of canvas or paper. Try mixing different blues and greens until you find the shades that resonate with you. With a bit of patience and practice, you'll soon be able to capture the essence of water in your paintings beautifully.
Creating Depth with Color
When it comes to painting water, creating a sense of depth is crucial for achieving a realistic and captivating effect. Think of water as a vast, mysterious world beneath the surface; the colors you choose can either bring it to life or leave it flat and uninspiring. The key lies in understanding how to layer colors and manipulate saturation to create that three-dimensional illusion.
One effective technique is to start with a base layer of color that represents the deepest part of the water. For instance, when painting a serene lake, you might begin with a deep, rich blue or green. This foundational color sets the stage for the layers that will follow. As you add subsequent layers, gradually introduce lighter shades to simulate the way light penetrates the water, illuminating the depths. This method not only enhances the visual appeal but also invites viewers to imagine what lies beneath the surface.
Another important aspect to consider is the use of transparency. Water is inherently transparent, allowing colors to blend and interact with one another. By using a glazing technique—where you apply thin layers of transparent paint over your base layer—you can create a sense of depth that mimics the way light refracts through water. This technique works wonders in capturing the subtle variations in color that occur in natural water bodies, giving your painting a more dynamic and fluid appearance.
To illustrate how depth can be effectively created through color, consider the following table that outlines various water bodies and the corresponding color techniques:
| Water Body | Base Color | Highlight Color | Technique |
|---|---|---|---|
| Ocean | Deep Blue | Turquoise | Layering with Glazing |
| Lakes | Rich Green | Soft Aqua | Dry Brush for Texture |
| Rivers | Dark Teal | Light Blue | Wet-on-Wet for Flow |
As you explore these techniques, remember that the goal is to evoke emotion and draw the viewer into the scene. A well-painted water scene can transport someone to a tranquil lakeside or the edge of a rushing river. Experiment with different combinations of colors and techniques to discover what resonates with you and your artistic vision. Don’t be afraid to make bold choices; sometimes, the most surprising results come from a little risk-taking!
In conclusion, creating depth with color in your water paintings is not just about technical skill; it’s about evoking a feeling and telling a story. By layering colors, utilizing transparency, and understanding the unique characteristics of water, you can create stunning, lifelike scenes that capture the imagination of your audience.
- What colors should I use for painting water? The colors depend on the type of water body. For oceans, deep blues and turquoises work well, while lakes may require greens and soft aquas.
- How can I create realistic reflections in my water paintings? Focus on the colors of the objects above the water and blend them into the water's surface using lighter shades.
- What is the best technique for painting flowing water? The wet-on-wet technique is ideal for creating the soft, flowing effects of rivers and waterfalls.
Using White for Highlights
When it comes to painting water, one of the most crucial elements to master is the use of white paint for highlights. This technique plays a significant role in capturing the shimmering, reflective nature of water surfaces. Think of it this way: just as the sun glistens on a lake's surface, your brushwork should replicate that magic. The key is to understand where and how to apply white to create the most realistic effects.
To effectively use white for highlights, consider the following tips:
- Identify Light Sources: Before you even dip your brush into the white paint, take a moment to observe where the light is coming from in your reference photo or scene. Is it a bright sunny day, or are there clouds overhead? This will influence where you place your highlights.
- Layering is Key: Start with a base layer of color and allow it to dry before adding white highlights. This layering technique not only helps the highlights stand out but also adds depth to your painting.
- Use Different Brush Sizes: Depending on the effect you want to achieve, you may need to switch between brushes. A finer brush can help create delicate, shimmering highlights, while a larger brush can be used for broader strokes.
Another important aspect to consider is the transparency of your white paint. Using a more transparent white can create a softer, more ethereal effect, which is often desirable when painting water. Conversely, a thicker application can provide a stark, striking highlight, perfect for capturing the intensity of sunlight reflecting off the surface.
To illustrate the impact of highlights on water, let's take a look at a simple table that outlines different water types and how to apply white highlights effectively:
| Water Type | Highlight Technique | Brush Type |
|---|---|---|
| Calm Lake | Soft, blended highlights | Round brush |
| Raging River | Sharp, bright highlights | Flat brush |
| Ocean Waves | Layered, textured highlights | Fan brush |
Finally, don’t forget that less is often more when it comes to highlights. Overdoing it can lead to a painting that feels unnatural. Instead, aim for a balance that enhances your water scene without overpowering it. Just like a gentle breeze can create ripples on a lake, a few well-placed highlights can breathe life into your artwork.
Capturing Movement and Flow
When it comes to painting water, capturing its movement and flow can be one of the most exhilarating challenges an artist faces. Think about it: water is never still; it dances, swirls, and rushes, creating a dynamic visual experience. To effectively portray this movement in your artwork, you’ll need to embrace a few key techniques that will breathe life into your water scenes.
First off, it’s essential to observe real water in motion. Whether it’s the gentle ripples of a lake or the powerful rush of a waterfall, each type of water has its own rhythm. You might find it helpful to take a moment to watch how the light interacts with the water's surface, creating reflections and shadows. By understanding these nuances, you can begin to translate that observation onto your canvas.
One effective technique for capturing movement is through the use of dynamic brush strokes. For instance, when painting a flowing river, consider using long, sweeping strokes that mimic the direction of the water's flow. This technique not only conveys movement but also guides the viewer’s eye across the artwork, creating a sense of journey. In contrast, shorter, choppy strokes can be used to depict the frothy, turbulent waters of a waterfall or ocean waves crashing against the shore.
Another important aspect to consider is the composition of your painting. Positioning elements such as rocks, trees, or figures along the water's edge can enhance the sense of movement. For example, a large boulder in a rushing stream can create a natural focal point, drawing attention to the water swirling around it. Additionally, using diagonal lines in your composition can evoke a sense of action and flow, making your painting more dynamic.
To further enhance the illusion of movement, consider the use of color and light. Warm colors can suggest speed and energy, while cooler tones can evoke calmness and serenity. Experimenting with a variety of color transitions can help depict the changing nature of water as it flows. For instance, you might use a gradient of blues and greens to show the depth of a river, contrasting with lighter shades where the water splashes against rocks.
Lastly, don’t forget about the importance of practice. Like any skill, mastering the art of painting water takes time and dedication. Set aside time to practice different techniques, experiment with various brush strokes, and study the movement of water in different settings. The more you practice, the more intuitive your approach will become, allowing you to create stunning, lifelike representations of water in motion.
- What materials do I need to paint water effectively? You will need quality brushes, watercolors or acrylics, a palette, and good paper or canvas. Experiment with different types of brushes to find what works best for you.
- How can I make my water paintings look more realistic? Pay attention to details like reflections, shadows, and highlights. Observing real water will help you understand how to replicate its characteristics on your canvas.
- Is it necessary to use a specific color palette for water? While there are common palettes for different types of water, feel free to experiment. The key is to choose colors that evoke the mood you want to convey.
Brush Techniques for Water
When it comes to painting water, mastering brush techniques can truly elevate your artwork. The way you wield your brush can dramatically alter the perception of water in your paintings, transforming a simple blue canvas into a mesmerizing aquatic scene. Each technique has its own charm and utility, allowing artists to capture the essence of water, whether it's the gentle ripples of a serene lake or the powerful cascades of a waterfall. Let's dive into some of the most effective brush techniques that can help you achieve stunning results.
First up is the dry brush technique. This method involves using a brush with very little paint on it, which creates a textured effect on the canvas. It's perfect for adding subtle details like ripples and waves. To use this technique, simply load your brush with a small amount of paint and lightly drag it across the surface. The result? A beautiful, textured appearance that mimics the natural movement of water. You can also experiment with different brush sizes to achieve varied textures, making your water scenes more dynamic.
Next, we have the wet-on-wet technique, which is ideal for creating soft transitions and blending colors seamlessly. In this method, you apply wet paint onto a wet surface, allowing the colors to mix and flow together. This technique is particularly effective for painting flowing water, such as rivers or waterfalls, as it captures the fluidity and movement of water beautifully. To master this technique, you might want to practice layering colors while keeping your brush strokes light and fluid.
Now, let’s talk about the importance of brush shapes in water painting. Different brush shapes can produce various effects. For instance, a flat brush can create broad strokes that are great for depicting large bodies of water, while a round brush can be used for more intricate details, such as the edges of a wave or the reflections on the water's surface. You can even use fan brushes to create the illusion of foam and splashes, adding a lively touch to your water scenes.
To further illustrate the impact of brush techniques, consider this simple table summarizing the techniques discussed:
| Technique | Description | Best For |
|---|---|---|
| Dry Brush | Minimal paint on the brush for texture | Ripples, waves |
| Wet-on-Wet | Blending colors on a wet surface | Flowing water, soft transitions |
| Flat Brush | Broad strokes for large areas | Large bodies of water |
| Round Brush | Intricate details with a pointed tip | Wave edges, reflections |
| Fan Brush | Creates texture and splashes | Foam, splashes |
Incorporating these techniques into your painting practice can truly transform your approach to depicting water. Remember, practice makes perfect! Don’t hesitate to experiment with different brushes and techniques to find what works best for your style. As you become more comfortable with these methods, you'll discover your unique way of portraying water, making your artwork not only visually appealing but also full of life and movement.
Q: What is the best brush for painting water?
A: The best brush depends on the effect you want to achieve. A flat brush is great for large areas, while a round brush is perfect for details. Experiment with different brushes to see which works best for you!
Q: Can I use acrylics for painting water?
A: Absolutely! Acrylics are versatile and can be used effectively to depict water. Just remember to work quickly with wet-on-wet techniques as acrylics dry faster than oils.
Q: How can I make my water paintings look more realistic?
A: Focus on color selection, texture, and light reflections. Using techniques like dry brush and wet-on-wet can also help create a more lifelike appearance.
Dry Brush Technique
The is a fascinating method that can transform your water paintings from ordinary to extraordinary. This technique involves using a brush that has very little paint on it, allowing you to create a textured, almost ethereal effect on the canvas. Imagine walking along the shore and watching the sunlight dance on the surface of the water; that shimmering quality can be captured beautifully with the dry brush technique. It’s perfect for depicting the subtle ripples and waves that characterize water, giving your artwork a sense of movement and life.
To get started with the dry brush technique, you’ll need to select the right tools. A stiff-bristled brush works best, as it can hold just enough paint to create texture without overwhelming the canvas. Here’s a quick guide to help you prepare:
- Choose your brush: Opt for a flat or angular brush with stiff bristles.
- Select your colors: Use lighter shades for highlights and darker tones for shadows.
- Prepare your canvas: Make sure it’s primed and ready to absorb the paint.
Once you have your materials ready, it’s time to dive into the technique. Start by loading your brush with a small amount of paint. You want to avoid saturating the bristles; instead, you should be able to see some of the canvas texture through the paint. Lightly drag the brush across the surface of your canvas, allowing the bristles to skip over the high points. This creates the illusion of light reflecting off the water's surface, mimicking the way light interacts with the ripples and waves.
Another exciting aspect of the dry brush technique is the ability to layer your colors. Begin with a base layer of color that represents the water body you’re painting—perhaps a deep blue for a lake or a vibrant turquoise for the ocean. After allowing this layer to dry, you can apply lighter colors with the dry brush technique to add highlights. This layering not only enhances the depth of your painting but also creates a more dynamic and engaging visual experience.
As you practice, remember that less is often more. The beauty of the dry brush technique lies in its subtlety. Too much paint can easily overwhelm the canvas, so take your time and build up the texture gradually. With patience and practice, you’ll be able to create stunning water scenes that capture the fluidity and beauty of nature.
| Question | Answer |
|---|---|
| What type of paint works best for the dry brush technique? | Acrylic or oil paints are ideal, as they have the right consistency for this technique. |
| Can I use this technique on other surfaces? | Yes, the dry brush technique can be applied to various surfaces, including paper and wood. |
| How do I clean my brush after using the dry brush technique? | Clean your brush with soap and water if using acrylics, or with paint thinner for oil paints. |
Wet-on-Wet Technique
The is a magical approach to painting water that allows for seamless blending and soft transitions between colors. Imagine dipping your brush into a pool of vibrant blue and then swirling it into a softer turquoise; the colors dance together on the canvas, creating a harmonious flow that mimics the gentle ripples of a lake. This technique is particularly effective for capturing the fluidity of water, whether you're depicting a serene pond or a roaring waterfall.
To get started with the wet-on-wet technique, you'll need to prepare your canvas properly. It's essential to have a wet surface, which can be achieved by applying a thin layer of water or a medium that keeps your paint moist. This method not only allows for better blending but also encourages the colors to merge naturally, creating a sense of movement that is vital for any water scene.
When applying this technique, consider the following tips:
- Use high-quality paints: Acrylics or oils work wonderfully for this technique, as they maintain their viscosity and blend beautifully.
- Work quickly: Since the wet surface can dry out, it's crucial to apply your colors while everything is still wet. This can be a race against time, but it adds an exhilarating challenge to your painting process!
- Layer wisely: Start with your base colors and gradually build up layers. This layering effect not only adds depth but also creates a more realistic representation of water.
One of the most exciting aspects of the wet-on-wet technique is the unexpected surprises that can occur. As colors bleed into each other, you might discover new shades and textures that you hadn't anticipated. This spontaneity is akin to watching a river flow; it’s unpredictable yet beautiful, offering unique results with every stroke.
For those who are new to this technique, practice is key. Don’t be discouraged if your first attempts don’t turn out as you envisioned. Just like learning to swim, you’ll find your rhythm with time. Experiment with different brush sizes and shapes to see how they interact with the wet paint. A larger brush can create sweeping motions that mimic the broad strokes of a river, while a finer brush can help you capture the delicate details of a waterfall.
In conclusion, the wet-on-wet technique is a fantastic method to explore the beauty of water in your artwork. It invites you to embrace the fluidity of paint and the unpredictability of nature. So grab your brushes, prepare your canvas, and let the colors flow freely—your masterpiece awaits!
Q: Can I use the wet-on-wet technique with watercolor paints?
A: Absolutely! The wet-on-wet technique works beautifully with watercolors as well. Just remember to keep your paper wet to achieve the best blending effects.
Q: How do I prevent my colors from becoming muddy?
A: To avoid muddy colors, use a clean brush and rinse it frequently. Additionally, try to work with a limited color palette to maintain clarity and vibrancy in your painting.
Q: Is this technique suitable for beginners?
A: Yes! While it may seem challenging at first, the wet-on-wet technique is a great way for beginners to learn about color blending and brush control. Just dive in and have fun!
Frequently Asked Questions
- What are the best techniques for painting water?
There are several effective techniques for painting water, including understanding its surface characteristics, using the right color palettes, and employing specific brush techniques. Experimenting with methods like dry brush and wet-on-wet can help you capture the fluidity and movement of water.
- How do I choose the right colors for water?
Choosing the right colors involves understanding the type of water you want to depict. For serene lakes, softer blues and greens work well, while turbulent oceans might require deeper, more vibrant hues. Mixing colors to reflect the surrounding environment can also enhance the realism of your painting.
- What is the dry brush technique, and how is it used in painting water?
The dry brush technique involves using a brush with minimal paint to create texture. This method is perfect for adding ripples and waves to your water paintings, as it allows for more control and can create a realistic impression of movement on the water's surface.
- Can I use white paint for highlights in my water paintings?
Absolutely! Using white paint for highlights is essential for depicting the reflective quality of water. Applying white strategically can create shimmering effects that bring your water scenes to life, enhancing their overall realism.
- How can I create depth in my water paintings?
Creating depth involves layering colors and varying saturation. By using darker shades in the foreground and lighter shades in the background, you can achieve a three-dimensional appearance. This technique helps to convey the illusion of depth in your water scenes.
- What should I consider when capturing movement in water?
To capture movement, focus on your brush strokes and composition. Using sweeping strokes can convey flow, while varying the direction of your brush can mimic the natural movement of water. Observing real water can also provide insight into how to depict its motion effectively.


