
How to Learn to Draw: Top Techniques and Tips
Are you ready to unleash your inner artist? Drawing can be an incredibly fulfilling creative outlet, and the journey to mastering it is filled with excitement and discovery. Whether you're a complete novice or someone looking to refine your skills, this article explores effective techniques and tips that will elevate your drawing game. From understanding the basics to exploring different styles, the world of drawing is vast and inviting.
Before diving into the intricate world of drawing, it's crucial to grasp the fundamental concepts that serve as the bedrock for every artist. Think of these basics as the building blocks of your artistic journey. Lines, shapes, and forms are the essential elements that will help you create anything from a simple sketch to a detailed masterpiece. By mastering these concepts, you'll find that your confidence grows, and your ability to express yourself through art becomes more fluid.
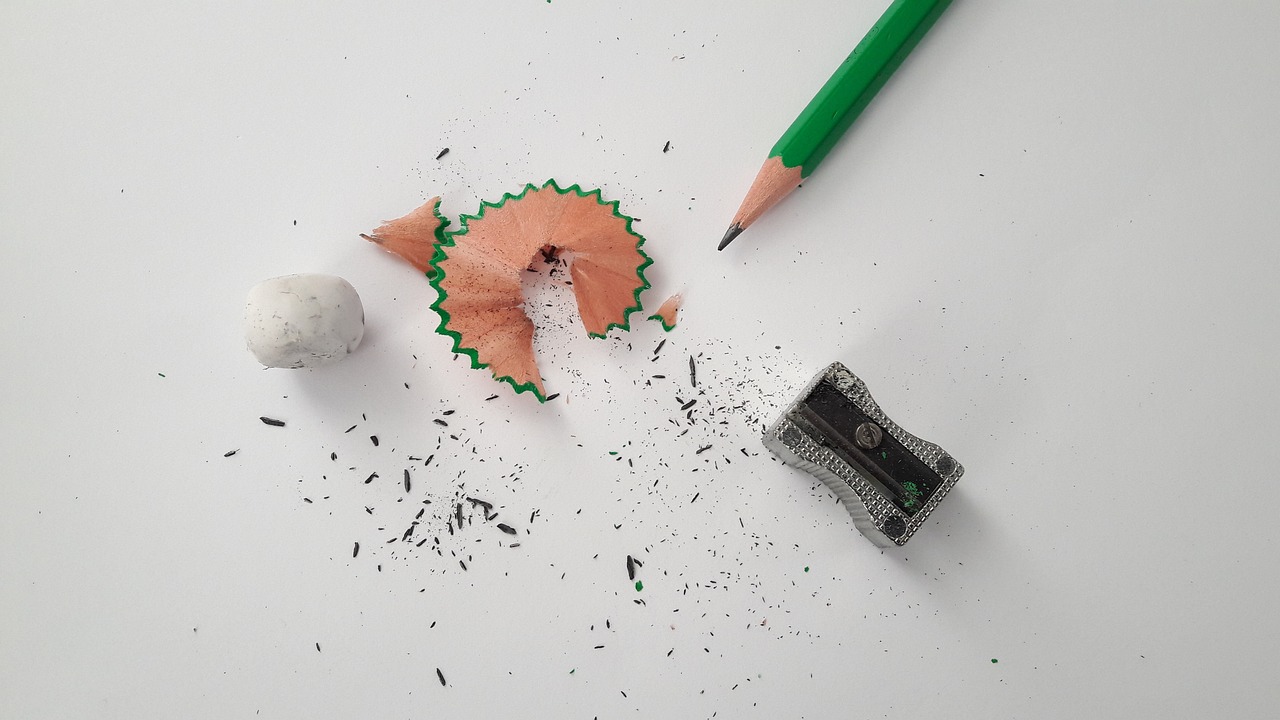
Choosing the right tools can significantly enhance your drawing experience. Imagine trying to cook without the right utensils; it's the same with drawing. The tools you select can make all the difference in your artistic expression. In this section, we will discuss various materials, from pencils to sketchbooks, and their importance in your artistic journey. Having the right tools not only makes the process easier but also more enjoyable.
When it comes to pencils, not all are created equal. Different pencils offer varying hardness and darkness, which can dramatically affect your drawing style. Here’s a quick guide to help you choose the right pencil:
| Pencil Type | Hardness | Best For |
|---|---|---|
| H | Hard | Fine lines, detailed work |
| B | Soft | Shading, bold lines |
| HB | Medium | General purpose |
By understanding the different types of pencils available, you can select the ones that best suit your artistic needs and preferences.
When you think about drawing mediums, graphite and charcoal often come to mind. Each has its unique characteristics and can produce distinct effects in your artwork. Graphite is known for its smooth application and fine details, while charcoal offers a rich, deep black that can create dramatic contrasts. Consider your drawing style and the mood you want to convey when choosing between these two mediums.
Just like a painter needs the right canvas, a drawer needs the appropriate paper. The type of paper you choose can influence your drawing outcome significantly. From textured paper that enhances charcoal drawings to smooth paper ideal for fine pencil work, understanding the different types of paper available is essential. Here are some common types:
- Sketch Paper: Lightweight and perfect for practice.
- Drawing Paper: Heavier and designed for finished artwork.
- Watercolor Paper: Great for mixed media and ink.
Selecting the right paper can elevate your drawings and help you achieve the desired effects.
Sketching is a vital skill for any artist. It’s like the warm-up before a big game, helping you loosen up and get in the zone. This part covers various techniques to help beginners develop confidence and improve their sketching abilities. Start with simple shapes and gradually work your way up to more complex compositions. Remember, every artist was once a beginner, so don't be afraid to make mistakes; they are a crucial part of the learning process!
Observation is key to drawing accurately. Have you ever noticed how artists seem to see the world differently? This ability comes from honing your observation skills. Engaging in exercises that enhance your ability to see and replicate the world around you is essential. The more you practice, the more you'll notice the subtleties in shapes, shadows, and proportions.
Drawing from real-life subjects sharpens your skills like nothing else. It’s like training for an athlete; the more you practice, the better you get. We explore methods for practicing life drawing effectively, including tips for setting up a drawing session. Consider finding a comfortable spot, gathering your materials, and taking your time to observe your subject closely. You might be surprised by how much you can capture!
Reference images can be a fantastic tool in your artistic arsenal. They help in understanding proportions and details that might be hard to grasp otherwise. When selecting reference images, look for clear, high-quality pictures that inspire you. This section discusses how to select and use reference images for your drawings, ensuring that you stay true to your artistic vision while learning from the best.
Experimenting with various styles can help you find your unique artistic voice. Think of it as trying on different outfits until you find the one that feels just right. This section introduces different drawing styles, from realism to abstract art, and encourages exploration. Don't be afraid to mix things up; sometimes, the best discoveries come from stepping outside your comfort zone!
Understanding the differences between realism and abstract art can expand your creative horizons. Realism focuses on capturing the world as it is, while abstract art allows for more freedom and expression. We explore the characteristics of each style and their appeal, helping you decide which resonates more with your artistic sensibilities.
Combining different mediums can create unique effects that breathe life into your drawings. Imagine blending the smoothness of graphite with the boldness of ink or the texture of pastels. This section discusses how to experiment with mixed media techniques to enhance your drawings, encouraging you to push your creative boundaries.
Consistency is crucial for improvement. Think of it as training for a marathon; regular practice builds stamina and skill. This part offers strategies for establishing a regular drawing routine that fosters growth and creativity. Set aside dedicated time each week to draw, and challenge yourself to try new techniques or subjects.
Setting specific drawing goals can motivate you to keep pushing forward. Whether it's completing a certain number of sketches each week or mastering a new technique, having clear objectives can provide direction. We discuss how to create achievable challenges that push your artistic boundaries while keeping the process enjoyable.
Staying inspired is essential for any artist. It’s like keeping the fire of creativity burning bright. This section shares tips on finding motivation and keeping your creative spark alive throughout your journey. Surround yourself with art, connect with fellow artists, and don’t forget to take breaks to recharge your creativity.
Q: How long does it take to learn to draw?
A: The time it takes to learn to draw varies for each individual. With consistent practice, you can see improvement in a few months, but mastery takes years.
Q: Do I need expensive materials to start drawing?
A: Not at all! You can start with basic materials like a simple pencil and paper. As you progress, you can invest in higher-quality supplies.
Q: What if I don't have a natural talent for drawing?
A: Drawing is a skill that can be developed. With practice and dedication, anyone can improve their drawing abilities.
Q: How often should I practice drawing?
A: Aim for regular practice, even if it's just a few minutes a day. Consistency is key to improvement!

Understanding the Basics of Drawing
When embarking on your artistic journey, understanding the basics of drawing is akin to learning the alphabet before writing a novel. Just as every story begins with letters, every drawing starts with fundamental concepts. These include lines, shapes, and forms, which are the building blocks of any visual representation. Mastering these elements not only enhances your skills but also fuels your creativity, allowing you to express your ideas more effectively.
To illustrate, think of lines as the skeleton of your drawing. They provide structure and guide the viewer's eye. Whether you're drawing a simple stick figure or a complex landscape, lines define the edges and contours of your subject. Next, shapes come into play. Shapes are formed when lines enclose space, and they can be geometric (like squares and circles) or organic (like the shape of a leaf). Understanding how to manipulate shapes can lead to more dynamic and interesting compositions.
Now, let's consider forms. Forms add depth and dimension to your drawings. While shapes are flat, forms are three-dimensional, giving your artwork a lifelike quality. When you learn to represent forms accurately, you can create the illusion of volume and space on a two-dimensional surface. This transition from flat shapes to three-dimensional forms is a critical step in developing your drawing skills.
As you delve deeper into the basics, you'll encounter concepts such as proportion and perspective. Proportion refers to the size relationship between different elements in your drawing. For example, when drawing a human figure, understanding how the head relates to the body is crucial for achieving realistic proportions. On the other hand, perspective allows you to create the illusion of depth on a flat surface. Techniques such as one-point and two-point perspective can transform your drawings from simple shapes into complex, believable scenes.
To summarize, grasping the basics of drawing is not just about learning techniques; it's about developing a visual language that allows you to communicate your ideas. Here’s a quick overview of the key concepts:
| Concept | Description |
|---|---|
| Lines | The foundation of all drawings, defining edges and contours. |
| Shapes | Enclosed spaces formed by lines, can be geometric or organic. |
| Forms | Three-dimensional representations that add depth to drawings. |
| Proportion | The size relationship between different elements in a drawing. |
| Perspective | Techniques to create the illusion of depth on a flat surface. |
By dedicating time to practice these fundamental concepts, you'll find that your drawing skills will flourish. Remember, every great artist started with these basics, so don't rush the process! Embrace the learning curve, and soon enough, you'll be amazed at how far you've come.
- What are the best materials for beginners? Start with basic pencils, erasers, and sketch paper. As you progress, you can explore different mediums.
- How often should I practice drawing? Consistency is key! Aim for at least 30 minutes of practice each day.
- Can I learn to draw if I have no experience? Absolutely! Everyone can learn to draw with patience and practice.
- What should I focus on as a beginner? Focus on mastering lines, shapes, and forms before moving on to more complex techniques.
Essential Drawing Tools and Materials
When it comes to drawing, having the right tools can make a world of difference. Think of it like a chef in a kitchen; without the right knives, even the freshest ingredients won't shine. The same goes for artists! Whether you're just starting out or you're a seasoned pro, understanding the essential drawing tools and materials is crucial for unleashing your creativity and honing your skills.
Let's begin with the most fundamental tool: the pencil. Not all pencils are created equal, and each type serves a different purpose. For instance, graphite pencils come in a range of hardness levels, from 9H (very hard) to 9B (very soft). The harder the pencil, the lighter the mark it makes, while softer pencils produce darker, richer lines. Choosing the right pencil can significantly impact your drawing style, so it's worth experimenting with different grades to find what works best for you.
In addition to graphite, many artists enjoy using charcoal for its deep, expressive lines and rich textures. Charcoal allows for a more dramatic effect and is excellent for creating shadows and depth in your drawings. However, it can be a bit messy, so be prepared for some cleanup after your creative sessions.
Next up is paper, which is another vital component of your drawing toolkit. The type of paper you choose can greatly influence the outcome of your artwork. For example, smooth paper is ideal for detailed work and fine lines, while textured paper can add an interesting dimension to your drawings. It's essential to consider the weight and finish of the paper, as these factors will affect how your medium interacts with it.
| Type of Paper | Best For |
|---|---|
| Smooth Paper | Detailed sketches and fine lines |
| Textured Paper | Adding dimension and depth |
| Watercolor Paper | Mixed media and wet techniques |
Now, let’s not forget about sketchbooks! A good sketchbook is like a diary for your artistic journey. It provides a space for you to experiment, practice, and document your progress. When choosing a sketchbook, consider its size, paper quality, and binding. A spiral-bound sketchbook may lay flat, making it easier to draw, while a hardcover sketchbook can offer more protection for your artwork.
Finally, don’t overlook the importance of additional tools like erasers, blending stumps, and sharpeners. An eraser is not just for mistakes; it can also be used creatively to lift graphite and create highlights. Blending stumps help smooth out your pencil or charcoal marks, giving your drawings a polished look. And of course, a sharp pencil is a happy pencil! Keeping your pencils well-sharpened ensures that you can achieve the precision you desire.
In summary, investing in the right drawing tools and materials is essential for any aspiring artist. By understanding the various options available and how they can enhance your work, you'll be better equipped to express your creativity and develop your unique artistic voice. Remember, it’s not just about the tools you use; it’s about how you use them to bring your imagination to life!
- What is the best pencil for beginners? A good starting point is a 2B pencil, as it offers a balance of darkness and ease of use.
- Can I use regular paper for drawing? While you can, it's best to use paper specifically designed for drawing to achieve better results.
- Do I need to buy expensive materials to improve my drawing skills? Not at all! Quality materials can help, but consistent practice and experimentation are far more important.
Types of Pencils and Their Uses
When it comes to drawing, the type of pencil you choose can make a world of difference in your artistic expression. Each pencil offers its unique characteristics, affecting everything from the texture of your lines to the depth of your shadows. Understanding the various types of pencils available can help you select the perfect tool for your creative endeavors. So, let’s dive into the fascinating world of pencils!
First off, pencils are categorized by their hardness, which is indicated by a grading scale. The scale typically ranges from H (hard) to B (black), with HB being the middle ground. Here’s a quick breakdown of what these grades mean:
| Grade | Characteristics | Best For |
|---|---|---|
| H (Hard) | Produces lighter, finer lines. | Detail work, fine sketching. |
| HB | Balanced hardness and darkness. | General-purpose drawing and writing. |
| B (Black) | Offers darker, softer lines. | Shading, bold sketches. |
In addition to the standard graphite pencils, you also have options like mechanical pencils and colored pencils. Mechanical pencils are fantastic for precise lines and detailed work, as they maintain a consistent point without the need for sharpening. On the other hand, colored pencils allow for vibrant expressions and can be layered for depth and texture.
Another popular choice among artists is charcoal pencils. These pencils create rich, deep blacks and are perfect for expressive sketches and dramatic shading. They can be smudged easily, allowing for a softer look, but they can also be challenging to control, making them ideal for those who want to experiment with bold strokes.
To summarize, your choice of pencil can greatly affect your drawing style and the overall outcome of your artwork. Here’s a quick recap of some common types of pencils and their uses:
- Graphite Pencils: Versatile and great for most drawing techniques.
- Colored Pencils: Perfect for adding color and vibrancy.
- Charcoal Pencils: Ideal for bold, expressive drawings.
- Mechanical Pencils: Excellent for precision and detail.
Choosing the right pencil isn't just about the type; it's also about how you use it. Experimenting with different pencils can help you discover your unique style and preferences. So grab a few different types, and let your creativity flow!
Q: What pencil should I start with as a beginner?
A: Starting with an HB pencil is a great choice for beginners. It offers a good balance of hardness and darkness, making it versatile for various drawing techniques.
Q: Can I use colored pencils for shading?
A: Absolutely! Colored pencils can be layered to create depth and shading. Just remember to apply light pressure initially and build up the color gradually.
Q: How do I choose between graphite and charcoal pencils?
A: If you're looking for precision and control, graphite is the way to go. However, if you want to create dramatic, expressive sketches, charcoal might be your best bet.
Graphite vs. Charcoal
When it comes to drawing, choosing the right medium can make all the difference in your artistic expression. Two of the most popular materials artists use are graphite and charcoal. While both have their unique characteristics and applications, understanding their differences can help you select the one that best suits your style and project needs.
Graphite is the classic choice for many artists, known for its smooth application and range of hardness. Graphite pencils come in various grades, from hard (H) to soft (B), allowing you to create everything from fine, detailed lines to bold, dark strokes. This versatility makes graphite an excellent option for precise sketches and detailed drawings. One of the advantages of using graphite is that it is relatively easy to erase, enabling you to refine your work without too much hassle.
On the other hand, charcoal offers a different texture and depth, often favored for its rich, dark tones and expressive qualities. Charcoal can produce a variety of effects, from soft, subtle shading to intense, dramatic contrasts. It is particularly popular in life drawing and portraiture because it allows for quick and dynamic strokes that can capture the essence of a subject. However, one downside to charcoal is that it can be more challenging to erase, which means you'll need to be more deliberate with your strokes.
To help you understand the key differences between graphite and charcoal, here's a quick comparison:
| Feature | Graphite | Charcoal |
|---|---|---|
| Texture | Smooth and fine | Rough and textured |
| Shading | Subtle gradients | Bold contrasts |
| Ease of Erasing | Easy to erase | More difficult to erase |
| Best For | Detailed work, fine lines | Expressive sketches, life drawing |
Ultimately, the choice between graphite and charcoal comes down to your personal preference and the specific requirements of your project. Why not experiment with both? You might find that using them in tandem can create stunning effects in your artwork. Imagine blending the precision of graphite with the dramatic flair of charcoal—now that's a combination that can truly elevate your drawings!
- Can I use both graphite and charcoal in the same drawing? Absolutely! Many artists combine these mediums to take advantage of their unique qualities.
- Which medium is better for beginners? Graphite is often recommended for beginners due to its ease of use and erasing capabilities.
- How do I fix charcoal drawings? Use a fixative spray to prevent smudging and preserve your charcoal artwork.

Choosing the Right Paper
When it comes to drawing, the type of paper you choose can make a world of difference in your artwork. Imagine trying to paint a beautiful sunset on a crumpled piece of newspaper—frustrating, right? The right paper not only supports your medium but also enhances your overall drawing experience. It's essential to understand the various types of paper available and how they can impact your artistic expression.
First and foremost, consider the weight of the paper. Paper weight is measured in grams per square meter (gsm). Heavier paper (around 200 gsm and above) is excellent for wet media like watercolor and ink, while lighter paper (around 90-150 gsm) works well for pencil and charcoal. Here’s a quick breakdown:
| Paper Type | Weight (gsm) | Best For |
|---|---|---|
| Sketch Paper | 90-120 | Pencil, Charcoal |
| Drawing Paper | 150-200 | Pencil, Ink, Pastel |
| Watercolor Paper | 200+ | Watercolor, Ink |
Next, think about the texture of the paper. The surface texture can significantly affect how your medium interacts with the paper. Smooth papers are ideal for detailed work and fine lines, while textured papers can add depth and character to your sketches. Here are a few common textures:
- Smooth: Great for detailed illustrations and ink work.
- Cold Press: Has a slight texture, perfect for watercolor and pastels.
- Hot Press: Very smooth, excellent for fine art and detailed pencil drawings.
Additionally, consider the color of the paper. While white paper is the most common choice, colored paper can offer a unique backdrop for your artwork. Using colored paper can create interesting contrasts and enhance the vibrancy of your drawing. Just remember that the color can affect the perception of your medium's hues.
Finally, don't forget about the archival quality of the paper, especially if you plan to keep your drawings for a long time. Acid-free papers resist yellowing and deterioration over time, ensuring your artwork remains as stunning as the day you created it. Investing in high-quality paper is like buying a good pair of shoes; it pays off in the long run!
In summary, choosing the right paper involves understanding its weight, texture, color, and archival quality. Take the time to experiment with different types, and you'll discover how much of an impact the right paper can have on your drawing journey. Remember, your paper is the canvas for your creativity, so choose wisely and let your imagination run wild!
Q: What is the best paper for beginners?
A: For beginners, a medium-weight sketch paper (around 120 gsm) is often the best choice as it can accommodate various mediums without breaking the bank.
Q: Can I use printer paper for drawing?
A: While printer paper can be used for quick sketches, it is not recommended for serious artwork as it is too thin and may not hold up well with erasing or heavy application of medium.
Q: How do I know if a paper is acid-free?
A: Look for labels that state "acid-free" or "archival quality." Many art supply stores provide paper specifically designed for artists, ensuring longevity for your creations.
Sketching Techniques for Beginners
When it comes to sketching, the journey can feel overwhelming, especially for beginners. But fear not! The beauty of sketching lies in its simplicity and the freedom it offers. Think of sketching as the warm-up before a big game; it’s where you loosen up your creative muscles, explore your ideas, and build your confidence. So, let’s dive into some fundamental techniques that will help you get started on your artistic adventure!
First and foremost, practice makes perfect. It’s essential to sketch regularly, even if it’s just a few minutes a day. Set aside time in your schedule to draw, whether it’s doodling in a sketchbook or capturing the world around you. You might find that setting a timer for 10-15 minutes allows you to focus without the pressure of creating a masterpiece. The key is to keep your hand moving and your mind open.
One effective technique is the contour drawing method. This involves drawing the outline of a subject without looking at your paper. It may sound tricky, but it’s a fantastic way to improve your observation skills. By focusing on the subject and not worrying about the outcome, you’ll begin to see shapes and lines more clearly. Plus, the results can be surprisingly delightful! You might even discover a unique style in your sketches.
Another essential technique is gesture drawing. This practice focuses on capturing the essence and movement of a subject quickly. Set a timer for one or two minutes and sketch a figure or object in that time. This exercise encourages you to loosen up and prioritize the overall form over details. It’s like capturing a fleeting moment; the more you practice, the better you’ll become at understanding proportions and poses.
Don't forget about shading techniques! Adding depth to your sketches can transform a flat image into something dynamic. Start with basic hatching and cross-hatching methods. Hatching involves drawing parallel lines in the direction of the form, while cross-hatching adds another layer of lines at different angles. This technique can create shadows and highlights, giving your sketches a more three-dimensional appearance.
For those who enjoy a bit of structure, consider using grid drawing. This technique involves dividing your reference image into smaller squares and then replicating it on your paper, square by square. It’s an excellent way to practice proportions and ensure accuracy, especially when drawing complex subjects. You can create your own grid or use a printed reference; just remember to keep your lines light and erase them later!
Lastly, remember that sketching is about exploration and fun. Don’t be afraid to make mistakes; they’re part of the learning process! Keep a sketchbook where you can jot down ideas, practice techniques, or even create quick studies. It’s your personal space to experiment without judgment. Over time, you’ll see how your skills evolve and how your unique style begins to emerge.
In summary, here are the key techniques to embrace as you embark on your sketching journey:
- Practice regularly to build confidence.
- Try contour drawing to improve observation skills.
- Engage in gesture drawing for quick expression.
- Utilize shading techniques for depth.
- Experiment with grid drawing for accuracy.
By incorporating these techniques into your practice, you’ll find that sketching becomes not just a skill, but a joyful part of your artistic expression. So grab your pencils, find a comfortable spot, and let your creativity flow!
Q: How often should I sketch to improve?
A: Aim to sketch daily, even if it's just for a few minutes. Consistency is key to improvement!
Q: What should I sketch as a beginner?
A: Start with simple objects around you, like a cup or a plant. Gradually move on to more complex subjects as you gain confidence.
Q: Is it necessary to use expensive materials?
A: No! You can start with basic materials like a pencil and paper. As you progress, you can explore different tools and mediums.
Practicing Observation Skills
Observation is the bedrock of drawing; it’s the difference between a mere sketch and a captivating piece of art. When you look at the world around you, do you see just shapes and colors, or do you notice the intricate details that bring life to your drawings? To truly enhance your drawing skills, you need to train your eyes to see beyond the surface. Think of it as tuning a radio—when you find the right frequency, everything becomes clearer and more vibrant.
One effective way to practice your observation skills is through exercises that challenge your perception. For instance, try drawing objects from different angles or in varying lighting conditions. This not only helps you understand how light interacts with forms but also hones your ability to replicate what you see. You might even consider setting up a still life arrangement at home. Grab some fruits, a vase, or any objects you find interesting, and spend time sketching them from different perspectives. It’s a fantastic way to improve your skills while having fun!
Another valuable technique is to engage in gesture drawing. This involves quick sketches of live subjects, focusing on capturing the essence of the form rather than the details. By limiting yourself to a short timeframe—say, 30 seconds to 2 minutes—you force your brain to prioritize what’s essential and discard the superfluous. This method is particularly beneficial when drawing people or animals, as it helps you understand movement and posture.
As you practice, it’s crucial to keep a sketchbook handy. A sketchbook is not just a collection of drawings; it’s a visual diary of your artistic journey. Use it to jot down observations, doodle ideas, or even write notes about what you see. This habit will not only improve your observation skills but also serve as a source of inspiration when you find yourself in a creative slump. Remember, every little detail counts, and your sketchbook is the perfect place to document them.
To further enhance your observation skills, consider the following tips:
- Slow Down: Take your time to really look at your subject. The more time you spend observing, the more you’ll notice.
- Break It Down: Instead of trying to capture everything at once, break your subject into basic shapes. This simplifies the process and makes it less daunting.
- Practice Regularly: Make observation a daily habit. Even a few minutes of focused drawing can lead to significant improvement over time.
Lastly, don’t shy away from using reference images to aid your practice. Whether it’s photographs or other artists’ works, reference images can provide insight into proportions, lighting, and textures that you might struggle to capture from life. Just remember to use them as a guide rather than a crutch; the goal is to develop your unique style while enhancing your observational skills.
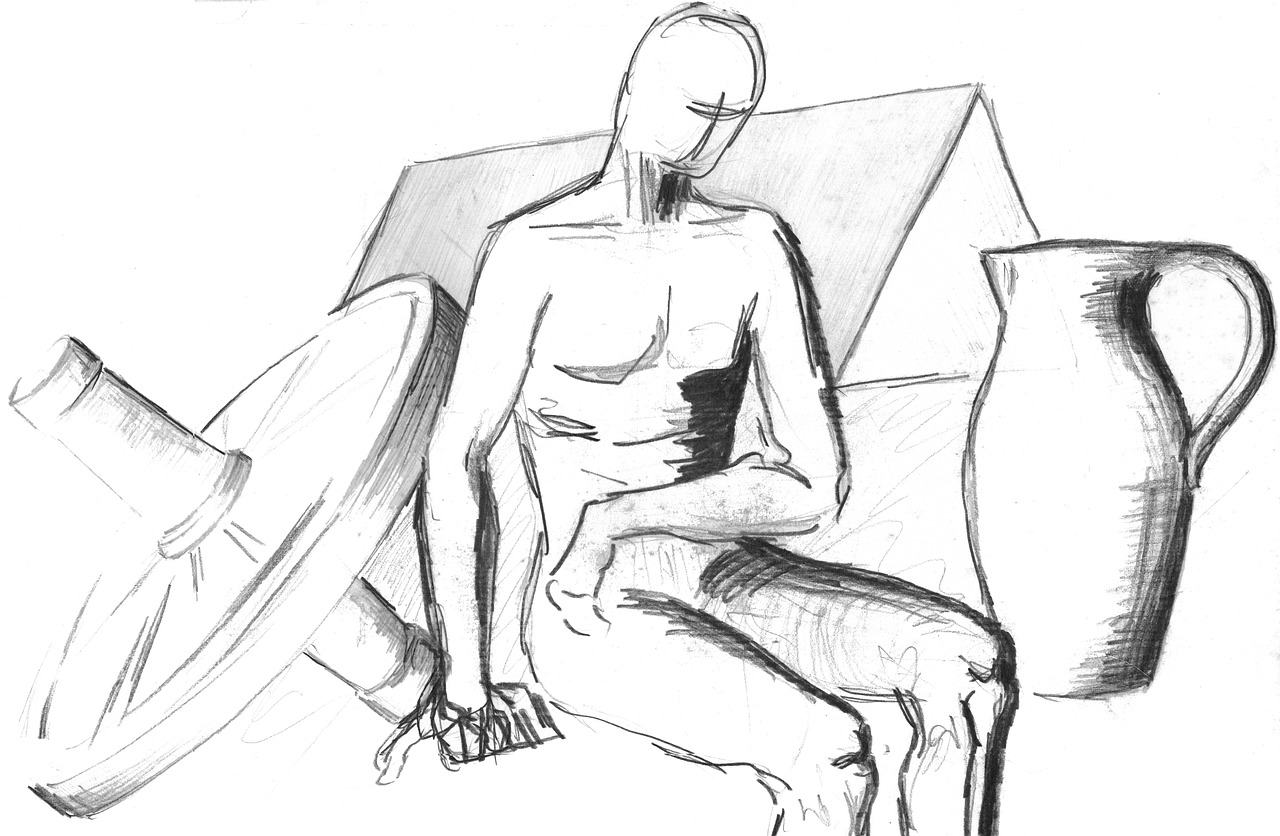
Drawing from Life
Drawing from life is an exhilarating experience that can significantly sharpen your artistic skills. Imagine standing in front of a bustling café, sketchbook in hand, capturing the essence of a moment in time. There’s something magical about translating the three-dimensional world onto a two-dimensional surface. But how do you get started? What techniques can you use to make your drawings come alive?
First, it's essential to choose your subject wisely. You might want to start with static objects, like a fruit bowl or a potted plant, before moving on to more complex subjects like people or animals. This gradual approach allows you to build confidence and hone your skills. When drawing from life, focus on the following key aspects:
- Proportions: Pay attention to the size relationships between different elements of your subject. Use simple measuring techniques, like comparing the width of one object to another.
- Light and Shadow: Observe how light interacts with your subject. Notice where the highlights and shadows fall, as they add depth and dimension to your drawing.
- Movement: If you're drawing people, look for gestures and expressions that convey emotion. Capturing a fleeting moment can bring your artwork to life.
Now that you have your subject, it’s time to set up your drawing session. Find a comfortable spot where you can observe your subject without distractions. Make sure you have good lighting, as this will help you see details more clearly. As you begin to draw, remember to keep your hand relaxed and your lines fluid. This will help you capture the essence of your subject rather than getting bogged down in details.
Another fantastic tip is to practice quick sketches, often referred to as gesture drawing. These are short, timed sketches (usually 1-5 minutes) that focus on capturing the basic form and movement of your subject. This technique is particularly useful when drawing live models or animals, as it trains your eye to see the essential shapes and proportions quickly.
Lastly, don’t forget to embrace the mistakes! Drawing from life can be challenging, and not every sketch will turn out as you envisioned. Instead of getting discouraged, view each drawing as a learning opportunity. Analyze what worked and what didn’t, and use that knowledge to improve your future sketches.
Q: How often should I practice drawing from life?
A: Consistency is key! Aim to practice drawing from life at least a few times a week. The more you practice, the more you’ll see improvement.
Q: What materials do I need for drawing from life?
A: You don’t need much to get started! A sketchbook, a set of pencils or charcoal, and an eraser are great basics. As you progress, you can experiment with different mediums.
Q: Is it necessary to take art classes to improve my life drawing skills?
A: While classes can be beneficial, they are not essential. You can learn a lot through practice and by studying online resources or books. However, feedback from peers or instructors can help you grow faster.
Q: How do I overcome the fear of drawing in public?
A: Start by drawing in less crowded places to build your confidence. As you become more comfortable, gradually move to busier environments. Remember, everyone is focused on their own lives, so don’t worry about what others think!
Using Reference Images
When it comes to enhancing your drawing skills, reference images can be a game changer. They serve as a visual guide, helping you understand proportions, lighting, and the intricate details that can make or break your artwork. Think of reference images as your artistic GPS—they help you navigate through the vast landscape of creativity, ensuring you stay on the right path. But how do you effectively utilize these images? Let’s dive into some key considerations.
First and foremost, choosing the right reference image is crucial. You want to select images that resonate with your artistic goals. Are you aiming for realism? Look for high-quality photographs that capture the subject in great detail. If you’re leaning towards a more abstract style, you might prefer images that inspire your imagination rather than strictly adhering to reality. Here are some tips to help you select the best reference images:
- Quality over Quantity: A single, well-composed image can provide more value than a dozen mediocre ones.
- Lighting Matters: Pay attention to how light interacts with your subject. Good lighting can enhance textures and forms.
- Angle and Perspective: Different angles can offer unique insights into your subject. Experiment with various perspectives to find what works best for you.
Once you have your reference image, it’s time to analyze it. Take a moment to study the shapes, lines, and shadows. Break down the image into basic forms—this will make it easier to replicate. Imagine you’re a detective, piecing together clues that will lead you to a successful drawing. Ask yourself questions like:
- What shapes do I see?
- How does light affect the colors and shadows?
- What is the overall composition like?
Another effective technique is to create a grid overlay on your reference image. This involves dividing your reference into smaller sections, which can help you replicate the proportions accurately. You can also apply this grid system to your drawing paper. It’s like having a roadmap that guides you step by step through your drawing journey.
However, while reference images are incredibly useful, it’s essential not to become overly reliant on them. They should serve as a tool to enhance your skills, not replace your creativity. Challenge yourself to draw without looking at the reference image after you’ve grasped the basics. This practice will help you develop your observation skills and encourage you to tap into your artistic intuition.
Lastly, don't forget to credit your sources if you’re using someone else's photographs, especially if you plan to share your artwork online. Respecting the original creator’s work fosters a community of mutual appreciation and support among artists. So, go ahead and embrace reference images—they're your allies in the quest to become a better artist!
- What types of reference images are best for beginners? High-quality photographs with clear details and good lighting are ideal for beginners.
- Can I use images from the internet? Yes, but make sure to check the usage rights and credit the original creator if necessary.
- How can I avoid over-relying on reference images? Practice drawing from memory and try to recreate images without looking at them to strengthen your skills.
Exploring Different Drawing Styles
When it comes to drawing, the beauty lies in its diversity. Each artist has a unique voice, and exploring different drawing styles can be the key to discovering yours. Think of it like trying on different outfits; some styles may fit you perfectly, while others might feel a bit off. Embracing variety in your drawing practice not only enhances your skills but also keeps the creative juices flowing. So, how do you dive into this colorful world of artistic expression?
First off, let’s talk about the two major categories that often come to mind: realism and abstract art. Realism is all about capturing the world as it is, focusing on details, proportions, and accurate representations. It’s like looking through a window and trying to replicate what you see. On the other hand, abstract art breaks free from traditional representation, allowing emotions and ideas to take center stage. It’s akin to a dream—vivid, imaginative, and often open to interpretation. Understanding these two styles can help you navigate your artistic journey.
Now, let’s not forget about the thrill of experimenting with mixed media. This technique combines various materials such as ink, watercolor, and even collage elements to create unique effects. Imagine blending the fluidity of watercolor with the boldness of ink; the possibilities are endless! Mixing mediums can add depth and texture to your drawings, making them more dynamic and engaging. Plus, it’s a fantastic way to break out of creative ruts. If you haven’t tried it yet, grab some supplies and let your imagination run wild.
Here’s a quick comparison to help you visualize the differences between the two styles:
| Style | Characteristics | Purpose |
|---|---|---|
| Realism | Focus on details, accurate proportions, lifelike representation. | To depict reality as closely as possible. |
| Abstract Art | Emphasizes colors, shapes, and forms over realistic representation. | To express emotions or concepts rather than literal interpretations. |
As you explore these styles, don’t hesitate to experiment! Try drawing the same subject in both realism and abstract styles. This not only sharpens your skills but also helps you understand your preferences better. You might find that you enjoy the precision of realism one day and the freedom of abstraction the next. The key is to stay open-minded and curious.
Moreover, consider the influence of cultural styles. Art is a reflection of society, and different cultures have their unique approaches to drawing. From traditional Japanese ink painting to the vibrant street art of urban landscapes, each style tells a story. Exploring these cultural influences can enrich your understanding and appreciation of art, as well as inspire your own creations.
In conclusion, the journey of discovering different drawing styles is akin to a thrilling adventure. It invites you to step out of your comfort zone, play with various techniques, and ultimately find your artistic voice. So grab your sketchbook, dive into this exploration, and let your creativity soar!
- What is the best drawing style for beginners? It often depends on your interests, but starting with realism can help you understand basic techniques like proportions and shading.
- Can I combine different drawing styles? Absolutely! Mixing styles can lead to unique and personal artwork. Don’t be afraid to experiment!
- How do I find my unique drawing style? Explore various styles, practice regularly, and pay attention to what resonates with you. Your style will evolve naturally over time.
Realism vs. Abstract Art
When it comes to the world of art, two distinct styles often come to mind: realism and abstract art. Each of these styles offers a unique perspective and approach to creativity, and understanding them can significantly enhance your drawing skills and artistic expression. So, what exactly sets them apart?
Realism is all about capturing the world as it is. Artists who embrace realism strive to depict subjects accurately, paying meticulous attention to detail, proportion, and perspective. Think of it as a window into reality—where every stroke of the pencil or brush aims to replicate the visual experience of the viewer. This style often draws from life, whether it be landscapes, portraits, or everyday objects. For many artists, realism serves as a foundation, allowing them to hone their skills in observation and technique.
On the other hand, abstract art breaks free from the constraints of reality. Instead of focusing on accurate representation, abstract artists express emotions, ideas, and concepts through colors, shapes, and forms. Imagine an explosion of colors and lines that evoke feelings rather than depict a scene. This style invites viewers to interpret the artwork based on their own experiences and emotions, making it a deeply personal and subjective form of expression.
To illustrate the differences further, consider the following table:
| Aspect | Realism | Abstract Art |
|---|---|---|
| Definition | Represents subjects as they appear in real life. | Focuses on conveying emotions and ideas through non-representational forms. |
| Technique | Emphasizes detail, perspective, and proportion. | Utilizes colors, shapes, and lines to create visual impact. |
| Viewer Experience | Offers a familiar, relatable perspective. | Encourages personal interpretation and emotional engagement. |
Both styles have their merits and can coexist beautifully in the art world. Realism can provide a solid technical foundation, while abstract art encourages freedom of expression and creativity. Many artists find that experimenting with both styles can lead to a richer understanding of their own artistic voice.
In your artistic journey, consider exploring both realism and abstract art. You might find that one resonates more with you than the other, or perhaps you'll discover a unique blend of the two that reflects your personal style. The beauty of art lies in its diversity, and embracing different approaches can only enhance your skills and creativity.
- Can I combine realism and abstract art in my work? Absolutely! Many artists blend techniques from both styles to create unique pieces that reflect their personal vision.
- Which style is easier for beginners? Realism may be more straightforward to start with, as it relies on observation and technique. However, abstract art can also be liberating, allowing for creative exploration without strict rules.
- How do I find my own style? Experiment with both realism and abstract art, and don't be afraid to mix elements from each. Over time, you'll develop a style that feels authentic to you.
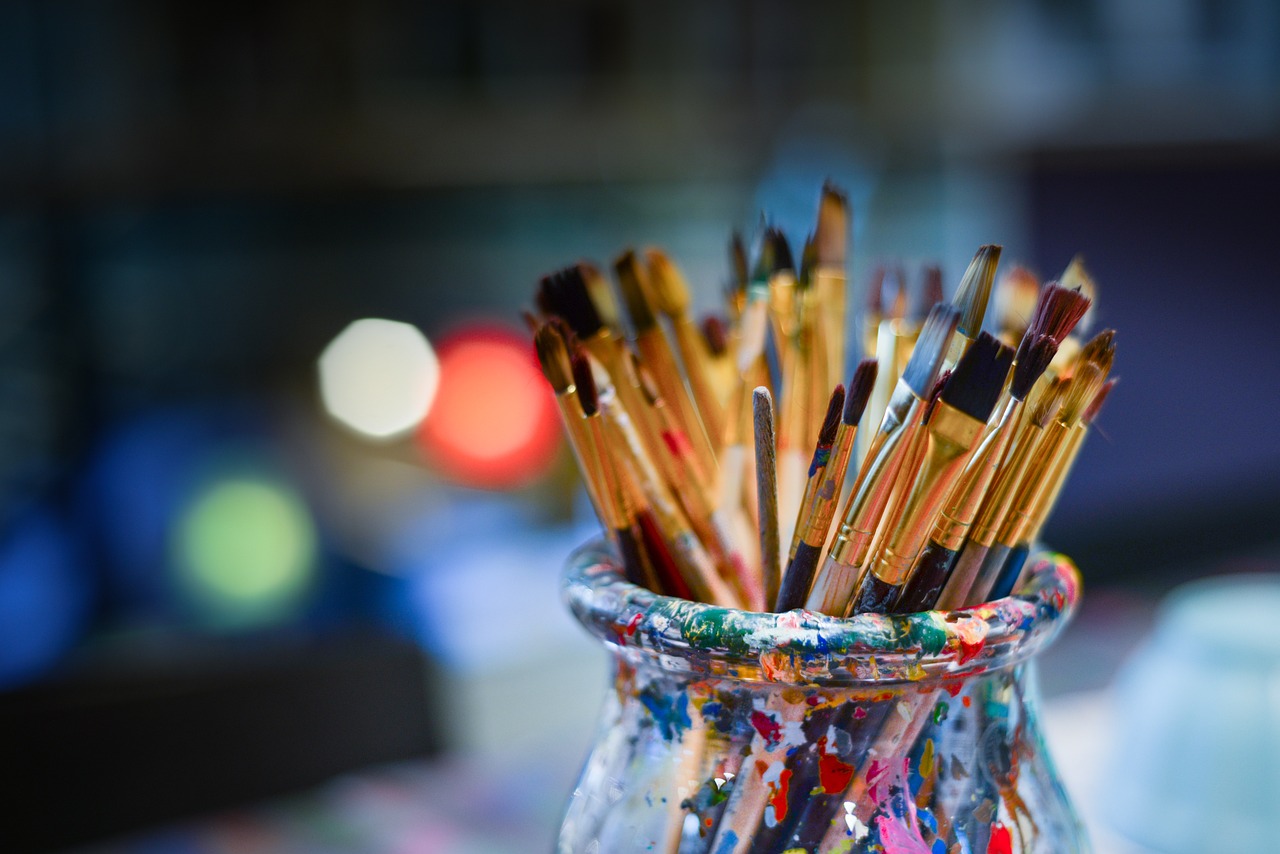
Incorporating Mixed Media
When it comes to enhancing your drawings, mixed media is like adding a secret ingredient to your favorite recipe—suddenly, everything pops! Mixed media involves using various materials and techniques in a single artwork, creating depth and texture that can elevate your art to new heights. Imagine blending the smoothness of graphite with the boldness of watercolor or the texture of collage elements. It’s a playground for your creativity!
To get started with mixed media, consider the following materials that can complement your drawings:
- Graphite Pencils: Perfect for detailed sketches and shading.
- Charcoal: Great for rich, dark lines and expressive strokes.
- Watercolors: Add vibrant washes and soft backgrounds.
- Ink Pens: For bold outlines and intricate details.
- Collage Materials: Such as magazine cutouts, fabric, or textured paper to introduce new elements.
One of the most exciting aspects of mixed media is the ability to experiment. You might start with a pencil sketch, then layer on some watercolor, and finish with ink details. The key is to allow each layer to dry before adding the next, which helps prevent unwanted smudging and blending. Remember, there are no strict rules in art—trust your instincts and let your imagination guide you!
Here’s a simple process to incorporate mixed media into your drawings:
- Choose Your Base: Start with a drawing that you’re excited about. It could be a simple sketch or a more complex piece.
- Layering: Begin adding your mixed media elements. You might want to apply watercolor washes first, letting them dry completely.
- Details: Once the base is dry, use ink or colored pencils to add details and highlights. This contrast can make your artwork stand out.
- Collage Elements: If you’re feeling adventurous, glue on some collage materials. You can cut shapes from magazines or use textured paper to add another dimension.
- Final Touches: Step back and evaluate your work. Add any final touches or adjustments to ensure everything feels cohesive.
By incorporating mixed media, you’re not just creating a drawing; you’re crafting a visual story that invites viewers to explore every layer. It’s a fantastic way to express your unique style and voice. So grab your supplies, let go of any perfectionism, and dive into the world of mixed media—your artistic journey awaits!
Q: What is mixed media in art?
A: Mixed media refers to an artwork created using more than one medium or material. This can include combinations of drawing, painting, collage, and more.
Q: Do I need special materials for mixed media?
A: Not at all! You can use everyday materials like pencils, markers, watercolors, and even recycled paper or fabric. The beauty of mixed media is that it encourages creativity with whatever you have at hand.
Q: Can I use mixed media in digital art?
A: Absolutely! Digital mixed media can involve combining different digital techniques, textures, and images to create a unique piece of artwork.
Q: How do I know when my mixed media artwork is finished?
A: This can be subjective. A good rule of thumb is to step back and look at your piece from a distance. If you feel it tells the story you intended or evokes the emotions you want, it’s likely done!

Building a Consistent Drawing Practice
Establishing a consistent drawing practice is crucial for anyone looking to improve their artistic skills. Think of your drawing journey like training for a marathon; it's not just about running a few laps once in a while, but about building endurance over time. The more you draw, the more you refine your techniques, and the more confident you become in your abilities. So, how do you create a routine that sticks?
First off, set aside dedicated time for drawing. This could be as little as 15 minutes a day or a couple of hours a week—whatever fits into your schedule. The key is to treat this time as sacred, just like you would a meeting or a doctor's appointment. By prioritizing your drawing practice, you signal to yourself that it’s important.
Next, consider creating a drawing schedule. This doesn't have to be complicated; a simple calendar will do. Mark the days and times you plan to draw, and try to stick to it. You might find it helpful to keep a journal where you can jot down your thoughts after each session. This can help you track your progress and keep you motivated. Here’s a sample weekly schedule:
| Day | Time | Activity |
|---|---|---|
| Monday | 6 PM | Sketching from reference |
| Wednesday | 7 PM | Life drawing session |
| Friday | 5 PM | Experimenting with mixed media |
Setting goals and challenges is another fantastic way to keep your practice fresh and exciting. Think of challenges like mini-adventures that push you to explore new techniques or styles. For instance, you could challenge yourself to draw a different object every day for a week or try to replicate a famous artwork. This not only keeps things interesting but also encourages you to step outside your comfort zone.
Moreover, don’t forget to find inspiration in the world around you. Whether it’s a beautiful landscape, an interesting person, or even a captivating photo online, inspiration is everywhere! Surround yourself with art, join online communities, or follow artists on social media that resonate with you. Engaging with others can spark new ideas and keep your creative juices flowing.
Lastly, remember that consistency doesn’t mean perfection. It’s okay to have off days where your drawings don’t turn out as you hoped. The important thing is to keep showing up and putting pencil to paper. Over time, you’ll notice growth in your skills, and those off days will become less frequent. Just like a plant needs sunlight and water to thrive, your artistic skills need nurturing through regular practice.
In summary, building a consistent drawing practice is all about commitment, setting achievable goals, and staying inspired. Embrace the process, and don’t be afraid to experiment. Your art journey is uniquely yours, and every stroke of the pencil brings you closer to discovering your artistic voice.
- How long should I practice drawing each day? – Aim for at least 15-30 minutes daily, but adjust based on your schedule and comfort.
- What if I miss a day of drawing? – Don’t stress! Just pick up where you left off and continue your practice.
- How can I stay motivated to draw regularly? – Set specific goals, find inspiration, and connect with other artists to keep your passion alive.

Setting Goals and Challenges
Setting goals and challenges is one of the most powerful ways to propel your drawing skills to new heights. Think of it like planning a road trip: without a destination, you might just end up driving in circles! Just as a roadmap guides you to your destination, well-defined goals can steer your artistic journey in the right direction. So, how do you create effective goals that will not only inspire you but also push you to improve?
First, it’s essential to start with S.M.A.R.T. goals. This acronym stands for Specific, Measurable, Achievable, Relevant, and Time-bound. By following this framework, you can ensure that your goals are clear and attainable. For example, instead of saying, “I want to draw better,” you could set a goal like, “I will complete one detailed sketch of a human figure every week for the next month.” This goal is specific (drawing a human figure), measurable (one sketch per week), achievable (with practice, you can do it), relevant (it improves your figure drawing), and time-bound (one month).
Next, consider incorporating challenges into your practice. Challenges can be a fun way to shake things up and keep your drawing routine fresh. You might decide to participate in a drawing challenge like Inktober, where you create an ink drawing every day in October. Or perhaps you could challenge yourself to draw in a different style each week, such as realism one week and abstract the next. These challenges not only enhance your skills but also encourage you to step outside your comfort zone.
Furthermore, it’s vital to keep track of your progress. You could maintain a drawing journal where you log your completed sketches, note the techniques you used, and reflect on what you learned. This practice not only helps you see how far you’ve come but also highlights areas that need improvement. Consider creating a simple table to track your goals and challenges:
| Goal/Challenge | Start Date | End Date | Status |
|---|---|---|---|
| Complete a human figure sketch | 01/01/2024 | 01/31/2024 | In Progress |
| Participate in Inktober | 10/01/2024 | 10/31/2024 | Upcoming |
Lastly, remember that the journey of an artist is filled with ups and downs. There will be days when your sketches don't turn out as expected, and that's completely okay! Embrace the challenges as part of your growth process. Celebrate small victories, and don’t be afraid to adjust your goals if they feel too daunting. The key is to stay motivated and keep pushing your creative boundaries.
In conclusion, setting clear goals and embracing challenges can transform your drawing practice from mundane to extraordinary. So grab your sketchbook, set those goals, and embark on an exciting artistic adventure!
- What are good drawing goals for beginners? Start with simple sketches, practice drawing everyday objects, or focus on mastering basic shapes.
- How can I stay motivated to draw regularly? Set specific goals, join art communities, or participate in drawing challenges to keep your inspiration alive.
- What should I do if I feel stuck in my drawing practice? Experiment with new styles, take breaks, or revisit your goals to refresh your perspective.

Finding Inspiration and Motivation
Finding inspiration and motivation as an artist can sometimes feel like searching for a needle in a haystack. You're staring at a blank page, and suddenly, all those creative juices seem to dry up. But fear not! There are countless ways to ignite that spark and keep the flame of creativity alive. Think of inspiration as a treasure hunt; sometimes you have to dig deep to uncover the gems that will fuel your artistic journey.
One of the most effective ways to find inspiration is to immerse yourself in the world around you. Nature is a fantastic muse—take a walk in the park, visit a botanical garden, or simply sit outside and observe the way light dances on the leaves. You’d be surprised at how a simple change of scenery can rejuvenate your creative spirit. As you observe, keep a sketchbook handy. Jot down your thoughts, doodle what you see, or capture the colors and shapes that catch your eye. This practice not only sharpens your observation skills but also serves as a visual diary of your inspirations.
Another great source of motivation comes from engaging with other artists and their work. Attend local art shows, join online art communities, or participate in workshops. Surrounding yourself with like-minded individuals can provide a fresh perspective and can be incredibly uplifting. You might find that sharing your struggles and triumphs with fellow artists can lead to unexpected breakthroughs. Remember, even the most seasoned artists have days when they feel uninspired.
To keep your creative juices flowing, consider setting up a routine that includes dedicated time for drawing. Just like athletes train their bodies, artists must train their minds and hands. Establishing a consistent practice not only improves your skills but also builds discipline. You might want to try the Pomodoro technique—work for 25 minutes, then take a 5-minute break. This method can help you maintain focus while also giving your mind a chance to rest and recharge.
Inspiration can also be found in the stories of other artists. Read biographies, watch documentaries, or listen to podcasts featuring artists discussing their journeys. Learning about their challenges and triumphs can provide you with the motivation to persevere through your own creative blocks. You might even find that their experiences resonate with your own, giving you the encouragement you need to push through.
Lastly, don't underestimate the power of self-care. Sometimes, stepping away from your art and taking time for yourself can lead to the most profound moments of inspiration. Engage in activities that bring you joy—whether it's cooking, reading, or spending time with friends. When you return to your drawing, you may find that your mind is clearer and your creativity is recharged.
In summary, finding inspiration and motivation is a personal journey that can take many forms. Embrace the process, explore various sources of inspiration, and remember that every artist has their own unique path. The key is to stay curious and open-minded, allowing yourself the freedom to explore and create without the pressure of perfection.
- How can I overcome artist's block?
Try changing your environment, experimenting with new techniques, or taking a break to recharge your creativity. - What are some good sources of inspiration?
Nature, art communities, biographies of artists, and even everyday life can serve as great sources of inspiration. - How often should I practice drawing?
Consistency is key. Aim for a regular practice schedule, even if it's just 15-30 minutes a day. - Can I find motivation in other art forms?
Absolutely! Exploring music, literature, and dance can provide fresh perspectives and inspire your work.
Frequently Asked Questions
- What are the basic skills I need to start drawing?
To kickstart your drawing journey, focus on mastering the basics: understanding lines, shapes, and forms. These fundamental concepts are the building blocks of all drawing skills. It's like learning the alphabet before you can write a novel!
- What drawing tools should I invest in as a beginner?
As a newbie, you don't need to break the bank. Start with a good set of graphite pencils, an eraser, and a sketchbook. These essentials will allow you to explore and develop your skills without overwhelming you with choices.
- How do I choose the right pencil for my drawing?
Pencils come in various hardness levels, from H (hard) to B (black). If you're looking for fine lines, go for H pencils. For darker, bolder strokes, B pencils are your best bet. Experimenting with different types will help you discover what works best for your style.
- What type of paper is best for drawing?
The right paper can make all the difference! For pencil drawings, a smooth paper works well, while textured paper is fantastic for charcoal. Think of it as choosing the right canvas for a masterpiece—your medium deserves the best!
- How can I improve my observation skills for drawing?
Practice makes perfect! Spend time drawing from life—whether it's a still life setup or a bustling street scene. The more you observe and replicate, the sharper your skills will become. It's like training your eyes to be your best artistic friends!
- Is it okay to use reference images when drawing?
Absolutely! Reference images are a fantastic way to understand proportions and details. Just make sure to use them as a guide rather than a crutch, allowing your creativity to flow while you learn.
- What are some different drawing styles I can explore?
There’s a whole world of styles out there! From realism that captures every detail to abstract art that plays with shapes and colors, experimenting with various styles can help you find your unique artistic voice. Think of it as trying on different outfits until you find the one that feels just right!
- How can I maintain a consistent drawing practice?
Setting a regular drawing schedule is key! Try to draw a little every day or set specific goals for your practice. Just like building a muscle, consistency will help you grow as an artist over time.
- What can I do to stay inspired in my drawing practice?
Inspiration can come from anywhere! Surround yourself with art, visit galleries, or even take a stroll in nature. Keeping a sketchbook handy to jot down ideas or doodles can also spark your creativity when you need it most.


