
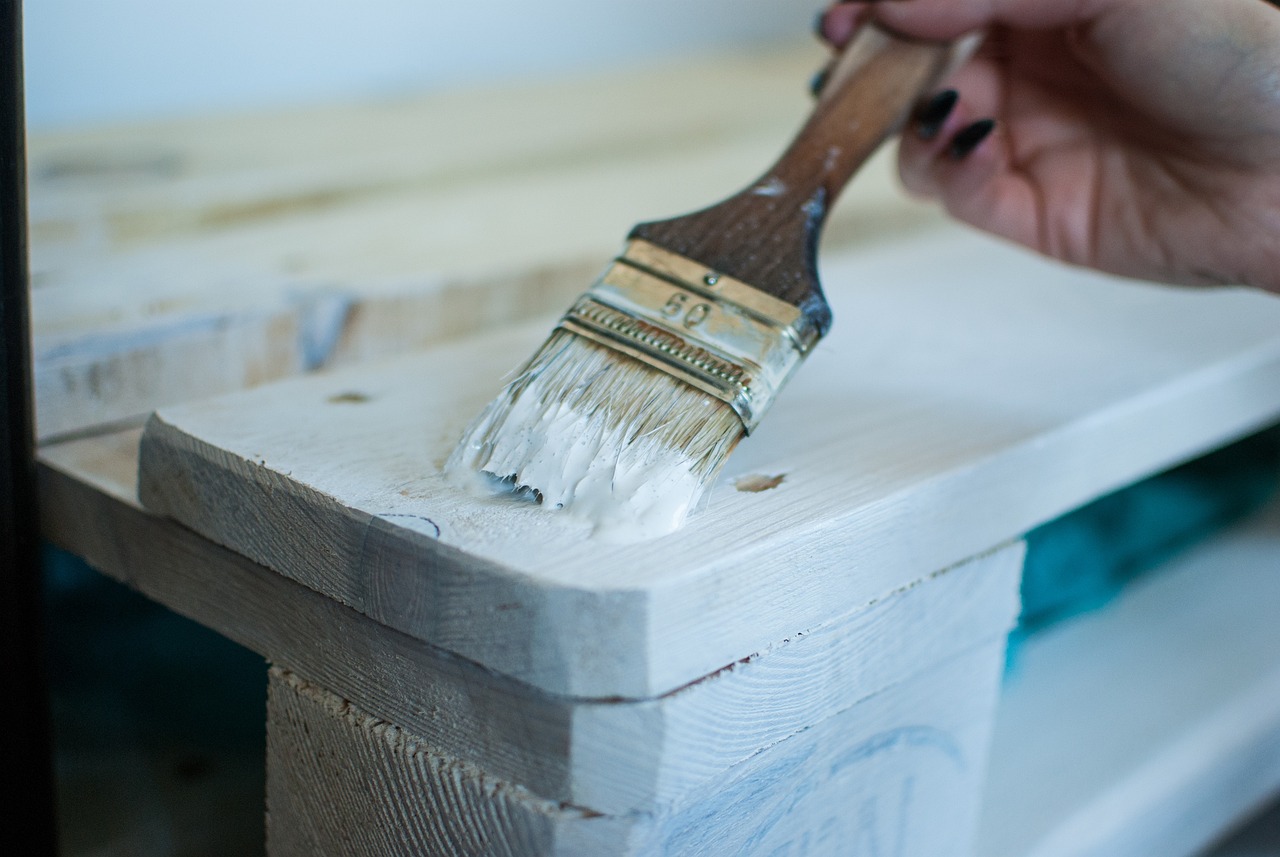
How to Prevent Your Paint from Cracking
When it comes to keeping your paint job looking fresh and flawless, preventing cracking is key. Imagine walking into a room and seeing beautiful, vibrant walls, only to be greeted by unsightly cracks ruining the aesthetic. It's like finding a wrinkle on your favorite shirt just before a big presentation. To avoid this, you need to understand the various factors that contribute to paint cracking and how to tackle them effectively. In this article, we’ll explore the essential strategies for ensuring your paint remains smooth and intact, so you can enjoy a stunning finish for years to come.
Identifying the root causes of paint cracking is essential for prevention. Various factors such as temperature, humidity, and surface preparation greatly influence paint adhesion and longevity. For instance, if you paint during a humid day, the moisture can interfere with how the paint bonds to the surface. Similarly, extreme temperatures can cause the paint to expand and contract, leading to cracks over time. Understanding these causes is the first step towards mastering the art of paint preservation.
Selecting high-quality paint can significantly reduce the risk of cracking. Think of paint like the foundation of a house; if it's not solid, everything built on top can crumble. Understanding different paint types and their properties helps you make informed decisions for your specific project. For example, water-based paints are often easier to work with and clean up, while oil-based paints can provide a more durable finish. The choice you make will set the tone for how well your paint job withstands the test of time.
Both water-based and oil-based paints have unique characteristics that affect their performance. Knowing their differences can help you choose the best option for your surface and environmental conditions. Water-based paints are typically easier to apply and dry faster, making them ideal for quick projects. On the other hand, oil-based paints offer a level of durability that water-based options may not match, especially in high-traffic areas.
Water-based paints dry quickly and have lower VOC (Volatile Organic Compounds) levels, making them environmentally friendly. They are ideal for indoor applications where ventilation is limited. Plus, cleanup is a breeze with just soap and water. However, they may not adhere as well to glossy surfaces without proper preparation, so keep that in mind when selecting your paint.
On the flip side, oil-based paints offer durability and a smooth finish, making them suitable for high-traffic areas. They tend to resist wear and tear better than their water-based counterparts. However, they take longer to dry and require proper ventilation during application, as the fumes can be quite strong. If you’re willing to put in the extra effort, oil-based paints can provide a long-lasting finish.
Different paint sheens affect the final look and durability of your paint job. Learning about various finishes can help you select the right sheen for your project. For example, a matte finish can hide imperfections but may be less durable, while a glossy finish can enhance colors but may show flaws more easily. Choosing the right sheen is like picking the perfect outfit for an occasion—it can make all the difference.
Proper surface preparation is crucial for preventing paint cracking. Techniques such as cleaning, sanding, and priming ensure better adhesion and a smoother finish. Think of this step as laying the groundwork for a strong relationship; without trust (or in this case, a clean and smooth surface), things can quickly fall apart.
Thoroughly cleaning the surface removes dirt and grease, which can hinder paint adhesion. Use appropriate cleaning solutions based on the surface material for optimal results. For example, a simple mixture of soap and water works wonders on most surfaces, while specialized cleaners may be necessary for tougher grime. Always allow the surface to dry completely before proceeding to the next steps.
Sanding creates a rough texture for better paint grip, while priming seals the surface. Both steps are vital for achieving a long-lasting paint job that resists cracking. Think of sanding as giving your walls a little exfoliation—removing the dead skin (or old paint) allows for a fresh start. Priming is like applying a protective barrier that helps the paint adhere better, ensuring your hard work pays off.
Environmental factors play a significant role in paint performance. Understanding temperature, humidity, and ventilation can help you choose the right time and conditions for painting. Ideally, you want to paint when the weather is just right—think of it as finding the perfect day for a picnic.
Painting in optimal temperature and humidity conditions ensures better adhesion and drying. Aim for a temperature between 50°F and 85°F with humidity levels below 70%. If it’s too cold or too humid, you might end up with a paint job that cracks or peels. Always check the weather forecast before you start your project!
Good ventilation helps paint dry evenly and reduces the risk of moisture buildup. Ensure windows are open or use fans to promote airflow during the painting process. Just like a good conversation needs fresh air to flow smoothly, your paint job needs proper ventilation to avoid issues later on.
Proper application techniques can prevent paint from cracking. Techniques such as using the right tools and applying thin coats contribute to a smooth, durable finish. Think of it like cooking; using the right utensils and following the recipe can make all the difference in the final dish.
Selecting the appropriate brushes, rollers, or sprayers can affect the paint application. High-quality tools help achieve an even coat and reduce the likelihood of cracking. Investing in good tools is like buying a reliable car; it may cost more upfront, but it pays off in the long run.
Applying multiple thin coats instead of one thick coat allows for better drying and adhesion. This technique minimizes the risk of cracking and improves the overall finish. Think of it as layering your clothing; a few thin layers can keep you warmer than one thick one.
Regular maintenance and inspections can help identify potential issues before they escalate. Keeping an eye on your painted surfaces ensures longevity and prevents cracking. Just like you wouldn’t ignore a small leak in your roof, don’t overlook small signs of wear on your walls.
Conducting routine checks for signs of wear or damage allows for timely repairs. Addressing issues early can prevent further deterioration and cracking. Look for peeling paint, discoloration, or any other signs that your walls may need a little TLC.
Regular cleaning and timely touch-ups maintain the appearance and integrity of your paint job. Establishing a maintenance schedule can prolong the life of your painted surfaces. Just like you wouldn’t let your car go without a wash for too long, your walls deserve the same attention!
- What causes paint to crack? Paint can crack due to various factors including temperature changes, humidity levels, and poor surface preparation.
- How can I prevent paint from cracking? Proper surface preparation, choosing the right paint, and applying thin coats can help prevent cracking.
- Is it better to use water-based or oil-based paint? It depends on your project; water-based paints are easier to clean and dry quickly, while oil-based paints offer durability.
- How often should I inspect my painted surfaces? Regular checks every few months can help catch any issues early, ensuring your paint stays in good condition.

Understanding the Causes of Paint Cracking
This article explores effective strategies to ensure your paint remains smooth and intact, detailing causes of cracking and preventative measures to maintain a flawless finish on various surfaces.
Identifying the root causes of paint cracking is essential for prevention. Paint is not just a decorative layer; it serves as a protective barrier for surfaces. When this barrier fails, it can lead to unsightly cracks, which not only diminish the aesthetic appeal but can also expose the underlying material to damage. Several factors contribute to paint cracking, and understanding these can save you time, money, and frustration in the long run.
One of the primary culprits behind paint cracking is temperature fluctuations. When temperatures rise and fall, the materials beneath the paint can expand and contract. This movement can cause the paint to stretch and, eventually, crack. For instance, if you paint a surface during a hot day and then experience a sudden drop in temperature, the rapid change can lead to significant stress on the paint film.
Humidity also plays a critical role in paint performance. High humidity can prevent paint from drying properly, causing it to remain soft and susceptible to damage. Conversely, extremely low humidity can lead to quick drying, which might not allow the paint to adhere well to the surface. Both scenarios can result in cracking, making it vital to monitor humidity levels before embarking on a painting project.
Another crucial factor is surface preparation. Many people underestimate the importance of prepping a surface before painting. If the surface is dirty, greasy, or poorly primed, the paint will struggle to adhere properly. This lack of adhesion can create weak spots that are prone to cracking. For instance, if you’re painting a wooden surface that hasn’t been sanded or cleaned thoroughly, the paint may not grip well, leading to future problems.
In addition to these factors, the quality of the paint itself cannot be overlooked. Using low-quality paint may save you money in the short term, but it often leads to long-term issues such as cracking and peeling. High-quality paints are formulated to withstand environmental stresses and provide better adhesion, ultimately leading to a more durable finish.
To summarize, the main causes of paint cracking include:
- Temperature fluctuations
- Humidity levels
- Poor surface preparation
- Low-quality paint
By understanding these factors, you can take proactive steps to prevent paint cracking and ensure that your surfaces remain beautiful and protected for years to come.
Selecting high-quality paint can significantly reduce the risk of cracking. Understanding paint types and their properties helps in making informed decisions for your specific project.
Both water-based and oil-based paints have unique characteristics. Knowing their differences can help you choose the best option for your surface and environmental conditions.
Water-based paints dry quickly and have lower VOC levels, making them environmentally friendly. They are ideal for indoor applications where ventilation is limited.
Oil-based paints offer durability and a smooth finish, making them suitable for high-traffic areas. However, they take longer to dry and require proper ventilation during application.
Different paint sheens affect the final look and durability of your paint job. Learning about various finishes can help you select the right sheen for your project.
Proper surface preparation is crucial for preventing paint cracking. Techniques such as cleaning, sanding, and priming ensure better adhesion and a smoother finish.
Thoroughly cleaning the surface removes dirt and grease, which can hinder paint adhesion. Use appropriate cleaning solutions based on the surface material for optimal results.
Sanding creates a rough texture for better paint grip, while priming seals the surface. Both steps are vital for achieving a long-lasting paint job that resists cracking.
Environmental factors play a significant role in paint performance. Understanding temperature, humidity, and ventilation can help you choose the right time and conditions for painting.
Painting in optimal temperature and humidity conditions ensures better adhesion and drying. Aim for a temperature between 50°F and 85°F with humidity levels below 70%.
Good ventilation helps paint dry evenly and reduces the risk of moisture buildup. Ensure windows are open or use fans to promote airflow during the painting process.
Proper application techniques can prevent paint from cracking. Techniques such as using the right tools and applying thin coats contribute to a smooth, durable finish.
Selecting the appropriate brushes, rollers, or sprayers can affect the paint application. High-quality tools help achieve an even coat and reduce the likelihood of cracking.
Applying multiple thin coats instead of one thick coat allows for better drying and adhesion. This technique minimizes the risk of cracking and improves the overall finish.
Regular maintenance and inspections can help identify potential issues before they escalate. Keeping an eye on your painted surfaces ensures longevity and prevents cracking.
Conducting routine checks for signs of wear or damage allows for timely repairs. Addressing issues early can prevent further deterioration and cracking.
Regular cleaning and timely touch-ups maintain the appearance and integrity of your paint job. Establishing a maintenance schedule can prolong the life of your painted surfaces.
1. What are the main causes of paint cracking?
The main causes include temperature fluctuations, high humidity, poor surface preparation, and using low-quality paint.
2. How can I prevent paint from cracking?
Ensure proper surface preparation, choose high-quality paint, and apply in optimal environmental conditions.
3. Is it better to use water-based or oil-based paint?
It depends on the project. Water-based paints are ideal for indoor applications, while oil-based paints provide durability for high-traffic areas.
4. How often should I inspect my painted surfaces?
Routine checks should be conducted at least once a year to catch any damage early.
5. Can I paint over cracked paint?
It's best to repair the cracks and prepare the surface properly before repainting to ensure a smooth finish.
Choosing the Right Paint
When it comes to achieving that perfect finish on your walls, choosing the right paint is absolutely critical. Not all paints are created equal, and understanding the differences can save you time, effort, and prevent future headaches, like cracking or peeling. So, how do you navigate the vast sea of options available? First, consider the type of paint you need. This decision can significantly reduce the risk of cracking and enhance the overall appearance of your project.
There are primarily two types of paints: water-based and oil-based. Each has its own unique set of properties, making them suitable for different applications. Water-based paints are known for their quick drying times and lower levels of volatile organic compounds (VOCs), which makes them an environmentally friendly choice. They’re perfect for indoor use, especially in spaces that lack proper ventilation. On the other hand, oil-based paints offer a level of durability and a smooth, glossy finish that can withstand wear and tear, making them ideal for high-traffic areas like hallways or kitchens.
Additionally, understanding the sheen of the paint is crucial. The sheen refers to the glossiness of the finish, which affects both the look and durability of the paint job. Here’s a quick breakdown of common paint sheens:
| Sheen Type | Description | Best For |
|---|---|---|
| Flat | No shine, hides imperfections | Ceilings, low-traffic areas |
| Satin | Slightly glossy, easy to clean | Living rooms, bedrooms |
| Eggshell | Soft sheen, more durable than flat | Hallways, dining rooms |
| Gloss | High shine, very durable | Trim, cabinets, high-traffic areas |
Choosing the right sheen can dramatically affect how your paint looks and performs over time. For instance, if you’re painting a bathroom, opting for a satin or semi-gloss finish can help resist moisture and prevent cracking. On the flip side, if you’re looking to cover up imperfections, a flat finish might be your best bet.
In summary, when selecting paint, always consider the type, sheen, and the specific requirements of the area you’re painting. This thoughtful approach will not only enhance the aesthetic appeal of your space but also ensure that your paint job stands the test of time, free from the dreaded cracking that can ruin your hard work.

Water-Based vs. Oil-Based Paints
When it comes to choosing the right paint for your project, understanding the differences between water-based and oil-based paints is crucial. Each type has its unique properties that can significantly affect the outcome of your painting job. So, let’s dive into the nitty-gritty of these two popular paint categories!
Water-based paints are formulated with water as the primary solvent. This makes them an excellent choice for indoor applications, especially in spaces where ventilation is limited. One of the standout features of water-based paints is their quick drying time. You can often apply multiple coats in a single day, which is a huge plus if you're in a hurry to finish a project. Additionally, they tend to have lower levels of volatile organic compounds (VOCs), making them more environmentally friendly and safer for indoor air quality.
On the flip side, oil-based paints use organic solvents, which gives them some distinct advantages. They are known for their durability and ability to provide a smooth, glossy finish. This makes them particularly well-suited for high-traffic areas or surfaces that are subject to wear and tear, such as trim and cabinetry. However, oil-based paints come with a caveat: they take significantly longer to dry. This means you’ll need to plan for extended drying times and ensure adequate ventilation while working with them.
To help you understand the differences better, here’s a quick comparison:
| Property | Water-Based Paints | Oil-Based Paints |
|---|---|---|
| Drying Time | Quick (1-2 hours) | Slow (6-8 hours) |
| VOC Levels | Low | High |
| Durability | Moderate | High |
| Ideal Use | Indoor, low-traffic areas | High-traffic areas, exteriors |
In conclusion, the choice between water-based and oil-based paints ultimately depends on your specific needs and the conditions of your project. If you're looking for a quick-drying option that’s easy to clean up, water-based paints are the way to go. However, if you need a tough, long-lasting finish, oil-based paints might be your best bet. Remember to always consider the environment where the paint will be applied, as well as the desired finish and durability.
- Can I mix water-based and oil-based paints?
No, mixing these two types of paints can lead to poor adhesion and an uneven finish. - How do I clean up after using water-based paint?
Water-based paints can be cleaned up easily with soap and water. - Are oil-based paints more durable than water-based paints?
Yes, oil-based paints typically offer greater durability, especially in high-traffic areas.

Advantages of Water-Based Paints
When it comes to painting, water-based paints have gained immense popularity, and for good reason! One of the most significant advantages is their quick drying time. Unlike oil-based paints that can take hours or even days to dry, water-based paints typically dry within 30 minutes to an hour. This means you can complete your painting project much faster, allowing you to get back to enjoying your space without long waits.
Another key benefit is their low volatile organic compound (VOC) levels. Water-based paints emit fewer harmful chemicals into the air, making them a more environmentally friendly choice. This is particularly important for indoor applications where ventilation may be limited. By choosing water-based paints, you're not just protecting your health but also contributing to a healthier planet.
Water-based paints also offer excellent color retention. They tend to maintain their vibrancy and resist fading over time, ensuring that your walls look fresh and new for longer periods. Additionally, these paints are easy to clean up with soap and water, which is a significant advantage for those who may not have the time or resources for extensive cleanup processes. Imagine finishing a painting project and simply rinsing your brushes under the tap!
Moreover, water-based paints have a flexibility that makes them less prone to cracking and peeling. This is particularly advantageous in areas that experience temperature fluctuations. The ability of water-based paints to expand and contract with changing temperatures means you can enjoy a more durable finish.
In summary, the advantages of water-based paints make them an excellent choice for both DIY enthusiasts and professional painters alike. Here’s a quick overview of their key benefits:
- Quick drying time - Get back to your routine sooner.
- Low VOCs - Better for your health and the environment.
- Color retention - Keep your walls looking vibrant.
- Easy cleanup - Simplifies the post-painting process.
- Flexibility - Reduces the risk of cracking and peeling.
Choosing water-based paints can transform your painting experience, making it more efficient, healthier, and ultimately more satisfying. Whether you're refreshing a room or embarking on a larger project, understanding these advantages can guide you toward making the best choice for your needs.
Q: Are water-based paints suitable for exterior use?
A: Yes, water-based paints can be used for exterior applications, but it's essential to choose a high-quality product designed for outdoor conditions.
Q: Can I use water-based paint on previously oil-painted surfaces?
A: Yes, but it's crucial to prepare the surface properly by cleaning, sanding, and priming to ensure good adhesion.
Q: How do I clean brushes used with water-based paints?
A: Brushes can be easily cleaned with soap and water right after use. Make sure to rinse them thoroughly to remove all paint residues.
Q: Do water-based paints have a strong odor?
A: Water-based paints typically have a milder odor compared to oil-based paints, making them more pleasant to work with, especially indoors.

Benefits of Oil-Based Paints
When it comes to choosing the right paint for your project, oil-based paints often stand out due to their numerous advantages. One of the primary benefits is their durability. Oil-based paints form a hard, resilient surface that can withstand wear and tear, making them an excellent choice for high-traffic areas such as hallways and kitchens. This durability ensures that your painted surfaces look fresh and vibrant for years, even in challenging conditions.
Another significant advantage is the smooth finish that oil-based paints provide. They dry to a hard finish that can be sanded and polished, resulting in a professional-looking appearance. This quality is particularly beneficial for surfaces that require a refined look, such as furniture or cabinetry. When applied correctly, oil-based paints can offer a glossy sheen that enhances the color and depth of your project, making it visually appealing.
Moreover, oil-based paints have excellent adhesion properties. They bond well to various surfaces, which minimizes the risk of peeling or chipping over time. This is especially important for exterior applications where environmental factors can compromise paint integrity. For instance, oil-based paints can better resist moisture, making them suitable for areas exposed to water or humidity.
However, it’s crucial to note that oil-based paints do have some considerations. They generally take longer to dry compared to their water-based counterparts, which can be a drawback if you’re in a hurry. Additionally, they have a higher level of volatile organic compounds (VOCs), which means they require good ventilation during application. But for those willing to take the time and precautions, the benefits of using oil-based paints can significantly enhance the quality and longevity of your paint job.
In summary, the key benefits of oil-based paints include:
- Durability: Ideal for high-traffic areas.
- Smooth Finish: Provides a professional look.
- Excellent Adhesion: Reduces the risk of peeling and chipping.
By weighing these benefits against your project needs, you can make an informed decision that will lead to stunning results.
Q: Can I use oil-based paint indoors?
A: Yes, you can use oil-based paint indoors, but ensure that the area is well-ventilated due to the higher VOC levels.
Q: How long does oil-based paint take to dry?
A: Oil-based paint typically takes 6 to 8 hours to dry to the touch and up to 24 hours for a full cure.
Q: Can I clean oil-based paint brushes with water?
A: No, oil-based paint brushes should be cleaned with mineral spirits or paint thinner, not water.

Understanding Paint Sheens
When it comes to painting, the term sheen refers to the level of gloss or shine a paint finish has after it dries. Understanding the different types of paint sheens is crucial because they not only affect the appearance of your walls but also their durability and maintenance. You might think of paint sheens as the different personalities of paint; each one has its unique traits that can either enhance or detract from your home’s aesthetic.
There are several common paint sheens, each with its advantages and ideal applications. Here’s a quick rundown:
| Sheen Type | Characteristics | Best Used For |
|---|---|---|
| Flat/Matte | No shine, great for hiding imperfections | Ceilings, low-traffic areas |
| Eggshell | Slight sheen, soft and velvety finish | Living rooms, bedrooms |
| Satin | Soft sheen, easy to clean | Hallways, family rooms, kitchens |
| Semigloss | Moderate shine, durable and moisture-resistant | Trim, cabinets, bathrooms |
| Gloss | High shine, very durable | Furniture, doors, high-traffic areas |
Choosing the right sheen can be likened to picking the right outfit for an occasion. Just as you wouldn’t wear a formal suit to a beach party, you wouldn’t want to use a flat finish in a high-traffic area where durability is essential. For example, if you’re painting a child’s room, an eggshell or satin finish would be ideal because they offer a balance of durability and aesthetic appeal.
Moreover, different sheens also play a role in how light interacts with your walls. A glossy finish will reflect more light, making a room feel brighter and larger, while a flat finish absorbs light, creating a cozy and intimate atmosphere. It’s all about the mood you want to set!
In conclusion, understanding paint sheens is not just a technical detail; it’s a fundamental aspect of achieving the desired look and feel for your space. By selecting the appropriate sheen, you can ensure that your paint job not only looks great but also stands the test of time.
- What is the best paint sheen for kitchens? Satin or semigloss finishes are best for kitchens due to their durability and ease of cleaning.
- Can I use flat paint in high-traffic areas? It's not recommended as flat paint is less durable and harder to clean compared to other finishes.
- How do I choose the right sheen for my project? Consider the room's function, the amount of traffic, and the desired aesthetic when selecting a sheen.

Surface Preparation Techniques
When it comes to ensuring your paint job stands the test of time, surface preparation is absolutely critical. Think of it as laying the foundation for a house; without a solid base, everything built on top is at risk of crumbling. The first step in this process is cleaning the surface. This involves removing any dirt, grease, or old paint that could interfere with adhesion. Depending on the material you're working with, you might need to use specific cleaning solutions. For instance, a simple mixture of water and soap can work wonders on wooden surfaces, while a stronger solvent might be necessary for metal or plastic. Whatever you choose, make sure to rinse thoroughly and allow the surface to dry completely before moving on.
Once your surface is clean, it’s time to tackle the next crucial step: sanding and priming. Sanding creates a rough texture that allows the paint to grip better, much like how a basketball player needs traction on the court to make those swift moves. You should use sandpaper that suits the surface; for example, finer grits are better for smoothing out wood, while coarser grits can help with rougher surfaces. After sanding, don’t forget to wipe away the dust with a damp cloth. This is where priming comes into play. Applying a good primer seals the surface and provides an even base for your paint, which is essential for achieving a long-lasting finish. Primers can also help in blocking stains and preventing them from bleeding through your new paint job.
Here’s a quick comparison of cleaning and preparation methods:
| Surface Type | Cleaning Method | Sanding Type | Recommended Primer |
|---|---|---|---|
| Wood | Soap and water | Fine grit | Oil-based primer |
| Metal | Solvent cleaner | Coarse grit | Rust-inhibiting primer |
| Plastic | Soap and water | Medium grit | Adhesion primer |
By following these surface preparation techniques, you’re setting yourself up for success. Remember, taking the time to prepare your surfaces properly can save you from the headache of paint cracking or peeling down the line. It’s an investment in both time and effort that pays off with a beautiful and durable finish.
Q: How long should I wait after cleaning before sanding?
A: It’s best to wait until the surface is completely dry, which usually takes a few hours, depending on conditions. Ensure there’s no moisture left to avoid issues during sanding.
Q: Can I skip priming if I’m using high-quality paint?
A: While high-quality paint can adhere well, skipping primer can lead to uneven finishes and increased risk of cracking. Priming is a step that should not be overlooked.
Q: How do I know which sandpaper to use?
A: The grit of the sandpaper depends on the surface type. Coarse grit is great for rough surfaces, while fine grit is perfect for smoothing out wood. Always start with a coarser grit and finish with a finer one for the best results.

Cleaning the Surface
Cleaning the surface is a fundamental step in ensuring your paint job remains flawless and free from cracks. Imagine trying to paint on a dirty canvas; the results would be far from perfect! To achieve that smooth finish, you must start with a clean slate. Begin by removing any dirt, grease, or old paint chips that may hinder the adhesion of your new paint. This is especially important for surfaces that have been exposed to the elements or have seen better days.
When it comes to cleaning, the method you choose depends on the type of surface you’re working with. For instance, if you're dealing with wood, a mixture of warm water and mild detergent can work wonders. On the other hand, metal surfaces might require a more robust approach, such as a degreaser or a specialized metal cleaner. Always remember to rinse thoroughly after cleaning to ensure no residue is left behind. Residual cleaning agents can interfere with paint adhesion, leading to unsightly cracks.
Here are some key steps to follow when cleaning your surfaces:
- Choose the Right Cleaning Solution: Depending on your surface material, select a cleaner that effectively removes dirt and grime without causing damage.
- Scrub Gently: Use a soft cloth or sponge to scrub the surface gently. Avoid abrasive materials that might scratch or harm the surface.
- Rinse Thoroughly: After scrubbing, rinse the surface with clean water to remove all traces of the cleaning solution.
- Dry Completely: Allow the surface to dry completely before applying any paint. Moisture can lead to adhesion issues, causing the paint to crack.
In addition to these steps, it’s wise to inspect the surface for any signs of damage, such as peeling paint or cracks. Addressing these issues before painting can save you time and effort in the long run. If you find any areas that need repair, consider using a filler or caulk to smooth them out. Once the surface is clean and repaired, you’re ready to move on to sanding and priming, which are crucial for achieving that long-lasting, beautiful finish.
Q: What should I use to clean my walls before painting?
A: For most interior walls, a mixture of warm water and mild dish soap works best. For tougher stains, consider using a vinegar solution or a commercial wall cleaner.
Q: How do I know if my surface is clean enough?
A: A clean surface should feel smooth to the touch and have no visible dirt or grease. You can perform a simple test by running your hand over the surface; if it feels gritty or sticky, it needs more cleaning.
Q: Can I paint over dirty surfaces?
A: It's not advisable. Painting over dirt will trap it under the paint, leading to peeling and cracking down the line. Always clean your surfaces thoroughly before painting.
Sanding and Priming
Sanding and priming are two critical steps in achieving a flawless paint job that not only looks stunning but also stands the test of time. Think of sanding as the foundation of a house; without a solid base, everything built on top can crumble. When you sand a surface, you're creating a rough texture that allows the paint to grip better, ensuring a more durable finish. This step is especially important for surfaces that are glossy or have previously been painted. A good rule of thumb is to use a fine-grit sandpaper (around 220 grit) for most surfaces, as it provides just the right amount of texture without causing damage.
Once you've sanded the surface, the next step is priming. Priming is like putting on a protective layer before the main event – it seals the surface and prevents any stains or imperfections from bleeding through your paint. It also enhances the paint's adhesion, allowing it to stick better and last longer. For different surfaces, you might need different types of primers. For instance, a stain-blocking primer works wonders on surfaces that have been previously painted or are prone to discoloration, while a bonding primer is ideal for slick surfaces like tile or metal.
Here’s a quick overview of the benefits of sanding and priming:
| Step | Benefits |
|---|---|
| Sanding |
|
| Priming |
|
In conclusion, don’t skip these essential steps. Investing time in sanding and priming your surfaces can save you from a lot of headaches down the line. Remember, a well-prepared surface is the key to a long-lasting and beautiful paint job!
Q: How long should I wait after sanding before priming?
A: It's best to clean the surface to remove any dust from sanding before applying primer. You can prime immediately after sanding, as long as the surface is clean and dry.
Q: Can I use a primer without sanding?
A: While it's possible to use primer without sanding, especially on porous surfaces, sanding is highly recommended for better adhesion and a smoother finish.
Q: What type of primer should I use for exterior surfaces?
A: For exterior surfaces, a high-quality exterior primer is recommended. Look for primers that are specifically formulated to withstand weather conditions.

Environmental Considerations
When it comes to maintaining the integrity of your paint job, environmental factors play a pivotal role. Understanding how elements like temperature, humidity, and ventilation can affect paint performance is essential for achieving a flawless finish. It's not just about slapping on a coat of paint; it's about creating the right conditions for that paint to thrive. Think of painting as a delicate dance between the paint and the environment—if one partner is out of sync, the entire performance can falter.
One of the most critical factors to consider is the ideal temperature for painting. The optimal range typically falls between 50°F and 85°F. If you paint when it's too cold, the paint may not adhere properly, leading to cracking as it dries. On the flip side, painting in excessively hot conditions can cause the paint to dry too quickly, preventing it from properly bonding with the surface. This imbalance can leave your paint job vulnerable to the elements.
Humidity is another significant player in this game. High humidity levels—anything above 70%—can introduce moisture into the paint, causing it to become tacky and difficult to work with. When the paint dries, this moisture can lead to an uneven finish and, ultimately, cracking. Therefore, it’s essential to monitor the humidity levels before you start your project. You might even consider investing in a hygrometer to keep track of moisture levels in your workspace.
Additionally, ventilation during the painting process cannot be overstated. Good airflow not only helps the paint to dry evenly but also reduces the risk of moisture buildup, which can compromise the paint's integrity. Ensure that windows are open or use fans to create a cross-breeze. This will not only improve drying times but also enhance the overall quality of your paint job. Think of it as giving your paint the fresh air it needs to breathe and set properly.
To summarize, here are some key environmental factors to keep in mind:
- Temperature: Aim for 50°F to 85°F for optimal adhesion.
- Humidity: Keep levels below 70% to avoid moisture issues.
- Ventilation: Ensure good airflow to promote even drying.
By paying attention to these environmental considerations, you can significantly reduce the risk of paint cracking and ensure a long-lasting, beautiful finish. Remember, the right conditions can transform your painting project from a potential disaster into a masterpiece.
Q: What is the best time of year to paint?
A: The best time usually falls in spring or fall when temperatures are moderate and humidity levels are typically lower.
Q: Can I paint indoors during winter?
A: Yes, but ensure that the indoor temperature is maintained between 50°F and 85°F and that you have adequate ventilation to avoid moisture buildup.
Q: How can I check humidity levels?
A: You can use a hygrometer, which is a simple device that measures humidity levels in your environment.
Q: What should I do if the weather changes suddenly while painting?
A: If you notice a sudden drop in temperature or increase in humidity, it’s best to pause your painting project until conditions improve.
Ideal Temperature and Humidity Levels
When it comes to painting, the environment plays a crucial role in the success of your project. Achieving the perfect finish is not just about selecting the right paint or tools; it’s also about understanding the ideal temperature and humidity levels during application. The optimal conditions for painting typically fall within a temperature range of 50°F to 85°F (10°C to 29°C). This range ensures that the paint adheres properly and dries at a pace that allows for a smooth finish.
Humidity is another critical factor to consider. Ideally, you want to keep humidity levels below 70%. High humidity can lead to longer drying times, which may cause the paint to sag or run, resulting in an uneven appearance. Conversely, if the air is too dry, it can cause the paint to dry too quickly, leading to cracking and peeling. Therefore, maintaining a balance is essential for achieving that flawless look.
To give you a clearer picture, here’s a quick reference table:
| Condition | Ideal Range |
|---|---|
| Temperature | 50°F - 85°F (10°C - 29°C) |
| Humidity | Below 70% |
So, how do you know when the conditions are just right? One tip is to check the weather forecast before starting your project. If you're painting indoors, consider using a dehumidifier or air conditioner to control humidity levels. For outdoor projects, try to paint on days that are neither too hot nor too humid. This way, you can ensure that your paint will not only look good but also last longer.
In summary, paying attention to temperature and humidity is just as important as the paint you choose. By following these guidelines, you can set yourself up for success, ensuring that your paint job remains intact and beautiful for years to come.
- What is the best temperature to paint indoors? The ideal temperature for indoor painting is between 60°F and 80°F.
- Can I paint if it's raining? It's best to avoid painting on rainy days, as high humidity can affect the drying process.
- How can I control humidity while painting? Use a dehumidifier or air conditioning to maintain optimal humidity levels in the painting area.
- What happens if I paint in extreme temperatures? Extreme temperatures can lead to poor adhesion, uneven drying, and ultimately, cracking.

Ventilation During Painting
When it comes to painting, ventilation is not just an afterthought; it’s a crucial element that can make or break your project. Imagine trying to breathe in a stuffy room filled with fumes—it's uncomfortable, right? That's exactly what your paint needs to avoid during the drying process. Proper ventilation helps to ensure that the air circulates freely, reducing the risk of moisture buildup and allowing the paint to dry evenly. This is especially important when using oil-based paints, which can emit strong odors and harmful VOCs (volatile organic compounds).
To achieve optimal ventilation, consider the following strategies:
- Open Windows: If you're painting indoors, make sure to open windows to create a cross-breeze. This simple act can significantly enhance airflow and help dissipate any odors or fumes.
- Use Fans: Positioning fans strategically can help to circulate air throughout the room. A box fan in the window can draw out stale air while bringing in fresh air from outside.
- Work During Optimal Times: If possible, choose to paint during cooler parts of the day. This can help maintain a comfortable working environment and improve ventilation.
Moreover, it's essential to monitor the weather conditions. High humidity can slow down the drying process, leading to potential issues such as cracking or peeling. Aim for a humidity level below 70% for the best results. If you find yourself in a particularly humid environment, consider using a dehumidifier to help control moisture levels.
In summary, ensuring good ventilation while painting is a simple yet effective way to enhance the quality of your work and prolong the life of your paint job. By allowing your painted surfaces to breathe, you are setting the stage for a flawless finish that will stand the test of time.
Application Techniques
When it comes to achieving a flawless paint job, play a critical role in preventing cracking and ensuring a durable finish. Think of painting like cooking; just as the right ingredients and methods can elevate a dish, the correct techniques can transform your paint application into a masterpiece. One of the first things to consider is the tools you use. Selecting the right brushes, rollers, or sprayers can make a world of difference. High-quality tools not only help in achieving an even coat but also reduce the likelihood of imperfections that lead to cracking. For instance, using a synthetic brush for water-based paints ensures that the bristles maintain their shape and do not absorb too much paint, which can create uneven layers.
Another vital technique is the application of thin coats. Instead of slapping on one thick layer of paint, opt for multiple thin coats. This method allows each layer to dry thoroughly, promoting better adhesion and minimizing the risk of cracking. Think of it like layering a cake; each layer needs to be stable before adding the next. Applying paint in this way not only improves the overall finish but also helps in achieving a more vibrant color, as each layer builds upon the last. As a rule of thumb, allow each coat to dry completely before applying the next one, and always follow the manufacturer's instructions regarding drying times.
Additionally, it's essential to consider the environment during application. Factors like temperature and humidity can significantly affect how paint adheres and dries. For instance, painting in excessively humid conditions can trap moisture beneath the paint, leading to bubbling and eventual cracking. Ideally, you want to paint when temperatures are between 50°F and 85°F and humidity levels are below 70%. If you're painting indoors, ensure that the space is well-ventilated. Open windows and use fans to promote airflow; this not only helps in drying the paint evenly but also reduces the risk of moisture buildup.
Finally, always remember to inspect your work as you go. After applying each coat, take a moment to check for any imperfections or areas that may need touch-ups. This proactive approach can save you time and effort in the long run, preventing small issues from becoming significant problems. By paying attention to these application techniques, you can ensure a smooth, durable finish that resists cracking, allowing your painted surfaces to look great for years to come.
- What is the best way to prepare a surface before painting? Thoroughly clean the surface, sand it for better grip, and apply a suitable primer to ensure optimal adhesion.
- How long should I wait between coats of paint? It's best to follow the manufacturer's recommendations, but generally, waiting at least 2 to 4 hours between coats is advisable.
- Can I paint in high humidity? It's not recommended, as high humidity can lead to poor adhesion and increased risk of cracking. Aim for lower humidity levels for best results.
- What tools are best for applying paint? High-quality brushes, rollers, and sprayers designed for the type of paint you are using will yield the best results.
Using the Right Tools
When it comes to painting, the tools you choose can make a world of difference in achieving that flawless finish you desire. Think of it like cooking; would you use a dull knife to chop vegetables? Of course not! Similarly, using the right painting tools is essential for a smooth application and long-lasting results. High-quality brushes, rollers, and sprayers can significantly impact the outcome of your paint job.
Let’s break down some key tools you might consider:
- Brushes: A good brush is crucial for cutting in edges and painting detailed areas. Look for brushes with synthetic bristles for water-based paints and natural bristles for oil-based paints. The size and shape of the brush can also affect how well you can maneuver around corners and edges.
- Rollers: Rollers are perfect for covering large areas quickly. Choose the nap length based on the texture of the surface you're painting. A shorter nap is ideal for smooth surfaces, while a longer nap works better on textured surfaces.
- Sprayers: If you're tackling a big project or working with intricate details, a paint sprayer can save you time and effort. However, they require some practice to master, so be sure to read the manual and do a test spray before diving in.
In addition to selecting the right type of tools, proper maintenance of your painting tools is equally important. Clean your brushes and rollers immediately after use to prevent paint from drying and ruining them. For brushes, rinse them thoroughly with water (or solvent for oil-based paints) and reshape the bristles to maintain their form. Rollers should be washed and dried flat to avoid any misshaping.
Moreover, using tools that are comfortable to hold can reduce fatigue during longer painting sessions. Ergonomically designed handles can make a significant difference, especially if you're working on a large project. So, invest a little extra time and money into selecting the right tools, and you’ll find that the quality of your work improves immensely.
Q: How do I choose the right brush for my paint project?
A: The right brush depends on the type of paint you're using. For water-based paints, opt for synthetic bristles, while natural bristles work best for oil-based paints. Additionally, consider the size and shape of the brush based on the areas you need to paint.
Q: Can I use a roller for all surfaces?
A: While rollers are great for large, flat surfaces, the nap length you choose should match the texture of the surface. A shorter nap is best for smooth surfaces, while a longer nap is suitable for textured surfaces.
Q: How often should I clean my painting tools?
A: It's best to clean your brushes and rollers immediately after use. This prevents paint from drying on them, which can ruin the tools and affect your future projects.

Applying Thin Coats
When it comes to achieving a flawless paint job, one of the most effective techniques is . You might be wondering, why thin coats? Well, think of it as building a strong foundation for a house. Just as a sturdy base supports the entire structure, each layer of paint contributes to the overall durability and appearance of your finish. Applying multiple thin coats instead of one thick layer allows for better drying and adhesion, which ultimately minimizes the risk of cracking.
Imagine trying to pour a thick layer of frosting on a cake. If you slather it on all at once, it might not set properly, leading to drips and an uneven surface. The same principle applies to paint. When you apply paint too thickly, it can dry unevenly, leading to cracks and imperfections. By applying thin coats, you give each layer a chance to dry thoroughly, ensuring that the paint adheres properly to the surface beneath.
Here’s a quick breakdown of the benefits of applying thin coats:
- Improved Adhesion: Thin layers allow the paint to bond better with the surface, reducing the likelihood of peeling or cracking.
- Faster Drying Time: Each coat dries more quickly, allowing you to move on to the next layer sooner.
- Enhanced Finish: Multiple thin coats provide a richer color and smoother texture, enhancing the overall appearance.
As a rule of thumb, aim for about two to three thin coats, allowing each layer to dry completely before applying the next. This not only helps in achieving a professional-looking finish but also extends the life of your paint job. Remember, patience is key! Rushing the process by applying thick coats can lead to a myriad of problems down the line.
In conclusion, applying thin coats is a simple yet highly effective technique that can save you from the headache of paint cracking and peeling. So, the next time you tackle a painting project, keep this tip in mind and enjoy the smooth, durable finish that comes with it.
Q1: How many thin coats should I apply?
A1: Generally, applying two to three thin coats is ideal. Allow each coat to dry completely before applying the next.
Q2: Can I use a roller for thin coats?
A2: Yes, using a roller can be effective, but ensure it's a high-quality roller that applies an even layer without excess paint.
Q3: What should I do if the paint starts to crack?
A3: If you notice cracking, it's best to sand down the affected area, clean it thoroughly, and then reapply the paint using thin coats.

Regular Maintenance and Inspections
When it comes to preserving the beauty and integrity of your painted surfaces, are absolutely vital. Just like you wouldn’t ignore a check engine light in your car, you shouldn’t overlook signs of wear and tear on your walls, furniture, or any other painted surfaces. By conducting routine checks, you can catch potential issues before they escalate into bigger problems, ultimately saving you time and money in the long run. Think of your painted surfaces as a delicate canvas that requires periodic attention to maintain its vibrancy and durability.
During these inspections, it’s important to look for common signs of damage. Cracks, peeling, or discoloration can indicate that the paint is starting to fail. If you notice any of these issues, it’s crucial to take action immediately. For example, a small crack might seem insignificant, but if left untreated, it can lead to larger cracks and even peeling paint, which is a much more extensive repair job. Regularly checking your painted surfaces can help you stay ahead of such problems.
Additionally, establishing a maintenance schedule can be incredibly beneficial. Depending on the environment and the type of paint used, you may want to inspect your painted surfaces every six months to a year. This schedule allows you to consistently monitor the condition of the paint and address any issues before they worsen. You might also consider keeping a maintenance log to track when inspections are done and what repairs are needed. This log can serve as a helpful reference for future maintenance.
As part of your maintenance routine, regular cleaning is just as important. Dust, dirt, and grime can accumulate over time, dulling the appearance of your paint and potentially leading to adhesion issues. Use a mild detergent and a soft cloth to gently clean the surfaces without damaging the paint. For tougher stains, a bit of elbow grease may be required, but always test any cleaning solution on a small, inconspicuous area first.
Touch-ups are another critical aspect of maintenance. If you notice a small scratch or chip in the paint, don’t wait too long to address it. A quick touch-up can prevent moisture from seeping in and causing further damage. Make sure to use the same type and color of paint for touch-ups to maintain a uniform appearance. You can even keep a small supply of leftover paint from your original project for convenience.
In conclusion, are essential for keeping your painted surfaces looking their best and preventing cracking. By staying proactive and attentive, you can ensure that your paint job remains smooth and intact for years to come. Remember, a little effort goes a long way in preserving the beauty and durability of your painted surfaces!
- How often should I inspect my painted surfaces?
It's advisable to inspect your painted surfaces every six months to a year, depending on the environment and type of paint used.
- What should I look for during inspections?
Look for signs of cracks, peeling, discoloration, or any other irregularities that may indicate damage to the paint.
- How can I clean my painted surfaces without damaging them?
Use a mild detergent and a soft cloth for cleaning. Always test any cleaning solution on a small area first to ensure it won't damage the paint.
- What should I do if I find a small chip or scratch?
Address it promptly with a touch-up using the same type and color of paint to prevent moisture from causing further damage.
Routine Checks for Damage
Conducting on your painted surfaces is an essential practice that can save you time and money in the long run. Just like regular health check-ups can help catch potential issues early, inspecting your paint can prevent minor flaws from escalating into major problems. So, what should you be looking for during these inspections? Here are some key aspects to consider:
First off, keep an eye out for peeling or flaking paint. This is often a sign that the paint is losing its grip on the surface, which can lead to further deterioration if not addressed. If you notice any areas where the paint is lifting away from the surface, it might be time to scrape off the loose paint and reapply a fresh coat. Additionally, look for cracks or fissures in the paint. These can be caused by various factors, including temperature changes and improper application techniques. Catching these cracks early allows you to fill them in before they widen and become more noticeable.
Another aspect to consider is discoloration. Over time, exposure to sunlight and environmental elements can cause your paint to fade or change color. If you notice uneven patches or fading, it might be worth considering a touch-up to restore the uniformity of your painted surfaces. Also, don't forget to check for signs of mold or mildew, especially in damp areas like bathrooms or kitchens. These can not only affect the appearance of your paint but also pose health risks if left untreated.
To help you keep track of your inspections, consider creating a simple checklist. This can include items like:
- Inspect for peeling or flaking paint
- Check for cracks or fissures
- Look for discoloration
- Examine for mold or mildew
By setting a routine—perhaps every six months or at the change of seasons—you can ensure that your painted surfaces remain in top condition. This proactive approach not only enhances the aesthetic appeal of your home but also extends the life of your paint job, keeping it looking fresh and vibrant for years to come.
- How often should I check my painted surfaces for damage? It's recommended to conduct routine checks every six months or at the change of seasons.
- What should I do if I find cracks in my paint? If you notice cracks, it's best to fill them in with a suitable filler and repaint the affected area to prevent further damage.
- Can I paint over peeling paint? It's advisable to remove any peeling paint before applying a new coat to ensure proper adhesion and a smooth finish.
- What causes paint to discolor over time? Discoloration can be caused by prolonged exposure to sunlight, moisture, and environmental pollutants.
Proper Cleaning and Touch-Ups
Maintaining the integrity of your paint job goes beyond just the initial application; it requires regular cleaning and timely touch-ups to ensure your surfaces remain vibrant and crack-free. Over time, dirt, grime, and environmental factors can take a toll on your painted surfaces, leading to deterioration and potential cracking. By implementing a consistent maintenance routine, you can significantly extend the life of your paint and keep it looking fresh.
Start with a gentle cleaning regimen. Use a soft cloth or sponge along with a mild detergent mixed with water to wipe down the surfaces. This will help remove any dust or grease that has accumulated. For tougher stains, you might consider a more robust cleaning solution, but always test it in a small area first to ensure it won't damage the paint. Remember, harsh chemicals can strip away the protective layers of your paint, so opt for gentle cleaners whenever possible.
Once your surfaces are clean, it's time to focus on touch-ups. This is where you can really save your painted surfaces from the brink of disaster. Look for any signs of wear, such as chips, scratches, or fading. A quick inspection can help you identify areas that need a little extra love. When you find a spot that requires attention, grab some paint that matches your original color and use a small brush to apply it carefully. This technique not only restores the beauty of your paint job but also prevents moisture from seeping in and causing further damage.
Consider establishing a maintenance schedule to keep your painted surfaces in top shape. This could be as simple as a monthly check-up to wipe down surfaces and inspect for any damage. By being proactive, you can catch issues early before they escalate into more significant problems. Additionally, if you notice any areas that seem to be wearing more quickly than others, it might be worth investigating the underlying cause, such as inadequate surface preparation or environmental factors.
In summary, regular cleaning and timely touch-ups are essential components of paint maintenance. By taking the time to care for your painted surfaces, you not only enhance their appearance but also prolong their lifespan, keeping them looking as good as new for years to come.
- How often should I clean my painted surfaces? It’s advisable to clean your painted surfaces at least once a month to prevent buildup of dirt and grime.
- What type of cleaner should I use? A mild detergent mixed with water is usually sufficient. Avoid harsh chemicals that can damage the paint.
- How do I match paint for touch-ups? If you have leftover paint from your original project, use that. If not, take a sample to a paint store for color matching.
- Can I use a roller for touch-ups? For small areas, a brush is preferable, but for larger areas, a roller can work as long as you ensure the paint matches well.
Frequently Asked Questions
- What causes paint to crack?
Paint can crack due to various factors, including poor surface preparation, extreme temperatures, high humidity, and using low-quality paint. Identifying these causes is crucial for preventing cracking in your paint job.
- How can I choose the right paint for my project?
Selecting the right paint involves considering the type (water-based or oil-based), the sheen, and the specific requirements of your project. High-quality paints are less likely to crack and provide a better finish.
- What is the difference between water-based and oil-based paints?
Water-based paints dry quickly and have lower levels of volatile organic compounds (VOCs), making them suitable for indoor use. Oil-based paints, on the other hand, offer durability and a smooth finish but take longer to dry and require ventilation during application.
- Why is surface preparation important before painting?
Proper surface preparation, which includes cleaning, sanding, and priming, is essential for ensuring good paint adhesion. A well-prepared surface minimizes the risk of cracking and enhances the overall finish of your paint job.
- What are the ideal temperature and humidity levels for painting?
The best conditions for painting are a temperature between 50°F and 85°F with humidity levels below 70%. These conditions help ensure better adhesion and drying of the paint.
- How can I avoid paint cracking during application?
To prevent cracking during application, use high-quality tools, apply multiple thin coats instead of one thick coat, and ensure good ventilation while painting. These techniques contribute to a smoother, more durable finish.
- What should I do for regular maintenance of painted surfaces?
Regular maintenance includes conducting routine checks for damage, cleaning the surfaces, and performing timely touch-ups. Establishing a maintenance schedule can help prolong the life of your painted surfaces and prevent cracking.


