
Transparent Watercolor Techniques for Beginners
Welcome to the vibrant world of transparent watercolors! If you're a beginner eager to dive into this exciting medium, you're in the right place. Watercolor painting is not just about slapping paint on paper; it's an art form that requires a delicate balance of technique, patience, and creativity. The beauty of transparent watercolors lies in their ability to create luminous, glowing effects that can transform a simple scene into a breathtaking masterpiece. Imagine painting a sunset where the colors blend seamlessly, each layer revealing more depth and vibrancy. Doesn’t that sound enticing?
In this article, we’ll explore essential techniques that will help you harness the magic of transparency in your watercolor paintings. From understanding the basics of watercolor to mastering color mixing and brush techniques, we'll cover everything you need to know to get started on your artistic journey. So, grab your brushes, and let’s get ready to make some beautiful art!
Before diving into techniques, it's crucial to grasp the fundamentals of watercolor. Watercolors are unique because they rely on the transparency of the paint to create depth and luminosity. Unlike acrylics or oils, where the paint sits on top of the surface, watercolors allow the white of the paper to shine through, creating a glowing effect. This characteristic makes understanding color theory and the properties of transparent paint essential for any beginner.
A successful watercolor painting begins with the right tools. Investing in quality materials can make a significant difference in your results. You'll need a few basic items: watercolor paper, brushes, and paints. Each of these components plays a vital role in your painting process, and choosing the right ones will set you up for success.
The paper you use significantly impacts your watercolor outcome. Watercolor paper comes in various textures and weights, which affect how the paint behaves on the surface. Here are some key points to consider:
- Weight: Look for paper that is at least 200 gsm (grams per square meter) to prevent warping.
- Texture: Choose between hot-pressed (smooth), cold-pressed (not rough), or rough textures based on your desired effect.
- Acid-Free: Ensure the paper is acid-free to prevent yellowing over time.
Not all brushes are created equal! The type of brush you select can significantly influence your painting technique. For transparent watercolors, consider the following brush types:
- Round Brushes: Great for detail work and washes.
- Flat Brushes: Perfect for broad strokes and washes.
- Fan Brushes: Ideal for creating textures like foliage.
Choosing the right size is also crucial—larger brushes are excellent for washes, while smaller brushes work well for details.
Mastering color mixing is vital for achieving the desired hues and transparency in your artwork. Start by familiarizing yourself with the color wheel and how colors interact. Understanding complementary colors can help you create stunning contrasts in your paintings. When mixing colors, remember that less is often more; start with a small amount of paint and gradually add more until you achieve the desired shade.
Developing a cohesive color palette can enhance your artwork significantly. Choose colors that complement each other and maintain transparency for a harmonious composition. A simple palette might include:
- Primary Colors: Red, blue, and yellow.
- Secondary Colors: Green, orange, and purple.
- Neutral Colors: Browns and grays for balance.
Layering is a fundamental technique in transparent watercolor. By applying multiple layers of paint, you can build depth, richness, and luminosity in your paintings. Start with light washes and gradually add darker layers, allowing each layer to dry before adding the next. This technique not only enhances transparency but also creates a sense of dimension in your artwork.
Different brush techniques can create unique effects in transparent watercolor. Here are a few techniques to explore:
- Wet-on-Wet: Applying wet paint onto wet paper for soft, blended edges.
- Dry Brush: Using a dry brush on dry paper for a textured effect.
- Glazing: Applying a thin layer of transparent color over a dry layer to modify its hue.
Even experienced artists make mistakes! Here are some common pitfalls beginners encounter when working with transparent watercolors:
- Overworking: Avoid the temptation to keep adding layers; sometimes less is more.
- Using Too Much Water: Finding the right water-to-paint ratio is crucial for transparency.
- Neglecting to Plan: Sketching your composition beforehand can save time and frustration.
Finding inspiration is key to growth as an artist. Try setting aside some time each week to experiment with different transparent watercolor techniques. Here are a few practice project ideas:
- Paint a simple landscape using a limited color palette.
- Create a floral composition focusing on layering techniques.
- Experiment with abstract designs using wet-on-wet techniques.
Q: What is the best paper for transparent watercolors?
A: Look for 200 gsm or heavier watercolor paper, preferably cold-pressed for texture.
Q: How do I prevent my colors from becoming muddy?
A: Always clean your brush between colors and avoid mixing too many hues on your palette.
Q: Can I use regular paints for watercolor techniques?
A: It's best to use watercolor paints specifically designed for transparency and blending.
Ready to create stunning artworks with transparent watercolors? With practice and patience, you'll soon find yourself captivated by the beauty of this medium. Happy painting!
Understanding Watercolor Basics
Before diving into the exciting world of transparent watercolor techniques, it's essential to grasp the fundamentals of watercolor painting. Watercolor is a unique medium that relies heavily on water to manipulate the pigments, allowing for a stunning range of effects, especially when it comes to transparency and luminosity. Unlike oils or acrylics, watercolors are known for their ability to create soft washes and delicate layers, making them a favorite among artists who appreciate subtlety and depth in their work.
One of the first things to understand is the materials you'll be using. Watercolors come in two primary forms: pans and tubes. Pans are solid blocks of color that you activate with water, while tubes contain liquid paint. Each form has its own advantages; for instance, pans are portable and easy to use for quick sketches, while tubes allow for more vibrant color mixes. Regardless of the form you choose, always opt for high-quality paints to ensure the best results.
Next, let's talk about color theory. Understanding how colors interact is crucial for any artist, especially when working with transparent watercolors. The basic color wheel consists of primary colors (red, blue, yellow), secondary colors (green, orange, purple), and tertiary colors, which are created by mixing primary and secondary colors. By familiarizing yourself with complementary colors (colors opposite each other on the wheel), you can create striking contrasts and enhance the transparency in your paintings.
What makes transparent watercolors so special is their translucent quality. When applied in washes, these paints allow the white of the paper to shine through, creating a luminous effect. This is fundamentally different from opaque paints, which cover the surface completely. To master this aspect, it’s crucial to learn how to control the amount of water you mix with your paint. Too much water can dilute the pigment, while too little may lead to harsh edges and less transparency. Finding the right balance is key.
Moreover, let’s not forget about the properties of water itself. Watercolor paints behave differently depending on the amount of water used, the type of paper, and even the brush technique. For instance, a wet-on-wet technique, where wet paint is applied to wet paper, results in soft, diffused edges, while a dry brush technique allows for more defined lines and textures. Understanding these properties will help you manipulate your painting to achieve the desired outcome.
In summary, mastering the basics of watercolor is about more than just picking up a brush; it’s about understanding the interplay of materials, color theory, and the unique properties of the medium itself. By laying this solid foundation, you'll be well-prepared to explore the exciting techniques that will elevate your watercolor skills to new heights.
Essential Tools and Materials
When it comes to creating stunning transparent watercolor paintings, having the right tools and materials is absolutely essential. Think of your supplies as the foundation of a house; without a solid base, everything else can crumble. So, let's dive into the must-have items that will help you unleash your creativity and achieve those beautiful, luminous effects that watercolors are known for.
First and foremost, you'll need quality watercolor paper. The type of paper you choose can make or break your artwork. Watercolor paper comes in various textures and weights, which can significantly influence the final result. For beginners, a good starting point is to use cold-pressed (or NOT) paper, which has a textured surface that holds water well. Alternatively, hot-pressed (or smooth) paper offers a sleek surface for more detailed work. The weight of the paper is also crucial; a weight of 200 lb (or 425 gsm) is ideal as it can handle a lot of water without warping.
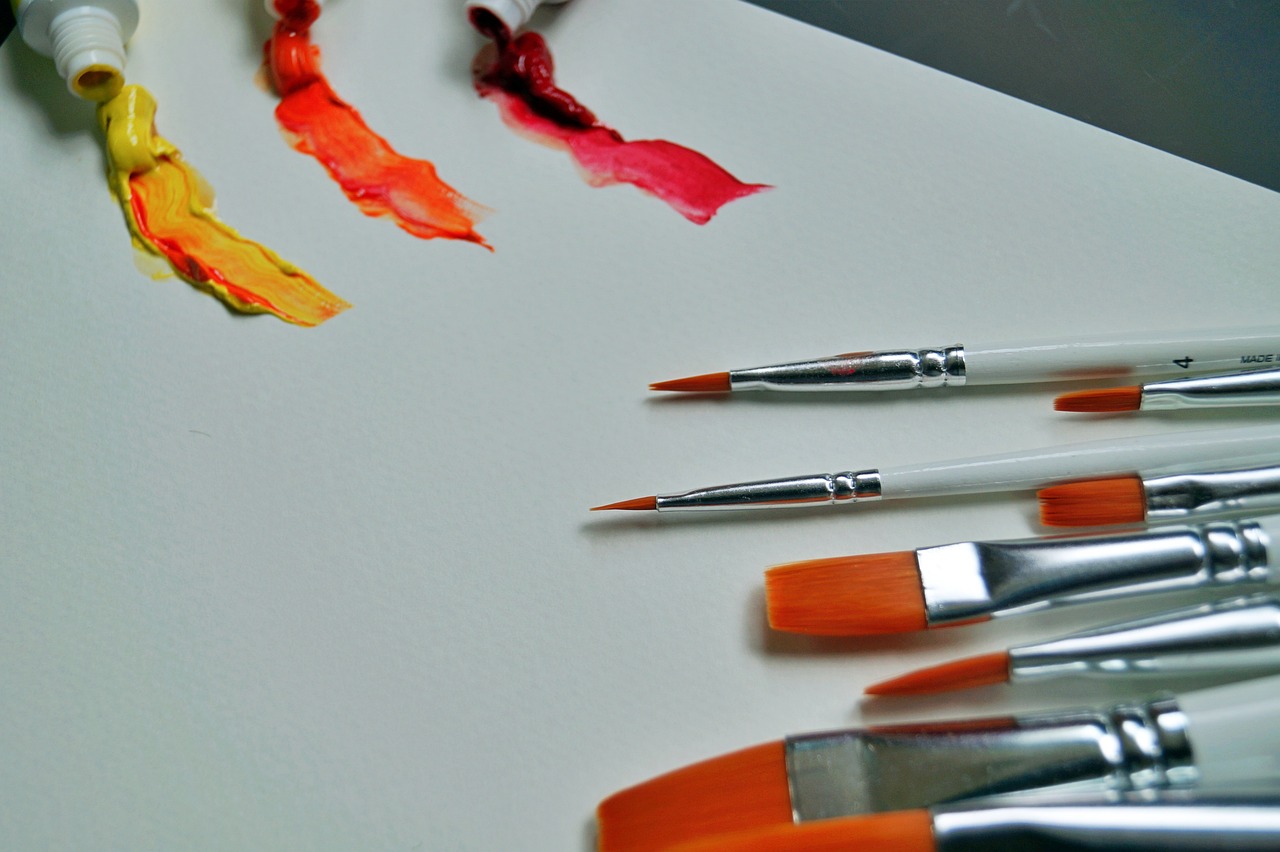
Next up, let's talk about brushes. Not all brushes are created equal, and using the right ones can elevate your painting experience. A few essential types include:
- Round Brushes: Perfect for detail work and creating fine lines.
- Flat Brushes: Great for washes and broad strokes.
- Filbert Brushes: Ideal for blending and soft edges.
Each brush type has its unique shape and purpose, so having a variety will allow you to experiment with different techniques. Remember, the size of the brush also matters; larger brushes are fantastic for washes, while smaller ones are better for intricate details.
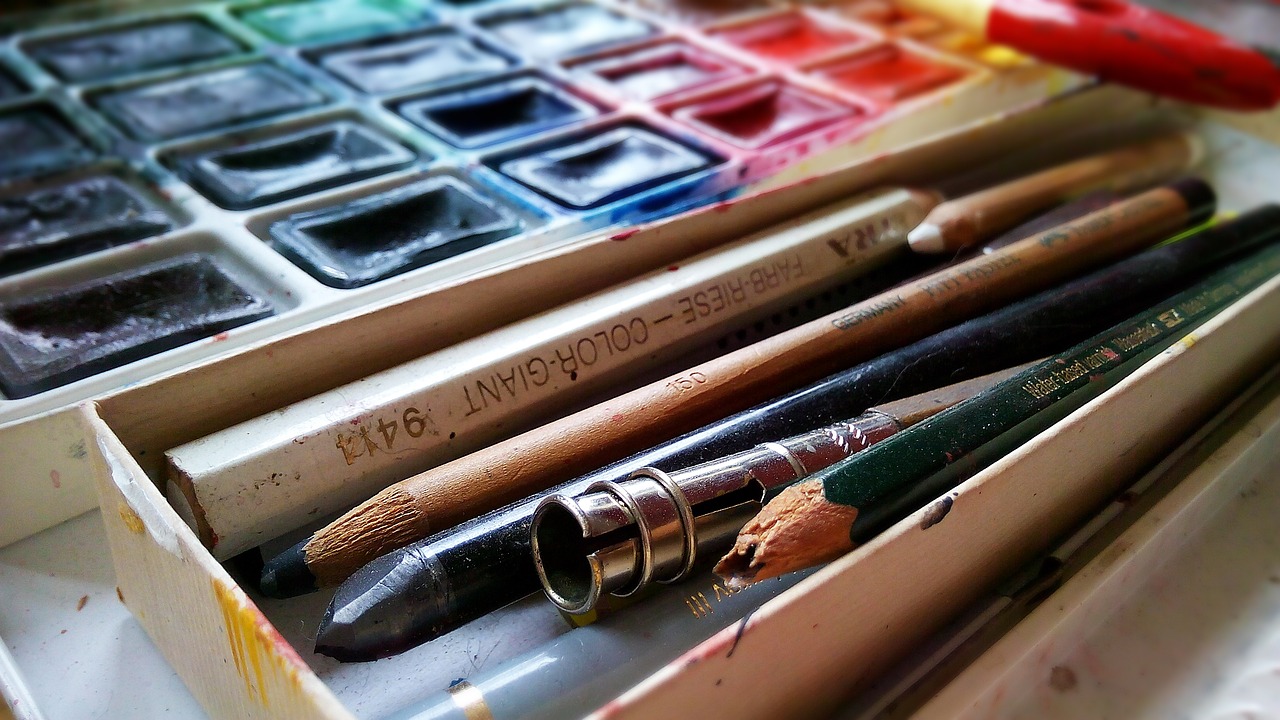
Now, onto the paints! Transparent watercolors are usually sold in tubes or pans. Tubes are great for mixing large amounts of color, while pans are more portable and convenient for quick sketches. When selecting your colors, opt for a mix of primary colors and a few earth tones to create a versatile palette. Don't forget, the transparency of the paint is key; look for paints labeled as "transparent" to ensure you can achieve that luminous effect.
Finally, don't overlook the importance of a palette and a water container. A good palette allows you to mix colors effectively, while a clean water container is essential for rinsing brushes and controlling the water-to-paint ratio. Having a paper towel or cloth on hand is also a good idea for quick clean-ups and to control the amount of water on your brush.
In summary, investing in quality tools and materials is crucial for any aspiring watercolor artist. By choosing the right paper, brushes, and paints, you'll set yourself up for success. So, gather your supplies, and let your imagination flow onto the page!
Q: What type of paper is best for beginners?
A: Cold-pressed watercolor paper (200 lb or 425 gsm) is highly recommended for beginners due to its texture and ability to absorb water.
Q: How many brushes do I need to start?
A: A basic set of three brushes—a round, flat, and filbert—should suffice for beginners to explore various techniques.
Q: Can I use regular paints for watercolor techniques?
A: It's best to use paints specifically designed for watercolor, as they have the right consistency and transparency needed for this medium.
Q: How do I clean my brushes?
A: Rinse your brushes in clean water after each use, and reshape the bristles to maintain their form. Avoid letting paint dry on the brushes.
Choosing the Right Paper
When it comes to creating stunning transparent watercolor artworks, the choice of paper is absolutely crucial. Think of your watercolor paper as the canvas for your creativity; it can either enhance or hinder your artistic expression. The right paper will allow the colors to flow and blend beautifully, while the wrong type might lead to frustration and unsatisfactory results. So, what should you consider when selecting your watercolor paper?
First off, let's talk about weight. Watercolor paper typically comes in different weights, measured in grams per square meter (gsm). For beginners, it’s recommended to start with paper that is at least 200 gsm—this weight can handle water without warping. If you're feeling adventurous, you might even want to try heavier papers, like those that are 300 gsm or more, which can absorb more water and pigment, giving you a richer experience.
Next, you’ll want to consider the texture of the paper. There are three main types of watercolor paper: rough, cold-pressed (also known as NOT, or not hot-pressed), and hot-pressed (or smooth). Each type has its own unique characteristics:
- Rough paper: This has a pronounced texture, perfect for creating lively effects and capturing the spontaneity of watercolors.
- Cold-pressed paper: This is the most versatile and popular choice among artists. It has a moderate texture that allows for both detailed work and washes.
- Hot-pressed paper: Smooth and flat, this type is ideal for detailed illustrations and fine lines, but may not hold as much water.
Another important factor is the composition of the paper. Look for papers made from 100% cotton, as they offer superior absorbency and durability. They can withstand multiple washes and are less likely to tear, making them a favorite among professional artists. However, if you're just starting out, there are also quality cellulose-based papers that can work well without breaking the bank.
Lastly, consider acid-free paper. Acid-free materials resist yellowing over time, ensuring that your artwork remains vibrant for years to come. This is particularly important if you plan to display your work or sell it. You want your masterpieces to stand the test of time!
To summarize, here are the key points to remember when choosing your watercolor paper:
| Feature | Recommendation |
|---|---|
| Weight | 200 gsm or higher |
| Texture | Rough, Cold-pressed, or Hot-pressed |
| Composition | 100% Cotton or Quality Cellulose |
| Acidity | Acid-free |
By paying attention to these aspects, you'll be well on your way to selecting the perfect paper for your transparent watercolor projects. Remember, the right paper can make all the difference in achieving those stunning, luminous effects that watercolor is known for. So, go ahead, explore different types of paper, and find the one that resonates with your artistic style!
Q: What is the best paper for beginners?
A: For beginners, cold-pressed watercolor paper around 200 gsm is a great choice as it balances texture and absorbency.
Q: Can I use regular paper for watercolor painting?
A: While you can use regular paper, it may not hold water well and could warp or tear. It's best to use specially designed watercolor paper.
Q: Is cotton paper worth the investment?
A: Yes! Cotton paper offers excellent durability and absorbency, making it a worthwhile investment for serious artists.
Selecting Brushes
When it comes to transparent watercolor painting, the choice of brush is not just a matter of preference; it's a crucial factor that can significantly influence the outcome of your artwork. Imagine trying to paint a delicate flower with a rough, stiff brush – it simply wouldn't work, right? That's why understanding the different types of brushes available is essential for any beginner looking to master transparent watercolor techniques.
There are several types of brushes that are particularly well-suited for watercolor painting, each with its own unique characteristics. The most common types include:
- Round Brushes: These are versatile and can be used for both fine details and broader strokes. The pointed tip allows for precision, making them ideal for intricate work.
- Flat Brushes: Perfect for washes and broad strokes, flat brushes can cover large areas quickly. They are also great for creating sharp edges and defined shapes.
- Filbert Brushes: With a shape that combines both round and flat, filbert brushes are excellent for blending and creating soft edges, making them a favorite for floral compositions.
- Fan Brushes: These brushes are fantastic for creating texture and foliage effects. Their unique shape allows for unique patterns that can mimic natural elements.
Additionally, the size of the brush matters. Smaller brushes are ideal for detailed work, while larger brushes are suitable for washes and broader areas. A good rule of thumb is to have a variety of sizes in your toolkit to give you flexibility in your painting. Think of your brushes as the instruments in an orchestra; each has its role, and together they create a beautiful symphony of color.
Another important aspect to consider is the material of the brush bristles. Natural hair brushes, such as those made from sable or squirrel, hold more water and pigment, allowing for smoother application and better control. However, they can be more expensive. Synthetic brushes, on the other hand, are often more affordable and can be quite durable, making them a great option for beginners. They may not hold as much water, but they can still produce beautiful results.
Ultimately, selecting the right brushes for transparent watercolor painting is about finding what works best for you. Experiment with different types and sizes to discover your personal preferences. Don't be afraid to invest in quality brushes, as they can make a significant difference in your painting experience. Remember, the right tools can elevate your art from ordinary to extraordinary!
Q: How do I clean my watercolor brushes?
A: Cleaning your brushes is essential for maintaining their shape and longevity. Rinse them in clean water immediately after use, and gently reshape the bristles with your fingers. For stubborn paint, use a mild soap and rinse thoroughly.
Q: How often should I replace my watercolor brushes?
A: The lifespan of a brush depends on its quality and how often you use it. Generally, if you notice fraying bristles or a loss of shape, it’s time to replace your brush.
Q: Can I use regular paintbrushes for watercolor?
A: While you can use regular paintbrushes, they may not perform as well as brushes specifically designed for watercolor. Watercolor brushes are designed to hold water and pigment effectively, providing better control and results.

Color Mixing Techniques
When it comes to transparent watercolor painting, mastering color mixing is your secret weapon. It's like cooking; the right ingredients can turn a simple dish into a culinary masterpiece. Understanding how to blend colors effectively can help you achieve those stunning hues and the desired level of transparency that makes watercolors so captivating. So, how do you get started? Let’s dive into the essentials!
First off, it's important to recognize that not all colors are created equal. Some pigments are more transparent than others, and knowing this can make a world of difference in your artwork. For instance, colors like Cadmium Yellow and Cobalt Blue are known for their transparency, while others, like Titanium White, are more opaque. This means that when you mix colors, the transparency of the resulting hue will depend on the properties of the pigments you're using.
To achieve the perfect mix, start by using a color wheel. This handy tool helps you visualize how colors interact. You can create a harmonious palette by mixing complementary colors (those opposite each other on the wheel) to achieve muted tones. For example, mixing a bit of red with green can give you a lovely earthy brown that maintains transparency. Remember, the key here is to add colors gradually; a little goes a long way!
Another technique to enhance your color mixing is to utilize a limited palette. By restricting yourself to just a few colors, you can learn how to mix them to create a wide range of shades and tones. Here's a simple example of a limited palette:
| Color | Mixing Suggestions |
|---|---|
| Cadmium Yellow | Mix with Ultramarine Blue for a vibrant green. |
| Ultramarine Blue | Combine with Alizarin Crimson for a rich purple. |
| Alizarin Crimson | Mix with Cadmium Yellow for a range of oranges. |
Moreover, don't forget the power of layering! When you apply a wash of one color and let it dry before adding another, you can create incredible depth and luminosity. This technique allows you to build your painting gradually, ensuring that the colors remain vibrant and transparent. Think of it like building a sandwich; each layer adds flavor, and the final result is a delicious blend of tastes!
Lastly, always keep a mixing palette handy for experimentation. This allows you to test out combinations before committing them to your artwork. It’s like having a rehearsal before the big performance. You can see how the colors interact and adjust as needed, giving you the confidence to make bold choices in your painting.
In conclusion, mastering color mixing in transparent watercolor is all about experimentation and practice. By understanding the properties of your pigments, utilizing a limited palette, layering colors, and testing combinations, you can create stunning artworks that are vibrant and full of life. So grab your brushes, and let’s get mixing!
- What is the best way to mix colors in watercolor? Start with a clean palette, use a limited number of colors, and mix gradually to see how they interact.
- How do I know if a color is transparent? Check the pigment information on your watercolor tube or palette; many brands indicate whether the pigment is transparent, semi-transparent, or opaque.
- Can I fix a color that is too dark? Yes! You can lift some of the paint with a damp brush or sponge, or add a lighter color on top to soften the effect.
Creating a Color Palette
Creating a color palette is one of the most exciting yet challenging aspects of watercolor painting. Think of your palette as the heart of your artwork; it sets the mood, conveys emotions, and brings your vision to life. When you select your colors, you're not just choosing hues; you're crafting a story that will unfold on your canvas. So, how do you go about this seemingly daunting task? Let’s break it down!
First and foremost, consider the **emotion** or **theme** you want to convey. Are you aiming for a serene landscape that evokes calmness, or perhaps a vibrant street scene full of life? The colors you choose will significantly impact the overall feel of your painting. For instance, cool colors like blues and greens can create a tranquil atmosphere, while warm colors like reds and yellows can inject energy and warmth into your work.
Next, it's essential to understand the concept of **color harmony**. This refers to how well your chosen colors work together. A harmonious palette can be achieved through various color schemes, such as:
- Analogous Colors: These are colors that sit next to each other on the color wheel, like blue, blue-green, and green. They create a serene and comfortable design.
- Complementary Colors: These are opposite each other on the color wheel, such as blue and orange. They can create vibrant contrasts and make each color pop.
- Monochromatic Colors: This scheme uses variations in lightness and saturation of a single color. It can create a cohesive and subtle look.
Once you have a theme and an understanding of color harmony, it’s time to start mixing! Begin with a limited palette—perhaps three primary colors—and experiment with mixing them to create secondary and tertiary colors. This approach not only helps you learn about color interactions but also maintains the **transparency** that is crucial in watercolor painting. Remember, the more transparent your colors, the more luminous your artwork will appear!
As you mix, keep track of your combinations. A simple way to do this is to create a color chart. You can take a piece of watercolor paper and paint swatches of each color you mix. This not only serves as a reference for future projects but also allows you to see how different colors interact when layered. Here's a simple format you can use:
| Color Name | Mixing Ratio | Resulting Color |
|---|---|---|
| Cadmium Red | 1:1 with Ultramarine Blue | |
| Cadmium Yellow | 2:1 with Cobalt Blue |
Finally, don't be afraid to **experiment**! Watercolor is a medium that thrives on spontaneity and exploration. Try different combinations and layering techniques to see how they affect the transparency and depth of your colors. Remember, the goal is to create a palette that speaks to you and enhances your artistic expression.
In conclusion, creating a color palette is a journey that requires practice and patience. As you become more familiar with your colors and their interactions, you'll find that your confidence grows, and your artwork will reflect that growth. So grab your brushes, mix those colors, and let your creativity flow!
- How do I choose the right colors for my palette? Start with a limited palette and focus on colors that evoke the emotions you want to convey. Experiment with mixing and layering to find combinations that work for you.
- Can I use non-transparent colors in my watercolor painting? While transparent colors are preferred for their luminosity, you can incorporate non-transparent colors for specific effects. Just be mindful of how they interact with your transparent hues.
- How do I maintain the transparency of my colors? Use a light touch when applying paint, and layer your colors gradually. Avoid using too much pigment in your mixes, as this can reduce transparency.
Layering Colors
Layering colors is one of the most essential and exciting techniques in transparent watercolor painting. It’s like building a beautiful cake; each layer adds flavor and depth, creating a masterpiece that tantalizes the eyes. When you apply this technique correctly, you can achieve stunning effects that bring your artwork to life. But how do you layer effectively? First, it’s important to understand that transparency is key. Unlike opaque paints, transparent watercolors allow the underlying layers to shine through, creating a sense of luminosity and depth.
To start layering, you should begin with a light wash as your base. This initial layer sets the tone for your painting. Think of it as the foundation of a house. Once this layer is dry, you can add subsequent layers, each one progressively darker or more saturated. This gradual build-up is crucial because it helps you maintain control over the intensity and transparency of the colors. Remember, patience is vital! Rushing through the drying process can lead to muddy colors and loss of that coveted transparency.
Here are some tips to keep in mind while layering:
- Start Light: Always begin with lighter colors and gradually move to darker shades. This approach helps maintain the transparency of your artwork.
- Let Each Layer Dry: Allow each layer to dry completely before adding another. This prevents colors from bleeding into one another and maintains clarity.
- Experiment with Water: Adjust the amount of water in your brush. More water can create softer edges and blends, while less water can produce sharper lines.
Moreover, the order in which you layer colors can significantly affect the final outcome. For instance, if you’re painting a sunset, starting with a pale yellow wash, then adding layers of orange and red can create a vibrant sky that glows. The interplay of colors creates a stunning visual effect that draws the viewer in. Remember, layering is not just about color; it’s also about texture. You can use different brush techniques, like dry brushing or wet-on-wet, to create varied textures that enhance your layers.
As you practice layering, don’t be afraid to experiment! Try combining unexpected colors or varying the thickness of your layers. Each painting is an opportunity to learn and grow. Keep a sketchbook handy to test out your ideas before committing them to your main artwork. This way, you can see how different layering techniques work together and refine your approach.
In conclusion, mastering the art of layering colors in transparent watercolor is a rewarding journey. It allows you to create depth, vibrancy, and a sense of movement in your paintings. So grab your brushes, choose your palette, and start layering your way to beautiful watercolor creations!

Brush Techniques for Transparency
When it comes to transparent watercolor painting, the way you wield your brush can make all the difference. Imagine your brush as a magic wand, capable of bringing your visions to life with just a stroke. There are several techniques that can enhance the transparency of your watercolors, allowing light to bounce off the paper and create stunning effects. Let’s dive into some of the most effective brush techniques that will elevate your artwork.
One of the most popular techniques is wet-on-wet. This method involves applying wet paint onto a wet surface, which allows the colors to blend seamlessly. Picture a watercolor cloud—soft, fluffy, and ethereal. That’s the kind of effect you can achieve with this technique. To master wet-on-wet, start by wetting your paper with clean water using a large brush. Then, while the paper is still wet, add your desired colors. Watch as they swirl together, creating beautiful gradients and soft edges. Just remember, the key here is to work quickly before the paper dries!
Next up is the dry brush technique. This technique is quite the opposite of wet-on-wet, as it involves using a dry brush to apply paint onto a dry surface. This approach can create a textured, almost scratchy effect, perfect for capturing the details in foliage or rough surfaces. To try this, load your brush with paint but remove excess moisture by dabbing it on a paper towel. Then, lightly drag the brush across the paper, allowing the texture of the paper to show through. It’s like scratching the surface of a canvas to reveal hidden gems beneath!
Glazing is another essential technique that every watercolorist should master. This involves applying a transparent layer of paint over a dried layer. Think of it as building a sandwich; each layer adds flavor and depth to your artwork. To glaze, make sure your first layer is completely dry. Then, select a transparent color and apply it gently over the first layer. This technique allows you to create luminous effects, as the colors underneath will shine through, giving your painting a rich, complex look. It’s a fantastic way to adjust tones and create shadows without losing the vibrancy of the colors.
For those looking to experiment further, consider combining these techniques. For example, you can start with a wet-on-wet base for your sky, then use dry brush techniques for the clouds, and finish with glazing to add depth to the foreground. The possibilities are endless, and the best part is that practice makes perfect. Don’t be afraid to make mistakes; they often lead to the most beautiful discoveries!
As you explore these brush techniques, remember that transparency is key in watercolor painting. The more you understand how your brush interacts with water and pigment, the more control you’ll have over your artwork. So grab your brushes, experiment, and let your creativity flow!
- What is the best brush for watercolor techniques? The best brush often depends on your technique. Round brushes are versatile for detailed work, while flat brushes are great for washes and broad strokes.
- How do I clean my brushes properly? Always rinse your brushes in clean water and reshape the bristles after use. Avoid letting paint dry on the bristles to maintain their shape and functionality.
- Can I use regular paper for watercolor? It's best to use watercolor paper, as it can handle the water without buckling or tearing, allowing for better transparency and color application.
Common Mistakes to Avoid
When starting your journey with transparent watercolors, it’s easy to fall into some common traps that can hinder your progress. One of the biggest mistakes beginners make is not understanding the importance of water control. Watercolor is all about the balance between water and pigment. If you use too much water, your colors can become washed out, losing that beautiful transparency you’re aiming for. On the flip side, too little water can lead to harsh edges and an uneven application. Think of it like cooking; the right amount of seasoning (or in this case, water) can make all the difference in the final dish!
Another frequent pitfall is neglecting to test colors before applying them to your artwork. Mixing colors directly on your palette without testing them on a scrap piece of paper can lead to unexpected results. It’s essential to know how each color interacts with others, especially when you’re aiming for a specific hue or transparency. Imagine trying to bake a cake without tasting the batter first—you might end up with a flavor that’s far from what you intended!
Additionally, many beginners rush through the layering process. Patience is key in watercolor painting. When applying multiple layers, it’s crucial to allow each layer to dry completely before adding the next. This not only prevents colors from muddying but also enhances the luminosity of your work. Think of layering like building a house; you wouldn’t put the roof on before the walls are up, right?
It’s also important to choose the right paper for your project. Using paper that isn’t designed for watercolor can lead to warping and buckling, which can ruin your painting. Always opt for high-quality watercolor paper that can handle the amount of water you plan to use. In this case, your canvas is your foundation—if it’s unstable, everything else will crumble.
Lastly, don’t forget to embrace the messiness of watercolor! Many beginners fear making mistakes and try to control every brush stroke, which can stifle creativity. Remember, watercolor is a fluid medium that often has a mind of its own. Instead of fighting it, learn to work with it. Allow for happy accidents and unexpected outcomes; sometimes the best parts of your painting come from the moments you didn’t plan for!
Q: What is the best way to control water in my watercolor painting?
A: Practice varying your brush pressure and the amount of water you load onto your brush. Always have a paper towel handy to absorb excess water when necessary.
Q: How can I prevent my colors from becoming muddy?
A: Always let each layer dry completely before adding another. Use a limited color palette to maintain harmony and avoid mixing too many colors on your palette.
Q: Is it necessary to use expensive watercolor paper?
A: While it’s not mandatory, using quality watercolor paper can significantly enhance your painting experience and the final outcome. It’s worth investing in good materials.
Q: What should I do if I make a mistake?
A: Embrace it! Watercolor is about exploration. You can often incorporate mistakes into your work or find creative ways to fix them. Remember, every artist has their share of ‘oops’ moments!
Inspiration and Practice Projects
Finding inspiration can sometimes feel like searching for a needle in a haystack, especially when you're diving into the world of transparent watercolors. But fear not! The beauty of this medium lies in its versatility and the endless possibilities it offers. To get those creative juices flowing, consider starting with a few simple practice projects that can help you experiment with techniques while building your confidence.
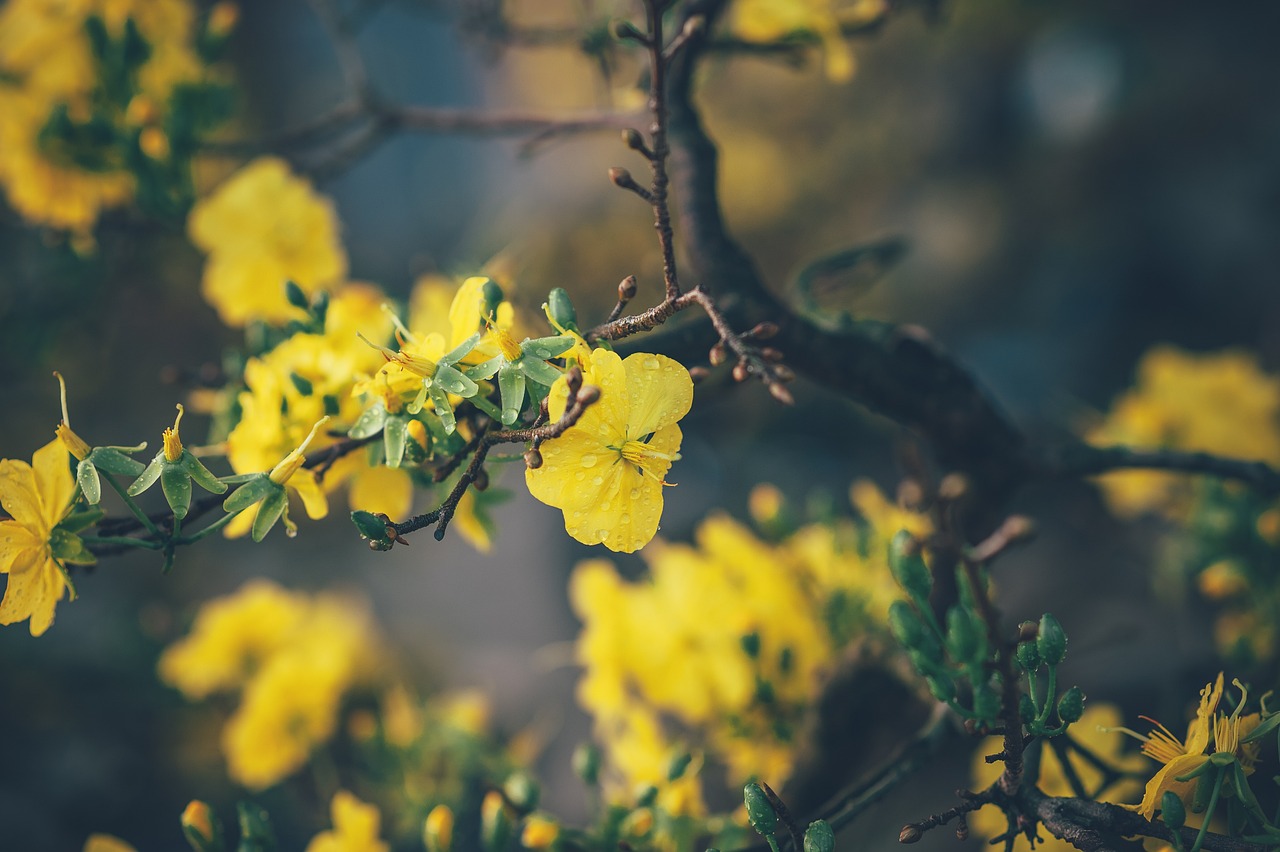
One fantastic way to kick off your watercolor journey is by painting nature scenes. Think about the vibrant colors of a sunset or the delicate petals of a flower. These subjects allow you to play with transparency, layering, and color mixing. You could set up a small still life with fruits or flowers and observe how light interacts with their surfaces. This will not only enhance your understanding of transparency but also improve your observational skills.
Another exciting project is to try your hand at creating abstract art. Abstract watercolor allows for freedom and spontaneity. You can experiment with different brush techniques, such as wet-on-wet or dry brush, to see how colors blend and interact on the paper. Don't be afraid to make mistakes; sometimes, the best surprises come from unexpected color combinations!
If you're looking for structured practice, consider creating a series of mini-paintings focused on a specific theme. For instance, you could choose to paint various types of leaves, capturing their unique shapes and colors. This project not only hones your skills but also results in a cohesive body of work that showcases your growth as a painter.
Lastly, joining an online watercolor community can provide a wealth of inspiration. Platforms like Instagram and Pinterest are filled with talented artists sharing their work. You can also participate in challenges or prompts that encourage you to create within a set timeframe or theme. Engaging with fellow artists can motivate you to push your boundaries and explore new techniques.
Remember, the key to improvement is consistent practice and exploration. Embrace the learning process, and don’t shy away from experimenting. Each brushstroke is a step toward developing your unique style. So grab your brushes, and let your imagination run wild!
Q: What should I do if I make a mistake while painting?
A: Mistakes are a natural part of the creative process! You can often turn them into opportunities by incorporating them into your artwork or using techniques like glazing to cover them up.
Q: How can I improve my color mixing skills?
A: Practice mixing colors on a separate palette before applying them to your artwork. Keep a color wheel handy to help you understand how colors interact and complement each other.
Q: What types of subjects are best for beginners?
A: Start with simple objects like fruits, flowers, or landscapes. These subjects allow you to focus on basic techniques without feeling overwhelmed.
Q: How often should I practice?
A: Consistency is key! Try to paint a little every day or set aside dedicated time each week to work on your skills. The more you practice, the more confident you'll become.
Frequently Asked Questions
- What are the basic materials needed for transparent watercolor painting?
To get started with transparent watercolor painting, you'll need a few essential materials: high-quality watercolor paper, a set of transparent watercolor paints, and a variety of brushes. Additionally, having a palette for mixing colors and clean water for rinsing your brushes is crucial. Remember, the quality of your materials can significantly affect your final artwork!
- How do I choose the right watercolor paper?
Choosing the right watercolor paper is vital for achieving the desired transparency in your painting. Look for papers specifically designed for watercolor, which come in various weights and textures. Heavier papers (like 300 lb) can handle more water and layering without warping, while lighter papers (like 200 lb) are great for lighter washes. Experiment with different types to see what works best for your style!
- What are some effective color mixing techniques?
Effective color mixing is all about understanding your palette and the properties of your paints. Start by mixing small amounts of paint on your palette to see how colors interact. Remember to mix colors gradually; it's easier to darken a color than to lighten it! Also, keep in mind that transparent colors often look different when applied in layers, so experiment with transparency to achieve depth.
- What is the layering technique in transparent watercolor?
Layering is a fundamental technique in transparent watercolor painting that involves applying multiple washes of color to create depth and luminosity. Begin with a light wash and allow it to dry before adding another layer. This technique can help you build rich colors without losing the transparency that makes watercolor unique. Just remember to be patient and let each layer dry completely!
- What common mistakes should beginners avoid?
As a beginner, it’s easy to make a few common mistakes. One of the biggest pitfalls is using too much water, which can lead to muddy colors. Another mistake is not allowing layers to dry before adding more paint, which can cause colors to blend unintentionally. Lastly, remember that practice is key—don’t be discouraged by initial results; every artist has been there!
- How can I find inspiration for my watercolor projects?
Finding inspiration can be as simple as looking around you! Nature, everyday objects, and even other artists’ works can spark ideas. Consider setting up a still life, exploring your local environment, or browsing online platforms like Pinterest or Instagram for creative prompts. The key is to keep experimenting and have fun with your art!


