
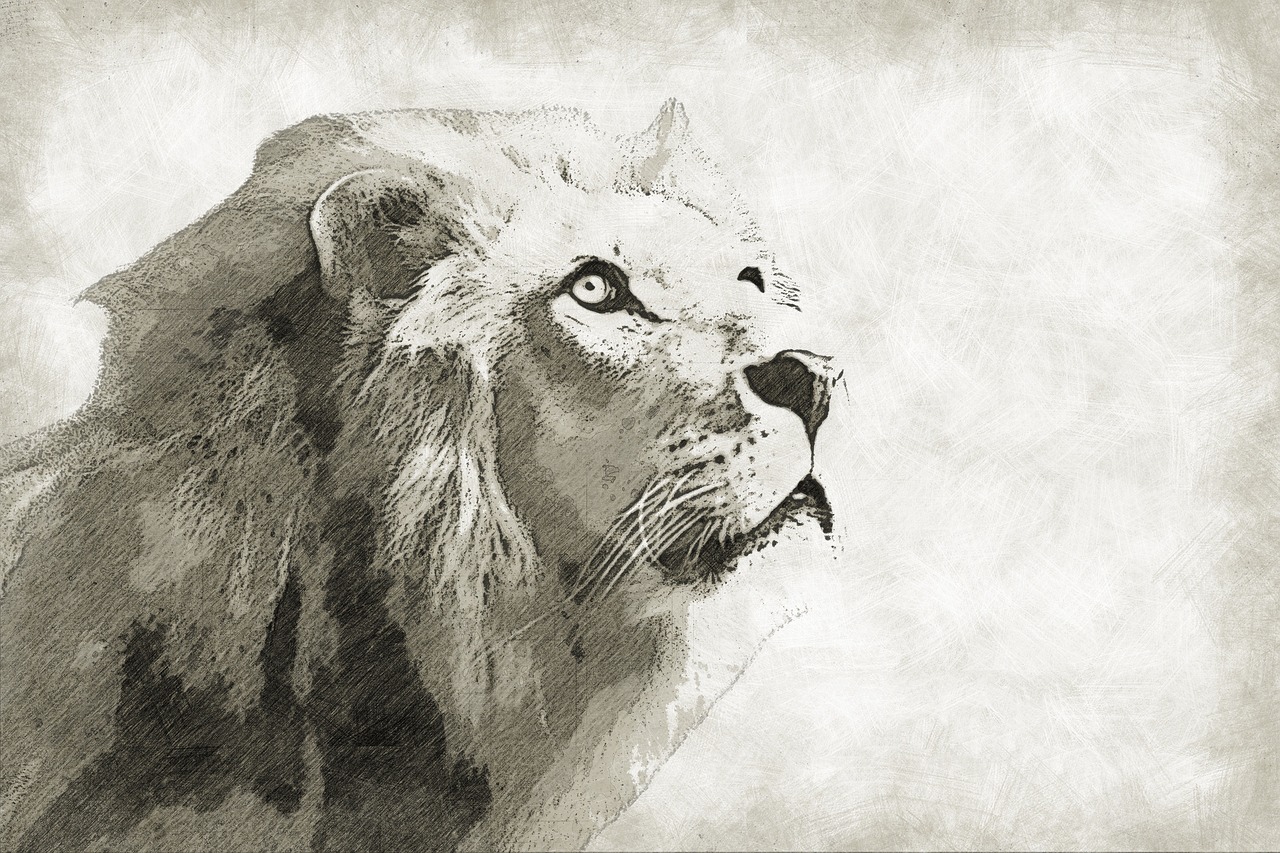
Drawing Portraits with Graphite: Tips and Techniques
Creating stunning graphite portraits is an art form that combines skill, patience, and a keen eye for detail. Whether you're an aspiring artist or someone looking to refine your skills, understanding the nuances of graphite portrait drawing can elevate your work from ordinary to extraordinary. In this article, we will explore essential tips and techniques that cover everything from basic sketching methods to advanced shading techniques that enhance realism and depth. Are you ready to embark on this artistic journey? Let’s dive into the world of graphite!
Mastering proportions is crucial for accurate portrait drawing. Think of proportions as the foundation of your artwork; if the base is shaky, the entire structure may crumble. In this section, we’ll discuss techniques for measuring and establishing correct facial dimensions. One popular method is the use of the grid technique, where you divide your reference image into smaller sections. This allows you to focus on drawing one part at a time, ensuring that the features align correctly. Another useful technique is the plumb line method, where you use vertical and horizontal lines to gauge the angles and positions of facial features. By practicing these methods, you’ll find that your portraits become more lifelike and accurate.
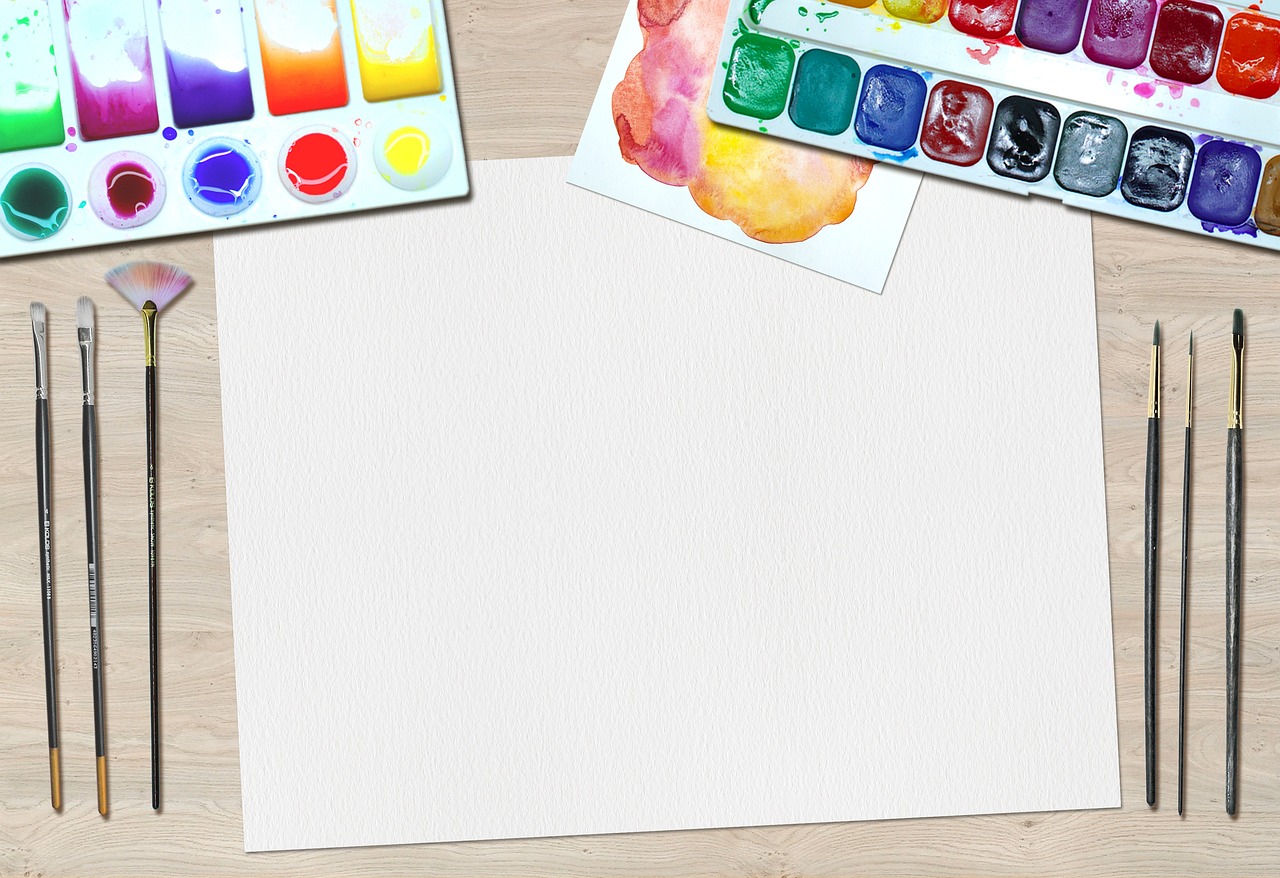
The choice of materials can significantly impact your drawing. Selecting the right tools is like a chef choosing the finest ingredients for a gourmet dish. Here, we delve into the various types of graphite pencils, papers, and erasers to help you select the best tools for your portraits. High-quality materials can make a world of difference in the texture and depth of your artwork. For instance, using a smooth, heavyweight paper can prevent smudging and allow for cleaner lines.
Different pencil grades yield varying darkness and texture. The grading system ranges from H (hard) to B (soft), with F (fine point) in between. Understanding how to use each grade effectively for different aspects of your portrait can enhance your artistic expression. For example, H pencils are excellent for fine lines and details, while B pencils are perfect for shading and creating depth. By experimenting with different grades, you can discover how each contributes to your unique style.
Understanding the differences between soft and hard pencils can enhance your shading techniques. Soft pencils (B grades) produce darker marks and are ideal for shading, while hard pencils (H grades) create lighter, finer lines. This distinction is essential when you aim to achieve a balance between detail and depth in your portraits. For instance, using a soft pencil for the shadows on a face can create a more realistic effect, while a hard pencil can be used for the intricate details of the eyes.
The texture of your paper affects the final outcome. Different papers can absorb graphite differently, impacting the overall look of your portrait. Here’s a quick overview of common paper types:
| Paper Type | Texture | Best For |
|---|---|---|
| Smooth | Flat | Fine details and clean lines |
| Textured | Rough | Shading and blending |
| Heavyweight | Thick | Preventing bleed-through |
Choosing the right paper can significantly enhance your drawing experience and the quality of your final piece.
Effective sketching is the foundation of any portrait. Techniques such as gesture drawing and contour sketching help in developing your initial layout. Gesture drawing captures the essence of the subject's pose, while contour sketching focuses on the outlines. Both techniques are invaluable for laying down the groundwork of your portrait. Remember, the initial sketch doesn’t have to be perfect; it’s all about getting the proportions and placements right before diving into the details.
Shading adds dimension to your portraits. It’s like adding layers to a cake; each layer contributes to the overall flavor and texture. In this section, we explore various shading techniques, including hatching, cross-hatching, and blending. Hatching involves drawing parallel lines to create shadows, while cross-hatching uses intersecting lines for deeper shadows. Blending, on the other hand, smooths out the transitions between light and dark, creating a more realistic representation of skin tones and textures.
Blending is key to achieving smooth transitions in shading. Various tools such as blending stumps, tissues, and even your fingers can be used to blend graphite effectively. Each method offers a different texture and level of control, so it’s worth experimenting to find what works best for you. The goal is to create a seamless transition that mimics the natural softness of skin.
Highlights and shadows are essential for depth. They are like the light and dark in a photograph, bringing your portrait to life. When incorporating these elements, consider your light source; understanding where the light hits the face can dramatically change your drawing. Use an eraser to create highlights and darker pencils for shadows, ensuring that the interplay of light and dark enhances the three-dimensionality of your subject.
Achieving a likeness in portrait drawing can be challenging, but with practice, it becomes easier. One practical tip is to focus on the unique features of your subject; everyone has distinct characteristics that make them who they are. By honing in on these features, you can create a more accurate representation. Additionally, consider the expression of your subject; capturing a fleeting smile or a thoughtful gaze can add life to your portrait.
Reference photos are invaluable for accuracy. They serve as a guide, helping you understand the nuances of your subject’s features and expressions. When choosing reference images, select ones with good lighting and clear details. This will make it easier to replicate the likeness in your drawing.
Focusing on individual facial features is essential for improvement. Here, we provide exercises and techniques to practice drawing eyes, noses, mouths, and ears. For example, spend time sketching eyes in different expressions to understand their structure and how they convey emotion. This practice will enhance your overall portrait skills and allow you to capture the essence of your subject more effectively.
The final touches can elevate your portrait. Refining details, adding finishing touches, and preserving your artwork are crucial steps in the drawing process. Consider using a fixative spray to protect your finished piece from smudging and fading over time. Remember, the journey doesn’t end once you put down your pencil; taking care of your artwork ensures that it remains as stunning as the day you created it.
- What is the best paper for graphite portraits? Smooth, heavyweight paper is generally recommended for detailed work, while textured paper can be used for shading.
- How do I achieve realistic skin tones? Use a combination of hatching, cross-hatching, and blending techniques to create depth and dimension.
- Can I use colored pencils for portrait drawing? Absolutely! Colored pencils can add an extra layer of vibrancy to your portraits.

Understanding Proportions
Mastering proportions is crucial for accurate portrait drawing. Think of proportions as the framework of a house; if the structure is off, everything else will be too. When you're sketching a portrait, getting the facial dimensions right can make the difference between a lifelike representation and a caricature. To help you achieve this, there are several techniques you can employ. One of the most effective methods is the grid technique. By overlaying a grid on your reference photo and your drawing paper, you can accurately measure and replicate the relationships between different facial features.
Another useful approach is the head measurement method. This technique involves using the head as a unit of measurement. For example, the average adult head can be divided into sections, each representing specific facial features. Typically, you can break the head down into eight equal parts, where:
| Section | Measurement |
|---|---|
| Top of the head to the eyebrows | 1 part |
| Eyebrows to the bottom of the nose | 2 parts |
| Bottom of the nose to the chin | 1 part |
| Width of the face | 2 parts |
By understanding and applying these proportions, you can create a more realistic likeness of your subject. However, it's important to remember that while these guidelines are helpful, every individual is unique. Factors such as age, ethnicity, and personal features can influence proportions. Therefore, always be ready to adapt your measurements based on the specific characteristics of the person you are drawing.
Additionally, practicing with live models or even friends can provide invaluable experience. Observing how proportions change with different angles and lighting conditions will enhance your ability to capture likenesses more accurately. Remember, practice makes perfect, and the more you draw, the better you will become at understanding and applying proportions in your portraits.
In summary, mastering proportions is not just about following a set of rules; it’s about developing a keen eye for detail and an understanding of the human face. So grab your pencil, and let’s get started on this exciting journey of portrait drawing!

Choosing the Right Materials
When it comes to drawing stunning graphite portraits, the materials you choose can make a world of difference. Imagine trying to bake a cake with subpar ingredients; the result would be far from delicious. Similarly, using the right tools can elevate your artwork from average to extraordinary. First and foremost, let’s talk about graphite pencils. They come in various grades, each serving a unique purpose. Understanding these grades will help you select the right pencil for the job, ensuring that your portraits have the depth and detail they deserve.
Next up is the paper. Not all paper is created equal, and the texture can significantly affect how your graphite interacts with the surface. For instance, a smooth paper allows for fine details, while a textured paper can add a richer quality to your strokes. You might want to experiment with different types to find what feels right for your style. Below is a quick overview of common paper types:
| Paper Type | Texture | Best For |
|---|---|---|
| Smooth Bristol | Very smooth | Fine details and precise lines |
| Cold Press Watercolor | Textured | Rich shading and texture |
| Drawing Paper | Moderate texture | General sketching and practice |
Now, let’s not forget about erasers. Yes, they are often overlooked, but a good quality eraser can be your best friend in portrait drawing. Whether you need to lighten a shadow or correct a mistake, the right eraser can help you achieve the precision you’re aiming for. There are two main types to consider:
- Kneaded Erasers: Great for lifting graphite without damaging the paper.
- Vinyl Erasers: More aggressive and perfect for sharper corrections.
In conclusion, choosing the right materials is not just about picking up a pencil and some paper. It’s about understanding how each tool can contribute to your artistic vision. Think of it as building a toolkit for your creative journey; each item has its role and can help you unlock new levels of artistry. So, take the time to select materials that resonate with your style, and watch your graphite portraits come to life!
Pencil Grades Explained
When it comes to drawing portraits with graphite, understanding pencil grades is absolutely essential. The grading system for pencils ranges from H (hard) to B (black), with F (fine point) in between. Each grade offers different levels of hardness and darkness, which can significantly affect the outcome of your artwork. For example, a 2H pencil is quite hard and produces light lines, making it perfect for initial sketches or fine details, while a 4B pencil is much softer, yielding darker lines that are excellent for shading and depth.
To give you a clearer picture, here's a quick breakdown of the pencil grading system:
| Pencil Grade | Characteristics | Best Uses |
|---|---|---|
| H (Hard) | Produces lighter marks, less graphite. | Initial sketches, fine details. |
| F (Fine Point) | Somewhere between H and B, versatile. | General use, outlines. |
| B (Black) | Creates darker, softer lines. | Shading, depth, and texture. |
When selecting pencils for your portrait work, consider the softness and hardness of the lead. Softer pencils (B grades) are fantastic for achieving rich, dark shadows, while harder pencils (H grades) are ideal for precision and lighter lines. This balance is crucial in portrait drawing, where you want to capture the nuances of the subject’s features.
Moreover, it's important to keep in mind that the way you apply pressure while drawing also influences the darkness of the line. A light touch with a soft pencil can create beautiful gradients, while a firmer grip can produce bold, defined strokes. Experimenting with different grades will help you discover which combinations work best for your style and technique.
In conclusion, mastering the use of pencil grades can elevate your portrait drawing skills significantly. Whether you prefer the delicate lines of H pencils or the deep shadows of B pencils, understanding their characteristics will allow you to create more dynamic and lifelike portraits. So grab your pencils and start experimenting; the world of graphite is waiting for your artistic touch!
- What is the best pencil for beginners? - For beginners, a set that includes a range of H and B pencils is ideal. This allows you to experiment with different grades.
- How do I choose the right paper for graphite? - Look for paper that has a bit of texture, as this will help hold the graphite better and allow for smoother shading.
- Can I use colored pencils for portrait drawing? - Yes, colored pencils can be used to add color to your portraits, but it's essential to understand the blending techniques that come with them.

Soft vs. Hard Pencils
When it comes to portrait drawing, understanding the difference between soft and hard pencils is crucial for achieving the desired effects in your artwork. Each type of pencil serves a unique purpose and can dramatically influence the outcome of your portraits. Soft pencils, typically graded with an "B" (for example, 2B, 4B, 6B), are known for their ability to produce rich, dark lines and smooth shading. This makes them ideal for creating deep shadows and adding texture to skin tones, giving your portraits a lifelike quality.
On the other hand, hard pencils, graded with an "H" (such as 2H, 4H, 6H), are perfect for fine details and lighter lines. They produce a lighter mark on the paper, which is beneficial for sketching outlines or adding intricate details to facial features without overwhelming the overall composition. The choice between these two types of pencils often depends on the stage of your drawing process and the specific effects you wish to achieve.
To help you understand when to use each type, consider the following recommendations:
- Soft Pencils: Use these for shading, creating depth, and adding darker areas in your portrait. They excel in blending and can create smooth transitions between tones.
- Hard Pencils: Ideal for initial sketches and detailed work, hard pencils allow for precision and control, making them perfect for outlining and refining features.
In practice, many artists find it beneficial to use a combination of both soft and hard pencils throughout their drawing process. This approach not only enhances the depth and dimension of the portrait but also allows for greater flexibility in expressing the unique characteristics of the subject. Experimenting with different grades will help you discover your personal preferences and develop a style that best suits your artistic vision.
Ultimately, the key to mastering portrait drawing lies in understanding how to use these tools effectively. Whether you lean towards the boldness of soft pencils or the precision of hard ones, the most important thing is to practice regularly and pay attention to how each pencil grade interacts with your chosen paper. This knowledge will empower you to create stunning, lifelike portraits that capture the essence of your subjects.
Q: What pencil grade is best for beginners?
A: Beginners often find that a range of pencils, including HB, 2B, and 4B, provides a good balance for sketching and shading. This allows for versatility as you practice.
Q: How do I choose the right paper for my pencils?
A: The right paper depends on the pencil grade you are using. For soft pencils, a textured paper can help with blending, while smoother papers work well with hard pencils for detailed work.
Q: Can I mix soft and hard pencils in one drawing?
A: Absolutely! Many artists use both types of pencils to achieve a more dynamic and dimensional look in their portraits.

Paper Types and Textures
When it comes to creating stunning graphite portraits, the choice of paper is just as important as the pencils you use. The texture and weight of the paper can significantly influence the final outcome of your artwork. Different types of paper can affect the way graphite adheres, the ease of blending, and the overall feel of your drawing. So, let's dive into the various paper types and their unique characteristics.
Firstly, you have smooth paper, which is ideal for detailed work. This type of paper allows for precise lines and is perfect for achieving fine details in your portraits. Artists often use smooth paper when they want to create a polished, clean look. However, one downside is that it may not hold as much graphite as textured paper, which can limit the depth of shading.
On the other hand, textured paper offers a more tactile surface that can create interesting effects in your drawings. The bumps and valleys of textured paper can hold more graphite, allowing for richer shading and depth. This type of paper is great for creating a more dynamic and expressive portrait, but it may require more skill to control the medium effectively.
Another popular option is cold-pressed paper, which has a moderate texture. This paper type strikes a balance between smooth and textured surfaces, making it versatile for various techniques. It allows for some detail work while also accommodating blending and shading, making it a favorite among many artists.
When selecting paper, consider the weight as well. Heavier papers (typically 200 gsm or higher) can withstand multiple layers of graphite and erasing without warping. In contrast, lighter papers may buckle or tear under pressure, which can be a frustrating experience during the drawing process.
To summarize, here’s a quick comparison of the different types of paper:
| Paper Type | Texture | Best For |
|---|---|---|
| Smooth Paper | Very smooth | Detailed work and fine lines |
| Textured Paper | Rough | Dynamic shading and expressive portraits |
| Cold-Pressed Paper | Moderate texture | Versatile techniques and blending |
Ultimately, the best paper for your graphite portraits will depend on your personal style and the effects you wish to achieve. Don't be afraid to experiment with different types and textures until you find the perfect match for your artistic vision. Remember, the right paper can elevate your artwork from good to truly stunning.
- What type of paper is best for beginners? Smooth paper is often recommended for beginners as it allows for easier control and cleaner lines.
- Can I use regular printer paper for graphite portraits? While you can use printer paper, it's not ideal for detailed work as it may not hold the graphite well and can tear easily.
- How do I choose the right weight of paper? For portrait drawing, a weight of 200 gsm or higher is recommended to prevent buckling and tearing.

Essential Sketching Techniques
When it comes to drawing portraits, sketching techniques serve as the backbone of your artwork. Just like a house needs a solid foundation, your portrait needs a well-structured sketch to support all the details that follow. One of the most effective methods to kick off your portrait is through gesture drawing. This technique involves quickly capturing the essence and movement of your subject, allowing you to focus on the overall form rather than getting bogged down in details. Imagine it as capturing the spirit of a dance; you want to express the flow and rhythm of the pose before honing in on specifics.
Another essential technique is contour sketching. This method emphasizes the outlines of your subject, helping you to define shapes and relationships between different features. To practice contour drawing, try to draw the outline of the face without lifting your pencil off the paper. This continuous line approach not only enhances your observational skills but also encourages you to see the subject as a whole instead of a collection of parts. Think of it like tracing the path of a river; the flow is continuous, and every twist and turn is important.
Moreover, it's crucial to keep your pencil strokes light during the initial stages of sketching. This allows for easy corrections and adjustments as you refine your work. If you press too hard, you may find it difficult to erase mistakes later on. As you progress, you can gradually increase the pressure to add more depth and detail. Remember, sketching is a process of exploration; don't be afraid to make mistakes along the way!
Another technique worth mentioning is the use of blocking in. This involves sketching basic shapes to represent different parts of the face—like circles for the eyes, ovals for the cheeks, and rectangles for the jawline. By breaking down the face into simple geometric forms, you can establish proportions and placements more easily. Once you have your basic shapes, you can start refining them into more accurate representations. It’s like assembling a puzzle; you need to find where each piece fits before you can see the complete picture.
Lastly, consider incorporating negative space into your sketching practice. This technique involves focusing on the space around your subject rather than the subject itself. By observing the shapes formed by the empty spaces, you can gain a better understanding of the proportions and relationships between different elements of the face. It’s akin to looking at a shadow; sometimes, the absence of light can reveal more than the light itself.
In summary, mastering these essential sketching techniques will not only improve your portrait drawing skills but also enhance your overall artistic expression. Remember to experiment with different methods, embrace your unique style, and most importantly, enjoy the process of creating!
- What is the best way to start a portrait sketch?
Begin with gesture drawing to capture the overall movement and form of your subject. - How can I improve my proportions in portrait drawing?
Practice blocking in basic shapes and use measuring techniques to ensure accuracy. - Should I use hard or soft pencils for sketching?
Soft pencils are great for shading, while hard pencils are ideal for fine lines. Start with a medium pencil for your initial sketch. - How important is it to use reference photos?
Reference photos are invaluable for capturing likeness and understanding details, so utilize them whenever possible.

Shading Techniques for Depth
Shading is where the magic happens in portrait drawing. It’s the secret sauce that transforms a flat sketch into a three-dimensional masterpiece. When you think about it, shading is like adding the final touches to a cake; it’s what makes everything come together beautifully. In this section, we will dive deep into various shading techniques that can help you create realistic skin tones and textures, giving your portraits the depth they need to truly stand out.
One of the most fundamental techniques is hatching. This involves drawing a series of parallel lines to create tonal variation. The closer the lines are to each other, the darker the area will appear. It’s like building a fence; the more slats you add, the less light gets through. On the other hand, cross-hatching takes it a step further by layering lines in different directions. This technique can add even more depth and texture, almost like weaving a tapestry. The interplay of these lines can create shadows that mimic the natural contours of the face.
Another essential technique is blending. Blending smooths out the harsh lines created by hatching and cross-hatching, making transitions between light and dark areas more seamless. You can use tools like blending stumps, tissues, or even your fingers to achieve soft gradients that mimic the softness of skin. Just remember, blending is like mixing paint; too much can muddy your colors, so use it judiciously to maintain the integrity of your work.
To effectively create highlights and shadows, understanding the light source is crucial. Imagine the sun shining on your subject; it casts shadows and creates highlights that define the shape of their features. When drawing, visualize where the light hits and where it falls away. This will guide your shading decisions and help you create a realistic representation. For instance, the bridge of the nose might catch the light, while the underside of the chin might be in shadow. By observing the way light interacts with the face, you can add a level of realism that draws the viewer in.
Here’s a quick overview of the key shading techniques you can incorporate into your portrait drawing:
- Hatching: Use parallel lines for basic shading.
- Cross-Hatching: Layer lines in different directions for added depth.
- Blending: Soften transitions between light and dark areas.
- Highlighting: Identify where light hits to create realistic features.
- Shadowing: Determine where shadows fall to add dimension.
In conclusion, mastering shading techniques is essential for creating portraits that resonate with viewers. It's not just about filling in areas with dark and light; it's about understanding the interplay of light and shadow and using that knowledge to breathe life into your drawings. So grab your pencils and start experimenting with these techniques—your portraits will thank you for it!
Q: What is the best pencil grade for shading?
A: Generally, softer pencils (like 2B to 8B) are better for shading as they produce darker marks, while harder pencils (like H or 2H) are great for fine lines and details.
Q: How do I know where to place shadows in my portrait?
A: Observe your subject and consider the light source. Shadows will fall opposite to the light and will vary based on the contours of the face.
Q: Can I use my fingers to blend graphite?
A: Yes, many artists use their fingers for blending, but be cautious as oils from your skin can affect the graphite.
Q: What paper is best for graphite portraits?
A: A medium-textured paper works well for graphite, allowing for both smooth shading and detailed lines.

Blending Tools and Methods
Blending is a crucial aspect of creating realistic graphite portraits, as it allows for smooth transitions between light and dark areas, mimicking the natural texture of skin. To achieve this, you'll need to familiarize yourself with various blending tools and techniques that can elevate your artwork. One of the most common tools is the blending stump, which is a tightly rolled paper tool that helps you blend graphite without leaving unwanted marks. Another popular option is the tortillon, a similar tool but with a finer tip, perfect for detailed areas. You might also consider using your fingers for blending, but be cautious as the oils from your skin can affect the graphite's appearance.
When it comes to methods of blending, there are several techniques you can employ to achieve different effects. For instance, the circular motion technique involves using a blending stump or your finger to make small circles over the graphite, which helps to create a soft, smooth transition. Alternatively, the side-to-side technique can be used for broader areas, where you gently move the blending tool back and forth to merge the shades. Each method has its own unique effect, so it's worth experimenting to see which one works best for your style.
Additionally, consider the type of graphite you are using. Softer pencils (like 4B or 6B) tend to blend more easily and create darker, richer shadows, while harder pencils (like H or 2H) provide lighter, more precise lines that may require different blending techniques. Understanding the characteristics of your materials will help you make informed decisions about how to blend effectively.
Lastly, don’t forget about the importance of paper texture. The texture of the paper can significantly impact how well your blending techniques work. For example, smoother papers allow for finer details and smoother blends, while textured papers can create interesting effects but may require more effort to blend effectively. Experimenting with different paper types will help you discover what works best for your blending style.
- What is the best blending tool for beginners? Blending stumps are often recommended for beginners as they are easy to use and provide good control.
- Can I use my fingers to blend graphite? Yes, but be careful as the oils from your fingers can affect the graphite's finish.
- How do I know which blending method to use? It depends on the area you are working on; practice different techniques to see which gives you the desired effect.
- Does the type of paper matter for blending? Absolutely! Smoother paper allows for easier blending, while textured paper can create different effects.

Creating Highlights and Shadows
When it comes to drawing portraits, highlights and shadows play a crucial role in adding depth and dimension to your artwork. Think of these elements as the seasoning in a dish; without them, your portrait might taste flat and lifeless. To create a realistic representation, you need to understand how light interacts with the features of the face. The placement of highlights and shadows can dramatically change the perception of form, making your subject appear more three-dimensional.
First, let's talk about highlights. These are the areas where light hits the surface directly, creating a bright spot. In portrait drawing, highlights are often found on the forehead, the bridge of the nose, the cheekbones, and the chin. To effectively incorporate highlights into your portrait, you can use a kneaded eraser to gently lift graphite from these areas after you've applied your initial shading. This technique allows you to create a soft, glowing effect that mimics the way light naturally reflects off skin.
On the other hand, shadows are equally important. They add depth and help define the contours of the face. Shadows are typically found in areas that are further away from the light source, such as under the chin, around the nose, and beneath the eyebrows. To create convincing shadows, you can use various shading techniques, such as hatching and cross-hatching. These methods involve layering lines in different directions to build up darker areas gradually. The key is to observe your subject closely and replicate the way shadows fall based on the light source's position.
To give you a clearer understanding, here's a simple table illustrating the common areas for highlights and shadows on a face:
| Feature | Highlight Area | Shadow Area |
|---|---|---|
| Forehead | Center of the forehead | Above the eyebrows |
| Nose | Bridge of the nose | Sides of the nose |
| Cheekbones | Top of the cheekbones | Underneath the cheekbones |
| Chin | Tip of the chin | Underneath the chin |
When creating highlights and shadows, always remember to consider the light source. Is it coming from above, the side, or below? This will affect where you place your highlights and shadows. Additionally, practice is essential. Try sketching different faces under various lighting conditions to see how shadows and highlights change with the light's angle. The more you practice, the better you'll become at capturing the essence of your subject.
In conclusion, mastering the art of highlights and shadows is pivotal in creating lifelike portraits. By carefully observing your subject and applying these techniques, you can add a sense of realism that draws viewers in and makes your artwork truly stand out.
- What is the best way to create highlights in graphite portraits?
Using a kneaded eraser to lift graphite from areas where light hits directly is an effective technique. - How can I enhance shadows in my portraits?
Utilizing hatching and cross-hatching techniques can help you build up shadows gradually for a more realistic effect. - What should I consider when determining where to place highlights and shadows?
Always take into account the light source's position, as it will dictate how and where light interacts with your subject.
Tips for Capturing Likeness
Achieving a likeness in portrait drawing can feel like trying to catch smoke with your bare hands—challenging but entirely possible with the right techniques! The key to capturing the unique features and expressions of your subject lies in a few practical tips and tricks. First and foremost, it's essential to take your time and observe your subject closely. Look beyond the surface and pay attention to the subtle nuances that make them who they are. This means studying the shape of their face, the angles of their features, and even the way light interacts with their skin.
One effective method is to utilize reference photos. A good reference photo can serve as a roadmap for your drawing, guiding you through the intricate details of your subject's likeness. When selecting reference images, choose ones that highlight the features you want to capture, such as expressions, lighting, and angles. A well-lit photo can reveal the depth and texture of the skin, making it easier for you to translate those elements onto your paper.
Moreover, practicing individual facial features is crucial for honing your skills. Focus on drawing eyes, noses, mouths, and ears separately before incorporating them into your portraits. This targeted practice allows you to understand the unique characteristics of each feature, making it easier to replicate them accurately in your drawings. For example, consider the following tips:
- Eyes: Pay attention to the shape and size, as well as the reflections in the iris.
- Noses: Observe the bridge and nostrils; they can vary significantly between individuals.
- Mouths: Notice how the lips curve and the subtle shadows they create.
- Ears: Don’t overlook their shape and placement; they can dramatically affect likeness.
As you practice, remember that capturing likeness is not just about replicating what you see; it’s about conveying the essence of your subject. This means focusing on their expression and the emotion behind it. Try to understand what makes them unique—how their smile lights up their face or how their eyebrows furrow when they concentrate. Incorporating these elements into your portrait can elevate your work from a simple representation to a true likeness.
Lastly, don’t shy away from making adjustments as you go along. Sometimes, a small tweak in the angle of the jaw or the placement of an eye can make a world of difference. Keep stepping back to evaluate your work from a distance; this perspective can help you see aspects that might need refining. Remember, capturing likeness is a journey, and every stroke brings you closer to your destination!
Q: How can I improve my ability to capture likeness in my portraits?
A: Regular practice is key! Focus on drawing individual facial features, use quality reference photos, and observe your subject closely to understand their unique characteristics.
Q: Are there specific tools that can help me in capturing likeness?
A: Yes! Using a range of graphite pencils can enhance your shading and detail work. Additionally, blending tools can help create smoother transitions in your drawings.
Q: What should I do if I feel my portrait doesn't look like the subject?
A: Don’t hesitate to make adjustments. Step back and evaluate your work; sometimes, small changes can significantly enhance likeness. Also, consider seeking feedback from others.

Utilizing Reference Photos
When it comes to drawing portraits, the importance of utilizing reference photos cannot be overstated. Think of reference photos as your personal guide, leading you through the intricate landscape of facial features and expressions. They provide a roadmap that helps you navigate the often tricky terrain of proportions, shadows, and highlights. Without a solid reference, you might find yourself lost in the details, struggling to capture the essence of your subject.
Choosing the right reference photo is crucial. Ideally, you want to select images that showcase the subject in good lighting, emphasizing their unique characteristics. Look for photos that highlight different angles, as this will give you a more comprehensive understanding of how the features relate to one another. For instance, a photo taken in natural light can reveal subtle nuances in skin tone and texture that artificial lighting might obscure.
Once you've selected your reference, take a moment to analyze it. Break down the photo into manageable parts. Pay attention to the following:
- Facial Proportions: Measure the distances between key features like the eyes, nose, and mouth. This can help you maintain accuracy in your drawing.
- Lighting and Shadows: Observe how light interacts with the face. Notice where the highlights fall and where the shadows deepen. This will guide your shading techniques.
- Expressions: Capturing a specific expression can be challenging. Study the nuances in the subject's face to replicate those emotions in your portrait.
Moreover, don't hesitate to take multiple reference photos if needed. Different angles can reveal various aspects of the face that might be missed in a single shot. For example, a three-quarter view can provide depth and dimension that a straight-on view might lack. You might even consider creating a collage of reference images to serve as a comprehensive guide throughout your drawing process.
In addition to traditional photographs, consider using digital tools to manipulate your reference images. Programs like Photoshop allow you to adjust brightness, contrast, and even crop the image to focus on specific details. This can be particularly helpful when dealing with complex textures or intricate features. However, remember that while these tools can enhance your reference, they should not replace your observational skills. Always strive to see the subject as it is, rather than how it appears through a filter.
Lastly, practice is key. The more you work with reference photos, the better you will become at interpreting them. Over time, you'll develop an intuitive understanding of how to translate what you see into your drawings. Embrace the learning process, and don't be discouraged by initial challenges. Each portrait you create is a step toward mastering the art of likeness.
Q: How do I choose the best reference photo for portrait drawing?
A: Look for photos with good lighting, clear details, and the subject's unique features. Multiple angles can also provide a more comprehensive view.
Q: Can I use digital images as reference photos?
A: Absolutely! Digital images can be manipulated for better contrast and clarity, making them excellent references for drawing.
Q: How can I improve my ability to capture likeness?
A: Consistent practice with a variety of reference photos and focusing on individual facial features will enhance your skills over time.
Practicing Facial Features
When it comes to drawing portraits, mastering facial features is a game changer. Just like a chef perfects their knife skills before tackling a gourmet dish, you too need to hone in on the individual components of the face. Each feature—eyes, noses, mouths, and ears—has its own unique quirks and characteristics that can make or break the likeness of your portrait. So, why not dive into the nitty-gritty of each part? By focusing on these features separately, you can build a solid foundation that will elevate your overall portrait skills.
Start with the eyes, often referred to as the windows to the soul. They can convey a multitude of emotions, from joy to sorrow. When practicing eyes, pay attention to their shape, size, and placement. Consider using a mirror to study your own eyes or reference photos to understand the subtle differences in various eye shapes. You might find it helpful to create a small sketchbook dedicated to eyes, where you can practice drawing them in different expressions and angles.
Next, let’s talk about the nose. The nose might seem simple, but it has a complexity that can be tricky to capture. Start by breaking it down into basic shapes: the bridge, nostrils, and tip. Use a variety of angles to understand how light and shadow play across its surface. A great exercise is to draw noses from different perspectives; this will help you grasp how it looks from various viewpoints and improve your spatial awareness.
Now, onto the mouth. The mouth is incredibly expressive and can change dramatically based on the subject's mood. Focus on the shape of the lips, the curvature, and the way they interact with the surrounding features. Try drawing a series of mouths in different positions—smiling, frowning, and even mid-speech. This will not only improve your ability to capture expressions but also help you understand the mechanics of how the mouth moves.
Finally, don’t overlook the ears. Often forgotten, ears can add essential detail to your portraits. They come in various shapes and sizes, and their placement can significantly affect the overall proportion of the face. Practice drawing ears from different angles, and pay close attention to how they sit in relation to the head and jawline. A good exercise is to sketch ears from both the front and side views to get a well-rounded understanding.
To enhance your practice, consider setting up a facial features comparison table that highlights key aspects you want to focus on for each feature. Here’s an example:
| Facial Feature | Key Characteristics | Practice Tips |
|---|---|---|
| Eyes | Shape, Size, Emotion | Use mirrors and reference photos |
| Nose | Bridge, Nostrils, Tip | Break into basic shapes, draw from various angles |
| Mouth | Shape, Curvature, Expression | Sketch different expressions, focus on movement |
| Ears | Shape, Size, Placement | Draw from multiple angles, focus on proportions |
In conclusion, practicing facial features is not just about repetition; it’s about observation and understanding. Each feature contributes to the overall likeness and expression of your portrait. By dedicating time to study and practice each one individually, you’ll find that your portraits become more lifelike and expressive. So grab your sketchbook and start experimenting—you might just surprise yourself with how much you can improve!
- How long should I practice each facial feature? It's best to practice until you feel comfortable with the feature. This could range from a few days to a few weeks, depending on your skill level.
- Can I use photos for practice? Absolutely! Reference photos are a great way to understand proportions and details.
- What materials should I use for practicing? Use a variety of pencils and papers to see what works best for you. A good quality sketchbook and a range of graphite pencils can make a big difference.

Finalizing Your Portrait
Finalizing your portrait is where the magic truly happens; it's the stage that can transform a good drawing into a breathtaking piece of art. After spending hours sketching, shading, and refining, the last few steps are crucial in making sure your portrait captures not just the likeness but also the essence of your subject. So, how do you achieve that? Let’s dive into some essential techniques that will elevate your work from ordinary to extraordinary.
First and foremost, refining details is essential. This means going back to your portrait and examining it closely. Are there areas that need more definition? Perhaps the eyes need a bit more sparkle, or the lips require a subtle highlight to make them pop. Use a sharp pencil to add intricate details like eyelashes, hair strands, or the texture of the skin. These small touches can make a world of difference in bringing your portrait to life.
Next, consider the finishing touches. This could involve adding a soft wash of graphite to the background, which can help your subject stand out. A well-chosen background can add depth and context to your portrait. You might also want to use a kneaded eraser to gently lift some graphite in specific areas, creating highlights that enhance the three-dimensionality of your work.
Once you are satisfied with the details and the overall appearance, it’s time to think about preservation. You’ve poured your heart and soul into this artwork, so you’ll want to protect it. Here are a few methods to consider:
- Fixative Spray: Using a fixative spray can help prevent smudging and preserve the integrity of your drawing. Make sure to apply it in a well-ventilated area, and follow the instructions on the can for best results.
- Framing: Consider framing your portrait under glass. This not only protects it from dust and damage but also adds a professional touch.
- Storing Properly: If you’re not ready to frame your work, store it flat in a protective sleeve or between sheets of acid-free paper to prevent deterioration.
Finally, take a step back and admire your work. It’s important to recognize the effort you’ve put into this piece. You might even want to share it with friends or fellow artists to get feedback, which can be invaluable for your growth. Remember, every artist has their unique style, and your portrait is a reflection of your journey. So, embrace it, and don’t hesitate to keep experimenting with new techniques and ideas in your future works!
Q: How do I know when my portrait is finished?
A: A portrait is typically finished when you feel that all necessary details are defined, and the likeness of the subject is captured. Trust your instincts; if you feel it's complete, it likely is!
Q: What should I do if I make a mistake?
A: Mistakes are part of the artistic process. You can use an eraser to correct minor errors, or if it’s a larger issue, consider adjusting the surrounding areas to blend with the mistake.
Q: How can I improve my portrait drawing skills?
A: Practice is key! Regularly sketching and studying different facial features will help you improve. Also, consider taking classes or watching tutorials to learn new techniques.
Frequently Asked Questions
- What are the essential materials needed for drawing portraits with graphite?
To create stunning graphite portraits, you'll need a selection of graphite pencils (ranging from hard to soft), quality drawing paper, a good eraser, and blending tools like tortillons or blending stumps. Each material plays a crucial role in achieving the desired effect in your artwork.
- How do I ensure accurate proportions in my portrait drawings?
Mastering proportions is vital for lifelike portraits. You can use techniques like the pencil measurement method or grid drawing to help maintain correct facial dimensions. Additionally, practicing with guidelines can assist in positioning features accurately.
- What shading techniques should I use to add depth to my portraits?
Shading techniques such as hatching, cross-hatching, and blending are essential for creating depth. By varying the pressure and direction of your strokes, you can achieve realistic skin tones and textures that bring your portrait to life.
- How can I effectively capture the likeness of my subject?
To capture likeness, focus on the unique features and expressions of your subject. Utilize reference photos for accuracy and practice drawing individual facial features like eyes, noses, and mouths to improve your skills. This targeted practice can significantly enhance your overall portrait work.
- What are the best practices for finalizing my portrait?
Finalizing your portrait involves refining details and adding finishing touches. Pay attention to highlights and shadows to enhance depth, and consider using a fixative to preserve your artwork. This ensures that your masterpiece remains vibrant and intact over time.


