
Mastering Perspective in Your Drawings: A Quick Guide
Are you ready to take your drawing skills to the next level? If you've ever looked at a piece of art and thought, "Wow, how did they make that look so real?" then you're in the right place! This article provides essential techniques and tips for artists to enhance their drawing skills through the effective use of perspective, making their artwork more realistic and engaging. Whether you're a beginner or looking to refine your skills, understanding perspective is crucial to creating depth and dimension in your artwork. So, grab your sketchbook, and let's dive into the fascinating world of perspective drawing!
Linear perspective is a fundamental technique that creates the illusion of depth on a flat surface. Imagine standing on a long road that seems to narrow as it stretches into the distance. That's linear perspective at work! This section explores the principles behind vanishing points and horizon lines, which form the foundation of perspective drawing. The horizon line represents the viewer's eye level, while vanishing points are where parallel lines appear to converge. By mastering these elements, you can create stunning compositions that draw your audience in and make them feel part of your scene.
Did you know there are various types of perspective that can dramatically affect the composition of your drawings? Understanding these types can unlock new dimensions in your art. The three main types of perspective are:
- One-point perspective
- Two-point perspective
- Three-point perspective
Each type serves different artistic purposes and can transform a simple drawing into a captivating piece of art. Let's explore these perspectives in detail!
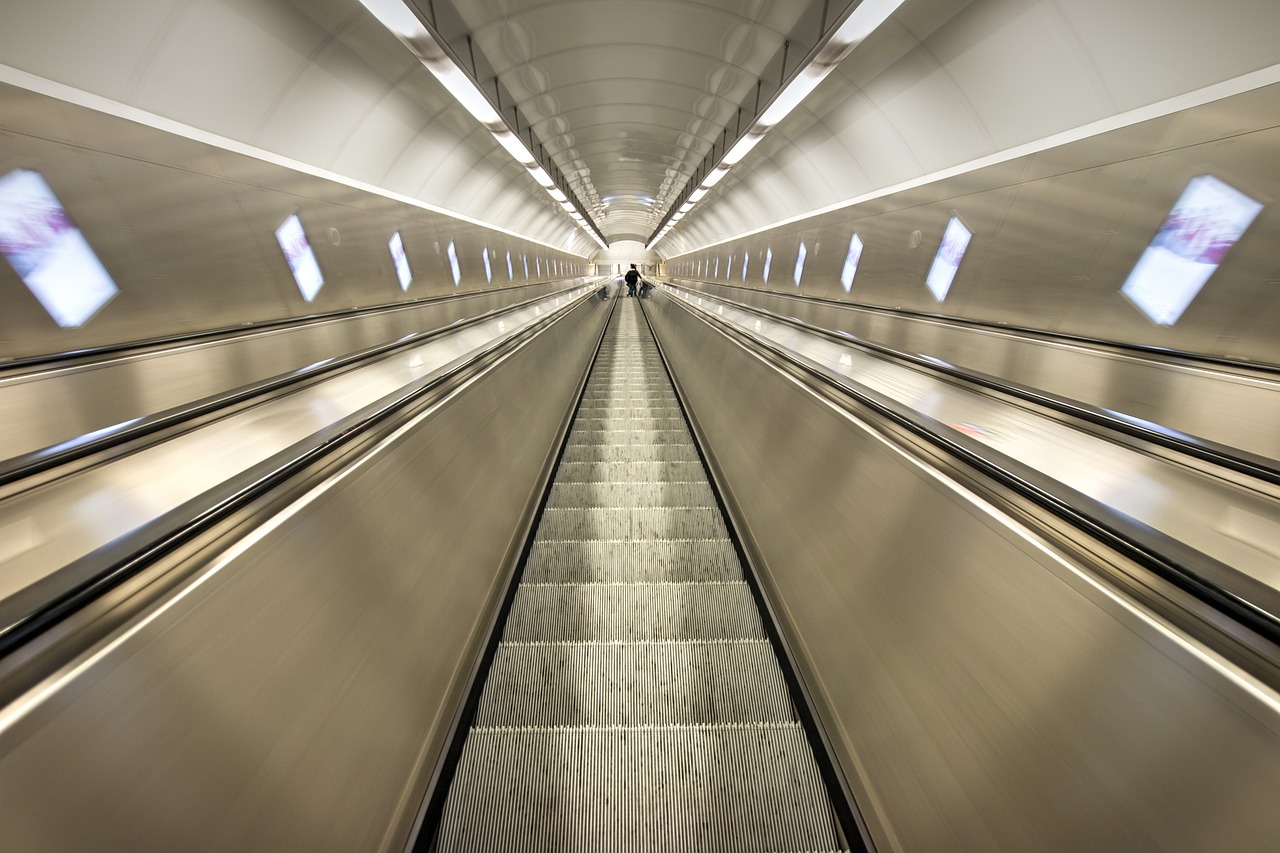
One-point perspective is the simplest form of perspective, utilizing a single vanishing point on the horizon line. This method is ideal for creating depth in scenes like roads, hallways, or railway tracks. Picture yourself standing at the end of a long corridor; everything seems to converge toward that one point. This technique effectively draws the viewer's eye toward the focal point, making your artwork more engaging.
So, where can you apply one-point perspective in your art? Here are some practical applications:
- Interior scenes: Think of a cozy room with furniture arranged along the walls. One-point perspective helps convey the room's depth.
- Simple landscapes: Use this technique to create roads or paths that lead into the distance, enhancing the viewer's experience through depth and focus.
By incorporating one-point perspective, you can elevate your drawings and create a sense of realism that captivates your audience.
Even the best artists make mistakes, and one-point perspective is no exception. Identifying and avoiding common pitfalls can significantly improve your drawings. Some frequent errors include:
- Misplacing the vanishing point: Ensure it's on the horizon line for accurate depth.
- Inconsistent line angles: Keep your lines converging toward the vanishing point to maintain perspective.
By being aware of these mistakes and applying the right techniques, you can achieve better results in your artwork!
Now, let's step it up a notch! Two-point perspective introduces two vanishing points, providing a more dynamic view of objects at an angle. This technique is essential for drawing buildings and complex structures with depth. Imagine looking at a skyscraper from a corner; the lines of the building recede toward two different points on the horizon. This creates a more realistic and engaging representation of space.
For those ready to tackle a more advanced technique, three-point perspective adds a vertical vanishing point, allowing for dramatic viewpoints, such as looking up at tall buildings or down from a height. This section delves into its complexities and artistic applications. The addition of a vertical vanishing point can create an exhilarating sense of height or depth, making your drawings truly stand out.
Mastering three-point perspective can be challenging due to its complexity. Artists often struggle with maintaining proportion and angle, which can lead to distorted images. However, don't let that discourage you! Here are some strategies for overcoming these challenges:
- Practice sketching simple shapes in three-point perspective before moving on to complex structures.
- Use reference images to understand how objects look from various angles.
With patience and practice, you'll soon find yourself creating stunning three-dimensional drawings that leave viewers in awe!
Engaging in practical exercises is vital for mastering perspective. Here are some drawing exercises designed to reinforce your understanding and application of perspective techniques:
- Draw a simple room using one-point perspective.
- Create a street scene using two-point perspective.
- Sketch a tall building using three-point perspective.
These exercises will help solidify your understanding of perspective and allow you to experiment with different techniques in your artwork.
Q: How can I improve my perspective drawing skills?
A: Practice is key! Regularly sketching from real life and using reference images can significantly enhance your skills. Consider taking online courses or watching tutorials to learn new techniques.
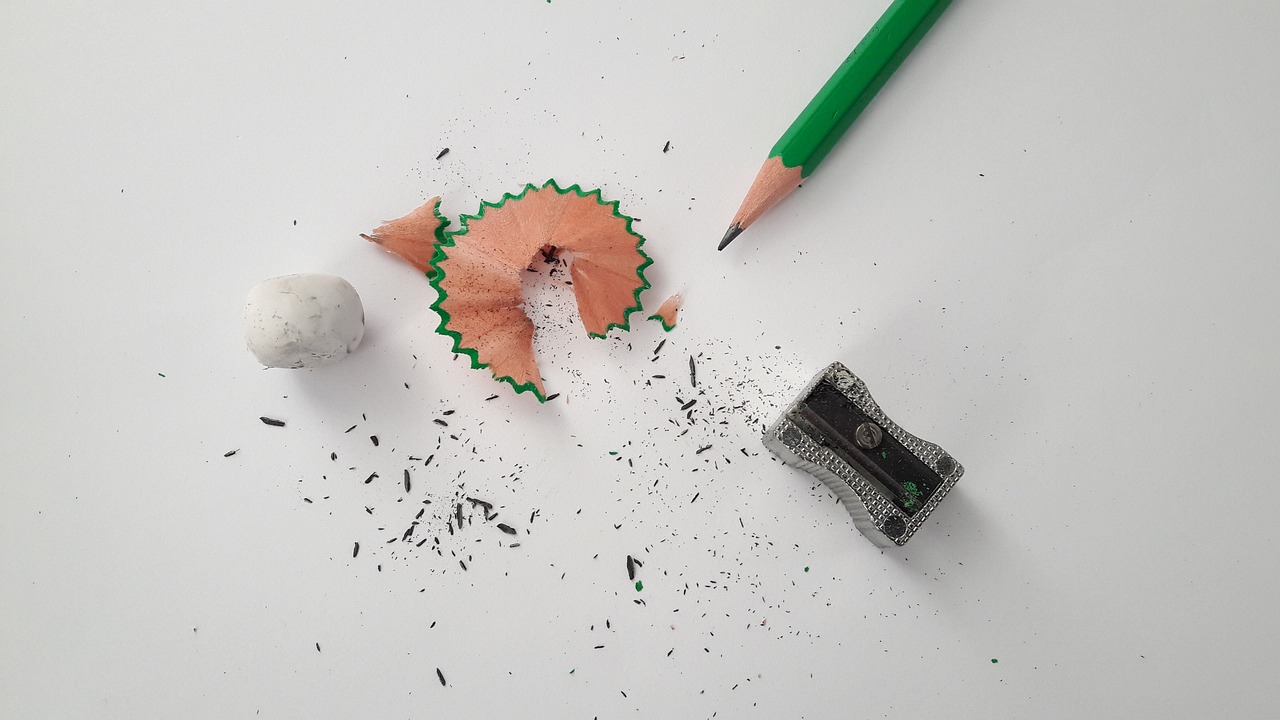
Q: What materials do I need to start practicing perspective?
A: You can start with basic drawing supplies like pencils, erasers, and sketch paper. As you progress, you might want to explore using rulers and straight edges for more precise lines.
Q: Is perspective drawing only for realistic art?
A: Not at all! While perspective is often used in realistic art to create depth, it can also be applied in abstract and stylized drawings to create interesting compositions.

Understanding Linear Perspective
Linear perspective is a fascinating technique that transforms a flat canvas into a mesmerizing three-dimensional space. Imagine standing at the end of a long road, where the sides seem to converge into a single point on the horizon. That’s the magic of linear perspective! At its core, this method relies on two fundamental elements: vanishing points and horizon lines. The horizon line represents the viewer's eye level, while the vanishing points are where parallel lines appear to meet as they recede into the distance. This creates an illusion of depth, making your drawings not just images, but windows into another world.
To truly grasp linear perspective, it’s essential to understand how these elements interact. The horizon line is like the stage on which your drawing plays out. Everything above it is perceived as being above eye level, and everything below seems to be below eye level. The vanishing points, on the other hand, are the focal points that guide the viewer's gaze. When you draw lines that lead to these points, they create a sense of direction and movement within your artwork. Think of it like a road trip: the road (your lines) leads you to a destination (the vanishing point), pulling the viewer into the scene.
Here’s a simple breakdown of how to effectively use linear perspective in your drawings:
- Identify the Horizon Line: Begin by determining where your viewer's eye level is. This will be your horizon line.
- Place Your Vanishing Points: Depending on the perspective you want to create, position one or more vanishing points along the horizon line.
- Draw Guiding Lines: Use straight lines from your objects to the vanishing points. This will help in maintaining the correct proportions and angles.
By mastering these principles, you can create stunning artworks that draw viewers into your world. However, it’s crucial to practice regularly. The more you experiment with different scenes and perspectives, the more intuitive it will become. Remember, even the most renowned artists had to start somewhere! They practiced and refined their skills over time, learning from their mistakes and successes alike.
In conclusion, understanding linear perspective is not just about following rules; it’s about seeing the world in a new light. It’s about translating what you see into a form that others can appreciate. So grab your sketchbook, find a view that excites you, and start practicing! The world is full of angles waiting to be captured, and with linear perspective, you hold the key to unlocking their beauty.
Types of Perspective
When it comes to drawing, understanding the different is crucial for creating captivating and realistic artwork. Each type of perspective offers unique ways to represent depth and space, allowing artists to convey emotions and narratives through their work. Let's dive into the three primary types of perspective: one-point, two-point, and three-point perspective. Each of these techniques has its own applications and can profoundly impact the composition of your drawings.
At its core, one-point perspective simplifies the world into a single vanishing point on the horizon line. This technique is particularly effective for scenes that recede into the distance, like a straight road or a hallway. Imagine standing at the end of a long corridor; everything converges toward that one point, drawing your eye in. This method is not just a tool for artists; it's a way to guide the viewer's gaze, creating a sense of depth that feels almost tangible.
On the other hand, two-point perspective introduces a second vanishing point, allowing for more dynamic compositions. This approach is ideal for depicting objects at an angle, such as buildings viewed from a corner. Think of it as looking at a cube; the edges recede toward two different points on the horizon. This perspective adds complexity and interest to your artwork, making it feel more immersive and engaging. It’s like turning a simple box into a striking architectural marvel!
Finally, we have three-point perspective, which takes things to a whole new level. This method incorporates a vertical vanishing point in addition to the two horizontal ones, providing dramatic viewpoints—like looking up at a towering skyscraper or down from a high balcony. While this perspective can be challenging to master, it opens up a world of creative possibilities. It’s akin to standing at the base of a mountain and gazing up; the sheer scale can evoke feelings of awe and wonder.
To illustrate these types of perspective further, here’s a simple comparison:
| Type of Perspective | Description | Common Applications |
|---|---|---|
| One-Point Perspective | Uses a single vanishing point on the horizon line. | Hallways, roads, railway tracks. |
| Two-Point Perspective | Involves two vanishing points, ideal for angled views. | Buildings, furniture, complex objects. |
| Three-Point Perspective | Adds a vertical vanishing point for dramatic views. | Skyscrapers, looking down from heights. |
Understanding these types of perspective not only enhances your technical skills but also allows you to express your artistic vision more effectively. The next time you pick up a pencil, consider how you can use these perspectives to transform your drawings from flat images into immersive experiences. Remember, mastering perspective is like learning to see the world through an artist's eyes—it's all about depth, dimension, and the stories you want to tell.

One-Point Perspective
One-point perspective is a fascinating technique that can transform your drawings from flat and lifeless to vibrant and engaging. Imagine standing at the end of a long hallway, where all the lines converge toward a single point on the horizon. That’s the magic of one-point perspective! It creates a sense of depth and draws the viewer's eye directly to the focal point, making it an essential tool for artists looking to add realism to their work.
This method is particularly effective in scenes where the lines of the objects are parallel to each other. Think about a straight road stretching into the distance or the interior of a room. In both cases, the walls and the floor appear to converge at a single vanishing point on the horizon line. This technique not only enhances the three-dimensionality of your artwork but also guides the viewer’s gaze, creating a natural flow that keeps them engaged.
To effectively utilize one-point perspective, it’s crucial to understand the relationship between the vanishing point and the horizon line. The horizon line represents the viewer's eye level, while the vanishing point is where all parallel lines appear to meet. This concept is foundational in perspective drawing and serves as a guideline for positioning objects within your scene.
Now, let’s explore some practical applications of one-point perspective:
- Interior Scenes: When drawing rooms, one-point perspective allows you to depict the depth of the space, making it feel more immersive.
- Simple Landscapes: A straight road or railway track can be illustrated using one-point perspective, creating a sense of journey and exploration.
- Architectural Drawings: Buildings viewed head-on can benefit from this technique, as it emphasizes their height and structure.
However, like any technique, one-point perspective comes with its own set of challenges. Many artists struggle with maintaining proportion and scale, leading to drawings that feel awkward or unrealistic. To avoid common mistakes, consider the following tips:
- Always establish your horizon line and vanishing point before starting your sketch.
- Use a ruler to ensure that your lines are straight and converge accurately at the vanishing point.
- Practice drawing simple shapes in one-point perspective to get comfortable with the technique.
By paying attention to these aspects, you can enhance your ability to create stunning one-point perspective drawings. Remember, practice makes perfect, so don’t be afraid to experiment with different scenes and compositions!

Applications of One-Point Perspective
One-point perspective is a powerful tool that can transform an ordinary drawing into a captivating visual experience. By utilizing a single vanishing point on the horizon line, artists can create a sense of depth that draws viewers into the scene. This technique is particularly effective in various applications, such as interior scenes, where the viewer feels as if they are stepping into a room. Imagine a cozy living room with a fireplace; the walls seem to recede into the background, creating an inviting atmosphere.
Another common application of one-point perspective is in landscapes, especially when depicting roads or pathways. As the road narrows toward the horizon, it gives the illusion of distance, guiding the viewer's eye along the path. This technique can evoke feelings of adventure and exploration, as if the viewer is about to embark on a journey. Think of how a long, straight road surrounded by trees can create a sense of tranquility and openness.
Moreover, one-point perspective is often employed in architectural drawings. By focusing on a single viewpoint, architects can effectively communicate the design of a building, highlighting its structure and spatial relationships. For instance, consider a drawing of a modern office space; the use of one-point perspective can emphasize the sleek lines and open spaces, making the design more appealing to potential clients.
To further illustrate the versatility of one-point perspective, here are some specific applications:
- Interior Design: Capturing the essence of a room by showcasing furniture arrangement and spatial flow.
- Urban Scenes: Creating depth in cityscapes, allowing viewers to feel the hustle and bustle of urban life.
- Product Design: Presenting products in a way that emphasizes their features and usability.
In summary, one-point perspective is not just a technique; it's a gateway to creating immersive and engaging artwork. Whether you're illustrating a serene landscape or a bustling city street, mastering this technique can elevate your drawings and captivate your audience.
Q: What is one-point perspective?
A: One-point perspective is a drawing technique that uses a single vanishing point on the horizon line to create the illusion of depth and space.
Q: How can I practice one-point perspective?
A: You can practice by drawing simple scenes, such as roads or hallways, and focusing on keeping all lines converging toward the vanishing point.
Q: What are some common mistakes to avoid in one-point perspective?
A: Common mistakes include misplacing the vanishing point, inconsistency in line angles, and neglecting to maintain proper scale of objects.
Q: Can one-point perspective be used in digital art?
A: Absolutely! One-point perspective is widely used in digital art, allowing artists to create realistic environments and compositions with ease.

Common Mistakes in One-Point Perspective
When venturing into the world of one-point perspective, many artists, both beginners and seasoned pros, often stumble upon some common pitfalls that can derail their efforts. These mistakes can turn a potentially stunning piece of artwork into a confusing jumble that lacks depth and coherence. Understanding these missteps is crucial, as it allows you to avoid them and create more engaging and realistic drawings.
One of the **most frequent errors** is misplacing the vanishing point. The vanishing point is the anchor of your composition; it dictates how all other elements will align. If you place it too high or too low, your entire drawing can feel off-balance. Imagine trying to build a house on a shaky foundation; it just won’t stand right! Always ensure that your vanishing point is strategically located on the horizon line, where it makes the most sense for the perspective you are trying to achieve.
Another common mistake is forgetting about the **horizon line**. Just like the vanishing point, the horizon line is essential in establishing depth. Artists sometimes neglect it or place it arbitrarily, leading to a disjointed scene. Remember, the horizon line represents the viewer’s eye level. If you’re drawing a tall building, for instance, the horizon line will help you determine how the building’s height relates to other elements in your drawing.
Furthermore, many artists struggle with **scaling objects** correctly. In one-point perspective, objects closer to the viewer should appear larger than those farther away. Failing to follow this principle can result in a flat and unrealistic appearance. To practice this, try drawing a series of boxes or cubes, gradually decreasing their size as they move towards your vanishing point. This exercise will help you grasp the concept of scale and distance.
Lastly, a significant mistake arises from a lack of **consistency in angles**. When drawing lines that converge towards the vanishing point, it’s essential to maintain the same angle throughout your composition. If you start with one angle and then shift to another, your drawing will appear chaotic and unplanned. Take a moment to visualize the overall structure before committing to your lines; this can save you a lot of time and frustration in the long run.
To wrap it up, avoiding these common mistakes will dramatically enhance your one-point perspective drawings. Remember to check your vanishing point and horizon line, scale your objects appropriately, and maintain consistent angles. With practice, your understanding of perspective will deepen, and your artwork will resonate with realism and depth. Keep pushing those boundaries, and don’t shy away from experimenting!
- What is one-point perspective?
One-point perspective is a drawing method that uses a single vanishing point on the horizon line to create the illusion of depth and space in a two-dimensional artwork.
- How can I practice one-point perspective?
Start by drawing simple shapes like roads, hallways, or boxes, focusing on placing the vanishing point and horizon line correctly to create depth.
- What are some common applications of one-point perspective?
This technique is often used in interior scenes, such as rooms and hallways, as well as in landscapes to draw the viewer's eye toward a focal point.

Two-Point Perspective
Two-point perspective is a fascinating technique that takes your drawing skills to the next level by introducing not just one, but two vanishing points on the horizon line. This method allows you to create a more dynamic and realistic representation of objects, especially when they are viewed at an angle. Imagine standing on a street corner, looking at a building that stretches away from you. The edges of the building seem to converge towards two separate points on the horizon, creating an illusion of depth that pulls the viewer into the scene. This is the magic of two-point perspective!
In practice, two-point perspective is particularly useful for drawing architectural elements and complex structures. When you sketch a building, for example, you can use the two vanishing points to define how the sides of the building recede into the distance. This not only enhances the realism of your work but also adds a sense of drama and interest. Think of it as giving your artwork a 3D effect that makes it pop off the page. You can almost feel the weight of the structure and the space around it!
To effectively use two-point perspective, start by establishing your horizon line. This is your eye level and will serve as the anchor for your vanishing points. Next, place your two vanishing points at either end of the horizon line. From these points, draw lines that represent the edges of your objects. The lines will guide you in creating the illusion of depth. It’s like using a map to navigate through a city; these lines help you find your way in the three-dimensional space of your drawing.
However, as with any artistic technique, mastering two-point perspective comes with its own set of challenges. It’s easy to get lost in the lines and lose track of proportions. Practice is key! Start with simple shapes like boxes or buildings before moving on to more complex structures. Remember, every great artist was once a beginner, so don’t be discouraged if your first attempts aren’t perfect. Embrace the learning process!
One of the most common mistakes artists make when using two-point perspective is misplacing the vanishing points. If they are too close together, your drawing may appear flat and unrealistic. Conversely, if they are too far apart, the objects can look distorted. To help you avoid these pitfalls, consider the following tips:
- Keep your vanishing points at a reasonable distance to maintain balance in your composition.
- Use a ruler to ensure your lines are straight and accurate.
- Regularly step back from your work to assess the overall perspective.
As you practice, you’ll start to notice how two-point perspective can dramatically change the way you approach your drawings. It opens up new avenues for creativity and expression, allowing you to convey a sense of space that is both engaging and realistic. So grab your sketchbook and start experimenting with this technique—your artistic journey is just getting started!
Q1: What is the main difference between one-point and two-point perspective?
A1: The primary difference lies in the number of vanishing points. One-point perspective uses a single vanishing point, while two-point perspective employs two, allowing for a more dynamic representation of objects viewed at an angle.
Q2: Can I use two-point perspective for drawing landscapes?
A2: Absolutely! While two-point perspective is often used for architectural drawings, it can also be applied to landscapes, especially when depicting roads, paths, or any elements that recede into the distance.
Q3: How can I improve my two-point perspective skills?
A3: Practice is essential. Start with simple shapes, gradually increase complexity, and always refer to real-life structures for reference. Additionally, studying works by other artists can provide valuable insights into effective perspective techniques.

Three-Point Perspective
is an advanced drawing technique that elevates your artwork by adding a vertical vanishing point to the two-dimensional plane. This method allows artists to create a sense of depth and realism that is particularly striking when depicting tall structures, such as skyscrapers or steep cliffs. Imagine standing at the base of a towering building, looking up; the edges of the structure converge towards a point high above your head, while the sides may also recede towards two other points on the horizon. This creates a dynamic and immersive visual experience that draws the viewer into the scene.
One of the most exciting aspects of three-point perspective is its ability to convey dramatic viewpoints. When you master this technique, you'll find yourself capable of depicting scenes that evoke strong emotions. Whether it's the awe of gazing up at a skyscraper or the dizzying sensation of peering down from a cliff, three-point perspective can transform ordinary subjects into extraordinary works of art.
However, with great power comes great responsibility! The complexity of three-point perspective can be daunting for many artists. It requires a solid understanding of how vanishing points interact with one another and how to accurately depict the angles and proportions of objects in relation to those points. But fear not! With practice and a few helpful guidelines, you can conquer this technique and elevate your artwork to new heights.
To effectively implement three-point perspective in your drawings, consider the following tips:
- Establish Your Horizon Line: This is where the viewer's eye level is situated. It’s crucial for determining where your vanishing points will be placed.
- Place Your Vanishing Points: For three-point perspective, you will need to set one vanishing point above the horizon line and two on the horizon line itself. The placement of these points will dramatically affect the composition of your drawing.
- Use Guide Lines: Draw light lines from your vanishing points to help you visualize the angles and proportions of the objects you’re creating. These lines can be erased later.
As you practice, try to incorporate three-point perspective into various subjects. For instance, you might start with a simple box or cube, gradually moving on to more complex objects like buildings or even entire cityscapes. The key is to continuously challenge yourself while reinforcing your understanding of how perspective works.
In conclusion, mastering three-point perspective can open up a world of possibilities in your art. It allows you to create captivating scenes that draw viewers in and evoke emotion. So grab your sketchbook, and don’t be afraid to look up—your artistic journey is just beginning!
Q: What is the difference between two-point and three-point perspective?
A: Two-point perspective uses two vanishing points on the horizon line, while three-point perspective adds a vertical vanishing point, allowing for more dramatic angles and depth.
Q: Is three-point perspective difficult to master?
A: Yes, it can be challenging due to its complexity, but with practice and understanding of the principles, you can become proficient.
Q: Can I use three-point perspective for all types of drawings?
A: While three-point perspective is excellent for depicting tall structures and dramatic views, it may not be necessary for simpler compositions. Choose the perspective that best suits your subject matter.
Challenges of Three-Point Perspective
Mastering three-point perspective can feel like trying to solve a Rubik's cube while riding a roller coaster—exciting yet daunting! This technique is incredibly powerful for creating dramatic views, especially when depicting tall buildings or looking down from a great height. However, the intricacies involved can often leave artists feeling overwhelmed.
One of the primary challenges is understanding how to position the vertical vanishing point. Unlike one-point and two-point perspectives, where the vanishing points are typically placed along the horizon line, the vertical point introduces a new dimension that can cause confusion. Artists often struggle with the placement of lines that converge towards this point, leading to skewed or unrealistic representations of height.
Another difficulty arises in maintaining consistent proportions throughout the drawing. As you apply three-point perspective, it’s crucial to remember that objects will appear smaller as they recede into the distance. This can easily lead to mistakes, especially when drawing complex structures like skyscrapers, where the top may seem disproportionately small compared to the base. To avoid this, many artists find it helpful to create a reference grid or sketch out the basic shapes before diving into details.
Furthermore, three-point perspective can create a sense of disorientation for the viewer if not executed carefully. The dramatic angles and foreshortening can lead to a feeling of imbalance, making it essential to consider the viewer's experience. A well-composed drawing should guide the eye naturally through the scene, rather than leaving the audience feeling lost or dizzy. To achieve this, artists should practice visual flow techniques, ensuring that lines and shapes lead the viewer’s gaze in a cohesive direction.
To help you navigate these challenges, consider these strategies:
- Practice regularly: The more you draw using three-point perspective, the more intuitive it becomes.
- Study examples: Analyze works by artists who excel in this technique to understand their approach.
- Use digital tools: Software can help you visualize and adjust vanishing points and lines more easily.
In summary, while three-point perspective presents unique challenges, it also offers incredible opportunities for creating stunning, dynamic artwork. With practice, patience, and a willingness to learn from mistakes, any artist can master this technique and elevate their drawings to new heights.
- What is the best way to practice three-point perspective? Regular sketching using reference images and creating grids can help reinforce your understanding.
- Can I use three-point perspective for all types of drawings? While it's great for dramatic scenes, simpler perspectives may be more suitable for less complex compositions.
- Are there any tools that can help with perspective drawing? Yes! There are various digital drawing tools and apps that allow you to set vanishing points and create grids.

Practical Exercises for Perspective Mastery
Mastering perspective in your drawings is like learning to ride a bike; it takes practice, patience, and a willingness to fall a few times before you can glide smoothly. To help you navigate the intricate world of perspective, here are some practical exercises that can enhance your skills and boost your confidence. These exercises are designed to be engaging and effective, so grab your sketchbook and let’s dive in!
First off, start with simple shapes. Begin by drawing basic geometric forms like cubes, spheres, and cylinders in one-point perspective. Place them on your horizon line and designate a vanishing point. This exercise will help you understand how these shapes interact with the horizon and how they appear smaller as they recede into the distance.
Next, try your hand at drawing a room using one-point perspective. Imagine you’re standing in a long hallway or a simple room. Sketch the walls, floor, and ceiling, ensuring they all converge at the vanishing point. This will give you a sense of depth and space. As you get comfortable, you can add furniture or other elements to create a more complex scene.
Once you feel confident with one-point perspective, it’s time to tackle two-point perspective. Start by drawing a box at an angle. You’ll need to establish two vanishing points on the horizon line. This exercise is a game-changer for artists who want to depict buildings and objects from a more dynamic viewpoint. Remember, practice makes perfect, so don’t hesitate to sketch multiple boxes at different angles!
For those adventurous souls ready to take on a challenge, three-point perspective awaits. Find a tall building photo and try to replicate it in your sketchbook. Identify the three vanishing points: two on the horizon and one above or below, depending on your viewpoint. This exercise will push your understanding of perspective to new heights—literally!
Additionally, consider setting up a real-life scene to draw. Choose a spot in your home, a park, or even a busy street corner. Observe how the lines of buildings, roads, and trees converge as they recede into the distance. Take your time to sketch what you see, focusing on the perspective. This real-world application will solidify your understanding and help you recognize perspective in everyday life.
To track your progress, maintain a perspective journal. Document your exercises, noting what worked well and what didn’t. Reflecting on your growth can be incredibly motivating. You might even want to include a few of your favorite sketches alongside your notes to see how far you’ve come!
Lastly, don't forget to incorporate digital tools into your practice. There are numerous apps and software programs designed for artists that can help you visualize perspective more effectively. These tools often allow you to manipulate shapes and angles, giving you instant feedback on your work.
In summary, mastering perspective is a journey filled with exploration and creativity. By engaging in these practical exercises, you’ll not only improve your technical skills but also discover a new way of seeing the world through your art. So, keep practicing, stay curious, and let your creativity soar!
- What is the best way to practice perspective drawing? The best way is through consistent practice with simple shapes and real-life scenes. Start small and gradually increase complexity.
- How long does it take to master perspective? Mastery varies by individual, but regular practice can lead to noticeable improvement in a few weeks.
- Are there any resources for learning perspective? Yes! There are many online tutorials, books, and courses dedicated to perspective drawing.
- Can I use digital tools for perspective drawing? Absolutely! Digital tools can enhance your understanding and allow for easy adjustments to your work.
Frequently Asked Questions
- What is linear perspective?
Linear perspective is a drawing technique that helps create the illusion of depth on a flat surface. It involves using vanishing points and horizon lines to guide the viewer's eye and make objects appear three-dimensional.
- How do I know which type of perspective to use?
The type of perspective you choose depends on the scene you want to create. For straightforward views like roads or hallways, one-point perspective works best. If you're drawing buildings or objects at an angle, two-point perspective is ideal. For dramatic views, like looking up at skyscrapers, three-point perspective is the way to go!
- What are some common mistakes in one-point perspective?
Common mistakes include misplacing the vanishing point, inconsistent horizon lines, and failing to maintain proportional relationships between objects. To avoid these pitfalls, always double-check your guidelines and practice regularly!
- Can I use perspective in digital art?
Absolutely! Perspective techniques are just as applicable in digital art as they are in traditional drawing. Many digital art programs have tools to help you create perspective grids, making it easier to apply these concepts.
- How can I practice perspective drawing effectively?
Engage in practical exercises like drawing simple shapes in different perspectives, creating scenes with one, two, and three-point perspectives, and sketching from real-life references. The more you practice, the more confident you'll become!
- What resources are available for learning perspective?
There are numerous resources available, including online tutorials, books on perspective drawing, and video courses. Websites like YouTube and art forums also provide valuable tips and demonstrations from experienced artists.
- Is mastering perspective necessary for all artists?
While not every artist may need to master perspective, having a solid understanding can significantly enhance your artwork. It allows for more realistic representations and can elevate your artistic skills, no matter your style!


