
Creating an Impressionistic Landscape with Acrylics
If you've ever gazed at a breathtaking landscape and thought, "I wish I could capture that on canvas," you're not alone! Painting impressionistic landscapes with acrylics is a fantastic way to express your love for nature while experimenting with vibrant colors and dynamic brushstrokes. In this article, we'll dive into the techniques and tips that will help you create stunning landscapes that evoke emotion and transport viewers into the scene.
Impressionism, as an art movement, focuses on capturing the essence of a moment rather than detailing every single element. This approach allows for a more personal and emotional connection to the artwork. With acrylics, you have the flexibility to layer colors and create textures that can bring your landscapes to life. Whether it's the gentle sway of grass in the wind or the shimmering reflection of water, we'll explore how to convey these elements effectively.
Throughout this article, we will cover essential materials, helpful methods, and creative approaches that will set you on the path to becoming a skilled impressionistic landscape painter. So grab your brushes, squeeze out some paint, and let's get started on this colorful journey through nature!
When it comes to painting impressionistic landscapes, selecting the appropriate acrylic paints is crucial for achieving the desired effects. Acrylics come in various types, each with unique properties that can influence your painting experience. For instance, heavy body acrylics are thick and perfect for creating texture, while fluid acrylics are more transparent and great for glazing techniques.
Here’s a quick overview of the types of acrylics you might consider:
| Type of Acrylic | Characteristics | Best For |
|---|---|---|
| Heavy Body Acrylics | Thick, buttery consistency | Texture and impasto techniques |
| Fluid Acrylics | Thin, pourable consistency | Glazing and fine details |
| Acrylic Gouache | Matte finish, opaque | Flat areas of color and detailed work |
Choosing the right acrylics will not only enhance your painting but also make the process more enjoyable. Consider your style and the effects you wish to achieve, and don't hesitate to experiment with different types until you find the perfect match for your artistic vision.
Having the right tools can significantly impact your painting experience. While the quality of your acrylics is important, your brushes, palettes, and other tools can elevate your artwork to new heights. A well-equipped artist's toolkit can make a world of difference in how you express your creativity.
Here’s a rundown of essential tools you’ll want to have on hand:
- Brushes: A variety of brushes, including flat, round, and filbert, will allow you to achieve different textures and effects.
- Palettes: A large, flat palette for mixing colors is essential. Consider using a stay-wet palette to keep your paints moist longer.
- Canvas or Canvas Boards: Choose the right surface for your painting style, whether it be stretched canvas or boards.
- Palette Knives: These are great for mixing paint and creating texture in your landscapes.
Remember, the right tools can make your painting process smoother and more enjoyable. Investing in quality supplies will pay off in the long run as you develop your skills and create beautiful impressionistic landscapes.
Q: What is the best way to start an impressionistic landscape painting?
A: Begin by sketching a rough outline of your composition on the canvas. Then, start with larger areas of color and gradually build up layers for detail.
Q: Can I use water to thin acrylic paint?
A: Yes, water can be used to thin acrylic paint for a more fluid consistency. However, be cautious not to dilute it too much, as this may affect the paint’s adhesion and vibrancy.
Q: How do I clean my brushes after using acrylics?
A: Clean your brushes with water immediately after use. If the paint has dried, you may need to use soap and warm water to remove it completely.
By following these guidelines, you'll be well on your way to creating stunning impressionistic landscapes that capture the beauty of nature. Happy painting!
Choosing the Right Acrylics
When it comes to painting impressionistic landscapes, the choice of acrylic paints can make all the difference. Imagine standing before a blank canvas, ready to capture the vibrant hues of a sunset or the lush greens of a forest. The right acrylics help translate that vision into reality. So, how do you choose the right ones? Let’s dive into the world of acrylic paints!
Acrylic paints come in various formulations, each with unique properties that can affect your painting experience. The most common types include student-grade and artist-grade acrylics. Student-grade paints are more affordable and great for beginners, but they often have less pigment and may not provide the vibrancy needed for impressionistic work. On the other hand, artist-grade acrylics are richer in pigment and offer better coverage, allowing for more expressive brushwork and depth in your landscapes.
Another aspect to consider is the viscosity of the paint. Acrylics can range from fluid to heavy body. Fluid acrylics are excellent for glazing and creating washes, while heavy body acrylics allow for thick application and texture, perfect for those bold strokes that define impressionism. Think of fluid acrylics as the gentle breeze that caresses a field of wildflowers, while heavy body acrylics are like the sturdy brushstrokes that bring those flowers to life on your canvas.
Additionally, pay attention to the lightfastness of the paints. Lightfastness refers to how resistant the paint is to fading when exposed to light. For landscapes that you want to last for years, opt for paints labeled as “lightfast.” This ensures that your beautiful scenes will remain vibrant and true to life, much like the memories we cherish of our favorite outdoor adventures.
To help you navigate the world of acrylics, here’s a quick reference table highlighting the different types of acrylics and their characteristics:
| Type of Acrylic | Characteristics | Best For |
|---|---|---|
| Student-Grade | Less pigment, more affordable | Beginners, practice |
| Artist-Grade | High pigment concentration, vibrant colors | Professional work, serious artists |
| Fluid Acrylics | Thin consistency, great for washes | Glazing, soft effects |
| Heavy Body Acrylics | Thick, buttery texture | Textured applications, bold strokes |
Ultimately, the choice of acrylics will depend on your personal style and the effects you want to achieve. Don’t be afraid to experiment! Mix different brands and types to discover what works best for your impressionistic landscapes. Remember, just like nature itself, your artistic journey is about exploration and finding your unique voice on the canvas.
As you embark on this colorful adventure, keep in mind that the right acrylic paints are your allies in capturing the essence of the great outdoors. So gather your supplies, unleash your creativity, and let the beauty of nature inspire your next masterpiece!
- What is the difference between student-grade and artist-grade acrylics?
Student-grade acrylics are less expensive and contain less pigment, making them suitable for practice and beginners. Artist-grade acrylics are more vibrant and offer better quality for serious artists. - Can I mix different brands of acrylic paints?
Yes! Mixing different brands is common and can lead to unique results. Just make sure they are all acrylic-based paints. - How do I know if my acrylics are lightfast?
Check the label on the paint tube or the manufacturer's website for a lightfastness rating. Look for paints that are labeled as “lightfast” for the best durability.
Essential Tools for Landscape Painting
When it comes to painting impressionistic landscapes, having the right tools can make all the difference. Imagine trying to paint a beautiful sunset with a dull brush—it's like trying to write a novel with a broken pencil! The tools you choose not only influence the outcome of your artwork but also enhance your overall painting experience. So, let’s dive into the essential tools that will elevate your landscape painting game.
First and foremost, you'll need a good set of acrylic paints. Acrylics are versatile and quick-drying, making them perfect for capturing the fleeting beauty of nature. Look for professional-grade paints that offer vibrant colors and excellent coverage. If you're unsure where to start, consider a basic palette that includes primary colors, white, and black. This will give you the flexibility to mix a wide range of shades. You might also want to explore heavy body acrylics for a thicker consistency, which can add wonderful texture to your landscapes.
Next up, let’s talk about brushes. The type of brush you use can completely change the texture and feel of your painting. You'll want a mix of different brush types to create a variety of effects. For instance, flat brushes are fantastic for bold strokes and creating sweeping skies, while round brushes excel at adding intricate details like leaves and branches. Here’s a quick breakdown of some essential brush types:
| Brush Type | Best For |
|---|---|
| Flat Brushes | Bold strokes, skies, and fields |
| Round Brushes | Details, foliage, and fine elements |
| Fan Brushes | Textures, grass, and trees |
In addition to brushes, a good palette is crucial for mixing your colors. You can use a traditional wooden palette or opt for a disposable palette pad. The key is to have enough space to mix different shades without them getting muddled together. A palette knife can also come in handy for mixing paints and creating texture in your artwork.
Don’t forget about canvas or canvas boards! The surface you choose will affect how the paint adheres and how colors appear. For impressionistic landscapes, a textured canvas can help create depth and interest in your work. You can also experiment with different sizes, depending on your vision—sometimes a large canvas can make a bold statement, while a smaller one can feel more intimate.
Finally, let’s not overlook some other handy tools that can enhance your painting process. A spray bottle filled with water can keep your paints moist, while a rag or paper towels will help you clean brushes and correct mistakes quickly. Additionally, having a good easel can provide comfort and stability as you paint outdoors, allowing you to immerse yourself in the environment you're capturing.
In summary, investing in the right tools is essential for creating stunning impressionistic landscapes. From quality acrylics and brushes to a reliable palette and canvas, each element plays a significant role in your artistic journey. So gather your supplies, set up your easel, and let your creativity flow!
- What type of acrylic paints are best for beginners? Professional-grade acrylics are recommended for their vibrancy and coverage, but student-grade paints can also be a good starting point.
- Can I use watercolor brushes for acrylic painting? While you can use them in a pinch, it's best to use brushes specifically designed for acrylics to achieve the best results.
- How do I clean my brushes after painting? Rinse your brushes thoroughly with water immediately after use, and use soap if necessary to remove any remaining paint.
Brush Types and Techniques
When it comes to creating stunning impressionistic landscapes, the type of brush you use can make all the difference. Each brush has its own personality, much like the strokes of a painter's hand. Understanding these brush types and their techniques is essential for capturing the essence of nature on your canvas. Let’s dive into some of the most popular brush types that will elevate your painting game!
First off, we have the flat brush. This brush is your best friend for making bold, sweeping strokes. Imagine painting a vast sky or rolling hills; the flat brush allows you to cover large areas quickly while maintaining control. The key to mastering the flat brush is to use it at different angles. For instance, holding it horizontally can create wide strokes for the horizon, while a vertical hold can help you define the edges of clouds or mountains. Don't be afraid to experiment with pressure; pressing harder can produce thicker paint application, while lighter strokes yield softer effects.
Next up are the round brushes. These brushes are perfect for adding intricate details that bring your landscape to life. Think about the delicate leaves on a tree or the fine lines of a winding river. The round brush excels in these areas, allowing you to create both fine lines and broader strokes depending on how you hold it. A quick tip: try using the tip of the brush for detailed work and the side for filling in larger areas. This versatility makes round brushes a must-have in your toolkit.
In addition to flat and round brushes, fan brushes are fantastic for creating textures, particularly in foliage. The unique shape of the fan brush allows you to mimic the appearance of leaves and grass effortlessly. By using a stippling technique—tapping the brush lightly on the canvas—you can create the illusion of depth and movement in your landscapes. This brush is particularly effective when you want to convey the wildness of nature, such as a dense forest or a field of wildflowers.
Lastly, we can't forget about the detail brushes. These are smaller brushes that excel in precision work. They are perfect for painting tiny elements like birds in the sky or intricate details on tree bark. Using a detail brush requires patience and a steady hand, but the results can be incredibly rewarding. Always remember to clean your brushes thoroughly between colors to maintain their shape and effectiveness.
In conclusion, the brushes you choose and how you use them can dramatically influence the outcome of your impressionistic landscape. By experimenting with different types of brushes and techniques, you can find your unique voice as an artist. So, gather your brushes, let your creativity flow, and watch as your landscapes come alive with vibrant colors and textures!
- What type of brush is best for beginners?
Flat brushes are often recommended for beginners because they are versatile and easy to use for larger areas. - How do I clean my brushes?
Use warm soapy water to clean your brushes immediately after use, and reshape them to maintain their form. - Can I use acrylics on canvas board?
Absolutely! Canvas boards are a great option for acrylic painting and are often more affordable than stretched canvases.
Flat Brushes for Bold Strokes
When it comes to creating striking and dynamic landscapes, flat brushes are your best friends. These brushes are uniquely designed with a rectangular shape that allows for broad strokes and sweeping motions, making them perfect for painting skies, fields, and other expansive areas in your artwork. Imagine standing in front of a vast, open field, the sun setting in the background, casting a warm glow over everything. With a flat brush, you can easily replicate that feeling on canvas, translating the beauty of nature into bold, expressive strokes.
One of the most exciting aspects of using flat brushes is their versatility. You can use them to create a variety of effects, from sharp lines to soft blends, depending on how you hold and apply the brush. For instance, holding the brush flat against the canvas allows you to cover larger areas quickly, while turning it on its edge gives you the ability to create finer details. This adaptability makes flat brushes an essential tool in any impressionistic landscape painter's toolkit.
To get the most out of your flat brushes, consider the following techniques:
- Bold Strokes: Use the flat side of the brush to create sweeping strokes across the canvas. This technique is perfect for depicting the rolling hills or the expansive sky.
- Layering: Apply multiple layers of color using the flat brush to build depth. Start with a base layer and gradually add lighter or darker shades to create dimension.
- Mixing Colors: Use the brush to mix colors directly on the canvas. This can create beautiful gradients and transitions that enhance the impressionistic style.
As you practice with flat brushes, you'll discover that they can also help you develop a unique style. Experiment with different pressures and angles to see how they affect the outcome of your strokes. For instance, a gentle touch can create soft, wispy clouds, while a firmer application can yield bold, dramatic landscapes.
In summary, flat brushes are indispensable for any artist looking to capture the essence of impressionistic landscapes. Their ability to create bold strokes and dynamic textures makes them a valuable addition to your painting arsenal. So, the next time you find yourself in front of a canvas, reach for a flat brush and let your creativity flow!
Round Brushes for Detail
When it comes to capturing the intricate beauty of nature in your impressionistic landscapes, round brushes are your best friends. These brushes, characterized by their pointed tips and versatile shapes, allow you to create fine details that bring your paintings to life. Imagine painting delicate leaves on a tree or the subtle textures of a flower petal; round brushes make these tasks not only possible but also enjoyable. Their ability to hold a good amount of paint while providing precision means you can achieve stunning results with just a flick of your wrist.
One of the key advantages of using round brushes is their adaptability. Depending on the pressure and angle you apply, you can create a variety of strokes—from thin lines to broader shapes. This flexibility is particularly useful when you want to depict elements like foliage, where you need both fine details and broader strokes to convey depth and dimension. For instance, when painting a forest scene, you can use the tip of a round brush to capture the intricate veins of leaves while employing the belly of the brush to create the lush canopy above.
To maximize the effectiveness of your round brushes, consider the following tips:
- Choose the Right Size: Round brushes come in various sizes, so selecting the right one for your specific detail work is crucial. A smaller brush is ideal for fine lines, while a larger one can help fill in broader areas.
- Practice Control: The key to mastering round brushes lies in controlling the pressure you apply. Light pressure will yield finer lines, while more pressure will create thicker strokes.
- Experiment with Techniques: Try using the brush in different ways—such as stippling, swirling, or dabbing—to see what effects you can achieve. Each technique can add a unique quality to your landscape.
Moreover, the type of paint you use with your round brushes can also influence the outcome. For instance, using a heavy body acrylic will provide more texture and opacity, while fluid acrylics will allow for finer details and smoother lines. This adaptability makes round brushes an essential tool in your artistic arsenal, enabling you to explore various styles and techniques.
In conclusion, round brushes are invaluable when it comes to adding detail to your impressionistic landscapes. By practicing with different sizes and techniques, you can enhance your ability to capture the beauty of the natural world. Whether you're painting the delicate petals of a wildflower or the intricate patterns of a tree trunk, round brushes will help you convey the essence of your subject with finesse and creativity.
Q: What sizes of round brushes should I have for landscape painting?
A: It's beneficial to have a range of sizes, from small (for fine details) to medium and large (for broader strokes). This variety allows you to tackle different aspects of your painting with ease.
Q: How do I clean my round brushes properly?
A: Clean your brushes immediately after use with water and mild soap. Avoid letting paint dry on the bristles, as this can ruin the shape and effectiveness of the brush.
Q: Can I use round brushes for other painting techniques?
A: Absolutely! Round brushes are versatile and can be used in various techniques, including watercolor, oil painting, and acrylics. Their adaptability makes them a staple in any artist's toolkit.
Palette Knives for Texture
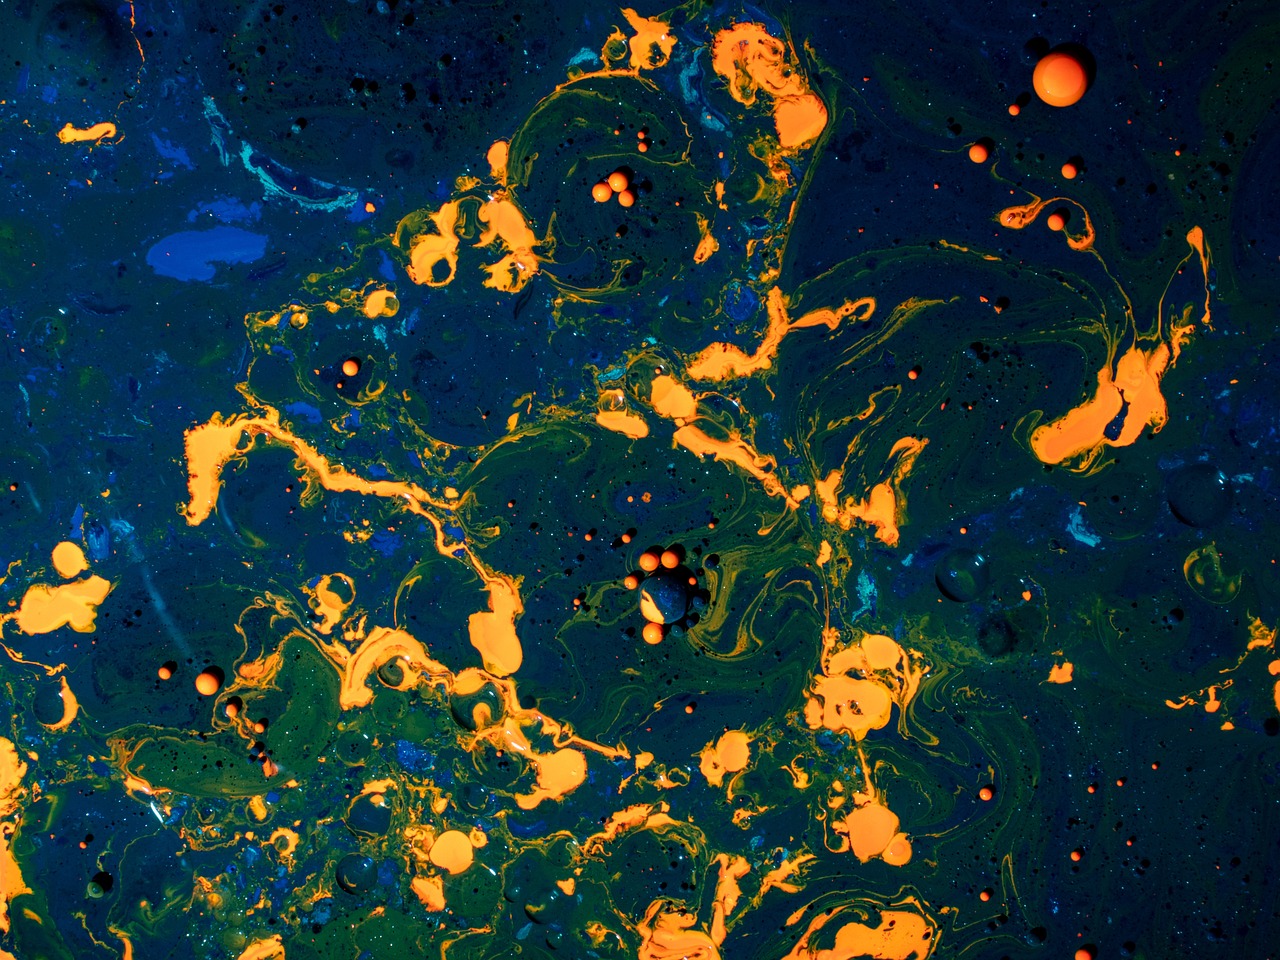
When it comes to adding depth and dimension to your impressionistic landscapes, palette knives are your best friends. Unlike traditional brushes, palette knives allow you to create a variety of textures that can bring your artwork to life. Imagine the way a gentle breeze rustles through a field of grass or the shimmering surface of a tranquil lake—these are the kinds of effects you can achieve with the right technique.
Using a palette knife is all about exploration and experimentation. The flat, flexible blade can be used to apply paint in thick, textured layers, creating a sense of movement and energy in your landscapes. Unlike brushes, which often leave a smooth finish, palette knives can produce a rugged, tactile surface that invites viewers to engage with your work more deeply. Think of it as sculpting with paint—each stroke can add a new dimension to your canvas.
To get started with palette knives, you might want to consider the following techniques:
- Scraping: This technique involves applying a thick layer of paint and then scraping some of it away to create interesting patterns and textures. It’s perfect for depicting rocky surfaces or the rough bark of trees.
- Layering: You can layer different colors on top of each other using a palette knife. This not only adds depth but also allows for the colors to mix slightly, creating beautiful gradients.
- Stabbing: For a more spontaneous effect, try stabbing the knife into the paint and then applying it to the canvas. This can create a sense of chaos and movement, ideal for depicting windy scenes or turbulent waters.
One of the most exciting aspects of using palette knives is the way they can transform your approach to color. Instead of meticulously blending colors on a palette, you can apply them directly to the canvas in bold strokes. This method encourages a more intuitive and expressive painting style, allowing your emotional response to the landscape to guide your hand. As you experiment with different techniques, you’ll discover how the palette knife can help you express the raw beauty of nature in a way that feels both personal and authentic.
In summary, palette knives are versatile tools that can add significant texture and character to your impressionistic landscapes. By embracing their unique qualities, you can create stunning artworks that capture the essence of your surroundings. So, grab your palette knife, let your creativity flow, and watch as your landscapes transform into vibrant, textured experiences that resonate with viewers.
Q: Can I use palette knives with other types of paint?
A: Yes, palette knives can be used with various types of paint, including oil and watercolor. However, they are particularly effective with acrylics due to their quick drying time.
Q: Do I need special palette knives for texture?
A: While there are specialized palette knives available, a basic set with different shapes and sizes will suffice for most texture techniques.
Q: How do I clean my palette knives?
A: Clean your palette knives immediately after use with water and soap. If the paint dries, you may need to use a paint thinner or solvent to remove it.

Color Mixing and Theory
When it comes to painting impressionistic landscapes, understanding color mixing and theory is absolutely essential. The vibrant hues that you create on your canvas can evoke emotions and set the mood of your artwork. Imagine walking through a sunlit meadow, the colors around you are alive, and capturing that essence on canvas begins with mastering the art of mixing colors. It’s not just about slapping paint together; it’s about knowing how to blend, layer, and create a palette that sings.
First things first, let’s talk about the color wheel. This handy tool is your best friend when it comes to understanding how colors interact. The primary colors—red, blue, and yellow—are the building blocks of all other colors. By mixing these together, you can create secondary colors: green, orange, and purple. But that’s just the beginning! Mixing these secondary colors with primary colors gives you a whole new range of shades and tones.
One of the most crucial aspects of color mixing is the concept of complementary colors. These are colors that sit opposite each other on the color wheel. For instance, red and green, blue and orange, or yellow and purple. When placed next to each other, complementary colors create a striking contrast that can make your landscape pop. However, when mixed together, they can neutralize each other, creating beautiful, muted tones perfect for shadows or underpainting.
To help you visualize this, here’s a simple table that outlines some common color mixes:
| Primary Color | Secondary Color | Mix Result |
|---|---|---|
| Red | Yellow | Orange |
| Blue | Yellow | Green |
| Red | Blue | Purple |
As you dive deeper into the world of color mixing, you’ll find that the temperature of colors plays a significant role. Warm colors (reds, oranges, yellows) tend to bring forward elements in your painting, while cool colors (blues, greens, purples) push them back. This understanding can help you create depth in your landscapes, making the foreground elements leap off the canvas while the background recedes into a soft blur.
Another vital aspect is the value of colors, which refers to how light or dark a color is. By mixing white into your colors, you create tints that can lighten your palette, while adding black creates shades that darken them. This manipulation of value can add a three-dimensional quality to your work, allowing you to depict the subtleties of light and shadow that are so crucial in impressionistic landscapes.
Finally, let’s not forget the importance of experimenting. Don’t be afraid to mix unexpected colors or try out new combinations. Sometimes, the most beautiful results come from happy accidents. Keep a color journal or swatch book where you can document your experiments, and soon you’ll have a treasure trove of colors to draw from for your landscapes.
In summary, mastering color mixing and theory is a journey that enriches your artistic expression. By understanding how colors interact, you’ll be able to create landscapes that are not only visually striking but also deeply moving. So grab your palette, unleash your creativity, and let the colors of nature guide your brush!
- What are the best acrylic colors for landscape painting? Look for a range of greens, blues, and earth tones, as these colors are essential for capturing nature.
- How do I achieve a soft edge in my landscape? Blending colors while they are still wet can help create soft edges that suggest movement.
- Can I use other mediums with acrylics? Yes! Many artists combine acrylics with mediums like gel or matte medium to achieve different textures and finishes.
Creating a Harmonious Palette
When it comes to painting impressionistic landscapes, color harmony is essential. A well-balanced palette can elevate your artwork, making it feel cohesive and inviting. But how do you achieve this harmony? First, it’s crucial to understand the basics of color theory. This involves knowing how colors interact with each other, the relationships between primary, secondary, and tertiary colors, and how to utilize these relationships to create stunning visual effects.
To begin with, consider the color wheel. This tool is invaluable for artists. It helps you see which colors complement each other and which ones might clash. For instance, colors that are opposite each other on the wheel, known as complementary colors, can create striking contrasts that draw the viewer's eye. In an impressionistic landscape, using complementary colors can help to highlight certain areas, such as a bright blue sky against golden fields.
Another technique for creating a harmonious palette is to use analogous colors. These are colors that sit next to each other on the color wheel, like blue, blue-green, and green. When used together, they create a sense of unity and can evoke a specific mood. Imagine a tranquil landscape at dusk, where shades of purple, blue, and pink blend seamlessly to depict the fading light. This approach can bring a sense of peace and calm to your painting.
Moreover, don’t forget about the importance of value in your palette. Value refers to how light or dark a color is. Even if your colors are harmonious, a lack of contrast in value can lead to a flat-looking painting. Incorporating a range of values can add depth and interest. For example, using darker shades in the foreground while reserving lighter shades for the background can create a sense of distance and dimension.
To help you get started, here’s a simple table that outlines some color combinations to consider for your landscapes:
| Color Scheme | Colors | Effect |
|---|---|---|
| Complementary | Blue & Orange | Vibrant contrast, eye-catching |
| Analogous | Green, Blue-Green, Blue | Harmonious and serene |
| Monochromatic | Various shades of Blue | Unified and calming |
Finally, remember that creating a harmonious palette is not just about mixing colors; it's also about your personal expression. Don’t be afraid to experiment and find what resonates with you. Each artist has a unique voice, and your palette should reflect that. So grab your brushes, mix those colors, and let your creativity flow!
- What is the best way to start mixing colors? Begin with primary colors and gradually add small amounts of secondary colors to see how they change.
- How can I ensure my colors remain vibrant? Use high-quality paints, and avoid over-mixing to preserve the intensity of the colors.
- What should I do if my palette looks muddy? Try to limit the number of colors you use in a single area and focus on maintaining clean brushes.
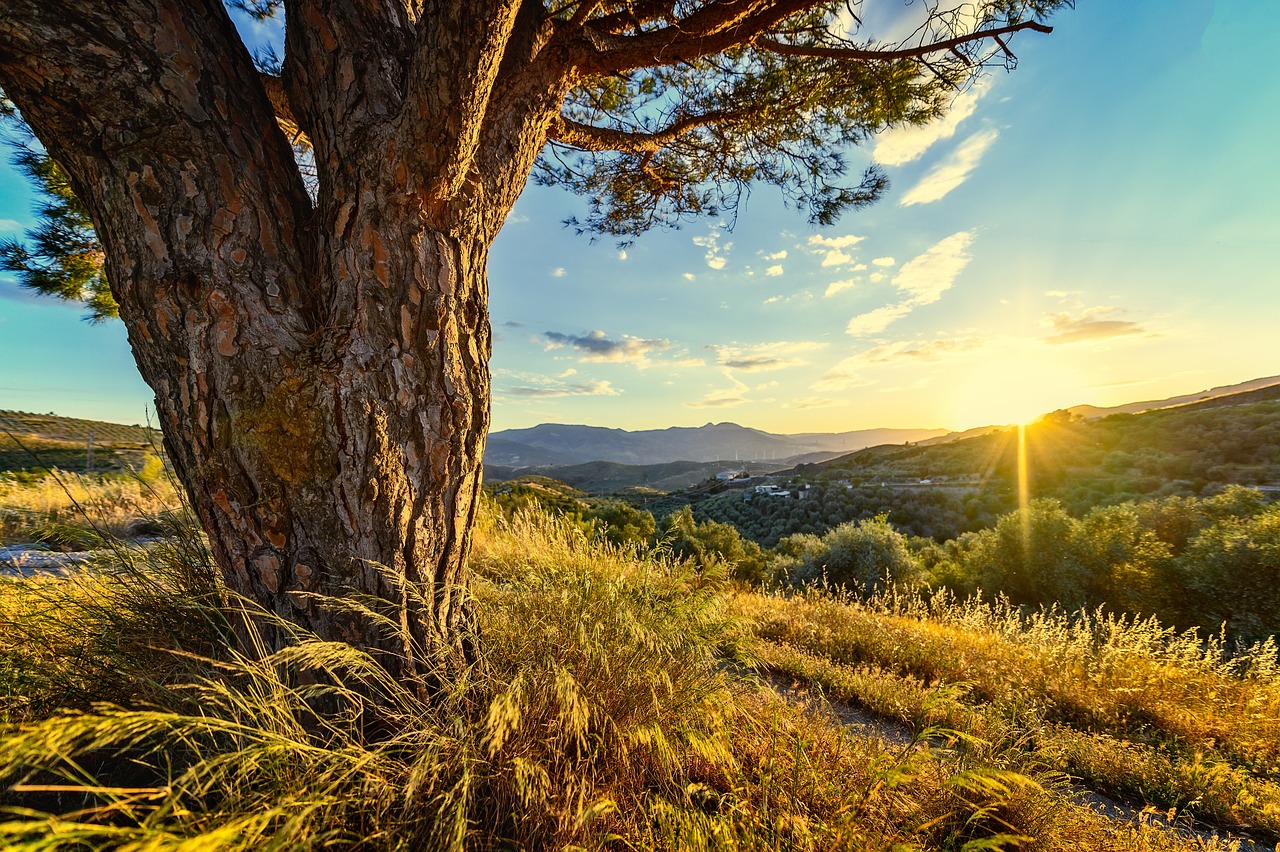
Using Light and Shadow
When it comes to painting impressionistic landscapes, light and shadow are your best friends. They breathe life into your artwork, creating depth and dimension that can transform a flat canvas into a vibrant depiction of nature. Imagine standing in a sunlit meadow, where the sunlight dances on the grass and casts playful shadows beneath the trees. Capturing this essence on your canvas can be both exciting and challenging.
To effectively use light and shadow, it’s essential to understand their role in your composition. Light sources can dramatically change the mood and atmosphere of your painting. For instance, a bright, sunny day evokes feelings of warmth and joy, while a dusky sunset can create a sense of calm and nostalgia. To achieve this, consider the following techniques:
- Identify Your Light Source: Before you start painting, determine where the light is coming from. This will guide your decisions on where to place highlights and shadows.
- Observe Real Life: Spend time outdoors, observing how light interacts with different surfaces. Notice how shadows stretch and change as the sun moves across the sky.
- Use Contrast: High contrast between light and dark areas can create a striking visual impact. Don’t shy away from deep shadows; they can enhance the brightness of your highlights.
Now, let’s delve into some practical tips for incorporating light and shadow into your acrylic landscapes:
1. **Layering Techniques**: Start with a base layer of color, then gradually build up layers of lighter and darker shades. This creates a sense of depth and allows you to play with the light. For example, if you’re painting a sunset, begin with a warm orange base and layer lighter yellows and deeper purples to suggest the fading light and shadows.
2. **Dry Brushing**: This technique involves using a dry brush to apply lighter colors over darker ones. It’s perfect for creating the illusion of sunlight hitting textured surfaces like grass or rocky terrain. The key is to use minimal paint on your brush, allowing the underlayer to peek through for a more dynamic effect.
3. **Glazing**: Glazing is a method where you apply a thin, transparent layer of paint over dried paint. This technique can help you achieve a luminous quality in your landscapes, especially when depicting light filtering through trees or clouds. Use a medium to mix with your paint for a smooth glaze that enhances the underlying colors.
4. **Highlighting Edges**: Focus on the edges of objects in your landscape. Adding highlights to the edges of trees, hills, or clouds can create a sense of volume and make them pop against the background. Think of it as giving your landscape a gentle touch of sunlight that captures the viewer’s eye.
By mastering the use of light and shadow, you can elevate your impressionistic landscapes from mere representations of nature to vibrant, dynamic experiences. Remember, the play of light is not just about what you see, but also about what you feel. So, grab your brushes, step into the light, and let your creativity flow!
Q: How can I practice using light and shadow in my paintings?
A: Start by observing your surroundings and sketching simple scenes with clear light sources. Practice layering colors and using techniques like dry brushing and glazing to see how they affect your work.
Q: What colors should I use for shadows?
A: Shadows aren’t just black or gray; they often contain colors from the surrounding environment. Experiment with mixing complementary colors to create natural-looking shadows that enhance your landscapes.
Q: Can I use photographs to study light and shadow?
A: Absolutely! Photographs can be a great reference for understanding how light interacts with different elements. Pay attention to the highlights and shadows in your photos and try to replicate them in your paintings.
Techniques for Capturing Movement
When it comes to painting impressionistic landscapes, capturing movement is like trying to catch the wind in your hands. You want to convey that sense of life and dynamism, whether it’s the gentle sway of grass in a summer breeze or the tumultuous rush of a waterfall. The beauty of acrylics lies in their versatility, allowing you to play with techniques that breathe life into your artwork. Let’s dive into some effective methods that will help you depict movement in your landscapes.
One of the most effective techniques for illustrating movement is blending colors for soft edges. By gently mixing colors on your canvas, you can create smooth transitions that mimic the natural flow of elements like water or the softness of clouds drifting across the sky. Imagine a serene lake; the ripples on the surface can be represented by blending various shades of blue and green, allowing the colors to flow into one another seamlessly. This technique not only adds depth but also evokes a sense of tranquility, making the viewer feel as if they are witnessing the scene come to life.
Another powerful approach is layering for depth. This technique involves applying multiple layers of paint to build texture and complexity in your landscape. Start with a base layer that sets the foundation, then gradually add subsequent layers to enhance details and create shadows. For instance, when painting a field of flowers swaying in the breeze, layering different colors can help you depict the vibrant hues of petals while also suggesting movement as they dance in the wind. The trick is to allow each layer to dry before adding the next, which helps maintain the clarity and vibrancy of the colors.
To further enhance the sense of movement, consider using palette knives. These tools are fantastic for creating unique textures that can symbolize the energy in your landscapes. For example, when painting a stormy sky, you can use a palette knife to apply thick strokes of paint, mimicking the chaotic movement of clouds. This technique not only adds dimension but also invites the viewer to feel the intensity of the scene. The sharp edges and varied thicknesses can evoke a sense of turbulence, drawing the eye across the canvas.
In addition to these methods, don't underestimate the power of color choice and placement. The colors you select can significantly influence the perception of movement in your painting. Warm colors like reds and oranges can create a feeling of energy and vibrancy, while cooler colors can evoke calmness and serenity. Think about how you can use contrasting colors to guide the viewer's eye through the painting, creating a path that suggests movement. For example, a bright orange sun setting over a deep blue ocean can create a dynamic interplay that feels alive.
Finally, remember to embrace spontaneity. Sometimes, the best representations of movement come from unexpected brush strokes or splashes of color. Don’t be afraid to let your instincts take over. Grab that brush, mix those colors, and let the canvas guide you. The beauty of impressionism is in its ability to capture fleeting moments, so allow yourself to experiment and explore different techniques until you find what resonates with you.
- What are the best acrylic paints for beginners?
Acrylic paints that are student-grade are typically more affordable and easier to work with, making them ideal for beginners. Brands like Liquitex Basics and Winsor & Newton Galeria are great starting points. - How can I prevent my acrylics from drying too quickly?
Using a palette with a lid, a wet palette, or adding a slow-drying medium can help extend the working time of acrylics, allowing you to blend and manipulate the paint more effectively. - Is it necessary to use a medium with acrylics?
While it's not strictly necessary, using mediums can enhance your painting experience by altering the texture, drying time, and finish of the paint, allowing for more creative possibilities. - What should I do if I make a mistake while painting?
One of the advantages of acrylics is that they can be painted over once dry. Simply wait for the area to dry completely and then paint over it with your desired color or technique.

Blending for Soft Edges
When it comes to impressionistic landscapes, one of the most magical techniques you can master is blending for soft edges. Imagine standing in a serene meadow, where the colors of the sky melt into the horizon, and the gentle breezes create a seamless transition between the vibrant greens of the grass and the soft blues of the sky. This is the essence of blending—creating a visual experience that feels as fluid and alive as nature itself.
To achieve these soft edges in your acrylic paintings, you need to embrace the art of blending colors on your palette and canvas. Start by using a wet brush technique, where you keep your brush moist with water or a medium. This allows the paint to glide smoothly across the canvas, giving you the ability to create those soft transitions that are characteristic of impressionism. When you apply your paint, work with a gentle hand, using light pressure to avoid harsh lines.
One effective method for blending is the “feathering” technique. This involves lightly dragging your brush along the edge of two colors that are next to each other on the canvas. For instance, if you're blending a bright yellow with a soft orange, start with your yellow and then gently pull the orange into it. The key here is to use a clean brush and to work quickly before the paint dries. You can also use a dry brush technique after applying your initial colors; simply take a clean, dry brush and lightly sweep it over the area to soften any harsh lines.
Another tip is to work in layers. Start with a base layer of color, and once it’s dry, apply a second layer with a slightly different shade to create depth. This layering not only enhances the dimensionality of your painting but also allows for incredible blending opportunities, as the colors interact with each other. Remember, the beauty of impressionism lies in its spontaneity, so don’t be afraid to experiment with different colors and blending techniques.
To help you visualize the blending process, here’s a simple table that outlines the steps you can follow:
| Step | Description |
|---|---|
| 1 | Choose your colors and apply them side by side on the canvas. |
| 2 | Use a wet brush to blend the edges of the two colors. |
| 3 | Apply a second layer of color for added depth. |
| 4 | Use a dry brush technique to soften any harsh lines. |
Blending for soft edges can truly transform your landscape paintings, allowing them to breathe and come alive. The next time you pick up your brush, remember that the goal is not just to replicate nature, but to capture its essence. With practice, patience, and a little bit of intuition, you’ll find that blending can elevate your artwork to new heights, creating landscapes that resonate with viewers and evoke emotion.
- What types of brushes are best for blending in acrylic painting? Flat and round brushes work well for blending, as they provide different textures and control.
- Can I blend acrylics after they dry? While it's best to blend while the paint is wet, you can use glazing techniques with transparent colors to achieve a similar effect once dry.
- How do I clean my brushes for blending? Regularly rinse your brushes in water and use a brush cleaner to maintain their shape and effectiveness.
Layering for Depth
When it comes to creating an impressionistic landscape, layering is not just a technique; it’s a powerful tool that can transform your painting from flat to fascinating. Imagine building a cake, where each layer adds flavor and texture. In the same way, layering in painting allows you to add depth, richness, and complexity to your artwork. By applying multiple layers of paint, you can create a sense of dimension that draws the viewer in, inviting them to explore every nook and cranny of your landscape.
To effectively layer your acrylics, start with a solid foundation. Begin with your background, using lighter colors to set the mood of the scene. As you progress, gradually add darker hues and more saturated colors to the foreground. This technique not only enhances the perception of depth but also creates a natural progression that mimics how we perceive landscapes in real life. Think of it as creating a three-dimensional space on a two-dimensional canvas.
One of the most important aspects of layering is to allow each layer to dry before applying the next one. Acrylics dry quickly, which is a blessing and a curse. While it means you can work rapidly, it also means you need to be mindful of your timing. If you apply wet paint on top of wet paint, you risk muddying your colors. To avoid this, here are a few tips:
- Start with thin layers: Use a diluted mix of paint and water or a medium to create a wash. This will help you establish your base without overwhelming the canvas.
- Use a variety of brush strokes: Experiment with different brushes and techniques to create unique textures in each layer. For instance, a dry brush technique can add a soft, ethereal quality to your clouds.
- Incorporate glazes: Once your base layers are dry, consider using glazes—thin layers of transparent paint—to enhance color vibrancy and add luminosity.
As you layer, don’t forget about the interplay of light and shadow. Shadows can add incredible depth to your landscapes, making them feel more realistic. Use darker tones to create shadows beneath trees or in the crevices of hills. Layering these shadows with lighter colors on top can create a stunning contrast that brings your painting to life.
Finally, remember that layering is an iterative process. Step back frequently to assess your work from a distance. This will give you a better perspective on how the layers interact and whether you need to add more depth or adjust certain areas. Like a sculptor chiseling away at a block of marble, sometimes less is more. You might find that a few well-placed layers can speak volumes more than a canvas overloaded with paint.
- What is the best way to start layering in acrylic painting?
Begin with a light wash for your background and gradually add layers of darker colors, allowing each layer to dry before applying the next. - How long do I need to wait between layers?
Acrylics dry quickly, usually within 10-20 minutes, but it's best to wait until the paint feels dry to the touch before adding more layers. - Can I use a palette knife for layering?
Absolutely! A palette knife can create interesting textures and effects when layering paint, adding depth and dimension to your landscapes.
Frequently Asked Questions
- What type of acrylic paints are best for landscape painting?
When it comes to choosing acrylic paints for landscape painting, opt for high-quality, artist-grade acrylics. These paints offer better pigmentation and consistency. Look for brands that provide a wide range of colors and are known for their lightfastness, which means they won't fade over time. Additionally, consider using heavy body acrylics for more texture or fluid acrylics for smoother applications.
- What tools do I need to start painting impressionistic landscapes?
To get started with impressionistic landscape painting, you'll need a few essential tools. First, invest in a variety of brushes, including flat and round brushes, to achieve different effects. A palette for mixing colors, a palette knife for texture, and a canvas or acrylic paper are also crucial. Don’t forget a water container and paper towels for cleaning your brushes!
- How do I create a harmonious color palette?
Creating a harmonious color palette involves selecting colors that complement each other. Start by choosing a dominant color and then pick two or three supporting colors that blend well. Use a color wheel to find complementary colors, and experiment with mixing shades to see how they interact. Remember, the goal is to create a balanced look that enhances the beauty of your landscape.
- Can I use palette knives instead of brushes?
Absolutely! Palette knives are fantastic for adding unique textures and effects to your paintings. They allow for bold strokes and can create a sense of depth in your landscape. Experiment with different knife shapes and techniques to see how they can enhance your impressionistic style. Just remember to clean your knife between colors to maintain clarity in your work.
- What techniques can I use to depict movement in my landscapes?
To convey movement in your landscapes, consider techniques like blending and layering. Blending colors can create soft edges that suggest wind or flowing water. Layering allows you to build depth, making elements like clouds or waves feel dynamic. Additionally, using quick, expressive brush strokes can also evoke a sense of motion in your artwork.
- How important is light and shadow in landscape painting?
Light and shadow are crucial in landscape painting as they add realism and depth to your artwork. Understanding how light interacts with objects in your scene can help you create more compelling compositions. Pay attention to where the light source is coming from and use contrasting colors to depict shadows, enhancing the three-dimensional quality of your landscapes.


