
How to Draw a Charming Cottage in 7 Steps
Welcome to the delightful world of cottage drawing! If you've ever gazed at a quaint cottage nestled in the woods or perched on a hill, you know how captivating they can be. In this guide, we will take you through seven simple steps that will help you create your own charming cottage illustration. Whether you're a seasoned artist or a beginner, this article will provide you with the tools and techniques needed to bring your artistic vision to life.
Before diving into the world of drawing, it's essential to gather the right materials. Having quality supplies can make a significant difference in the outcome of your artwork. Here’s what you’ll need:
- Pencils: A range of pencils (H, HB, 2B, 4B) for sketching and shading.
- Erasers: A kneaded eraser is great for lifting graphite without damaging the paper.
- Paper: Choose a good quality sketching paper that can handle erasing and layering.
- Coloring Tools: Colored pencils, watercolors, or markers for adding color to your cottage.
- Ruler: Useful for drawing straight lines, especially for architectural elements.
Once you have your materials ready, you’ll be set to embark on your drawing journey!
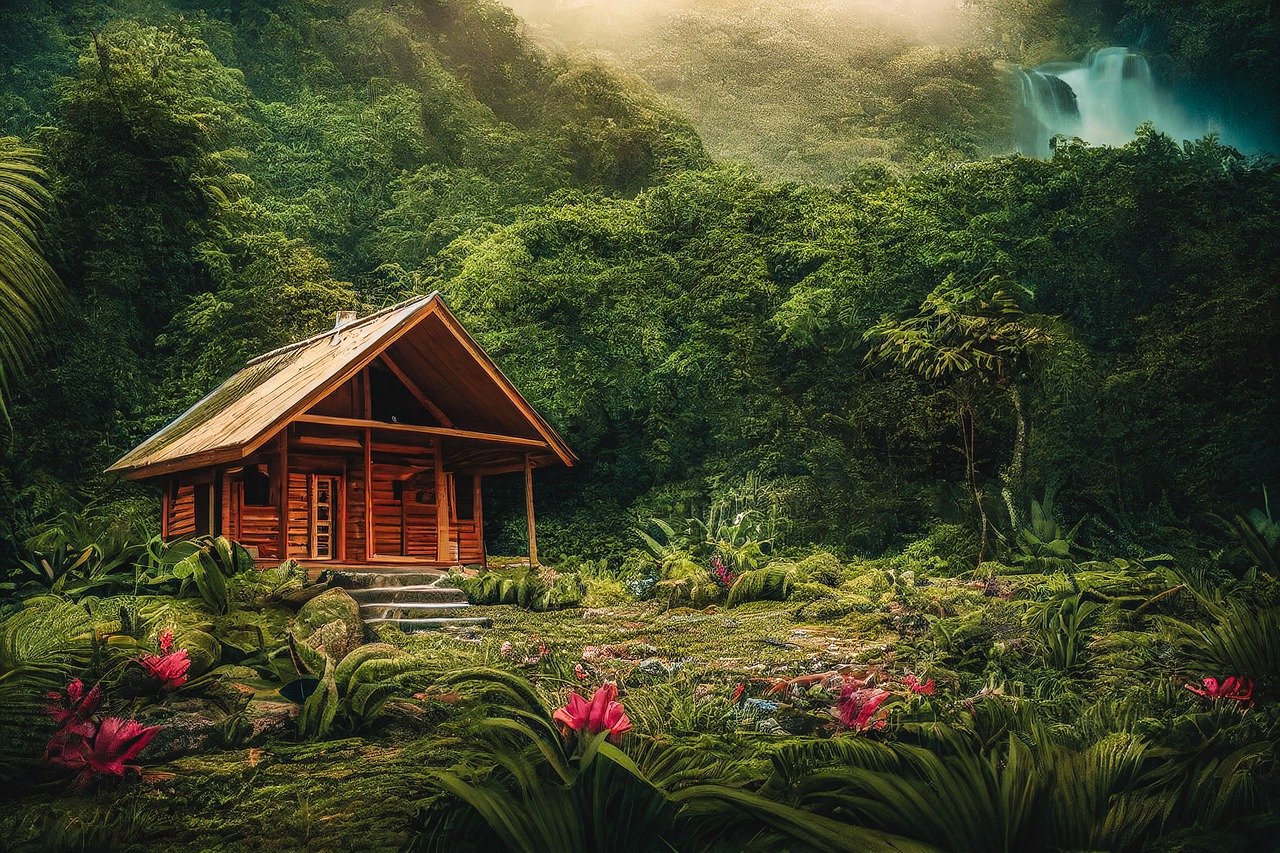
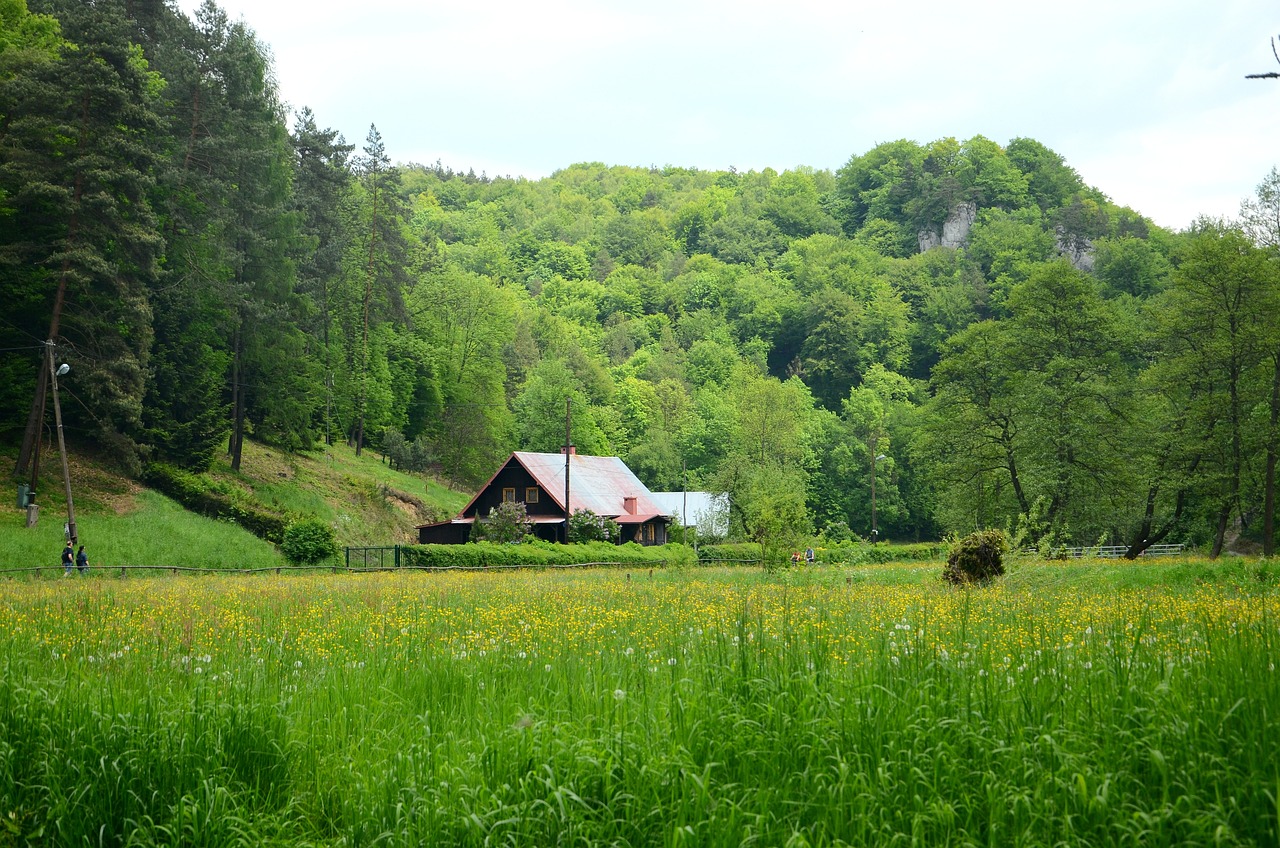
Now that you have your tools, it's time to select a reference image. A good reference can elevate your drawing and guide you in capturing the essence of a cottage. Look for images that resonate with you—perhaps one that features a cozy stone cottage surrounded by blooming flowers or a whimsical wooden cabin in the woods. Analyze the image closely; note the shapes, proportions, and unique features. By understanding the elements in your reference, you can recreate them effectively in your own style.
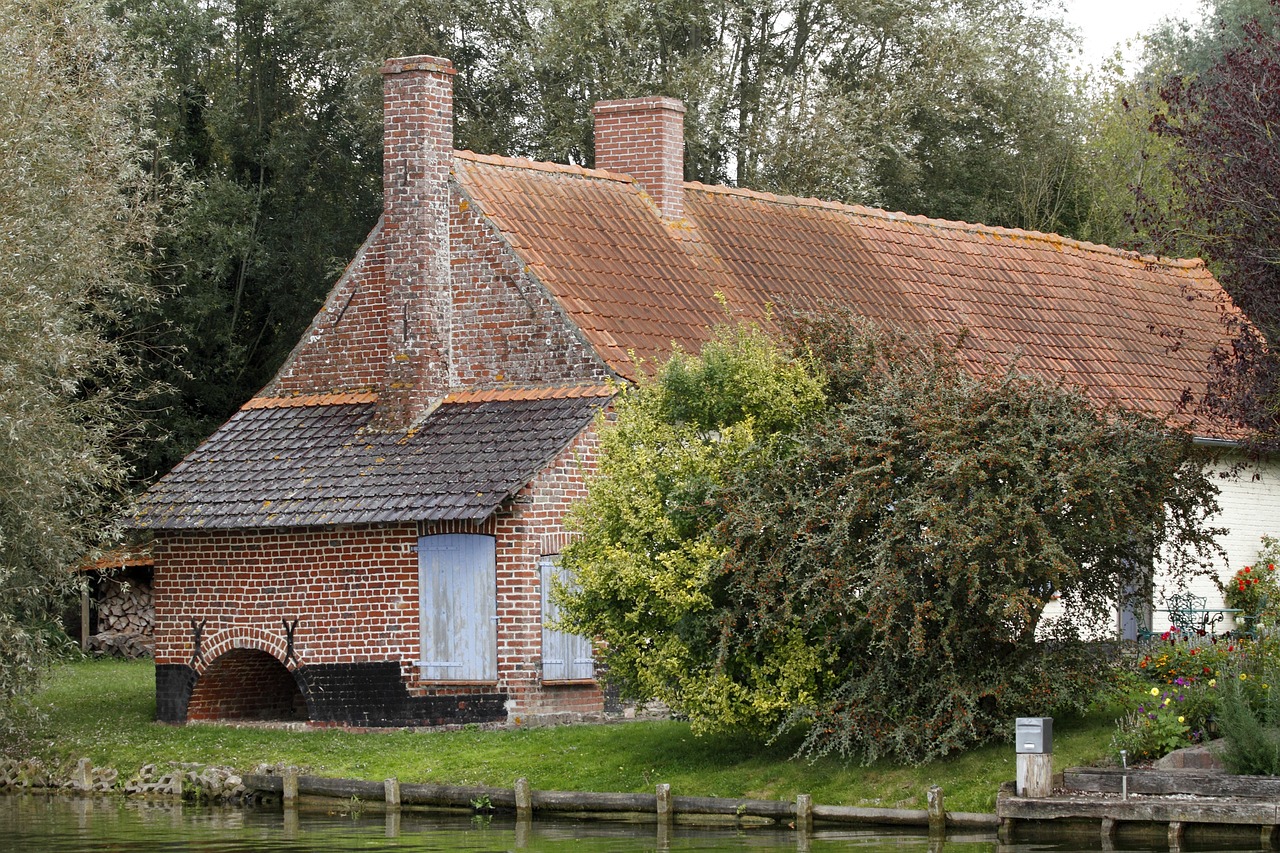
To draw a charming cottage, it's crucial to familiarize yourself with its architectural features. Cottages often embody a rustic charm, characterized by specific elements that define their appearance. Some common features include:
- Low-Pitched Roofs: These roofs often have a thatched or shingled finish, giving them a cozy look.
- Chimneys: A stone or brick chimney adds to the cottage's character and warmth.
- Small Windows: Cottages typically have quaint, small windows that invite warmth and light.
Understanding these elements will help you create a more authentic representation of a cottage in your drawing.
Exploring different roof styles can significantly enhance the character of your drawing. Cottages often feature a variety of roofs, including gabled, hipped, and thatched roofs. Each style brings its own flair:
- Gabled Roof: Triangular shape that adds a classic touch.
- Hipped Roof: Slopes on all sides, providing a more rounded look.
- Thatched Roof: Made from straw or reeds, giving a rustic and charming appearance.
Consider incorporating a unique roof style that resonates with your artistic vision!
Windows are the eyes of your cottage, playing a vital role in its charm. When sketching, think about the window designs you want to include. Some popular styles are:
- Casement Windows: These open outward and provide a classic look.
- Bay Windows: These protrude from the wall, creating a cozy nook.
- Leaded Glass Windows: Often seen in older cottages, they add a touch of elegance.
Incorporating these styles will enhance the overall aesthetic of your drawing.
With your materials ready and your reference image chosen, it’s time to sketch the basic outline of your cottage. Start with simple shapes—rectangles for the main structure, triangles for the roof, and circles for windows. Don’t worry about making it perfect; this is just the foundation. Use light pencil strokes so you can easily erase and adjust as needed. Remember, every great drawing starts with a strong outline!
Once your outline is complete, it’s time to breathe life into your drawing by adding details and texture. Think about the materials that make up your cottage. For example, if it’s a stone cottage, use stippling or cross-hatching techniques to create the illusion of texture. If it’s wooden, draw long, straight lines to represent the wood grain. Adding depth through shading will make your cottage pop off the page!
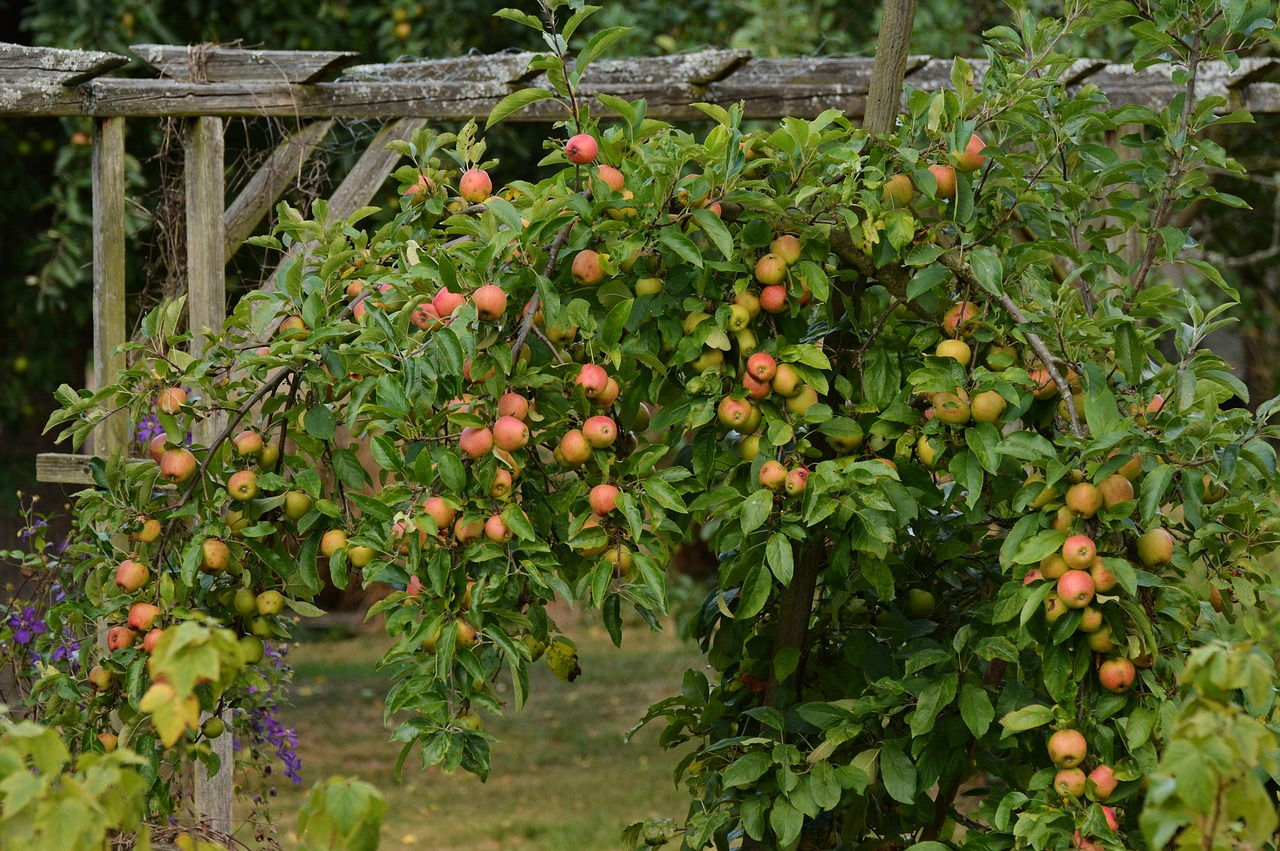
To enhance the charm of your cottage, consider adding natural elements around it. Trees, flowers, and shrubs can create a beautiful landscape that complements your drawing. For instance, sketch a few tall trees to frame your cottage, or add a colorful flower bed in front. This not only adds interest but also gives context to your cottage, making it feel like a part of a larger scene.
As you approach the final stages of your drawing, it’s time to refine and polish your work. Go over your lines, darkening those you want to keep and erasing any unnecessary marks. Add any finishing touches, like highlights on the windows or shadows under the eaves. Take a step back and evaluate your work—does it capture the charm you were aiming for? If so, congratulations! You’ve created a charming cottage illustration!
Q: What if I'm not good at drawing?
A: Remember, practice makes perfect! Start with simple shapes and gradually add details. Everyone has to start somewhere.
Q: Can I use digital tools instead of traditional materials?
A: Absolutely! Digital drawing tools can offer unique advantages, such as easy color adjustments and layers.
Q: How do I add color to my drawing?
A: You can use colored pencils, watercolors, or markers. Start with light layers and build up to achieve the desired vibrancy.
Q: Is it necessary to use a reference image?
A: While not mandatory, a reference image can help you understand proportions and details better, making your drawing more accurate.
Gathering Your Materials
Before diving into the delightful world of drawing a charming cottage, it's crucial to gather the right materials. Think of this step as setting the stage for a magical performance; the better your tools, the more enchanting your artwork will be. So, what exactly do you need? Let's break it down.
First off, you'll want to grab some high-quality drawing paper. The texture and weight of the paper can significantly affect your drawing's outcome. If you're planning to use pencils, a medium to heavy-weight paper will allow for better shading and detail. For those who prefer markers or watercolors, opt for a smoother surface to prevent bleeding.
Next, let’s talk about pencils. A variety of pencils is essential to create depth and detail in your drawing. You might consider having:
- Graphite Pencils: Ranging from H (hard) to B (soft), these will help you achieve different shading effects.
- Colored Pencils: Perfect for adding life and vibrancy to your cottage.
- Charcoal Pencils: Great for dramatic shading and texture.
In addition to pencils, you might want to include some erasers. A kneaded eraser is fantastic for lifting graphite without damaging the paper, while a vinyl eraser works well for cleaner, sharper lines. Don’t forget about sharpeners; keeping your pencils sharp will make a world of difference!
Now, if you're planning to add color, consider investing in some high-quality markers or watercolor paints. These will allow you to bring your cottage to life with rich, vibrant hues. Remember to have a set of brushes handy if you're using watercolors, as they can help you blend colors seamlessly.
Lastly, having a ruler and a compass can be incredibly helpful for drawing straight lines and perfect circles. These tools assist in maintaining proportion and symmetry in your cottage design. And let’s not overlook the importance of a sketchbook! It's the perfect companion for practice and experimentation before committing to your final piece.
In summary, gathering your materials is the first step towards creating a charming cottage drawing that reflects your artistic vision. With the right tools in hand, you're ready to embark on this creative journey. So, are you excited to start sketching? Trust me, the process is just as rewarding as the final product!
Choosing the Right Reference Image
When it comes to drawing a charming cottage, the importance of selecting the right reference image cannot be overstated. A good reference image serves as your guiding star, helping you navigate the intricacies of architectural details and the overall vibe of the cottage you wish to create. But how do you choose the perfect one? It’s all about understanding what you want to convey in your artwork. Are you aiming for a whimsical fairy-tale cottage or a rustic, cozy retreat? Identifying your vision will help you in this process.
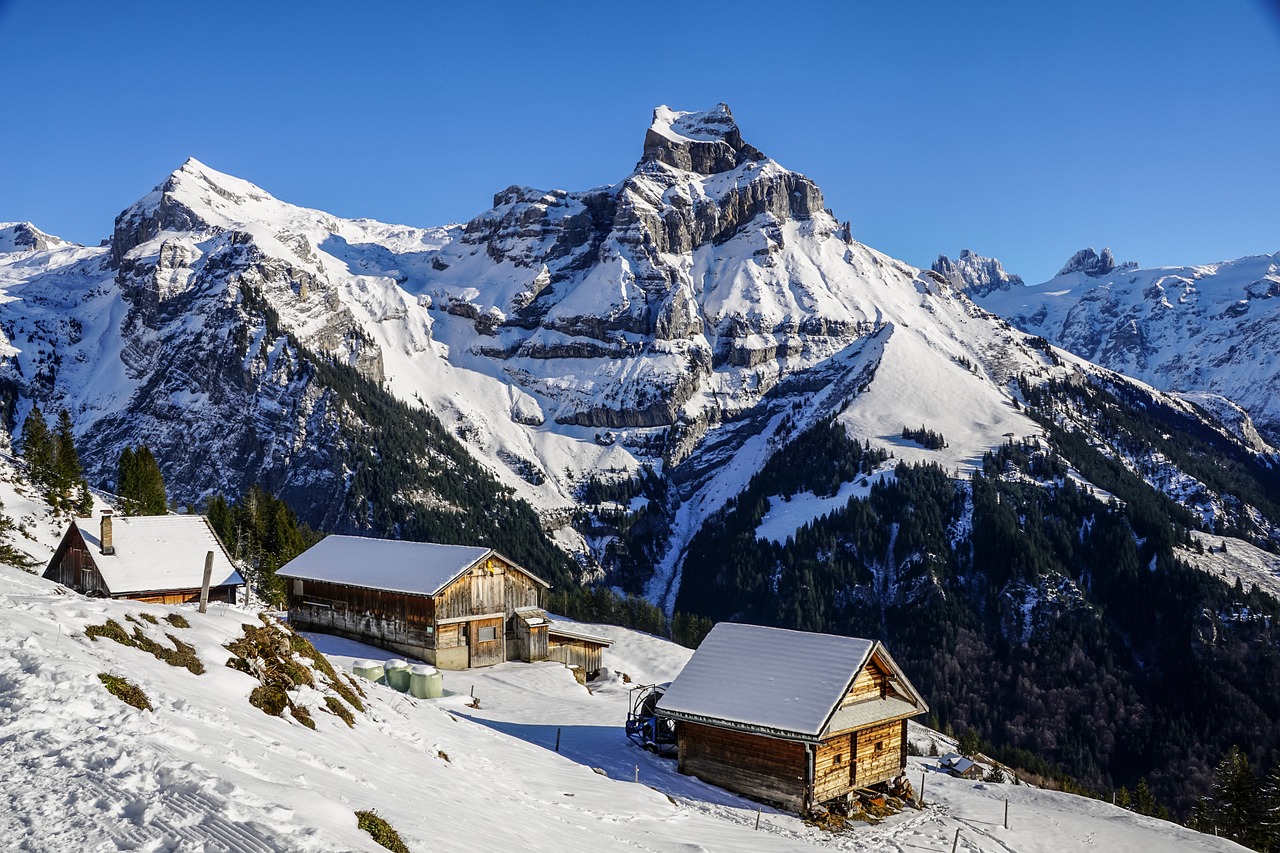
To begin, look for images that resonate with your artistic style and the mood you want to create. Websites like Unsplash, Pixabay, and Pexels are treasure troves of high-quality images that can inspire you. When browsing these sites, keep an eye out for the following elements:
- Lighting: The way light falls on the cottage can dramatically affect its appearance. Soft, diffused light can create a dreamy atmosphere, while bright sunlight can highlight textures.
- Angle: Consider the perspective from which the photo was taken. A frontal view might be great for symmetry, while a side angle can showcase depth.
- Surroundings: Take note of the environment around the cottage. Are there lush gardens, rugged hills, or a serene lake? These elements can add context to your drawing.
Once you’ve found a few potential images, it’s time to analyze them closely. Pay attention to the architectural features and details that make each cottage unique. Look for aspects such as the shape of the roof, the style of windows, and any decorative elements like shutters or flower boxes. You might even want to create a small mood board by combining several images to capture the essence of what you want. This can be particularly helpful in merging different styles or features into one cohesive design.
Another crucial aspect to consider is the resolution of your reference image. A high-resolution image will allow you to see finer details that can elevate your drawing. If you’re working from a low-quality image, you might miss out on essential textures and patterns that could bring your cottage to life. Therefore, aim for images that are clear and well-defined.
Lastly, don't shy away from using your imagination! While reference images are a fantastic starting point, they should serve as a springboard for your creativity. Feel free to modify elements as you see fit. Maybe you want to add a whimsical chimney or a vibrant garden that isn't in the original image. Remember, your drawing is an expression of your unique vision, so let it shine!
In summary, choosing the right reference image is about more than just picking a pretty picture; it’s about finding inspiration that aligns with your artistic goals. By considering factors like lighting, angle, surroundings, and resolution, you’ll set yourself up for a successful drawing experience. So go ahead, dive into the world of reference images, and let your creativity flow!

Understanding Cottage Architecture
When it comes to drawing a charming cottage, understanding the architecture is key. Cottages are often characterized by their quaint and cozy features, which evoke a sense of warmth and nostalgia. These structures typically showcase a blend of functional design and artistic flair, making them appealing to both artists and admirers alike. The architectural elements that define a cottage can vary significantly depending on the region and style, but there are some common traits that you should be aware of.
One of the most prominent features of cottage architecture is the use of natural materials. Cottages often incorporate stone, wood, and thatch, which not only add to their aesthetic charm but also help them blend into their surroundings. For instance, a stone cottage evokes a sense of permanence and stability, while a wooden cottage might feel more inviting and rustic. When sketching your cottage, consider how these materials can influence the texture and depth of your drawing.
Another aspect to consider is the layout. Cottages are usually compact, often with a simple floor plan. They may have a central living area with adjoining rooms, which creates a cozy and intimate atmosphere. As you sketch, think about how the layout affects the overall look and feel of your drawing. A well-planned composition can make your cottage appear more inviting and realistic.
Additionally, pay attention to the roof styles that are prevalent in cottage architecture. Roofs can vary from steeply pitched gables to low, thatched designs. Each style contributes to the overall character of the cottage. For example, a steep gable roof can give a cottage a fairy-tale appearance, while a thatched roof adds a rustic charm. Understanding these elements will help you choose the right roof style for your drawing, enhancing its visual appeal.
Furthermore, the windows of a cottage are not just functional; they are also a crucial aspect of its charm. Cottages often feature small, multi-paned windows that allow for plenty of natural light while maintaining a cozy feel. Some may even have window boxes overflowing with flowers, adding a touch of color and life to the scene. As you incorporate windows into your drawing, think about how their size and design can influence the overall composition.
Finally, consider the surrounding environment. Cottages are often nestled in picturesque settings, whether it's a lush garden, a serene forest, or a quaint village. The landscape plays a significant role in how the cottage is perceived, so don’t forget to include elements like trees, flowers, and pathways in your drawing. These natural features not only enhance the charm of the cottage but also create a harmonious balance between the building and its environment.
In summary, understanding cottage architecture involves recognizing the importance of materials, layout, roof styles, windows, and surroundings. By paying attention to these details, you can create a drawing that captures the essence of a charming cottage, inviting viewers to step into your artistic vision.
- What are the key features of a cottage? Cottages typically feature natural materials, compact layouts, charming roof styles, and inviting windows.
- How can I choose a good reference image for my cottage drawing? Look for images that highlight architectural details and natural surroundings that inspire you.
- What materials are best for drawing a cottage? Pencils, charcoal, and colored pencils are great for capturing texture and detail in your drawing.

Roof Styles
When it comes to capturing the essence of a charming cottage, the roof style plays a pivotal role in defining its character. Think of the roof as the hat of your cottage; it not only protects but also adds personality. There are several roof styles you can choose from, each with its own unique flair. Let’s dive into some popular options that can elevate your drawing.
First up, we have the classic gable roof. This style features two sloping sides that meet at the top, forming a triangular shape. Gable roofs are not just aesthetically pleasing; they also allow for excellent drainage, making them a practical choice, especially in areas with heavy rainfall. Imagine your cottage nestled among lush greenery with a gable roof peeking through the trees—it's a picturesque scene!
Next, consider the thatched roof. This style is quintessentially English and evokes a sense of nostalgia. Made from dried straw or reeds, thatched roofs create a cozy, rustic vibe that transports you to a simpler time. Drawing a thatched roof can be a delightful challenge, as it involves capturing the texture and layers of the thatch. Picture the soft, golden hues of the straw contrasting against the vibrant colors of your cottage—it's truly enchanting.
Another fantastic option is the hip roof, which slopes down on all four sides, creating a more rounded appearance. This style is often associated with stability and elegance. A hip roof can give your cottage a sophisticated look while maintaining its charming essence. Imagine how a hip roof would look adorned with climbing vines or colorful flowers, adding even more charm to your drawing.
If you want to add a touch of whimsy, consider the mansard roof. This style features two slopes on each side, with the lower slope being much steeper than the upper. The mansard roof is perfect for creating an attic space, which can be a great place for a cozy reading nook or a small artist's studio. Visualize your cottage with a mansard roof, complete with a little balcony where you can sip tea and enjoy the view.
Lastly, we have the flat roof. While it may seem less traditional, flat roofs can be quite modern and stylish. They offer a unique canvas for rooftop gardens or patios, allowing for creativity in your design. Imagine your cottage with a flat roof, surrounded by blooming flowers and perhaps a little seating area where you can relax and soak in the beauty of nature.
In summary, the roof style you choose can significantly influence the overall look and feel of your cottage drawing. Each style has its own charm and character, allowing you to express your artistic vision. So, as you sketch, think about the story you want your cottage to tell through its roof. Will it be a cozy thatched cottage or a sleek modern flat-roofed design? The possibilities are endless!
Window Designs
When it comes to drawing a charming cottage, play a pivotal role in capturing the essence of its character. Windows are not just functional elements; they serve as the eyes of your cottage, inviting light in and offering glimpses of the cozy interior. So, how do you choose the right window designs for your drawing? Let’s dive into some delightful options that can enhance the charm of your cottage.
First, consider the classic casement windows, which swing open like a door, providing a welcoming feel. These windows often have a rustic wooden frame that adds a touch of warmth to your drawing. You can illustrate them with a slight tilt to suggest they are open, allowing a gentle breeze to flow through. Alternatively, sash windows are another popular choice, characterized by their sliding panes. They evoke a sense of nostalgia and are often found in traditional English cottages. When drawing sash windows, pay attention to the grid patterns that divide the glass, as they can add intricate detail to your artwork.
Next up, we have arched windows. These windows can bring an air of elegance to your cottage, with their rounded tops that soften the overall look. They work beautifully in combination with stone or brick exteriors, creating a harmonious balance between structure and design. If you're feeling adventurous, try incorporating bay windows into your drawing. Bay windows protrude from the main wall and create a cozy nook inside, perfect for a reading space. They add depth and dimension, making your cottage look even more inviting.
Don’t forget about the shutters! Adding shutters to your windows can enhance their charm significantly. You can draw them either open or closed, depending on the mood you want to convey. Open shutters can suggest a sunny day, while closed shutters might hint at a cozy evening inside. Furthermore, consider the materials—wooden shutters can add a rustic touch, while painted shutters in vibrant colors can make your cottage pop with personality.
As you sketch, think about the surroundings of the windows as well. Adding flower boxes filled with vibrant blooms can create a delightful scene, drawing the viewer's eye to the windows. You might choose flowers like petunias or geraniums, which are classic choices for cottage gardens. Remember, the goal is to create a sense of warmth and charm that invites the viewer into your artistic vision.
In summary, the choice of window designs can dramatically influence the overall appeal of your cottage drawing. Whether you opt for classic casement windows, elegant arched styles, or charming bay windows, each design contributes to the story your cottage tells. So grab your pencils, let your creativity flow, and watch as your charming cottage comes to life through the windows you choose!
- What materials should I use for drawing a cottage? You can use pencils, charcoal, or even watercolors, depending on your preferred style.
- How do I choose the right reference image for my cottage drawing? Look for images that inspire you and highlight the architectural features you want to include.
- Can I add my own elements to the cottage drawing? Absolutely! Feel free to personalize your drawing with unique features or colors.
- What is the best way to practice drawing windows? Start by sketching simple shapes and gradually add details like frames and textures.
Sketching the Basic Outline
When it comes to drawing a charming cottage, is like laying the foundation for a house. It’s the crucial first step that sets the stage for all the lovely details to come. Grab your pencil and paper, and let’s dive into the process. Start by visualizing the cottage in your mind. Picture its shape, size, and how it sits within its surroundings. This mental image will guide your hand as you begin to sketch.
Begin with simple geometric shapes to represent the main components of your cottage. For instance, use a rectangle for the body of the house, a triangle for the roof, and smaller rectangles for the windows and door. This technique not only simplifies the drawing process but also ensures that your proportions are correct. Remember, it’s all about getting the basic structure down before you dive into the details.
As you sketch, don’t be afraid to use light strokes. This allows you to easily erase and adjust as needed. Think of your pencil as a gentle guide, not a strict ruler. Once you have the basic shapes in place, start refining the outline. Add curves to the roofline or the edges of the walls to give your cottage that whimsical charm. You might want to consider the following elements:
- Roofline: Is it steep and pointed, or more relaxed and sloped?
- Chimney: Will it be a classic brick chimney or a quaint wooden flue?
- Front Porch: Does your cottage have a welcoming porch? If so, sketch it out!
Once you’re satisfied with the outline, take a step back and look at your work. Does it feel balanced? Are the proportions correct? It’s essential to ensure that the elements of your cottage harmonize together. If something seems off, don’t hesitate to make adjustments. This is your artistic journey, and every stroke should reflect your vision.
After refining the outline, it’s time to think about the surroundings. Where is your cottage located? Is it nestled in a forest, on a hillside, or by a tranquil lake? Lightly sketch in some background elements to provide context. This could be as simple as a few trees or a winding path leading up to your cottage. The key is to create a sense of place without overwhelming your main subject.
Finally, once you’re happy with the basic outline of your cottage and its surroundings, it’s time to move on to the next phase—adding details and texture. But remember, the outline is your canvas; treat it with care and respect, and it will serve as a solid base for your masterpiece.
Q1: What materials do I need to sketch the outline?
A1: All you need is a pencil, eraser, and paper. Optional tools include a ruler for straight lines and a lightbox for tracing.
Q2: How do I keep my proportions accurate?
A2: Use basic geometric shapes to outline your cottage. Measure with your pencil and compare lengths and widths to maintain balance.
Q3: Should I sketch lightly or darkly?
A3: Start with light strokes. This allows for easy adjustments. You can darken the lines once you're satisfied with the outline.
Q4: Can I use a reference image while sketching?
A4: Absolutely! A reference image can help you understand shapes and proportions better, making your drawing more accurate.

Add Details and Texture
Once you’ve established a solid outline for your charming cottage, it’s time to breathe life into your drawing by adding details and texture. This step is crucial because it transforms a simple sketch into a captivating illustration that draws the viewer in. Think of your drawing as a stage, and the details are the actors that bring the scene to life. Without them, the cottage might appear flat and uninviting. So, how do you go about adding these essential elements?
First, consider the materials you’ll be using. If you’re working with pencils, you can create different shades and textures through varying pressure and layering. For those using ink or markers, cross-hatching and stippling can add a dynamic quality to your work. If you’re feeling adventurous, watercolor or pastels can introduce a beautiful softness and depth. Remember, the choice of medium can dramatically influence the final look of your cottage.
Next, let’s dive into some specific details you can incorporate. Here are a few ideas to enhance your drawing:
- Brick and Stone Textures: If your cottage has a brick or stone facade, use short, controlled strokes to mimic the uneven surfaces. Vary the pressure to create a sense of depth.
- Wood Grain: For wooden elements like doors and window frames, draw thin, wavy lines to represent the natural grain of the wood. This small detail can add warmth to your cottage.
- Roof Shingles: When illustrating the roof, consider using overlapping shapes to depict shingles. This not only adds texture but also gives your roof a realistic appearance.
Don’t forget about the lighting in your drawing. Shadows and highlights can significantly impact the perception of depth. Imagine the sun shining down on your cottage—where would the light hit, and where would shadows fall? Use a lighter pencil or a white gel pen to add highlights on the roof and walls, while darker shades can be used in the corners and under eaves to create shadow.
Now, let’s talk about incorporating natural elements into your scene. Adding trees, shrubs, or flowers not only enhances the charm of your cottage but also provides context. Think about how these elements interact with your cottage. Are there blooming flowers in the garden, or perhaps a winding path leading up to the door? Adding these elements can make your drawing feel more inviting and alive.
Finally, take a step back and assess your work. Is there anything that feels off? Maybe the roof needs more texture, or the windows could use a bit more character. Don’t be afraid to adjust and refine your drawing. Sometimes, the finishing touches—like adding a little smoke coming from the chimney or a cat lounging on the porch—can make all the difference.
In conclusion, adding details and texture is where your artistic vision truly shines. Embrace the process, have fun with it, and watch as your charming cottage comes to life on the page!
Q: What materials are best for adding texture to my drawing?
A: The best materials depend on your style! Pencils, ink, and watercolors are all great choices. Experiment with different mediums to see which one you prefer.
Q: How do I create realistic shadows?
A: Observe how light interacts with objects in real life. Use darker shades where shadows naturally fall, and lighter shades for areas that catch the light.
Q: Can I use digital tools to add texture?
A: Absolutely! Digital drawing programs offer various brushes and effects that can replicate traditional textures. Just be sure to explore different tools to find what works best for your style.
Incorporating Nature Elements
When it comes to drawing a charming cottage, one of the most delightful aspects to consider is the incorporation of nature elements. These elements not only enhance the overall aesthetic of your artwork but also evoke a sense of tranquility and warmth that is often associated with cottage life. Imagine a cozy little home nestled among vibrant flowers, towering trees, and perhaps a winding path leading to the front door. By integrating these features, you can create a scene that feels alive and inviting.
Start by envisioning the surroundings of your cottage. Are there lush green trees? Maybe a few colorful flower beds? Consider the scale of these elements in relation to your cottage. For instance, tall trees can provide a striking backdrop, while smaller shrubs and flowers can frame the foreground beautifully. To help you visualize this, think of how a picture frame enhances a painting; nature elements serve a similar purpose by guiding the viewer's eye and adding depth to your drawing.
When sketching trees, pay attention to their shapes and sizes. Different species have unique characteristics that can add variety to your scene. For example, oak trees are broad and sturdy, while willow trees have a more delicate, flowing appearance. You might choose to cluster a few trees together for a sense of intimacy or spread them out for a more open feel. Don't forget to include details like branches, leaves, and textures to make them come alive on the page.
Now, let’s talk about flowers! Adding a variety of flowers can create a vibrant, colorful landscape. Consider using a mix of different types and colors to create visual interest. Here are a few popular options:
- Roses: Perfect for adding a touch of romance.
- Daisies: Great for a cheerful, sunny vibe.
- Lavender: Adds a calming, aromatic element.
Incorporating these flowers around your cottage can create a welcoming atmosphere. You might even want to sketch a small garden path leading to the door, lined with flowers on either side. This not only draws the viewer's eye to the cottage but also adds a storytelling element to your drawing. It invites the viewer to imagine walking up to that charming little home.
Finally, consider adding small details like a wooden fence, a birdbath, or even some garden tools leaning against the cottage. These elements can provide context and make your scene feel more lived-in. Just like the final touches on a dish, these little aspects can elevate your drawing from good to extraordinary.
In conclusion, by thoughtfully incorporating nature elements into your cottage drawing, you can transform a simple sketch into a captivating scene that resonates with the viewer. Remember, nature is not just a backdrop; it’s an integral part of the story you’re telling through your art.
Q: What types of trees should I draw around my cottage?
A: Consider using a variety of trees such as oaks, pines, and willows to add diversity. Each type can evoke a different mood and atmosphere.
Q: How can I make my flowers look more realistic?
A: Pay attention to the shapes and colors of real flowers, and don’t hesitate to add shading and highlights to give them depth.
Q: Should I include animals in my drawing?
A: Including animals can enhance the charm of your scene! Birds, butterflies, or even a small dog can add life and interest to your artwork.
Finalizing Your Drawing
As you approach the final stages of your cottage drawing, it's time to add those crucial finishing touches that will make your artwork truly shine. This is where your initial sketch transforms into a captivating piece of art. Think of it as the icing on a cake; it’s the final detail that brings everything together and makes it irresistible. Start by taking a step back and observing your work from a distance. This perspective will help you identify areas that may need more definition or balance.
One of the most important aspects of finalizing your drawing is to enhance the contrast and depth. You can achieve this by using darker shades to emphasize shadows and lighter tones for highlights. For example, consider the areas under the eaves of the roof or around the windows where shadows would naturally fall. Using a range of pencils, from hard (H) to soft (B), can help you create this effect. If you're using color, layering different shades will add richness and dimension to your cottage.
Don’t forget about the details that make your cottage unique. Perhaps there's a whimsical chimney, a charming door, or intricate window frames. Adding these elements will not only enhance the visual appeal but also tell a story about the cottage itself. You might even want to include some personal touches, like a small garden or a winding path leading up to the door. These details can transform a simple drawing into a scene bursting with life and character.
Once you’re satisfied with the details, it’s time to refine the edges. Use an eraser to clean up any stray lines or smudges that may have occurred during the drawing process. A clean finish can make a significant difference in the overall presentation of your artwork. If you’re working digitally, consider using layers to adjust and refine without losing your original work. This flexibility allows you to experiment with different looks until you find the perfect balance.
Finally, consider adding a background. A simple wash of color or a soft gradient can create a sense of atmosphere and context for your cottage. Think about what kind of setting you want to portray: a sunny meadow, a snowy landscape, or perhaps a misty forest? The background can enhance your drawing and provide a sense of place, making your cottage feel like it belongs in a specific world.
In conclusion, finalizing your drawing is about enhancing the beauty of your cottage while ensuring it reflects your artistic vision. Remember, the goal is to create a piece that resonates with you and your audience. Take your time, and don’t be afraid to experiment with different techniques until you achieve the look you desire. Your charming cottage is just a few strokes away from being complete!
- What materials are best for finalizing my drawing? A good quality eraser, blending stumps, and a range of pencils or colors will help you achieve the best results.
- How can I add depth to my drawing? Use darker shades for shadows and lighter shades for highlights, creating a three-dimensional effect.
- Is it necessary to add a background? While it’s not mandatory, a background can greatly enhance the overall composition and storytelling of your drawing.
Frequently Asked Questions
- What materials do I need to draw a cottage?
To create a charming cottage drawing, you'll need basic materials like sketching pencils, erasers, fine liners, and colored pencils or watercolors. Don't forget quality paper to ensure your artwork looks its best!
- How do I choose a reference image for my cottage drawing?
Selecting a good reference image is crucial. Look for images that capture the essence of a cottage, focusing on details like roof styles and window designs. Analyze the composition and lighting to help guide your drawing process.
- What architectural features should I include in my cottage drawing?
Familiarize yourself with classic cottage elements such as steep roofs, dormer windows, and charming porches. Incorporating these features will add authenticity and character to your drawing, making it more visually appealing.
- How can I add texture to my cottage drawing?
Texture can be achieved by varying your pencil strokes and using techniques like cross-hatching or stippling. Pay attention to materials like wood, stone, and foliage, and use different shading methods to create depth and realism.
- What natural elements should I include around my cottage?
Enhance the charm of your cottage by adding elements like trees, flowers, and a garden path. These features not only frame your cottage but also create a delightful, inviting atmosphere in your drawing.
- How do I finalize my cottage drawing?
Finalizing your drawing involves refining details, enhancing contrast, and adding finishing touches. Step back to evaluate your work, and don't hesitate to make adjustments until you're satisfied with the final look!


