
How to Bring Your Drawings to Life with Shading
Shading is not just a technique; it's the secret ingredient that transforms a simple sketch into a captivating piece of art. Imagine your drawing as a flat pancake—no flavor, no excitement. Now, sprinkle some shading on it, and voilà! You've created a delicious, three-dimensional masterpiece. In this article, we're diving deep into the world of shading, exploring various techniques and tips that will enhance your drawings, allowing you to create depth, dimension, and realism in your artwork. Whether you’re a budding artist or someone looking to refine your skills, understanding shading can elevate your work from ordinary to extraordinary.
Why is shading so crucial, you ask? Well, think about it: without shading, your drawings can appear flat and lifeless. Shading adds that vital depth and realism that makes your artwork engaging. It helps convey light, form, and texture, allowing the viewer to connect with your piece on a deeper level. Imagine walking through a gallery filled with two-dimensional drawings; they might catch your eye, but they won’t hold your attention. Now, picture those same drawings, enhanced with shading. Suddenly, they pop off the page, inviting you to explore every intricate detail. Shading is the magic wand that brings your drawings to life!
There are several shading techniques that every artist should be familiar with. Each method offers unique effects and can be used to achieve different textures in your drawings. Let’s explore some of the most popular ones:
Hatching is a straightforward yet effective technique that involves creating parallel lines to indicate shadows or texture. This method allows artists to build depth gradually in their work. Think of it like laying down the foundation of a house; without a solid base, nothing can stand tall. Hatching can be as simple or intricate as you want it to be, making it a fantastic starting point for beginners.
Single hatching uses one set of parallel lines, making it perfect for creating subtle shadows. It’s a foundational technique that every artist should master before moving on to more complex methods. Just like learning to walk before you run, mastering single hatching will set you up for success in your artistic journey.
Cross-hatching takes things up a notch by layering intersecting lines. This technique allows you to create darker shadows and richer textures, adding complexity to your drawings. It’s versatile and can produce intricate details, much like weaving a beautiful tapestry where every thread contributes to the overall picture.
Stippling is another fascinating method that uses dots to create shading and texture. This technique can produce soft gradients and is particularly effective for creating detailed and intricate illustrations. Picture a starry night sky; the dots come together to form a breathtaking scene. That’s the power of stippling!
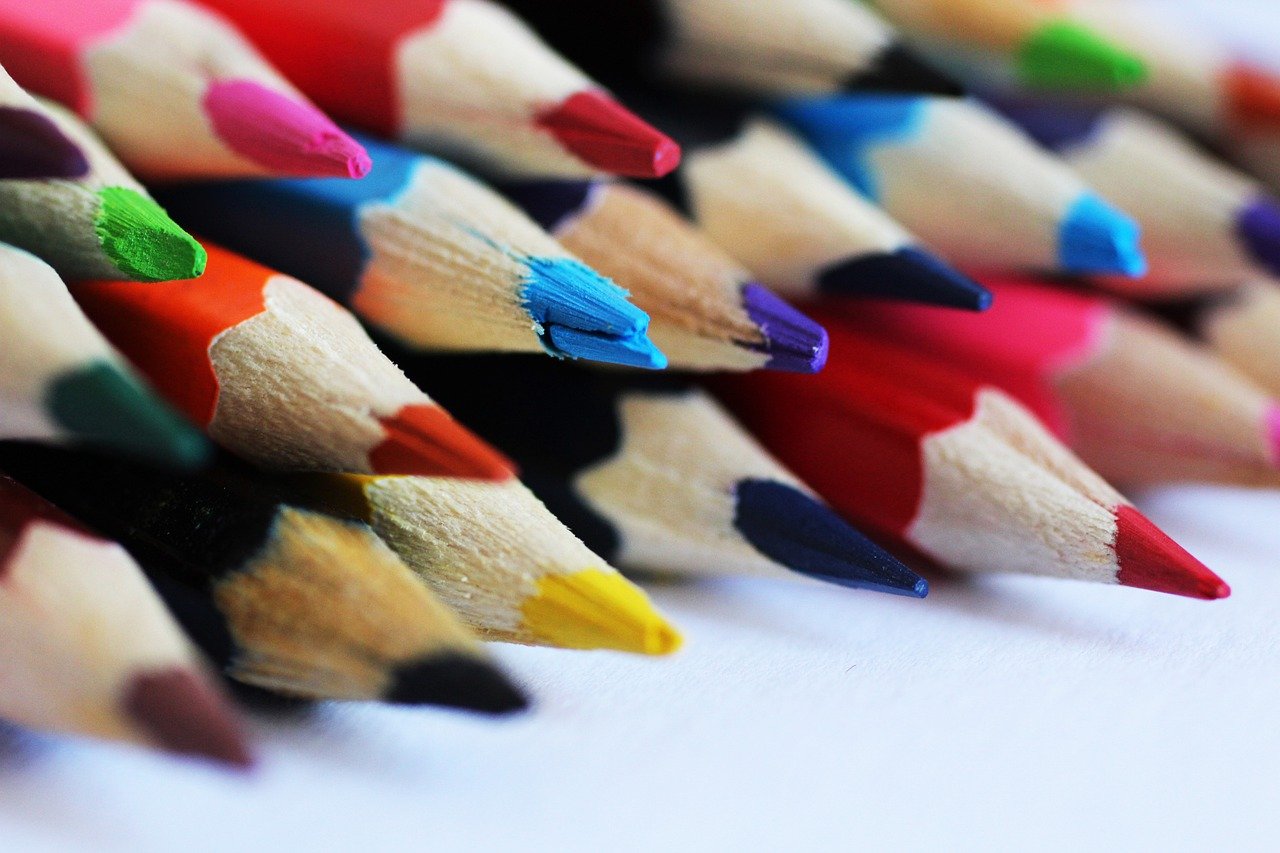
Now that you’re familiar with various shading techniques, let’s talk tools. Selecting the appropriate tools is essential for effective shading. From pencils to charcoal and blending tools, each offers different results and can significantly impact the final appearance of your artwork. Here’s a quick overview:
| Tool | Purpose |
|---|---|
| Pencils | Great for detailed shading and varying tones. |
| Charcoal | Ideal for bold, dramatic effects. |
| Blending Tools | Helps create smooth transitions and soft edges. |
Understanding pencil grades is vital for achieving a range of tones and textures in your drawings. Pencils come in various grades, from hard (H) to soft (B), and each grade affects shading quality. For instance, softer pencils produce darker marks, while harder pencils yield lighter strokes. It’s like choosing the right brush for painting; the right pencil can make all the difference!
Blending tools, such as tortillons and blending stumps, are essential for smoothing out pencil marks and creating seamless transitions. Utilizing these tools enhances the overall quality of shaded areas in your artwork. Think of them as the icing on the cake—necessary for making your masterpiece truly shine!
Effective shading techniques can create a sense of depth and dimension in your drawings. Learning how to manipulate light and shadow will enhance the three-dimensionality of your subjects. This is where the magic happens!
Recognizing the direction and intensity of light sources is crucial for accurate shading. This knowledge helps artists determine where to place highlights and shadows, enhancing realism in their work. Imagine a spotlight shining down on a stage; it casts shadows and highlights that define the scene. Your drawing needs that same attention to lighting!
Layering shadows involves gradually building up darker areas to create depth. This technique can make your drawings appear more dynamic and lifelike by emphasizing form and volume. It’s like sculpting with light; the more you layer, the more defined your subject becomes.
As with any skill, there are common pitfalls in shading that you should be aware of. Identifying and avoiding these mistakes can significantly improve your artwork. Let’s take a look at a couple of them:
Over-shading can lead to a flat appearance and lack of contrast. Striking a balance between light and dark areas is essential for creating effective depth in your drawings. Think of it like seasoning a dish; too much salt can ruin the flavor, just as too much shading can flatten your artwork.
Ignoring highlights can result in drawings that appear dull and lifeless. Incorporating highlights is crucial for achieving a realistic representation of light and enhancing the overall composition. Highlights are like the sparkle in an eye; they bring life and vibrancy to your work!
- What is the best shading technique for beginners? Single hatching is a great starting point for beginners to practice shading.
- Can I use colored pencils for shading? Absolutely! Colored pencils can add a unique touch to your shading techniques.
- How do I know where to place shadows? Observe real-life objects and consider the light source's direction to determine shadow placement.
The Importance of Shading
Shading is not just an afterthought in the world of drawing; it is a fundamental element that can transform a flat image into a captivating piece of art. Imagine looking at a drawing where the shadows and highlights dance together, bringing the subject to life. This is the magic of shading! It adds depth and realism, making your artwork more engaging and lifelike. Without shading, even the most detailed drawings can appear flat and uninteresting.
Understanding the significance of shading allows artists to effectively convey light, form, and texture. It’s like adding spices to a dish; without them, the flavor is bland. Similarly, shading enhances the visual appeal of your drawings, making them pop off the page. When done correctly, it can evoke emotions and create a connection between the viewer and the artwork.
To illustrate the importance of shading, consider this: when light hits an object, it creates areas of light and shadow. These contrasts help define the object's shape and volume. For example, think of a simple sphere. Without shading, it looks like a flat circle, but with the right shading technique, it can appear as a three-dimensional ball, complete with highlights and shadows that mimic the way light interacts with its surface.
Moreover, shading allows artists to create various textures. Whether it’s the softness of a fabric, the roughness of stone, or the smoothness of skin, shading techniques can help depict these qualities. By mastering shading, you can enhance the overall quality of your drawings and communicate your artistic vision more effectively.
In summary, shading is a crucial skill for any artist. It not only adds depth and realism but also enhances the overall impact of your artwork. By understanding and applying effective shading techniques, you can elevate your drawings from ordinary to extraordinary, capturing the attention and admiration of your audience.
- What is the best shading technique for beginners?
The single hatching technique is often recommended for beginners as it helps to build a foundation in understanding how to create shadows with parallel lines.
- How can I practice shading effectively?
Start with simple shapes and gradually move to more complex forms. Use different pencil grades and experiment with various shading techniques to see what works best for you.
- What tools do I need for shading?
A good set of pencils ranging from hard to soft, blending tools like tortillons, and quality paper can significantly enhance your shading practice.

Types of Shading Techniques
When it comes to bringing your drawings to life, shading techniques play a pivotal role in transforming flat images into captivating pieces of art. Each technique has its own unique flair, allowing artists to express textures, shadows, and depth in ways that can evoke emotion and intrigue. Let's delve into some of the most popular shading methods that can elevate your artwork from ordinary to extraordinary.
One of the most fundamental techniques is hatching. This method involves drawing a series of parallel lines to create the illusion of shadows or texture. The spacing and density of these lines can dramatically affect the shading's intensity. For instance, closely spaced lines create darker areas, while wider spacing yields lighter tones. Single hatching is the simplest form, perfect for beginners who are just getting their feet wet in the world of shading. It allows you to practice control over your pencil and develop a feel for how different pressures alter the outcome.
As you gain confidence, you might want to explore cross-hatching, which takes hatching a step further. By layering intersecting lines, you can achieve richer textures and deeper shadows. This technique is incredibly versatile; whether you're sketching a soft portrait or a rugged landscape, cross-hatching can adapt to your needs, offering a complexity that single hatching simply cannot match.
Another fascinating technique is stippling, which utilizes tiny dots to create shading and texture. This method can produce soft gradients and intricate details, making it particularly effective for illustrations that require a delicate touch. Imagine creating a starry night sky or a detailed animal fur pattern—stippling allows you to control the density of the dots to manipulate light and shadow effectively.
To give you a clearer idea of how these techniques stack up, here’s a quick comparison:
| Technique | Description | Best For |
|---|---|---|
| Hatching | Parallel lines to indicate shadows. | Beginners, simple textures. |
| Cross-Hatching | Layered intersecting lines for deeper shadows. | Detailed illustrations. |
| Stippling | Dots creating gradients and textures. | Intricate designs, soft effects. |
In summary, mastering these shading techniques can significantly enhance your artistic skills. Each method offers a unique way to express light, form, and texture, allowing you to create more engaging and lifelike drawings. Whether you're just starting out or looking to refine your skills, experimenting with these techniques will undoubtedly add depth to your artistic repertoire.

Hatching
This article explores various techniques and tips for enhancing your drawings through effective shading, allowing you to create depth, dimension, and realism in your artwork.
Shading is crucial in drawing as it adds depth and realism. Understanding its significance helps artists convey light, form, and texture, making their drawings more engaging and lifelike.
There are several shading techniques, including hatching, cross-hatching, stippling, and blending. Each method offers unique effects and can be used to achieve different textures in your drawings.
Hatching is one of the fundamental techniques that every artist should master. It involves creating a series of parallel lines to indicate shadows or texture. This technique is simple yet effective, allowing artists to build depth gradually in their work. Imagine drawing a sunny day where the shadows are cast gently; hatching can help you replicate that soft transition from light to dark.
When you start hatching, the direction and spacing of your lines play a vital role in the overall effect. Closer lines can create a darker shadow, while wider spaces can give a lighter appearance. You might find it helpful to think of hatching as a dance between light and dark, where the lines are the dancers moving gracefully across the page.
There are different types of hatching techniques that you can explore:
- Single Hatching: This basic form uses one set of parallel lines and is suitable for creating subtle shadows. It’s a foundational technique for beginners to master before exploring more complex methods.
- Cross-Hatching: By layering intersecting lines, this technique creates darker shadows and richer textures. Cross-hatching is versatile and can produce intricate details in your drawings.
Overall, hatching can be a powerful tool in your artistic arsenal. It not only enhances your drawings but also allows you to express your artistic voice. As you practice, you’ll discover how to manipulate the density and direction of your lines to evoke different emotions and atmospheres in your artwork.
Selecting the appropriate tools is essential for effective shading. Pencils, charcoal, and blending tools each offer different results and can significantly impact the final appearance of your artwork.
Different pencil grades, from hard to soft, affect shading quality. Understanding how to use various grades allows artists to achieve a range of tones and textures in their drawings.
Blending tools, such as tortillons and blending stumps, help smooth out pencil marks and create seamless transitions. Utilizing these tools enhances the overall quality of shaded areas in your artwork.
Effective shading techniques can create a sense of depth and dimension in your drawings. Learning how to manipulate light and shadow will enhance the three-dimensionality of your subjects.
Recognizing the direction and intensity of light sources is crucial for accurate shading. This knowledge helps artists determine where to place highlights and shadows, enhancing realism in their work.
Layering shadows involves gradually building up darker areas to create depth. This technique can make your drawings appear more dynamic and lifelike by emphasizing form and volume.
Identifying and avoiding common shading mistakes can significantly improve your artwork. Being aware of these pitfalls allows artists to refine their skills and produce more polished pieces.
Over-shading can lead to a flat appearance and lack of contrast. Striking a balance between light and dark areas is essential for creating effective depth in your drawings.
Ignoring highlights can result in drawings that appear dull and lifeless. Incorporating highlights is crucial for achieving a realistic representation of light and enhancing the overall composition.
Q: What is the best technique for beginners to start with?
A: Hatching is often recommended for beginners as it is simple to learn and provides a solid foundation for understanding shading.
Q: How can I improve my shading skills?
A: Practice regularly with different tools and techniques. Experimenting with light sources and observing real-life objects can also enhance your understanding of shading.
Q: Is it necessary to use blending tools?
A: While blending tools can enhance your shading, they are not strictly necessary. You can achieve great results with just your pencils and practice.

Single Hatching
Single hatching is one of the most fundamental techniques in shading, and it serves as a perfect starting point for budding artists. This method involves creating a series of parallel lines that run in one direction, which can effectively suggest shadows and texture in your drawings. Think of it as laying down the groundwork for a house; without a solid foundation, everything else can crumble. With single hatching, you can create subtle variations in tone and depth, making your artwork more engaging.
When employing single hatching, the key is to pay attention to the spacing between your lines. The closer the lines are to each other, the darker the area will appear. Conversely, wider spacing will create lighter areas. This technique allows artists to gradually build up layers of shading, much like how an artist might layer paint on a canvas. It’s a simple yet powerful way to give your drawings a sense of form and volume.
Moreover, single hatching is incredibly versatile. You can use it to depict everything from soft shadows on a round object to the texture of a rough surface. For instance, if you’re drawing a sphere, the side facing the light will have fewer lines, while the shadowed side will be filled with more closely spaced lines. This contrast helps to create a three-dimensional effect that can make your drawings pop off the page.
To master single hatching, practice is essential. Start with simple shapes like cubes or spheres, and gradually work your way up to more complex subjects. Experiment with different angles and pressures on your pencil to see how it affects the line quality. Remember, it’s not just about filling in spaces; it’s about conveying the essence of what you’re drawing. So grab your pencil, and let those lines flow!
- What is the best pencil to use for single hatching? A medium-soft pencil (like a 2B) works well, as it allows for smooth lines and easy shading.
- How can I improve my single hatching technique? Practice regularly, experiment with line spacing, and study how light interacts with different surfaces.
- Can I combine single hatching with other shading techniques? Absolutely! Combining it with cross-hatching or stippling can add even more depth and texture to your artwork.
Cross-Hatching
This article explores various techniques and tips for enhancing your drawings through effective shading, allowing you to create depth, dimension, and realism in your artwork.
Shading is crucial in drawing as it adds depth and realism. Understanding its significance helps artists convey light, form, and texture, making their drawings more engaging and lifelike.
There are several shading techniques, including hatching, cross-hatching, stippling, and blending. Each method offers unique effects and can be used to achieve different textures in your drawings.
Hatching involves creating parallel lines to indicate shadows or texture. This technique is simple yet effective, allowing artists to build depth gradually in their work.
Single hatching uses one set of parallel lines, suitable for creating subtle shadows. It’s a foundational technique for beginners to master before exploring more complex methods.
Cross-hatching is a dynamic shading technique that involves layering intersecting lines to create darker shadows and richer textures. This method not only adds depth but also enhances the intricacy of your drawings. Imagine weaving a tapestry; each line you add contributes to the overall design, creating a more complex and visually appealing piece. By varying the spacing and angle of your lines, you can manipulate the perceived weight of the shadow and the texture of the surface you're depicting.
Cross-hatching can be particularly useful when representing forms that are rounded or have multiple planes. For instance, when shading a sphere, lines can radiate from the top to the bottom, crossing at different angles to suggest curvature. This technique allows you to create a sense of volume and three-dimensionality that flat shading simply cannot achieve.
Here are a few tips to keep in mind when practicing cross-hatching:
- Vary Line Thickness: Use a combination of thick and thin lines to create contrast.
- Adjust Line Spacing: Closer lines create darker areas, while wider spacing results in lighter shades.
- Experiment with Angles: Changing the angle of your lines can add texture and interest.
With practice, cross-hatching can transform your drawings, giving them a lifelike quality that draws the viewer in. It's a versatile technique that can be adapted for various subjects, from landscapes to portraits, making it a valuable tool in any artist's arsenal.
Selecting the appropriate tools is essential for effective shading. Pencils, charcoal, and blending tools each offer different results and can significantly impact the final appearance of your artwork.
Different pencil grades, from hard to soft, affect shading quality. Understanding how to use various grades allows artists to achieve a range of tones and textures in their drawings.
Blending tools, such as tortillons and blending stumps, help smooth out pencil marks and create seamless transitions. Utilizing these tools enhances the overall quality of shaded areas in your artwork.
Effective shading techniques can create a sense of depth and dimension in your drawings. Learning how to manipulate light and shadow will enhance the three-dimensionality of your subjects.
Recognizing the direction and intensity of light sources is crucial for accurate shading. This knowledge helps artists determine where to place highlights and shadows, enhancing realism in their work.
Layering shadows involves gradually building up darker areas to create depth. This technique can make your drawings appear more dynamic and lifelike by emphasizing form and volume.
Identifying and avoiding common shading mistakes can significantly improve your artwork. Being aware of these pitfalls allows artists to refine their skills and produce more polished pieces.
Over-shading can lead to a flat appearance and lack of contrast. Striking a balance between light and dark areas is essential for creating effective depth in your drawings.
Ignoring highlights can result in drawings that appear dull and lifeless. Incorporating highlights is crucial for achieving a realistic representation of light and enhancing the overall composition.
Q: What is the best tool for cross-hatching?
A: While pencils are commonly used, fine-tipped pens or markers can also produce excellent results for cross-hatching.
Q: How do I know when to stop shading?
A: Step back and observe your drawing from a distance. If it feels balanced and conveys the desired depth, you’re likely finished.
Q: Can I use cross-hatching for color drawings?
A: Absolutely! Cross-hatching can enhance color illustrations by adding depth and texture.

Stippling
Stippling is a fascinating shading technique that involves using dots to create depth and texture in your drawings. Imagine creating an entire landscape or a portrait just by placing tiny dots on the paper. It’s like painting with a pointillist brush, but with your pencil or ink! This method can produce soft gradients, giving your artwork a unique and intricate appearance. The beauty of stippling lies in its ability to allow artists to control the density and distribution of dots, which can lead to stunning visual effects.
When you use stippling, the closer the dots are to each other, the darker the area appears. Conversely, spreading the dots further apart will create lighter areas. This technique is particularly effective for achieving detailed illustrations, such as realistic skin textures or delicate shadows in nature scenes. It requires patience and precision, but the results can be incredibly rewarding.
One of the key advantages of stippling is its versatility. You can use it to create a variety of textures and effects, from soft shadows to more defined lines. To get started with stippling, consider the following tips:
- Start Light: Begin with lighter dots and gradually build up density to create depth.
- Vary Dot Size: Experiment with different dot sizes to add more interest and dimension.
- Practice Patience: Take your time; stippling can be time-consuming, but it's worth it for the detail.
As you practice stippling, you might find it helpful to create a small sample piece where you can experiment with different densities and patterns. This will give you a better understanding of how to manipulate dots to achieve the desired shading effect. Remember, the key to mastering stippling is to keep your hand steady and your eye keen on the details!
Q: What materials do I need for stippling?
A: You can use any drawing medium that allows for precise dot placement, such as fine-tipped pens, pencils, or even markers. Experiment with different tools to find what works best for you.
Q: Is stippling suitable for beginners?
A: Absolutely! While it requires practice, stippling is a great way for beginners to develop their control and patience. Start with simple shapes and gradually move to more complex subjects.
Q: How can I improve my stippling technique?
A: Regular practice is essential. Try to create small stippling exercises focused on different textures and shadows. Observing real-life objects and how light interacts with them can also enhance your skills.

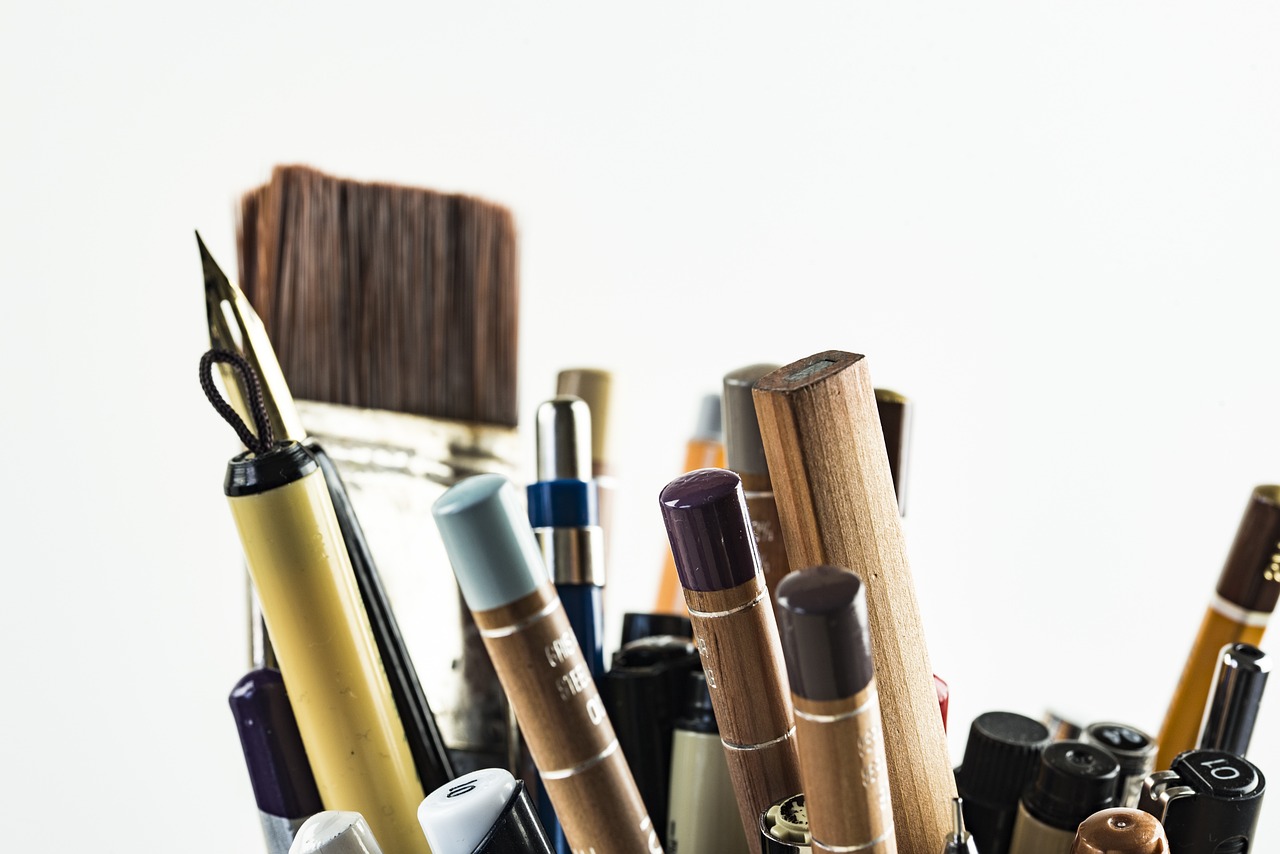
Choosing the Right Tools
When it comes to shading your drawings, the tools you choose can make all the difference. Think of your tools as the paintbrushes of a painter; the right ones can elevate your artwork from ordinary to extraordinary. Whether you're a budding artist or a seasoned pro, understanding the various tools available will empower you to achieve stunning results in your shading techniques.
First and foremost, let’s talk about pencils. The type of pencil you use can dramatically affect the quality of your shading. Pencils are graded on a scale from H (hard) to B (soft), with HB being the middle ground. Hard pencils create lighter lines and are great for fine details, while softer pencils offer richer, darker tones, perfect for deep shadows. Here’s a quick reference:
| Pencil Grade | Characteristics | Best Used For |
|---|---|---|
| H | Hard, light lines | Fine details, light shading |
| HB | Medium hardness | General drawing |
| B | Soft, dark lines | Shadows, bold strokes |
Alongside pencils, charcoal is another fantastic tool for shading. Charcoal allows for a broader range of tones and can create deep, rich blacks that pencils often struggle to achieve. It's perfect for larger areas where you want to create dramatic contrasts. Just remember, charcoal can be messy, so keep a smock handy!
Finally, let’s not forget about blending tools. These handy little gadgets, such as tortillons and blending stumps, are essential for achieving smooth transitions between shades. They help to soften harsh lines and give your shading a more polished look. Using these tools can be likened to using a sponge to blend colors in painting; they help create that seamless, flowing effect that makes your artwork come alive.
In summary, the right tools can significantly enhance your shading techniques and overall artwork. By experimenting with different pencil grades, incorporating charcoal for depth, and using blending tools for smooth transitions, you’ll be well on your way to creating stunning, lifelike drawings that capture the viewer's attention.
- What is the best pencil for beginners? A good starting point is an HB pencil, as it offers a balance between hardness and softness, making it versatile for various techniques.
- Can I use colored pencils for shading? Absolutely! Colored pencils can add a unique dimension to your artwork, allowing for creative shading techniques.
- How do I clean my blending tools? Gently wipe them with a clean cloth or paper towel to remove excess graphite or charcoal after use.
Pencil Grades
When it comes to shading, understanding is like knowing the secret ingredients to a delicious recipe. Each pencil grade, ranging from hard to soft, offers a unique way to create various tones and textures in your artwork. The grading system typically uses a combination of letters and numbers, where the letter 'H' indicates a hard pencil, 'B' signifies a soft pencil, and 'F' stands for fine point. The higher the number in front of the 'H', the harder the pencil, while the higher the number in front of the 'B', the softer the pencil. This might sound a bit complicated at first, but once you dive in, it becomes second nature.
For instance, a 2H pencil is great for creating light lines and fine details, making it ideal for initial sketches or when you want to lay down a foundation without committing too heavily. On the other hand, a 4B pencil allows for rich, dark shading, which can bring depth and drama to your drawings. The beauty of using different pencil grades lies in their ability to create a rich tapestry of tones that can make your artwork pop off the page.
To help you visualize the differences in pencil grades, here’s a simple table:
| Pencil Grade | Characteristics | Best Uses |
|---|---|---|
| H (Hard) | Produces lighter marks, less graphite | Fine lines, detailed work, initial sketches |
| HB (Medium) | Balanced hardness and softness | General writing, basic shading |
| B (Soft) | Creates darker marks, more graphite | Shading, darker lines, expressive details |
By experimenting with various pencil grades, you can discover how each one interacts with your drawing style. It’s like having a toolbox at your disposal, where each tool has its purpose. So, don’t hesitate to mix and match! You might find that using a combination of grades can yield stunning results, giving your artwork a unique flair that sets it apart.
- What pencil grade should I start with? If you’re just beginning, an HB pencil is a great all-rounder to start with.
- Can I use colored pencils for shading? Absolutely! Colored pencils can add a beautiful layer of depth and color to your shading.
- How do I know which grade to use for shading? It often depends on the effect you want to achieve; softer pencils (B grades) are typically better for darker shadows, while harder pencils (H grades) are great for lighter areas.
Blending Tools
This article explores various techniques and tips for enhancing your drawings through effective shading, allowing you to create depth, dimension, and realism in your artwork.
Shading is crucial in drawing as it adds depth and realism. Understanding its significance helps artists convey light, form, and texture, making their drawings more engaging and lifelike.
There are several shading techniques, including hatching, cross-hatching, stippling, and blending. Each method offers unique effects and can be used to achieve different textures in your drawings.
Hatching involves creating parallel lines to indicate shadows or texture. This technique is simple yet effective, allowing artists to build depth gradually in their work.
Single hatching uses one set of parallel lines, suitable for creating subtle shadows. It’s a foundational technique for beginners to master before exploring more complex methods.
Cross-hatching involves layering intersecting lines to create darker shadows and richer textures. This technique is versatile and can produce intricate details in your drawings.
Stippling uses dots to create shading and texture. This method can produce soft gradients and is particularly effective for creating detailed and intricate illustrations.
Selecting the appropriate tools is essential for effective shading. Pencils, charcoal, and blending tools each offer different results and can significantly impact the final appearance of your artwork.
Different pencil grades, from hard to soft, affect shading quality. Understanding how to use various grades allows artists to achieve a range of tones and textures in their drawings.
When it comes to shading, play a pivotal role in achieving smooth transitions and a polished look in your artwork. These tools help artists to merge different tones seamlessly, creating a more realistic representation of light and shadow. Commonly used blending tools include tortillons, blending stumps, and even your fingers. Each of these tools serves a unique purpose:
- Tortillons: These are tightly rolled paper tools that help in blending pencil marks smoothly. They are great for softening edges and creating gradients.
- Blending Stumps: Similar to tortillons but made from a firmer material, blending stumps are perfect for more controlled blending, especially in detailed areas.
- Fingers: Sometimes, the best tool is your own finger! Using your finger can produce a natural blend, but be cautious as oils from your skin can affect the pencil's texture.
Utilizing these tools effectively requires practice and understanding of how they interact with different mediums. For instance, when using a pencil, applying varying pressure can yield different results, and combining this with a blending stump can elevate the shading quality significantly. It’s like cooking; the right tools and techniques can turn a simple dish into a gourmet meal!
Effective shading techniques can create a sense of depth and dimension in your drawings. Learning how to manipulate light and shadow will enhance the three-dimensionality of your subjects.
Recognizing the direction and intensity of light sources is crucial for accurate shading. This knowledge helps artists determine where to place highlights and shadows, enhancing realism in their work.
Layering shadows involves gradually building up darker areas to create depth. This technique can make your drawings appear more dynamic and lifelike by emphasizing form and volume.
Identifying and avoiding common shading mistakes can significantly improve your artwork. Being aware of these pitfalls allows artists to refine their skills and produce more polished pieces.
Over-shading can lead to a flat appearance and lack of contrast. Striking a balance between light and dark areas is essential for creating effective depth in your drawings.
Ignoring highlights can result in drawings that appear dull and lifeless. Incorporating highlights is crucial for achieving a realistic representation of light and enhancing the overall composition.
Q: What is the best tool for blending?
A: The best tool depends on personal preference. Tortillons and blending stumps are popular choices for their ability to create smooth transitions.
Q: Can I use my fingers for blending?
A: Yes, but be cautious! Oils from your skin can affect the texture of the pencil marks.
Q: How do I know when to stop blending?
A: It often comes down to personal taste. If the shading looks too harsh or the transitions seem unnatural, it may be time to stop.
Creating Depth and Dimension
When it comes to art, creating a sense of depth and dimension can transform a flat drawing into a captivating piece that draws the viewer in. Imagine looking at a drawing of a landscape where the mountains seem to rise majestically in the background, or a portrait where the subject's features pop out as if they are ready to step off the page. This is the magic of effective shading! By mastering a few techniques, you can manipulate light and shadow to enhance the three-dimensionality of your subjects.
One of the first steps in creating depth is understanding the light sources in your artwork. Recognizing where the light is coming from and how it interacts with different surfaces is crucial. For instance, if you’re drawing a sphere, the side facing the light will be illuminated, while the opposite side will be in shadow. This contrast is what gives the sphere its roundness. To help you visualize this, consider the following:
| Light Position | Shadow Placement | Highlight Area |
|---|---|---|
| Above | Below the sphere | Top of the sphere |
| To the left | Right side of the sphere | Left side of the sphere |
Once you’ve established your light source, the next step is to layer shadows. This technique involves gradually building up darker areas to create a more pronounced sense of depth. Start with lighter shades and slowly add darker tones, paying attention to how the shadows interact with the forms you are creating. For example, in a drawing of a human face, the areas under the chin or around the nose will naturally be darker due to the way light falls on the features. Layering these shadows not only adds realism but also brings a dynamic quality to your artwork.
Another important aspect to consider is the contrast between light and dark areas. Think of it as a dance between the two; too much light can wash out a drawing, while too much darkness can make it feel flat. Striking the right balance is essential. This is where the concept of highlighting comes into play. By incorporating highlights, you can effectively guide the viewer’s eye and emphasize the most important parts of your artwork.
In summary, creating depth and dimension in your drawings is all about understanding light and shadow, layering your techniques, and maintaining a balance between highlights and dark areas. With practice, you’ll find that your drawings will not only look more realistic but will also evoke emotion and intrigue, inviting viewers to explore the stories behind each piece. So grab your pencils, and let’s bring your drawings to life!
- What is the best way to practice shading techniques? Start with simple shapes and gradually move on to more complex forms. Regular practice will help you understand how light interacts with different surfaces.
- Can I use digital tools for shading? Absolutely! Digital art programs offer various brushes and tools that mimic traditional shading techniques, allowing for endless experimentation.
- How can I avoid over-shading my drawings? Keep stepping back from your work to assess the overall balance of light and dark. It can also help to work in layers, gradually building up your shadows.

Understanding Light Sources
Understanding light sources is a fundamental aspect of shading that can elevate your drawings from flat to fabulous. When you think about it, light is like the magician of the art world—it reveals the form, creates drama, and adds life to your work. Imagine a sculpture in a dim room; without light, you wouldn't see its curves or details. The same principle applies to drawing. By recognizing the direction, intensity, and quality of light, you can place your highlights and shadows effectively, creating a sense of realism that draws viewers in.
To illustrate the impact of light sources, consider the following aspects:
- Direction: The angle at which light hits your subject influences how shadows are cast. For instance, if the light source is above, shadows will fall below the object, creating a natural look.
- Intensity: A strong light source creates sharp, defined shadows, while softer light results in gentle gradients. Think about how sunlight on a bright day differs from the soft glow of a lamp.
- Quality: The type of light—whether it’s natural or artificial—affects the mood of your drawing. Harsh light can create stark contrasts, while diffused light can produce softer transitions.
By paying attention to these factors, you’ll be able to manipulate light in your drawings, guiding the viewer's eye and enhancing the three-dimensionality of your subjects. For example, when drawing a face, consider where the light hits the forehead and cheekbones. This knowledge not only helps you render realistic features but also adds emotional depth to your artwork. It’s like telling a story through light and shadow, where every highlight and dark area contributes to the narrative.
Moreover, experimenting with different light sources can yield surprising results. Try drawing the same object under various lighting conditions—morning sunlight, midday brightness, and evening shadows. You’ll quickly notice how each scenario transforms the object, revealing new textures and forms. This practice will sharpen your observational skills and deepen your understanding of how light interacts with surfaces.
In conclusion, mastering the concept of light sources is essential for any artist looking to enhance their shading techniques. It’s not just about where you place the shadows, but about understanding the entire environment that shapes your subject. So grab your pencil, find a light source, and start exploring how it can breathe life into your drawings!
- What is the best way to practice shading? Regular practice with different techniques and subjects is key. Start with simple shapes and gradually move to complex forms.
- How can I improve my understanding of light and shadow? Study real-life objects under various light conditions, and try to replicate those effects in your drawings.
- Are there specific tools recommended for shading? Yes! Pencils, charcoal, and blending tools like tortillons can greatly enhance your shading techniques.

Layering Shadows
This article explores various techniques and tips for enhancing your drawings through effective shading, allowing you to create depth, dimension, and realism in your artwork.
Shading is crucial in drawing as it adds depth and realism. Understanding its significance helps artists convey light, form, and texture, making their drawings more engaging and lifelike.
There are several shading techniques, including hatching, cross-hatching, stippling, and blending. Each method offers unique effects and can be used to achieve different textures in your drawings.
Hatching involves creating parallel lines to indicate shadows or texture. This technique is simple yet effective, allowing artists to build depth gradually in their work.
Single hatching uses one set of parallel lines, suitable for creating subtle shadows. It’s a foundational technique for beginners to master before exploring more complex methods.
Cross-hatching involves layering intersecting lines to create darker shadows and richer textures. This technique is versatile and can produce intricate details in your drawings.
Stippling uses dots to create shading and texture. This method can produce soft gradients and is particularly effective for creating detailed and intricate illustrations.
Selecting the appropriate tools is essential for effective shading. Pencils, charcoal, and blending tools each offer different results and can significantly impact the final appearance of your artwork.
Different pencil grades, from hard to soft, affect shading quality. Understanding how to use various grades allows artists to achieve a range of tones and textures in their drawings.
Blending tools, such as tortillons and blending stumps, help smooth out pencil marks and create seamless transitions. Utilizing these tools enhances the overall quality of shaded areas in your artwork.
Effective shading techniques can create a sense of depth and dimension in your drawings. Learning how to manipulate light and shadow will enhance the three-dimensionality of your subjects.
Recognizing the direction and intensity of light sources is crucial for accurate shading. This knowledge helps artists determine where to place highlights and shadows, enhancing realism in their work.
Layering shadows is an essential technique for adding depth to your drawings. It involves gradually building up darker areas to create a more pronounced sense of form and volume. Think of it like painting with light and darkness; you want to create a harmonious balance that draws the viewer's eye. Start with a light base layer, and then, using a softer pencil or charcoal, gently add more shadow in specific areas. This method not only enhances the dimensionality of your subject but also allows for more control over the final outcome.
To effectively layer shadows, consider the following steps:
- Start Light: Begin with a light touch to establish the initial shadow. This will serve as the foundation for your layering.
- Build Gradually: Use progressively darker pencils or charcoal to add depth. It’s like stacking building blocks; each layer should support the next.
- Blend Wisely: After applying the darker shades, use blending tools to smooth out transitions between light and dark areas. This will give your drawing a more polished look.
- Assess and Adjust: Step back and evaluate your work frequently. This will help you identify areas that may need more shadow or highlights.
Layering shadows not only adds realism but also brings your artwork to life. It’s about creating a visual story where light and shadow play together, inviting the viewer to explore every detail.
Identifying and avoiding common shading mistakes can significantly improve your artwork. Being aware of these pitfalls allows artists to refine their skills and produce more polished pieces.
Over-shading can lead to a flat appearance and lack of contrast. Striking a balance between light and dark areas is essential for creating effective depth in your drawings.
Ignoring highlights can result in drawings that appear dull and lifeless. Incorporating highlights is crucial for achieving a realistic representation of light and enhancing the overall composition.
Q: How can I practice shading effectively?
A: Start with simple shapes and gradually move to more complex objects. Use reference images to understand how light interacts with different surfaces.
Q: What tools are best for beginners?
A: A basic set of pencils ranging from hard to soft, along with blending stumps, will give you a good foundation for practicing shading techniques.
Q: Can I use colored pencils for shading?
A: Absolutely! Colored pencils can add a unique dimension to your artwork. Just remember to layer colors gradually for the best effect.

Common Mistakes to Avoid
When it comes to shading, even the most experienced artists can stumble upon a few common pitfalls that can detract from their work. Being aware of these mistakes is the first step toward creating stunning, lifelike drawings. One of the most prevalent errors is over-shading. This occurs when an artist applies too much shadow, leading to a flat appearance that lacks contrast. Imagine a beautiful landscape where the sky is a dull gray rather than a vibrant blue; that's what over-shading can do to your art. To prevent this, always strive for a balance between light and dark areas. Think of your drawing as a dance between shadows and highlights, where each plays a crucial role in bringing your subject to life.
Another frequent mistake is neglecting highlights. Highlights are essential for creating a sense of realism and depth. Without them, your drawings can appear dull and lifeless, much like a photograph that’s been washed out. When you forget to include highlights, you're missing out on the opportunity to showcase the play of light on your subject. To avoid this, take a moment to observe how light interacts with different surfaces. For instance, a shiny apple will have bright spots where the light hits it, while a matte surface will reflect light differently. Incorporating these highlights can elevate your work from ordinary to extraordinary.
Additionally, many artists often struggle with inconsistent shading. This inconsistency can manifest as abrupt transitions between light and dark areas, which can disrupt the flow of your drawing. To achieve smooth transitions, consider using blending tools such as tortillons or your fingers to gently smudge the pencil marks. This technique can create a more cohesive look, allowing your artwork to breathe and feel more organic. Remember, shading is not just about darkening areas; it’s about creating a gradient that guides the viewer's eye through your piece.
Lastly, don’t forget the importance of practice and observation. Many artists rush through their shading techniques without taking the time to study real-life objects. Spend time observing how light falls on different surfaces, and practice replicating these effects in your sketches. Set up a simple still life with a lamp and some objects, and take notes on where the shadows and highlights fall. This practice will not only improve your shading skills but also enhance your overall understanding of light and form.
- What is the best way to practice shading techniques?
Start with simple shapes and gradually move to more complex objects. Use a variety of shading techniques and tools to find what works best for you. - How can I avoid over-shading my drawings?
Regularly step back and assess your work from a distance. This will help you see if your shadows are too dark and if you need to lighten certain areas. - Are there specific tools recommended for blending?
Blending stumps, tortillons, and even your fingers can be effective. Experiment with different tools to see which gives you the desired effect.
Over-Shading
When it comes to shading, one of the most common pitfalls artists encounter is . This occurs when too much darkness is applied to a drawing, resulting in a flat and lifeless appearance. Imagine trying to add depth to a beautiful landscape, only to end up burying it under layers of graphite that obscure its natural beauty. The key to effective shading is to strike a balance between light and dark, creating a dynamic contrast that draws the viewer in.
Over-shading can lead to several issues in your artwork. First, it diminishes the three-dimensionality of your subjects. Instead of appearing round and full, they may look like cardboard cutouts. Second, it can create a sense of heaviness that detracts from the overall composition. To avoid this, it's essential to remember that shadows should enhance the form, not overwhelm it. Think of shading as seasoning in cooking; just the right amount can elevate a dish, but too much can ruin it.
To help you understand the nuances of shading better, consider these tips:
- Use a Reference: Always have a reference image to guide you on where shadows should fall. This will help you maintain a realistic approach.
- Build Gradually: Start with lighter shades and gradually layer darker tones. This technique allows for better control over the depth and richness of your shadows.
- Step Back: Periodically stepping back from your work can provide a fresh perspective. This will help you see if you've gone overboard with the shading.
Additionally, consider using a value scale to guide your shading process. A value scale is a simple gradient that shows the transition from light to dark. By comparing your shading against this scale, you can ensure that you're not straying too far into the dark side. Below is a simple representation of a value scale:
| Value | Shade |
|---|---|
| 1 | White |
| 2 | Light Gray |
| 3 | Medium Gray |
| 4 | Dark Gray |
| 5 | Very Dark Gray |
| 6 | Black |
Ultimately, over-shading can be a significant barrier to achieving the desired depth and realism in your drawings. By being mindful of your shading techniques and continually assessing your work, you can avoid this common mistake and create art that truly resonates with your audience.

Neglecting Highlights
When it comes to shading, one of the most common mistakes artists make is . Highlights are the bright spots in your artwork that reflect light, and they play a crucial role in creating a sense of realism. Imagine a shiny apple; without the gleam of light on its surface, it would appear flat and lifeless. Similarly, in your drawings, highlights are essential for giving objects their three-dimensional form and making them pop off the page.
Ignoring highlights can lead to drawings that lack vibrancy and depth. Think of highlights as the finishing touch that adds that extra sparkle to your artwork. They help to define the contours of objects and can significantly enhance the overall composition. When you fail to incorporate highlights, your subjects can end up looking dull, as if they've been trapped in a shadowy void. To avoid this pitfall, it’s essential to observe how light interacts with different surfaces and to replicate that in your drawings.
To effectively use highlights in your artwork, consider the following tips:
- Observe Real Life: Take a moment to study how light affects various objects around you. Notice where the light hits and where shadows fall.
- Use Contrast: Make sure to balance your highlights with darker areas. This contrast will help create a more dynamic and engaging piece.
- Experiment with Different Techniques: Try different shading techniques to see how they can enhance your highlights. Blending, stippling, or even using a white pencil can create striking effects.
Incorporating highlights into your drawings doesn’t have to be complicated. Start by identifying the light source in your composition and determine where the light would naturally hit your subject. From there, you can gradually build up your highlights with a lighter pencil, or even leave areas of the paper untouched to let the white shine through. Remember, the goal is to create a balance between light and shadow, allowing your artwork to breathe and come to life.
Q1: Why are highlights important in drawing?
Highlights are crucial because they create the illusion of depth and dimension, making your drawings appear more realistic and engaging.
Q2: How do I know where to place highlights?
Observe the light source in your composition. Highlights typically appear on surfaces facing the light and can vary in intensity based on the light's angle and strength.
Q3: Can I use colors for highlights?
Absolutely! While white or lighter shades are common for highlights, using colors can add vibrancy and interest, especially in colored drawings.
Frequently Asked Questions
- What is the importance of shading in drawing?
Shading is essential because it adds depth and realism to your artwork. It helps convey light, form, and texture, making your drawings more engaging and lifelike. Without shading, your drawings may appear flat and less dynamic.
- What are the different types of shading techniques?
There are several shading techniques, including hatching, cross-hatching, stippling, and blending. Each technique has its unique effects and can be used to achieve various textures in your drawings, allowing for a wide range of artistic expression.
- How do I choose the right tools for shading?
Selecting the appropriate tools is vital for effective shading. Pencils, charcoal, and blending tools each provide different results. Understanding the characteristics of each tool can significantly impact the final appearance of your artwork.
- What pencil grades should I use for shading?
Pencil grades range from hard to soft, affecting shading quality. Softer pencils create darker marks, while harder ones produce lighter tones. Knowing how to use various grades allows you to achieve a broad spectrum of tones and textures in your drawings.
- How can I create depth and dimension in my drawings?
To create depth and dimension, you should learn to manipulate light and shadow effectively. Recognizing light sources and layering shadows gradually will enhance the three-dimensionality of your subjects, making them appear more lifelike.
- What are common mistakes to avoid when shading?
Common mistakes include over-shading, which can lead to a flat appearance, and neglecting highlights, which can make your drawings look dull. Striking a balance between light and dark areas, along with incorporating highlights, is crucial for effective shading.


