
Acrylic Painting for Beginners: A Beginner's Guide
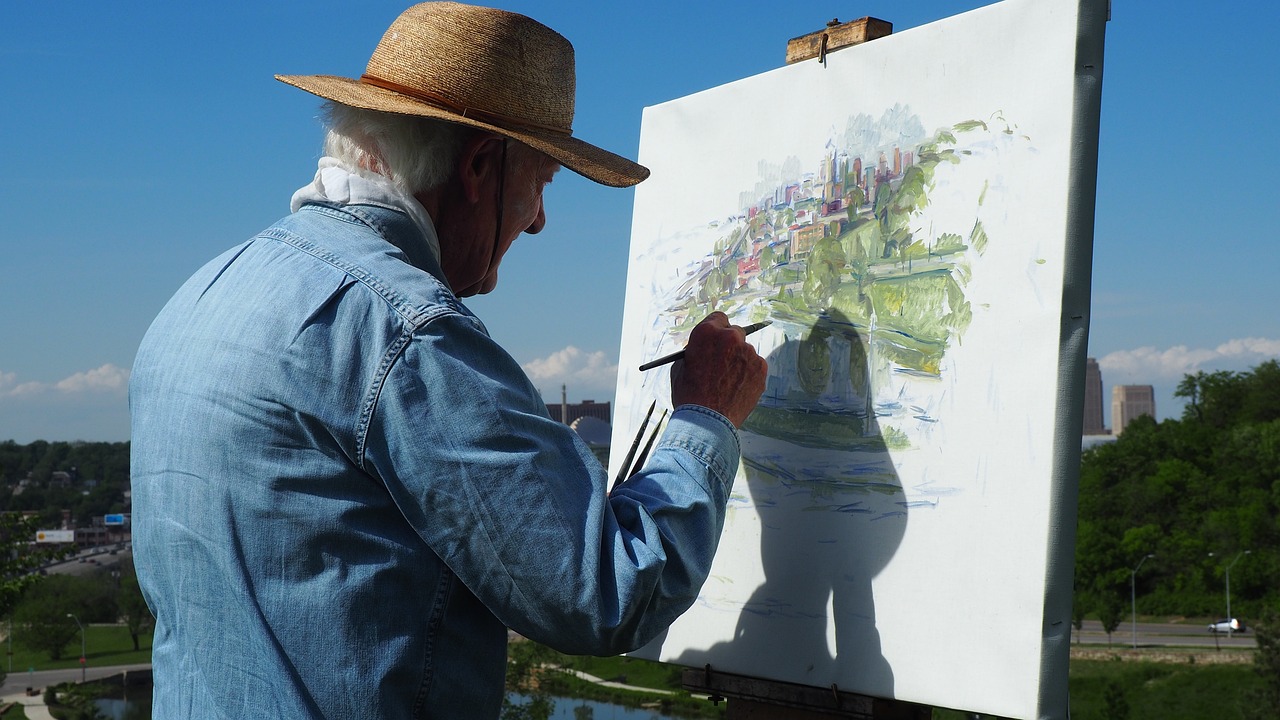
Welcome to the vibrant world of acrylic painting! If you’ve ever looked at a stunning piece of art and thought, “I wish I could create something like that,” you’re in the right place. Acrylic painting is not only a fantastic medium for expressing your creativity, but it’s also incredibly accessible for beginners. In this guide, we’ll embark on an exciting journey to uncover the essential techniques, tools, and tips that will help you dive into your artistic adventure with confidence. Imagine standing in front of a blank canvas, your heart racing with anticipation, knowing that you have the power to bring your imagination to life. That’s the magic of acrylics!
Before you start splashing paint around, it’s crucial to gather the right materials. Think of it like setting up your toolkit before embarking on a home improvement project. The right tools make all the difference! For acrylic painting, you’ll need a few basic items:
- Acrylic Paints: Look for student-grade paints if you’re just starting out. They’re affordable and come in a wide range of colors.
- Brushes: Invest in a variety of brushes, including flat, round, and filbert shapes. Each brush offers different effects.
- Canvas or Canvas Boards: Choose pre-stretched canvases or canvas boards. They provide a great surface for your artwork.
- Palette: A palette is essential for mixing your colors. You can use a disposable palette or a traditional wooden one.
- Water Container: Keep a jar of water nearby for rinsing your brushes between colors.
- Rags or Paper Towels: These are handy for wiping brushes and cleaning up spills.
With these materials in hand, you’ll be ready to unleash your creativity. Remember, the quality of your materials can impact your final piece, so don’t skimp too much on your paint and brushes!
Now that you have your materials, it’s time to get your hands dirty! Understanding a few fundamental techniques will elevate your acrylic painting skills and help you create stunning effects. Let’s break down some essential methods:
Blending is like a magic trick in acrylic painting; it allows you to create smooth transitions between colors, making your artwork come alive. Imagine painting a sunset where the colors melt into each other seamlessly. To master this technique, you can experiment with different approaches:
Wet-on-wet blending is an exciting method where you apply wet paint on top of wet paint. This creates soft, dreamy backgrounds and gradients. Picture a beautiful sky at dusk, where the blues and purples blend effortlessly. To achieve this effect, work quickly and use a clean brush to blend the colors while they’re still wet. It’s like dancing with the paint!
On the other hand, dry brushing is a technique that uses a dry brush to apply paint. This method creates texture and can add depth to your artwork. Think of it as gently dusting powder onto a surface. You’ll want to load your brush with a small amount of paint and lightly drag it across the canvas. The result? Beautiful textures that make your piece pop!
Layering is another vital technique in acrylic painting. It involves applying multiple layers of paint to achieve depth and richness. Imagine building a sandwich; each layer adds flavor and complexity. Start with a base layer, let it dry, and then add additional layers to create shadows, highlights, and intricate details. This technique not only enhances the visual appeal of your painting but also allows for corrections and adjustments along the way.
Understanding color theory is crucial for creating vibrant paintings. It’s like having a secret recipe for mixing the perfect colors! Let’s dive into the basics:
Primary colors (red, blue, and yellow) are the building blocks of all other colors. By mixing these colors, you can create secondary colors (green, orange, and purple). It’s essential to know how these colors interact, as they will be the foundation of your color palette.
Once you grasp the basics, you can start creating custom shades to make your artwork unique. Mixing colors is like cooking; it’s all about experimenting! Start with equal parts of two colors and adjust as necessary. Want a softer hue? Add white. Need a darker tone? Mix in some black. The possibilities are endless!
Q: Do I need to take classes to learn acrylic painting?
A: Not at all! Many artists are self-taught. Start experimenting and have fun!
Q: How do I clean my brushes?
A: Rinse them in water immediately after use and reshape the bristles. For stubborn paint, use soap and water.
Q: Can I use acrylics on paper?
A: Yes, but make sure to use thicker paper designed for wet media to prevent warping.
Choosing the Right Materials
When diving into the vibrant world of acrylic painting, it’s essential to equip yourself with the right materials. Think of it like gearing up for an adventure; having the right tools can make all the difference between a smooth journey and a bumpy ride. So, what do you need to get started? Let’s break it down!
First and foremost, you’ll need acrylic paints. These paints come in a variety of colors and consistencies, making them perfect for beginners. They dry quickly, allowing you to layer and modify your artwork without waiting for hours. When selecting your paints, consider purchasing a basic set of primary colors—red, blue, yellow—along with black and white. This way, you can mix and create a rainbow of shades!
Next up, you’ll want to invest in some quality brushes. Brushes come in various shapes and sizes, each serving a unique purpose. For beginners, I recommend starting with a set that includes:
- Flat brushes for bold strokes and filling in larger areas.
- Round brushes for detail work and fine lines.
- Filbert brushes for blending and soft edges.
Don’t forget to have a palette on hand! A palette is where you'll mix your colors, and it can be a simple plastic or wooden surface. If you’re feeling fancy, you can even get a disposable palette pad that makes cleanup a breeze.
Now, let’s talk about canvases. You can choose between stretched canvases, canvas boards, or even acrylic paper. Stretched canvases are fantastic for beginners because they’re ready to go right out of the package. Canvas boards are also a great option, providing a sturdy surface without the bulk. If you’re looking to practice, acrylic paper is an economical choice that mimics the texture of canvas.
Lastly, don’t overlook the importance of water and rags. Acrylic paints are water-soluble, which means you can easily clean your brushes and tools with water. Having a container filled with clean water nearby will help keep your workspace tidy. And trust me, you’ll want to have some old rags or paper towels handy for quick cleanups and to wipe off excess paint.
In summary, here’s a quick overview of the materials you'll need:
| Material | Purpose |
|---|---|
| Acrylic Paints | To create vibrant artworks |
| Brushes | For applying paint and creating details |
| Palette | For mixing colors |
| Canvases | As the surface for your artwork |
| Water and Rags | For cleaning brushes and workspace |
With these materials in hand, you’re ready to embark on your acrylic painting journey! Remember, the key to success is to experiment and have fun. Every artist has their unique style, and the more you practice, the more you’ll discover what works best for you. So, grab your brushes, unleash your creativity, and let the colors flow!
Basic Acrylic Techniques
When diving into the vibrant world of acrylic painting, mastering some basic techniques is essential for unleashing your creativity. Acrylic paints are incredibly versatile, allowing you to explore various styles and effects. Whether you're aiming for realism or abstract expression, understanding these fundamental techniques will set you on the right path. Let's break down the key methods that every beginner should familiarize themselves with, ensuring you can create stunning pieces that reflect your vision.
Blending is a crucial technique in acrylic painting that creates smooth transitions between colors, adding depth and dimension to your artwork. Imagine painting a sunset; the seamless shift from vibrant orange to soft pink is achieved through effective blending. To master this skill, practice is key. Start with two colors placed side by side on your palette. Use a clean brush to mix the edges where the colors meet, gradually pulling one color into the other. This technique can be achieved in several ways:
- Wet-on-Wet Blending: This involves applying wet paint on top of wet paint, allowing for seamless transitions. It’s perfect for creating soft backgrounds and gradients.
- Dry Brushing: Using a dry brush with minimal paint can create texture and add depth. This technique is particularly effective for adding highlights and intricate details.
Wet-on-wet blending is a magical technique that can transform your canvas into a dreamscape. By layering wet paint over wet paint, you create a soft, diffused effect that is hard to achieve with other methods. To try this, begin with a wet canvas. Apply your first color generously, then quickly add your second color. Use a clean brush to gently mix the two colors where they overlap. The key is to work quickly before the paint dries, which allows for those beautiful, soft transitions.
Dry brushing is like adding a sprinkle of magic to your artwork. By using a dry brush with minimal paint, you can create texture that brings your piece to life. This technique is especially useful for adding highlights or creating the illusion of rough surfaces. To master dry brushing, dip your brush lightly into your paint, then wipe off most of it on a paper towel. What remains should be just enough to lightly drag across the surface of your canvas, allowing the texture beneath to show through. This method is fantastic for landscapes, fur, and other intricate details.
Layering is another essential technique that allows you to build depth and richness in your artwork. Think of it as constructing a sandwich; each layer adds flavor and texture to the final result. Start with a base layer of color, then allow it to dry completely before adding additional layers. This technique not only enhances the vibrancy of your colors but also allows you to create complex visual effects. Remember to use a light touch with each layer, gradually building up to your desired intensity.
As you practice these techniques, don’t forget to experiment! Acrylics are forgiving, and you can easily paint over mistakes. Embrace the learning process and let your creativity flow. With time, you’ll develop your unique style and approach to acrylic painting, making each piece a reflection of your artistic journey.
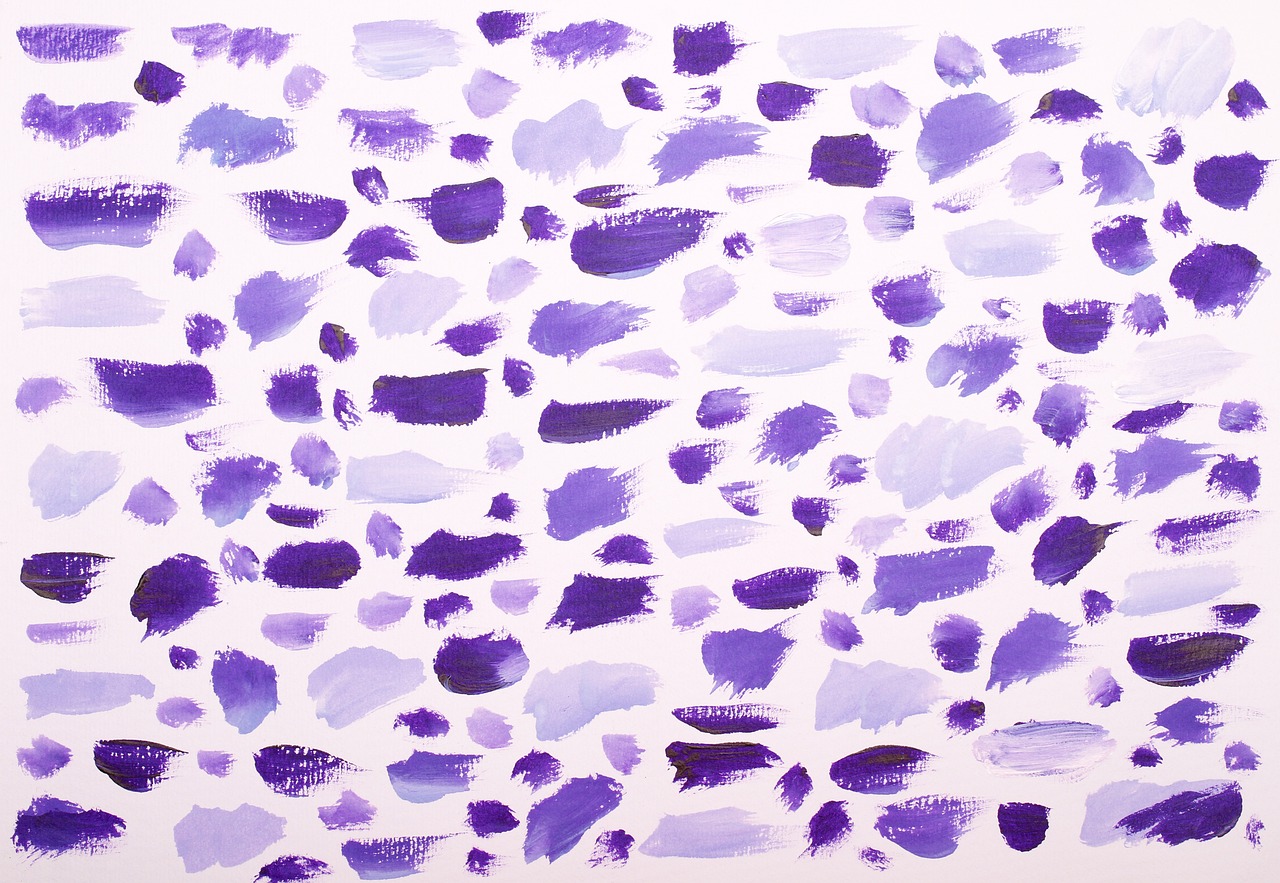
Blending Colors
Blending colors is one of the most exciting and essential techniques in the world of acrylic painting. It allows artists to create smooth transitions between hues, giving life and depth to their artwork. Imagine standing on a beach, watching the sunset where the sky transitions from a vibrant orange to a soft pink, and finally to a deep purple. That magical gradient is what blending can achieve on your canvas. But how do you master this technique? Let’s dive into some tips and tricks that will have you blending like a pro in no time!
First off, it's important to understand that blending is all about the right timing and the right tools. You want to work with wet paint, as this is when the magic really happens. If you allow your paint to dry too much, you’ll find it difficult to create those smooth transitions you’re aiming for. So, keep your paints moist and your brush ready. You might want to have a palette with your chosen colors laid out, as this will allow you to easily access and mix them as you go.
One popular method for blending is the wet-on-wet technique. This involves applying wet paint on top of wet paint, which creates a seamless transition. To do this effectively, you can follow these steps:
- Start with a base color on your canvas.
- While that color is still wet, add your second color directly on top.
- Use a clean brush to gently swirl or stroke the two colors together, allowing them to mix and create a gradient effect.
Another technique is dry brushing, which, contrary to its name, can also be used for blending. This method involves using a dry brush to apply a small amount of paint. It’s particularly effective for creating texture and adding depth to your artwork. You can achieve a soft, blended look by lightly dragging the dry brush over the already painted areas, allowing the underlying colors to show through. Think of it like a whisper of color rather than a shout!
Additionally, remember that practice makes perfect. Don’t be discouraged if your first attempts at blending don’t turn out as you envisioned. It’s all part of the learning process. Experiment with different brushes and techniques to discover what works best for you. You might even find that creating a blending chart helps you visualize how different colors interact with one another. Simply take a sheet of paper and paint swatches of colors next to each other, then blend them together to see the results. This little exercise can be both fun and educational!
In summary, blending colors is a vital skill in acrylic painting that can drastically enhance your artwork. By mastering techniques like wet-on-wet and dry brushing, you’ll be well on your way to creating stunning pieces that capture the eye and evoke emotion. So grab your brushes, mix those colors, and let your creativity flow!
Here are some common questions about blending colors in acrylic painting:
- What brush should I use for blending? A soft, flat brush works well for blending. You can also use round brushes for more detailed blending.
- How long should I wait before blending? You should blend while the paint is still wet. If it dries, you might need to reapply some paint.
- Can I use a palette knife for blending? Yes! A palette knife can create unique textures and blends, especially for thicker applications of paint.
Wet-on-Wet Blending
Wet-on-wet blending is one of the most exciting techniques in acrylic painting, and it can truly elevate your artwork to a new level. Imagine the soft, dreamy backgrounds you can create, or the seamless transitions between colors that evoke emotion and depth. This technique involves applying wet paint on top of wet paint, allowing the colors to merge and mix directly on the canvas. It’s like a dance of colors, where each hue moves gracefully into the next, creating stunning visual effects.
To master wet-on-wet blending, you'll need to consider a few essential tips. First, make sure your paint is adequately wet. If your paint dries too quickly, it won't blend as effectively. Using a slow-drying medium can help keep your acrylics workable for longer, giving you ample time to play with colors. Additionally, using a brush with soft bristles can make a significant difference, as it allows for smoother strokes and better blending.
Here are some steps to effectively practice wet-on-wet blending:
- Start with a Base Layer: Begin by applying a base layer of color to your canvas. This could be a solid color or a gradient, depending on your desired effect.
- Apply Additional Colors: While the base layer is still wet, take your second color and apply it directly onto the canvas. Use a clean brush to gently blend the edges of the two colors together.
- Use a Light Touch: The key to successful blending is to use a light touch. Pressing too hard can lift the paint off the canvas instead of blending it.
- Experiment: Don't be afraid to experiment with different color combinations and techniques. Each artist has a unique style, and finding what works best for you is part of the fun!
As you practice, you’ll discover the beauty of creating soft gradients and atmospheric effects. Wet-on-wet blending is particularly useful for backgrounds in landscapes, skies, and any abstract work where you want to create a sense of movement and fluidity. Just picture a serene sunset where the colors melt into one another, or a tranquil ocean scene where the waves blend seamlessly into the horizon. This technique opens up a world of possibilities!
So grab your brushes, get your paints ready, and let the magic of wet-on-wet blending transform your canvas into a masterpiece. Remember, the more you practice, the more comfortable you’ll become, and soon enough, you’ll be blending like a pro!
- What type of paint should I use for wet-on-wet blending? It's best to use high-quality acrylic paints that have a good amount of pigment and a creamy consistency. This will help with blending.
- Can I use this technique on other surfaces? Yes! While canvas is the most common surface, you can also experiment with acrylic paper, wood panels, or even fabric.
- How do I clean my brushes between colors? Clean your brushes with water and a brush cleaner to prevent colors from muddying. Always have a paper towel handy to wipe off excess paint.
Dry Brushing
Dry brushing is a fascinating technique in acrylic painting that can add incredible texture and depth to your artwork. Imagine running your brush across a canvas, but instead of saturating it with paint, you’re just grazing the surface. This method creates a beautiful, almost ethereal effect that can make your paintings come alive. It's like whispering colors onto your canvas rather than shouting them out loud. But how do you master this technique? Let’s dive into the essentials!
To start with dry brushing, you'll need a few key materials. First, choose a stiff-bristled brush; a flat or angular brush works wonders for this technique. The stiffness of the bristles allows for better control and helps to create those textured strokes. Next, you'll want to have your acrylic paints ready, but here’s the catch: you should use a minimal amount of paint. Think of it like seasoning a dish; too much can overpower the flavor, while just the right amount enhances the experience.
Before you begin, it’s essential to prepare your brush. Dip it lightly into the paint, then wipe off most of the paint onto a paper towel or cloth. You want your brush to be almost dry, with just a hint of paint left on it. This is the secret sauce to achieving that perfect dry brush effect! Now, with your brush ready, you can start applying it to your canvas. Use quick, light strokes, and watch as the texture begins to emerge. You can create a variety of effects depending on how you hold your brush and the angle at which you apply it.
One of the beauties of dry brushing is its versatility. You can use it to create stunning highlights on landscapes, add depth to portraits, or even give life to abstract pieces. For instance, if you’re painting a sunset, dry brushing can help you create soft clouds that seem to float effortlessly across the sky. Alternatively, if you’re working on a textured surface, such as canvas or wood, the dry brushing technique can enhance the surface’s natural grain, making your artwork even more dynamic.
However, like any technique, dry brushing takes practice. Don’t be discouraged if your first attempts don’t turn out as expected. Instead, think of it as an adventure in creativity! Experiment with different colors and brush sizes, and see how they interact. You might find that mixing a little water into your acrylics can help achieve a different texture, or perhaps using a metallic paint can add a stunning shimmer to your work.
To wrap it up, dry brushing is an essential technique for any acrylic painter. It allows for creativity and exploration while providing a unique way to add texture and depth to your pieces. So grab your brush, pick your colors, and let your imagination run wild! The world of acrylic painting is waiting for you to make your mark.
- What is dry brushing in acrylic painting? Dry brushing is a technique that involves using a dry brush with minimal paint to create texture and subtle effects on the canvas.
- Can I use any brush for dry brushing? While you can use various brushes, stiff-bristled brushes, especially flat or angular ones, work best for achieving the desired texture.
- Do I need to thin my acrylic paint for dry brushing? It's not necessary, but experimenting with a little water can help achieve different textures. Just remember to keep the brush dry!
- What types of projects are best for dry brushing? Dry brushing is versatile and can be used in landscapes, portraits, and abstract art to add depth and highlights.
Layering Techniques
Layering is one of the most exciting and transformative techniques you can master as an acrylic painter. Imagine building a beautiful structure, where each layer adds depth, complexity, and richness to your artwork. When you layer acrylic paint, you're not just slapping on color; you're creating a visual journey that draws the viewer in. This technique allows you to enhance your paintings, making them feel more alive and dynamic. But how do you go about layering effectively? Let's dive into some essential tips!
First off, it's important to start with a solid foundation. Begin with a base layer, which is usually a lighter color or a wash, to set the tone for your painting. This initial layer creates a backdrop that can influence the colors you apply on top. Think of it like the base coat when painting your walls; it sets the mood for everything else that follows. Once your base layer is dry, you can begin adding additional layers. Remember, patience is key here—allow each layer to dry completely before adding the next. This prevents colors from muddying together and ensures that your layers remain distinct.
Another technique to consider is the glazing method. Glazing involves applying a transparent layer of paint over a dry base layer. This technique can create stunning effects, allowing the colors underneath to shine through while adding a new hue on top. For instance, if you have a blue base layer, glazing with a transparent yellow can create a vibrant green effect. To achieve this, mix your acrylic paint with a glazing medium to thin it down, allowing for that beautiful transparency.
Now, let’s talk about the importance of color choice. When layering, the colors you select can dramatically affect the final outcome. Using complementary colors can create visual interest, while analogous colors can provide a more harmonious look. Consider creating a small color swatch on a separate piece of paper to see how your chosen colors interact when layered. This little exercise can save you a lot of surprises down the line!
Lastly, don't forget about texture! You can add texture to your layers by using different tools and techniques. For example, using a palette knife to apply thick layers of paint can create a three-dimensional effect. Alternatively, you can experiment with sponges, cloths, or even your fingers to add unique textures to your artwork. This not only adds dimension but also makes your painting more tactile and engaging.
In summary, mastering layering techniques in acrylic painting can elevate your artistry to new heights. By starting with a solid foundation, utilizing glazing methods, carefully choosing your colors, and experimenting with texture, you'll be well on your way to creating stunning, multi-layered masterpieces. So grab those brushes and let your creativity flow!
- What is the best way to start layering in acrylic painting?
Begin with a solid base layer and allow it to dry completely before adding more layers. Use transparent glazes for added depth. - Can I layer different colors without them mixing?
Yes! Allow each layer to dry before applying the next to prevent colors from muddying together. - How do I create texture in my layers?
You can use tools like palette knives, sponges, or even your fingers to add texture to your layers. - Is it necessary to use a glazing medium?
While not necessary, a glazing medium can help achieve transparent layers that allow underlying colors to show through.
Color Mixing Basics
When it comes to acrylic painting, understanding color theory is like having a secret map that guides you through the vibrant landscape of your imagination. Imagine stepping into a world where colors dance and interact, creating a symphony that speaks to your soul. In this section, we’ll unravel the mysteries of color mixing and equip you with the knowledge to bring your artistic visions to life.
The foundation of color mixing lies in the color wheel, which is a circular diagram that illustrates the relationships between colors. At its core, the color wheel consists of primary colors—red, blue, and yellow. These colors are the building blocks of all other colors. When you mix two primary colors, you create secondary colors: orange, green, and purple. This simple yet powerful concept can transform your painting experience.
| Primary Colors | Secondary Colors |
|---|---|
| Red | Orange (Red + Yellow) |
| Blue | Green (Blue + Yellow) |
| Yellow | Purple (Red + Blue) |
Now that you have a grasp of primary and secondary colors, let's dive into the exciting world of creating custom shades. Mixing colors isn't just about following a recipe; it's about discovering the unique voice of your palette. Imagine you want to create a soft lavender. You can start with purple, which is a secondary color, and then add a touch of white to lighten it up. This process allows you to explore endless possibilities and find the shades that resonate with your artistic style.
To successfully mix colors, remember these key tips:
- Start Small: Begin with small amounts of paint. It’s easier to adjust your mix when you have less paint to work with.
- Mix Thoroughly: Ensure the colors are well-blended to achieve a uniform shade. Inconsistent mixing can lead to unexpected results.
- Test Your Mix: Always test your mixed colors on a scrap piece of canvas before applying them to your artwork. This way, you can see how they look when dry.
As you experiment with mixing, you’ll discover that the same colors can yield different results based on their proportions. For example, if you mix more yellow with blue, you’ll create a brighter green, while adding more blue will result in a darker, richer green. This flexibility is what makes acrylic painting so exciting and dynamic!
In conclusion, mastering color mixing is an essential skill for any aspiring artist. It empowers you to create a personal color palette that reflects your unique vision. So grab your brushes, unleash your creativity, and let the colors flow!
1. What are the primary colors I should start with?
The primary colors are red, blue, and yellow. These colors cannot be created by mixing other colors and serve as the foundation for all other colors.
2. How can I create a specific shade I have in mind?
To create a specific shade, start with the closest color in your palette and gradually add small amounts of other colors until you achieve the desired hue. Don't forget to test it on a scrap surface!
3. Why is it important to understand color theory?
Understanding color theory helps you mix colors effectively and create harmonious color palettes, enhancing the overall quality of your artwork.
4. Can I mix acrylic paints with other types of paints?
It's generally not recommended to mix acrylic paints with other types, as they have different properties and drying times. Stick to acrylics for the best results.
Primary and Secondary Colors
When diving into the vibrant world of acrylic painting, understanding primary and secondary colors is like learning the alphabet before writing a novel. These colors form the foundation of your palette and are essential for creating a spectrum of hues that will bring your artwork to life. So, what exactly are these primary and secondary colors? Let’s break it down!
Primary colors are the building blocks of all other colors. In the realm of acrylic painting, the primary colors are red, blue, and yellow. These colors cannot be created by mixing other colors together, which makes them unique. Think of them as the raw ingredients in a recipe—without them, you can’t bake your cake!
Once you have your primary colors, you can start mixing them to create secondary colors. By combining two primary colors, you can generate a whole new palette of shades:
| Primary Color 1 | Primary Color 2 | Resulting Secondary Color |
|---|---|---|
| Red | Blue | Purple |
| Blue | Yellow | Green |
| Yellow | Red | Orange |
Now, let’s explore these secondary colors a bit more. Purple is a regal color that can add a touch of luxury to your paintings. Green is often associated with nature and can evoke feelings of tranquility and harmony. Lastly, orange brings warmth and vibrancy, perfect for creating lively scenes. Understanding how these colors interact will allow you to manipulate your artwork’s emotional impact.
But wait, there's more! Mixing colors isn’t just about getting the right shade; it’s about understanding how they work together. For instance, if you mix a little bit of yellow into purple, you’ll create a muted tone that can add depth to your painting. This concept of color interaction is crucial for any artist who wishes to create dynamic and engaging pieces.
As you experiment with these colors, don’t be afraid to play around and make mistakes. After all, art is about exploration and self-expression. Try creating a color wheel with your primary and secondary colors to visualize how they relate to one another. This simple exercise can enhance your understanding of color theory and help you become more confident in your color choices.
In conclusion, mastering primary and secondary colors is your first step towards unlocking a world of creativity in acrylic painting. They are not just colors; they are your allies in crafting stunning visual stories. So grab your brushes, mix those colors, and let your imagination run wild!
- What are the primary colors in acrylic painting? The primary colors are red, blue, and yellow.
- How do I create secondary colors? Mix two primary colors together to create secondary colors: red + blue purple, blue + yellow green, and yellow + red orange.
- Can I create custom shades? Absolutely! By mixing primary and secondary colors, you can create an endless array of custom shades.
Creating Custom Shades
Creating custom shades is one of the most exciting aspects of acrylic painting. Imagine having the ability to mix colors that perfectly match your vision—it's like being a magician with a palette! To get started, you’ll want to familiarize yourself with the basics of color mixing. The primary colors—red, blue, and yellow—are your building blocks. By blending these colors, you can create a wide range of secondary colors: green, orange, and purple. But why stop there? The real fun begins when you venture into mixing these colors to create unique shades that reflect your artistic style.
When mixing colors, it’s essential to remember that a little goes a long way. Start with small amounts of paint on your palette, gradually adding more as needed. This approach not only saves paint but also allows you to control the outcome more effectively. For instance, if you want to create a softer shade of blue, mix a tiny bit of white with your blue paint. The result will be a beautiful sky-blue that can evoke calmness and serenity in your artwork.
Another important tip is to keep a color mixing chart. This chart can serve as a reference for future projects, helping you remember which combinations worked well. You can create a simple table like this:
| Base Color | Mixing Color | Resulting Shade |
|---|---|---|
| Red | White | Pink |
| Blue | Yellow | Green |
| Yellow | Red | Orange |
| Blue | Red | Purple |
Don’t be afraid to experiment! Mixing colors is all about trial and error. Sometimes, you might stumble upon a shade that you absolutely love, and other times, you might create a muddy color that doesn’t work at all. That’s all part of the learning process! If you find yourself creating a shade you’re not fond of, simply adjust it by adding more of the primary colors until you achieve the desired effect.
Additionally, consider the temperature of your colors. Warm colors (reds, oranges, yellows) can create feelings of warmth and excitement, while cool colors (blues, greens, purples) can evoke calmness and tranquility. Understanding how to manipulate these temperatures will allow you to create more dynamic pieces. For example, if you want to create a sunset effect, mixing warm oranges and yellows with a hint of cool blue can create a stunning contrast that draws the viewer in.
Lastly, remember to document your mixing process. Take notes on the ratios of colors you use to create your custom shades. This documentation will be invaluable for future projects, allowing you to replicate those beautiful hues with ease. As you grow more comfortable with mixing colors, you’ll find that your palette becomes an extension of your creative expression, opening up endless possibilities for your acrylic paintings.
- What are the primary colors used in acrylic painting? The primary colors are red, blue, and yellow. These colors cannot be created by mixing other colors together.
- How can I create a shade of green? Mix blue and yellow together in equal parts to create a vibrant green. Adjust the ratio to achieve different shades of green.
- What should I do if I mix a color I don’t like? If you create a color you don’t like, try adding more of one of the primary colors to adjust it. Experimentation is key!
- Can I use white to lighten my colors? Yes, adding white to any color will create a lighter shade, which is often referred to as a 'tint'.
Frequently Asked Questions
- What materials do I need to start acrylic painting?
To kick off your acrylic painting journey, you'll need a few essential materials. Start with high-quality acrylic paints, a variety of brushes (flat and round), and a sturdy canvas or acrylic paper. Don't forget a palette for mixing colors, a water container for rinsing brushes, and some paper towels for quick clean-ups. Having these basics will set you up for success!
- How do I blend colors effectively?
Blending colors in acrylic painting can be a game-changer for your artwork. A popular method is the wet-on-wet technique, where you apply wet paint over wet paint. This allows for beautiful, seamless transitions. Another method is dry brushing, which creates texture and depth. Experiment with both to see which technique you prefer!
- What are layering techniques, and why are they important?
Layering is all about building up multiple coats of paint to create depth and richness in your artwork. It allows you to add details, adjust colors, and achieve a more dynamic look. Start with thin layers and gradually build up to thicker ones. This technique can transform a flat painting into a vibrant masterpiece!
- How can I mix custom colors?
Mixing custom colors is one of the most exciting parts of acrylic painting! Start with primary colors (red, blue, yellow) and mix them to create secondary colors (green, orange, purple). From there, you can adjust your mixtures by adding white to lighten or black to darken. Keep experimenting until you find the perfect shades for your artwork!
- Can I use acrylic paints on different surfaces?
Absolutely! Acrylic paints are incredibly versatile and can be used on various surfaces such as canvas, wood, paper, and even fabric. Just make sure the surface is clean and primed if necessary. This flexibility allows you to explore different textures and styles in your art!
- How do I clean my brushes after painting?
Cleaning your brushes is crucial to maintain their shape and longevity. Rinse them in water as soon as you're done painting to remove excess paint. Use soap and water to give them a thorough clean, and reshape the bristles before letting them dry. Proper care will keep your brushes in top condition for your next masterpiece!


