Paint a Perfect Day: Mastering Light in Landscape Art
Have you ever gazed at a landscape painting and felt as though you were transported to that very moment? The secret behind such captivating artwork often lies in the artist's ability to master light. In the world of landscape art, light is not just a physical phenomenon; it’s a powerful tool that can evoke emotions, create depth, and transform an ordinary scene into something extraordinary. This article dives into the techniques for capturing light in landscape painting, emphasizing its crucial role in creating mood and depth while providing practical tips for artists of all skill levels.
Understanding how light influences color and atmosphere is vital for landscape artists. Imagine standing on a hillside at dawn, the world around you bathed in a soft, golden glow. This is the kind of magic that light can create, enhancing the beauty and emotion of a scene. Light acts as a storyteller, guiding the viewer's eye and setting the overall tone of the painting. It can evoke feelings of tranquility, vibrancy, or even drama, depending on how it is portrayed. For an artist, recognizing the nuances of natural light can make all the difference in their work. By mastering the interplay between light and shadow, artists can breathe life into their landscapes, making viewers feel as though they are part of the scene.
Natural light is dynamic, changing throughout the day and across seasons, which can significantly affect how landscapes are perceived. From the soft hues of early morning to the harsh brightness of midday sun, each type of light offers unique challenges and opportunities for artists. Here are a few types of natural light to consider:
- Soft Morning Light: This light is gentle and diffused, perfect for capturing the delicate details of nature.
- Harsh Midday Sun: This light can create stark contrasts and deep shadows, making it ideal for dramatic compositions.
- Warm Evening Glow: The golden tones of sunset can add warmth and richness to a scene, creating a sense of nostalgia.
By observing these variations, artists can choose the best time to paint, ensuring that their landscapes resonate with the intended mood and atmosphere.
Ah, the golden hour! This enchanting period shortly after sunrise or before sunset offers unique lighting conditions that every landscape artist should take advantage of. During this time, the sun casts a warm, golden light that bathes everything in a soft glow, enhancing colors and creating long, dramatic shadows. To effectively utilize this time for stunning landscape compositions, artists should plan their outings around these hours, setting up their easels to capture the fleeting beauty of this magical moment. The colors during the golden hour can be mesmerizing, transforming ordinary landscapes into breathtaking vistas, making it one of the best times to paint.
Shadows play a vital role in adding depth and dimension to landscape paintings. They can create a sense of realism and help to define shapes within the composition. To observe and paint shadows accurately, artists should pay close attention to the direction of the light source and how it interacts with the landscape. Techniques such as using darker hues of the local color or employing a cooler palette can effectively depict shadows, enhancing the overall realism of the painting. Remember, shadows are not just dark patches; they are an integral part of the composition that can guide the viewer's eye and create a three-dimensional feel.
Water surfaces can create mesmerizing reflections of light, adding another layer of complexity to landscape paintings. When capturing reflections in lakes and rivers, artists should consider the angle of the light and the surface texture of the water. Techniques such as using a wet-on-wet approach or glazing can help to create the illusion of shimmering reflections, enriching the overall composition of a landscape. The interplay between light and water can evoke a sense of tranquility and movement, making it a captivating element to include in any landscape piece.
Understanding color temperature is essential for portraying light accurately in landscape paintings. Colors can be categorized as warm or cool, each possessing its emotional impact. Warm colors, such as reds and yellows, often evoke feelings of warmth and energy, while cool colors like blues and greens can create a sense of calm and serenity. By skillfully balancing these colors, artists can create a more dynamic and engaging composition that reflects the true essence of the light in their landscape.
Various techniques can help artists convey light effectively in their landscapes. Methods such as glazing, layering, and using complementary colors can enhance the luminosity of a landscape, making it feel alive. Glazing, for instance, involves applying thin layers of transparent paint over dry layers, allowing the underlying colors to shine through and creating depth. Layering can also help to build complexity in the painting, while complementary colors can create vibrancy and contrast, emphasizing areas of light.
Different brushwork techniques can create various effects of light in landscape art. Specific strokes can depict sunlight filtering through trees or shimmering on water. For example, using short, quick strokes can mimic the flickering light on leaves, while long, sweeping strokes can capture the smooth surface of a lake. Experimenting with different brushes and techniques allows artists to find their unique voice in portraying light.
Contrast between light and dark areas can emphasize focal points in a landscape painting. By strategically placing lighter colors against darker backgrounds, artists can draw attention to illuminated parts of the composition. This technique not only enhances the visual impact of the painting but also guides the viewer's eye to important elements within the scene, creating a more engaging experience.
1. What is the best time to paint landscapes?
The best time to paint landscapes is during the golden hour, shortly after sunrise or before sunset, when the light is soft and warm.
2. How can I effectively capture shadows in my paintings?
To capture shadows effectively, observe the direction of the light source and use darker hues of the local color to depict them accurately.
3. What techniques can I use to create reflections in water?
Using a wet-on-wet approach or glazing can help create the illusion of shimmering reflections in water, adding depth to your landscape.
4. How does color temperature affect my landscape painting?
Color temperature can influence the mood of your painting; warm colors evoke energy, while cool colors create calmness. Balancing both can enhance your composition.

The Importance of Light in Landscape Art
When it comes to landscape art, light is not just an accessory; it’s the very essence that breathes life into a painting. Imagine standing before a breathtaking view, the sun rising over a tranquil lake, casting a warm golden hue across the water. This moment is fleeting, yet it holds the power to evoke deep emotions and tell a story. Understanding how light influences color and atmosphere is crucial for landscape artists. It’s like the difference between a black-and-white photograph and a vibrant, colorful one—light is what adds dimension and drama.
Natural light can transform an ordinary scene into something extraordinary. For instance, consider how a simple tree can appear magical when illuminated by the soft glow of dawn. The shadows it casts and the way the light filters through its leaves create a dynamic interplay that draws the viewer in. Without light, landscapes can feel flat and lifeless, lacking the emotional depth that makes art resonate with the soul.
Additionally, the time of day can drastically alter the mood of a landscape. Morning light, with its gentle touch, tends to evoke feelings of tranquility and renewal. In contrast, the harsh midday sun can create stark contrasts that might feel overwhelming or intense. As the day wanes, the warm evening glow can wrap a scene in a blanket of nostalgia, prompting reflections on the day that has passed. Artists must learn to observe these changes and harness them effectively in their work.
To illustrate the significance of light in landscape painting, let’s consider a few key aspects:
- Color Variation: Light influences how colors are perceived. A vibrant red can appear muted under a shadow, while the same red can burst with energy under direct sunlight.
- Emotional Impact: Different lighting can evoke various feelings—soft light can feel calming, while harsh light can create tension.
- Depth and Dimension: Light and shadow work together to create a three-dimensional effect, adding depth to flat surfaces.
In summary, mastering the use of light is fundamental for any landscape artist. It’s not just about what you see; it’s about how you interpret and convey that vision on canvas. By understanding the nuances of light, artists can create works that not only capture a moment in time but also resonate emotionally with the viewer. So, the next time you pick up a brush, remember: light is your greatest ally in painting the perfect landscape.
- Why is light important in landscape painting? Light shapes how we perceive colors and creates depth, making it essential for capturing the essence of a scene.
- What is the golden hour? The golden hour refers to the period shortly after sunrise or before sunset when the light is soft and warm, ideal for landscape painting.
- How can I practice painting light? Observing natural light at different times of the day and experimenting with various techniques can help you improve your ability to paint light effectively.
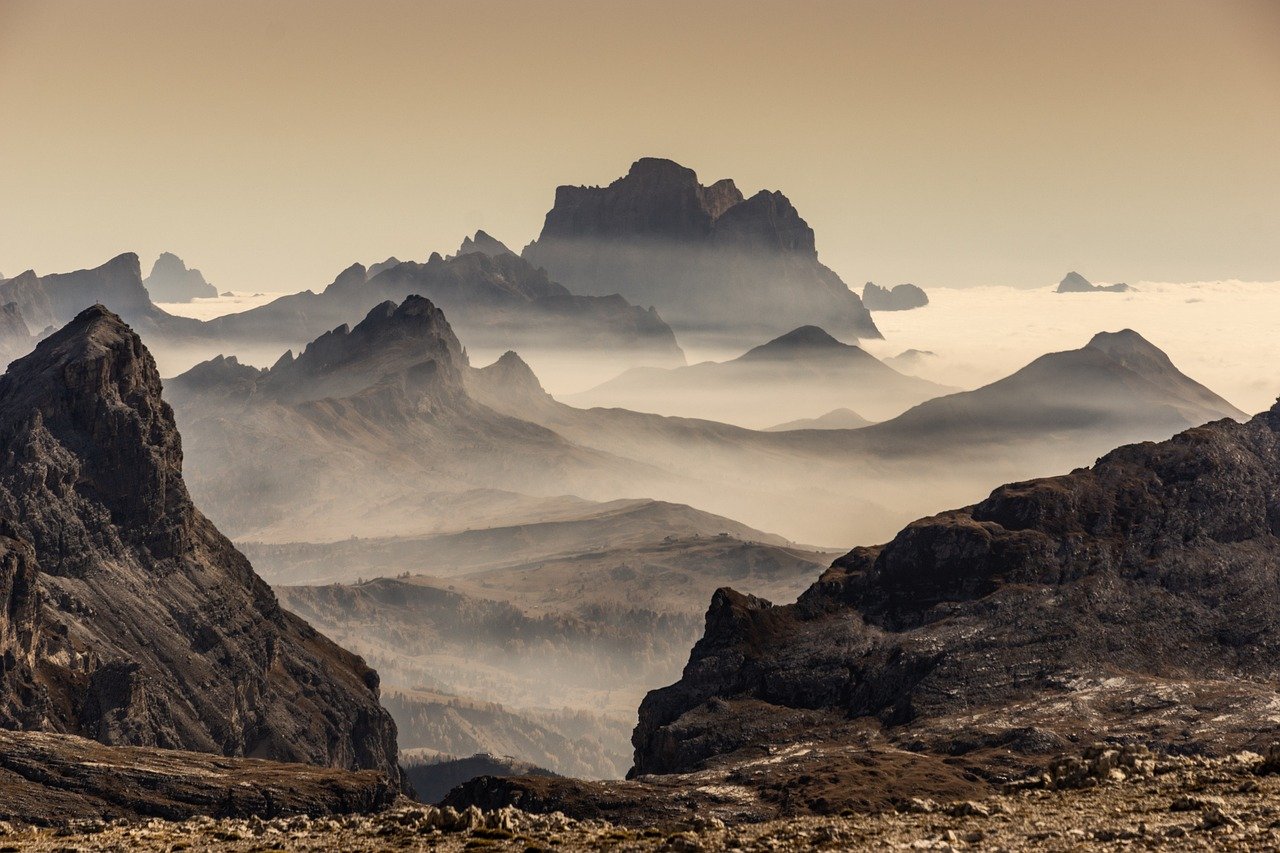
Types of Natural Light
When it comes to landscape painting, understanding the is essential for capturing the essence of a scene. Natural light isn't just a backdrop; it's a dynamic element that can transform the mood and emotion of your artwork. Each part of the day brings its own unique lighting conditions, influencing how colors appear and how shapes are defined. Imagine the difference between a bright, sunny afternoon and a misty morning—each evokes a different feeling and atmosphere. Let’s dive into the various types of natural light and see how they can elevate your landscape paintings.
First up, we have the soft morning light. This is the gentle light that greets us at dawn, often characterized by its diffused quality. It creates a serene and peaceful ambiance, perfect for capturing the delicate hues of early blooms or the subtle textures of dew on grass. The colors during this time are typically cooler, with soft pastels dominating the palette. Artists often find this light ideal for portraying tranquility and freshness, making it a favorite for those looking to convey a sense of calm.
As the day progresses, we encounter the harsh midday sun. This light is intense and can create stark contrasts and deep shadows. While it can be challenging to work with, it also offers a unique opportunity to play with dramatic light and shadow. The colors can appear more vibrant under this light, giving landscapes a lively and energetic feel. However, it's crucial to be aware of the potential for overexposure and to use techniques such as glazing to maintain balance.
Then, as the sun begins to set, we are treated to the warm evening glow. This light bathes the landscape in rich, golden tones, often referred to as the golden hour. It creates a magical atmosphere, enhancing the beauty of the scene and adding depth to the colors. Artists often find this time to be the most inspiring, as the warm hues can evoke feelings of nostalgia and warmth. This is the perfect moment to capture the interplay of light and shadow as the day transitions to night.
In addition to these main types of light, it's essential to consider how seasonal changes affect natural light. For example, during autumn, the angle of the sun shifts, casting longer shadows and enriching the colors of fall foliage. In winter, the low sun can create a soft, diffused light that enhances the cool tones of snow-covered landscapes. Each season presents unique opportunities to explore light in your artwork, and being aware of these changes can significantly impact your painting techniques.
To summarize, understanding the different types of natural light is crucial for any landscape artist. By observing how light interacts with the environment at various times of the day and across seasons, you can create paintings that not only capture the beauty of a scene but also evoke emotions and tell a story. Remember, light is not just a tool; it’s a vital character in your artistic narrative.
- What is the golden hour? The golden hour refers to the period shortly after sunrise and before sunset when the light is soft and warm, creating beautiful lighting conditions for photography and painting.
- How can I effectively capture shadows in my paintings? Observing the direction and intensity of light can help you accurately depict shadows. Use darker hues of the local color to create depth and dimension.
- What are some tips for painting in harsh midday sun? Look for areas of shade to work in, and consider using a limited palette to avoid overwhelming contrasts. Glazing techniques can help soften the intensity of the colors.
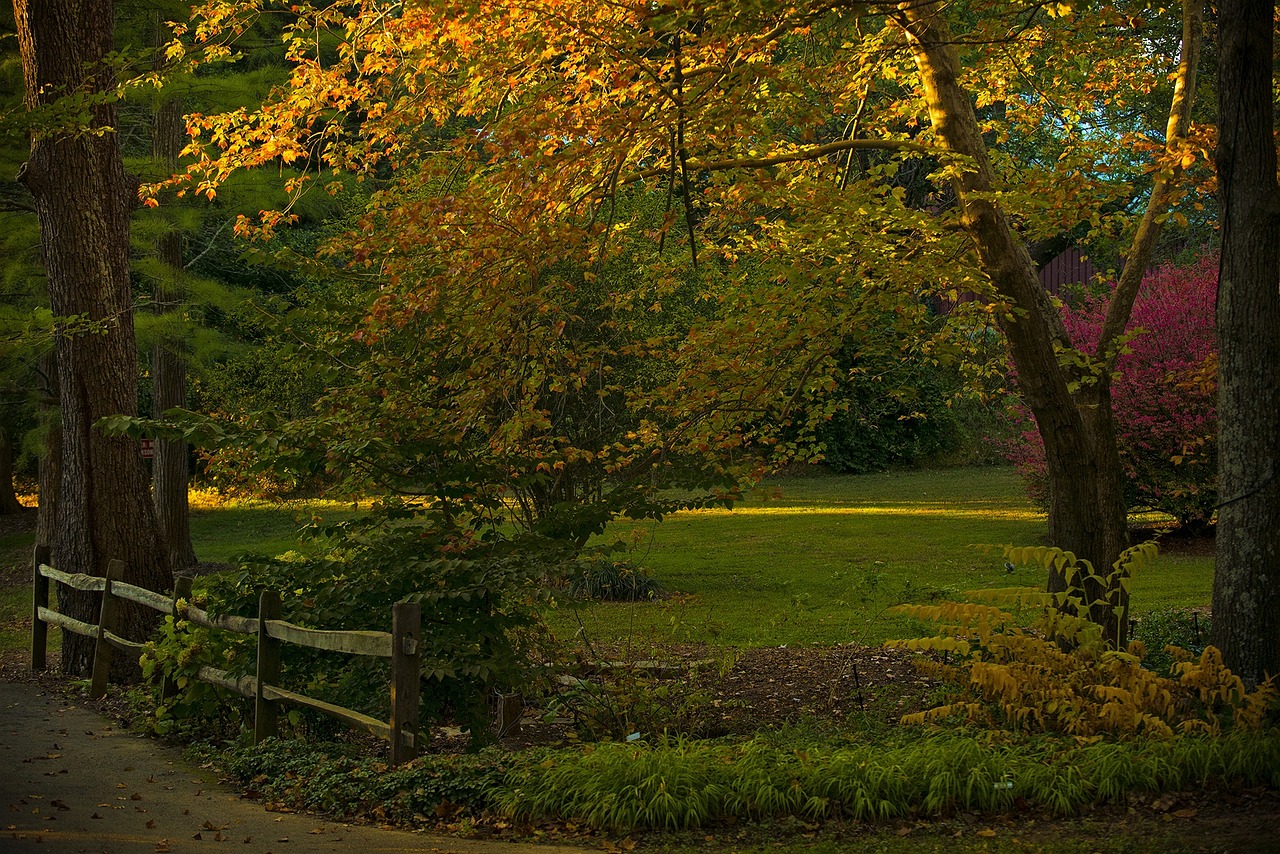
Golden Hour: The Magic Moment
The golden hour is often hailed as the most enchanting time for landscape painting, and for good reason. This magical period occurs shortly after sunrise and just before sunset, when the sun casts a warm, golden light that transforms the landscape into a breathtaking canvas. During this time, the light is softer and more diffused, creating a stunning interplay of colors that can evoke a wide range of emotions. Have you ever noticed how everything seems to glow during these moments? It’s as if nature itself is putting on a show just for you!
One of the most captivating aspects of the golden hour is how it alters the perception of colors. The warm hues of the sun enhance the vibrancy of greens, blues, and browns, making them appear more saturated and alive. This is the perfect opportunity to experiment with your palette! Instead of the standard colors, consider adding golden yellows, soft oranges, and even deep purples to reflect the changing light. When you stand in front of a landscape during this time, you’re not just an observer; you become part of the scene, feeling the warmth on your skin and the excitement in your heart.
To make the most of the golden hour, timing is everything. Here are a few tips to help you capture this fleeting moment:
- Plan Ahead: Use apps or websites that track sunrise and sunset times in your area. Arriving early ensures you don’t miss the magic.
- Scout Locations: Visit potential painting spots beforehand to find the best angles and compositions. Familiarity will help you react quickly when the light changes.
- Be Ready to Adapt: The golden hour can be unpredictable. Be prepared to switch gears if the light shifts dramatically, and embrace the unexpected!
When you’re out there painting, remember to focus on the shadows as well. They play a crucial role in adding depth and dimension to your work. The contrast between the warm light and dark shadows creates a visual drama that can elevate your painting from ordinary to extraordinary. As you observe the landscape, take a moment to appreciate how the light dances across the scene, highlighting certain features while leaving others in shadow. This dynamic interplay can lead to some of your most striking compositions.
And let's not forget about the reflections in water! If you’re lucky enough to be near a lake or river during the golden hour, you’ll witness a spectacular display of light bouncing off the surface, creating a kaleidoscope of colors. Capturing these reflections can add a whole new layer of interest to your artwork. Try to paint the way the light shimmers and ripples, and don’t shy away from using bold strokes to convey movement.
In conclusion, the golden hour is a gift for landscape artists. It offers unparalleled opportunities to capture the beauty of nature in its most flattering light. Whether you’re a seasoned painter or just starting out, don’t miss the chance to immerse yourself in this magical moment. Embrace the warmth, the colors, and the emotions that come with it, and let your creativity flow!
Q: What is the golden hour?
A: The golden hour refers to the period shortly after sunrise and just before sunset when the light is soft and warm, creating ideal conditions for photography and painting.
Q: How can I find the golden hour times for my location?
A: You can use smartphone apps or websites that provide sunrise and sunset times based on your geographical location.
Q: Why is golden hour light so special for painting?
A: The golden hour light enhances colors, creates beautiful shadows, and adds depth to landscapes, making it a favorite time for artists.
Q: What should I focus on when painting during the golden hour?
A: Pay attention to the interplay of light and shadow, the vibrant colors, and any reflections in water to create a captivating composition.
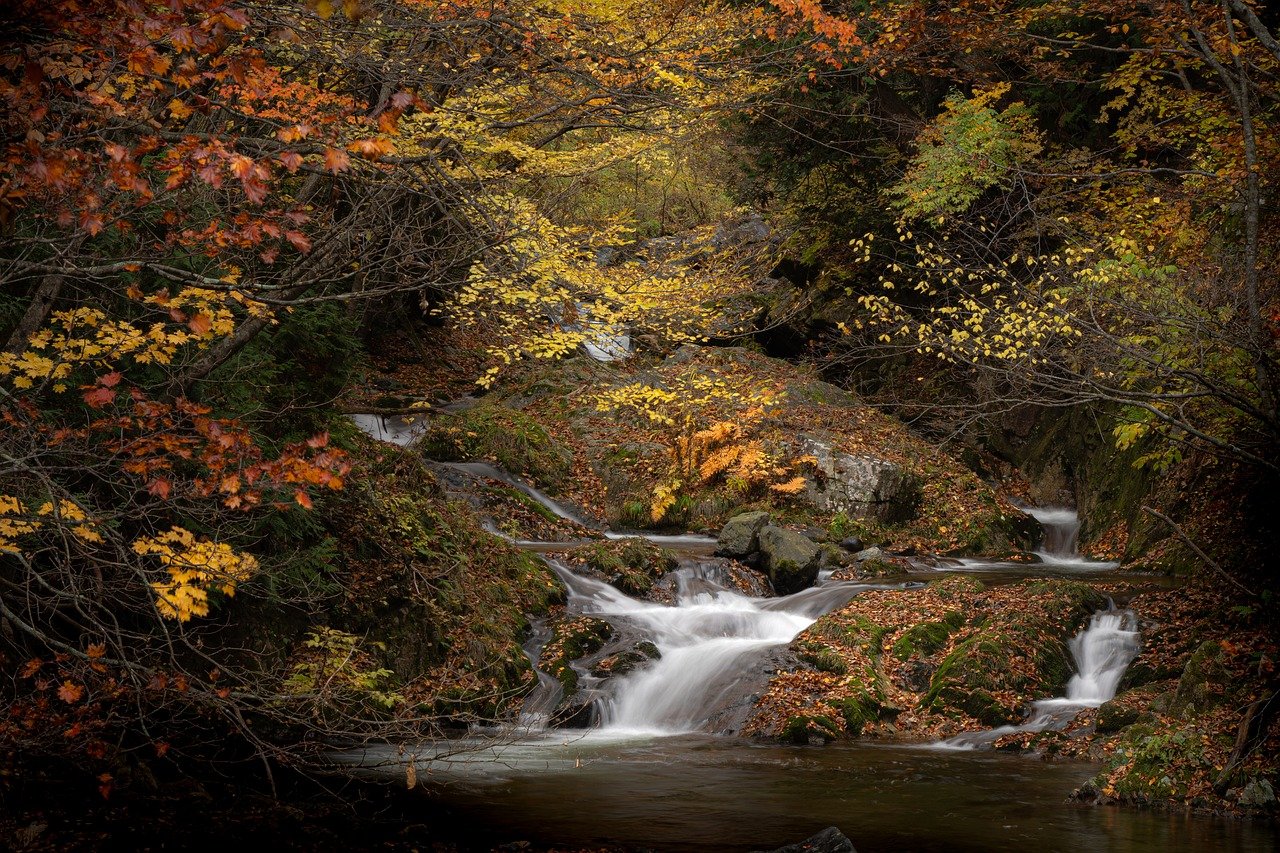
Capturing Shadows
Shadows are often considered the unsung heroes of landscape painting. They add depth, dimension, and a touch of realism that can transform a flat canvas into a vibrant scene. When you think about it, shadows are like the whispers of nature, subtly guiding the viewer's eye and enhancing the overall composition. But how do you effectively capture these elusive elements? Let's dive into some techniques that will help you master the art of painting shadows.
First off, it's essential to observe how shadows behave in various lighting conditions. The length, direction, and intensity of shadows can change dramatically based on the time of day and the light source. For instance, during the golden hour, shadows tend to be longer and softer, creating a gentle contrast against brightly lit areas. In contrast, harsh midday sun casts shorter and more defined shadows, which can create a stark, dramatic effect. By understanding these variations, you can better anticipate how shadows will interact with your landscape.
One effective technique for capturing shadows is to start with a light sketch of your landscape. This initial outline should include the major elements of your composition, such as trees, hills, and water bodies. Once you have your sketch, begin to identify where the light is coming from and how it will affect the placement of shadows. Use a light pencil to mark the areas where shadows will fall, keeping in mind that shadows are typically darker than the surrounding areas. This will serve as a guide as you begin to layer your paints.
When it comes to painting shadows, color choice is crucial. Many artists make the mistake of using pure black for shadows, which can result in a flat and lifeless appearance. Instead, consider using a mix of colors that reflect the surrounding environment. For example, if you're painting a green landscape, try mixing your shadow color with a deep blue or purple to create a rich, organic shadow. This technique adds life to your painting and helps maintain a cohesive color palette.
Another important aspect of capturing shadows is understanding their edges. Shadows can have both hard and soft edges, depending on the light source and the distance of the object casting the shadow. For instance, shadows cast by a nearby object will have sharper edges, while those cast by distant elements may appear softer and more diffused. To replicate this in your painting, use different brush techniques: a stiff brush can create hard edges, while a softer, round brush can help you blend and soften the transitions. Experimenting with these techniques will allow you to add a dynamic range to your shadows.
Finally, don't forget to step back and assess your work from a distance. Sometimes, shadows can appear too harsh or too subtle when viewed up close. By stepping back, you can see how the shadows interact with the overall composition and make necessary adjustments. Remember, the goal is to create a harmonious balance between light and shadow, which ultimately brings your landscape to life.
- What colors should I use for shadows? It's best to avoid pure black; instead, mix colors that reflect the surrounding environment to create more natural-looking shadows.
- How can I practice painting shadows? Start by observing shadows in nature. Try sketching and painting them in different lighting conditions to understand their behavior.
- Should shadows be darker than the surrounding colors? Yes, shadows should generally be darker, but they can also carry hints of the colors around them for a more realistic effect.
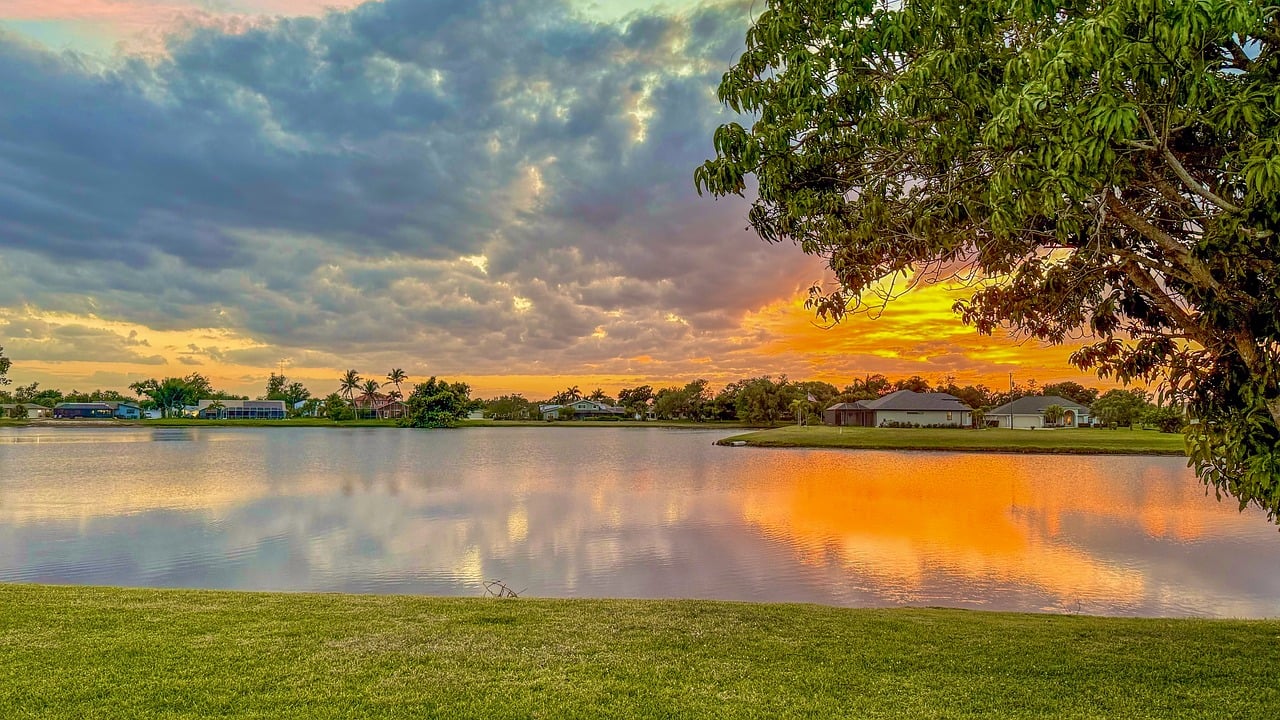
Reflections in Water
When it comes to landscape painting, capturing can elevate your artwork from ordinary to extraordinary. Water, with its smooth surface, acts like a mirror, reflecting not only the scenery above but also the emotions of the moment. Imagine standing by a serene lake, where the vibrant colors of the sky blend beautifully with the lush greens of the surrounding trees. This mesmerizing interplay of light and color is what makes reflections so captivating.
To effectively capture these reflections, it’s essential to understand a few key principles:
- Observation: Take a moment to observe how light interacts with the water. Notice how the colors change depending on the angle of the sun and the time of day.
- Color Mixing: Reflections often appear muted compared to the actual landscape. Mix your colors with a touch of white or gray to achieve a more realistic effect.
- Brush Techniques: Use soft, horizontal strokes to mimic the smoothness of the water’s surface. This technique can help create a sense of tranquility in your painting.
One of the most striking aspects of painting reflections is the distortion that occurs when the water is not perfectly still. Ripples and waves can create dynamic shapes and patterns that add interest to your piece. To depict this, consider using a combination of short, choppy strokes for the ripples and longer, smoother strokes for the reflections. This contrast will bring your painting to life.
Another important factor is the lighting. The way light hits the water can dramatically change the appearance of the reflection. During the golden hour, for instance, the warm hues can create a magical glow, enhancing the overall mood of your landscape. Make sure to observe the color temperature of the light, as it can affect how you perceive the colors in your reflection.
In addition, consider the surrounding elements in your composition. Trees, rocks, or even the sky can contribute to the overall effect of the reflection. When painting, think about how these elements interact with the water and how they can enhance the narrative of your artwork.
Lastly, remember that practice makes perfect. Spend time studying real-life examples of reflections in water, whether it’s in a tranquil pond or a bustling river. Experiment with different techniques and allow yourself to make mistakes; this is how you will discover your unique style and improve your skill in capturing these stunning reflections.
Q: What type of paint is best for capturing reflections in water?
A: Acrylics and oils are both excellent choices. Acrylics dry quickly, allowing for layering, while oils provide a longer working time for blending colors.
Q: How can I make my reflections look more realistic?
A: Pay close attention to the colors and shapes of the objects being reflected. Use softer, lighter strokes for the reflections and consider the effects of light and movement on the water’s surface.
Q: Should I paint the reflection first or the landscape?
A: It often helps to paint the landscape first, as this will give you a better idea of how to approach the reflection. However, feel free to experiment with both methods!
Color Temperature and Light
Understanding color temperature is essential for any artist looking to portray light accurately in their landscape paintings. Just like how the warmth of a cozy fire can evoke feelings of comfort, the colors in your artwork can stir emotions and set the mood. In the world of painting, color temperature refers to the warmth or coolness of a color, which can dramatically influence the perception of light in your scenes.
Colors are often categorized into two main groups: warm colors (like reds, oranges, and yellows) and cool colors (such as blues, greens, and purples). Warm colors tend to advance in a composition, making them appear closer to the viewer, while cool colors recede, creating a sense of depth. This principle is crucial when you're trying to capture the essence of natural light, as it can help create a more dynamic and engaging landscape.
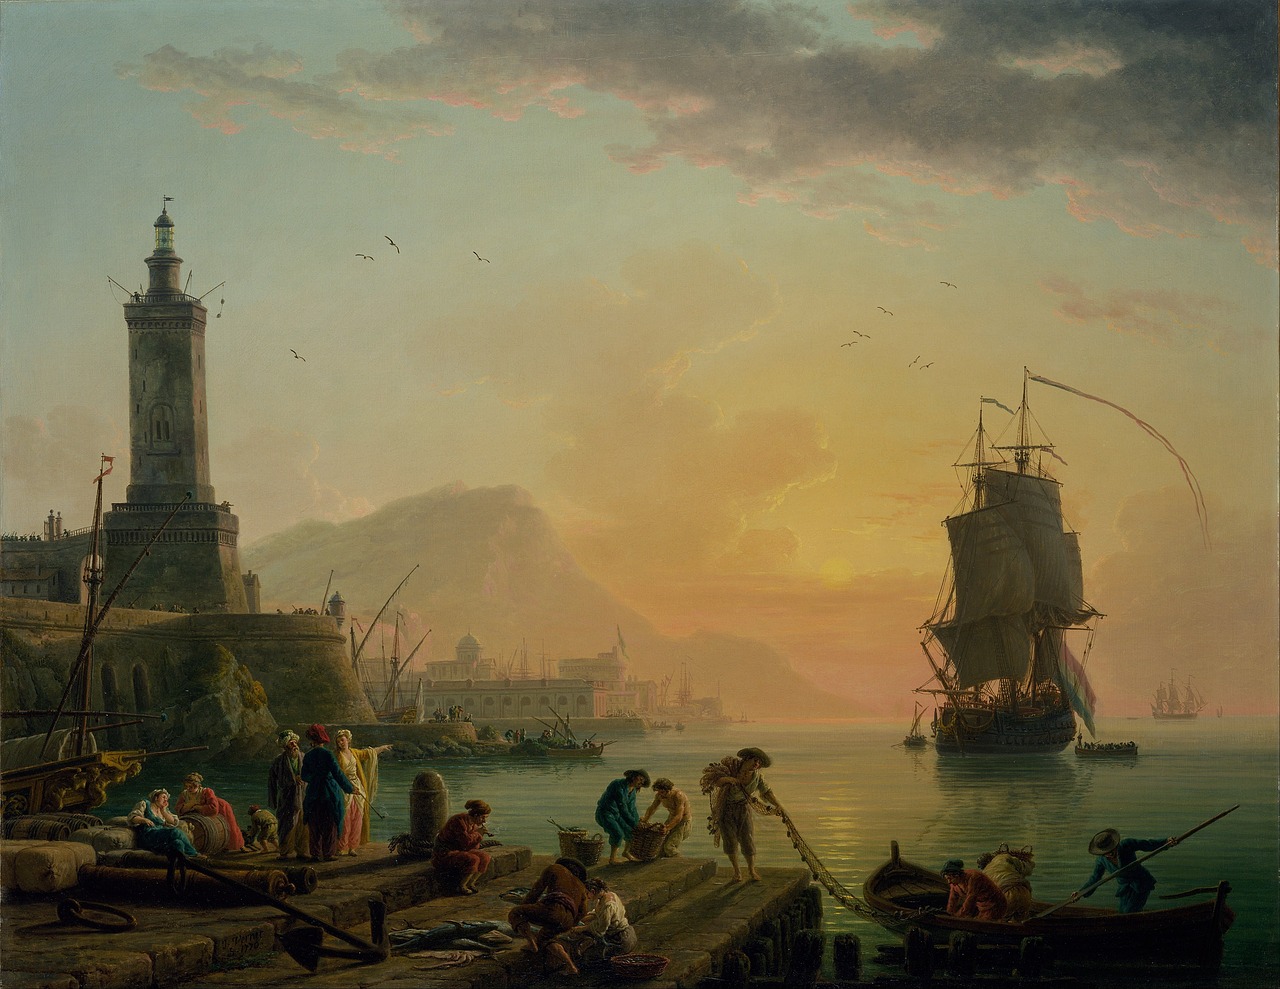
For instance, consider a sunset painting. The warm hues of the setting sun can dominate the scene, casting a golden glow across the landscape. As the sun dips below the horizon, the surrounding colors shift, transitioning to cooler shades of blue and purple in the sky, which can evoke feelings of tranquility and reflection. This interplay between warm and cool colors not only enhances the visual appeal but also adds layers of emotional depth to your work.
To effectively utilize color temperature in your paintings, you might want to consider the following techniques:
- Observe the Scene: Take a moment to really look at your surroundings. Notice how the light changes the colors of the landscape at different times of day. This observation will inform your palette choices.
- Mixing Colors: When mixing your paints, think about the temperature of the colors you’re using. Adding a touch of yellow to a blue can warm it up, making it more vibrant, while adding a bit of blue to a red can cool it down, giving it a more subdued feel.
- Layering Techniques: Use glazing to build up layers of color. This technique allows you to create depth and luminosity, as the underlying colors can influence the visible layers, enhancing the overall warmth or coolness of the light in your painting.
In addition to these techniques, it's important to remember that color temperature can also change based on the time of day and weather conditions. For example, during a cloudy day, the light tends to be more diffused and cooler, which can affect how colors appear in your landscape. Conversely, a bright sunny day will produce stronger, warmer colors. Understanding these nuances will empower you to create landscapes that are not only visually stunning but also rich in emotional resonance.
Ultimately, mastering color temperature is about more than just mixing paints on your palette; it’s about capturing the very essence of light and its impact on the world around you. By paying attention to the interplay of warm and cool colors, you can create landscapes that invite viewers to step into your painted world and experience the beauty of light in all its forms.
Q: What is color temperature in painting?
A: Color temperature refers to the warmth or coolness of a color, influencing how light is perceived in a painting.
Q: How can I determine the color temperature of a scene?
A: Observe the colors in natural light at different times of day and in various weather conditions to understand their temperature.
Q: Can I mix warm and cool colors in my painting?
A: Yes! Mixing warm and cool colors can create depth and interest in your artwork, enhancing the portrayal of light.
Q: What techniques can help me capture light effectively?
A: Techniques such as glazing, layering, and careful observation of your surroundings will help you portray light accurately.
Techniques for Painting Light
When it comes to painting landscapes, mastering the art of light can transform a simple scene into a breathtaking masterpiece. The are essential for any artist looking to evoke emotion and depth in their work. One of the most effective methods involves the use of glazing, where transparent layers of color are applied over dry paint. This technique allows light to penetrate through the layers, creating a luminous effect that mimics the way light interacts with natural elements.
Another technique worth exploring is layering. By building up layers of paint, artists can achieve a sense of depth that is crucial for depicting light. Think of it like constructing a sandwich; each layer adds flavor and complexity. For example, when painting a sunset, you might start with a base layer of warm yellow, followed by layers of orange and red, each slightly transparent, allowing the underlying colors to shine through. This not only enhances the vibrancy of the scene but also captures the fleeting nature of light.
Using complementary colors is yet another technique that can significantly enhance the portrayal of light. When placed next to each other, complementary colors can create a striking contrast that makes the light appear more intense. For instance, when painting a bright sky, you might use a deep blue for the background while incorporating bright yellows and whites for the clouds. This interplay of colors can trick the eye into perceiving a more dynamic light source, making your landscape come alive.
Brushwork techniques are equally vital in conveying light effectively. Different strokes can produce various effects that mimic sunlight filtering through trees or shimmering on water. For instance, using a dry brush technique can create a soft, diffused light effect, perfect for capturing the gentle glow of early morning. Conversely, a stippled brush technique can add texture and vibrancy, ideal for depicting the sparkling highlights on a lake. Experimenting with these brush techniques can lead to exciting discoveries in how light interacts with your subject matter.
Lastly, understanding the power of contrast is crucial. The interplay between light and dark can emphasize focal points in your painting, drawing the viewer's eye to the illuminated sections. Imagine a landscape where a sunlit meadow contrasts sharply against dark, shadowy trees; this dynamic can create a sense of drama and intrigue. By strategically using contrast, you can highlight the beauty of light and its effects on the surrounding environment.
In conclusion, mastering the techniques for painting light is not just about understanding the physical properties of light itself, but also about how to manipulate color, brushwork, and contrast to create a scene that resonates with the viewer. Whether you're a beginner or a seasoned artist, these methods can elevate your landscape paintings, helping you to capture the essence of nature's light in a way that feels both authentic and magical.
- What is glazing in painting? Glazing is a technique where transparent layers of paint are applied over a dried layer to create depth and luminosity.
- How can I create contrast in my paintings? You can create contrast by placing light colors next to dark colors, which helps to emphasize focal points in your artwork.
- What brush techniques work best for depicting light? Techniques like dry brushing and stippling are effective for creating various light effects in your paintings.
- Why is understanding color temperature important? Color temperature helps convey the emotional tone of a painting; warm colors can evoke feelings of warmth and comfort, while cool colors can create a sense of calm or distance.
Brushwork Techniques
When it comes to capturing the essence of light in landscape painting, can make all the difference. The way you wield your brush can evoke emotions and create a sense of atmosphere that draws viewers into your artwork. Think of your brush as an extension of your imagination; each stroke can transform a simple canvas into a breathtaking scene. Whether you're painting the soft glow of dawn or the vibrant colors of sunset, mastering your brushwork is essential.
One effective technique is the dry brush method. This involves using a relatively dry brush with minimal paint to create a textured effect. It’s perfect for depicting the rough surfaces of rocks or the delicate details of leaves illuminated by sunlight. Imagine the way sunlight dances on a tree trunk; the dry brush technique allows you to replicate that sparkle and texture beautifully. To achieve this, simply load your brush with a small amount of paint and gently drag it across the canvas, allowing the underlying colors to peek through.
Another popular method is the wet-on-wet technique, where you apply wet paint onto a wet surface. This technique is fantastic for blending colors seamlessly, mimicking the soft transitions of light in nature. For instance, when painting a sunset, you can blend oranges and purples directly on the canvas to create a radiant sky. The key is to work quickly before the paint dries, allowing for that magical fusion of colors that makes your landscape come alive.
Additionally, consider using layering as a technique to build depth in your paintings. Start with a base layer of color and let it dry before adding additional layers. Each layer can represent a different time of day or weather condition, enhancing the overall mood of your piece. For example, a base layer of cool blues can set the stage for a tranquil lake scene, while warm yellows and reds can be added to depict the sun setting in the background.
Don’t forget about stippling, a technique where you use the tip of your brush to create small dots or dabs of paint. This method can be particularly effective for illustrating the shimmering effect of sunlight on water or the delicate petals of flowers in a meadow. Imagine standing by a lake, watching the sunlight flicker on the surface; stippling can help you capture that essence in your artwork.
Incorporating these brushwork techniques into your landscape paintings not only enhances the portrayal of light but also adds an element of personal expression. Each artist has a unique style, so don’t hesitate to experiment with different strokes and methods. Remember, the goal is to convey the feeling of the moment, whether it’s the harsh light of midday or the soft shadows of dusk.
- What is the best brush for landscape painting? The best brush often depends on the technique you are using. For fine details, a small round brush works well, while flat brushes are great for broader strokes.
- How do I choose colors for my landscape? Consider the time of day and weather conditions. Warm colors like yellows and oranges are great for sunsets, while cool colors like blues and greens work well for daytime scenes.
- Can I mix techniques in one painting? Absolutely! Mixing techniques can create a more dynamic and interesting piece. Just ensure that the methods complement each other.
Using Contrast to Highlight Light
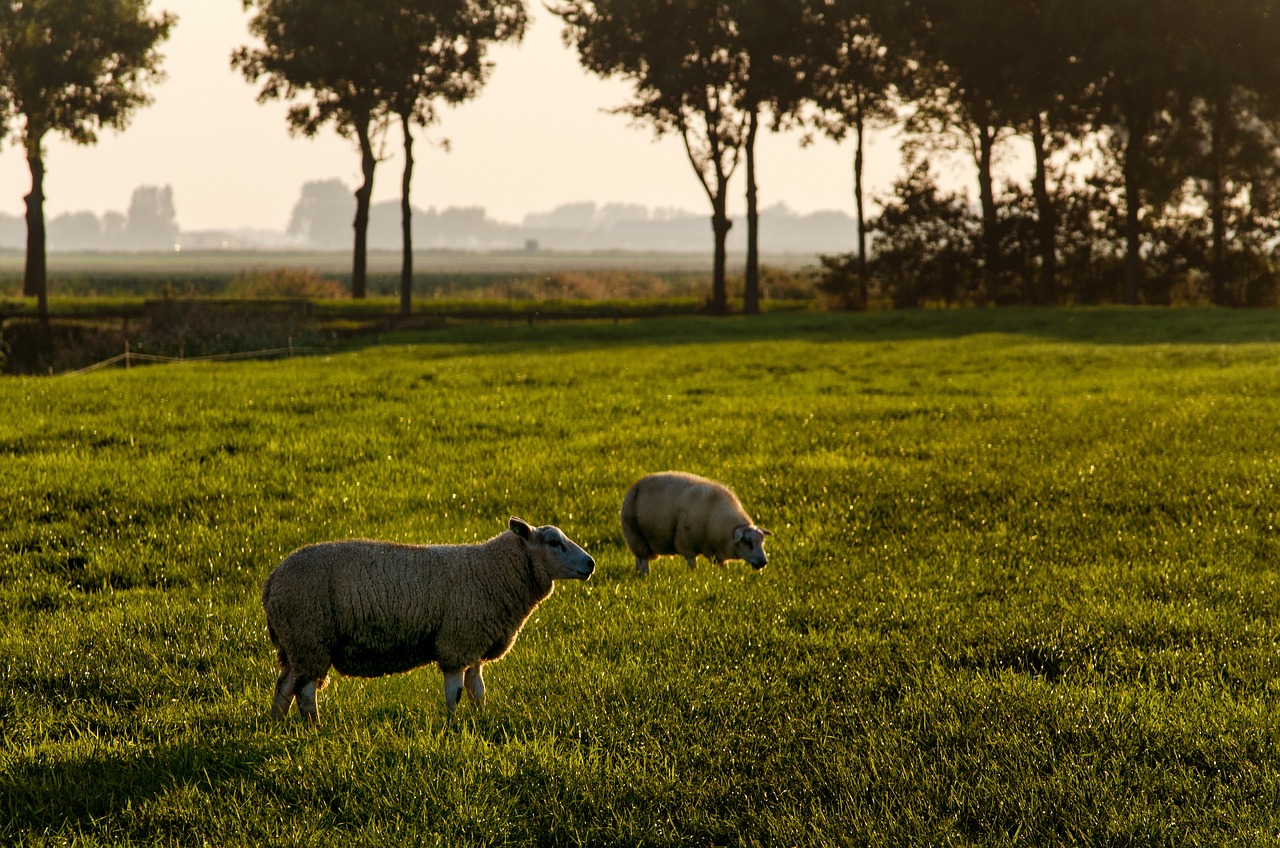
When it comes to landscape painting, contrast is your best friend. Imagine standing on a cliff, gazing at a breathtaking sunset. The vibrant oranges and pinks of the sky seem to leap out against the deep blues and purples of the approaching night. This is the magic of contrast at work! By strategically placing light and dark areas in your artwork, you can create a visual dialogue that draws the viewer's eye to the most important aspects of your composition.
To effectively use contrast, start by identifying the focal point of your painting. This could be a radiant sun setting behind a mountain, or a shimmering lake reflecting the sky. Once you've pinpointed this area, consider the surrounding elements. By using darker shades around your focal point, you can enhance its brightness and make it pop. For example, if you're painting a bright yellow sun, surrounding it with deep blues or greens can create a stunning effect that captures the viewer's attention.
One effective technique is to employ a light-to-dark gradient. This involves gradually transitioning from light to dark colors, which can mimic the way natural light behaves in real life. Think of a pathway leading into a forest; the sunlight filtering through the trees casts dappled shadows. By painting the areas where light hits the ground in lighter tones and the shaded areas in darker hues, you can create a sense of depth and realism. This technique not only enhances the visual appeal of your painting but also evokes a sense of mood and atmosphere.
Another tip is to consider the color wheel. Using complementary colors can amplify contrast dramatically. For instance, if you have a bright red barn in your landscape, placing it against a backdrop of green fields will make it stand out even more. This method is not just about using colors that are opposite each other on the wheel; it’s about creating a visual tension that keeps the viewer engaged. The eye naturally gravitates towards areas of contrast, so leveraging this can lead to compelling compositions.
In addition to color, think about the texture in your painting. A smooth, light area can contrast beautifully with a rough, dark surface. For instance, if you have a calm lake reflecting the sky, the surface can be painted with smooth, lighter strokes, while the surrounding rocky shoreline can be rendered with more textured, darker strokes. This not only highlights the light but also adds an extra layer of interest to your artwork.
Finally, remember that contrast can also be about the emotional impact of your piece. A stark contrast between light and shadow can evoke feelings of drama or tranquility, depending on how you use it. Consider how you want your viewer to feel when they look at your painting and use contrast to amplify that emotion. Whether it’s the serenity of a misty morning or the tension of a stormy sky, contrast can be the key to unlocking the emotional depth of your landscape.
- What is the best way to practice using contrast in my paintings?
Experiment with different lighting scenarios in your sketches. Try painting the same scene at different times of day to see how light and contrast change. - Can I use digital tools to help with contrast?
Absolutely! Digital painting software often has features that allow you to adjust contrast easily, making it a great way to experiment before committing to a canvas. - How can I make sure my contrast doesn’t become overwhelming?
Balance is key. Use contrast strategically and keep in mind the overall harmony of your composition. Sometimes, less is more!
Frequently Asked Questions
- Why is light so important in landscape painting?
Light is the backbone of any landscape painting. It influences the colors you see and the emotions a scene evokes. By mastering light, you can create depth and mood, transforming a simple landscape into a captivating piece of art.
- What are the different types of natural light I should be aware of?
Natural light varies throughout the day and across seasons. You have soft morning light that gently illuminates, harsh midday sun that can wash out colors, and warm evening glow that adds a golden touch. Each type affects how you perceive and paint landscapes.
- What is the golden hour and how can I use it?
The golden hour occurs shortly after sunrise or before sunset, providing a magical quality of light that enhances colors and textures. To make the most of it, plan your painting sessions during these times to capture stunning, warm tones and long shadows.
- How do I effectively capture shadows in my paintings?
Shadows add depth and dimension to your work. Observe how shadows fall and change throughout the day. Use darker tones to paint shadows, paying attention to their shapes and direction to create a more realistic representation of light.
- What techniques can I use to paint reflections in water?
To capture reflections, start by observing the water's surface. Use horizontal strokes to mimic the reflective quality, and remember to slightly distort the reflection to match the movement of the water. This technique enriches your landscape and adds a layer of intrigue.
- How does color temperature affect my landscape paintings?
Color temperature refers to the warmth or coolness of colors. Warm colors (like reds and yellows) can evoke feelings of warmth and happiness, while cool colors (like blues and greens) can create a sense of calm or distance. Understanding this helps you convey the right mood in your artwork.
- What are some effective techniques for painting light?
Techniques like glazing, layering, and using complementary colors can help enhance the luminosity of your landscapes. Experiment with these methods to see how they can bring your paintings to life and make the light appear more dynamic.
- How can brushwork techniques impact the portrayal of light?
Different brushwork techniques can create various effects of light. For instance, quick, light strokes can depict sunlight filtering through trees, while smoother strokes can represent the shimmer on water. The way you apply paint can dramatically change the perception of light in your artwork.
- What role does contrast play in highlighting light?
Contrast between light and dark areas is crucial for emphasizing focal points in your painting. By strategically placing darker shades next to illuminated areas, you can draw the viewer's eye to specific parts of your landscape, making the light appear even more vibrant.


