Exploring Realistic Drawing Techniques
Realistic drawing is a captivating art form that allows artists to express their perception of the world around them. Whether you're a seasoned artist or just starting out, enhancing your skills in this area can be both rewarding and challenging. The journey of mastering realistic drawing techniques is akin to embarking on an adventure where every stroke of your pencil or brush unveils a new layer of creativity. In this article, we will explore various methods and practices that can significantly improve your realistic drawing skills. From understanding proportions and the interplay of light and shadow to mastering texture representation and color theory, we will cover essential techniques, tools, and tips that cater to artists at all levels.
Each section will delve deeply into the aspects that contribute to creating lifelike drawings. We will discuss how to effectively use reference images, the importance of layering techniques, and the right tools and materials to elevate your artwork. Moreover, we will emphasize the significance of practice and patience in your artistic journey. So, grab your sketchbook, and let's dive into the fascinating world of realistic drawing techniques!
Mastering proportions is essential for creating realistic drawings. Imagine trying to sketch a human figure without understanding the basic ratios of limbs and torso; it would look distorted, right? This section explores techniques to measure and compare dimensions accurately, ensuring your subjects maintain their true-to-life appearance. One effective method is to use a grid system, which can help break down complex shapes into manageable squares. By focusing on one square at a time, you can maintain accurate proportions throughout your drawing.
The interplay of light and shadow brings depth to drawings. Think of it as the magic ingredient that transforms a flat image into a three-dimensional form. Here, we discuss how to observe and replicate light sources, creating contrast and enhancing three-dimensionality in your artwork. Understanding where the light hits and where shadows fall can dramatically change the perception of your subject. Techniques like hatching, cross-hatching, and stippling can be employed to create varying degrees of light and shadow, giving your drawings a lifelike quality.
Achieving realistic textures is crucial for lifelike drawings. Each material has its unique characteristics—smooth skin, rough bark, or soft fabric—and capturing these nuances can elevate your work. This section covers various techniques to depict different materials, enhancing visual interest in your pieces. For instance, using short, quick strokes can convey the softness of fur, while longer, flowing lines can represent the smoothness of silk. Observing real-life textures and practicing replicating them on paper will sharpen your skills.
Understanding color theory is vital for realistic drawing. It’s not just about picking colors; it’s about knowing how they interact with each other. This part introduces color mixing, complementary colors, and how to apply these concepts to create more vibrant and true-to-life representations. For example, incorporating shadows with complementary colors can add depth and richness to your work. Experimenting with color palettes can also help you discover the emotional undertones of your artwork.
Gesture drawing captures the essence of movement and form. It’s like catching a fleeting moment in time, and it helps artists improve their understanding of anatomy and fluidity in poses. In this section, we explore techniques for quickly sketching figures, emphasizing the importance of capturing the overall movement rather than focusing on details. Setting a timer for short, timed sessions can help you loosen up and draw more instinctively, which is crucial for developing your skills.
Reference images are invaluable for realism. They serve as guides that help you understand shapes, colors, and proportions more accurately. Here, we discuss how to select and utilize references effectively, ensuring your drawings remain accurate and true to your observational skills. When choosing reference images, look for high-quality photos that highlight the details you want to capture. Remember, the goal is not to copy but to learn and interpret what you see.
Layering is a fundamental technique in realistic drawing. It’s similar to building a cake—each layer adds flavor and depth. This section examines how to build up layers of shading and color, creating depth and richness in your artwork. Start with light layers and gradually increase the intensity. This approach allows for better control and blending, resulting in a more polished final piece.
The right tools can significantly impact your drawing quality. From pencils to paper types, choosing the right materials can make a world of difference in your artistic process. This part reviews various materials, helping artists choose what best suits their realistic drawing style. For instance, softer pencils are great for shading, while harder pencils are ideal for fine lines. Experimenting with different papers can also yield interesting textures and effects.
Developing realistic drawing skills requires dedication. It’s like training for a marathon—consistent practice is key. In this final section, we emphasize the importance of regular practice and patience, providing tips on how to stay motivated throughout your artistic journey. Setting achievable goals, tracking your progress, and celebrating small victories can help keep your motivation high. Remember, every artist was once a beginner, and with time and effort, you too can master the art of realistic drawing.
- What materials do I need to start realistic drawing? You can start with basic materials like pencils, erasers, and sketch paper. As you advance, consider investing in higher-quality tools.
- How can I improve my proportions in drawing? Practice using a grid system and measuring techniques to ensure accurate proportions.
- Is it necessary to use reference images? While not mandatory, reference images can significantly enhance your accuracy and understanding of your subject.
- How often should I practice drawing? Aim for daily practice, even if it's just for a short period. Consistency is crucial for improvement.
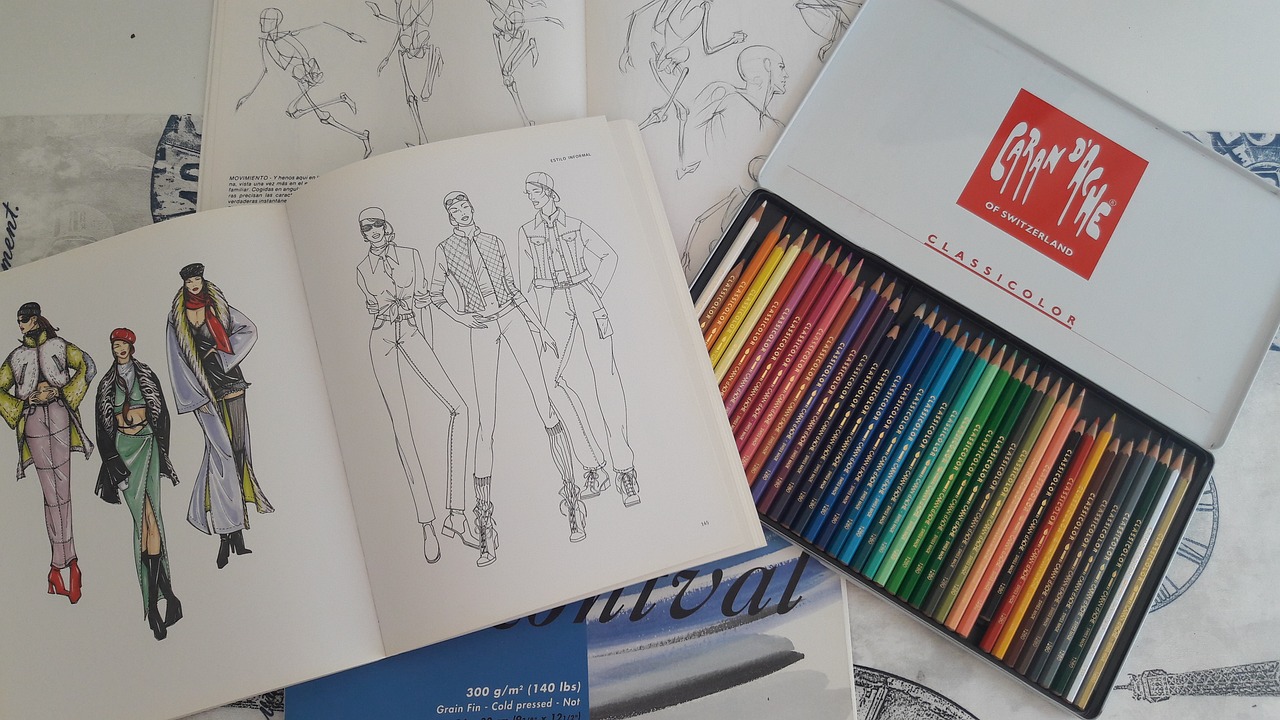
Understanding Proportions
Mastering proportions is essential for creating realistic drawings. Think of proportions as the backbone of your artwork; they provide structure and ensure that every element fits together harmoniously. When you draw a figure, for instance, it’s crucial to get the size relationships between different parts correct. Imagine trying to draw a human figure where the head is the size of a watermelon! It just wouldn’t look right, would it? This is where understanding proportions becomes your best friend.
One effective technique artists use to measure proportions is the grid method. By overlaying a grid on your reference image and then creating a corresponding grid on your drawing surface, you can break down the image into manageable sections. This allows you to focus on one small area at a time, making it easier to capture the correct dimensions. You can also use tools like a caliper or even just your pencil held at arm’s length to compare sizes. This technique is akin to using a map; it guides you to your destination without getting lost in the details.
Another popular method is the comparative measurement technique. This involves using a reference point on your subject to gauge the size of other elements. For example, if you’re drawing a person, you might start with the height of the head and then use that as a unit to measure the rest of the body. This method is not only effective but also helps you develop a keen eye for observation. The more you practice, the more intuitive this process becomes, almost like learning to ride a bike—you’ll find your balance without even thinking about it!
To further enhance your understanding of proportions, consider the following tips:
- Study Anatomy: Familiarize yourself with the basic anatomy of the human figure or the structure of animals. Knowing how bones and muscles work together can significantly improve your proportion accuracy.
- Use Reference Images: Always have a reference image nearby. It serves as a visual guide to help you maintain accurate proportions.
- Practice Gesture Drawing: This technique helps you capture the overall form and proportions quickly, allowing you to focus on the movement and flow of your subject.
Lastly, don't forget that proportions can vary depending on the perspective from which you view your subject. For instance, when drawing a person from above, their feet may appear smaller compared to their head, which looks larger due to the angle. Understanding this concept of perspective will elevate your drawing skills to new heights. Remember, the more you practice and experiment with different techniques, the more confident you’ll become in your ability to capture realistic proportions in your artwork!
Q: What is the best way to practice proportions?
A: The best way to practice is by drawing from life or using reference images. Incorporate the grid method or comparative measurement techniques to enhance your accuracy.
Q: How can I improve my eye for proportions?
A: Regularly practicing gesture drawing can help you develop a better sense of proportions. Additionally, studying anatomy and observing real-life subjects will sharpen your observational skills.
Q: Are there specific tools that can help with measuring proportions?
A: Yes! Tools like calipers, rulers, or even a simple pencil can be very useful for measuring proportions accurately. It's all about finding what works best for you.

Light and Shadow
The interplay of light and shadow is what breathes life into your drawings, transforming flat images into captivating three-dimensional forms. Imagine standing in a dimly lit room, where a single beam of sunlight spills through a window, casting dramatic shadows that dance across the walls. This dynamic relationship between light and shadow not only adds depth but also guides the viewer's eye, highlighting the most important aspects of your artwork.
To truly master this technique, it’s essential to observe how light interacts with different surfaces. Start by identifying the light source in your scene. Is it natural light from the sun, or is it artificial light from a lamp? Each source will create different shadows and highlights. For instance, sunlight tends to produce sharper shadows, while artificial light can create softer, more diffused shadows. Take a moment to study how these shadows behave in various environments; the more you observe, the better you will understand how to replicate these effects in your drawings.
When drawing, you can break down the light and shadow into three key components:
- Highlights: These are the areas where the light hits directly, creating bright spots that draw attention.
- Midtones: The transitional shades between light and shadow that give your drawing depth.
- Shadows: The darker areas where light is obstructed, adding contrast and dimension.
One effective exercise is to practice with a simple object, like a fruit or a vase. Set it under a strong light source and observe how the light changes throughout the day. As you draw, pay close attention to the placement of highlights and shadows. A good tip is to use a blending stump or your fingers to smooth out transitions between these areas, creating a more realistic effect.
Additionally, understanding the concept of cast shadows is crucial. These are the shadows that an object casts onto another surface. They provide context and ground your subject in the scene. For example, a round object like an apple will cast a shadow that is not only shaped by the object itself but also influenced by the angle of the light. Experiment with different angles to see how the cast shadow changes, and don’t forget to incorporate this into your drawings for added realism.
To further enhance your understanding of light and shadow, consider creating a value scale. This is a simple gradient that represents the range of tones from white to black. By practicing how to transition between these values, you’ll develop a better sense of how to apply shading techniques effectively. Here’s a simple representation of a value scale:
| Value | Shade |
|---|---|
| 1 | White |
| 2 | Light Gray |
| 3 | Medium Gray |
| 4 | Dark Gray |
| 5 | Black |
In conclusion, mastering light and shadow is not just about replicating what you see; it’s about understanding the underlying principles that govern how we perceive objects in space. The next time you pick up your pencil, take a moment to consider the light in your scene. With practice and patience, you’ll find that your drawings will not only look more realistic but will also convey a sense of emotion and depth that captivates your audience.
Q: How can I improve my skills in drawing light and shadow?
A: Practice is key! Start with simple objects and gradually move to more complex scenes. Observing real-life lighting conditions will help you understand how to replicate them in your artwork.
Q: What tools are best for shading?
A: Pencils ranging from HB to 8B are great for shading. Blending stumps and tortillons can help smooth transitions, while erasers can be used for highlights.
Q: Should I always use black for shadows?
A: Not necessarily. Shadows can be represented with various colors depending on the light source. Experiment with different hues to create more dynamic shadows.
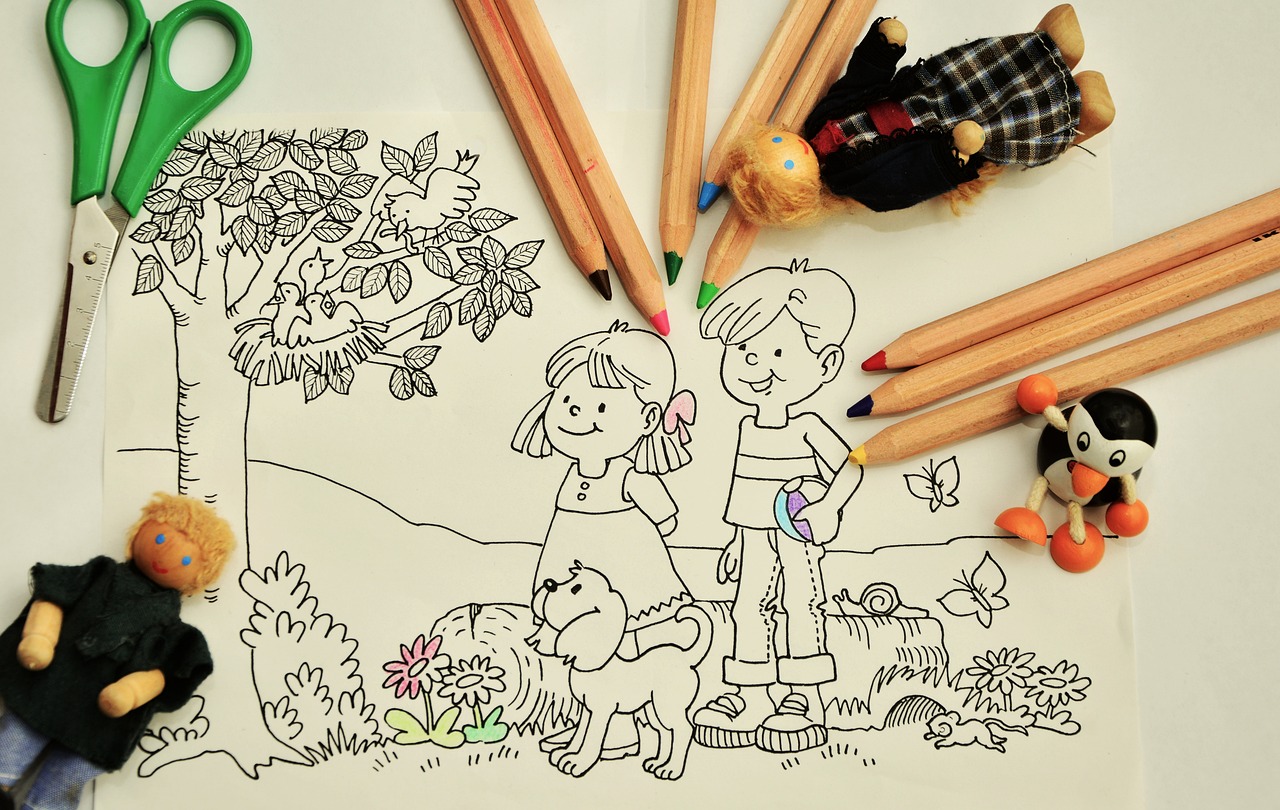
Texture Representation
When it comes to creating realistic drawings, plays a crucial role in bringing your artwork to life. Think of texture as the skin of your drawing; it adds character and depth, making the viewer want to reach out and touch it. Whether you’re depicting the smoothness of a porcelain vase or the roughness of a tree bark, mastering how to convey texture can elevate your artwork from good to truly stunning.
To begin, it's essential to observe the world around you. Take a moment to look at various materials, noticing how light interacts with them. For instance, consider how light reflects off shiny surfaces versus how it absorbs into matte ones. This observation will help you replicate those effects in your drawings. The key is to understand that texture is not just about the surface details; it’s about how those details interact with light and shadow.
One effective technique is to use cross-hatching and stippling to create texture. Cross-hatching involves drawing intersecting lines to build up areas of darkness, which can suggest rough textures like fabric or tree bark. Stippling, on the other hand, uses dots to create shading, perfect for representing softer textures like skin or clouds. Here’s a simple comparison:
| Technique | Best For |
|---|---|
| Cross-Hatching | Rough textures (e.g., wood, fabric) |
| Stippling | Soft textures (e.g., skin, clouds) |
Additionally, consider the use of blending techniques to create smoother transitions between textures. For example, when drawing a human face, you might use a blending stump to soften the edges of shadows around the nose and cheeks, giving a more realistic portrayal of skin. This technique can also be applied to other materials, such as blending colors to depict the smoothness of a glass surface.
Another important aspect is to experiment with different mediums. Each medium has its own unique way of representing texture. For instance, charcoal can create rich, dark textures with a velvety finish, while colored pencils can achieve a more delicate, layered effect. Here are some mediums to consider:
- Graphite Pencils: Great for fine details and smooth textures.
- Charcoal: Ideal for bold, dramatic textures.
- Colored Pencils: Excellent for layering and subtle textures.
- Ink: Perfect for sharp, defined textures.
Lastly, don’t forget to practice! The more you draw, the better you’ll become at recognizing and replicating textures. Set aside time to create texture studies, focusing solely on different materials. This practice will not only improve your skills but also enhance your understanding of how texture contributes to the overall realism of your artwork.
Q: How can I improve my texture representation skills?
A: Regular practice is key. Focus on studying real-life textures and experiment with different drawing techniques and mediums.
Q: What materials are best for practicing texture?
A: Start with a variety of pencils, charcoal, and colored pencils. Each medium offers unique ways to represent texture.
Q: Can I use digital tools to practice texture representation?
A: Absolutely! Digital tools can provide a versatile platform for experimenting with texture, allowing you to undo mistakes and try new techniques easily.
Color Theory in Realism
Understanding color theory is vital for creating realistic drawings that resonate with viewers. Just like a chef needs to know the right ingredients to whip up a delicious dish, an artist must grasp the nuances of color to breathe life into their work. Color isn’t just about picking what looks pretty; it’s about creating a visual language that communicates emotion, depth, and reality. So, how do we tackle this concept? Let’s dive in!
First off, let's talk about color mixing. This is where the magic begins! When you mix colors, you’re not just blending pigments; you’re creating a spectrum of possibilities. For instance, combining red and yellow gives you a vibrant orange, but mixing blue and yellow results in a lively green. Understanding how to mix colors effectively allows you to create shades and tones that can make your artwork pop. It’s like adding spices to your dish—you can enhance the flavor and make it unforgettable.
Next, let’s explore complementary colors. These are pairs of colors that, when combined, cancel each other out, resulting in a grayscale color. However, when placed next to each other, they create a vibrant contrast that can make your subject stand out. For example, think of the fiery red of an apple against a deep green background. This contrast draws the viewer's eye and creates a sense of depth. It’s essential to use complementary colors wisely; too much can be overwhelming, but just the right amount can elevate your work!
Now, you may wonder how to apply these concepts in your drawings. Here’s where the realism comes into play. When you observe the world around you, notice how colors change based on light and shadow. For instance, a white object in sunlight appears warmer than the same object in shade. This phenomenon is due to the colors surrounding it and the light's influence. By replicating these variations in your artwork, you can achieve a more lifelike representation.
To put this into practice, consider the following tips:
- Study the Color Wheel: Familiarize yourself with the color wheel to understand relationships between colors.
- Experiment with Mixing: Spend time mixing colors to see how they interact. Create a swatch book of your mixes for reference.
- Observe Real Life: Take a sketchbook outside and practice capturing the colors you see in different lighting conditions.
Lastly, let’s not forget about transparency and layering. When working with mediums like watercolor or colored pencils, layering transparent colors can create depth and richness that mimics the way light interacts with surfaces in real life. Think of it as building a sandwich; each layer adds to the overall flavor and texture. The more you practice layering colors, the more realistic your drawings will become.
In conclusion, mastering color theory is not just a technical skill; it’s an artistic journey that enhances your ability to convey reality through your drawings. By understanding how to mix colors, utilize complementary shades, and observe the world around you, you can elevate your artwork from mere representation to a vibrant expression of reality. So grab your brushes and pencils, and let the colors flow!
Q: How do I choose the right colors for my drawing?
A: Start by observing the subject closely. Note the colors and how they change with different lighting. Use a color wheel to help select harmonious colors.
Q: What are complementary colors, and why are they important?
A: Complementary colors are opposite each other on the color wheel. They create contrast and can make your artwork more dynamic when used effectively.
Q: Can I use color theory in black and white drawings?
A: Absolutely! Understanding color theory can help you create effective contrasts and shades even in monochromatic work. It’s all about value and how light interacts with surfaces.

Gesture Drawing
is an essential practice for artists who want to capture the essence of movement and form. This technique is all about quick sketches that convey the dynamic pose of a figure rather than focusing on intricate details. Imagine trying to catch a fleeting moment—like a dancer mid-leap or a dog chasing a ball. The goal is to encapsulate that energy and motion in just a few lines. By honing this skill, you not only improve your ability to depict figures but also enhance your overall understanding of anatomy and fluidity.
When starting with gesture drawing, it’s crucial to keep your mindset flexible. You’re not aiming for perfection; instead, focus on the overall shape and flow of the subject. Think of it as creating a roadmap of the body’s movement. To do this effectively, consider the following tips:
- Use a timer: Set a timer for short intervals, typically between 30 seconds to 2 minutes, to encourage quick sketches. This helps you prioritize the essence of the pose over details.
- Start with simple shapes: Break down the figure into basic shapes like circles, ovals, and rectangles. This simplification helps in capturing the overall movement.
- Focus on lines of action: Identify the main line of action in the pose, which is the imaginary line that represents the flow of movement. This line acts as a guide for your drawing.
Incorporating gesture drawing into your routine can serve as a warm-up exercise, much like stretching before a workout. It prepares your hand and mind for more detailed work. As you practice, you’ll notice your ability to visualize and render poses improves significantly. It’s like training your eye to see the world differently, where every curve and angle tells a story.
Moreover, gesture drawings can be a great way to explore different styles and approaches. You might find that certain poses resonate with you, inspiring you to develop a unique artistic voice. So, don’t hesitate to experiment! Use different mediums—charcoal, ink, or even digital tools—to see how they affect your expression of movement.
Ultimately, gesture drawing is about embracing spontaneity and letting go of the fear of making mistakes. Every line you draw contributes to your growth as an artist. Remember, even the most celebrated artists started with simple gestures. So, grab your sketchbook, find a model or reference, and let your creativity flow!
Q: How often should I practice gesture drawing?
A: Aim for at least a few sessions each week. Regular practice will help you become more comfortable and confident in capturing movement.
Q: Do I need a model for gesture drawing?
A: While working with a live model is ideal, you can also use photos or videos as references. Just ensure they capture the movement you want to study.
Q: What materials are best for gesture drawing?
A: You can use anything from pencils and charcoal to markers and digital tools. Choose what feels comfortable for you and allows for quick, expressive strokes.
Q: How long should each gesture drawing session last?
A: Sessions can vary, but 30 minutes to an hour is a good starting point. Focus on quality over quantity during this time.

Using Reference Images
When it comes to creating realistic drawings, reference images are like a secret weapon in an artist's arsenal. Imagine trying to draw a complex scene or a detailed portrait without any visual aid—it's like trying to navigate through a dense fog without a map! Reference images provide clarity and direction, allowing you to capture the nuances of your subject with precision.
One of the key benefits of using reference images is that they help you understand proportions and perspective. By studying these images, you can compare dimensions and see how different elements relate to one another. For instance, if you're drawing a human figure, a reference image can guide you in understanding how the head relates to the torso, or how the limbs should be positioned in relation to the body. This is especially crucial for beginners who might struggle with getting the scale right.
Moreover, reference images allow you to explore various lighting conditions and textures. Have you ever tried to capture the way light dances on a surface? It can be tricky! But with a good reference image, you can observe how light interacts with different surfaces, helping you replicate that effect in your own work. Whether it’s the soft glow of skin or the rough texture of bark, reference images can be invaluable in achieving realism.
However, it's important to choose your reference images wisely. Not all references are created equal! Here are some tips for selecting effective reference images:
- High Resolution: Choose images that are clear and detailed. Blurry or pixelated images can lead to inaccuracies in your drawing.
- Good Lighting: Look for images with well-defined light and shadow. This will help you understand how to apply shading in your drawing.
- Multiple Angles: If possible, use images from different angles. This will give you a better understanding of the subject's form and structure.
Once you've selected your reference images, the next step is to effectively incorporate them into your drawing process. Some artists prefer to have the reference image printed out or displayed on a separate screen, while others might use a grid method to transfer the image onto their drawing surface. The grid method can be particularly helpful for maintaining accurate proportions and placements.
Another technique is to create a mood board or a collage of reference images. This not only inspires creativity but also helps you see how different elements can work together in your final piece. Think of it as a puzzle—each reference image provides a piece that contributes to the overall picture you're trying to create.
Lastly, while reference images are incredibly useful, it's essential to strike a balance between using them and developing your own artistic intuition. Relying too heavily on references can sometimes stifle creativity. Challenge yourself to draw from memory or imagination after studying your reference images. This practice will help you internalize what you’ve learned and develop your own unique style.
In conclusion, reference images are a powerful tool for any artist seeking to improve their realistic drawing skills. They provide insight into proportions, lighting, and textures, making them indispensable for both beginners and seasoned artists alike. So, the next time you sit down to draw, consider reaching for a reference image—it might just be the key to unlocking your artistic potential!
Q: How do I find good reference images?
A: You can find high-quality reference images on stock photo websites, art communities, and even social media platforms. Just make sure to check the usage rights if you plan to share your work publicly!
Q: Is it cheating to use reference images?
A: Not at all! Using reference images is a common practice among artists. They serve as a guide to help you improve your skills and understanding of your subject.
Q: Can I use multiple reference images for one drawing?
A: Absolutely! Many artists use multiple references to capture different aspects of their subject. Just ensure that they work well together in terms of lighting and perspective.

Layering Techniques
Layering is one of the most crucial techniques in realistic drawing, acting as the backbone of depth and richness in your artwork. Imagine building a cake; each layer adds flavor and texture, making the final product more appealing. Similarly, in drawing, layering allows artists to create a complex interplay of colors and shades that can make a simple sketch come alive. The process can be broken down into several steps to ensure that you achieve the desired effect.
To begin with, it's essential to choose the right medium. Whether you're using pencils, charcoal, or pastels, each medium has its unique properties that affect how layers interact with one another. For instance, graphite pencils allow for smooth layering and blending, while charcoal can provide a more dramatic effect with its rich blacks. Understanding your medium will help you determine how many layers you can apply and how they will interact.
When starting a drawing, it's often best to begin with a light base layer. This initial layer serves as a foundation, allowing you to sketch out basic shapes and outlines without committing to darker tones. Think of it as a roadmap for your artwork. Once you're satisfied with the base, you can gradually build up layers of color or shading. This gradual approach helps maintain control over the final outcome and prevents the drawing from becoming too dark too quickly.
As you progress, consider the order of layering. Typically, you’ll want to start with lighter colors and gradually move to darker shades. This technique allows for smoother transitions and helps in achieving a more realistic effect. For instance, if you’re drawing a human face, you might start with a light skin tone, then add blush and shadows to create dimension. Here’s a simple breakdown of the layering order:
| Layer Order | Description |
|---|---|
| 1. Base Layer | Light sketch or color to outline the subject. |
| 2. Mid-Tones | Add in the mid-tones to establish depth. |
| 3. Shadows | Introduce darker shades to create contrast. |
| 4. Highlights | Finish with highlights to add realism and depth. |
Another technique that can enhance your layering process is blending. Blending can be done using various tools, such as blending stumps, your fingers, or even a soft cloth. The key here is to use gentle pressure to mix the layers subtly, creating a smooth transition between colors. However, be cautious not to over-blend, as this can lead to a loss of texture and detail. Think of it like mixing paint; too much mixing can result in a muddy color rather than the vibrant hues you started with.
Finally, remember that layering is not just about color; it also involves texture. Different tools and techniques can be employed to create various textures that add realism to your artwork. For instance, using a stippling technique can create a rough texture, while smooth, circular motions can give a soft, blended appearance. Experimenting with these techniques will allow you to find your unique style and enhance the overall quality of your drawings.
In summary, layering techniques are essential for achieving realism in your drawings. By starting with a light base, gradually building up your colors, blending carefully, and incorporating texture, you can create stunning, lifelike images that capture the viewer's attention. So grab your tools, and start layering your way to breathtaking artwork!
- What is the best medium for layering?
Graphite pencils and colored pencils are generally considered the best for layering due to their ability to blend smoothly. However, charcoal and pastels can also create beautiful layered effects.
- How many layers should I apply?
There’s no strict rule, but starting with three to four layers usually works well. You can always add more if needed, but it's best to build up gradually.
- Can I use erasers in the layering process?
Absolutely! Erasers can help lighten areas and create highlights, which is a valuable technique in layering.

Tools and Materials
When it comes to realistic drawing, the you choose can make a world of difference. Think of your art supplies as the instruments of a musician; the better the quality, the more beautiful the performance. Whether you're a seasoned artist or just starting out, understanding the essentials of your toolkit can elevate your work to new heights.
First and foremost, let's talk about pencils. Not all pencils are created equal! The range of hardness from H (hard) to B (black) means you can achieve different effects with each stroke. For instance, H pencils are great for fine lines and details, while B pencils are perfect for rich, dark shading. A good set of pencils, perhaps ranging from 2H to 6B, will give you the versatility you need to tackle a variety of subjects.
Next up is paper. The type of paper you use can significantly affect the outcome of your drawing. A smooth surface is ideal for fine detail work, while textured paper can add an interesting element to your sketches. When selecting paper, consider the weight and texture. Heavier paper can withstand more erasing and layering, making it a wise choice for realistic work. For example, a heavyweight drawing paper (around 200 gsm) can handle multiple layers without warping.
In addition to pencils and paper, blending tools are essential for achieving smooth transitions and realistic textures. Tools like blending stumps, tortillons, or even your fingers can help you create that soft, lifelike quality in your drawings. By blending, you can soften harsh lines and create depth, making your subjects appear more three-dimensional.
Another crucial component is erasers. Don't underestimate the power of a good eraser! A kneaded eraser is particularly useful for lifting graphite without damaging the paper, allowing you to refine your details effortlessly. Additionally, a precision eraser can help you achieve those fine highlights that bring your drawings to life.
When it comes to color, if you're venturing into colored pencils or pastels, consider investing in a quality set that offers a wide range of hues. The mixing capabilities of colored pencils can help you create realistic skin tones or vibrant landscapes. Remember, layering is key in color work, so choose materials that allow for smooth application and blending.
Finally, let's not forget about reference materials. High-quality reference images can provide invaluable guidance when trying to capture realistic details. Whether it’s a photograph or a live model, having something to refer to can help you stay true to proportions, lighting, and textures. Keep a collection of reference images handy to inspire your creativity and keep your skills sharp.
In conclusion, equipping yourself with the right tools and materials is a fundamental step in your journey towards mastering realistic drawing. Just as a chef needs quality ingredients to create a masterpiece, artists need the best supplies to bring their visions to life. So, invest wisely in your art materials, and watch your skills flourish!
- What is the best pencil for realistic drawing? A range of pencils from 2H to 6B is recommended for versatility in detail and shading.
- Can I use regular paper for drawing? While you can, using heavyweight drawing paper is advised for better durability and quality results.
- What blending tool is best for beginners? A blending stump is a great starting point for achieving smooth transitions.
- Do I need to use color in realistic drawings? No, black and white drawings can also be incredibly realistic; color is just an option to enhance your work.
Practice and Patience
When it comes to mastering realistic drawing, one of the most crucial elements is the combination of practice and patience. Just like a musician who plays the same scale over and over again, or an athlete who trains tirelessly to perfect their technique, artists must dedicate time to honing their skills. But why is this so important? Well, think of drawing as building a muscle. The more you work it, the stronger and more capable it becomes.
Many aspiring artists often feel disheartened when they don't see immediate results. It's essential to understand that realistic drawing is not something you can master overnight. It requires a commitment to continuous improvement and a willingness to embrace the learning process. This journey can be incredibly rewarding, but it demands that you remain patient with yourself as you navigate through challenges and setbacks.
To help you stay on track, consider setting aside a specific time each day or week for your drawing practice. Consistency is key! Here are a few tips to keep in mind as you embark on this artistic journey:
- Set Realistic Goals: Break down your practice into manageable tasks. For instance, focus on mastering proportions one week, then move on to light and shadow the next.
- Keep a Sketchbook: Use it to doodle, experiment, and document your progress. This will not only help you see how far you've come but will also encourage you to draw regularly.
- Seek Feedback: Share your work with fellow artists or friends. Constructive criticism can provide valuable insights that help you grow.
Remember, every artist has their own pace. Some may pick up techniques quickly, while others might take a bit longer. The key is to enjoy the process and not rush through it. Celebrate small victories, whether it’s a drawing that turns out better than expected or simply completing a challenging piece. Each step forward, no matter how small, is a step in the right direction.
In conclusion, are the twin pillars that support your journey towards becoming a skilled realistic artist. Embrace the challenges, keep your spirits high, and remember that every stroke of your pencil is a step closer to achieving your artistic dreams. So grab your sketchbook, put on some music, and let your creativity flow!
Q1: How often should I practice drawing?
A1: Ideally, aim for daily practice, even if it’s just for 15-30 minutes. Consistency is more important than duration.
Q2: What if I don’t see improvement?
A2: Improvement takes time. Keep practicing, seek feedback, and focus on specific skills. You'll notice progress over time.
Q3: Should I focus on one technique at a time?
A3: Yes! Concentrating on one technique allows you to master it before moving on to the next, making your overall skills stronger.
Q4: How can I stay motivated?
A4: Set achievable goals, keep a sketchbook, and surround yourself with supportive fellow artists. Celebrate your progress!
Frequently Asked Questions
- What are the best techniques for mastering proportions in drawing?
Mastering proportions is all about observation and practice. One effective technique is to use a grid method, where you divide your reference image and drawing surface into equal sections. This helps you compare dimensions accurately. Another approach is to measure with your pencil, holding it at arm's length to gauge the relative sizes of different elements in your drawing.
- How can I effectively depict light and shadow in my drawings?
To effectively depict light and shadow, start by identifying your light source. Observe how it interacts with your subject and creates highlights and shadows. Using a range of values, from dark to light, will help you create depth. Remember, shadows are not just dark areas; they have their own shapes and forms, so pay attention to their nuances!
- What techniques can I use to represent different textures realistically?
Texture representation can be achieved through various techniques such as hatching, cross-hatching, and stippling. For example, to depict smooth skin, use soft, blended strokes, while rough surfaces can be illustrated with more jagged, erratic lines. Experiment with different tools, like blending stumps or brushes, to see what works best for the textures you want to create.
- How does color theory apply to realistic drawing?
Color theory is essential in realistic drawing as it helps you understand how colors interact and how to mix them effectively. Familiarize yourself with the color wheel, focusing on complementary colors to create contrast. Mixing colors can also add depth; for instance, adding a touch of blue to a shadow can make it appear more realistic. Don’t shy away from experimenting!
- What is gesture drawing, and how can it help me improve?
Gesture drawing is a quick sketching technique that captures the essence of movement and form. It helps you understand anatomy and fluidity in poses. By practicing gesture drawing regularly, you’ll enhance your ability to depict dynamic figures and improve your overall drawing speed and confidence.
- How should I choose and use reference images?
When selecting reference images, look for ones that clearly depict the subject you want to draw. Ensure they have good lighting and detail. Use them to study proportions, anatomy, and textures. However, don’t copy them verbatim; instead, use them as a guide to develop your unique style while maintaining accuracy in your work.
- What are layering techniques, and why are they important?
Layering techniques involve building up layers of shading and color to create depth and richness in your artwork. Start with light layers and gradually add darker tones. This approach allows for more control and subtlety in your work. It’s crucial for achieving realistic effects, especially in areas like skin tones or landscapes.
- What tools and materials should I use for realistic drawing?
The right tools can make a significant difference in your drawing quality. High-quality pencils, ranging from H to B grades, are essential for achieving various effects. Additionally, choose the right paper type—smooth paper works well for detailed work, while textured paper can add interesting effects. Don’t forget to experiment with erasers and blending tools!
- How can I stay motivated to practice drawing regularly?
Staying motivated requires setting achievable goals and tracking your progress. Create a schedule that includes short, focused practice sessions. Joining a community or finding a drawing buddy can also keep you accountable and inspired. Remember, every artist has their ups and downs, so be patient with yourself and celebrate small victories!


