Mastering the Art of Pastel Painting
Welcome to the vibrant world of pastel painting, where colors dance and creativity knows no bounds! This article explores the techniques, materials, and methods essential for creating stunning pastel artworks. Whether you're a novice eager to explore your artistic side or an experienced artist looking to refine your skills, there’s something here for everyone. Pastel painting is not just about putting color on paper; it’s about expressing emotions, capturing moments, and creating visual poetry. So, grab your pastels and let’s dive into this colorful journey!
When it comes to pastels, not all sticks of color are created equal. There are three main types of pastels: soft pastels, hard pastels, and oil pastels. Each type offers unique qualities that can significantly influence your artwork. Soft pastels are known for their rich pigmentation and smooth application, making them ideal for blending and creating soft transitions. On the other hand, hard pastels provide more control and precision, perfect for fine details and crisp lines. Lastly, oil pastels bring a creamy texture that allows for vibrant colors and a different approach to blending. Understanding these differences will help you choose the right pastels for your artistic vision.
To embark on your pastel painting adventure, you need the right tools. The essentials include not only the pastels themselves but also quality papers, blending tools, and fixatives. Without the right materials, achieving the best results can be a challenge. The type of paper you choose can dramatically affect how the pastels adhere and blend, while blending tools can help you achieve that dreamy, soft look. Fixatives are crucial too, as they help preserve your artwork and prevent smudging. Let’s break down the essentials:
The choice of paper is a game-changer in pastel painting. Using the right surface can elevate your artwork from ordinary to extraordinary. There are various paper textures and weights to consider, each complementing different pastel techniques. For instance, heavier papers with a textured surface hold more pigment and allow for layering, while smoother papers are great for fine details and less aggressive blending.
When deciding between textured and smooth paper, think about your desired painting style. Textured papers are fantastic for creating depth and capturing rich colors, while smooth papers lend themselves well to intricate details and controlled strokes. It’s like choosing between a rough canvas for an abstract piece versus a polished surface for a detailed portrait. So, which one suits your artistic flair?
Understanding the importance of color and weight in paper selection is vital. Lighter papers might buckle under heavy applications of pastel, while heavier, colored papers can enhance the vibrancy of your artwork. Choosing a paper that complements your color palette can make all the difference, allowing your pastels to pop and your artwork to shine.
Blending is crucial in pastel painting for achieving smooth transitions between colors. There are various blending techniques you can experiment with, including using your fingers, blending tools, or layering methods. Each technique offers a different effect, so don’t hesitate to try them all! It’s like mixing ingredients in a recipe; the right combination can create a masterpiece.
A solid grasp of color theory is vital for pastel artists. Understanding how colors interact can help you create mood and atmosphere in your paintings. Color mixing and harmony are key components that can elevate your work from simple to stunning. Imagine walking into a room filled with warm colors versus cool colors; the feelings they evoke are powerful! This section will delve into the nuances of color theory and how to apply it to your pastel artwork.
Building a cohesive color palette is essential for effective pastel artwork. Selecting and organizing colors thoughtfully allows you to create harmonious compositions that resonate with viewers. Think of your color palette as a musical score; each color plays a role in the overall symphony of your painting.
Understanding complementary colors can enhance your artwork's vibrancy. These colors, found opposite each other on the color wheel, can create striking contrasts and depth when used effectively. Consider how a splash of orange can make a blue sky pop! Learning to use these colors can transform your artwork into a visual feast.
For those just starting with pastels, this section offers essential techniques and tips to build confidence and skills. Mastering the basics is crucial for laying a solid foundation for your future artwork. Don’t be afraid to make mistakes; they are often the stepping stones to your greatest breakthroughs!
Mastering basic stroke techniques is crucial for beginners. Strokes can vary from light and feathery to bold and heavy, and understanding how to control these strokes can add texture and form to your paintings. The beauty of pastels lies in their versatility; with a little practice, you can create anything from soft landscapes to vibrant portraits.
Layering is key to achieving depth in pastel work. By applying multiple layers of color, you can create a three-dimensional effect that draws the viewer in. Think of it like building a cake; each layer adds richness and complexity to the final product. So, don’t rush—take your time to build up those layers and watch your artwork come to life!
This section explores advanced pastel techniques, including mixed media approaches and unique methods to push the boundaries of traditional pastel painting. For seasoned artists, the journey of exploration never ends. It’s all about experimenting and finding new ways to express your vision!
Combining pastels with other media can create exciting effects. Think about how watercolor can add a fluid backdrop to your pastel drawings or how ink can provide striking outlines. This fusion of materials opens up a world of creative possibilities and allows for more dynamic expressions.
Creating texture adds interest to your artwork. Using various tools and techniques, such as sponges, brushes, or even household items, can help you achieve diverse textures in your pastel paintings. It’s all about thinking outside the box and letting your imagination run wild!
Q: What are the best pastels for beginners?
A: Soft pastels are often recommended for beginners due to their vibrant colors and ease of blending.
Q: Can I use regular paper for pastel painting?
A: While you can use regular paper, it’s best to choose paper specifically designed for pastels to achieve optimal results.
Q: How do I preserve my pastel artwork?
A: Use a fixative spray to protect your artwork from smudging and fading over time.
Understanding Pastel Types
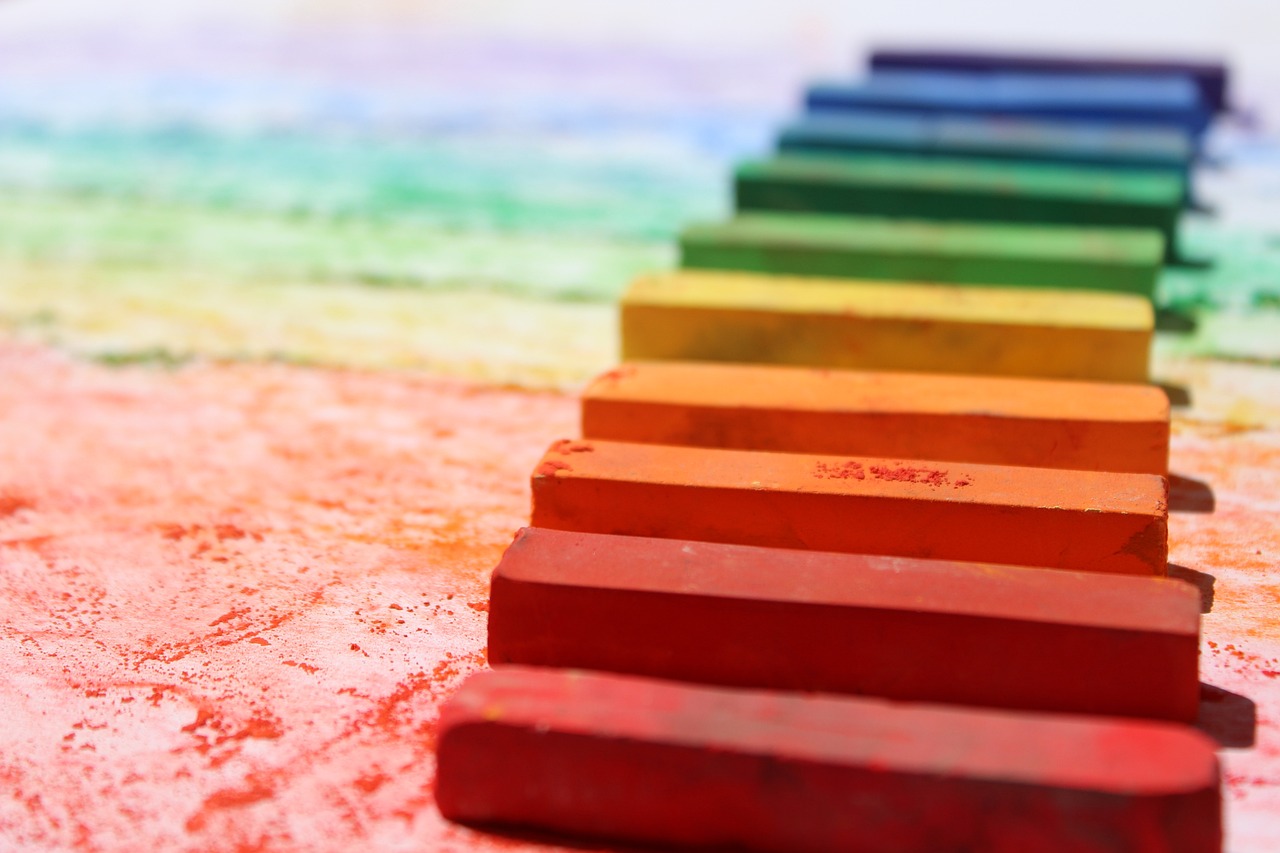
When it comes to pastel painting, understanding the different types of pastels is crucial for any artist looking to create stunning works of art. There are three primary types of pastels: soft pastels, hard pastels, and oil pastels. Each type comes with its own unique characteristics that can significantly influence your artistic expression and the final outcome of your artwork.
Soft pastels are perhaps the most popular among artists due to their vibrant colors and ease of blending. These pastels are made with a high proportion of pigment and a minimal amount of binder, resulting in a rich, creamy texture that glides smoothly across the paper. They are ideal for creating soft transitions and intricate details, making them a favorite for landscape and portrait artists. However, their softness also means they can be more fragile and prone to breakage, so handling them with care is essential.
On the other hand, hard pastels offer a firmer texture and are generally used for finer details and sharper lines. They contain more binder and less pigment than soft pastels, which makes them less vibrant but easier to control. Hard pastels are often favored for sketching and underpainting, as they can create a solid foundation for layering softer pastels on top. They are also less likely to break, making them a practical choice for artists who prefer a more structured approach to their work.
Finally, we have oil pastels, which are quite different from their chalk-based counterparts. Oil pastels are made with a non-drying oil and wax, giving them a unique buttery consistency that allows for bold strokes and intense color application. They can be blended with fingers or tools, but they do not adhere to paper as easily as soft and hard pastels. Instead, oil pastels often require a special surface or paper designed to hold their oily texture. This type of pastel is perfect for artists looking to experiment with vivid colors and unconventional techniques.
To summarize, here’s a quick comparison of the three pastel types:
| Type of Pastel | Characteristics | Best For |
|---|---|---|
| Soft Pastels | Vibrant, creamy, easy to blend | Landscapes, portraits, soft transitions |
| Hard Pastels | Firm, less vibrant, precise control | Sketching, underpainting, fine details |
| Oil Pastels | Buttery, bold, requires special surfaces | Vivid color application, experimental techniques |
Choosing the right type of pastel can make a significant difference in your artistic journey. Whether you’re a beginner or an experienced artist, understanding these differences will empower you to select the best materials for your creative vision. So, which type of pastel resonates with you? Each offers unique possibilities, and experimenting with them can open up a world of creativity!
Essential Tools and Materials
When it comes to creating stunning pastel artworks, having the right tools and materials is absolutely crucial. Just like a chef needs quality ingredients to whip up a delicious meal, an artist requires specific supplies to bring their visions to life. In this section, we'll explore the essential materials you'll need for pastel painting, ensuring that you're well-equipped to embark on your artistic journey.
First and foremost, you'll need a good selection of pastels. There are three primary types: soft pastels, hard pastels, and oil pastels. Each type has its unique characteristics and can influence your artwork in different ways. Soft pastels are known for their vibrant colors and smooth application, making them a favorite among artists. Hard pastels, on the other hand, are great for fine details and precise lines, while oil pastels offer a creamy texture that can be blended easily. Having a variety of these pastels on hand will allow you to experiment and find the right fit for your style.
Next up is paper, which plays a significant role in how your pastels adhere and blend. Not all paper is created equal, and choosing the right one can make all the difference in your final piece. You might want to consider papers with varying textures and weights, as they can affect the way colors appear and how smoothly you can apply your pastels. For instance, textured paper can hold more pigment and allows for more layering, while smooth paper is ideal for detailed work. Understanding these differences will help you make informed decisions based on your desired painting style.
When selecting paper for your pastel painting, you'll encounter various options. Here are some factors to consider:
- Texture: Textured papers are great for building layers and creating depth, while smooth papers are perfect for fine details.
- Weight: Heavier papers can withstand more layering and blending, while lighter papers might buckle under pressure.
- Color: Colored papers can enhance the vibrancy of your pastels, adding an exciting dimension to your work.
In addition to pastels and paper, you'll also need blending tools. Blending is a crucial technique in pastel painting, and there are several options available. Your fingers can be a great tool for blending, allowing for a personal touch in your artwork. Alternatively, you can use blending stumps or tortillons, which are designed specifically for this purpose. These tools help create smooth transitions and can add depth to your pieces.
Lastly, a good fixative is essential for preserving your artwork. Pastels can be quite fragile, and a fixative will help set the colors and prevent smudging. It's important to choose a fixative that is specifically designed for pastels, as some sprays can alter the colors or texture of your work. Always test your fixative on a small area before applying it to your entire piece to ensure it meets your expectations.
In summary, investing in quality pastels, selecting the right paper, utilizing effective blending tools, and applying a reliable fixative are all key components of successful pastel painting. By paying attention to these essential tools and materials, you'll be well on your way to creating breathtaking artworks that truly reflect your artistic vision.
Q1: What type of pastels should I start with as a beginner?
A: As a beginner, it's often recommended to start with soft pastels due to their vibrant colors and ease of blending. They allow for a more forgiving approach as you learn the basics of pastel painting.
Q2: Can I use regular drawing paper for pastels?
A: While you can use regular drawing paper, it's best to opt for paper specifically designed for pastels. These papers have the right texture and weight to hold the pigment better and allow for smoother application.
Q3: How do I prevent my pastel artwork from smudging?
A: Using a fixative after completing your artwork can help preserve it and prevent smudging. Additionally, handling your artwork carefully and keeping it away from direct contact can also help maintain its integrity.
Choosing the Right Paper
When it comes to pastel painting, the choice of paper is not just a trivial decision—it's a game-changer. The right paper can make all the difference in how your pastels adhere, blend, and ultimately shine in your artwork. Think of paper as the canvas of your creativity; it provides the foundation upon which your artistic vision comes to life. So, how do you choose the perfect paper for your pastel masterpieces? Let's dive into the essential aspects!
First off, consider the texture of the paper. Textured paper, often referred to as "toothy," has a surface that holds pastel pigments beautifully, allowing for rich layers and vibrant colors. On the other hand, smooth paper offers a different experience, giving you the ability to create fine details and sharp lines. Depending on your style, you might prefer one over the other.
Next, the weight of the paper plays a crucial role in your pastel application. Heavier papers (typically 200 gsm or more) can handle multiple layers of pastel without buckling, while lighter papers may struggle under the weight of your artistic ambitions. If you're planning to blend extensively or apply multiple layers, opt for a heavier stock that can withstand the pressure.
Additionally, the color of the paper can influence the overall mood and tone of your artwork. A light-colored paper can help pastel colors appear more vibrant, while darker papers can create dramatic contrasts and depth. It's essential to experiment with various colors to see how they interact with your chosen pastels.
Here’s a quick overview of some popular paper types you might consider:
| Paper Type | Texture | Weight | Best For |
|---|---|---|---|
| Pastel Paper | Textured | 200-300 gsm | Layering and blending |
| Watercolor Paper | Rough or Smooth | 200-400 gsm | Mixed media and wet techniques |
| Cardstock | Smooth | 180-300 gsm | Fine details and sketches |
In summary, choosing the right paper is about understanding your personal style and the specific effects you want to achieve in your pastel paintings. Experiment with different textures, weights, and colors to find what resonates with you. Remember, the paper is your partner in creativity, so choose wisely!
Q: Can I use regular drawing paper for pastels?
A: While you can use regular drawing paper, it may not hold the pastel as effectively as specialized pastel paper. It's best to use paper designed for pastels to achieve optimal results.
Q: What happens if I use too light of a paper?
A: Light paper may buckle or tear under the pressure of layering pastels, which can ruin your artwork. Always opt for heavier paper for better durability.
Q: Is colored pastel paper worth trying?
A: Absolutely! Colored pastel paper can enhance the vibrancy of your artwork and provide unique backgrounds that contribute to the overall composition.
Textured vs. Smooth Paper
When diving into the world of pastel painting, one of the first decisions you'll encounter is the choice between textured and smooth paper. Each type offers its own set of advantages and challenges, and understanding these differences can significantly impact your artistic process and the final outcome of your work. Imagine textured paper as a rugged mountain trail, full of bumps and dips, while smooth paper resembles a calm, flat lake, reflecting everything perfectly. Which path you choose can influence not just your technique but also the emotional resonance of your artwork.
Textured paper, often referred to as "toothy" paper, is designed to hold onto pastels more effectively. The raised surfaces create a natural grip, allowing artists to layer colors and build depth with ease. This type of paper is particularly beneficial for those who enjoy working with multiple layers and complex color blends. However, it can also present challenges, as the uneven surface might make fine details more difficult to achieve. If you're aiming for a painterly effect with rich textures, textured paper is your go-to choice.
On the flip side, smooth paper offers a different experience. It allows for a more delicate application of pastels, making it ideal for achieving fine lines and intricate details. Think of it as a blank canvas waiting for your creativity to flow. Smooth paper can be particularly advantageous when working on portraits or detailed landscapes, where precision is key. However, artists may find that it requires a different approach to layering, as pastels tend to sit on the surface rather than being absorbed into the paper.
To help you visualize the differences, here’s a quick comparison:
| Feature | Textured Paper | Smooth Paper |
|---|---|---|
| Surface | Rough, with peaks and valleys | Flat and even |
| Color Holding | Excellent for layering | Good for fine details |
| Application | More pressure needed for coverage | Less pressure, easier to control |
| Best For | Textured effects, landscapes | Portraits, intricate details |
Ultimately, the choice between textured and smooth paper comes down to your personal style and the effects you wish to achieve. Many artists find it beneficial to experiment with both types to discover which one resonates with their creative vision. Whether you prefer the robust character of textured paper or the sleekness of smooth paper, each has its unique charm that can elevate your pastel painting experience.
Color and Weight Considerations
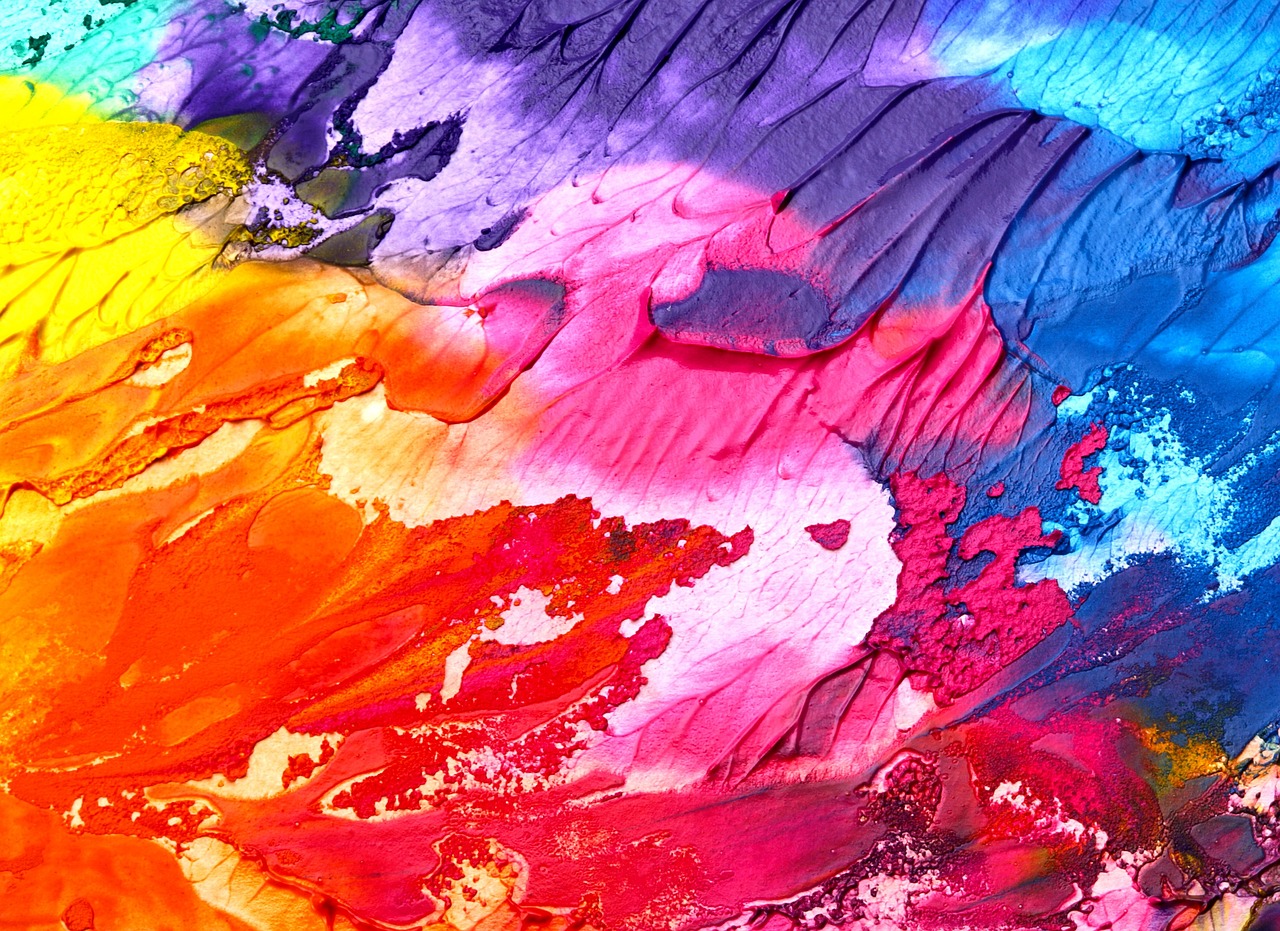
When diving into the world of pastel painting, one of the most crucial decisions you'll make is selecting the right paper. But why does color and weight matter so much? Well, think of your paper as the canvas of your creativity; it can either enhance or hinder your artistic expression. The color of the paper can significantly influence the overall mood and vibrancy of your artwork. For instance, using a dark paper can create a dramatic effect, allowing lighter pastels to pop and draw the viewer's eye, while a light paper can produce a softer, more ethereal quality. This choice can dramatically alter the perception of your piece, making it essential to consider your artistic intent.
Now, let's talk about weight. Paper weight is measured in grams per square meter (gsm), and it plays a vital role in how well your pastels adhere to the surface. Heavier papers, typically around 200 gsm or more, are excellent for layering and blending, as they can handle the pressure of multiple pastel applications without warping. On the other hand, lighter papers may buckle or tear under the same conditions, leading to frustration and limiting your creative possibilities. Choosing a paper weight that suits your technique is akin to selecting the right tools for a job; it can make all the difference.
To further illustrate the impact of color and weight, here’s a simple comparison:
| Paper Type | Color | Weight (gsm) | Best For |
|---|---|---|---|
| Dark Pastel Paper | Black, Dark Blue | 220 | High Contrast Works |
| Light Pastel Paper | White, Light Gray | 160 | Soft, Subtle Pieces |
| Textured Pastel Paper | Varied | 200 | Layering Techniques |
| Smooth Pastel Paper | Varied | 180 | Detailed Work |
In conclusion, choosing the right color and weight of your pastel paper is not just a technical decision; it's a fundamental part of your artistic journey. By understanding how these elements interact with your pastels, you can create stunning artworks that resonate with your audience and reflect your unique style. So next time you’re at the art supply store, remember: the perfect paper is out there waiting to bring your pastel visions to life!
- What type of paper is best for pastel painting? The best type of paper for pastel painting is one that is specifically designed for pastels, typically with a textured surface that holds the pigment well.
- Can I use regular drawing paper for pastels? While you can use regular drawing paper, it may not hold the pastel as effectively and can lead to smudging or tearing.
- How do I know the right weight of paper for my pastel work? Generally, a weight of 200 gsm or higher is recommended for pastel work, as it can handle multiple layers without warping.
- Does the color of the paper affect the final artwork? Yes, the color of the paper can dramatically influence the vibrancy and mood of your artwork, so choose a color that complements your vision.
Blending Techniques
Blending techniques are the heart and soul of pastel painting, allowing artists to achieve those smooth transitions and soft edges that make pastel artworks so captivating. If you're new to pastels, you might find yourself wondering, "How do I create that dreamy effect I've seen in professional pieces?" Well, let’s dive into the world of blending and explore the various methods that can elevate your pastel game!
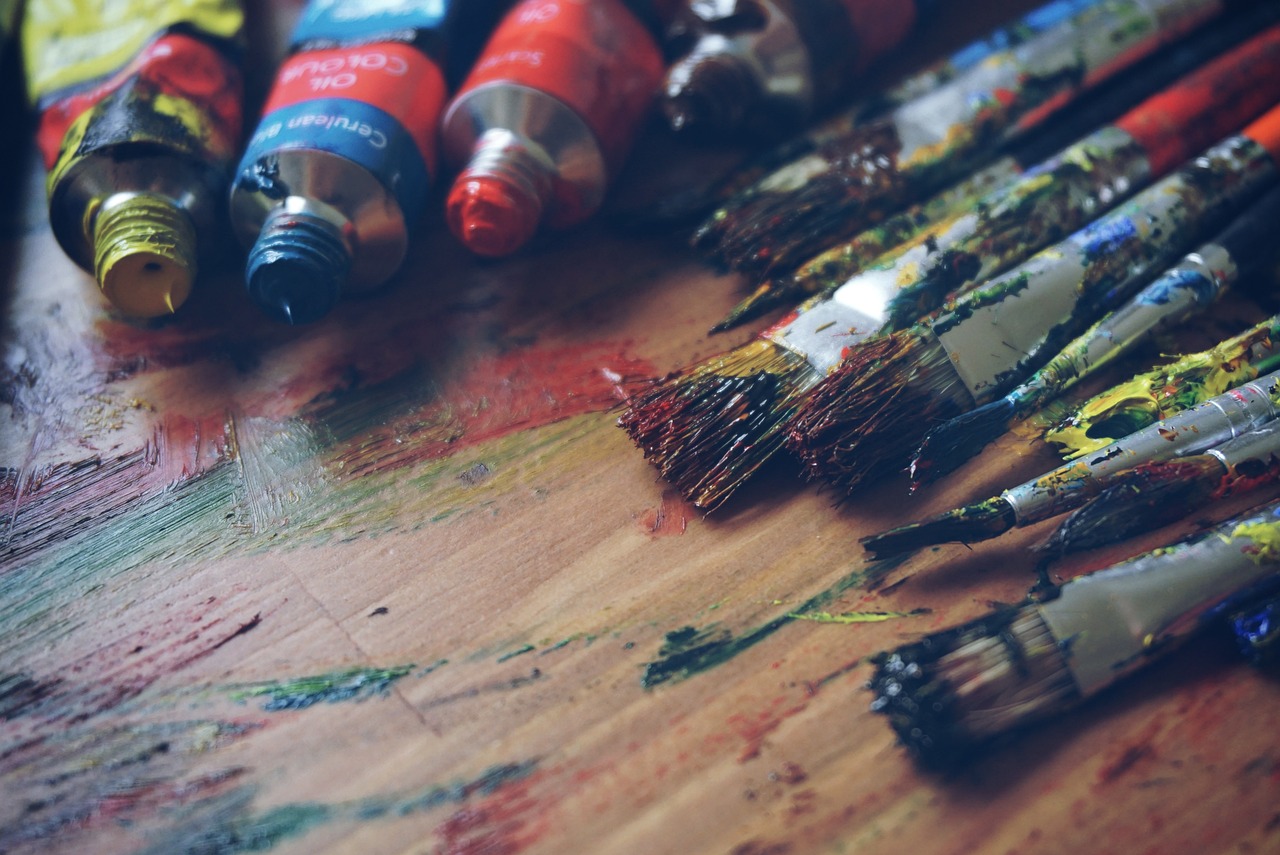
One of the most common techniques is using your fingers. Yes, you heard that right! Your fingers can be your best blending tool. The warmth of your skin helps to soften the pastel, allowing for seamless transitions between colors. Just remember to clean your fingers occasionally to avoid muddying your palette. Another popular method is using blending tools, such as blending stumps or tortillons. These cylindrical tools are perfect for achieving finer details and precision in your blending. They can be especially useful when working on smaller areas of your artwork where control is essential.
Layering is also a crucial aspect of blending. By applying multiple layers of color, you can create depth and richness in your artwork. Start with a light base layer, then gradually add darker shades, blending as you go. This method not only enhances the overall appearance but also allows for more dynamic color interactions. Think of layering like building a cake; each layer adds flavor and complexity to the final product!
For those who love experimenting, consider using a wet blending technique. This involves lightly dampening your paper or the pastel itself with a brush or sponge before applying the color. The moisture helps the pastels to glide smoothly, creating a beautiful, soft effect. However, be cautious with this method, as too much water can lead to unwanted results.
To summarize, here are some key blending techniques you can try:
- Finger Blending: Use your fingers to blend colors directly on the paper.
- Blending Tools: Utilize blending stumps or tortillons for precision.
- Layering: Build depth by layering colors and blending them together.
- Wet Blending: Experiment with moisture to create soft transitions.
Remember, blending is both an art and a science. It takes practice to master these techniques, so don't be discouraged if your first attempts don't turn out as expected. Keep experimenting, and soon you'll find your unique style that makes your pastel paintings truly shine!
Q1: How do I avoid muddy colors when blending pastels?
A1: To avoid muddy colors, start with clean blending tools and fingers. Additionally, blend colors that are close in hue to maintain harmony and vibrancy.
Q2: Can I use water with pastels?
A2: Yes, you can use a wet blending technique by lightly dampening the paper or the pastel. Just be careful not to use too much water, as it can cause the pigments to run.
Q3: What is the best paper for blending pastels?
A3: Textured paper is often recommended for blending, as it holds the pastel better and allows for smoother application. However, smooth paper can also work well for detailed blending.
Q4: How can I practice my blending techniques?
A4: Set aside time to experiment with different blending methods on scrap paper. Try blending various colors and layering them to see how they interact.
Color Theory in Pastel Painting
Understanding color theory is crucial for any pastel artist aiming to elevate their artwork. Color theory encompasses the principles of how colors interact, mix, and influence the viewer's perception. When working with pastels, the vibrancy and blendability of colors can create stunning effects, but knowing how to manipulate these colors is what truly makes a piece stand out. It's like having a secret ingredient in your recipe; without it, the dish may fall flat, but with it, you can create a masterpiece.
One of the first concepts to grasp is color mixing. When you combine different pastel colors, the results can vary dramatically based on the colors you choose. For instance, mixing complementary colors can produce a vibrant contrast that draws the eye. Complementary colors are those that are opposite each other on the color wheel, such as blue and orange or red and green. This principle can be applied in your artwork to create dynamic and engaging pieces that pop with life.
Another essential aspect of color theory is color harmony. This involves selecting colors that work well together to create a cohesive look. Think of it like putting together an outfit; you want colors that complement each other rather than clash. For pastel painting, achieving harmony can be as simple as using a limited palette of colors that share similar undertones. For example, using various shades of blue and green can evoke a calming atmosphere, perfect for landscapes or serene subjects.
Moreover, mood and atmosphere play a significant role in how colors are perceived. Warm colors such as reds, oranges, and yellows can evoke feelings of energy and warmth, while cooler colors like blues and greens tend to provide a sense of calmness and tranquility. As an artist, you can manipulate these color temperatures to convey different emotions in your work. Imagine painting a sunset; the warm hues of orange and pink can evoke feelings of nostalgia and warmth, while a cool blue sky can create a sense of peace and serenity.
To assist you in applying these concepts, here's a simple table that outlines some common color combinations and their effects:
| Color Combination | Effect |
|---|---|
| Blue & Orange | High contrast, vibrant energy |
| Red & Green | Festive, lively |
| Yellow & Purple | Playful, whimsical |
| Blue & Green | Calming, serene |
Finally, creating a cohesive color palette is essential for effective pastel artwork. You can start by selecting a few key colors that resonate with your subject matter. From there, you can mix and match to find shades that enhance your primary colors. A well-thought-out palette can guide your brushstrokes and ensure that your final piece is both harmonious and engaging.
In summary, mastering color theory in pastel painting is not just about knowing how to mix colors; it's about understanding how they interact and the emotions they evoke. By applying these principles, you can transform your pastel artworks into vibrant masterpieces that speak to the heart of the viewer. So, the next time you pick up your pastels, remember the power of color and let it guide your creativity!
- What is color theory? Color theory is a set of principles used to understand how colors interact and how they can be combined to create visually appealing artwork.
- Why is color harmony important? Color harmony ensures that the colors in your artwork complement each other, creating a cohesive and aesthetically pleasing piece.
- How can I create depth using color? By layering colors and using complementary colors, you can add depth and dimension to your pastel paintings.
- What are complementary colors? Complementary colors are colors that are opposite each other on the color wheel, such as blue and orange, and they create a striking contrast when used together.
Creating Color Palettes
Creating a cohesive color palette is essential for effective pastel artwork. It’s like setting the stage for a grand performance; the right colors can evoke emotions and draw viewers into your world. When you sit down to create your palette, consider the mood and message you want to convey. Are you aiming for a vibrant, energetic piece, or something more subdued and serene? Understanding your artistic intent can guide your color choices.
One effective method for building a color palette is to start with a dominant color. This is the color that will take center stage in your artwork. From there, you can select complementary colors that enhance or contrast with your dominant shade. For instance, if your dominant color is a warm yellow, consider adding shades of purple or blue to create a striking contrast. This interplay between colors can add depth and interest to your piece.
Additionally, consider using a color wheel as your trusty guide. A color wheel can help you visualize relationships between colors, making it easier to select harmonious combinations. Here’s a quick breakdown of some color relationships you can explore:
| Color Relationship | Description |
|---|---|
| Complementary | Colors opposite each other on the color wheel that create vibrant contrasts. |
| Analogous | Colors next to each other on the wheel that create a harmonious look. |
| Triadic | Three colors evenly spaced around the wheel, providing a balanced yet vibrant palette. |
When selecting your colors, also think about the values—the lightness or darkness of a color. Mixing light and dark shades can add dimension to your artwork. For example, if you’re working with a bright red, consider adding a darker burgundy or a lighter pink to create contrast and depth. This layering of values can help your colors pop and create a more engaging composition.
Finally, don’t be afraid to experiment! Sometimes the best palettes come from unexpected combinations. Grab your pastels, start swatching different colors together, and see what resonates with you. Remember, art is a journey, and your color palette is a reflection of your unique artistic voice. So go ahead, mix it up, and let your creativity flow!
- What is the best way to start creating a color palette?
Begin with a dominant color and build around it using complementary and analogous colors. - How can I ensure my colors work well together?
Use a color wheel to explore relationships and experiment with different combinations. - Do I need to stick to a specific color scheme?
No, feel free to experiment! Art is about personal expression, so trust your instincts.
Using Complementary Colors
When it comes to pastel painting, understanding and utilizing complementary colors can be a game-changer. Complementary colors are pairs of colors that, when combined, cancel each other out, producing a grayscale color like white or black. When placed next to each other, they create a striking contrast that can make your artwork pop! Imagine a vibrant orange sitting next to a deep blue; the two colors enhance each other's intensity, making them appear even more vivid. This principle is not just a theoretical concept but a practical tool that can elevate your pastel paintings to a whole new level.
To harness the power of complementary colors effectively, it’s essential to first understand the color wheel. The color wheel is divided into primary, secondary, and tertiary colors, and complementary colors are located directly opposite each other. Here’s a brief overview:
| Color | Complementary Color |
|---|---|
| Red | Green |
| Blue | Orange |
| Yellow | Purple |
By incorporating these complementary colors into your pastel artwork, you can create a sense of balance and harmony. For instance, if you’re painting a sunset, using soft yellows and purples can evoke a beautiful, serene atmosphere. The yellow can represent the sun's warmth, while the purple adds depth and intrigue to the sky. This technique doesn't just apply to landscapes; it can also be used in portraits and still life. Think about how a splash of green in a fruit bowl can make the reds and yellows of the fruits stand out, drawing the viewer's eye to the vibrancy of the scene.
Moreover, don’t shy away from experimenting with the saturation and value of complementary colors. Sometimes, using a muted version of a color can create a sophisticated effect without overwhelming the viewer. For example, a soft, pastel green paired with a slightly darker pink can create a gentle, inviting composition. The key is to create a dialogue between the colors, allowing them to interact and enhance each other rather than compete for attention.
In summary, using complementary colors in your pastel paintings is not just about choosing colors that look good together; it’s about understanding how they can transform your artwork. By strategically placing complementary colors next to each other, you can create depth, vibrancy, and emotional impact in your pieces. So next time you sit down to create, remember the color wheel, embrace the contrasts, and let your artwork speak through the harmony of complementary colors!
- What are complementary colors? Complementary colors are pairs of colors that are opposite each other on the color wheel, creating a strong contrast when used together.
- How can I use complementary colors in my pastel paintings? You can use complementary colors to create vibrant contrasts and enhance the depth of your artwork. Place them next to each other to make each color stand out more.
- Should I always use bright complementary colors? Not necessarily. You can experiment with muted or pastel versions of complementary colors to achieve a softer, more sophisticated look.
- Can I mix complementary colors? Yes, mixing complementary colors can produce neutral tones, which can be useful for shading and adding depth to your artwork.
Techniques for Beginners
Starting your journey in pastel painting can feel a bit like stepping into a vibrant dream, where colors dance and textures beckon. But don't worry! With the right techniques, you'll find yourself creating stunning artwork in no time. Let’s dive into some essential techniques that will help you build confidence and skill as you embark on this colorful adventure.
First and foremost, mastering basic stroke techniques is crucial. Think of strokes as the building blocks of your artwork. They can be soft and delicate or bold and assertive, depending on how you apply them. A gentle flick of your wrist can create soft lines, while a firm, steady hand can produce sharp edges. Practice drawing different types of strokes on scrap paper to see how they vary. You might want to experiment with:
- Short strokes for creating texture
- Long strokes for smooth areas
- Circular motions for blending
Another essential technique is layering. Layering is key to achieving depth and richness in your pastel work. Imagine painting a landscape where the foreground is vibrant and detailed, while the background fades softly into the distance. To accomplish this, start with a light layer of color and gradually build up darker or more intense hues. This method not only adds dimension but also allows for beautiful color mixing. Remember, the more you layer, the more depth you can achieve!
Don’t forget about blending techniques! Blending is like the magic wand of pastel painting, transforming harsh lines into soft transitions. You can use your fingers, blending stumps, or even cotton swabs to achieve that perfect look. Each method offers a different effect, so feel free to experiment. For instance, using your fingers can create a more organic feel, while a blending stump gives you more control. Just be cautious—too much blending can muddy your colors!
As a beginner, it’s also vital to understand the importance of color selection. Begin by choosing a limited palette of colors that complement each other. This will help you focus on mixing and layering without becoming overwhelmed by choices. A good starting palette might include primary colors and a few earth tones. As you grow more comfortable, you can expand your palette to include more vibrant shades and complementary colors.
Finally, don't shy away from making mistakes. Each smudge and unintended stroke is a step towards mastering your craft. Embrace the learning process, and remember that every artist has gone through it. Keep a sketchbook handy to jot down ideas, practice strokes, and explore color combinations. This will not only enhance your skills but also serve as a visual diary of your artistic journey.
In summary, the key to mastering pastel painting as a beginner lies in practicing basic stroke techniques, layering colors for depth, blending for smooth transitions, making thoughtful color selections, and embracing the learning process. With patience and practice, you'll find your unique style emerging, and soon enough, you'll be creating pastel masterpieces that showcase your creativity and passion.
Q: What type of pastels should I start with as a beginner?
A: It's best to start with soft pastels as they are easier to blend and work with. They offer vibrant colors and can be layered effectively.
Q: Do I need special paper for pastel painting?
A: Yes, using paper designed for pastels is recommended. It typically has a textured surface that holds the pigment better than regular paper.
Q: How can I fix my pastel artwork once it's finished?
A: You can use a fixative spray designed for pastels to help set your artwork and prevent smudging. Be sure to follow the instructions on the spray for the best results.
Q: Is it necessary to use blending tools?
A: While blending tools can enhance your artwork, your fingers can also be very effective. Experiment to see what works best for you!
Q: How often should I practice?
A: Regular practice is key! Aim for at least a few times a week to build your skills and confidence.
Basic Stroke Techniques
When diving into the world of pastel painting, mastering is essential for building a solid foundation. These strokes are not just mere marks on paper; they are the building blocks of your art, allowing you to express texture, form, and depth. Think of your strokes as the words in a story—each one contributes to the overall narrative of your artwork.
One of the first techniques to explore is the straight stroke. This simple yet effective method involves drawing a straight line with your pastel. It can be used to create outlines or define shapes in your composition. The key here is to maintain a steady hand and apply consistent pressure. A well-executed straight stroke can serve as a strong foundation for more complex techniques.
Next up is the curved stroke. This technique is particularly useful for rendering organic shapes such as leaves, flowers, or human figures. To achieve a smooth curve, practice moving your hand in a fluid motion while applying varying pressure to create different widths. Curved strokes can add a sense of movement and life to your artwork, making it more dynamic.
Another essential technique is the cross-hatching method. This involves layering strokes in different directions to build up texture and depth. By crossing your strokes, you can create shadows and highlights, giving your artwork a more three-dimensional appearance. Experiment with the angle and spacing of your strokes to discover how they can affect the overall look of your piece.
For those looking to create a softer effect, the feathering technique is a must-try. This involves using light, quick strokes to blend colors subtly. Feathering is perfect for creating gradients and soft transitions between colors. To master this technique, practice using the tip of your pastel and varying your pressure to achieve the desired softness.
It's also important to understand the layering technique, which is crucial for adding depth to your pastel paintings. Start with a base layer of color and gradually build up additional layers on top. Each layer should be applied lightly, allowing the colors to blend naturally. This technique not only enriches your artwork but also allows for greater control over the final outcome.
As you practice these basic stroke techniques, remember that the key to improvement lies in consistent practice. Don't be afraid to experiment with different strokes and see how they interact with one another. Every artist develops a unique style, and your strokes will help define yours. So grab your pastels, let your creativity flow, and enjoy the process of discovering what these techniques can do for your art!
- What types of strokes are best for beginners? Beginners should focus on mastering straight and curved strokes, as they form the basis for more advanced techniques.
- How can I improve my stroke technique? Regular practice is key. Try dedicating time each day to practice different strokes and experiment with varying pressure and angles.
- Can I use my fingers to blend strokes? Yes! Using your fingers can create a natural blending effect, but be sure to clean your fingers between colors to avoid muddying them.
Layering for Depth
When it comes to pastel painting, the technique of layering is absolutely essential for achieving depth and dimension in your artwork. Think of layering like building a sandwich; each layer adds flavor and texture, making the final product much more satisfying. By applying multiple layers of pastel, you can create a rich, vibrant surface that draws the viewer in and gives your artwork a three-dimensional quality.
To start layering effectively, it's crucial to understand how pastels interact with one another. Unlike other mediums, pastels can be applied in a way that allows the colors beneath to show through, creating a beautiful interplay of hues. This transparency means you can build depth by starting with lighter colors and gradually adding darker shades. It’s akin to the way light filters through leaves in a forest, where the colors blend and shift depending on the angle and intensity of the light.
Here are some tips to keep in mind when layering:
- Start Light: Begin with lighter colors as your base. This not only allows for easier blending but also helps to achieve a luminous effect.
- Use a Gentle Touch: Apply your pastels lightly at first. Heavy pressure can cause the colors to become muddy and lose their vibrancy.
- Build Gradually: Layer your colors gradually. Allow each layer to dry or settle before adding the next, which helps maintain clarity and depth.
- Experiment with Values: Don’t be afraid to mix different values of the same color. This can create a stunning gradient effect that adds realism and interest to your piece.
One effective technique for layering is to use a blending tool or even your fingers to gently merge the colors together after applying each layer. This technique softens the edges and creates a seamless transition between colors, much like a painter might use a brush to blend oils. However, be careful not to over-blend, as this can flatten the depth you’ve worked hard to create.
Another important aspect of layering is color selection. Choosing colors that complement each other will enhance the overall impact of your painting. For instance, layering warm colors like reds and oranges over cool colors like blues and greens can create dynamic contrasts that make your artwork pop. It’s like creating a beautiful sunset where the colors blend harmoniously yet stand out vibrantly against each other.
As you gain confidence in your layering technique, don’t hesitate to experiment with different materials and surfaces. Some artists find that using textured paper allows for more pronounced layering effects, while others prefer smooth surfaces for a more refined look. Ultimately, the choice is yours, and it can be a fun journey of discovery as you find what works best for your unique style.
In conclusion, mastering the art of layering in pastel painting is not just about applying color; it’s about creating a visual narrative that invites the viewer into your world. By understanding the principles of layering, you can transform a simple composition into a captivating masterpiece that resonates with emotion and depth.
Q: How many layers should I apply when using pastels?
A: There’s no strict rule on the number of layers, but generally, 3-5 layers can create a good depth. It really depends on your desired effect and the specific colors you’re using.
Q: Can I use fixatives between layers?
A: Yes, using a light fixative between layers can help to set the colors and prevent smudging. Just be sure to use it sparingly to avoid dulling your pastels.
Q: What if my colors become muddy when layering?
A: If your colors start to look muddy, try to lighten your touch and avoid layering too many dark colors. Always start with lighter tones and build up gradually.
Advanced Techniques for Experienced Artists
As you delve deeper into the world of pastel painting, you'll discover that the possibilities are truly endless. Advanced techniques can elevate your artwork from good to extraordinary, allowing you to express your creativity in ways you may not have thought possible. One of the most exciting aspects of pastel painting is the ability to combine different mediums, creating unique textures and effects that can captivate the viewer's eye. By incorporating mixed media into your pastel work, you can add layers of complexity and depth that breathe life into your compositions.
For example, consider integrating watercolor with pastels. Start by applying a light wash of watercolor to your paper, letting it dry completely. Then, use pastels to add vibrant colors and details on top of the dried watercolor. This technique not only enhances the vibrancy of your pastels but also allows for smoother transitions between colors, creating a stunning visual effect. Similarly, you can experiment with ink and charcoal. By adding ink outlines or charcoal shading, you can create dynamic contrasts that make your pastel paintings pop.
Another advanced technique worth exploring is the use of texturing tools. These can range from simple household items like sponges and rags to specialized tools designed for artists. By applying pastels with a sponge, for instance, you can achieve a soft, diffused effect that adds a dreamlike quality to your work. Alternatively, using a palette knife can create sharp lines and bold textures, perfect for adding dramatic flair to your pieces.
When it comes to creating texture, layering is essential. Start with a base layer of soft pastels, then gradually build up with harder pastels for details and highlights. The layering technique not only adds depth but also creates a rich, tactile surface that invites viewers to engage with your work. Remember, the key is to experiment and find what resonates with your artistic style.
To further enhance your skills, consider setting up a dedicated workspace that inspires creativity. Surround yourself with materials that spark your imagination, and don’t hesitate to try unconventional methods. For instance, you might want to explore frottage, a technique where you place your paper over a textured surface and rub pastels over it, capturing the underlying pattern. This can add an unexpected element to your artwork, making it truly unique.
Lastly, don’t shy away from seeking feedback. Sharing your work with fellow artists or joining a community can provide invaluable insights and encouragement. Engaging in discussions about techniques and experiences can open your eyes to new possibilities and help you refine your artistic voice.
- What are some good mixed media combinations with pastels? Combining pastels with watercolor, ink, or charcoal can yield exciting results. Each medium brings its unique qualities to the artwork.
- How do I create texture in my pastel paintings? You can create texture by using various tools like sponges, palette knives, or even household items. Layering different pastel types also contributes to texture.
- Can I use fixatives on mixed media works? Yes, but be cautious. Some fixatives can alter the appearance of pastels, so always test on a small area first.
- What are some common mistakes to avoid in advanced pastel techniques? Avoid overworking the pastels, as this can muddy colors. Also, be mindful of the paper you choose, as certain types may not hold up well to heavy layering.
Incorporating Mixed Media
When it comes to pastel painting, the possibilities are endless, especially when you start to incorporate mixed media into your work. This approach not only enhances the visual appeal of your pieces but also allows you to explore new dimensions of creativity. Imagine combining the soft, dreamy qualities of pastels with the bold strokes of ink or the fluidity of watercolor. The result? A stunning fusion that can captivate viewers and elevate your artistic expression.
One of the most exciting aspects of mixed media is the ability to experiment. You might start with a pastel base and then add layers of watercolor to create depth and vibrancy. Alternatively, using ink to outline certain elements can provide a striking contrast against the soft hues of pastels. The key is to play around and see what combinations resonate with your artistic vision. But remember, it's important to consider how each medium interacts with the others to achieve a harmonious outcome.
Here are some popular mixed media combinations that many artists find effective:
- Pastels and Watercolor: Use watercolors as a background and apply pastels on top for texture.
- Pastels and Ink: Outline your pastel drawings with ink to add definition and contrast.
- Pastels and Charcoal: Incorporate charcoal for dramatic shading and depth.
As you venture into mixed media, it’s essential to choose the right materials. Not all mediums play well together. For instance, using a water-soluble pastel can create beautiful blends when combined with watercolors, while traditional pastels may smudge if they come into contact with wet materials. Always test your combinations on a small scale before committing to a larger piece.
Additionally, consider the surface you’re working on. Some papers are better suited for mixed media than others. Look for papers that can handle moisture if you're incorporating watercolor, or choose heavier-weight papers for layering techniques. You can even create your own textured surfaces by applying gesso or acrylic mediums to your paper before you start. This preparation can open up new avenues for creativity and allow your pastels to adhere better.
Lastly, don’t shy away from embracing imperfection. Mixed media is all about exploration and discovery. Sometimes, the most unexpected results lead to the most compelling artwork. So grab your pastels, gather your other materials, and let your imagination run wild. Who knows? You might just create your next masterpiece!
Q: Can I use any type of paper for mixed media with pastels?
A: Not all paper is created equal for mixed media. Choose heavy-weight paper that can handle moisture and layering, such as watercolor paper or mixed media paper.
Q: What materials work best with pastels?
A: Some popular materials to use with pastels include watercolor, ink, and charcoal. Each brings a unique quality that can enhance your pastel work.
Q: How do I prevent my pastels from smudging when using mixed media?
A: To prevent smudging, always allow layers to dry before applying pastels. Additionally, use fixatives to set your pastels once you are satisfied with your work.
Q: Is it necessary to use fixatives in mixed media?
A: While it’s not strictly necessary, using fixatives can help preserve your artwork and prevent colors from blending unintentionally.
Experimenting with Textures
When it comes to pastel painting, can elevate your artwork from ordinary to extraordinary. Think of texture as the spice in a dish; it adds depth and intrigue, making your piece more engaging. There are so many ways to explore texture in your pastels, and it’s all about being adventurous and willing to try new things!
One of the simplest ways to create texture is by varying the pressure you apply while using your pastels. Light strokes can produce a soft, delicate look, while heavier pressure can create bold, vibrant marks. By adjusting your grip and the angle of your pastel, you can achieve a range of effects that can truly bring your artwork to life. Don't be afraid to layer different colors on top of one another; this layering can create a rich, textured surface that catches the eye.
Another effective method for adding texture is to use a variety of tools. While your fingers are great for blending, consider incorporating items like sponges, brushes, or even palette knives. Each tool can produce a unique effect, allowing you to experiment with everything from soft sweeps to sharp edges. For instance, a sponge can help create a soft, diffused texture, while a palette knife can add dramatic lines and shapes. The key is to explore how each tool interacts with the pastel and the paper.
Moreover, don't overlook the potential of mixed media in your pastel paintings. Combining pastels with other materials such as watercolor, ink, or charcoal can introduce exciting textures and effects. For example, you might start with a watercolor wash as a background and then layer pastels on top to create depth and detail. The fluidity of watercolor contrasts beautifully with the rich, opaque quality of pastels, resulting in a dynamic interplay of textures.
To give you a clearer idea, here’s a quick table summarizing some tools and techniques you can use to experiment with textures:
| Tool/Technique | Description |
|---|---|
| Fingers | Great for blending and softening edges. |
| Sponge | Creates soft, diffused textures. |
| Brushes | Can be used for both application and blending. |
| Palette Knife | Adds sharp lines and dramatic textures. |
| Mixed Media | Combining pastels with other media for unique effects. |
Lastly, remember that texture is not only about the tools and techniques you use but also about the emotional response your artwork evokes. Experimenting with different textures can help convey feelings and moods in your paintings. Perhaps a rough, jagged texture might express chaos, while a smooth, flowing texture could suggest calmness. So, dive in, get your hands dirty, and let your creativity run wild!
- What types of paper are best for textured pastel work? Textured paper such as pastel or watercolor paper is ideal as it holds the pigment better and allows for more layering.
- Can I use oil pastels for texture techniques? Absolutely! Oil pastels can create a different kind of texture due to their creamy consistency, which can be manipulated with tools and layering.
- How do I fix my pastel artwork without ruining the texture? Use a fixative spray designed for pastels, and apply it lightly from a distance to avoid disturbing the surface.
Frequently Asked Questions
- What are the different types of pastels, and how do they affect my artwork?
Pastels come in three main types: soft, hard, and oil. Soft pastels are vibrant and easy to blend, making them perfect for creating rich, colorful artworks. Hard pastels, on the other hand, are great for fine details and precise lines. Oil pastels are unique as they have a creamy texture and can be used for both drawing and painting techniques. Choosing the right type depends on your desired outcome and technique.
- What materials do I need for pastel painting?
To get started with pastel painting, you'll need a selection of pastels, suitable paper, blending tools like tortillons or your fingers, and fixatives to preserve your artwork. It's essential to choose high-quality materials to achieve the best results and enhance your creative expression.
- How does the choice of paper impact my pastel painting?
The choice of paper is crucial in pastel painting as it affects how the pastels adhere and blend. Textured paper holds more pigment and allows for greater layering, while smooth paper is ideal for detailed work. Experimenting with different textures and weights will help you find what works best for your style.
- What are some effective blending techniques for pastels?
Blending is key to achieving smooth transitions in pastel painting. You can use your fingers, blending stumps, or even soft cloths to mix colors directly on the paper. Layering colors is also an effective technique to create depth and richness in your artwork.
- How can I create a cohesive color palette for my pastel paintings?
Building a cohesive color palette involves selecting colors that complement each other. Start by choosing a dominant color and then select a few colors that harmonize with it. This will help you create a balanced composition and evoke the desired mood in your artwork.
- What basic techniques should beginners focus on when starting with pastels?
Beginners should focus on mastering basic stroke techniques, such as hatching and cross-hatching, to create texture and form. Layering colors is also essential for achieving depth. Practicing these fundamental techniques will build confidence and provide a solid foundation for more advanced skills.
- How can experienced artists push the boundaries of traditional pastel painting?
Experienced artists can explore advanced techniques like incorporating mixed media into their pastel work. Combining pastels with materials such as ink, watercolor, or charcoal can create unique effects and textures. Experimenting with various tools and techniques will help you develop a distinctive style and push your creative limits.


