5 Simple DIY Ideas for Kids Room Decor
Are you looking to transform your child's room into a vibrant and personalized space? Well, you've come to the right place! In this article, we will explore creative and easy DIY projects that not only add a splash of color but also encourage your child's creativity. Imagine walking into a room that feels like a whimsical wonderland, where every corner is filled with imagination and playfulness. These DIY ideas are simple enough for kids to help with, making the process not just about decorating but also about bonding and fun! So, roll up your sleeves, gather your supplies, and let’s dive into these exciting projects!
Creating colorful wall art is a fun way to brighten up a child's room. Using simple materials, kids can express their creativity while adding a personal touch to their space. Think about using canvas, paper, or even recycled materials to create unique pieces. You can also consider themes that resonate with your child's interests, whether it's animals, superheroes, or nature. The best part? This project is not just about creating art; it’s about sparking conversations and memories as you work together. Plus, every piece of art becomes a cherished memory hanging on the wall!
A DIY bed canopy can create a magical atmosphere in a child's room. This project is simple to execute and adds a cozy, whimsical element that kids will love. Choosing the right fabric is crucial; lightweight and colorful materials can enhance the overall aesthetic while ensuring the canopy is easy to assemble. Imagine your child drifting off to sleep under a canopy that feels like a cloud of dreams.
When selecting fabric for your canopy, think about colors and patterns that will delight your child. You can opt for sheer fabrics that let light filter through or bold prints that make a statement. The options are endless!
Accurate measurements are essential for a well-fitted canopy. Be sure to measure the height and width of the bed before purchasing materials. Proper installation techniques will ensure it hangs securely and looks great in the room. You wouldn’t want it sagging or falling down, right?
Adding decorative elements like fairy lights or pom-poms can elevate the canopy's appearance, making it even more enchanting and inviting for your child. Imagine the glow of fairy lights twinkling at night, creating a cozy hideaway for bedtime stories and dreams!
When creating a bed canopy, safety should always be a priority. Ensure that all materials are non-toxic and that the structure is securely anchored to prevent any accidents. You want your child's magical space to be safe and sound!
Personalized name banners are a delightful way to add a unique touch to a child's room. They can be customized with colors and designs that reflect the child's personality. This project allows kids to express themselves and feel a sense of ownership over their space. Imagine them beaming with pride every time they see their name hanging on the wall!
Gathering the right materials is the first step in creating a name banner. Options include fabric, paper, or even recycled materials for an eco-friendly approach. You can also use string or twine to hang the banner, making it easy to switch out designs as your child grows.
Exploring various design ideas can inspire creativity. Consider themes, colors, and patterns that resonate with your child's interests for a truly personalized banner. You can even add embellishments like glitter or stickers for that extra flair!
Upcycling old furniture can be a rewarding DIY project that adds character to a child's room. Simple transformations can make functional pieces more stylish and appealing. Think of it as giving new life to something that might otherwise be tossed aside. You can turn an old chair into a colorful reading nook or a dresser into a vibrant storage solution!
Selecting the right furniture piece to upcycle is key. Look for items with good bones that can be easily transformed with paint or new upholstery. This not only helps the environment but also adds a unique touch to your child's room.
Exploring different painting techniques can enhance the furniture's appearance. Techniques like distressing or stenciling can add unique flair and charm. Plus, it’s a great way for kids to get involved and learn new skills!
Implementing creative storage solutions can help keep a child's room organized while adding style. DIY storage projects can be both functional and visually appealing. Think about using colorful baskets or boxes to store toys, books, and art supplies. Not only does this keep things tidy, but it also adds a pop of color to the room!
Incorporating baskets and boxes into the decor can provide stylish storage options. Choose colorful or patterned designs that fit the room's theme. This way, cleaning up becomes a fun game rather than a chore!
Wall-mounted shelves are a great way to save floor space while displaying books and toys. Customizing these shelves can make them a focal point in the room. Imagine a shelf shaped like a cloud or a tree, creating a magical atmosphere while being practical!
Q: How can I involve my child in these DIY projects?
A: Involving your child in these projects is a fantastic way to bond! Let them choose colors, designs, and even help with the assembly. It makes the space feel more personal to them.
Q: What if I don’t have a lot of time?
A: Many of these projects can be completed in a few hours or over a weekend. You can also break them up into smaller tasks to fit your schedule.
Q: Are these projects safe for young children?
A: Absolutely! Just ensure that all materials are non-toxic and that any tools used are age-appropriate. Safety first!

1. Colorful Wall Art
Explore creative and easy DIY projects that can transform your child's room into a vibrant and personalized space, encouraging creativity and making it a fun place to grow and play.
Creating colorful wall art is a fun way to brighten up a child's room. With just a few simple materials, kids can express their creativity while adding a personal touch to their space. Imagine the joy on their faces as they see their own masterpieces hanging proudly on the walls! Not only does this project allow for artistic expression, but it also instills a sense of ownership and pride in their environment.
To get started, gather some basic supplies: canvases or sturdy paper, non-toxic paints, brushes, and perhaps some stencils or sponges for added texture. If you're feeling adventurous, you can even use natural materials like leaves or flowers to create unique prints. The beauty of this project is that there are no strict rules—let your child's imagination run wild!
Here are a few ideas to consider when embarking on this colorful journey:
- Abstract Shapes: Encourage your child to splash paint and create abstract designs. This can be a liberating experience, allowing them to explore colors and shapes without any pressure.
- Themed Art: If your child loves a particular theme, such as animals or space, help them create pieces that reflect those interests. For example, they could paint a large canvas with a colorful jungle scene or a starry night sky.
- Inspirational Quotes: Help your child choose their favorite quotes and turn them into wall art by painting or stenciling them on canvases. This not only beautifies the room but can also serve as daily motivation.
Once the artwork is complete, it's time to hang it up! You can create a gallery wall by arranging multiple pieces together, or you can let one large piece take center stage. Use colorful frames or washi tape for a playful touch. The end result will be a room that feels uniquely theirs—full of color, creativity, and character.
In addition to traditional painting, consider incorporating mixed media art. This can involve collaging, where your child can cut out pictures from magazines or use fabric scraps, adding another layer of texture and interest to their artwork. The possibilities are endless, and the best part is that the process itself is just as enjoyable as the final product.
So, gather those supplies, unleash your child's creativity, and watch as their room transforms into a vibrant canvas that reflects their personality. Not only will you be creating beautiful decor, but you'll also be fostering a love for art and self-expression that can last a lifetime.
1. What materials do I need to create colorful wall art?
You will need canvases or sturdy paper, non-toxic paints, brushes, and optional items like stencils or natural materials for texture.
2. Can this project be adapted for younger children?
Absolutely! You can simplify the project by using finger paints or letting them use sponges for easier application.
3. How can I display the artwork once it's done?
You can create a gallery wall with multiple pieces or let one large piece stand out. Using colorful frames or washi tape adds a fun touch!
2. DIY Bed Canopy
Explore creative and easy DIY projects that can transform your child's room into a vibrant and personalized space, encouraging creativity and making it a fun place to grow and play.
A DIY bed canopy can create a magical atmosphere in a child's room. Imagine your little one drifting off to sleep under a beautiful, flowing canopy that makes their bed feel like a cozy nest or a princess's castle. This project is not only simple to execute but also adds a cozy, whimsical element that kids will absolutely love. By taking a few basic materials and a bit of creativity, you can craft a stunning canopy that transforms the mundane into the extraordinary.
Selecting the perfect fabric for your canopy is crucial. Lightweight and colorful materials can enhance the overall aesthetic while ensuring the canopy is easy to assemble. Think about fabrics that are soft to the touch, like cotton or muslin, which are also breathable. You can even mix and match patterns and colors to reflect your child's personality. For instance, a starry night theme can be achieved with deep blue fabric adorned with white stars, while a floral pattern can bring a cheerful vibe. Here’s a quick comparison of fabric options:
| Fabric Type | Characteristics | Best For |
|---|---|---|
| Cotton | Soft, breathable, easy to wash | Everyday use, versatile designs |
| Muslin | Lightweight, airy, and flowy | Soft draping canopies |
| Organza | Sheer, sparkly, and decorative | Adding a touch of elegance |
Accurate measurements are essential for a well-fitted canopy. You want it to hang just right, not too low that it feels claustrophobic, and not too high that it loses its charm. Measure the height of the bed and the space above it, then decide how long you want the canopy to drape. Proper installation techniques will ensure it hangs securely and looks great in the room. Use a sturdy rod or a tension wire to hang your canopy, ensuring it can support the weight of the fabric without sagging.
Adding decorative elements like fairy lights or pom-poms can elevate the canopy's appearance, making it even more enchanting and inviting for your child. Imagine the delight on their face when they see twinkling lights surrounding their bed, or colorful pom-poms swaying gently in the breeze. You can also attach ribbons or fabric flowers to the top of the canopy for an extra touch of whimsy. These small details not only enhance the visual appeal but also create a space that feels uniquely theirs.
When creating a bed canopy, safety should always be a priority. Ensure that all materials are non-toxic and that the structure is securely anchored to prevent any accidents. Avoid using heavy materials that could pose a risk if they were to fall. Additionally, make sure that any lights used are safe for fabric and do not overheat. Regularly check the canopy to ensure everything is secure and in good condition, so your child can enjoy their magical space worry-free.
- What materials do I need to make a DIY bed canopy? You will need fabric, a curtain rod or tension wire, hooks for installation, and decorative elements like lights or pom-poms.
- How do I choose the right fabric? Opt for lightweight, breathable fabrics like cotton or muslin, and consider colors and patterns that reflect your child's personality.
- Is it safe to use fairy lights in a bed canopy? Yes, but ensure they are low heat and suitable for fabric. Always supervise their use to avoid overheating.
Choosing the Right Fabric
Explore creative and easy DIY projects that can transform your child's room into a vibrant and personalized space, encouraging creativity and making it a fun place to grow and play.
Creating colorful wall art is a fun way to brighten up a child's room. Using simple materials, kids can express their creativity while adding a personal touch to their space.
A DIY bed canopy can create a magical atmosphere in a child's room. This project is simple to execute and adds a cozy, whimsical element that kids will love.
When it comes to creating a stunning DIY bed canopy, selecting the right fabric is crucial. The fabric you choose not only impacts the overall look but also the feel of the space. Lightweight and colorful materials can enhance the aesthetic, making the room feel more inviting and cheerful. Consider fabrics like cotton, tulle, or even linen, as they are easy to work with and come in a variety of vibrant colors and patterns.
Here are some key factors to consider when choosing your fabric:
- Durability: Kids are active, and their rooms can be quite lively. Opt for fabrics that can withstand wear and tear.
- Washability: Choose materials that are easy to clean, as spills and messes are inevitable.
- Light Filtering: Depending on the atmosphere you want to create, consider how much light you want the fabric to filter. Sheer fabrics can create a soft glow, while thicker materials can block out light.
Additionally, think about the color scheme of the room. You might want to pick colors that complement existing decor or go for bold patterns that stand out. Remember, this canopy will not only serve as a decorative element but also as a cozy nook for your child. The right fabric can turn a simple bed into a magical hideaway, sparking imagination and creativity.
Accurate measurements are essential for a well-fitted canopy. Proper installation techniques will ensure it hangs securely and looks great in the room.
Adding decorative elements like fairy lights or pom-poms can elevate the canopy's appearance, making it even more enchanting and inviting for your child.
When creating a bed canopy, safety should always be a priority. Ensure that all materials are non-toxic and that the structure is securely anchored to prevent any accidents.
Personalized name banners are a delightful way to add a unique touch to a child's room. They can be customized with colors and designs that reflect the child's personality.
Gathering the right materials is the first step in creating a name banner. Options include fabric, paper, or even recycled materials for an eco-friendly approach.
Exploring various design ideas can inspire creativity. Consider themes, colors, and patterns that resonate with your child's interests for a truly personalized banner.
Upcycling old furniture can be a rewarding DIY project that adds character to a child's room. Simple transformations can make functional pieces more stylish and appealing.
Selecting the right furniture piece to upcycle is key. Look for items with good bones that can be easily transformed with paint or new upholstery.
Exploring different painting techniques can enhance the furniture's appearance. Techniques like distressing or stenciling can add unique flair and charm.
Implementing creative storage solutions can help keep a child's room organized while adding style. DIY storage projects can be both functional and visually appealing.
Incorporating baskets and boxes into the decor can provide stylish storage options. Choose colorful or patterned designs that fit the room's theme.
Wall-mounted shelves are a great way to save floor space while displaying books and toys. Customizing these shelves can make them a focal point in the room.
Q: What type of fabric is best for a bed canopy?
A: Lightweight fabrics like cotton or tulle are great choices as they are easy to work with and come in vibrant colors.
Q: How can I ensure the bed canopy is safe?
A: Always use non-toxic materials and securely anchor the canopy to prevent accidents.
Q: Can I use recycled materials for the name banner?
A: Absolutely! Using recycled materials not only adds a unique touch but also promotes eco-friendliness.
Q: What are some creative storage solutions for a child's room?
A: Consider using colorful baskets, wall-mounted shelves, and multi-functional furniture to keep the room organized and stylish.
Measurement and Installation
Explore creative and easy DIY projects that can transform your child's room into a vibrant and personalized space, encouraging creativity and making it a fun place to grow and play.
Creating colorful wall art is a fun way to brighten up a child's room. Using simple materials, kids can express their creativity while adding a personal touch to their space.
A DIY bed canopy can create a magical atmosphere in a child's room. This project is simple to execute and adds a cozy, whimsical element that kids will love.
Selecting the perfect fabric for your canopy is crucial. Lightweight and colorful materials can enhance the overall aesthetic while ensuring the canopy is easy to assemble.
Accurate measurements are essential for a well-fitted canopy. Start by measuring the height from the bed to the ceiling, as well as the width of the bed. This will help you determine how much fabric you will need and how to position it for optimal coverage. A common approach is to ensure that the canopy hangs about 12 to 18 inches above the bed, creating a cozy nook without overwhelming the space.
For installation, you will need to decide on the mounting method. You can use a ceiling hook or a tension rod, depending on the desired look and the weight of your fabric. If you opt for a ceiling hook, make sure it is securely anchored to support the weight of the canopy. If you choose a tension rod, ensure it fits snugly between the walls to prevent any slipping.
Once you have your measurements and installation method sorted, it’s time to hang the canopy. Start by attaching the fabric to the mounting point, making sure it is evenly distributed. This is where a second pair of hands can be incredibly helpful! As you hang the fabric, step back occasionally to check the appearance and adjust as necessary. Remember, the goal is to create a dreamy space that feels inviting and magical.
Lastly, don’t forget to add some decorative touches like fairy lights or pom-poms to elevate the canopy's appearance. These little additions can transform a simple project into a stunning focal point in your child's room.
When creating a bed canopy, safety should always be a priority. Ensure that all materials are non-toxic and that the structure is securely anchored to prevent any accidents.
Personalized name banners are a delightful way to add a unique touch to a child's room. They can be customized with colors and designs that reflect the child's personality.
Gathering the right materials is the first step in creating a name banner. Options include fabric, paper, or even recycled materials for an eco-friendly approach.
Exploring various design ideas can inspire creativity. Consider themes, colors, and patterns that resonate with your child's interests for a truly personalized banner.
Upcycling old furniture can be a rewarding DIY project that adds character to a child's room. Simple transformations can make functional pieces more stylish and appealing.
Selecting the right furniture piece to upcycle is key. Look for items with good bones that can be easily transformed with paint or new upholstery.
Exploring different painting techniques can enhance the furniture's appearance. Techniques like distressing or stenciling can add unique flair and charm.
Implementing creative storage solutions can help keep a child's room organized while adding style. DIY storage projects can be both functional and visually appealing.
Incorporating baskets and boxes into the decor can provide stylish storage options. Choose colorful or patterned designs that fit the room's theme.
Wall-mounted shelves are a great way to save floor space while displaying books and toys. Customizing these shelves can make them a focal point in the room.
Q: How can I ensure the bed canopy is safe for my child?
A: Always use non-toxic materials and securely anchor the canopy to prevent any accidents. Regularly check the installation to ensure it remains secure.
Q: What type of fabric is best for a DIY bed canopy?
A: Lightweight and colorful fabrics such as cotton or tulle work best, as they are easy to handle and provide an airy feel.
Q: Can I customize the name banner to match my child's interests?
A: Absolutely! Use colors, themes, and patterns that reflect your child's personality for a truly personalized touch.
Q: What are some good upcycling projects for kids' furniture?
A: Consider painting old chairs, reupholstering a small bench, or transforming a dresser with fun decals and bright colors.
Decorative Touches
When it comes to creating a stunning DIY bed canopy, the details truly make all the difference. Adding can transform a simple canopy into a magical retreat for your child. Imagine a cozy nook where they can escape into their own world of imagination! To achieve this, consider incorporating elements that spark joy and wonder.
One of the most enchanting additions can be fairy lights. These tiny twinkling lights can create a soft, warm glow, making the canopy feel like a starry night sky. You can drape them along the edges of the canopy or even weave them through the fabric for a more whimsical effect. Not only do they add a magical ambiance, but they also make nighttime reading sessions feel extra special.
Another delightful option is to use pom-poms or tassels. These colorful accents can be sewn onto the fabric or hung from the frame, adding a playful touch that kids adore. You can choose colors that match the room's theme or go for a rainbow effect to make the space even more vibrant. The tactile nature of these decorations invites little hands to explore, enhancing the overall sensory experience of the room.
It's also worth considering the use of themed decorations. For instance, if your child loves animals, you could hang plush animal toys from the canopy or use fabric featuring their favorite creatures. This not only personalizes the space but also encourages imaginative play. The canopy can become a jungle, a castle, or even a spaceship, depending on how you choose to decorate it!
Lastly, don't forget to involve your child in the decorating process. Allowing them to pick out their favorite colors, patterns, and decorative elements will make the canopy feel even more special to them. After all, it's their space, and their creativity should shine through! By adding these decorative touches, you create not just a bed canopy, but a cherished part of their childhood—a cozy haven filled with dreams and adventures.
Q1: How do I ensure the canopy is safe for my child?
A1: Safety is paramount! Always use non-toxic materials and ensure that the structure is securely anchored to prevent any accidents. Regularly check for any loose parts or wear and tear.
Q2: Can I use different types of fabric for the canopy?
A2: Absolutely! Lightweight fabrics like cotton or tulle work best as they are easy to work with and allow light to filter through, creating a dreamy effect. Just make sure they are durable enough to withstand playtime!
Q3: What if I want to change the decor later?
A3: That's the beauty of DIY! You can easily update the decorations by swapping out fairy lights, changing the fabric, or adding new elements as your child's tastes evolve. It keeps the space fresh and exciting!
Safety Considerations
When embarking on the exciting journey of creating a DIY bed canopy for your child's room, safety should always be your top priority. After all, while you want to craft a magical and inviting space, you also need to ensure that it remains a safe haven for your little one. Here are some crucial considerations to keep in mind:
First and foremost, select non-toxic materials. Children are naturally curious and may come into contact with the canopy fabric, so it's essential to choose materials that are free from harmful chemicals. Look for fabrics labeled as organic or certified safe to provide peace of mind while you create a beautiful space.
Next, secure installation is vital. Ensure that the canopy is anchored properly to the ceiling or wall, preventing any accidental falls. You can achieve this by using sturdy hardware and following installation guidelines carefully. It’s a good idea to double-check that everything is tightly secured before allowing your child to play or sleep beneath it.
Additionally, consider the height of the canopy. You want to ensure that it hangs at a safe distance from your child’s bed, allowing for adequate airflow and preventing any potential strangulation hazards. A good rule of thumb is to hang the canopy at least 12 inches above the bed to ensure safety while still maintaining that whimsical feel.
Lastly, it's wise to regularly inspect the canopy for wear and tear. Over time, even the sturdiest materials can degrade, so make it a habit to check for any loose parts or frayed edges. If you notice any issues, address them immediately to maintain a safe environment for your child.
By keeping these safety considerations in mind, you can create a stunning DIY bed canopy that not only enhances the aesthetics of your child's room but also prioritizes their safety. Remember, a happy and safe space is the best kind of space for your little one to dream and play!
- What materials are safe for a DIY bed canopy? Look for non-toxic fabrics, such as organic cotton or linen, which are safe for children.
- How can I ensure the canopy is securely installed? Use appropriate hardware, such as ceiling hooks or wall brackets, and follow installation instructions carefully to ensure everything is securely anchored.
- What is the ideal height for hanging a bed canopy? Aim to hang the canopy at least 12 inches above the bed to allow for airflow and safety.
- How often should I check the canopy for safety? Regularly inspect the canopy for any wear and tear, ideally every few months, to ensure it remains safe for use.
3. Personalized Name Banners
Personalized name banners are not just decorations; they are a wonderful way to infuse a child's room with a sense of identity and warmth. Imagine walking into a room where your little one’s name is proudly displayed in bright colors and fun designs, instantly making the space feel more inviting and special. Creating these banners is a delightful DIY project that allows kids to unleash their creativity while adding a unique touch to their personal space.
To get started, gathering the right materials is essential. You can choose from a variety of options, including fabric, paper, or even recycled materials for an eco-friendly approach. For example, consider using old bedsheets or scrap fabric that can be cut into letters. Not only does this promote sustainability, but it also encourages kids to think outside the box when it comes to their art projects.
When it comes to design ideas, the possibilities are endless! Think about themes that resonate with your child’s interests. Whether they love dinosaurs, princesses, or outer space, you can incorporate these elements into the banner design. Here are a few ideas to spark inspiration:
- Color Schemes: Use the child’s favorite colors to create a vibrant banner.
- Patterns: Incorporate stripes, polka dots, or even animal prints for added flair.
- Shapes: Consider adding stars, hearts, or other shapes around the letters to enhance the visual appeal.
Once you have your materials and design in mind, it’s time to start crafting! Begin by sketching out the letters on your chosen material. If you're using fabric, you might want to use fabric paint or markers to add color. For paper, colored pencils or markers can bring your designs to life. After cutting out the letters, you can string them together using twine or ribbon, making sure to leave enough space between each letter for a balanced look.
Don’t forget to involve your child in the process! This is a fantastic opportunity for them to learn about colors, shapes, and even basic sewing if you choose to sew the letters onto a backing. The joy of seeing their name displayed in their room will be an unforgettable experience, and it will surely boost their self-esteem.
In summary, personalized name banners are a creative and meaningful addition to any child's room decor. They not only beautify the space but also serve as a constant reminder of your child's uniqueness. So, gather your materials, unleash your creativity, and get ready to make a banner that your child will cherish for years to come!
Q: What materials do I need to create a personalized name banner?
A: You can use fabric, paper, recycled materials, twine, ribbon, and various coloring tools like fabric paints or markers.
Q: How can I ensure the banner reflects my child's personality?
A: Involve your child in the design process by discussing their favorite colors, themes, and shapes. This will help create a banner that truly represents them.
Q: Can I make a name banner for a special occasion?
A: Absolutely! Personalized name banners make great decorations for birthdays, graduations, or any special event. Just customize the design to fit the occasion!
Materials Needed
Explore creative and easy DIY projects that can transform your child's room into a vibrant and personalized space, encouraging creativity and making it a fun place to grow and play.
Creating colorful wall art is a fun way to brighten up a child's room. Using simple materials, kids can express their creativity while adding a personal touch to their space.
A DIY bed canopy can create a magical atmosphere in a child's room. This project is simple to execute and adds a cozy, whimsical element that kids will love.
Selecting the perfect fabric for your canopy is crucial. Lightweight and colorful materials can enhance the overall aesthetic while ensuring the canopy is easy to assemble.
Accurate measurements are essential for a well-fitted canopy. Proper installation techniques will ensure it hangs securely and looks great in the room.
Adding decorative elements like fairy lights or pom-poms can elevate the canopy's appearance, making it even more enchanting and inviting for your child.
When creating a bed canopy, safety should always be a priority. Ensure that all materials are non-toxic and that the structure is securely anchored to prevent any accidents.
Personalized name banners are a delightful way to add a unique touch to a child's room. They can be customized with colors and designs that reflect the child's personality.
Gathering the right materials is the first step in creating a name banner. You can choose from a variety of options, including:
- Fabric: Use colorful cotton or felt to create a soft and vibrant banner.
- Paper: Cardstock or decorative scrapbook paper can be used for a more structured look.
- Recycled Materials: Consider using old clothes or fabric scraps for an eco-friendly approach.
In addition to the main materials, don't forget to gather some essential tools like scissors, glue, and string or ribbon for hanging. If you want to add a touch of sparkle, embellishments such as sequins, glitter, or stickers can also be included. The beauty of this project lies in its versatility; you can mix and match materials to create a banner that truly represents your child's personality and interests.
Exploring various design ideas can inspire creativity. Consider themes, colors, and patterns that resonate with your child's interests for a truly personalized banner.
Upcycling old furniture can be a rewarding DIY project that adds character to a child's room. Simple transformations can make functional pieces more stylish and appealing.
Selecting the right furniture piece to upcycle is key. Look for items with good bones that can be easily transformed with paint or new upholstery.
Exploring different painting techniques can enhance the furniture's appearance. Techniques like distressing or stenciling can add unique flair and charm.
Implementing creative storage solutions can help keep a child's room organized while adding style. DIY storage projects can be both functional and visually appealing.
Incorporating baskets and boxes into the decor can provide stylish storage options. Choose colorful or patterned designs that fit the room's theme.
Wall-mounted shelves are a great way to save floor space while displaying books and toys. Customizing these shelves can make them a focal point in the room.
1. What are the best materials for a personalized name banner?
The best materials include fabric, paper, and recycled items. Choose what resonates most with your child's personality.
2. How can I ensure the bed canopy is safe for my child?
Always use non-toxic materials and securely anchor the canopy to prevent any accidents.
3. Can I involve my child in these DIY projects?
Absolutely! Involving your child in the process not only makes it more fun but also allows them to express their creativity.
4. What are some easy upcycling ideas for furniture?
Consider painting old chairs, reupholstering a small bench, or transforming a dresser with colorful knobs.
Design Ideas
When it comes to creating a personalized name banner for your child's room, the possibilities are as vast as your imagination! Start by considering your child's interests and favorite colors—this will guide you in selecting a theme that resonates with their personality. For instance, if your little one loves the ocean, you might incorporate shades of blue and green, along with fun sea creature designs. On the other hand, a nature theme could feature earthy tones and floral patterns, making the room feel vibrant and alive.
To spark your creativity, here are some that you might find inspiring:
- Animal Kingdom: Use cutouts of various animals to decorate the letters of the name. This not only adds a playful touch but also invites a sense of adventure.
- Space Explorer: Incorporate stars, planets, and rockets, using metallic colors or glow-in-the-dark paint for a cosmic feel.
- Fantasy Land: Create a whimsical atmosphere with fairy tale elements like castles, dragons, and unicorns, perfect for sparking your child's imagination.
- Sports Theme: If your child is a sports enthusiast, consider using their favorite team colors and adding miniature sports equipment like balls or bats as part of the design.
Additionally, think about the materials you want to use. Fabric banners can be sewn or glued together, giving a soft texture, while paper banners can be easily decorated with markers, stickers, or even glitter for that extra sparkle. You might also consider using recycled materials such as old t-shirts or cardboard, which not only adds a unique touch but also promotes sustainability.
Lastly, don't forget about the finishing touches! Adding embellishments like ribbons, buttons, or even fairy lights can elevate the overall look of the banner. These small details can make a big difference, transforming a simple name banner into a stunning piece of art that your child will cherish. Remember, the key is to have fun with the process and let your child's personality shine through in the design!
Q: What materials do I need to create a name banner?
A: You can use fabric, paper, or recycled materials. Additional items like scissors, glue, and embellishments such as ribbons or buttons will also be helpful.
Q: How can I ensure the banner reflects my child's personality?
A: Consider your child's favorite colors, interests, and hobbies. Incorporating these elements into the design will make the banner feel unique and personal.
Q: Can I involve my child in the DIY process?
A: Absolutely! Involving your child in the creation of the banner can be a fun bonding experience. Let them choose colors, designs, and materials to make it truly their own.
Q: How can I hang the banner once it’s completed?
A: You can use adhesive hooks, string, or even a curtain rod to hang the banner. Just make sure it's securely attached to avoid any accidents!
4. Upcycled Furniture Projects
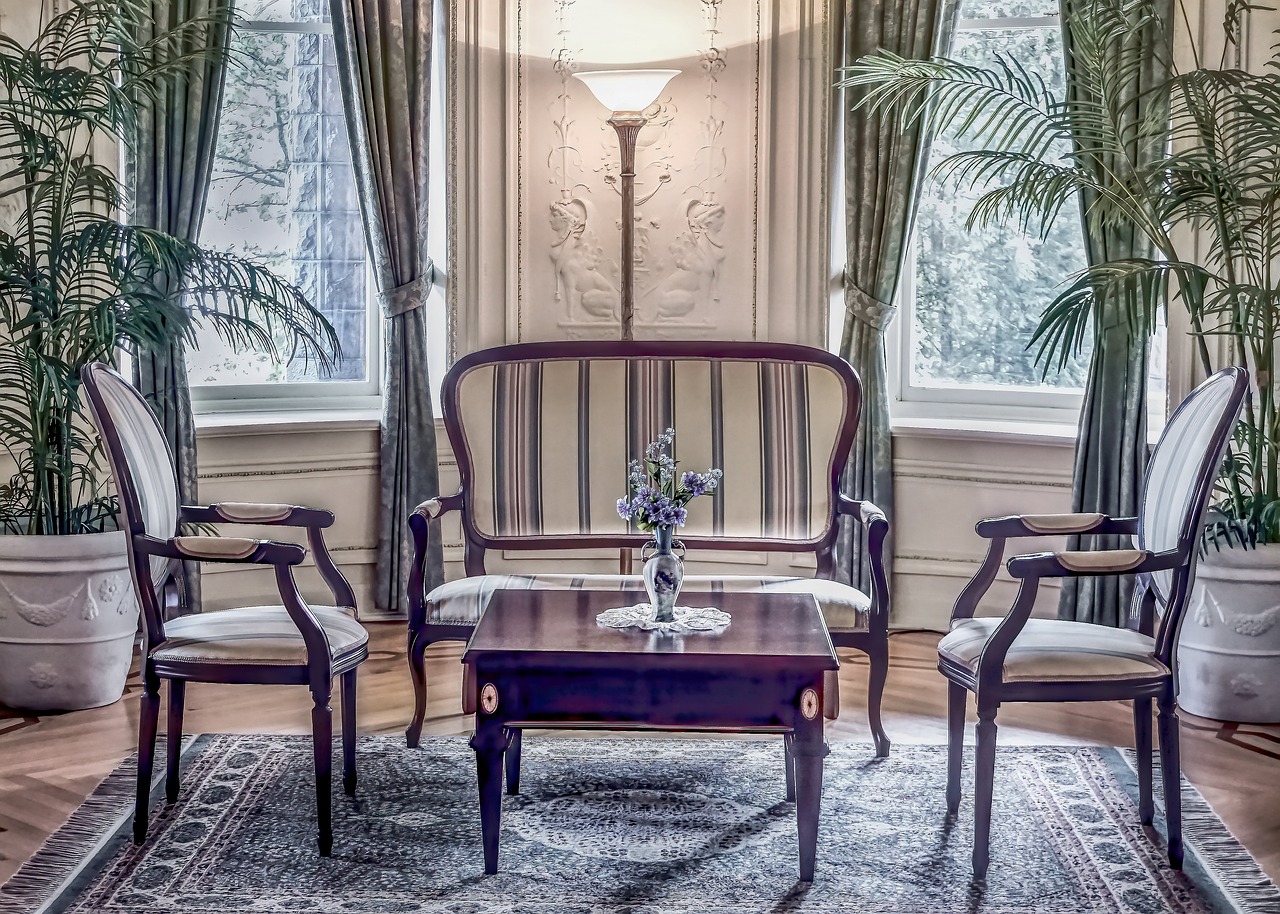
Upcycling old furniture is not just a trend; it’s a fantastic way to breathe new life into pieces that may otherwise be discarded. Imagine transforming a drab, outdated chair into a vibrant, eye-catching seat that your child will love! This DIY project can be incredibly rewarding, and it allows your child's room to showcase unique items that tell a story. Plus, it’s a fun way to engage your child in the process of creativity and sustainability.
When embarking on an upcycling adventure, the first step is choosing the right furniture piece. Look for items that have good structural integrity but might need a little love in the aesthetic department. For instance, an old wooden dresser can be painted in bright colors or adorned with fun decals, turning it into a statement piece. You might also consider items like:
- Chairs that can be reupholstered with playful fabric
- Tables that can be refinished or painted
- Bookshelves that can be customized with fun colors or patterns
Next, let's talk about painting techniques. Painting is one of the most effective ways to transform furniture. You can explore techniques such as:
- Distressing: This technique gives the furniture a vintage look by sanding down edges and surfaces to reveal the wood underneath.
- Stenciling: Use stencils to add fun designs or patterns that resonate with your child's interests, like stars, animals, or even their favorite cartoon characters.
- Color Blocking: Combining different colors in sections can create a modern, playful vibe.
After choosing your piece and deciding on a painting technique, it’s crucial to gather all necessary materials. You’ll need quality paint, brushes, sandpaper, and possibly new hardware like knobs or handles to give your furniture an even fresher look. Don’t forget to involve your child in the process! Let them choose colors and patterns that reflect their personality, making the furniture feel even more special to them.
Finally, remember that upcycling isn’t just about aesthetics; it’s also about sustainability. By giving old furniture a new lease on life, you’re not only saving money but also reducing waste. It’s a win-win! Plus, every time your child uses their newly upcycled furniture, they’ll feel a sense of pride knowing they helped create something beautiful.
Q: What types of furniture are best for upcycling?
A: Look for sturdy pieces that have potential for transformation, such as old chairs, tables, or dressers. Items with unique shapes or details can often be turned into something special.
Q: Do I need special skills to upcycle furniture?
A: Not at all! Most upcycling projects can be done with basic skills. With a little creativity and patience, anyone can transform furniture.
Q: How can I ensure the paint is safe for my child’s room?
A: Always choose non-toxic, child-safe paints and finishes. Look for products that are labeled as low-VOC (volatile organic compounds) to ensure a healthier environment.
Choosing Furniture to Upcycle
Explore creative and easy DIY projects that can transform your child's room into a vibrant and personalized space, encouraging creativity and making it a fun place to grow and play.
Creating colorful wall art is a fun way to brighten up a child's room. Using simple materials, kids can express their creativity while adding a personal touch to their space.
A DIY bed canopy can create a magical atmosphere in a child's room. This project is simple to execute and adds a cozy, whimsical element that kids will love.
Selecting the perfect fabric for your canopy is crucial. Lightweight and colorful materials can enhance the overall aesthetic while ensuring the canopy is easy to assemble.
Accurate measurements are essential for a well-fitted canopy. Proper installation techniques will ensure it hangs securely and looks great in the room.
Adding decorative elements like fairy lights or pom-poms can elevate the canopy's appearance, making it even more enchanting and inviting for your child.
When creating a bed canopy, safety should always be a priority. Ensure that all materials are non-toxic and that the structure is securely anchored to prevent any accidents.
Personalized name banners are a delightful way to add a unique touch to a child's room. They can be customized with colors and designs that reflect the child's personality.
Gathering the right materials is the first step in creating a name banner. Options include fabric, paper, or even recycled materials for an eco-friendly approach.
Exploring various design ideas can inspire creativity. Consider themes, colors, and patterns that resonate with your child's interests for a truly personalized banner.
Upcycling old furniture can be a rewarding DIY project that adds character to a child's room. Simple transformations can make functional pieces more stylish and appealing.
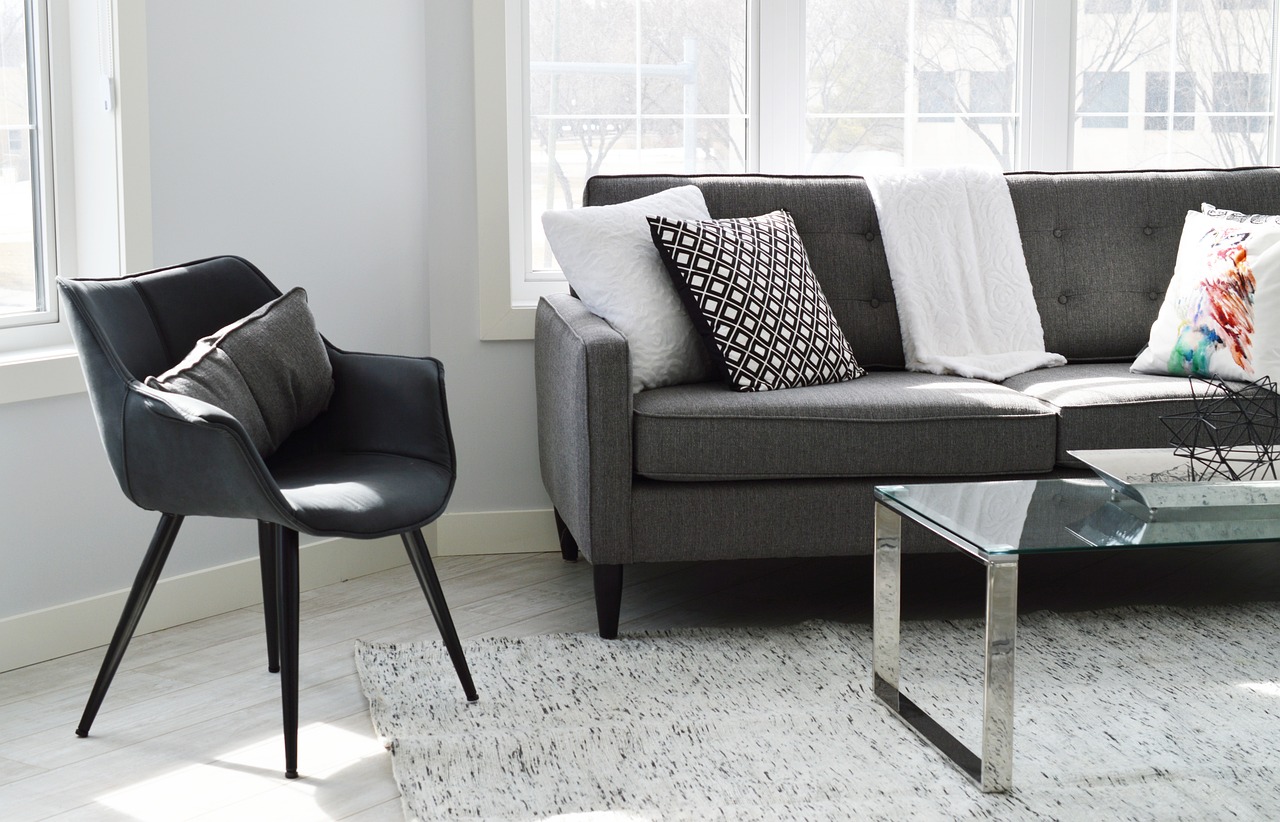
When it comes to , the possibilities are endless, but there are a few key factors to consider. First, look for pieces that have a sturdy frame and good structural integrity; these "good bones" are essential for a successful transformation. Items like old dressers, chairs, or tables can be perfect candidates. You don't want to start with something that's falling apart, right?
Next, think about the style and shape of the furniture. Is it something that fits with your child's room theme? For instance, a vintage rocking chair can bring a charming touch, while a plain bookshelf can be transformed into a colorful storage solution. Consider the following:
- **Material**: Wood is always a great choice for upcycling due to its durability and ease of painting or staining.
- **Size**: Ensure the piece fits well in the intended space without overcrowding the room.
- **Functionality**: Choose items that can serve a dual purpose, like a bench that also provides storage.
Finally, don't shy away from pieces that may seem outdated or unattractive at first glance. Sometimes, a little creativity and effort can turn a drab item into a fab focal point. For example, an old, chipped nightstand can be painted in bright colors and adorned with fun knobs to create a whimsical bedside table.
Implementing creative storage solutions can help keep a child's room organized while adding style. DIY storage projects can be both functional and visually appealing.
Incorporating baskets and boxes into the decor can provide stylish storage options. Choose colorful or patterned designs that fit the room's theme.
Wall-mounted shelves are a great way to save floor space while displaying books and toys. Customizing these shelves can make them a focal point in the room.
Q: What types of furniture are best for upcycling?
A: Look for sturdy items like wooden chairs, dressers, or tables. They provide a solid base for any DIY project.
Q: Do I need special tools for upcycling furniture?
A: Basic tools like sandpaper, paintbrushes, and a screwdriver will usually suffice for most projects.
Q: Can I upcycle furniture if I'm not crafty?
A: Absolutely! There are many simple projects that require minimal skills, and tutorials can guide you through the process.
Q: What are some eco-friendly materials I can use?
A: Consider using non-toxic paints, recycled fabrics, and sustainable wood options to make your project more environmentally friendly.
Painting Techniques
Explore creative and easy DIY projects that can transform your child's room into a vibrant and personalized space, encouraging creativity and making it a fun place to grow and play.
Creating colorful wall art is a fun way to brighten up a child's room. Using simple materials, kids can express their creativity while adding a personal touch to their space.
A DIY bed canopy can create a magical atmosphere in a child's room. This project is simple to execute and adds a cozy, whimsical element that kids will love.
Selecting the perfect fabric for your canopy is crucial. Lightweight and colorful materials can enhance the overall aesthetic while ensuring the canopy is easy to assemble.
Accurate measurements are essential for a well-fitted canopy. Proper installation techniques will ensure it hangs securely and looks great in the room.
Adding decorative elements like fairy lights or pom-poms can elevate the canopy's appearance, making it even more enchanting and inviting for your child.
When creating a bed canopy, safety should always be a priority. Ensure that all materials are non-toxic and that the structure is securely anchored to prevent any accidents.
Personalized name banners are a delightful way to add a unique touch to a child's room. They can be customized with colors and designs that reflect the child's personality.
Gathering the right materials is the first step in creating a name banner. Options include fabric, paper, or even recycled materials for an eco-friendly approach.
Exploring various design ideas can inspire creativity. Consider themes, colors, and patterns that resonate with your child's interests for a truly personalized banner.
Upcycling old furniture can be a rewarding DIY project that adds character to a child's room. Simple transformations can make functional pieces more stylish and appealing.
Selecting the right furniture piece to upcycle is key. Look for items with good bones that can be easily transformed with paint or new upholstery.
When it comes to breathing new life into old furniture, play a pivotal role. There are several methods you can explore, each offering a unique finish and style. For instance, a distressed finish can give furniture a rustic charm, while a glossy finish can create a modern look. Here are some popular techniques:
- Chalk Paint: This is a favorite for its matte finish and ease of use. It requires minimal prep work and can adhere to almost any surface.
- Spray Painting: Perfect for achieving a smooth and even coat, spray painting allows you to cover intricate details without brush strokes.
- Stenciling: If you want to add patterns or designs, stenciling can be a fun way to personalize furniture.
- Ombre Effect: Gradually blending colors can create a stunning visual effect that adds depth and interest to any piece.
Experimenting with these techniques can turn a simple piece of furniture into a statement piece that reflects your child's personality. Don't hesitate to mix and match these methods for a truly unique creation!
Implementing creative storage solutions can help keep a child's room organized while adding style. DIY storage projects can be both functional and visually appealing.
Incorporating baskets and boxes into the decor can provide stylish storage options. Choose colorful or patterned designs that fit the room's theme.
Wall-mounted shelves are a great way to save floor space while displaying books and toys. Customizing these shelves can make them a focal point in the room.
Q: What materials are best for DIY projects in a child's room?
A: Look for non-toxic, safe materials like water-based paints and fabrics. Always prioritize safety and durability.
Q: How can I make sure my DIY projects are safe for kids?
A: Use non-toxic materials and secure all furniture and decorations properly to prevent accidents.
Q: Can I involve my child in these DIY projects?
A: Absolutely! Many of these projects are perfect for kids to help with, fostering creativity and teamwork.
5. Creative Storage Solutions
Implementing creative storage solutions is essential for maintaining a tidy and organized space in your child's room. Not only do these solutions help with clutter, but they also add a touch of style to the decor. Imagine a room where every toy has its place, and every book is neatly stored away, making it easier for your little one to find what they need when they want to play or read. The best part? Many of these storage ideas are simple DIY projects that you can tackle together, fostering a sense of teamwork and creativity.
One effective way to add storage while keeping the room visually appealing is by incorporating baskets and boxes. These can be used to store toys, books, or even clothing. Look for colorful or patterned designs that fit the room's theme. For instance, if your child loves animals, consider using boxes with animal prints or vibrant colors that reflect their favorite characters. Not only do they serve a practical purpose, but they also act as decorative elements that enhance the overall aesthetic of the room.
Another fantastic option is to install wall-mounted shelves. These shelves are perfect for saving floor space while providing a stylish way to display books, toys, or even art projects. You can customize these shelves by painting them in your child's favorite colors or adding unique shapes that resonate with their interests. Imagine a shelf shaped like a cloud or a star, creating a whimsical touch while also being functional. Additionally, wall-mounted shelves can be arranged at different heights, allowing your child to reach their favorite items easily.
To inspire you further, here are some popular storage ideas:
- Under-bed storage: Utilize the space under the bed by adding rolling bins or drawers. This area is often overlooked but can be a treasure trove for extra toys or seasonal clothing.
- Over-the-door organizers: These are perfect for keeping items off the floor and can be used for shoes, accessories, or craft supplies. They come in various designs and can fit any door.
- DIY pegboards: A pegboard can be an excellent way to store art supplies, hats, or even small toys. You can paint it and arrange hooks and baskets in a way that suits your child's needs.
By implementing these creative storage solutions, you can transform your child's room into a more organized and visually appealing space. Plus, these projects can be a fun way to spend time together, encouraging your child to take ownership of their space while learning the importance of organization. Remember, a well-organized room not only looks great but also helps foster a sense of responsibility in your child.
Q: How can I encourage my child to keep their room organized?
A: One way to encourage organization is to involve your child in the process of creating storage solutions. Make it a fun activity where they can choose colors and designs that reflect their personality. Establishing a routine for cleaning up at the end of the day can also help.
Q: What are some budget-friendly storage solutions?
A: You can find budget-friendly options by repurposing items you already have at home. For example, old shoeboxes can be decorated and used for storage. Thrift stores often have great finds that can be upcycled into stylish storage solutions.
Q: How do I choose the right storage for my child's room?
A: Consider your child's interests and the types of items they have. For example, if they have a lot of books, a bookshelf or wall-mounted shelves would be ideal. If they have many toys, colorful bins or baskets can keep everything organized and accessible.
Using Baskets and Boxes
Explore creative and easy DIY projects that can transform your child's room into a vibrant and personalized space, encouraging creativity and making it a fun place to grow and play.
Creating colorful wall art is a fun way to brighten up a child's room. Using simple materials, kids can express their creativity while adding a personal touch to their space.
A DIY bed canopy can create a magical atmosphere in a child's room. This project is simple to execute and adds a cozy, whimsical element that kids will love.
Selecting the perfect fabric for your canopy is crucial. Lightweight and colorful materials can enhance the overall aesthetic while ensuring the canopy is easy to assemble.
Accurate measurements are essential for a well-fitted canopy. Proper installation techniques will ensure it hangs securely and looks great in the room.
Adding decorative elements like fairy lights or pom-poms can elevate the canopy's appearance, making it even more enchanting and inviting for your child.
When creating a bed canopy, safety should always be a priority. Ensure that all materials are non-toxic and that the structure is securely anchored to prevent any accidents.
Personalized name banners are a delightful way to add a unique touch to a child's room. They can be customized with colors and designs that reflect the child's personality.
Gathering the right materials is the first step in creating a name banner. Options include fabric, paper, or even recycled materials for an eco-friendly approach.
Exploring various design ideas can inspire creativity. Consider themes, colors, and patterns that resonate with your child's interests for a truly personalized banner.
Upcycling old furniture can be a rewarding DIY project that adds character to a child's room. Simple transformations can make functional pieces more stylish and appealing.
Selecting the right furniture piece to upcycle is key. Look for items with good bones that can be easily transformed with paint or new upholstery.
Exploring different painting techniques can enhance the furniture's appearance. Techniques like distressing or stenciling can add unique flair and charm.
Implementing creative storage solutions can help keep a child's room organized while adding style. DIY storage projects can be both functional and visually appealing.
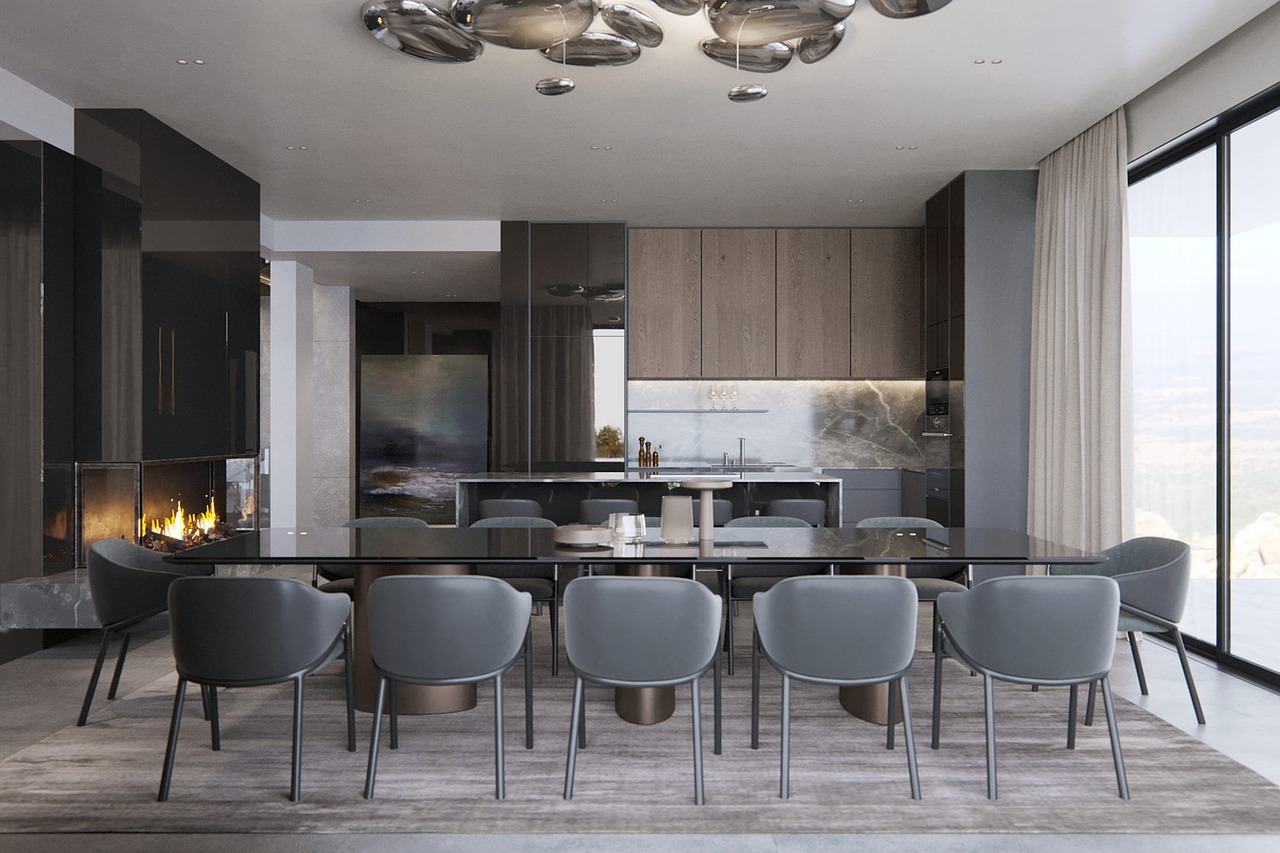
Incorporating baskets and boxes into your child's room decor is not just about organization; it's about making a statement! Imagine a room where every toy, book, and stuffed animal has a designated spot that looks fantastic. Baskets and boxes come in a variety of shapes, sizes, and colors, allowing you to choose ones that complement the existing decor while providing practical storage solutions.
When selecting baskets, consider options made from natural materials like wicker or seagrass, which can add a touch of warmth and texture to the room. You can also opt for colorful fabric bins that can be easily washed and come in fun patterns that appeal to kids. Not only do these storage options keep things tidy, but they can also serve as decorative elements in their own right.
For an added touch of creativity, you might want to label the baskets and boxes. This can be a fun DIY project in itself! Use colorful tags or even paint directly on the bins to indicate what goes where. This not only makes cleaning up easier for your little one but also encourages them to take ownership of their space.
Here are some ideas for using baskets and boxes effectively:
- Color Coordination: Match the colors of the baskets with the room's theme to create a cohesive look.
- Size Variation: Use a mix of small and large baskets to accommodate different types of toys and items.
- Accessibility: Place frequently used items in easily accessible boxes or baskets to encourage independent play and organization.
In essence, using baskets and boxes can transform a cluttered room into a well-organized haven, allowing your child to enjoy their space fully!
Q: What materials are best for children's storage baskets?
A: Look for materials that are durable and safe, such as cotton, canvas, or natural fibers like wicker. Make sure they are also easy to clean!
Q: How can I encourage my child to use the storage solutions?
A: Involve them in the process of choosing baskets and boxes, and create a fun labeling system. Make it a game to keep their room tidy!
Q: Can I personalize the storage baskets?
A: Absolutely! You can paint them, add stickers, or use fabric markers to create a unique look that reflects your child's personality.
Wall-Mounted Shelves
Explore creative and easy DIY projects that can transform your child's room into a vibrant and personalized space, encouraging creativity and making it a fun place to grow and play.
Creating colorful wall art is a fun way to brighten up a child's room. Using simple materials, kids can express their creativity while adding a personal touch to their space.
A DIY bed canopy can create a magical atmosphere in a child's room. This project is simple to execute and adds a cozy, whimsical element that kids will love.
Selecting the perfect fabric for your canopy is crucial. Lightweight and colorful materials can enhance the overall aesthetic while ensuring the canopy is easy to assemble.
Accurate measurements are essential for a well-fitted canopy. Proper installation techniques will ensure it hangs securely and looks great in the room.
Adding decorative elements like fairy lights or pom-poms can elevate the canopy's appearance, making it even more enchanting and inviting for your child.
When creating a bed canopy, safety should always be a priority. Ensure that all materials are non-toxic and that the structure is securely anchored to prevent any accidents.
Personalized name banners are a delightful way to add a unique touch to a child's room. They can be customized with colors and designs that reflect the child's personality.
Gathering the right materials is the first step in creating a name banner. Options include fabric, paper, or even recycled materials for an eco-friendly approach.
Exploring various design ideas can inspire creativity. Consider themes, colors, and patterns that resonate with your child's interests for a truly personalized banner.
Upcycling old furniture can be a rewarding DIY project that adds character to a child's room. Simple transformations can make functional pieces more stylish and appealing.
Selecting the right furniture piece to upcycle is key. Look for items with good bones that can be easily transformed with paint or new upholstery.
Exploring different painting techniques can enhance the furniture's appearance. Techniques like distressing or stenciling can add unique flair and charm.
Implementing creative storage solutions can help keep a child's room organized while adding style. DIY storage projects can be both functional and visually appealing.
Incorporating baskets and boxes into the decor can provide stylish storage options. Choose colorful or patterned designs that fit the room's theme.
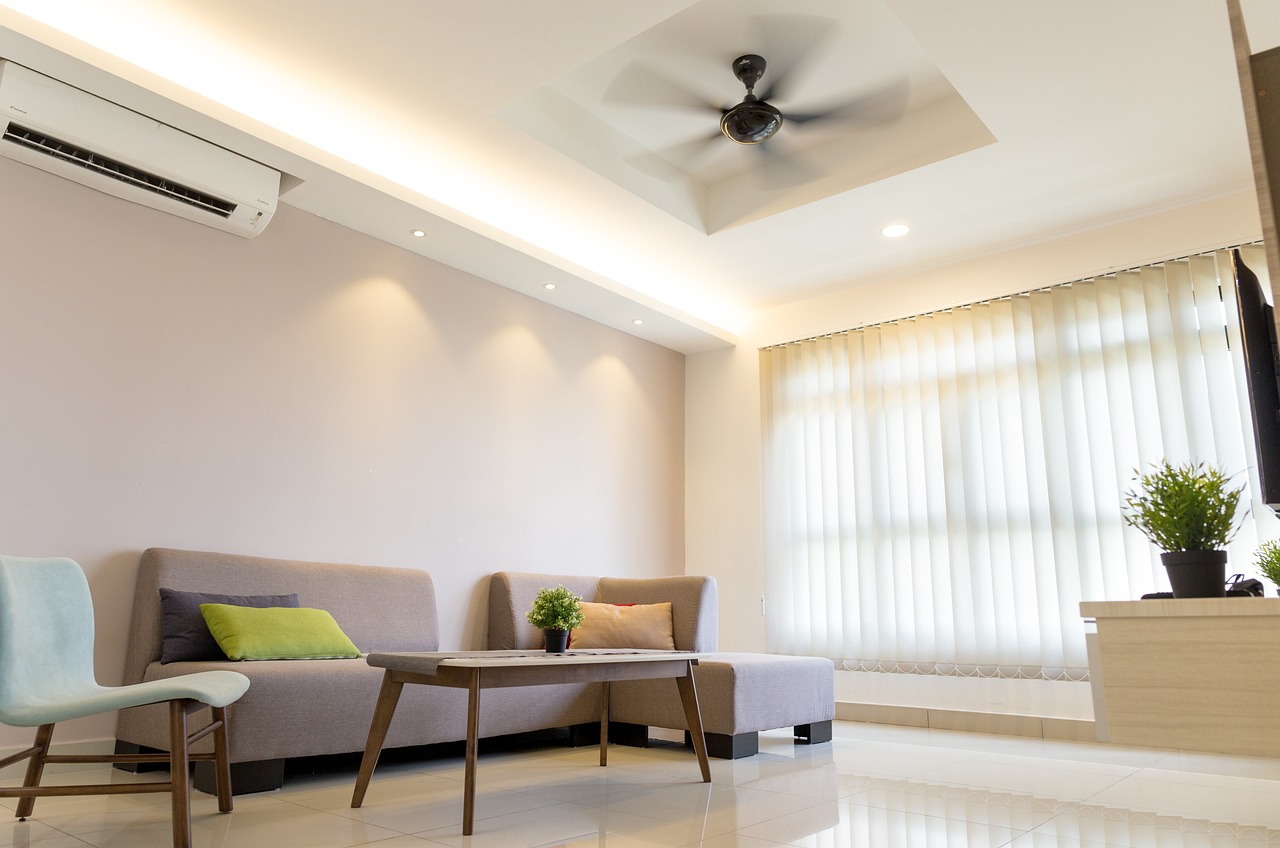
Wall-mounted shelves are a fantastic way to maximize space while adding an artistic element to your child's room. These shelves not only serve as a practical storage solution but also act as a canvas for creativity. Imagine transforming a plain wall into a vibrant display of your child's favorite books, toys, and art pieces! The beauty of wall-mounted shelves lies in their versatility; they can be arranged in various configurations to suit any room layout.
When designing these shelves, consider the height and accessibility. You want your child to be able to reach their favorite items without assistance. It's also a great opportunity to involve your child in the process—let them choose the placement of their shelves! Additionally, think about the theme of the room. A nautical theme might benefit from shelves shaped like boats, while a jungle theme could feature shelves painted in earthy tones.
Another fun aspect of wall-mounted shelves is the opportunity to add decorative elements. You can paint the shelves in bright colors or use stencils to create fun patterns. Adding small plants, framed photos, or even fairy lights can transform a simple shelf into a charming focal point. Just think of the endless possibilities!
Lastly, always ensure that the shelves are securely mounted to the wall. Use the appropriate hardware and follow installation instructions carefully to prevent any mishaps. After all, safety is just as important as style!
- How do I choose the right materials for DIY projects? Consider durability, safety, and how well the materials will match your child's room decor.
- Can my child help with these DIY projects? Absolutely! Involving your child can make the projects more enjoyable and give them a sense of ownership in their space.
- Are these projects safe for young children? Yes, as long as you use non-toxic materials and supervise the activities, these projects can be safe and fun.
- Where can I find inspiration for my DIY projects? Websites like Pinterest and Instagram offer endless inspiration for DIY decor ideas!
Frequently Asked Questions
- What materials do I need for the colorful wall art project?
For creating colorful wall art, you can use items like canvas, paints, markers, and even recycled materials like old magazines or fabric scraps. The goal is to let your child's creativity shine, so anything that can add color and texture is fair game!
- How can I ensure the DIY bed canopy is safe for my child?
Safety is crucial when making a bed canopy. Always choose non-toxic materials and ensure that the structure is securely anchored. Regularly check for any wear and tear, and make sure that the canopy is high enough to prevent any accidental entanglement.
- What are some creative ideas for designing a personalized name banner?
For a personalized name banner, consider using your child's favorite colors, themes, or characters. You can also incorporate fun shapes and patterns, like stars or hearts, to make it more visually appealing. The sky's the limit when it comes to creativity!
- How do I choose the right furniture to upcycle for my child's room?
When selecting furniture to upcycle, look for pieces that are sturdy and have good structure. Items like old chairs, tables, or dressers can be transformed beautifully with a little paint or new upholstery. Think about how the piece can fit into your child's room and enhance the decor!
- What are some effective storage solutions for keeping a child's room organized?
Creative storage solutions can include using colorful baskets, boxes, or wall-mounted shelves. Look for designs that complement the room's theme. Not only do these options help keep things tidy, but they can also add a fun element to the decor!


