
How to Draw A Realistic Eye for Beginners
Are you ready to embark on an exciting artistic journey? Drawing a realistic eye can seem daunting at first, but don't worry! This article will guide you through the essential techniques and steps required to create a stunning eye drawing. Whether you're a complete novice or just looking to refine your skills, you'll find valuable insights here. We'll cover everything from understanding the basic shapes of the eye to mastering shading techniques that make your drawing pop. So, grab your pencils and let's dive in!
Before you start drawing, it's crucial to familiarize yourself with the basic anatomy of the eye. Understanding how the eye works will help you accurately represent its features in your artwork. The eye is not just a simple circle; it consists of several components, each playing a vital role:
- Cornea: The clear front surface that allows light to enter the eye.
- Iris: The colored part of the eye that controls the size of the pupil.
- Pupil: The black circular opening that lets light in.
- Sclera: The white outer layer of the eyeball.
- Eyebrow and Eyelids: These frame the eye and add expression.
By understanding these components, you can create a more realistic representation of an eye in your drawings. Pay attention to the proportions and how these parts relate to each other; this will be your foundation for drawing.
Now that you have a grasp of eye anatomy, it's time to gather your materials. The right tools can significantly impact your drawing experience. Here’s what you’ll need:
| Material | Description |
|---|---|
| Pencils | A range of pencils (HB, 2B, 4B, 6B) for different shading techniques. |
| Paper | Smooth drawing paper or sketch paper that can handle shading. |
| Eraser | A kneaded eraser is great for subtle highlights and corrections. |
Having the right materials will not only enhance your drawing but also make the process more enjoyable. Remember, it's not just about having expensive tools; it's about how you use them!
To create a realistic eye, start with basic shapes. Begin by sketching a simple almond shape, which will serve as the outline of the eye. This will help you establish the proportions before diving into details. Use light pencil strokes to create guidelines for the iris and pupil, which will be placed within the almond shape. Think of this step as laying the foundation for a house; without a solid base, everything else will crumble.
Next, draw a horizontal line through the center of the almond shape. This will help you position the iris and pupil accurately. Remember, practice makes perfect! Don't hesitate to erase and adjust your shapes until they feel just right.
The iris and pupil are the focal points of the eye. To draw the iris, start by sketching a circle within the almond shape. The pupil, which is typically circular, sits in the center of the iris. Pay attention to the size and placement; the pupil should be slightly smaller than the iris. To add realism, consider the color variations and patterns within the iris. Use a combination of shading and lines to depict these details.
The eyelid plays a crucial role in adding depth to your eye drawing. Begin by sketching the upper and lower eyelids, ensuring you capture the natural curves and folds. Eyelids aren’t just straight lines; they have subtle dips and rises that give the eye its character. Take your time to observe how the eyelids interact with the eyeball and the surrounding skin. Adding these details will make your eye drawing come alive!
Shading is where the magic happens! It’s essential for achieving a three-dimensional look. Start by identifying the light source in your drawing. This will determine where the shadows and highlights fall. Use techniques like hatching (drawing parallel lines) and blending (smudging the pencil marks) to create depth and texture. Don’t be afraid to experiment; shading can dramatically change the appearance of your eye.
To make your eye drawing truly realistic, you need to capture how light interacts with it. Highlights and reflections on the iris and cornea are crucial for bringing your drawing to life. Use a white pencil or eraser to create small highlights on the iris and cornea, mimicking the way light bounces off these surfaces. It’s like adding the final touch of sparkle to a diamond; it makes all the difference!
Once you’re satisfied with your eye drawing, it’s time to add the final touches. Go over your lines, refining them to enhance contrast and depth. You might want to darken the pupil or add more detail to the eyelashes and surrounding skin. These small enhancements can elevate your drawing from good to exceptional. Remember, it’s all about the details!
Q: How long does it take to learn to draw a realistic eye?
A: The time varies for everyone. With practice, you can see significant improvement in just a few weeks!
Q: Do I need expensive materials to draw well?
A: Not at all! You can create stunning art with basic materials. It’s all about how you use them.
Q: Can I use color in my eye drawing?
A: Absolutely! Adding color can enhance the realism and make your drawing more vibrant.
Understanding Eye Anatomy
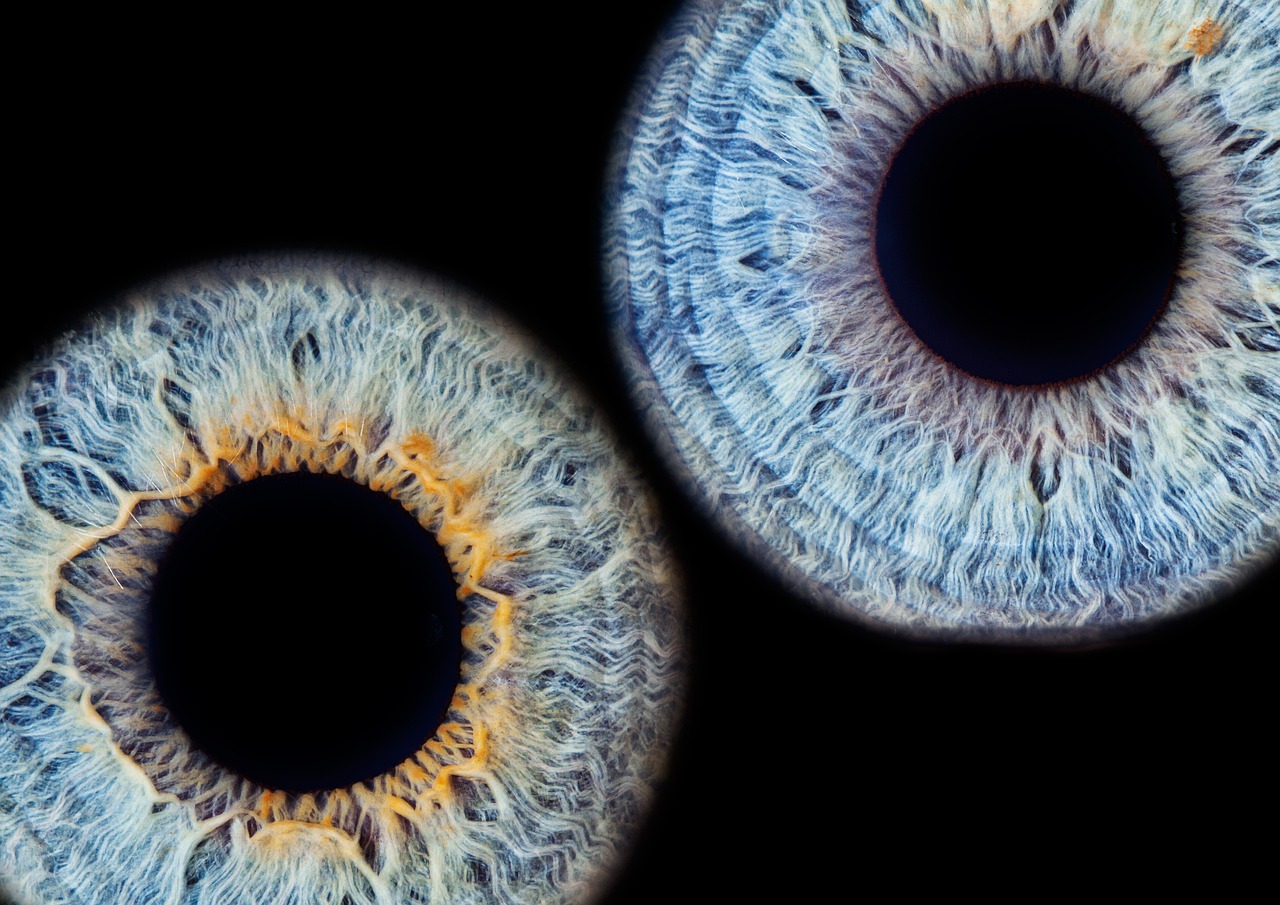
Familiarizing yourself with the basic anatomy of the eye is crucial for realistic drawing. The human eye is a complex organ, and understanding its structure can significantly enhance your ability to depict it accurately. The main components of the eye include the cornea, iris, pupil, lens, and retina. Each part plays a vital role in how we perceive the world around us.
The cornea is the transparent front part of the eye that covers the iris and pupil, acting as a protective barrier while also helping to focus light. Just beneath the cornea lies the iris, the colored part of the eye that controls the size of the pupil, thereby regulating the amount of light entering the eye. The pupil itself is the dark circular opening in the center of the iris, and its size can change in response to light conditions. This dynamic nature of the pupil is essential for achieving a realistic look in your drawings.
Next, we have the lens, which sits behind the iris and pupil. It helps to focus light onto the retina, which is located at the back of the eye and contains photoreceptor cells that convert light into electrical signals sent to the brain. Understanding these components and their functions will help you to create a more lifelike representation of the eye.
| Component | Function |
|---|---|
| Cornea | Protects the eye and helps focus light |
| Iris | Controls the size of the pupil |
| Pupil | Regulates light entering the eye |
| Lens | Focuses light onto the retina |
| Retina | Converts light into electrical signals |
In addition to these primary components, there are other features worth noting, such as the sclera, which is the white part of the eye, and the tear ducts that keep the eye moist. Understanding these details not only enriches your knowledge but also adds depth to your drawings. As you practice, pay close attention to how these parts interact with one another, and you'll find that your ability to draw realistic eyes improves dramatically.
So, the next time you sit down to draw an eye, take a moment to visualize its anatomy. Think of the eye as a delicate, intricate machine where each part has a role to play. Just like a car engine, if one piece is out of place, the whole system can falter. By grasping this concept, you’ll be better equipped to bring your drawings to life with stunning realism.
- What materials do I need to start drawing realistic eyes? You'll need quality pencils, various types of paper, and erasers. A blending stump can also be helpful for shading.
- How long will it take to draw a realistic eye? The time varies based on your skill level, but with practice, you can create a decent drawing in a couple of hours.
- Can I use references for my drawings? Absolutely! Using reference images can greatly enhance your understanding of eye anatomy and improve your drawing skills.
Gathering the Right Materials
When it comes to drawing a realistic eye, the materials you choose can make a significant difference in the outcome of your artwork. Think of your drawing tools as the ingredients in a recipe; if you have the right ones, your final dish—or in this case, your drawing—will turn out much better! So, let’s dive into what you’ll need to get started on this artistic journey.
First and foremost, you'll want to select a good set of pencils. A range of pencils from H to B is ideal because it allows you to create both fine lines and deep shadows. The H pencils are harder and produce lighter marks, which are perfect for initial sketches, while the B pencils are softer and great for shading. A typical set might include:
- 2H - for fine lines
- HB - for general sketching
- 2B - for shading
- 4B and 6B - for darker tones
Next, don’t overlook the importance of quality paper. The type of paper you choose can influence how your pencil interacts with the surface. A smooth paper allows for fine details, while textured paper can add interesting effects to your shading. For drawing realistic eyes, a medium-weight drawing paper or sketch pad is highly recommended. Look for something that can handle erasing without tearing easily.
Speaking of erasers, having a good eraser is crucial. A kneaded eraser is fantastic for subtle highlights and corrections, while a vinyl eraser can help with more stubborn marks. You might be surprised how often you’ll find yourself reaching for these tools as you refine your eye drawing!
Additionally, consider investing in some blending tools. Blending stumps or tortillons are excellent for smoothing out your shading and creating a more lifelike appearance. You can also use a soft cloth or even your fingers to blend, but having the right tools can make the process cleaner and more effective.
Finally, it’s always a good idea to have a sharpener on hand. A precise point on your pencil allows for greater control, especially when you’re working on intricate details like the iris or eyelashes. A good quality sharpener will help maintain your pencils in top condition, ensuring you can achieve the best results.
In summary, gathering the right materials is the first step toward mastering the art of drawing realistic eyes. With the right pencils, paper, erasers, blending tools, and sharpeners, you’ll be well-equipped to create stunning artwork that captures the beauty of the human eye. Remember, the tools you use can either enhance your skills or hinder them, so invest wisely!
Q: Do I need to buy expensive materials to draw well?
A: Not necessarily! While quality materials can enhance your experience, many affordable options work just as well for beginners. Focus on what feels comfortable for you.
Q: How important is the type of paper?
A: The paper type can affect the outcome of your drawing. A smoother paper is often better for detailed work, while textured paper can add depth to your shading.
Q: Can I use regular pencils from my school supplies?
A: Yes, you can start with regular pencils, but investing in a range of drawing pencils will give you more versatility and improve your results.
Basic Shapes and Guidelines
When it comes to drawing a realistic eye, starting with the right basic shapes is crucial. Think of these shapes as the skeleton of your drawing—they provide the structure and proportions that will guide your hand as you add more details. The eye can be broken down into several simple forms, primarily an oval for the eyeball and a circle for the iris. By beginning with these basic shapes, you can ensure that your eye drawing maintains a natural look.
To begin, lightly sketch an oval shape for the eyeball. This oval should be slightly tilted to mimic the natural orientation of a human eye. Next, draw a circle within the oval for the iris. It’s essential to position the iris correctly; it should be centered horizontally but can be slightly lower vertically, depending on the expression you want to convey. For the pupil, draw a smaller circle inside the iris. Remember, the size of the pupil can vary based on light conditions and emotional states, so feel free to adjust it accordingly.
Once you have these shapes in place, it’s time to add guidelines that will help you refine your drawing. Use light pencil strokes to create horizontal and vertical lines intersecting at the center of the iris. These lines will act as reference points for the placement of the eyelid, eyelashes, and other features. You might also want to sketch the outline of the eyelids, which typically have a slight curve. The upper eyelid usually has a more pronounced arch, while the lower eyelid is more subtle.
Here’s a quick overview of the basic shapes and guidelines you’ll want to keep in mind:
| Shape | Description |
|---|---|
| Oval | Forms the basic structure of the eyeball. |
| Circle | Represents the iris, centered within the oval. |
| Smaller Circle | Indicates the pupil, placed inside the iris. |
| Guidelines | Light lines that help position the eyelids and other features. |
As you work on your drawing, don’t hesitate to adjust these shapes as needed. The beauty of art lies in its flexibility; it’s okay to erase and redraw until you find the proportions that feel right to you. Remember, the goal is not just to replicate what you see but to capture the essence of the eye. So, take your time with these basic shapes, and don't rush the process. Mastering this foundation will pave the way for a more detailed and realistic eye drawing later on.
In summary, starting with basic shapes and guidelines is like laying the groundwork for a sturdy building. Without a solid foundation, your drawing may end up looking off-balance or unrealistic. So grab your pencil, take a deep breath, and let those shapes guide you to create something truly beautiful!
- What materials do I need to start drawing an eye? You will need pencils, erasers, and quality drawing paper to get started.
- Can I use a reference photo? Absolutely! Using reference photos can help you understand the details and nuances of the eye better.
- How do I know if my proportions are correct? Regularly step back from your drawing to see it from a distance, or compare it against your reference to check proportions.
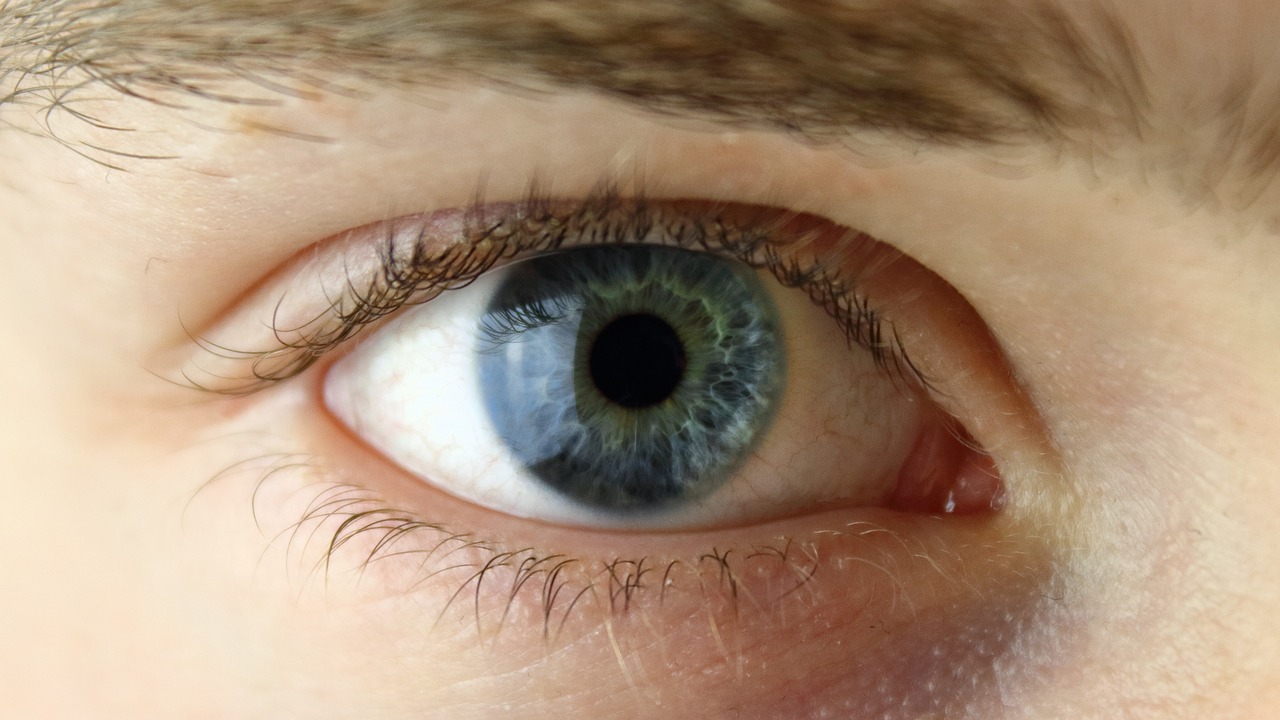
Drawing the Iris and Pupil
When it comes to drawing a realistic eye, the iris and pupil are undoubtedly the stars of the show. These two elements are not just mere circles on a piece of paper; they are vibrant features that can convey emotion and depth. So, how do you go about capturing their essence? Let’s dive into the steps that will guide you through drawing these crucial components.
First, it’s essential to understand the shapes and proportions of the iris and pupil. The pupil is typically a black circle in the center of the iris, which is the colored part of the eye. The size of the pupil can change based on lighting conditions, so it’s important to observe how it looks in different scenarios. To start, lightly sketch a circle for the iris and a smaller circle for the pupil in the center. Make sure to keep the proportions in mind—generally, the iris is about 2-3 times larger than the pupil.
Next, let’s talk about the details. The iris is not a solid color; it’s a mosaic of shades and patterns. Depending on the eye color, you might see flecks of different colors or radial lines extending from the pupil. To create this effect, use a variety of pencils or colored pencils to layer different shades. For instance, if you’re drawing a blue iris, start with a light blue base, then add darker blues and even hints of gray to create depth. You can use hatching techniques to mimic the texture of the iris, enhancing its realism.
Don’t forget to pay attention to the light source. The way light hits the iris can create beautiful highlights. To achieve this, leave a small area of the iris white or lightly shaded. This tiny detail can make your drawing pop and give it a more lifelike appearance. Additionally, consider the reflections that occur on the pupil. A simple white dot can suggest a reflection of light, making the eye appear more dynamic.
After you’ve sketched the iris and pupil, take a step back and evaluate your work. Are the shapes and colors balanced? Do the details look natural? If something feels off, don’t hesitate to adjust. Remember, drawing is a process of refinement. You can always go back and enhance the colors or redefine the lines to achieve the desired effect.
Finally, let’s talk about the finishing touches. Once you’re satisfied with the iris and pupil, consider adding a bit of shading around the eye to ground it in your drawing. This can be done by gently shading the area around the eye with a soft pencil, which will help to create a sense of depth and realism. With these steps, you’re well on your way to mastering the art of drawing a realistic iris and pupil!
- What materials do I need to draw the iris and pupil? You will need pencils (preferably a range from 2H to 6B), colored pencils, and quality drawing paper.
- How can I make my iris look more realistic? Focus on layering colors and adding details such as highlights and textures.
- Is it important to understand eye anatomy? Absolutely! Understanding the anatomy helps you to create more accurate and lifelike drawings.
Adding Details to the Eyelid
When it comes to drawing a realistic eye, the eyelid plays a pivotal role in creating depth and dimension. It's not just a simple line; rather, it’s a complex structure that adds character to your eye drawing. Understanding how to depict the eyelid accurately can transform your artwork from flat to lifelike. So, let’s dive into the details!
The first step in adding details to the eyelid is to observe its natural curves and folds. The upper eyelid typically has a slight arch, while the lower eyelid is more rounded. This curvature is essential for portraying the eye's openness and expression. You might want to look at your own eye in the mirror or use reference images to capture these nuances. Remember, the eyelid isn't just a solid mass; it has a delicate structure that features various subtle lines and shadows.
Next, consider the folds and creases that occur on the eyelid. These are crucial for adding realism. The upper eyelid usually has a prominent fold, while the lower eyelid may have a less pronounced one. To illustrate these features, lightly sketch the outlines of the folds using a pencil. Pay attention to how these lines curve and intersect at different angles. You can enhance the effect by varying the pressure on your pencil to create lighter and darker lines, mimicking the natural shadows that occur.
In addition to folds, let's not forget about the eyelashes. These tiny details can make a significant difference. Eyelashes grow in clusters and have a natural arc. When drawing them, start from the base of the eyelid and flick your pencil upward to create a realistic effect. You don’t need to draw every single lash; instead, focus on the overall shape and direction. A few well-placed strokes can convey the texture and density of the lashes beautifully.
Moreover, the eyelid's color and texture can vary depending on the individual. Some people have more pronounced veins or a slight redness around the eyelid area. To capture this, consider adding subtle color variations with colored pencils or pastels. A light wash of color can add life to your drawing, making it more engaging and realistic.
Finally, don’t overlook the importance of shading around the eyelid. Shading can enhance the three-dimensional quality of your drawing. Use techniques like hatching and blending to create shadows where the eyelid meets the eyeball. This will not only add depth but also help in defining the shape of the eyelid. Remember, light typically comes from one direction, so keep that in mind as you shade.
In summary, adding details to the eyelid involves a careful observation of its structure, folds, and the interplay of light and shadow. By focusing on these elements, you can create a more realistic and captivating eye drawing that truly stands out. Practice makes perfect, so don’t hesitate to experiment with different techniques until you find what works best for you!
- What materials do I need to draw realistic eyes? You will need quality pencils, erasers, and paper that can handle shading.
- How can I improve my eye drawing skills? Practice regularly, study eye anatomy, and use reference images to enhance your skills.
- Is it necessary to add color to my eye drawings? While it's not necessary, adding color can enhance realism and bring your drawings to life.

Shading Techniques for Realism
When it comes to drawing a realistic eye, shading is absolutely crucial. It’s like the secret sauce that transforms a flat sketch into a lifelike representation. Think of shading as the way you add depth and dimension, much like how a sculptor chisels away at stone to reveal the form within. But how do you master these techniques? Let’s dive in!
First off, you need to understand the different shading techniques available to you. Each technique can create a unique effect, and the choice often depends on the look you want to achieve. Here are a few popular methods:
- Hatching: This technique involves drawing closely spaced parallel lines. The closer the lines are, the darker the area will appear. It’s great for creating texture and depth.
- Cross-hatching: Similar to hatching, but here you add another layer of lines that cross the first set. This method allows for even more depth and is perfect for areas that require more shadow.
- Blending: This technique uses a blending tool, such as a stump or even your finger, to smooth out the pencil strokes. It creates a soft transition between light and dark areas, which is particularly useful for the smooth surfaces of the eye.
- Stippling: Instead of lines, use dots to create shading. This method can add a unique texture to your drawing, and it's especially effective for achieving subtle gradations.
Now, let’s talk about how to apply these techniques specifically to the eye. Start with the iris. Use hatching to create the initial shadow around the edges, which gives it a rounded appearance. Remember, the iris isn’t flat; it curves, so your shading should reflect that curvature. As you move toward the center, gradually lighten your strokes to indicate the highlight that naturally occurs.
Next, focus on the pupil. It’s typically the darkest part of the eye, so use a combination of cross-hatching and blending to achieve that deep, rich black. Don’t forget to leave a tiny highlight on the pupil itself; this is essential for making the eye look alive. A little sparkle can go a long way!
When shading the eyelid, think about how it casts shadows over the eye. The upper eyelid generally creates a shadow on the iris, so use soft blending to create a smooth transition. Remember, the skin around the eye is delicate, so your shading should reflect that softness. You can use a lighter pencil for the skin and apply gentle hatching to indicate the folds of the eyelid.
Finally, don’t overlook the importance of highlights. These are the bright spots that catch the light and bring your drawing to life. Use an eraser or a white pencil to gently lift some graphite from the areas where light hits the eye. This contrast between light and dark is what will give your eye drawing a realistic pop!
In summary, mastering shading techniques is key to creating a realistic eye drawing. Whether you prefer hatching, cross-hatching, or blending, each method has its place in your artistic toolbox. Experiment with these techniques, and don’t be afraid to combine them for the best results. Remember, practice makes perfect, so keep drawing and refining your skills!
Q: How do I choose the right pencil for shading?
A: It’s best to have a range of pencils from hard (H) to soft (B). Use harder pencils for lighter shades and softer ones for darker areas.
Q: Can I use colored pencils for shading?
A: Absolutely! Colored pencils can add a unique touch to your eye drawing, especially for the iris. Just remember to layer your colors for depth.
Q: How do I avoid making my shading look muddy?
A: Keep your pencil sharp and use light pressure. Build up layers gradually rather than going in too dark too quickly.
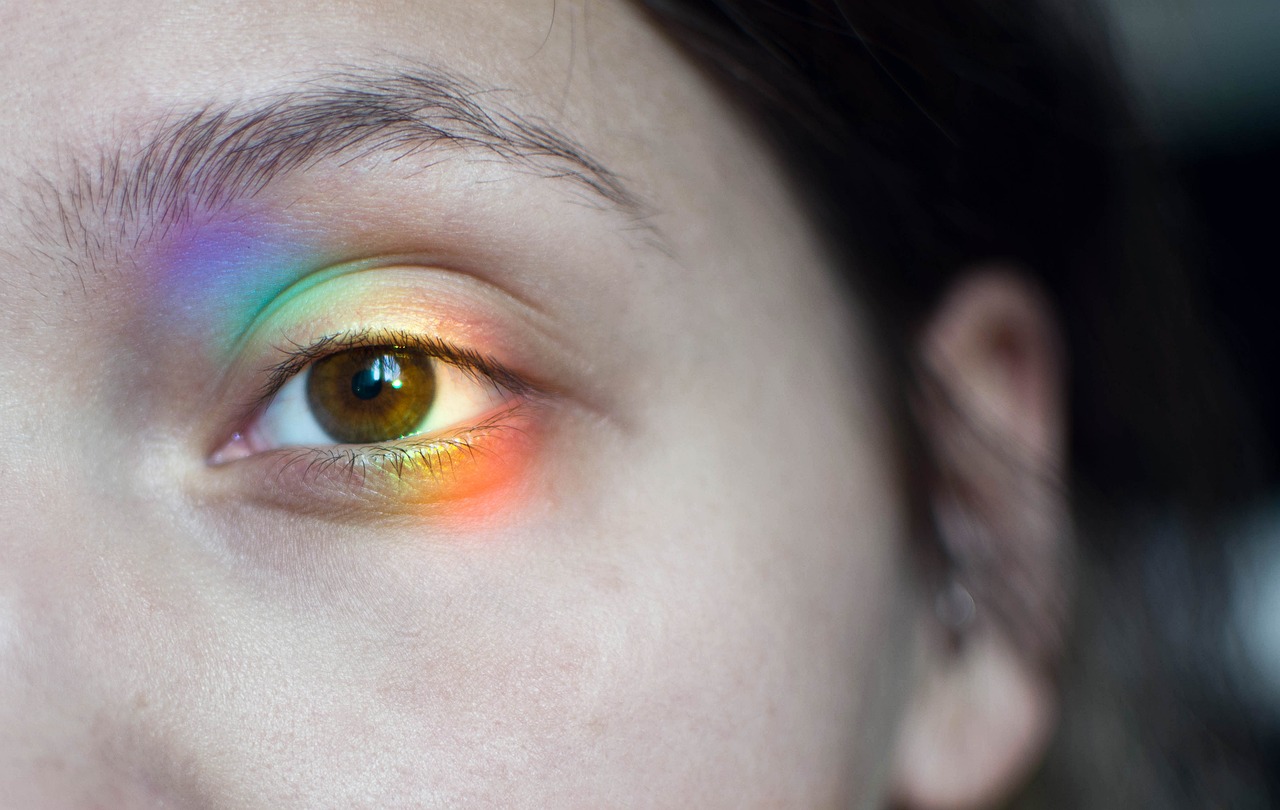
Capturing Light and Reflection
When it comes to drawing a realistic eye, is one of the most crucial aspects that can make or break your artwork. Imagine the eye as a tiny universe, where light dances and plays, creating a spectacle that draws people in. The way light interacts with the eye not only adds depth but also brings a sense of life to your drawing. To effectively depict this, you need to focus on two main elements: highlights and reflections.
First, let's talk about highlights. These are the bright spots on the surface of the iris and cornea, where light hits directly. To create these highlights, you'll want to leave small areas of your drawing untouched or use a white pencil or eraser to gently lift the graphite. This technique mimics the way light reflects off the moist surface of the eye. Typically, the highlight is located in the upper part of the iris, but its exact position can vary depending on the light source. Remember, the key is to keep it subtle; a stark white dot can look unnatural, so aim for a soft, blended highlight instead.
Next, we have reflections. These are the more complex light interactions that can be seen within the eye. Reflections often showcase the environment around the eye, like a mirror capturing its surroundings. To draw reflections, observe the light sources around you and how they might be mirrored in the eye. You can achieve this effect by incorporating soft lines and gentle curves that mimic the shapes of objects nearby. For instance, if there’s a window reflecting in the eye, sketching the outline of that window can add an incredible layer of realism to your drawing.
To further enhance your portrayal of light and reflection, consider the following techniques:
- Contrast: Use darker shades around the iris and pupil to make the highlights pop.
- Blending: Smooth out the edges of your highlights and reflections to create a more natural look.
- Layering: Build up your shading gradually, allowing for more control over the final appearance.
In addition to these techniques, it's essential to understand the importance of color when working with colored pencils or paints. Different colors of light can drastically change the appearance of the eye. For instance, if you're drawing a blue eye, the reflections might have hints of blue and white, while a brown eye might reflect warmer tones. Always pay attention to the subtleties of color and how they interact with light.
Lastly, don't forget to step back and look at your drawing from a distance. This can help you see if the light and reflections are working harmoniously within the context of the entire piece. Sometimes, what looks perfect up close may need a little adjustment when viewed from afar. So, take your time, and don't rush this crucial part of your eye drawing; it's where the magic truly happens!
Q1: How can I practice capturing light and reflection in my eye drawings?
A1: One effective way to practice is by observing real eyes under different lighting conditions. Take photographs or study how light interacts with the eye in various environments, then try to replicate those effects in your drawings.
Q2: Should I use color when drawing reflections in a black and white eye drawing?
A2: While color isn't necessary in a black and white drawing, you can use varying shades of gray to represent the intensity of light and reflections. Focus on creating contrast to highlight these areas.
Q3: What materials do you recommend for achieving realistic highlights and reflections?
A3: A good quality set of colored pencils or graphite pencils, along with a blending stump and an eraser, can help you achieve the desired effects. Experimenting with different paper types can also make a difference in how your highlights and reflections appear.
Final Touches and Enhancements
Once you've meticulously crafted the structure and shading of your eye drawing, it's time to add those final touches that make all the difference. Think of this stage as the icing on the cake; it’s where your hard work truly shines. You might be wondering, "What exactly should I focus on?" Here are a few key elements to consider:
First, refining your lines is crucial. Take a moment to review the outlines of your eye. Are they sharp and clear, or do they need a bit of sharpening? Use a fine-tipped pencil or a sharpened graphite pencil to enhance the edges, especially around the iris and eyelids. This will create a more defined look, giving your drawing a sense of realism and depth.
Next, think about enhancing the contrast in your drawing. This means going back to the shaded areas and darkening them slightly. Use a softer pencil (like a 6B or 8B) for the darkest parts, such as the pupil and the shadows cast by the eyelid. This added depth will help your eye pop off the page, making it look more lifelike.
Another important aspect is to add subtle highlights. Highlights are what bring your drawing to life. Use an eraser to gently lift some graphite from the areas where light would naturally hit the eye, such as the cornea and the upper part of the iris. This technique creates a beautiful contrast against the darker areas, simulating the reflective quality of the eye.
Don’t forget about the surrounding skin. Adding a bit of shading around the eye can help ground your drawing and provide context. Lightly shade the areas around the eye with a soft pencil, paying attention to the natural contours of the face. This not only enhances the realism but also frames the eye, drawing the viewer's attention directly to it.
Lastly, take a step back and evaluate your work. Sometimes, it's easy to get lost in the details. Look at your drawing from a distance to see if it captures the essence of realism you're aiming for. If something feels off, don’t hesitate to make adjustments until you’re satisfied.
In conclusion, the final touches are where your drawing transforms from a simple sketch to a stunning piece of art. With careful refinement and attention to detail, you can elevate your eye drawing into something truly remarkable.
- What materials do I need for drawing a realistic eye? You will need quality pencils, good paper, and an eraser. Optional materials include blending stumps and colored pencils for added detail.
- How can I improve my shading techniques? Practice different shading techniques like hatching, cross-hatching, and blending. Experiment with different pencils to see what works best for you.
- Is it necessary to draw the entire face for a realistic eye? No, you can focus solely on the eye. However, adding context with skin shading can enhance realism.
- How do I make the eye look more lifelike? Pay attention to highlights and reflections, and ensure your shading has depth and dimension.
Frequently Asked Questions
- What materials do I need to start drawing a realistic eye?
To kick off your journey into drawing realistic eyes, you'll need a few essential materials. Grab a set of quality pencils, preferably ranging from 2H to 6B for varying hardness. You'll also want some smooth drawing paper—think sketch pads or bristol board. Don't forget a good eraser and a blending stump for those smooth shading transitions!
- How do I ensure the proportions of the eye are accurate?
Getting the proportions right can feel daunting, but starting with basic shapes makes it easier! Begin by sketching a simple almond shape for the eye. Use guidelines to divide the eye into sections for the iris and pupil. Remember, the iris is typically one-third of the eye's height—keeping this in mind will help you maintain proportion and symmetry.
- Can I use colored pencils instead of graphite for drawing eyes?
Absolutely! Colored pencils can add a beautiful dimension to your eye drawings. Just remember that achieving realism with color requires a good understanding of shading and layering. Start with light colors and build up to darker shades for depth. It's all about patience and practice!
- What shading techniques should I use for realism?
Shading is where the magic happens! You can try techniques like hatching, cross-hatching, and blending. Hatching involves drawing parallel lines, while cross-hatching crisscrosses those lines. Blending is great for soft transitions—use a blending stump or even your finger for that. Experiment with these techniques to see what works best for you!
- How can I make the highlights on the eye look realistic?
Highlights are crucial for that lifelike sparkle! Observe how light reflects off your own eyes or reference photos. To create highlights, leave small areas of the iris and cornea white or lightly shaded. You can also use a white gel pen or pencil for added brightness—just be careful not to overdo it!
- What are some common mistakes to avoid when drawing eyes?
Ah, the classic pitfalls! One common mistake is not paying attention to the eye's anatomy, which can lead to unrealistic shapes. Another is over-shading, which can flatten your drawing. Lastly, don’t forget to take breaks! Stepping back allows you to view your work with fresh eyes and catch those little errors.
- How long will it take to improve my eye drawing skills?
Improvement varies from person to person, but with consistent practice, you’ll see progress! Set aside time each week to practice drawing eyes, and don’t be afraid to experiment with different techniques. Remember, every artist was once a beginner—so enjoy the journey!


