
The Practical Guide to Drawing Portraits
Drawing portraits is an enchanting journey into the world of art, where every stroke of the pencil can breathe life into a blank page. Whether you're a seasoned artist or just starting, mastering the art of portrait drawing can be both challenging and rewarding. This guide is designed to equip you with essential techniques, tips, and insights that will elevate your skills and help you capture the essence of your subjects. From understanding facial proportions to effectively conveying emotions, we’ll explore the various facets that make portrait drawing an art form that resonates deeply with viewers.
Mastering the basic proportions of the face is crucial for creating realistic portraits. The human face is a complex structure, and understanding its proportions is like learning the grammar of a new language. Artists often refer to the “Rule of Thirds” when sketching faces. This rule suggests that the face can be divided into three equal horizontal sections: the hairline to the eyebrows, the eyebrows to the bottom of the nose, and the bottom of the nose to the chin. Additionally, the width of the face can be measured against the width of the eyes—typically, five eyes can fit across the width of the face. By adhering to these fundamental measurements, you can achieve accurate likenesses that resonate with viewers.
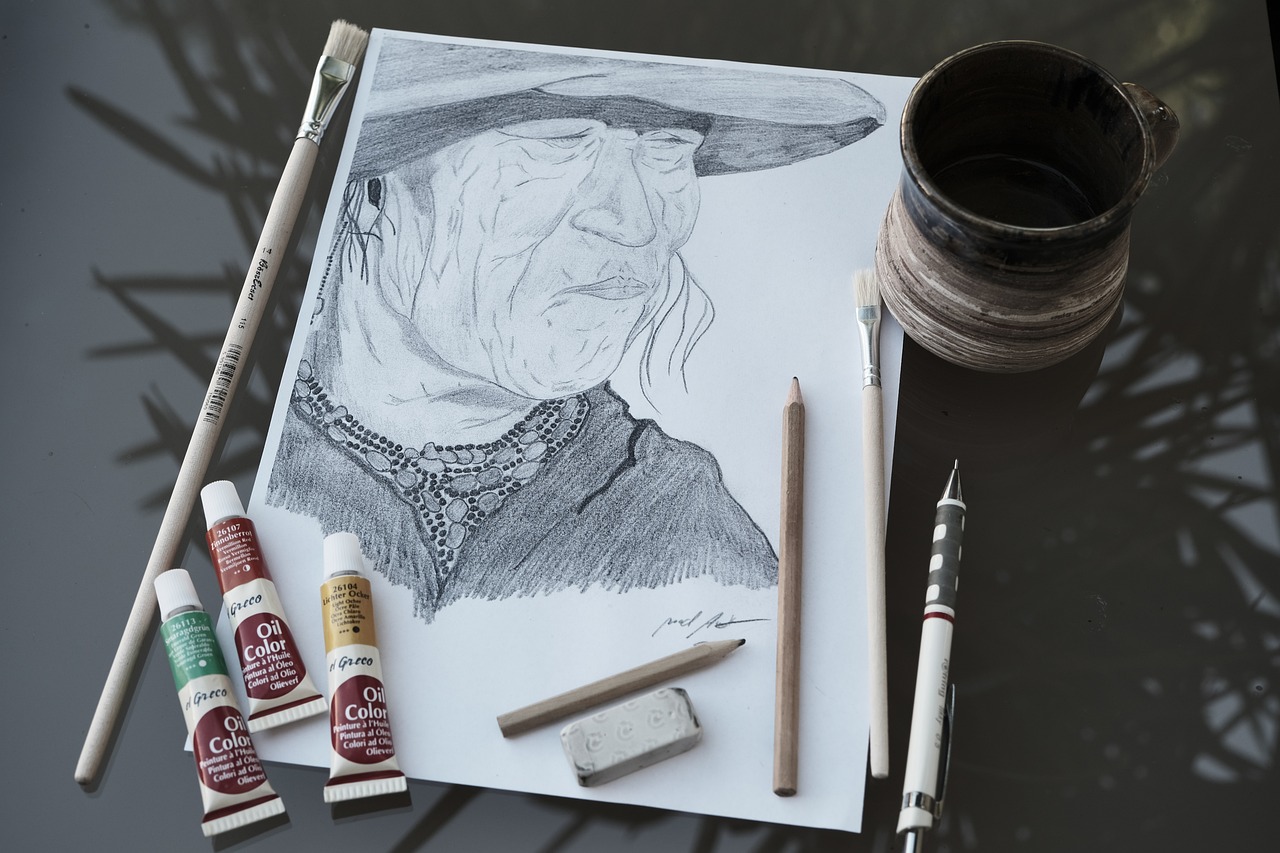
Selecting the appropriate tools and materials can significantly impact the quality of your portrait. Think of your materials as the instruments in an orchestra; each one plays a crucial role in creating a harmonious piece. For portrait drawing, consider using a range of pencils, from hard (H) for fine details to soft (B) for deep shadows. The choice of paper is also vital; a smooth surface is ideal for detailed work, while textured paper can add an interesting dimension to your drawings. Here’s a quick overview of recommended materials:
| Material | Recommended Type |
|---|---|
| Pencil | 2H, HB, 2B, 4B |
| Paper | Smooth Bristol, Textured Watercolor |
| Eraser | Kneaded, Vinyl |
Effective sketching techniques lay the foundation for a successful portrait. Think of sketching as laying down the groundwork for a magnificent building; without a solid base, the structure will crumble. One approach is gesture drawing, which captures the essence and movement of the subject quickly. This method helps to establish proportions and the overall flow of the composition. Another technique is using contour lines, which outline the features of the face while emphasizing the three-dimensionality of the subject. Remember, the goal is not to create a perfect representation at this stage but rather to capture the spirit of the person you are drawing.
Facial expressions convey emotions that bring portraits to life. Have you ever looked at a portrait and felt a connection to the subject? That’s the power of expression! To enhance the character and depth of your artwork, focus on the subtle changes in the face—like the slight furrow of a brow or the gentle curve of a smile. Observing your subject closely and understanding how emotions manifest physically will allow you to depict these nuances effectively. Techniques such as exaggerating certain features or using shadow to create depth can help in conveying the right emotion.
Shading adds dimension and realism to portraits. Imagine trying to visualize a sculpture without light and shadow—it would be flat and lifeless! In portrait drawing, mastering shading techniques is essential. Techniques like hatching, where parallel lines are drawn closely together, and blending, which smooths out the pencil strokes, can create lifelike textures and contours. Experiment with different pressures on your pencil to achieve a range of tones. Remember, the goal is to create a balance between light and shadow, which will ultimately bring your portrait to life.
Drawing portraits from various angles can be challenging yet rewarding. Have you ever tried to capture a friend’s likeness from a side view? It can feel like solving a puzzle! To tackle different perspectives, practice sketching from photographs taken at various angles. This will help you understand how features shift and change with perspective. Always keep in mind the proportions and angles you learned earlier, as they will guide you in maintaining the subject's likeness, no matter the viewpoint.
Reference photos can be invaluable for portrait artists. They serve as a roadmap, guiding you through the intricate details of your subject. When selecting reference images, look for high-quality photos with good lighting and clear features. Pay attention to the expressions and the context of the photo—this will aid in capturing the personality of your subject. Additionally, consider taking your own reference photos, as this allows you to control the lighting and angles to better suit your artistic vision.
The final touches can make or break a portrait. This is where your hard work comes together! Start by refining your details, adding highlights to create contrast, and correcting any mistakes that may have slipped through earlier stages. Once satisfied, consider how you want to present your work. Whether framing it or showcasing it digitally, presentation plays a significant role in how your art is perceived. Remember, every detail matters, and the final polish can elevate your portrait from good to breathtaking.
- What is the best pencil for portrait drawing? A range of pencils (2H to 4B) is recommended for different shading techniques.
- How do I improve my shading skills? Practice different techniques like hatching and blending, and experiment with pressure on your pencil.
- Can I draw portraits from photographs? Yes! Using reference photos is a great way to improve accuracy and detail.
- What should I focus on when drawing expressions? Pay attention to subtle changes in facial features to convey emotions effectively.

Understanding Facial Proportions
Mastering the basic proportions of the face is crucial for creating realistic portraits. Think of facial proportions as the foundation of a house; without a solid base, everything else can crumble. To start, it's essential to grasp the typical measurements that define human features. The human face can be divided into equal sections, which helps in achieving a balanced and lifelike representation.
One of the most common methods to understand facial proportions is the “three-section” method. The face can be divided vertically and horizontally into three equal parts:
| Section | Description |
|---|---|
| Top Section | From the hairline to the eyebrows. |
| Middle Section | From the eyebrows to the bottom of the nose. |
| Bottom Section | From the bottom of the nose to the chin. |
By understanding these sections, you can create a more accurate likeness of your subject. For instance, the eyes are typically located about halfway down the head. This means that if you measure from the top of the head to the chin, the eyes will sit at the midpoint. Additionally, the width of the face is generally about five eye widths across. By keeping these proportions in mind, you can avoid common pitfalls that lead to distorted features.
Furthermore, it’s important to consider the placement of other facial features. The nose, for example, usually aligns vertically with the inner corners of the eyes, while the mouth typically sits about one-third of the way down from the nose to the chin. These guidelines help ensure that your portrait maintains a realistic and harmonious appearance.
Another aspect to consider is the unique characteristics of your subject. No two faces are identical, and individual differences can create a unique challenge. Pay attention to the subtle variations in your subject's features, such as the shape of the jawline, the distance between the eyes, and the curve of the lips. These nuances can significantly affect the likeness of your portrait.
In conclusion, understanding facial proportions is not just about following rules; it's about developing a keen eye for detail. As you practice, you’ll find that these guidelines become second nature, allowing you to focus on the expression and emotion of your subject. Remember, every artist has their own style, so don’t hesitate to adapt these principles to suit your artistic voice.
Choosing the Right Materials
When it comes to portrait drawing, the materials you choose can make a world of difference. Think of it like cooking; the ingredients you select will determine the flavor and quality of your dish. In the same way, your choice of tools and materials can elevate your artwork from basic to breathtaking. So, let’s dive into the essential materials that every portrait artist should consider.
First off, let’s talk about pencils. Not all pencils are created equal, and understanding the grading system can help you pick the right one for your needs. Graphite pencils come in various grades, ranging from hard (H) to soft (B). For portrait drawing, you might want to use a combination of both. Hard pencils are excellent for fine details and light lines, while soft pencils are perfect for shading and creating depth. A typical selection might include:
| Pencil Grade | Use |
|---|---|
| H | Fine details and light lines |
| HB | General purpose, good for sketching |
| B | Shading and darker lines |
Next up is paper. The type of paper you use can drastically affect the outcome of your portrait. Look for papers that have a bit of texture, as they hold the graphite better and allow for smoother blending. A good choice is cold-pressed watercolor paper or specialized drawing paper that’s designed for pencil work. The weight of the paper is also important; heavier papers (around 200gsm or more) can withstand multiple layers of shading without tearing.
Now, let’s not forget about blending tools. These can be your secret weapon for achieving that smooth, lifelike quality in your portraits. Tools such as blending stumps, tortillons, and even your fingers can help you create seamless transitions between light and dark areas. Just remember, less is more! Over-blending can lead to a muddy appearance, so use these tools sparingly to maintain the integrity of your lines.
Finally, consider adding some erasers to your toolkit. A kneaded eraser is perfect for lifting graphite without damaging the paper, while a precision eraser can help you clean up small areas and add highlights. Think of your erasers as your best friends; they help you refine your work and correct any mistakes along the way.
In summary, choosing the right materials is crucial for creating stunning portraits. By investing in quality pencils, paper, blending tools, and erasers, you'll set yourself up for success. Remember, the right tools can inspire creativity and elevate your art to new heights!
- What type of pencil is best for beginners? A good starter set would include HB and 2B pencils, as they offer a balance of hardness and softness for various techniques.
- Can I use regular printer paper for sketching? While you can use it for practice, it’s not ideal for finished portraits due to its smooth texture and tendency to tear.
- How do I choose the right paper weight? Look for paper that is at least 200gsm for pencil work, as it will hold up better to multiple layers and blending.

Sketching Techniques for Portraits
When it comes to portrait drawing, the sketching stage is where the magic begins. This is your opportunity to lay down the groundwork for a stunning piece of art. Think of it as the foundation of a house; without a solid base, everything else can crumble. So, how do we create that strong foundation? Let's dive into some effective sketching techniques that will elevate your portrait drawing skills.
One of the first techniques to consider is gesture drawing. This method is all about capturing the essence and movement of your subject in a short amount of time. Imagine trying to catch a fleeting moment, like a dancer in motion. You want to convey the energy and flow rather than focusing on details. Start with quick, loose lines that represent the overall posture and dynamics of the figure. This will help you understand the structure and proportions before getting into the nitty-gritty.
Another essential technique is contour drawing. This involves sketching the outlines of the face and features without lifting your pencil from the paper. It's like tracing the edges of a beautiful landscape; you want to capture the shape and form without getting bogged down by details. Contour drawing helps you develop a keen eye for the relationships between different facial features, ensuring that everything is in proportion. Remember, the goal is to create a continuous line that flows smoothly, reflecting the contours of the face.
As you progress, you might want to incorporate blocking in shapes. This technique involves breaking down the face into simple geometric shapes, such as ovals and rectangles. By visualizing the face in this way, you can easily map out the proportions and placements of features. For instance, the head can be represented as an oval, while the eyes can be indicated with smaller ovals. This method simplifies the complex structure of the face, making it easier to achieve accuracy.
To enhance your sketching, consider using light and shadow from the very beginning. Even in the sketch phase, you can indicate where the light hits the face and where the shadows fall. This not only adds depth to your drawing but also helps you visualize the three-dimensional form of the face. When you sketch, use lighter strokes for areas that will be highlighted and darker lines for shadows. This technique sets the stage for a more dynamic and lifelike portrait.
Lastly, don't forget to practice regularly. Like any skill, sketching improves with practice. Set aside time each day to draw, whether it's quick studies or longer sessions. You could even keep a sketchbook dedicated to portraits, allowing you to experiment with different techniques and styles. Remember, every artist has their unique approach, and the more you practice, the more you'll discover what works best for you.
In summary, mastering sketching techniques for portraits involves a combination of gesture drawing, contour drawing, blocking in shapes, and understanding light and shadow. Each technique contributes to building a solid foundation for your artwork. So grab your pencil, and let the sketching journey begin!
- What is the best way to start a portrait sketch? Begin with light, loose lines to capture the overall shape and proportions of the face.
- How important is gesture drawing? Gesture drawing is crucial as it helps capture the essence and movement of your subject quickly.
- Can I use reference photos while sketching? Absolutely! Reference photos can provide valuable insights into proportions and details.
- What materials are best for sketching portraits? Use quality pencils, sketch paper, and an eraser to allow for corrections and adjustments.
Capturing Expressions and Emotions
When it comes to portrait drawing, the magic truly happens when you start to capture expressions and emotions. Think about it: have you ever gazed at a painting and felt an instant connection? That’s the power of a well-captured expression! It’s not just about the lines and shadows; it’s about telling a story through the face of your subject. The eyes, the mouth, the slight furrow of the brow—each element plays a pivotal role in conveying feelings. So, how do you go about mastering this art?
First, it’s essential to observe your subject closely. Pay attention to the subtle changes that occur in their facial features as they express different emotions. For instance, a smile can transform the entire face, changing not just the mouth but also the eyes and the cheeks. This is where your keen observation skills come into play. Try to notice how the muscles in the face react to different feelings. You might find it helpful to keep a small sketchbook handy to jot down quick studies of facial expressions as you see them in real life.
To help you understand the nuances of expressions, consider the following key emotions and their corresponding facial indicators:
| Emotion | Facial Indicators |
|---|---|
| Happiness | Smiling mouth, bright eyes, raised cheeks |
| Sadness | Downturned mouth, drooping eyelids, furrowed brow |
| Surprise | Wide-open eyes, raised eyebrows, mouth slightly open |
| Anger | Furrowed brow, clenched jaw, tight lips |
Once you’ve identified these indicators, practice sketching them. You can start with quick gesture drawings that capture the essence of each emotion. These don’t have to be perfect; the goal is to understand how the face shifts and changes with each feeling. You might find it useful to take a series of photographs of friends or family members when they are experiencing different emotions. This can serve as a fantastic reference for your drawings.
Another method to enhance your ability to capture emotions is to study theater and cinema. Actors are masters at conveying feelings through their expressions. Watching films or plays can provide insights into how different emotions manifest physically. Try pausing a movie at a moment of high emotion and sketching the actor’s face. This practice will not only improve your skills but also help you appreciate the art of expression in a deeper way.
Finally, don’t be afraid to infuse your own emotions into your work. Art is a reflection of the artist, and your unique perspective can add depth to your portraits. Whether you’re feeling joy, sadness, or even frustration, channel those feelings into your drawings. This connection will resonate with viewers on a profound level, making your portraits not just images, but windows into the soul.
In conclusion, capturing expressions and emotions in portrait drawing is an art that requires practice, observation, and a bit of soul-searching. By honing your skills in this area, you’ll not only improve your technical abilities but also create pieces that truly resonate with your audience. So grab your sketchbook, observe the world around you, and let your pencil dance across the paper, capturing the essence of what it means to be human!
Q: How can I improve my ability to capture emotions in portraits?
A: Practice observing real-life emotions, study facial expressions through photography, and sketch actors from films or plays to understand how emotions manifest physically.
Q: What materials are best for capturing fine details in facial expressions?
A: Using high-quality pencils with varying hardness, smooth paper, and blending tools can help you achieve the fine details needed for capturing expressions effectively.
Q: Is it important to capture every detail of the face to convey emotion?
A: Not necessarily. Sometimes, a few well-placed lines can convey more emotion than a hyper-realistic rendering. Focus on the essence of the expression rather than perfection.

Shading and Texture Techniques
Shading is like the magic wand of portrait drawing; it transforms a flat image into a lifelike representation. The right shading techniques can breathe life into your artwork, giving it depth and dimension. Think of shading as the artist's way of painting with light and shadow, where the subtle play of these elements creates the illusion of form. To get started, you need to understand the different types of shading techniques that can be employed, each offering a unique way to enhance your portraits.
One of the most popular techniques is hatching, which involves drawing closely spaced parallel lines. The closer the lines are together, the darker the area will appear. This method is fantastic for creating texture and can be used effectively to depict hair, fabric, and even skin tones. Another related technique is cross-hatching, where you layer lines in different directions. This adds even more depth and can help to create a more dramatic effect. Imagine layering a cake; each layer adds complexity and richness, just as cross-hatching does to your drawing.
Another essential technique is blending. This is where you use tools like a blending stump or your fingers to smooth out the pencil marks, creating soft transitions between light and shadow. Blending is particularly useful for achieving realistic skin textures, as it allows for gentle gradations that mimic the way light naturally falls on the face. Remember, a portrait with harsh lines can often look flat and uninviting, while one with smooth transitions feels warm and engaging.
When practicing shading, consider the following techniques:
- Stippling: This involves creating texture through tiny dots. It can be time-consuming but is great for detailed work.
- Scumbling: A free-flowing technique that allows for a more spontaneous look, perfect for capturing the essence of hair or fabric.
- Shadow Mapping: This technique involves mapping out where shadows fall on your subject before you start shading. It’s like creating a roadmap for your pencil!
To effectively apply these techniques, it's crucial to observe your subject closely. Look at how light interacts with their features. Are there hard shadows under the chin or soft gradients across the cheeks? Understanding these nuances can help you decide which technique to apply where. You might even want to create a shading chart for yourself, similar to a color palette, to practice different values and textures.
In conclusion, mastering shading and texture techniques is essential for any artist aiming to create compelling portraits. With practice and observation, you’ll find that your ability to render lifelike images will improve significantly. Remember, every stroke counts, and the more you experiment with these techniques, the more unique your style will become. So grab your pencils, find a good light source, and let your creativity flow!
Q1: What is the best pencil for shading?
A1: Generally, softer pencils (like 2B to 6B) are preferred for shading as they allow for richer darks and smoother blending.
Q2: How can I practice shading techniques?
A2: A great way to practice is to create a series of value scales and sketches focusing on different shading techniques. You can also copy works from artists you admire to understand their methods.
Q3: Is it necessary to use blending tools for shading?
A3: While blending tools can help achieve smoother transitions, you can also use your fingers or even a piece of cloth. The key is to find what works best for you.
Q4: Can I use colored pencils for shading?
A4: Absolutely! Colored pencils can add a unique dimension to your portraits, allowing for vibrant shading and texture.

Working with Different Angles
When it comes to drawing portraits, can be both a challenge and a rewarding experience. Imagine trying to capture the essence of a person while they’re tilting their head or looking off to the side. It’s like trying to catch a butterfly; it requires patience, observation, and a bit of skill. The key is to embrace these angles as opportunities to explore the subject's character and personality.
First and foremost, understanding the structure of the face is essential. The face is not just a flat canvas; it has depth and dimension. When drawing from different angles, you must consider how the features shift and change. For instance, the nose may appear larger when viewed from below, while the eyes can seem smaller when viewed from above. To help visualize this, you can think of the face as a three-dimensional object. Here’s a quick breakdown of some common angles:
| Angle | Description |
|---|---|
| Frontal View | Directly facing the subject; features appear symmetrical. |
| Profile View | Side view; highlights the nose and chin's protrusion. |
| Three-Quarter View | Between frontal and profile; adds depth and dimension. |
| High Angle | View from above; can create a sense of vulnerability. |
| Low Angle | View from below; can convey power or dominance. |
As you practice drawing from these angles, it’s crucial to keep your proportions in check. Use light guidelines to map out the basic shapes of the head and features. For example, when drawing a three-quarter view, start with an oval shape for the head and then divide it into sections to place the eyes, nose, and mouth accurately. This method will help you maintain the correct proportions, even when the angle changes.
Another important aspect to consider is light and shadow. Different angles will affect how light hits the face, creating varying shadows that can enhance the three-dimensional effect of your portrait. For instance, when drawing from a low angle, the light may cast dramatic shadows under the chin and nose, while a high angle might wash out those features. Pay attention to these details as they can bring your drawing to life.
Don't forget to practice with a variety of subjects and angles. The more you expose yourself to different perspectives, the more comfortable you'll become. Consider setting up a mirror or using a friend as a model while experimenting with different poses. This hands-on practice will not only improve your skills but also deepen your understanding of how to capture the human face in all its complexity.
In summary, working with different angles in portrait drawing is about observation, practice, and a willingness to experiment. Each angle presents its own set of challenges, but with patience and dedication, you can create dynamic and engaging portraits that truly reflect the essence of your subjects.
- How can I improve my ability to draw from different angles? Regular practice and studying reference images can significantly enhance your skills. Try drawing the same subject from multiple angles to see how their features change.
- What should I focus on when drawing from a low angle? Pay close attention to the shadows and how they define the features. This angle can create a sense of strength, so emphasize the jawline and cheekbones.
- Are there specific tools that can help with drawing at different angles? A good set of pencils, erasers, and blending tools can help you capture details more effectively. Additionally, using a sketchbook with quality paper allows for better shading and texture.
Using Reference Photos Effectively
When it comes to portrait drawing, using reference photos can be a game changer. Think of reference photos as your personal *roadmap*; they guide you through the intricate landscape of facial features, expressions, and proportions. But how do you use them effectively? First off, it's essential to select high-quality images that clearly showcase the details you want to capture. Look for photos with good lighting, sharp focus, and a variety of angles. This will not only help you understand the subject better but also allow you to see the subtle nuances that make a portrait truly come alive.
Once you've chosen your reference, take a moment to analyze it. Pay attention to the shapes and proportions of the face. You might find it helpful to overlay a grid on your reference photo to break it down into manageable sections. This technique can help you maintain accuracy in your drawing. Additionally, consider the emotions conveyed in the photo. Is the subject smiling, frowning, or lost in thought? Each expression tells a story, and capturing that essence can elevate your artwork to new heights.
Another tip is to experiment with multiple reference photos. Sometimes, a single image doesn’t provide all the information you need. By combining elements from different photos, you can create a more dynamic and interesting portrait. For instance, you might take the smile from one photo, the angle from another, and the lighting from yet another. This method not only enhances creativity but also allows you to construct a more personalized representation of your subject.
However, be cautious not to become overly reliant on your reference photos. They should serve as a guide, not a crutch. Try to interpret what you see rather than copying it verbatim. This means understanding the underlying structure of the face and being able to translate that knowledge onto your canvas. After all, art is about expression and interpretation, not just replication.
To make the most of your reference photos, consider creating a mood board. This can be a physical or digital collection of images that inspire you. Include various angles, expressions, and lighting scenarios. This way, you can pull from a broader range of visuals, enriching your understanding of your subject and enhancing your artistic vocabulary.
In summary, using reference photos effectively involves:
- Selecting high-quality, well-lit images.
- Analyzing shapes and proportions carefully.
- Combining elements from multiple photos for a richer portrayal.
- Interpreting rather than copying to maintain your unique artistic voice.
- Creating a mood board to inspire and guide your work.
By integrating these strategies, you’ll not only improve your technical skills but also infuse your portraits with more life and personality. So grab that camera, start snapping, and let your artistic journey begin!
Q: How do I choose the right reference photo for my portrait?
A: Look for photos that are well-lit, in focus, and show the subject's features clearly. Consider the expression and angle that best convey the emotion you want to capture.
Q: Can I use multiple reference photos for one portrait?
A: Absolutely! Combining elements from different photos can help you create a more dynamic and personalized portrait.
Q: Should I copy the reference photo exactly?
A: No, while reference photos are helpful guides, it's essential to interpret them in your own style. Focus on understanding the underlying structure and translating that onto your canvas.
Q: How can I improve my skills in using reference photos?
A: Practice regularly with different photos, experiment with various angles and expressions, and consider creating a mood board to inspire your work.

Finalizing Your Portrait
When it comes to , the last touches can either elevate your work to a masterpiece or leave it feeling incomplete. It’s like putting the cherry on top of a sundae; it’s that final detail that can make all the difference. So, how do you ensure your portrait is as captivating as possible? Let’s dive into some essential steps to refine your artwork.
First, take a step back and observe your work from a distance. This will help you see any inconsistencies or areas that need improvement. Are the proportions still accurate? Is the likeness of your subject captured effectively? Sometimes, stepping away can give you a fresh perspective, revealing things you might have missed when you were engrossed in the details.
Next, consider the importance of highlights. Adding highlights can significantly enhance the three-dimensional quality of your portrait. Use a white pencil or an eraser to gently lift some graphite in areas where light hits the face, such as the forehead, cheekbones, and nose. This technique not only adds realism but also draws the viewer’s eye to the most expressive parts of the face.
Another critical aspect is correcting any mistakes. Don’t be afraid to make adjustments. If something feels off, trust your instincts and fix it. You might need to blend certain areas or redefine lines to achieve the desired clarity. Using a blending stump or your fingers can help smooth out harsh lines and create a more cohesive look.
Lastly, once you’re satisfied with your portrait, it’s time to think about presentation. You could frame your artwork or mount it on a board. This not only protects your work but also enhances its visual appeal. Consider the following options:
- Framing: Choose a frame that complements your portrait without overpowering it.
- Mounting: Mounting on a sturdy backing can make your portrait look more professional.
- Display: Think about where you want to showcase your art; lighting can make a big difference.
In conclusion, finalizing your portrait is a rewarding process that requires careful attention to detail. By adding highlights, correcting mistakes, and considering how to present your work, you can transform a good portrait into an exceptional one. Remember, every stroke counts, and the final touches are what will make your portrait truly shine.
Q: How do I know when my portrait is finished?
A: A portrait is finished when you feel satisfied with the likeness and overall composition. Stepping back to view it from a distance can help you make this decision.
Q: What should I do if I make a mistake while drawing?
A: Mistakes can be corrected! Use an eraser to lift graphite or adjust your lines with a blending stump to smooth out any errors.
Q: How can I enhance the emotions in my portrait?
A: Focus on capturing subtle changes in facial expressions and add details like highlights to emphasize features that convey emotion.
Q: What materials are best for final touches?
A: High-quality pencils for fine details, blending stumps for smooth transitions, and a good eraser for highlights and corrections are essential for finalizing your portrait.
Frequently Asked Questions
-
What are the basic facial proportions I should know for drawing portraits?
Understanding facial proportions is essential for creating realistic portraits. Typically, the face can be divided into equal thirds: the top third from the hairline to the eyebrows, the middle third from the eyebrows to the bottom of the nose, and the bottom third from the nose to the chin. Additionally, the eyes are usually positioned halfway down the head, and the width of the face is generally five eye widths across.
-
What materials are best for portrait drawing?
Choosing the right materials can greatly enhance your portrait drawing experience. Commonly used materials include graphite pencils (ranging from H to B for different shading), smooth drawing paper, and blending stumps. Some artists also prefer charcoal for its rich, dark lines and ability to blend easily, while others might use colored pencils or pastels for more vibrant works.
-
How can I improve my sketching techniques for portraits?
Improving your sketching techniques takes practice and patience. Start with gesture drawing to capture the overall pose and movement of your subject. Use light, loose lines to establish the basic shapes before refining details. Contour drawing can also help you focus on the outlines and structure of the face, making it easier to capture likenesses.
-
What’s the best way to capture expressions and emotions in portraits?
Capturing expressions is all about observation. Pay attention to subtle changes in the face, such as the position of the eyebrows, the curve of the mouth, and the tension in the forehead. Practice drawing different emotions by studying reference images or live subjects, and remember that even slight alterations can convey a significant emotional shift.
-
What shading techniques should I use to add depth to my portraits?
Shading is crucial for creating dimension in your portraits. Techniques like hatching (drawing parallel lines) and cross-hatching (intersecting lines) are effective for building up values. Blending with a stump or your fingers can create smooth transitions between light and shadow, while stippling (using dots) can add texture and detail.
-
How do I draw portraits from different angles?
Drawing from different angles can be challenging, but it’s also rewarding. Start by understanding the basic structure of the head and how features shift with perspective. Use reference photos or live models to practice, and break down the face into simple shapes to maintain proportion and likeness, regardless of the angle.
-
How can I effectively use reference photos for my portraits?
Reference photos are invaluable for artists. When selecting a photo, look for clear lighting and expressions that inspire you. Study the details, such as shadows and highlights, and don’t be afraid to adjust features to fit your artistic style. Remember, a reference photo is a guide, not a strict rule!
-
What steps should I take to finalize my portrait?
Finalizing your portrait involves several key steps. Start by reviewing your work for any mistakes or areas needing refinement. Add highlights to enhance features and create depth. Finally, consider how you want to present your portrait, whether it’s framing it, adding a background, or simply signing your name to finish it off.


