5 Simple Exercises to Improve Your Drawing Skills
This article explores five effective exercises designed to enhance your drawing abilities, focusing on techniques that can be practiced by artists of all skill levels to foster creativity and precision. Whether you're a beginner or a seasoned artist, these exercises will help you tap into your artistic potential and elevate your skills to new heights. So, grab your sketchbook and let’s dive into the world of drawing!
Gesture drawing is a dynamic exercise that captures the essence of a subject's movement. It helps artists develop a sense of proportion and fluidity in their sketches, making their drawings more lifelike. Imagine trying to catch a fleeting moment in time; that's precisely what gesture drawing allows you to do! By focusing on the overall form and movement rather than the details, you can create sketches that are vibrant and full of life.
Contour drawing emphasizes the outline of subjects, encouraging artists to observe shapes and lines closely. This exercise hones observational skills and enhances the ability to depict form without relying on shading or color. Think of it as tracing the very essence of what you see—each line telling a story. As you practice, you'll find that your ability to capture the world around you improves dramatically.
In blind contour drawing, artists sketch a subject without looking at the paper. This technique fosters a deeper connection with the subject and encourages spontaneity, often resulting in unique and expressive outcomes. It's like dancing with your pencil—freeing and exhilarating! You might be surprised at what emerges from your subconscious when you let go of the need for perfection.
Blind contour drawing enhances hand-eye coordination and allows artists to focus on the subject rather than the final product, leading to more authentic representations and freeing up creative expression. Many artists report feeling liberated after practicing this technique, as it encourages them to embrace imperfections and explore new styles.
Artists may struggle with blind contour drawing initially, often feeling frustrated by the results. Understanding common pitfalls can help improve technique and encourage perseverance in mastering this exercise. Remember, the goal is not to create a masterpiece but to connect with your subject. Embrace the journey, and you'll see improvement over time!
Continuous line drawing involves creating a drawing without lifting the pencil from the paper. This technique promotes fluidity and encourages artists to think about the relationships between different elements in their compositions. It's a fantastic way to challenge yourself and see your subjects in a new light. You’ll be amazed at how much more you notice when you’re forced to keep your pencil moving!
Mastering shading is crucial for adding depth and dimension to drawings. Practicing various shading techniques can enhance an artist's ability to create realistic and three-dimensional representations of subjects. Just as a sculptor shapes their masterpiece, shading allows you to bring your drawings to life. The right techniques can transform a flat image into a captivating work of art.
Hatching and cross-hatching are fundamental shading techniques that use parallel lines to create texture and depth. Learning these methods allows artists to depict light and shadow effectively in their work. Picture a light source casting shadows; mastering these techniques will enable you to replicate that effect on paper, adding realism to your art.
Blending techniques, such as using a tortillon or your finger, enable artists to achieve smooth transitions between light and dark areas. Mastering blending can significantly enhance the realism of a drawing. It's like mixing colors on a palette—finding the perfect balance can make all the difference in the final outcome.
Drawing still life compositions allows artists to practice observation and composition skills. By arranging everyday objects, artists can focus on capturing light, shadow, and texture, leading to improved drawing proficiency. Think of it as setting up a mini stage for your artistic expression—each object contributing to the overall story you want to tell.
Selecting diverse objects for still life drawing can challenge artists and encourage creativity. A well-chosen arrangement can enhance the learning experience and provide valuable practice opportunities. Consider mixing textures, shapes, and colors to create a dynamic composition that will keep you engaged.
Understanding composition techniques, such as the rule of thirds, can elevate still life drawings. Applying these principles helps artists create balanced and visually appealing arrangements in their artwork. A well-composed piece is like a symphony—each element working together to create harmony and interest.
Incorporating daily sketching into your routine can significantly improve drawing skills. Regular practice fosters creativity, sharpens observation, and builds confidence, making it an essential habit for aspiring artists. Think of it as a workout for your artistic muscles; the more you practice, the stronger you become!
Setting specific goals for daily sketching can enhance focus and motivation. Whether it’s drawing a certain number of sketches per week or exploring new subjects, clear objectives can drive improvement. Goals give you a roadmap, guiding you on your artistic journey and helping you track your progress.
Maintaining a sketchbook serves as a personal record of progress and experimentation. It encourages artists to explore different styles and techniques, providing a safe space for creative exploration and growth. Your sketchbook is your playground—filled with ideas, doodles, and the evolution of your artistic voice.
Q: How often should I practice drawing?
A: Aim for daily practice, even if it's just for a few minutes. Consistency is key to improvement.
Q: What materials do I need to start drawing?
A: All you need is a pencil and paper to get started. As you progress, you can explore different tools.
Q: Can I improve my drawing skills if I'm a beginner?
A: Absolutely! With regular practice and dedication, anyone can improve their drawing skills.
Gesture Drawing
is a dynamic and exhilarating exercise that captures the very essence of a subject's movement. Think of it as a dance between your pencil and the subject you are observing. This technique is not just about drawing; it's about feeling the rhythm and flow of the forms in front of you. By engaging in gesture drawing, artists can develop a keen sense of proportion and fluidity, which ultimately makes their sketches come alive. Imagine sketching a dancer mid-leap or a dog in full sprint—these fleeting moments are what gesture drawing aims to encapsulate.
One of the beauties of gesture drawing is its accessibility. Whether you're a seasoned artist or just starting your creative journey, this exercise can be tailored to fit your skill level. You can practice with a variety of subjects, from live models to inanimate objects, allowing for a rich exploration of movement and form. The key is to keep your lines loose and your focus on capturing the overall shape and movement rather than getting bogged down in details.
To get started, you might want to consider the following tips:
- Warm-Up: Before diving into your gesture drawing, take a few moments to loosen up your hand and wrist. Simple wrist circles or finger stretches can help you feel more fluid.
- Set a Timer: Limiting your drawing time to just a few minutes per pose can encourage you to work quickly and instinctively. Try 30 seconds to 2 minutes for each gesture.
- Focus on Movement: Rather than fixating on details, concentrate on the overall pose and how the body moves through space. This will help you capture the essence of your subject.
As you practice gesture drawing, you may notice a significant improvement in your overall drawing skills. You'll find that your ability to observe and replicate movement becomes sharper, enhancing your artistic expression. Plus, it’s a fantastic way to warm up before tackling more detailed work. So grab your sketchbook, find a subject, and let the lines flow!
The advantages of incorporating gesture drawing into your routine are numerous. Here are just a few:
- Improved Observation Skills: Gesture drawing trains your eye to notice the nuances of movement and form.
- Enhanced Creativity: The freedom of movement allows your creativity to flourish without the constraints of perfection.
- Increased Confidence: Regular practice can lead to a more confident approach to drawing, making you less afraid to experiment.
In conclusion, gesture drawing is more than just an exercise; it's a gateway to understanding the world around you through the lens of art. So why not give it a try? You might just find that it transforms your approach to drawing in ways you never expected.
Contour Drawing
Contour drawing is an exciting and essential exercise for artists at any level. It focuses on the outlines and edges of a subject, allowing you to really hone in on the shapes and forms that make up your subject. Imagine tracing the silhouette of a dancer as they leap through the air; the lines you draw capture not just the physical form but also the energy and movement of the moment. This technique is all about observation and precision, encouraging artists to engage deeply with what they see.
When practicing contour drawing, you’ll find that it’s not just about replicating what’s in front of you. It’s about developing a keen eye for detail and understanding the relationships between different elements of your subject. By concentrating on the outlines, you can create a drawing that is both accurate and expressive. This exercise is particularly beneficial for beginners, as it helps build a solid foundation in drawing fundamentals.
One of the key benefits of contour drawing is its ability to improve your observational skills. You may find yourself noticing details you previously overlooked, such as the subtle curves of an object or the way light interacts with its surface. As you practice, you’ll also develop a better understanding of proportions and spatial relationships, which are crucial for creating lifelike representations.
To get started with contour drawing, you don’t need much—just a sketchbook and a pencil! Here’s how you can begin:
- Choose a subject: This could be anything from a still life arrangement to a live model.
- Focus on the outline: Look closely at the edges and contours of your subject, and begin to draw them without lifting your pencil.
- Keep your eyes on the subject: Try not to look at your paper as you draw; this will help you capture the essence of your subject more freely.
As you practice, remember that contour drawing is not about perfection. Embrace the unique lines and shapes that emerge, as they often carry a sense of spontaneity and character. Over time, you’ll notice improvements in your ability to convey form and depth, paving the way for more complex drawing techniques.
Contour drawing offers numerous benefits that can enhance your overall artistic journey. Here are some of the most significant advantages:
- Enhanced Observation: You’ll train your eyes to see more than just the surface, noticing intricate details and relationships.
- Improved Hand-Eye Coordination: By focusing on your subject, your hand and eyes will learn to work in harmony, leading to more fluid and confident strokes.
- Increased Confidence: As you see your skills improve, you’ll feel more confident in your abilities, encouraging you to tackle more challenging subjects.
In conclusion, contour drawing is a fantastic way to sharpen your drawing skills while fostering a deeper connection with your subjects. Whether you’re a beginner or a seasoned artist, this technique can breathe new life into your practice. So grab your sketchbook, find a subject that inspires you, and let your pencil dance across the page!
Q: How often should I practice contour drawing?
A: It's beneficial to practice contour drawing regularly. Aim for a few sessions each week to see significant improvements.
Q: Can I use color in contour drawing?
A: Contour drawing traditionally focuses on outlines, but you can certainly add color later if you wish to enhance your drawings.
Q: What materials do I need for contour drawing?
A: All you need is a pencil and paper! However, you can also experiment with pens or charcoal for different effects.
Blind Contour Drawing
Blind contour drawing is a fascinating and liberating exercise that pushes the boundaries of traditional sketching. Imagine trying to capture the essence of a subject without ever glancing at your paper. Sounds daunting, right? But that's exactly what makes this technique so exhilarating! By focusing entirely on the subject, artists can develop a profound connection with what they're observing. It's like diving into a pool of creativity where the water is your subject, and you're swimming without a lifeguard. This exercise encourages spontaneity and often leads to unexpected and expressive outcomes that can surprise even the artist themselves.
So, how does it work? The key is to maintain your gaze on the subject while allowing your hand to move freely across the paper. Your pencil becomes an extension of your eye, tracing the contours of the object as you observe it. This method not only enhances your observational skills but also helps you break free from the constraints of perfectionism. You might find that the results are not what you expected, but that's part of the charm! Embrace the quirks and imperfections; they often lead to unique artistic expressions.
To help you get started, here are some tips for successful blind contour drawing:
- Start Simple: Begin with simple shapes or objects. A cup or a fruit can be a great starting point.
- Take Your Time: Don’t rush! Allow yourself to really observe the subject.
- Practice Regularly: The more you practice, the more comfortable you’ll become with this technique.
One of the most rewarding aspects of blind contour drawing is the way it enhances your hand-eye coordination. By focusing solely on the subject, you train your brain to connect what you see with the movements of your hand. This skill will not only improve your contour drawing but will also benefit your overall artistic abilities.
However, it's important to recognize that many artists encounter challenges when first attempting blind contour drawing. You might feel frustrated by the results, especially if they don't match your expectations. But remember, every artist has been there! Understanding common mistakes can help you improve. For instance, many beginners tend to look back at their drawing too soon, which can disrupt the flow and lead to more rigid shapes. Instead, try to resist the urge to peek and trust the process.
In summary, blind contour drawing is more than just an exercise; it's a journey into the heart of observation and creativity. By practicing this technique, you'll not only enhance your drawing skills but also discover a new way to express your artistic voice. So grab your pencil, find a subject, and let your hand dance across the paper without looking back!

Benefits of Blind Contour
Blind contour drawing offers a plethora of benefits that can significantly enhance your artistic abilities. First and foremost, this technique sharpens your hand-eye coordination. By forcing you to focus solely on the subject without glancing at your paper, you train your brain to connect what you see with your hand movements, leading to more accurate representations over time.
Another remarkable advantage of blind contour drawing is the way it encourages spontaneity. Since you are not fixated on the outcome, you can let go of the pressure to produce a "perfect" drawing. This freedom allows your creativity to flow, often resulting in unique and expressive artworks that might surprise you. Think of it as dancing with your pencil—sometimes, the best moves come when you’re not overthinking the choreography!
Moreover, blind contour drawing fosters a deeper connection with your subject. When you draw without looking at your paper, you become more attuned to the details and nuances of what you're observing. This heightened awareness can translate into your other artistic endeavors, enriching your overall drawing experience. It’s similar to tuning into a song; the more you listen, the more you notice the subtle harmonies and rhythms.
Here’s a quick overview of the key benefits:
- Improved Hand-Eye Coordination: Enhances your ability to translate what you see onto paper.
- Increased Spontaneity: Reduces the pressure of perfection, allowing for more creative expression.
- Deeper Connection to Subjects: Encourages a more profound observation of details, enriching your artistic skills.
In summary, incorporating blind contour drawing into your practice is not just about producing a drawing; it’s about transforming your entire approach to art. You’ll find that the skills you develop through this exercise will serve you well in all your artistic pursuits, making it a valuable addition to your repertoire.
Q: What materials do I need for blind contour drawing?
A: All you need is a pencil and some paper. You can also use pens or markers for a different effect.
Q: How long should I practice blind contour drawing?
A: Start with short sessions of about 10-15 minutes and gradually increase the duration as you become more comfortable with the technique.
Q: Can I use blind contour drawing for any subject?
A: Absolutely! You can apply this technique to anything from still life to portraits, and even landscapes.
Q: Will my drawings look good?
A: The goal of blind contour drawing is not to create a "good" drawing but to improve your skills and understanding of form. Embrace the imperfections!

Common Mistakes
This article explores five effective exercises designed to enhance your drawing abilities, focusing on techniques that can be practiced by artists of all skill levels to foster creativity and precision.
Gesture drawing is a dynamic exercise that captures the essence of a subject's movement. It helps artists develop a sense of proportion and fluidity in their sketches, making their drawings more lifelike.
Contour drawing emphasizes the outline of subjects, encouraging artists to observe shapes and lines closely. This exercise hones observational skills and enhances the ability to depict form without relying on shading or color.
In blind contour drawing, artists sketch a subject without looking at the paper. This technique fosters a deeper connection with the subject and encourages spontaneity, often resulting in unique and expressive outcomes.
Blind contour drawing enhances hand-eye coordination and allows artists to focus on the subject rather than the final product, leading to more authentic representations and freeing up creative expression.
When diving into blind contour drawing, many artists encounter some common mistakes that can hinder their progress. One of the biggest challenges is overthinking the process. Artists often become so focused on the outcome that they lose sight of the purpose of the exercise, which is to connect with the subject and capture its essence. Instead of worrying about how the final drawing will look, it’s crucial to embrace the spontaneity of the moment.
Another frequent pitfall is lifting the pencil from the paper. This can break the flow of the drawing, leading to disjointed lines and an incomplete representation of the subject. Remember, the goal here is to create a continuous line that reflects the movement and form of what you’re observing. To help overcome this, try to keep your pencil moving as you observe the subject, allowing your hand to follow the contours without interruption.
Additionally, many artists struggle with accepting imperfections. It’s easy to feel frustrated when the results don’t match your expectations, but this exercise is all about exploration and growth. Embrace the quirks and oddities of your drawings; they can often lead to unexpected and delightful outcomes. Remember, every artist has their unique style, and these imperfections can become part of your artistic identity.
Continuous line drawing involves creating a drawing without lifting the pencil from the paper. This technique promotes fluidity and encourages artists to think about the relationships between different elements in their compositions.
Mastering shading is crucial for adding depth and dimension to drawings. Practicing various shading techniques can enhance an artist's ability to create realistic and three-dimensional representations of subjects.
Hatching and cross-hatching are fundamental shading techniques that use parallel lines to create texture and depth. Learning these methods allows artists to depict light and shadow effectively in their work.
Blending techniques, such as using a tortillon or finger, enable artists to achieve smooth transitions between light and dark areas. Mastering blending can significantly enhance the realism of a drawing.
Drawing still life compositions allows artists to practice observation and composition skills. By arranging everyday objects, artists can focus on capturing light, shadow, and texture, leading to improved drawing proficiency.
Selecting diverse objects for still life drawing can challenge artists and encourage creativity. A well-chosen arrangement can enhance the learning experience and provide valuable practice opportunities.
Understanding composition techniques, such as the rule of thirds, can elevate still life drawings. Applying these principles helps artists create balanced and visually appealing arrangements in their artwork.
Incorporating daily sketching into your routine can significantly improve drawing skills. Regular practice fosters creativity, sharpens observation, and builds confidence, making it an essential habit for aspiring artists.
Setting specific goals for daily sketching can enhance focus and motivation. Whether it’s drawing a certain number of sketches per week or exploring new subjects, clear objectives can drive improvement.
Maintaining a sketchbook serves as a personal record of progress and experimentation. It encourages artists to explore different styles and techniques, providing a safe space for creative exploration and growth.
- How often should I practice drawing?
Consistency is key! Aim for daily practice, even if it's just for 15-30 minutes. - What materials do I need to start drawing?
All you need is a sketchbook and a pencil to begin. As you progress, you can explore different mediums. - Can I improve my drawing skills as an adult?
Absolutely! Drawing is a skill that can be developed at any age. The more you practice, the better you will become. - What if I feel frustrated with my progress?
It's normal to feel this way. Remember that every artist goes through ups and downs. Embrace the journey and keep practicing!
Continuous Line Drawing
Continuous line drawing is a fascinating technique that can transform the way you perceive and create art. Imagine your pencil gliding across the paper, never lifting, as if it were a dancer performing a fluid ballet. This method not only encourages a sense of flow but also helps you to see the connections between different elements of your subject. By keeping your pencil on the page, you cultivate a deeper understanding of shapes and forms, leading to more cohesive and dynamic compositions.
This exercise is particularly beneficial for artists looking to enhance their observational skills. When you engage in continuous line drawing, you are forced to truly observe the subject before you. Your mind begins to map out the relationships between various parts, helping you to capture the essence of the subject in a way that is both unique and expressive. Think of it as weaving a tapestry with your pencil, where each stroke adds to the overall narrative of the piece.
One of the most exciting aspects of continuous line drawing is its unpredictability. Because you cannot lift your pencil, you might find yourself creating unexpected shapes and forms that you wouldn’t have considered otherwise. This spontaneity can lead to delightful surprises in your work, making every drawing an adventure. Whether you are sketching a still life, a figure, or an abstract concept, the continuous line approach can add a layer of depth and creativity to your art.
To get started with continuous line drawing, consider the following tips:
- Choose a Simple Subject: Start with something uncomplicated, like a fruit or a simple object. This allows you to focus on the technique rather than getting overwhelmed by details.
- Limit Your Time: Set a timer for 5 to 10 minutes. This constraint can help you focus and encourage quick thinking.
- Embrace Mistakes: Remember, the goal is not perfection. Allow your lines to wander and explore; sometimes, the most beautiful aspects of a drawing come from happy accidents.
As you practice continuous line drawing, you will likely notice improvements in your hand-eye coordination and your ability to visualize forms in three dimensions. This technique can serve as a powerful foundation for more complex drawing styles, allowing you to break down subjects into manageable parts. Over time, you will find that your overall drawing skills improve, making you a more versatile and confident artist.
Q: What materials do I need for continuous line drawing?
A: You can use any drawing materials you prefer, such as pencils, pens, or markers. Just ensure that you have a smooth surface to work on, like drawing paper or a sketchbook.
Q: Can I use continuous line drawing for complex subjects?
A: Absolutely! While starting with simple subjects is advisable, you can gradually incorporate more complex forms as you become comfortable with the technique.
Q: How often should I practice continuous line drawing?
A: Regular practice is key. Try to incorporate it into your routine a few times a week to see significant improvements in your drawing skills.

Shading Techniques
Mastering shading is crucial for adding depth and dimension to your drawings. Think of shading as the secret ingredient that transforms a flat image into a lifelike representation. When you can effectively manipulate light and shadow, your drawings will pop off the page, captivating viewers and showcasing your artistic prowess. Whether you’re sketching a simple object or a complex scene, understanding shading techniques can significantly enhance your work.
There are various shading techniques that artists can employ, each offering unique effects and styles. Among the most fundamental are hatching and cross-hatching. Hatching involves drawing closely spaced parallel lines to create shadows, while cross-hatching adds another layer of lines in a perpendicular direction to intensify the shading. This method allows you to depict light and shadow effectively, giving your drawings a sense of volume and realism. Imagine creating a sphere; without shading, it would appear flat, but with the right technique, it can look three-dimensional.
| Technique | Description | Usage |
|---|---|---|
| Hatching | Drawing parallel lines to create shading | Used for light shadows |
| Cross-Hatching | Overlapping hatching lines in different directions | Used for darker shadows |
| Blending | Soothing transitions between light and dark | Used for smooth surfaces |
Another essential technique is blending. This method involves using tools like a tortillon (a rolled paper tool) or even your finger to create smooth transitions between light and dark areas. Blending can significantly enhance the realism of a drawing, making textures appear softer and more lifelike. For instance, if you're drawing a human face, blending can help you achieve that natural skin tone by softening harsh lines and creating subtle gradations.
Moreover, practicing different shading techniques can help you discover your unique style. You might find that you prefer the boldness of hatching or the softness of blending. The key is to experiment and see what resonates with you. Remember, every artist has their own journey, and finding your voice through shading can be incredibly rewarding.
As you delve deeper into shading, it’s essential to keep in mind the direction of light. Observing how light interacts with different surfaces will enhance your ability to create convincing shadows. Ask yourself questions like, “Where is the light coming from?” and “How does it affect the form of the object?” This awareness will not only improve your shading skills but also elevate your overall drawing technique.
In conclusion, mastering shading techniques is a fundamental step in your artistic journey. By incorporating hatching, cross-hatching, and blending into your practice, you’ll add depth and dimension to your drawings, making them more engaging and lifelike. So grab your pencils, start experimenting, and watch as your art transforms before your eyes!
- What is the best technique for beginners? Hatching is often recommended for beginners as it is simple to grasp and helps in understanding light and shadow.
- Can I use different tools for shading? Absolutely! Pencils, charcoal, and even ink can be used for various shading techniques. Experiment with what feels comfortable for you.
- How can I improve my shading skills? Regular practice, studying light sources, and observing how shadows fall on objects can significantly enhance your shading abilities.
Hatching and Cross-Hatching
Hatching and cross-hatching are two fundamental techniques that can elevate your drawing game from basic to breathtaking. These methods involve using a series of parallel lines to create the illusion of depth and texture in your artwork. Imagine you're painting a sunset; the way you layer lines can mimic the way light fades and shadows deepen. By mastering these techniques, you can transform flat images into dynamic representations that breathe life into your sketches.
Hatching is the practice of drawing closely spaced parallel lines to convey shading. The closer the lines are to each other, the darker the area appears, while wider spaces create lighter tones. It’s like building a bridge with lines—each stroke adds strength and dimension to your drawing. Cross-hatching takes it a step further by layering another set of lines over the first, usually at an angle. This crisscross pattern allows for even more depth and complexity, much like weaving a tapestry where each thread adds to the overall design.
To give you a clearer understanding, here’s a simple table that illustrates the differences between hatching and cross-hatching:
| Technique | Description | Effect |
|---|---|---|
| Hatching | Using parallel lines to create shading. | Creates a smooth gradient effect. |
| Cross-Hatching | Layering lines at angles over existing hatching. | Enhances depth and texture. |
As you practice these techniques, it’s essential to pay attention to the direction and spacing of your lines. Different angles can evoke different feelings; for instance, diagonal lines might suggest movement or tension, while horizontal lines can impart calmness. Experimenting with line weight—making some lines thicker and others thinner—will also add variety and interest to your work. Remember, art is about exploration, so don’t hesitate to let your creativity flow!
Incorporating hatching and cross-hatching into your drawings not only improves your technical skills but also enhances your ability to observe and interpret the world around you. As you become more attuned to light and shadow, you'll find that these techniques will allow you to express your artistic vision more vividly. So grab your pencil, start practicing, and watch your drawings come to life!
- What is the difference between hatching and cross-hatching?
Hatching involves drawing parallel lines to create shading, while cross-hatching layers lines at angles to enhance depth. - Can I use hatching and cross-hatching with different mediums?
Absolutely! These techniques can be applied with pencils, ink, charcoal, and even digital art tools. - How can I improve my hatching technique?
Practice consistently, experiment with line spacing and angles, and observe how light interacts with objects in real life.

Blending Techniques
Blending techniques are essential for artists who want to achieve smooth transitions between light and dark areas in their drawings. Mastering these techniques can significantly enhance the realism and depth of your artwork. Imagine painting a sunset; the way the colors merge seamlessly into one another creates a breathtaking view. Similarly, in drawing, blending allows you to replicate the subtle nuances of light and shadow.
There are several methods to blend effectively, each with its own unique results. One of the most popular tools for blending is the tortillon, a tightly rolled piece of paper that can be used to smudge graphite or charcoal. When you glide a tortillon over your drawing, it softens the lines and creates a smooth gradient that mimics the softness of skin or the fluffy texture of clouds. Additionally, your fingers can be an excellent blending tool. The natural oils in your skin can help achieve a softer look, but be cautious; too much oil can alter the texture of the paper.
Here’s a quick overview of some common blending techniques:
- Tortillon Blending: Use a tortillon to blend areas of your drawing for a smooth finish.
- Finger Blending: Gently rub your finger over the drawing to create soft transitions.
- Brush Blending: A soft brush can be used to blend charcoal or pastel, providing a different texture.
- Wet Blending: For mediums like watercolor or ink, using water can help blend colors seamlessly.
Understanding how to control pressure while blending is also crucial. Applying light pressure will yield softer results, while applying more pressure can create darker, more defined areas. Experimenting with different tools and techniques will allow you to find what works best for your style. Remember, practice makes perfect! The more you blend, the more intuitive the process will become.
- What is the best tool for blending in drawing?
The best tool often depends on the medium you're using. For graphite, a tortillon or blending stump is ideal, while for pastels, a soft brush works well. - Can I use my fingers to blend?
Yes, your fingers can be an effective blending tool. Just be cautious about the oils from your skin affecting the paper. - How do I avoid over-blending?
To avoid over-blending, start with light pressure and gradually increase it. Take breaks to step back and assess your work. - Is blending necessary for all drawings?
No, blending is not necessary for all styles. It depends on the effect you want to achieve. Some artists prefer a more graphic approach without blending.
Still Life Drawing
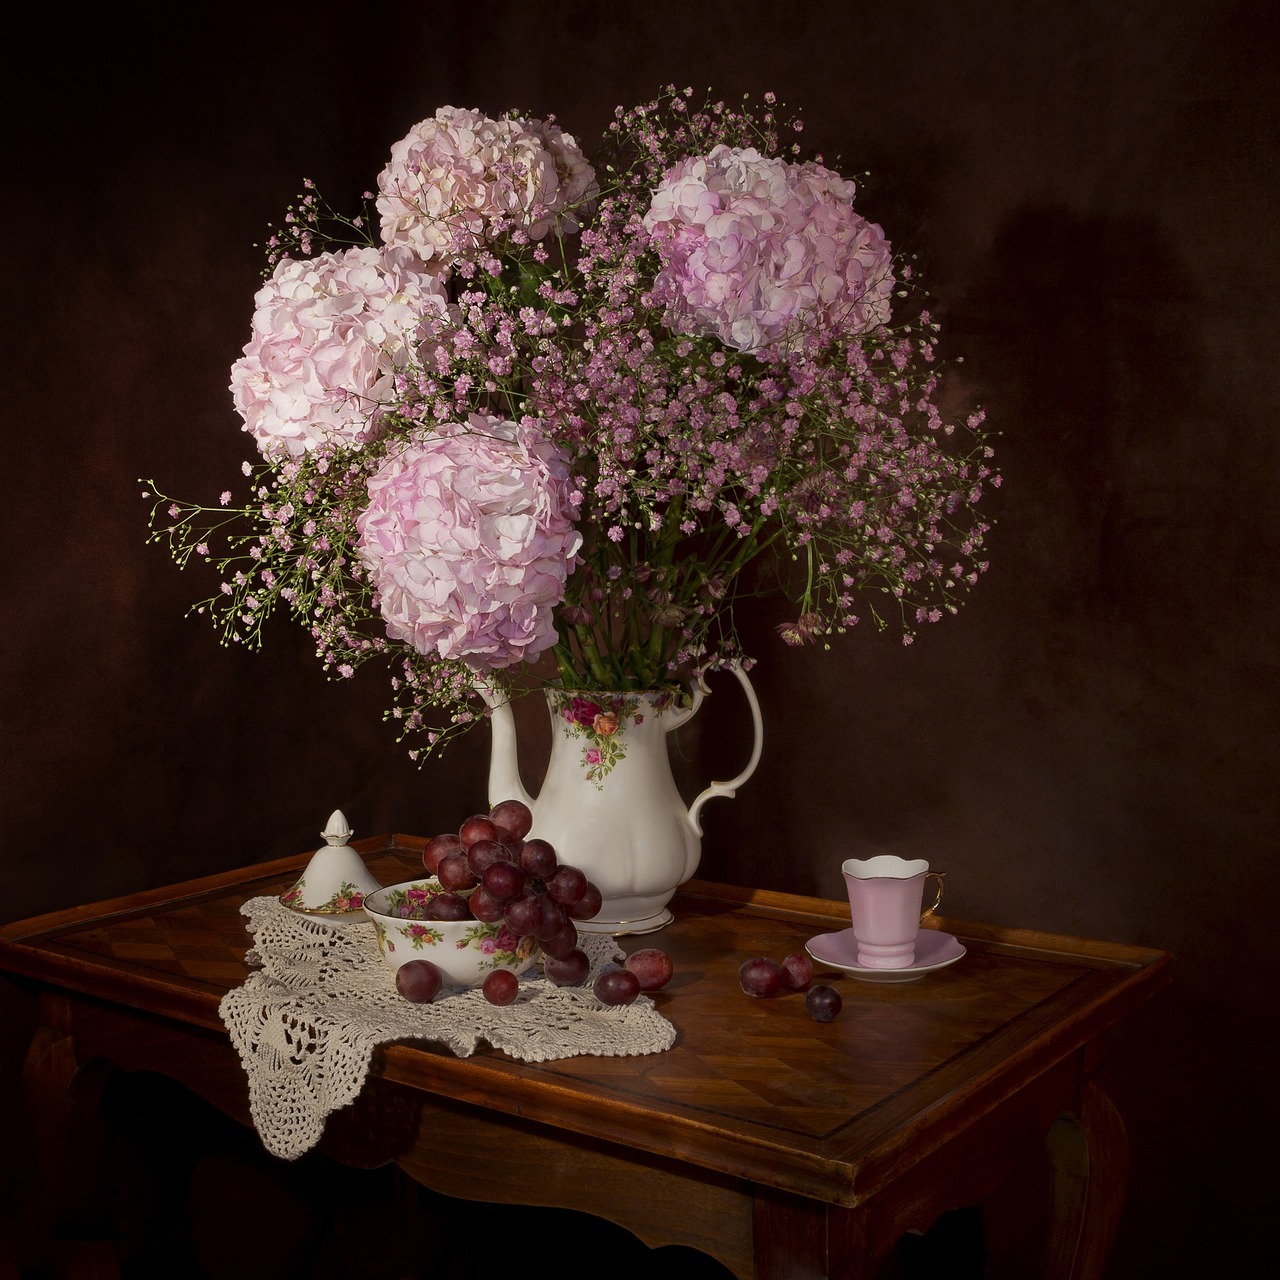
Drawing still life compositions is an incredible way to enhance your observation and composition skills. When you arrange everyday objects, you not only sharpen your ability to capture light and shadow but also improve your understanding of texture and form. Imagine setting up a simple scene with a vase, some fruit, and a piece of fabric; this seemingly mundane setup can transform into a captivating work of art. The beauty of still life is that it allows you to control the environment and focus on the intricate details that often go unnoticed in a bustling world.
When selecting objects for your still life drawing, consider choosing a variety of shapes, sizes, and textures. This diversity can challenge your artistic eye and push your creativity to new heights. For instance, pairing a shiny apple with a rough piece of burlap can create a striking contrast, making your drawing more dynamic. Aim for an arrangement that tells a story or evokes a certain emotion, as this can add depth to your artwork and engage viewers on a more personal level.
Furthermore, understanding composition techniques is crucial in still life drawing. One popular method is the rule of thirds, which suggests dividing your canvas into a 3x3 grid. Placing your focal points along these lines or at their intersections can create a sense of balance and harmony in your drawing. By applying these principles, you can elevate your still life compositions from mere representations of objects to compelling visual narratives that captivate your audience.
Incorporating still life drawing into your practice routine can significantly enhance your overall drawing proficiency. It encourages you to slow down and observe your subjects closely, fostering a deeper understanding of how light interacts with different surfaces. So, grab your sketchbook, set up your still life, and let your creativity flow!
- What materials do I need for still life drawing?
Basic materials include a sketchbook, pencils, erasers, and a variety of objects for your still life setup. You can also use charcoal or colored pencils for added depth and interest.
- How do I choose objects for my still life?
Look for objects that have different shapes, textures, and colors. Consider how they interact with each other and what story you want to tell through your arrangement.
- Can still life drawing help improve my overall drawing skills?
Absolutely! Still life drawing hones your observational skills, helps you understand light and shadow, and enhances your ability to depict form and texture, all of which are essential skills for any artist.

Choosing Objects
When it comes to still life drawing, the choice of objects can make all the difference in your artistic journey. Selecting the right items not only challenges your skills but also ignites your creativity. Think of it as setting the stage for a performance; the right props can elevate the entire experience. So, how do you choose the perfect objects for your still life composition? Here are a few tips to guide you:
First, consider the variety of shapes, sizes, and textures. A diverse selection can create visual interest and complexity in your drawings. For instance, pairing smooth, round fruits with rough, angular objects like a wooden bowl can create a dynamic contrast. This not only makes your composition more engaging but also allows you to explore different shading techniques and textures.
Next, think about the theme of your still life. Are you aiming for a rustic, cozy vibe, or something more modern and sleek? Choosing objects that align with your theme can help convey a story or emotion in your artwork. For example, a collection of vintage kitchen utensils could evoke a sense of nostalgia, while a minimalist arrangement of geometric shapes might reflect contemporary aesthetics.
Additionally, pay attention to the lighting conditions when selecting your objects. Natural light can dramatically change the appearance of your subjects, highlighting different features and creating shadows that add depth to your drawings. Experimenting with various lighting setups can lead to fascinating results, so don’t hesitate to move your arrangement around until you find the perfect setup.
Finally, remember that the objects you choose should be meaningful to you. Art is a personal expression, and incorporating items that resonate with your experiences or interests can add a layer of authenticity to your work. Whether it’s a cherished family heirloom or a favorite piece of fruit, these connections will shine through in your drawings.
In summary, choosing objects for your still life drawing is an exciting opportunity to express your creativity. By focusing on variety, theme, lighting, and personal significance, you can create compelling compositions that challenge your skills and enrich your artistic journey.
- What types of objects are best for still life drawing? Aim for a mix of shapes, textures, and sizes to create visual interest.
- How can lighting affect my still life drawing? Lighting can change the appearance of objects and create shadows, adding depth to your artwork.
- Should I choose objects that have personal significance? Yes! Personal connections can enhance the authenticity and emotion in your drawings.

Composition Techniques
When it comes to drawing, composition is everything. It’s the backbone of your artwork, the framework that holds everything together. Think of it like the foundation of a house; without a solid base, everything else can crumble. One of the most effective ways to enhance your compositions is by applying the rule of thirds. Imagine dividing your canvas into a 3x3 grid, like a tic-tac-toe board. The idea is to place the most important elements of your drawing along these lines or at their intersections. This technique naturally draws the viewer's eye and creates a sense of balance.
Another essential composition technique is leading lines. These are lines within your drawing that guide the viewer's eye toward the focal point. Think of a winding road that leads to a beautiful sunset; it invites you to follow it. You can create leading lines through various elements in your drawing, such as roads, rivers, or even the way a person’s gaze is directed. This not only adds depth but also keeps the viewer engaged with your artwork.
Additionally, consider the concept of framing. Just like a picture frame enhances a photograph, using natural elements in your drawing to frame the main subject can elevate your work. This can be achieved by incorporating branches, windows, or even shadows that enclose the focal point, making it pop out more vividly. It’s about creating a visual pathway that encourages the viewer to focus on the subject.
Don’t forget about negative space! This refers to the empty space around your subject. It’s just as important as the subject itself. By paying attention to negative space, you can create a sense of balance and harmony in your drawing. Sometimes, less is more. For instance, a simple still life with a single apple on a table can be striking when the surrounding space is thoughtfully considered.
To further illustrate these techniques, here’s a quick comparison table:
| Technique | Description |
|---|---|
| Rule of Thirds | Divides the canvas into a 3x3 grid to position focal points. |
| Leading Lines | Uses lines to guide the viewer's eye to the focal point. |
| Framing | Incorporates elements to create a frame around the subject. |
| Negative Space | Focuses on the space around the subject to create balance. |
Incorporating these composition techniques into your drawing practice can significantly elevate your artwork. So, the next time you sit down to sketch, remember to consider how you can apply these principles. They may seem simple, but their impact can be profound, transforming your drawings from ordinary to extraordinary!
Q: How do I know if my composition is effective?
A: An effective composition draws the viewer's eye and creates a sense of balance. You can test this by stepping back and looking at your drawing from a distance. If your eye is naturally drawn to the focal point and the overall arrangement feels harmonious, you’re on the right track!
Q: Can I break the rules of composition?
A: Absolutely! While these techniques are helpful, art is also about personal expression. Feel free to experiment and find what works best for you. Sometimes breaking the rules can lead to exciting and unique results.
Q: How can I practice these composition techniques?
A: You can practice by creating quick sketches using the techniques discussed. Set a timer for 10 minutes and focus on applying one composition technique at a time. This will help you internalize these concepts and improve your overall drawing skills.
Daily Sketching
Incorporating into your routine can significantly improve your drawing skills. Think of it as a workout for your artistic muscles; just like lifting weights builds physical strength, sketching daily hones your creativity and sharpens your observation skills. It's all about consistency! By dedicating even just a few minutes each day to sketching, you can see a remarkable transformation in your abilities over time.
Imagine waking up each morning and taking a moment to capture the world around you. Whether it's a quick sketch of your coffee cup, the view from your window, or even a doodle of your pet, every stroke helps you become more attuned to shapes, shadows, and forms. This routine not only enhances your technical skills but also builds your confidence as an artist. You might even find that the act of sketching becomes a form of meditation, allowing you to express your thoughts and feelings on paper.
Setting specific goals for your daily sketching can enhance your focus and motivation. Here are some ideas to consider:
- Draw a certain number of sketches each week.
- Explore new subjects or themes.
- Experiment with different styles or techniques.
These goals can give your practice direction and keep the process fresh and exciting. It’s essential to challenge yourself, but also to allow room for play and exploration. After all, art is as much about the journey as it is about the destination!
Maintaining a sketchbook serves as a personal record of your progress and experimentation. It's like a diary for your artistic journey, where you can track your growth over time. Each page can be a canvas for your thoughts, ideas, and sketches, allowing you to explore different styles and techniques without the pressure of perfection. In your sketchbook, mistakes are just stepping stones on the path to mastery.
Remember, the key to effective daily sketching is not just about quantity but also quality. Focus on enjoying the process and discovering new aspects of your creativity. So grab your pencil, find a comfortable spot, and let your imagination run wild!
Q: How long should I sketch each day?
A: Even 10-15 minutes of sketching daily can make a significant difference. The key is consistency!
Q: What should I sketch?
A: You can sketch anything that inspires you! Everyday objects, landscapes, or even abstract concepts are all great subjects.
Q: Do I need special materials to start sketching?
A: No, you don’t need fancy materials. A simple pencil and paper are sufficient to get started!
Q: How can I stay motivated to sketch daily?
A: Setting specific goals, joining art communities, or participating in challenges can help keep you motivated.

Setting Goals
Setting goals for your daily sketching practice is like drawing a roadmap for your artistic journey. Without a clear destination, it’s easy to feel lost or unmotivated. Think of goals as the guiding stars that keep your creativity aligned and focused. When you establish specific targets, you create a sense of purpose that can significantly enhance your overall progress. For instance, you might aim to complete a certain number of sketches each week or challenge yourself to explore new subjects. This not only keeps things exciting but also pushes you out of your comfort zone, which is where the real growth happens.
Moreover, breaking down your larger artistic aspirations into smaller, manageable goals can make the process less daunting. Consider setting daily, weekly, and monthly objectives. Daily goals could involve sketching for a set amount of time, while weekly goals might focus on completing a specific number of pieces or mastering a new technique. Monthly goals can serve as milestones to evaluate your growth and reassess your strategies. This structured approach not only makes your practice more effective but also allows you to celebrate small victories along the way, keeping your motivation high.
To help visualize your goals, you might find it useful to create a simple table or chart. Here’s an example of how you could structure your goal-setting:
| Time Frame | Goal | Progress |
|---|---|---|
| Daily | Sketch for 30 minutes | ____/30 mins |
| Weekly | Complete 5 sketches | ____/5 |
| Monthly | Master a new technique | Completed/Not Completed |
Don’t forget, flexibility is key! If you find that a particular goal isn’t resonating with you or feels overwhelming, it’s perfectly okay to adjust it. The aim is to keep your practice enjoyable and fulfilling. Remember, art is a personal journey, and your goals should reflect your unique aspirations and creative vision.
- How often should I sketch daily?
It depends on your schedule, but even 10-15 minutes a day can make a significant difference over time. - What materials do I need for sketching?
Start with basic materials like pencils, erasers, and sketch paper. As you progress, you can explore other mediums. - How do I stay motivated to sketch daily?
Set clear goals, keep your sketchbook visible, and remind yourself of the joy that drawing brings you. - What if I don’t see improvement?
Improvement takes time. Focus on the process rather than the outcome, and celebrate small achievements.

Keeping a Sketchbook
Maintaining a sketchbook is not just a practice; it's a journey into your personal artistic evolution. Think of it as your own private gallery where every page tells a story of your growth, experimentation, and creativity. A sketchbook serves multiple purposes: it’s a place to explore new ideas, refine your skills, and even document your daily life. Imagine capturing a fleeting moment or a random thought in a few strokes; that’s the magic of sketching!
One of the best aspects of keeping a sketchbook is the freedom it offers. There are no rules, no right or wrong ways to fill those pages. You can doodle, draw from life, or even paste in photos or other materials that inspire you. This flexibility can help you develop your unique style and voice as an artist. Plus, it’s a fantastic way to overcome creative blocks. When you’re feeling uninspired, flipping through your sketchbook can spark new ideas and reignite your passion for drawing.
To make the most of your sketchbook, consider these tips:
- Be Consistent: Try to sketch regularly, even if it’s just for a few minutes each day. Consistency builds habit and skill.
- Experiment Freely: Use your sketchbook as a playground. Test out new techniques, styles, or mediums without the pressure of creating a 'finished' piece.
- Document Your Progress: Occasionally, look back at older sketches. This reflection can be incredibly motivating as you see how far you’ve come.
In addition, think of your sketchbook as a record of your artistic journey. Each page can reflect your thoughts, feelings, and experiences at that moment in time. Whether it’s a quick sketch of a coffee cup or a detailed study of a landscape, every entry contributes to the tapestry of your artistic identity. Over time, you’ll find that these sketches not only improve your technical skills but also deepen your understanding of composition, light, and form.
Lastly, don’t forget to have fun! Your sketchbook is a private space meant for you to explore and enjoy the process of drawing. Embrace the imperfections and celebrate the mistakes; they are all part of your journey. So grab your favorite drawing tool, open that sketchbook, and let your creativity flow!
- How often should I sketch in my sketchbook?
It’s best to sketch regularly, even if it’s just a few minutes a day. The more you practice, the more your skills will improve!
- What should I include in my sketchbook?
Anything that inspires you! This can be drawings from life, doodles, or even notes about your thoughts and ideas.
- Do I need to use expensive materials for my sketchbook?
No, you don’t! Use whatever materials you have on hand. The focus should be on the process, not the tools.
Frequently Asked Questions
- What is gesture drawing and why is it important?
Gesture drawing is a quick sketching technique that captures the movement and essence of a subject. It's important because it helps artists develop a sense of proportion and fluidity, making their drawings more lifelike and dynamic.
- How can I improve my contour drawing skills?
To improve your contour drawing skills, practice observing shapes and lines closely without getting distracted by details. Focus on the outlines of objects, and try to draw continuously without lifting your pencil. This will enhance your observational skills significantly.
- What are the benefits of blind contour drawing?
Blind contour drawing enhances hand-eye coordination and encourages spontaneity in your sketches. By not looking at the paper, you can connect more deeply with your subject, resulting in unique and expressive outcomes that often surprise you.
- What common mistakes should I avoid in blind contour drawing?
Many artists feel frustrated with their initial attempts at blind contour drawing. Common mistakes include overthinking the process and focusing too much on the final product. Remember, it's about the experience and connection with the subject, not just the end result!
- How do hatching and cross-hatching techniques work?
Hatching and cross-hatching are shading techniques that use parallel lines to create texture and depth in your drawings. By varying the density and direction of these lines, you can effectively depict light and shadow, adding realism to your work.
- What is the best way to practice shading techniques?
The best way to practice shading techniques is to experiment with different tools, like pencils and blending stumps. Try drawing simple objects and focus on creating smooth transitions between light and dark areas to enhance the three-dimensionality of your drawings.
- How can I create an effective still life composition?
To create an effective still life composition, choose a variety of objects that differ in shape, size, and texture. Arrange them thoughtfully, considering principles like the rule of thirds, to create a balanced and visually appealing setup that will challenge your observational skills.
- Why is daily sketching important for artists?
Daily sketching is crucial for artists because it fosters creativity, sharpens observation skills, and builds confidence. By making it a routine, you can track your progress, experiment with new techniques, and ultimately improve your drawing abilities over time.
- What should I include in my sketchbook?
Your sketchbook should be a personal space for exploration and experimentation. Include sketches that reflect your daily practice, notes on techniques you've tried, and ideas for future projects. It's a great way to document your artistic journey and growth!


