
Successful Sketching: Posture, Alignment and Other Tips
This article explores essential techniques for effective sketching, focusing on posture, alignment, and practical tips to enhance your drawing skills and overall artistic expression.
Understanding the significance of posture can dramatically improve your sketching experience. Think about it: when you're hunched over your sketchbook, struggling to find comfort, it not only affects your physical well-being but also the quality of your drawings. Imagine trying to paint a masterpiece while sitting on a rollercoaster—it's just not going to happen! Good posture is all about creating a solid foundation for your creativity to flourish. By maintaining an upright position, you can breathe better, which helps in keeping your mind clear and focused. Not to mention, it can prevent fatigue and injury over time, allowing you to sketch for longer periods without discomfort.
Proper alignment in sketching is crucial for accuracy and proportion. When your lines are misaligned, your sketches can quickly become distorted, leading to frustration. So, how can you maintain alignment while drawing? One effective method is to keep your eyes on the reference point while your hand moves. This technique ensures that your drawing reflects the proportions of the subject accurately. Additionally, using your whole arm instead of just your wrist can help create smoother, more controlled lines. Remember, sketching is like dancing; you need to find your rhythm and flow to create something beautiful!
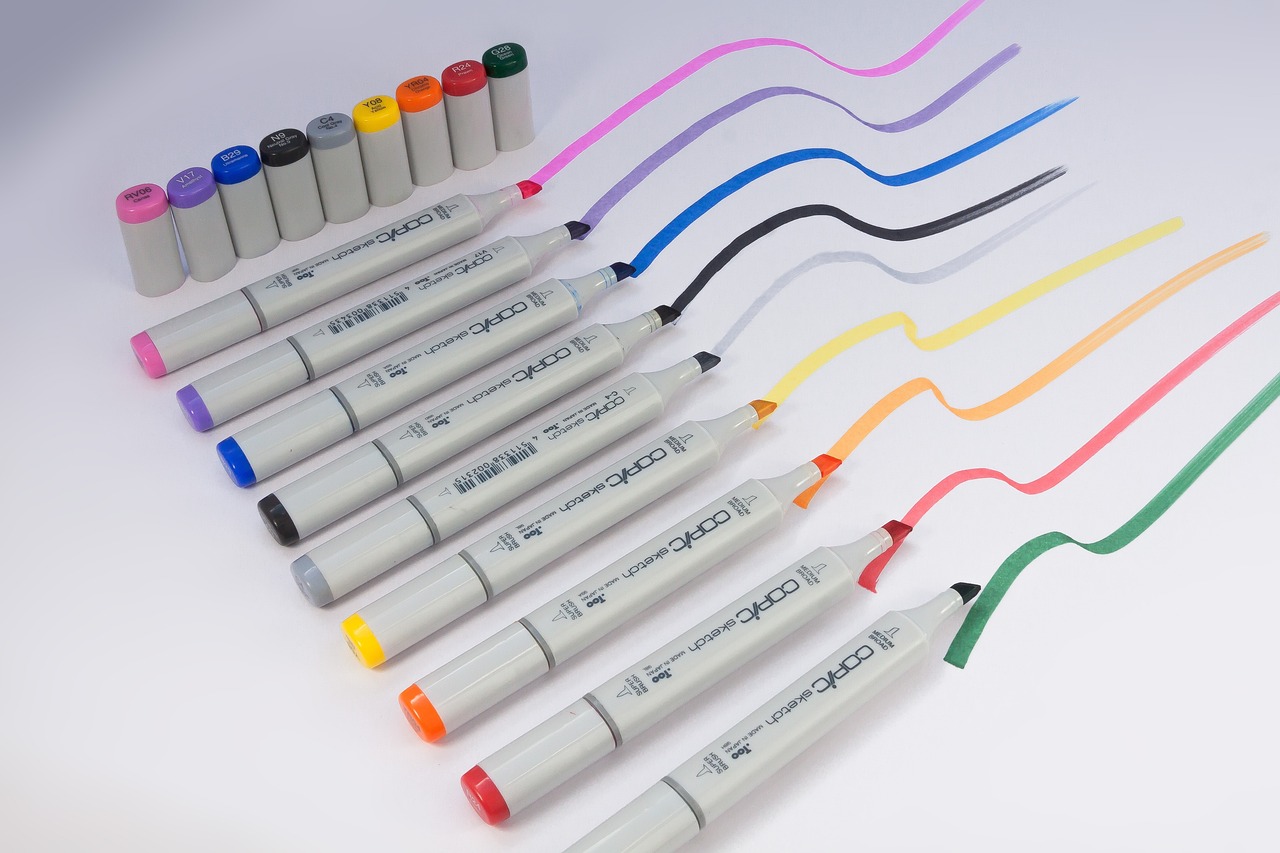
Various tools can assist in achieving precise alignment, from rulers to digital aids. These tools not only make your life easier but also enhance the overall quality of your sketches. Here are some of the best tools to use for maintaining accuracy:
- Rulers: A classic tool that helps in creating straight lines and measuring distances.
- French Curves: Perfect for drawing smooth, curved lines.
- Digital Aids: Software features like grids and snapping tools can be incredibly beneficial for digital artists.
Implementing a grid system can simplify the process of aligning your sketches. This technique allows for better proportion control and enhances overall composition in your artwork. By dividing your canvas into smaller sections, you can focus on one area at a time, making it easier to maintain proportions. Think of it like a treasure map; each square is a clue leading you to the final masterpiece!
Digital sketching offers unique alignment tools that can facilitate precision. Many software programs come equipped with features that allow you to overlay grids or use snapping options to align your sketches perfectly. These tools can save you time and effort, allowing you to concentrate on your creativity rather than worrying about alignment issues. Embrace technology; it can be your best friend in the world of digital art!
Many artists unknowingly adopt poor posture while sketching, leading to discomfort. Some common mistakes include slouching, craning your neck, and gripping your pencil too tightly. These habits can lead to chronic pain and hinder your artistic expression. To combat these issues, consider the following solutions:
- Adjust Your Chair: Ensure your chair supports your lower back and allows your feet to rest flat on the ground.
- Position Your Sketchbook: Keep your sketchbook at eye level to avoid straining your neck.
- Relax Your Grip: Hold your pencil loosely, letting your hand flow naturally.
Incorporating practical tips can elevate your sketching skills. One of the best pieces of advice is to take regular breaks and stretch during long sketching sessions. This practice is vital for maintaining comfort and preventing fatigue. Think of it as giving your creative muscles a quick workout; just like you wouldn't run a marathon without warming up, you shouldn't sketch for hours on end without a break!
Taking regular breaks and stretching is essential for maintaining comfort during long sketching sessions. Not only does it help your body, but it also rejuvenates your mind. A quick stretch can bring fresh blood flow, sparking new ideas and perspectives. Try setting a timer—every 30 minutes, stand up, stretch, and shake out those creative jitters!
Practicing mindfulness while sketching can enhance focus and creativity. When you're fully present in the moment, you can connect more deeply with your subject. Techniques like deep breathing or visualizing your lines before you draw can help center your thoughts. Remember, sketching is not just about the end result; it's a journey of exploration and expression. Embrace each stroke, and let your creativity flow!
Q: How can I improve my posture while sketching?
A: Ensure your chair supports your back, keep your sketchbook at eye level, and take regular breaks to stretch.
Q: What tools do I need for proper alignment?
A: Basic tools include rulers, French curves, and digital software features like grids and snapping tools.
Q: How often should I take breaks while sketching?
A: It's recommended to take a break every 30 minutes to stretch and refresh your mind.
Q: Can mindfulness really help my sketching?
A: Yes! Being present and focused can enhance your creativity and improve the quality of your work.

Importance of Posture in Sketching
When it comes to sketching, posture is everything. Imagine trying to create a beautiful masterpiece while sitting in a chair that feels like a medieval torture device. Not only does poor posture lead to discomfort, but it can also severely impact the quality of your work. Think about it: when you're hunched over, straining your neck, or gripping your pencil like it's a lifeline, your creativity is stifled. Good posture, on the other hand, allows for a free flow of ideas and energy, making the sketching process not just easier but also more enjoyable.
Proper posture can dramatically enhance your overall sketching experience. It helps in maintaining comfort, ensuring that you can focus on your art rather than the aches in your back or wrists. A well-aligned body allows for better control of your movements, which is essential for those intricate details that bring your sketches to life. You wouldn't want to ruin a beautiful line because your body is in the wrong position, right?
Moreover, adopting the right posture can prevent long-term injuries that many artists face. Issues like carpal tunnel syndrome, back pain, and neck strain can arise from hours of poor positioning. So, how do we achieve that perfect posture? Here are a few key elements to consider:
- Chair Height: Ensure your chair is at a height where your feet rest flat on the ground, and your knees are at a comfortable angle.
- Screen Position: If you're sketching digitally, your screen should be at eye level to avoid straining your neck.
- Wrist Position: Keep your wrists straight while drawing to minimize strain.
By paying attention to these details, you can create a sketching environment that promotes not just productivity but also creativity. Remember, the goal is to immerse yourself in the art, not the discomfort. So, stand tall, sit straight, and let your ideas flow freely onto the page. Good posture is the unsung hero of the sketching world, and it can be the difference between a mundane drawing session and a truly inspiring one.
Achieving Proper Alignment
When it comes to sketching, achieving proper alignment is like finding the right rhythm in music; it sets the foundation for everything else. Imagine trying to dance with two left feet—without alignment, your sketches can end up looking awkward and off-balance. Proper alignment ensures that your drawings maintain accuracy and proportion, which are crucial for creating visually appealing art. So, how do you get there? Let’s explore some effective techniques that can help you align your sketches like a pro.
One of the first steps in achieving alignment is to train your eye to see the relationships between different elements in your drawing. This means taking a moment to step back and assess how everything fits together. Are the proportions correct? Is the perspective accurate? By regularly checking these aspects, you can make adjustments as you go, preventing misalignment before it becomes a bigger issue.
Another effective technique is to use reference lines. These can be lightly drawn lines that act as guides for where certain elements should be placed. For instance, if you’re sketching a human figure, you might draw a vertical line down the center to help position the limbs symmetrically. This method not only aids in alignment but also helps you maintain a sense of balance throughout your composition. Remember, these lines are temporary; they’re just your roadmap to success!
Now, let’s talk about the tools that can assist you in achieving precise alignment. From traditional tools like rulers and T-squares to modern digital aids, there are plenty of options available. Here’s a quick overview of some useful tools:
| Tool | Description |
|---|---|
| Ruler | A simple yet effective tool for straight lines and measurements. |
| T-Square | Great for drawing horizontal and vertical lines with precision. |
| Digital Grids | Software features that provide a grid overlay for easy alignment. |
| Protractor | Useful for measuring angles, ensuring your sketches are geometrically correct. |
Implementing a grid system can also simplify the process of aligning your sketches. By dividing your canvas into smaller squares, you can focus on one section at a time, making it easier to achieve accurate proportions. This technique is particularly helpful for beginners, as it allows you to break down complex images into manageable parts. Plus, it enhances your overall composition, leading to a more polished final piece.
For those who prefer digital sketching, there are unique alignment tools that can facilitate precision. Many software programs offer features like snapping to grids, alignment guides, and even customizable grids that can help you maintain alignment effortlessly. These tools can take the guesswork out of placing elements, allowing you to focus on your creativity instead of worrying about whether your lines are straight.
In conclusion, achieving proper alignment in sketching is essential for creating art that resonates with viewers. By training your eye, using reference lines, and employing the right tools, you can enhance the accuracy and proportion of your sketches. Remember, alignment is not just about straight lines; it’s about creating a harmonious composition that draws the viewer in. So grab your tools, find your rhythm, and let your creativity flow!
Tools for Alignment
When it comes to sketching, achieving precision is paramount. Having the right tools for alignment can make a world of difference in the accuracy and quality of your art. Whether you're a seasoned artist or just starting out, understanding which tools can assist you in aligning your sketches can elevate your work to new heights. Rulers are the classic go-to for many artists. They help ensure that lines are straight and proportions are maintained. However, there are more advanced tools available today that can assist in achieving even greater precision.
For those who prefer a more digital approach, graphic tablets often come equipped with software that includes alignment features. Programs like Adobe Illustrator or Procreate offer grid overlays and snapping options, allowing you to align your sketches effortlessly. This can be particularly useful for digital artists who want to maintain clean lines and perfect proportions without the hassle of manual measurements.
Another fantastic tool is the French curve, which helps in creating smooth, flowing curves in your sketches. This tool is especially beneficial for artists working on complex shapes or organic forms, ensuring that every curve is gracefully aligned. Additionally, using a T-square can help when working on larger formats, providing a straight edge for drawing parallel lines and ensuring that your compositions are well-balanced.
For those who enjoy traditional mediums, alignment guides can be a game-changer. These templates often come with various shapes and sizes, allowing artists to trace over them for perfect alignment. They can be particularly useful for beginners who are still mastering the art of proportion and symmetry.
In summary, the tools you choose for alignment can greatly influence the outcome of your sketches. From traditional rulers and French curves to modern digital software features, each tool offers unique benefits that cater to different artistic needs. By incorporating these tools into your sketching routine, you can enhance your accuracy, streamline your process, and ultimately create more visually appealing artwork.
- What is the best tool for alignment in digital sketching?
Many artists prefer graphic tablets with software like Procreate or Adobe Illustrator, which provide built-in alignment tools such as grids and snapping features.
- Can I use traditional tools for digital sketching?
Absolutely! Many traditional tools like rulers and French curves can be referenced in your digital sketches, either by using them as guides or by replicating their effects digitally.
- How important is alignment in sketching?
Alignment is crucial for maintaining proportions and overall composition. It helps create a polished and professional look in your artwork.
- What are some common alignment mistakes?
Common mistakes include drawing without reference points, neglecting to measure proportions, and not using tools effectively. Being mindful of these can greatly improve your sketching accuracy.

Using a Grid System
Implementing a grid system in your sketching process can be a game-changer for artists of all levels. Imagine trying to fit together pieces of a puzzle without the outline—frustrating, right? A grid serves as that outline, guiding your hand and eye to maintain proper proportions and alignment in your artwork. By breaking down your canvas into manageable sections, you can focus on one part of your drawing at a time, ensuring that each element is correctly placed.
When you use a grid, you're essentially creating a roadmap for your sketch. This technique allows you to transfer complex images onto your paper with greater accuracy. For instance, if you're sketching a portrait, a grid can help you capture the exact placement of the eyes, nose, and mouth. By drawing a grid over your reference image and then replicating that same grid on your drawing surface, you can easily see where each feature should go. This method is particularly useful for beginners who may struggle with proportions.
To get started with a grid system, follow these simple steps:
- Choose Your Reference Image: Select a clear image that you want to sketch.
- Overlay a Grid: Use a ruler to draw a grid over your reference image. Keep the squares uniform, typically 1-inch by 1-inch.
- Replicate the Grid: Lightly draw the same grid on your sketching paper, ensuring that the squares match in size.
- Sketch Within Each Square: Focus on one square at a time, translating the shapes and lines from your reference image to your sketch.
As you become more comfortable with this technique, you might find yourself relying less on the grid and developing an intuitive sense for proportions. However, it's important to remember that a grid is not just a crutch; it's a tool that can enhance your skills and confidence. Plus, it can make the process of creating detailed sketches feel less daunting. Think of it as a training wheel for your artistic journey.
Additionally, you can experiment with different grid sizes depending on the complexity of your subject. For larger, more detailed images, consider using a smaller grid to capture finer details. Conversely, a larger grid can be useful for simpler subjects, allowing you to work more freely without getting bogged down in minutiae. This flexibility makes the grid system an invaluable technique in your sketching toolkit.
In conclusion, using a grid system not only aids in achieving accurate proportions but also boosts your confidence as you see your sketches come to life. Whether you’re a novice or a seasoned artist, integrating this method into your practice can radically transform your approach to drawing. So grab your ruler, set up your grid, and watch your artistic skills flourish!
1. What is the primary benefit of using a grid system in sketching?
The primary benefit of using a grid system is that it helps artists maintain accurate proportions and alignment in their sketches, making it easier to replicate complex images.
2. Do I need to use a grid for every sketch?
No, while a grid can be extremely helpful, especially for beginners, experienced artists may not need to rely on it for every sketch. It’s a tool that can be used as needed.
3. Can I create a grid digitally?
Absolutely! Many digital art programs offer features that allow you to overlay a grid on your canvas, making it easy to maintain alignment and proportions in your digital sketches.
4. How can I improve my sketching skills without a grid?
Practice is key! Regular sketching, studying anatomy, and observing real-life subjects can help you improve your skills. You can also try techniques like gesture drawing to enhance your understanding of form and movement.
Digital Alignment Tools
In the realm of digital sketching, artists are afforded a plethora of tools designed to enhance alignment and precision, making the creative process not only easier but also more enjoyable. Imagine trying to draw a straight line without a ruler—frustrating, right? That’s where digital alignment tools come into play, acting as your trusty sidekick in the world of art. These tools can help you achieve the accuracy that traditional methods sometimes fall short of, allowing you to focus on what truly matters: your creativity.
One of the most common digital tools used for alignment is the grid overlay. This feature allows artists to place a grid on their canvas, which can be adjusted to fit the scale of their drawing. By aligning your sketch with the grid, you can ensure that proportions are maintained, creating a harmonious composition. Furthermore, most digital art software enables you to customize the grid size, making it adaptable to various projects, whether you're sketching a tiny character or a sprawling landscape.
Another powerful tool is the ruler function, which can be found in many digital art programs. This tool allows you to draw straight lines with ease, ensuring that your sketches remain crisp and clean. Some software even offers a perspective ruler, which helps artists maintain correct angles and proportions when drawing objects in three-dimensional space. This is particularly useful when sketching architecture or complex scenes, as it can dramatically improve the overall accuracy of your work.
Additionally, many artists are now utilizing vector tools in their digital sketches. Unlike raster images, vector graphics are based on mathematical equations, allowing for infinite scalability without loss of quality. This means that you can create detailed sketches and adjust their size without worrying about pixelation. Vector tools often come equipped with alignment features that help ensure that your lines and shapes are perfectly aligned, which is particularly beneficial for graphic design projects.
Moreover, some advanced software includes snap-to-grid and smart guides. These features automatically align your objects and lines to the nearest grid line or guide, streamlining the process and reducing the time spent on adjustments. It’s like having a digital assistant that whispers, “Hey, this line needs to be straight!”
In conclusion, digital alignment tools are invaluable for artists seeking to enhance their sketching accuracy. By leveraging features like grid overlays, ruler functions, and vector tools, you can elevate your artwork to new heights. So, next time you sit down to sketch digitally, remember these tools are at your disposal, ready to help you create with confidence and precision.
- What are the benefits of using digital alignment tools?
Digital alignment tools enhance accuracy, save time, and reduce frustration during the sketching process. - Can I use alignment tools in traditional sketching?
While digital tools are specifically designed for digital art, some concepts, like grid systems, can be applied to traditional sketching. - Are there free digital sketching programs with alignment tools?
Yes, many free programs like Krita and GIMP offer various alignment features suitable for artists.
Common Posture Mistakes
When it comes to sketching, many artists unknowingly fall into the trap of poor posture, which can lead to discomfort and even injury over time. It's astonishing how something as simple as your body position can impact not just your comfort but also the quality of your artwork. Have you ever found yourself hunched over your sketchbook for hours, only to realize later that your back is screaming in protest? You're not alone! Let's dive into some of the most common posture mistakes that artists make and explore how to correct them.
One prevalent mistake is sitting too far away or too close to your drawing surface. This can cause strain on your neck and shoulders as you lean forward to see your work clearly. Ideally, you should be at a distance where you can comfortably see your entire sketch without straining. A good rule of thumb is to keep your eyes at a distance of about 18 to 24 inches from your paper or screen. You might want to adjust your chair or tabletop height to achieve this.
Another common error is slouching. It’s easy to get lost in your creativity and forget about your body, but slouching can lead to serious back pain. Instead, try to maintain a straight back with your shoulders relaxed but not hunched. Imagine your spine as a stack of books; if one book is out of place, the entire stack can wobble. Keeping your posture upright can provide a solid foundation for your sketching.
Wrist positioning is also crucial. Many artists tend to twist their wrists unnaturally or rest their wrists on the table while drawing. This can lead to repetitive strain injuries over time. Instead, try to keep your wrist straight and use your whole arm to make strokes. This not only helps with comfort but also enhances fluidity in your lines. Think of your arm as a pendulum; the more freely it moves, the smoother your lines will be.
Lastly, don’t forget about your feet! Many artists sit with their legs crossed or tucked under their chairs, which can restrict blood flow and lead to discomfort. Keep your feet flat on the ground or on a footrest, ensuring that your legs are at a comfortable angle. This simple adjustment can make a world of difference in how you feel during long sketching sessions.
In summary, avoiding these common posture mistakes can significantly enhance your sketching experience. By being mindful of your body position, you can sketch longer and more comfortably, allowing your creativity to flow without interruption. Remember, your body is just as important as your tools when it comes to creating art!
- What is the best posture for sketching? The best posture involves sitting up straight with your back supported, feet flat on the ground, and keeping your wrist in a neutral position.
- How often should I take breaks while sketching? It's recommended to take a break every 30 to 60 minutes to stretch and rest your eyes, which can help prevent fatigue and improve focus.
- Can poor posture affect my drawing quality? Yes, poor posture can lead to discomfort and fatigue, which may hinder your ability to draw accurately and creatively.
Tips for Enhanced Sketching
When it comes to sketching, the journey to improvement is as exhilarating as the destination. If you're looking to elevate your sketching skills, there are a few practical tips that can make a world of difference. First and foremost, it's essential to develop a routine that not only nurtures your creativity but also keeps you comfortable during those lengthy sessions. Think of your body as a finely tuned instrument; if it's out of tune, your sketches will reflect that. So, how can you ensure you're playing the right notes?
One of the most effective ways to maintain your artistic flow is by incorporating regular breaks into your sketching sessions. It may seem counterintuitive, but stepping away from your work can actually boost your creativity. During these breaks, consider doing some light stretching. Not only does this help prevent stiffness, but it also revitalizes your mind. Imagine your creativity as a wellspring; if you keep drawing from it without pause, it may run dry. But by taking a moment to recharge, you allow the waters to flow again. Here are a few stretches you might find beneficial:
- Neck Rolls: Gently roll your head in a circular motion to relieve tension.
- Wrist Flexors: Extend your arm, pull back your fingers with the opposite hand to stretch your wrist.
- Shoulder Shrugs: Lift your shoulders towards your ears, then release them down.
Next up is the concept of mindfulness in sketching. Have you ever found yourself lost in thought, only to look down and realize that your sketch has veered off course? Mindfulness encourages you to be fully present in the moment, allowing you to engage deeply with your art. By focusing on each stroke and the sensations of the pencil against the paper, you can cultivate a more profound connection with your work. Think of it as a dance; when you're in tune with the rhythm, the movements become fluid and natural, resulting in a more harmonious creation.
Another tip to enhance your sketching is to explore different mediums and styles. Don't hesitate to experiment! Just like a chef tries new ingredients, you, too, can mix things up. Whether it's charcoal, ink, or digital tools, each medium offers unique properties that can inspire fresh ideas. You might find that drawing with charcoal brings a raw intensity to your work, while watercolor can add an ethereal quality. The key is to embrace the learning process—each attempt, whether successful or not, is a step toward mastery.
Lastly, consider keeping a sketchbook dedicated to your experiments and ideas. This book can serve as a visual diary, capturing your artistic evolution. You might jot down notes about what works and what doesn’t, or even include snippets of inspiration from your daily life. Just like a traveler documenting their adventures, your sketchbook will become a treasure trove of memories and insights that you can refer back to in the future.
| Question | Answer |
|---|---|
| How often should I take breaks while sketching? | It's recommended to take a break every 30-60 minutes to stretch and refresh your mind. |
| What are some effective stretches for artists? | Neck rolls, wrist flexors, and shoulder shrugs are great for relieving tension. |
| How can I practice mindfulness while sketching? | Focus on the sensations of drawing and immerse yourself in the details of your work. |
| Is it important to experiment with different mediums? | Absolutely! Experimenting can lead to new discoveries and enhance your skills. |
Regular Breaks and Stretching
When it comes to sketching, many artists find themselves so engrossed in their work that they forget to take a moment to breathe. However, are not just beneficial; they're essential for maintaining both your physical health and your creative flow. Imagine your body as a finely tuned instrument; if you play it continuously without rest, it starts to sound off-key. Similarly, your muscles and joints can become tense and fatigued, leading to discomfort and even injury over time.
So, how often should you take breaks? A good rule of thumb is the 20-20-20 rule: every 20 minutes, take a break and look at something 20 feet away for 20 seconds. This simple practice not only helps your eyes relax but also gives your mind a moment to reset. During these breaks, consider standing up, stretching, or even walking around a bit. This movement stimulates blood flow, which is crucial for keeping your creativity alive and kicking.
Stretching is another critical aspect that many artists overlook. When you're huddled over your sketchbook or tablet, your muscles can tighten, especially in your neck, shoulders, and back. Incorporating simple stretches into your routine can dramatically improve your comfort level. Here are a few stretches to consider:
- Neck Stretch: Gently tilt your head to one side, holding for 15 seconds, then switch sides.
- Shoulder Rolls: Roll your shoulders forward and backward in a circular motion to release tension.
- Wrist and Finger Stretch: Extend your fingers and wrists, gently pulling back on your fingers to stretch.
Incorporating these stretches into your breaks can help alleviate tension and enhance your overall sketching experience. Think of it as a reset button for your body and mind—allowing you to return to your work with renewed focus and energy. Not only will you feel better physically, but your creativity may also flourish as a result.
Ultimately, the goal is to create a sustainable sketching practice that allows you to enjoy your art without the discomfort that can come from prolonged periods of drawing. By making a conscious effort to take regular breaks and engage in stretching, you can turn your sketching sessions into a more enjoyable and productive experience. So, the next time you find yourself lost in your art, remember to listen to your body, take that break, and stretch it out!
- How often should I take breaks while sketching? It's recommended to take a break every 20 minutes for at least 20 seconds to help reduce eye strain and fatigue.
- What are some effective stretches for artists? Neck stretches, shoulder rolls, and wrist stretches are all effective ways to relieve tension.
- Can regular breaks improve my creativity? Yes! Taking breaks allows your mind to reset, which can lead to enhanced creativity and focus when you return to your work.
Mindfulness in Sketching
When it comes to sketching, mindfulness can be a game-changer. Imagine you're sitting in a cozy corner, sketchbook in hand, and the world around you fades away. You're not just drawing; you're immersing yourself in the moment. This practice can transform your art from mere lines on paper to a profound expression of your thoughts and feelings. But how do you cultivate this mindfulness while sketching?
First, let's talk about the importance of being present. When you focus entirely on your sketch, you allow your mind to engage with the subject matter deeply. This can lead to more detailed observations and a stronger emotional connection to your work. Instead of just replicating what you see, you'll start interpreting it through your unique lens. Take a moment to breathe, center yourself, and let go of distractions. You might find that the simple act of breathing can enhance your awareness and sharpen your focus.
One effective technique is to incorporate breathing exercises into your sketching routine. Before you begin, take a few deep breaths, inhaling through your nose and exhaling through your mouth. This not only calms your nerves but also helps you transition into a creative mindset. As you sketch, you can maintain this rhythm. If you find your mind wandering, gently bring your attention back to your breath. This practice can help ground you, making each stroke feel intentional and deliberate.
Another way to enhance mindfulness is by observing your surroundings with fresh eyes. Instead of jumping right into your sketch, take a moment to look around. Notice the colors, shapes, and textures. How does the light interact with your subject? What emotions does it evoke? Write down your thoughts or even doodle them in the margins of your sketchbook. This can serve as a warm-up and help transition your mind into a state of creativity.
As you sketch, consider embracing a non-judgmental attitude. It’s easy to become critical of your work, but this can stifle creativity. Instead, allow yourself to make mistakes and view them as part of the artistic journey. Each line you draw is a step toward improvement. Remember, your sketchbook is a safe space for exploration. Celebrate the process rather than fixating on the outcome.
Incorporating mindfulness into your sketching practice can also mean setting intentions. Before you start, think about what you want to achieve with your sketch. Is it to capture a feeling, a moment, or perhaps to practice a specific technique? By having a clear intention, you can channel your energy more effectively, making your sketching sessions more fulfilling.
Lastly, consider keeping a mindfulness journal alongside your sketches. This journal can be a space for reflection, where you jot down your thoughts, feelings, and observations after each sketching session. Over time, you’ll not only see your artistic growth but also gain insights into your creative process. This combination of sketching and journaling can create a rich tapestry of your artistic journey, filled with moments of clarity and inspiration.
In conclusion, incorporating mindfulness into your sketching practice can significantly enhance your artistic expression. By focusing on the present, observing your surroundings, maintaining a non-judgmental attitude, setting intentions, and reflecting through journaling, you can unlock a deeper connection to your art. So next time you pick up your pencil, remember to breathe, observe, and let your creativity flow!
- What is mindfulness in sketching?
Mindfulness in sketching refers to being fully present and engaged in the drawing process, allowing for a deeper connection to your art and subject matter. - How can I practice mindfulness while sketching?
You can practice mindfulness by focusing on your breath, observing your surroundings, maintaining a non-judgmental attitude, and setting clear intentions for your sketching sessions. - Does mindfulness improve my artistic skills?
Yes, practicing mindfulness can enhance your focus, creativity, and emotional connection to your work, leading to improved artistic skills over time. - Can I use mindfulness techniques in other forms of art?
Absolutely! Mindfulness techniques can be beneficial in various artistic practices, including painting, sculpture, and even digital art.
Frequently Asked Questions
- Why is posture important when sketching?
Posture plays a crucial role in sketching because it affects both your comfort and the quality of your drawings. Good posture helps prevent fatigue and injuries, allowing you to stay focused and creative during your sketching sessions.
- How can I achieve proper alignment in my sketches?
Achieving proper alignment is all about practice and the right techniques. You can use tools like rulers or a grid system to maintain accuracy. Digital sketching software often includes alignment features that can help you keep everything in proportion.
- What are some common posture mistakes artists make?
Many artists tend to hunch over their sketchbooks or sit in awkward positions, which can lead to discomfort. Common mistakes include slouching, not using enough support, or drawing for long periods without breaks. Adjusting your workspace and taking regular breaks can help mitigate these issues.
- What tools can assist with alignment in sketching?
There are several tools you can use for alignment, including traditional rulers, T-squares, and digital aids like grid overlays in software. These tools help ensure your sketches are accurate and visually appealing by maintaining proper proportions.
- How often should I take breaks while sketching?
It’s recommended to take breaks every 30 to 60 minutes during long sketching sessions. This gives your eyes and hands a chance to rest, helping to maintain your creativity and prevent strain.
- Can mindfulness improve my sketching skills?
Absolutely! Practicing mindfulness while sketching can enhance your focus and creativity. By being present in the moment and connecting with your subject, you can produce more expressive and dynamic sketches.
- What is a grid system, and how can it help me?
A grid system divides your reference image and sketching surface into equal squares, making it easier to maintain proportions and alignment. This technique simplifies the process of scaling and can significantly improve the overall composition of your artwork.
- Are there specific digital tools for alignment?
Yes! Many digital sketching programs come with built-in alignment tools, such as snap-to-grid features, rulers, and guides. These tools can help you achieve precision and maintain alignment effortlessly while you sketch.


