
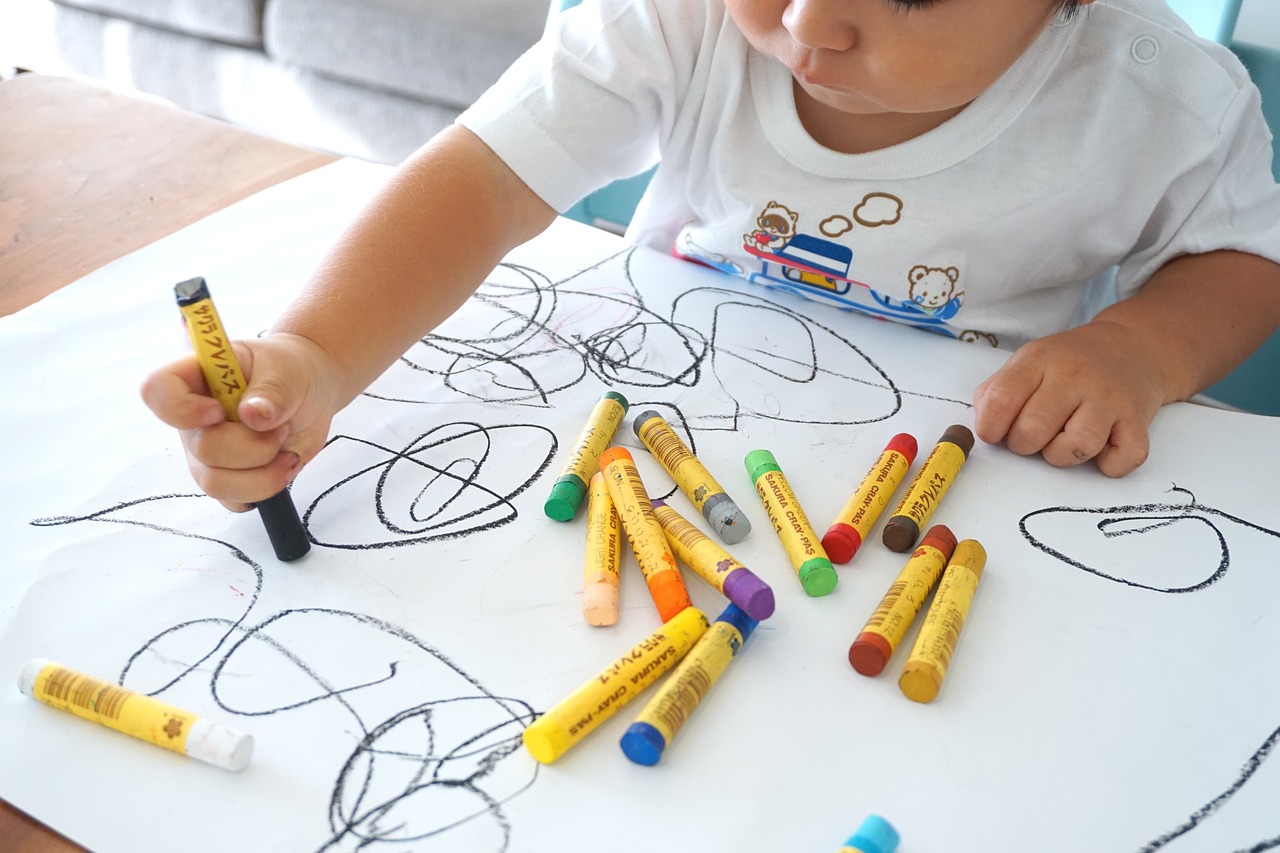
Learn to Draw: Your Guide to Sharpening Your Skills
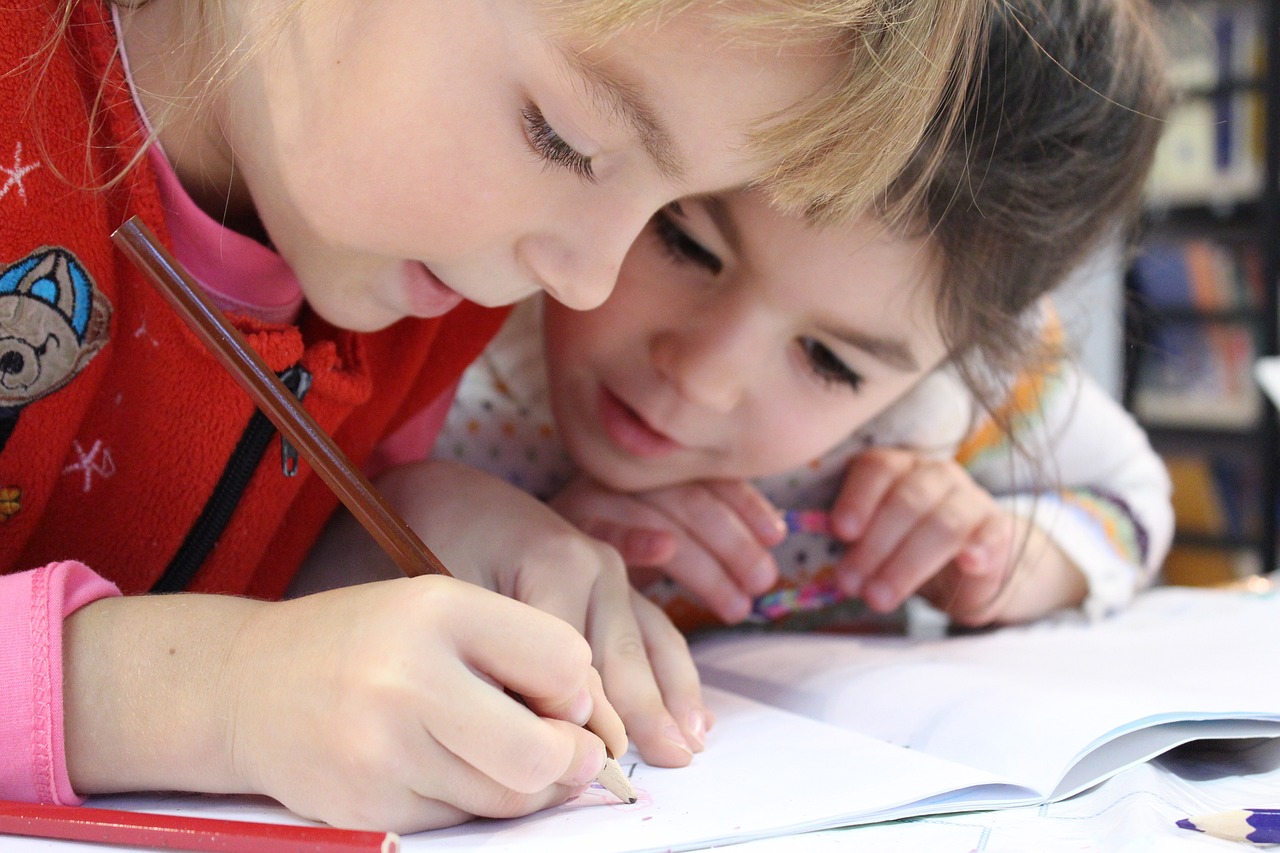
Welcome to the world of drawing, where your imagination can take flight and your creativity knows no bounds! Whether you’re just starting out or you’ve been doodling since you could hold a pencil, this comprehensive guide is here to help you sharpen your skills and elevate your artistic journey. Drawing is more than just putting pencil to paper; it’s about expressing yourself, capturing moments, and bringing ideas to life. So, grab your sketchbook and let’s dive into the exciting techniques and tips that will transform you into a confident artist!
Before we jump into the fun stuff, let’s establish a solid foundation. Understanding the basics of drawing is crucial for any aspiring artist. You might be wondering, what are these basics? Well, they include key concepts such as line, shape, and form. Think of these elements as the building blocks of your drawings. Just like a house needs a sturdy foundation, your artwork needs these fundamental principles to stand strong. Mastering them will not only boost your confidence but also enhance your ability to create more complex pieces.
Now that we’ve covered the basics, let’s talk about the tools of the trade. Choosing the right materials can significantly impact your drawing experience. Imagine trying to paint a masterpiece with a broken brush; it just wouldn’t work! In the world of drawing, your tools are your best friends. From pencils to paper, each item plays a vital role in your artistic expression. Here’s a quick rundown of the essential drawing tools you’ll need:
| Tool | Purpose |
|---|---|
| Graphite Pencils | For sketching and shading |
| Colored Pencils | Add color and vibrancy |
| Sketch Paper | Ideal for practice and rough drafts |
| Drawing Pad | For finished artworks |
When it comes to pencils, not all are created equal. Different pencils produce varying effects and textures, allowing you to explore a world of creativity. Let’s examine the two main types of pencils that every artist should consider:
Graphite pencils are the bread and butter of drawing. They come in various grades, from hard (H) to soft (B), giving you a range of options for shading and line work. The harder the pencil, the lighter the mark it makes; conversely, softer pencils create darker, richer lines. Experimenting with different grades can lead to stunning results in your artwork!
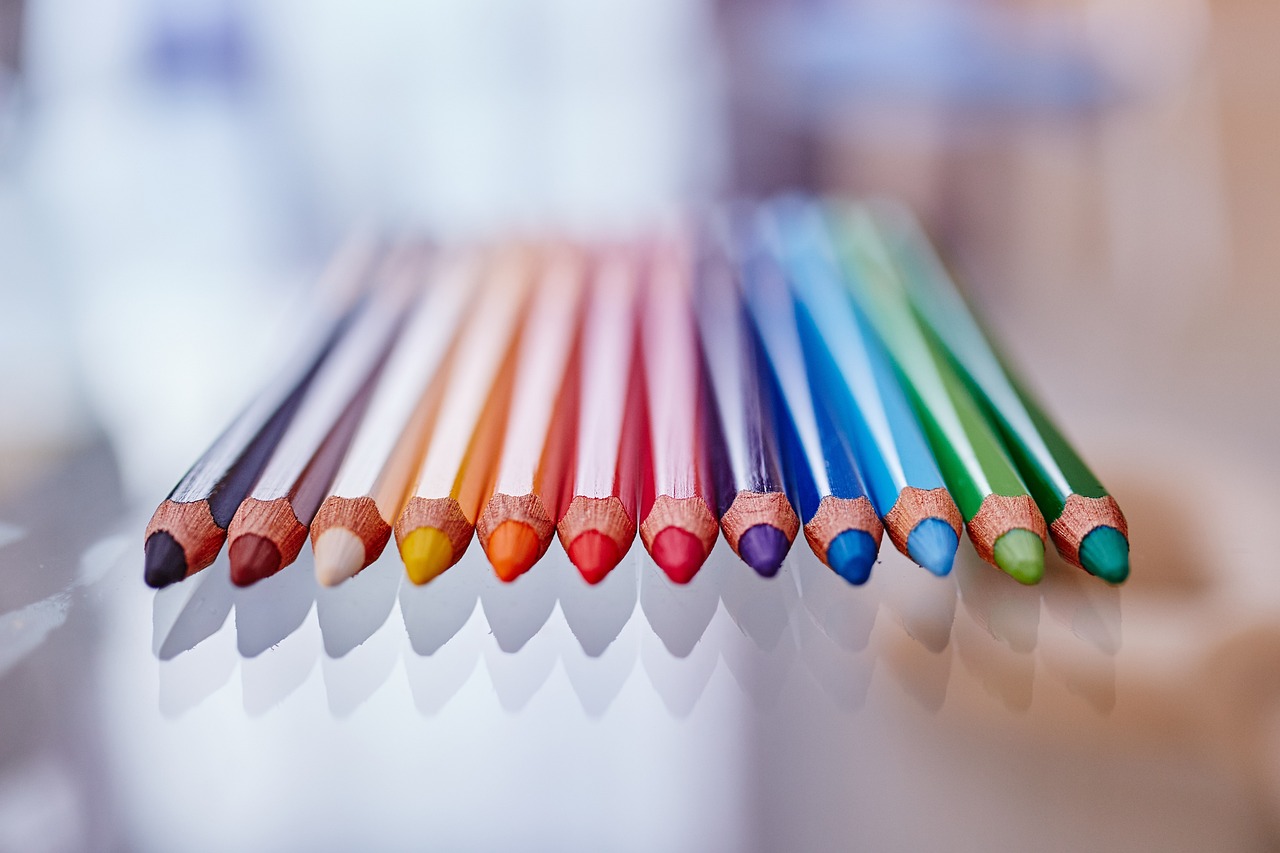
On the flip side, colored pencils offer a vibrant way to express your creativity. With a bit of practice, you can master techniques for blending and layering colors to create stunning artworks that pop off the page. Think of colored pencils as your palette; the more colors you have, the more possibilities you can explore!
The type of paper you use can also influence the outcome of your drawing. Just like a painter wouldn’t use the same canvas for oil and watercolor, artists should choose their paper based on the medium they’re using. Different papers have unique textures and weights that can enhance your drawing experience. For instance, smooth paper is great for detailed work, while textured paper can add character to your sketches.
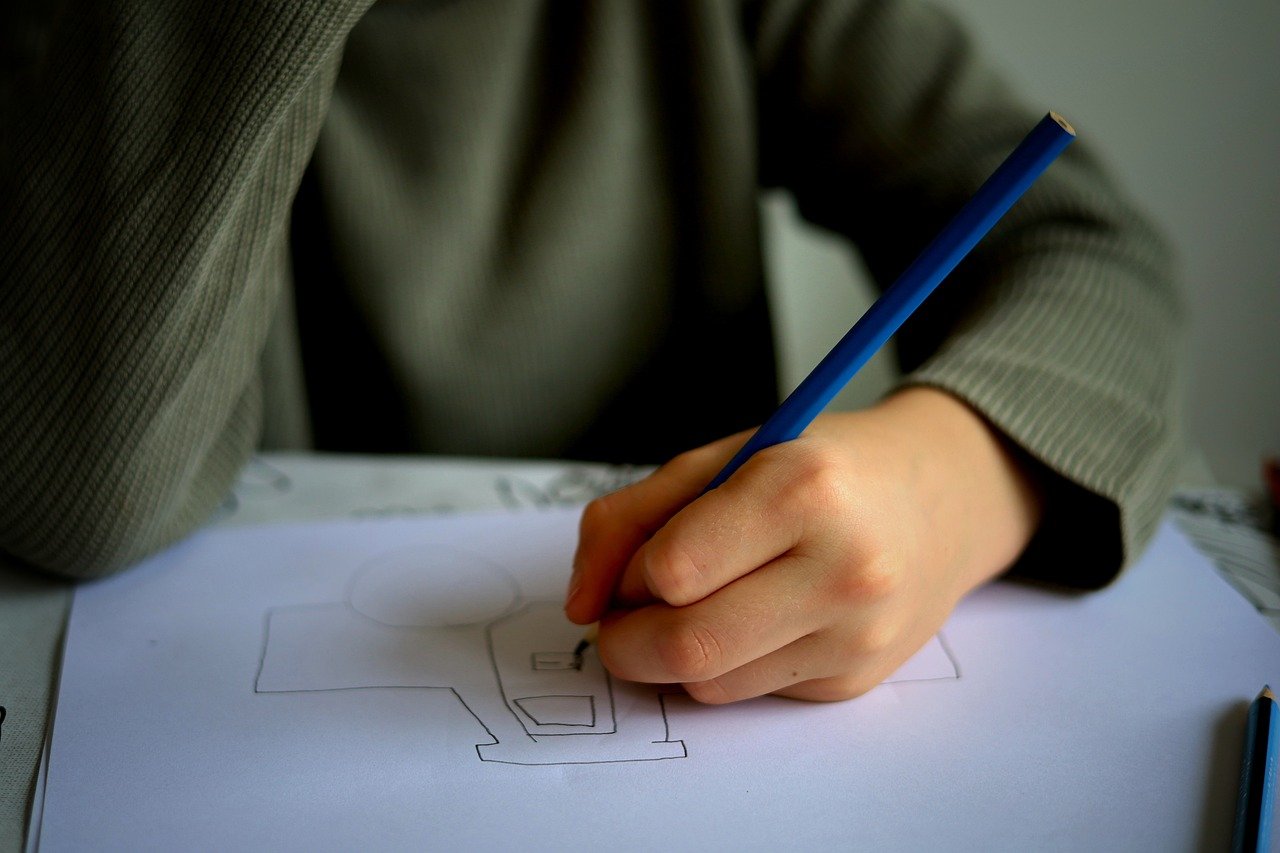
Now that you’re equipped with the right tools, it’s time to master some fundamental drawing techniques. This is where the magic happens! Essential skills such as shading, perspective, and proportions are crucial for improvement. Think of these techniques as the secret ingredients in your recipe for artistic success.
Effective shading adds depth and dimension to your drawings. It’s like giving your artwork a heartbeat! Explore various shading methods, including hatching, cross-hatching, and blending. Each technique can dramatically change the look of your piece, so don’t hesitate to experiment until you find what works best for you.
Perspective is key to creating realistic drawings. It’s the magic that transforms a flat image into a three-dimensional space. Understanding one-point and two-point perspective will help you depict depth accurately. Imagine looking down a long road; the sides seem to converge as they stretch away from you. That’s perspective in action!
Finding your artistic voice is an exciting journey. As you practice, you’ll start to discover what resonates with you. Don’t be afraid to experiment with different styles and techniques. Think of your artistic style as your fingerprint; it’s uniquely yours! Trying out various mediums like charcoal, ink, or even digital tools can broaden your artistic horizons.
Infusing your personal experiences and themes into your artwork can make your drawings more meaningful. Draw inspiration from your surroundings and emotions. What stories do you want to tell? Your art is a reflection of you, so let your personality shine through!
Consistent practice is vital for growth. Just like a musician practices scales, artists need to engage in exercises that enhance their skills. Daily drawing exercises can keep your practice fresh and inspiring. Challenge yourself with different prompts and themes to push your creative boundaries.
Finally, don’t underestimate the power of feedback. Sharing your work and learning from critiques can accelerate your growth as an artist. Constructive criticism is like a compass; it points you in the right direction and helps you refine your skills.
- How often should I practice drawing?
Consistency is key! Aim for at least 30 minutes a day to see improvement. - What’s the best pencil for beginners?
A good starting point is a medium graphite pencil (HB) for sketching and shading. - Can I draw on any type of paper?
While you can, using the right paper for your medium will yield better results. - How do I develop my unique style?
Experiment with different techniques and mediums, and don’t be afraid to let your personality shine through!
Understanding the Basics of Drawing
When diving into the world of drawing, it's crucial to establish a solid foundation. Just like building a house, if your base is weak, everything else can crumble. The basics of drawing encompass several key concepts that every aspiring artist must master. These include line, shape, and form. Each of these elements plays a vital role in how you perceive and create art.
Let's start with line. Lines are the building blocks of all drawings. They can be straight, curved, thick, or thin, and they help to define shapes and contours. Imagine drawing a simple apple; the outline you create with your pencil is made up of lines. Understanding how to manipulate lines can dramatically change the mood and feel of your artwork. For instance, jagged lines can evoke tension, while soft, flowing lines can convey calmness.
Next, we have shape. Shapes are formed when lines enclose an area. They can be geometric, like squares and circles, or organic, like the shapes of leaves or clouds. Recognizing shapes in the world around you is essential for translating what you see onto paper. Think about it: when you draw a figure, you often start with basic shapes before adding details. This method not only simplifies your process but also enhances your ability to capture proportions accurately.
Finally, let's discuss form. While shapes are flat, forms are three-dimensional. They give depth to your drawings and help create realism. When you learn to depict form, you’re essentially learning how to represent volume and space. Techniques such as shading and perspective are integral to achieving a convincing form. For example, a simple sphere can be transformed from a flat circle into a lifelike ball with the right use of shading and light.
In summary, understanding the basics of drawing is like learning the alphabet before you can read. By mastering lines, shapes, and forms, you set yourself up for success in your artistic journey. These foundational skills will not only improve your technical abilities but also enhance your creativity, allowing you to express your unique vision more effectively.
- What is the most important skill to develop as a beginner artist?
Mastering the basics of line, shape, and form is essential for any beginner. - How can I improve my drawing skills quickly?
Consistent practice and studying the fundamentals will help you improve more rapidly. - Is it necessary to use expensive materials when starting out?
No, it's more important to focus on technique than on the quality of materials when you're just starting.
Essential Drawing Tools and Materials
Choosing the right tools can significantly impact your drawing experience. Think of your drawing tools as the instruments of a musician; just as a violinist needs a quality violin to create beautiful music, an artist requires the right materials to bring their vision to life. The world of drawing tools can be vast and overwhelming, but fear not! We're here to simplify it for you.
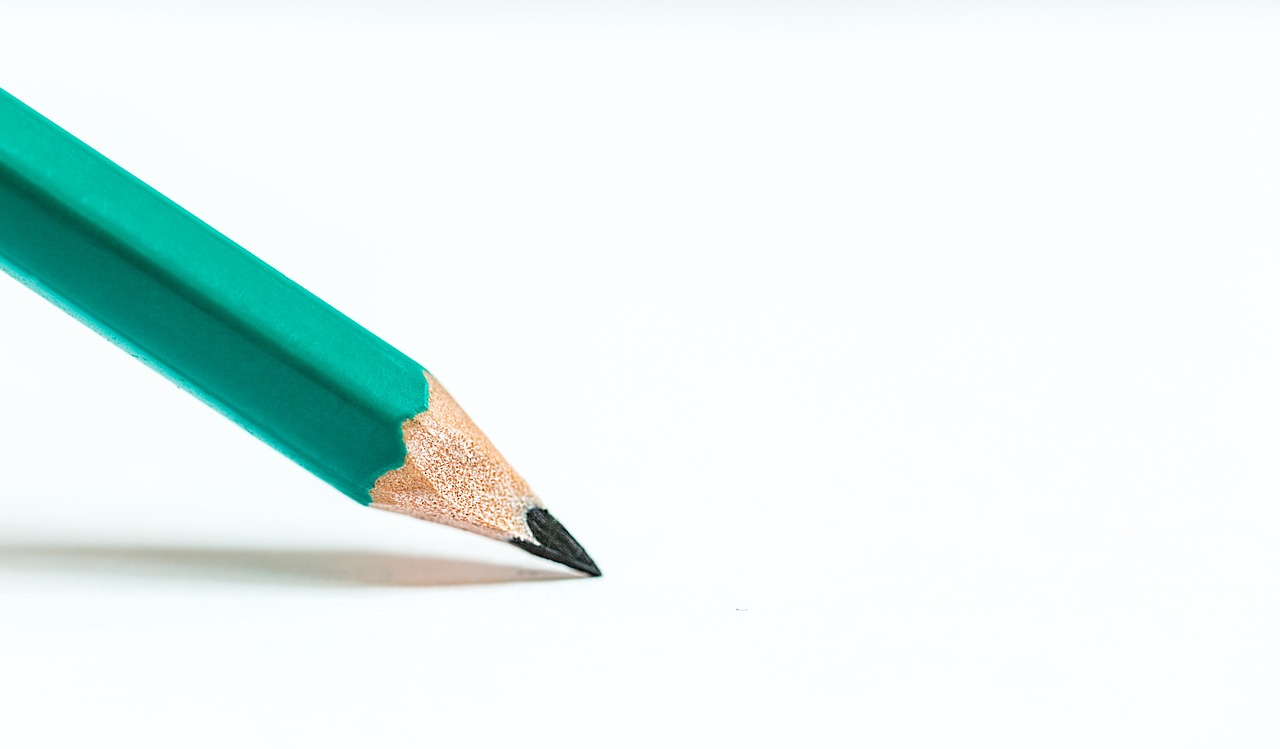
First and foremost, let's talk about the pencils. The type of pencil you choose can dramatically affect the outcome of your artwork. There are various types of pencils, each serving a unique purpose. For instance, graphite pencils are the most common and come in different grades, ranging from hard (H) to soft (B). The harder the pencil, the lighter the mark it makes, while softer pencils create darker lines and richer shading. Understanding the grading system can help you select the right pencil for your desired effect.
| Grade | Type | Use |
|---|---|---|
| H | Hard | Fine lines and details |
| B | Soft | Shading and darker lines |
| HB | Medium | General-purpose drawing |
Next up, we have colored pencils. These vibrant tools allow artists to express their creativity in a multitude of ways. They come in various brands and qualities, from student-grade to professional-grade. When using colored pencils, techniques like blending and layering are essential. By layering different colors and using a blending tool or even your fingers, you can achieve stunning effects that will make your artwork pop!
Now, let's not forget about the paper you use. The type of paper can significantly influence your drawing's outcome. There are various types of drawing paper, each designed for specific mediums and techniques. For example, smooth paper is ideal for detailed pencil work, while textured paper is great for charcoal and pastel drawings. When selecting paper, consider the weight and texture, as these factors will affect how your pencil or ink interacts with the surface.
In addition to pencils and paper, there are other essential tools that can enhance your drawing experience. A good eraser is a must-have, as it allows you to make corrections and refine your work. Kneaded erasers are particularly popular among artists because they can be shaped to erase specific areas without damaging the paper. Furthermore, having a reliable sharpener ensures that your pencils are always ready for action, providing precision in your lines.
Lastly, don’t underestimate the value of sketchbooks. A sketchbook is your personal playground where you can experiment without fear. Whether you’re doodling, practicing techniques, or brainstorming ideas, having a dedicated space for your drawings can foster creativity and growth. Choose a sketchbook that feels good to you, whether it’s spiral-bound or hardbound, and make it your own!
In conclusion, equipping yourself with the right drawing tools and materials is the first step in your artistic journey. Just as a chef selects their knives with care, an artist must choose their tools wisely. Remember, the journey of drawing is as important as the final piece, so enjoy the process of exploring and experimenting with your materials!
- What is the best pencil for beginners? - Generally, an HB pencil is a great starting point for beginners because it offers a balance between hardness and softness.
- Can I use regular paper for drawing? - While you can use regular paper, it’s best to use drawing paper that is designed to handle the medium you’re working with.
- How often should I practice drawing? - Consistency is key! Try to practice daily, even if it’s just for a short period, to see improvement over time.
Types of Pencils for Drawing
When it comes to drawing, the type of pencil you choose can make a **world of difference** in your artwork. Pencils aren't just simple writing instruments; they are tools that can help you express your creativity in unique ways. Understanding the various types of pencils available can enhance your drawing experience and empower you to create stunning pieces of art.
There are two primary categories of pencils that artists often use: graphite pencils and colored pencils. Each type serves different purposes and can yield various effects, so let's dive deeper into these categories.
Graphite pencils are the most common type of pencil used in drawing. They come in a range of grades, typically labeled from 9H (hardest) to 9B (softest), with HB being the middle ground. The grade of the pencil affects the darkness and texture of the line it produces. For instance:
| Grade | Characteristics | Best Used For |
|---|---|---|
| H (Hard) | Produces lighter, finer lines | Detailed sketches and precise work |
| HB | Medium hardness, balanced | General-purpose drawing |
| B (Soft) | Produces darker, thicker lines | Shading and expressive work |
Using a range of graphite pencils in your artwork allows for **dynamic shading** and depth. For example, starting with a hard pencil for outlines and transitioning to softer pencils for shadows can create a more **three-dimensional** effect.
Colored pencils bring a vibrant splash of color to your drawings, allowing for a different kind of expression. They come in various types, including wax-based, oil-based, and water-soluble. Each type has its unique qualities:
- Wax-based pencils: These are the most common colored pencils and are known for their rich pigmentation and smooth application. They blend well, making them ideal for creating gradients.
- Oil-based pencils: These provide a firmer texture and are less prone to breakage. They are excellent for detailed work and layering colors without wax bloom.
- Water-soluble pencils: These can be used dry or wet, allowing you to create watercolor effects. When water is applied, the colors dissolve and blend beautifully.
Experimenting with colored pencils can lead to exciting results. Techniques like blending and layering can help you achieve depth and richness in your artwork. For instance, layering different colors can create stunning gradients and textures that make your drawings pop.
In conclusion, the type of pencil you select can significantly influence your drawing style and the final outcome of your artwork. Whether you lean towards the precision of graphite or the vibrancy of colored pencils, understanding their characteristics will enable you to make informed choices that enhance your creative journey.
- What is the best pencil for beginners? For beginners, an HB pencil is often recommended as it offers a good balance between hardness and softness, making it versatile for various drawing techniques.
- Can I use colored pencils on any type of paper? While you can use colored pencils on various types of paper, textured paper often works best as it holds the pigment better and allows for smoother blending.
- How do I choose the right pencil for shading? Softer pencils (B grades) are typically better for shading as they produce darker lines and allow for smoother transitions. Experimenting with different grades can help you find your preferred shading technique.
Graphite Pencils
Graphite pencils are the backbone of many artists' toolkits, and for good reason! They offer incredible versatility and control, making them ideal for everything from rough sketches to detailed illustrations. When you think of a pencil, you might picture a simple writing instrument, but in the hands of an artist, it transforms into a powerful tool for expression. The secret lies in understanding the different grades of graphite and how they can affect your drawing.
Graphite pencils are graded on a scale that ranges from H (hard) to B (black), with F (fine point) sitting in the middle. The H pencils are great for fine lines and detailed work, while the B pencils are perfect for darker, bolder strokes. Here’s a quick breakdown:
| Grade | Description | Best Use |
|---|---|---|
| H | Hard pencils produce lighter marks. | Fine lines, detailed work, and technical drawings. |
| F | Fine point pencil, a balance between hard and soft. | General use, sketching, and detailed shading. |
| B | Soft pencils produce darker marks. | Shading, bold lines, and expressive drawings. |
When selecting a graphite pencil, consider what you want to achieve in your artwork. For instance, if you're working on a portrait and need to create soft shadows, a 2B or 4B pencil would be perfect for blending. Conversely, if you’re drafting a technical illustration that requires precision, you might reach for an H pencil. This understanding of pencil grades allows you to manipulate light and shadow effectively, adding depth and dimension to your drawings.
Another essential aspect of using graphite pencils is the technique of shading. Shading can bring your drawings to life, transforming flat images into three-dimensional representations. Techniques such as hatching, cross-hatching, and smudging can all be employed to create various textures and effects. For example, hatching involves drawing parallel lines to indicate shadow, while cross-hatching uses intersecting lines to build up darker areas. These techniques are not only fun to practice but also essential for developing your unique drawing style.
In conclusion, graphite pencils are an artist's best friend, providing a range of options for different styles and techniques. By experimenting with various grades and mastering shading methods, you’ll be well on your way to creating stunning artwork that captures the imagination. So grab your pencils, and let your creativity flow!
- What is the difference between H and B pencils? H pencils are harder and create lighter marks, while B pencils are softer and produce darker marks.
- How do I choose the right pencil for my drawing? Consider the type of work you’re doing; use H pencils for fine details and B pencils for shading and bold lines.
- Can I use graphite pencils for color blending? While graphite pencils are primarily for monochrome art, they can be combined with colored pencils for unique effects.
Colored Pencils
Colored pencils are a fantastic medium for artists looking to add a splash of vibrancy to their drawings. Unlike graphite pencils, which primarily focus on shading and line work, colored pencils open up a world of color and creativity. They allow for a range of effects, from soft pastel-like hues to bold, saturated tones. But how do you get the most out of this versatile tool? Let's dive into some techniques and tips that can elevate your colored pencil artwork to new heights.
One of the key aspects of working with colored pencils is understanding the importance of layering. This technique involves applying multiple layers of color to create depth and richness in your artwork. Start with a light base layer, gradually building up the intensity by adding more layers of color. This not only enhances the vibrancy of your artwork but also allows for smooth transitions between colors. To achieve a blended look, you can use a blending pencil or even a colorless blender pencil, which helps to merge colors seamlessly.
Additionally, blending techniques can significantly impact the final outcome of your piece. Here are a few methods you can experiment with:
- Burnishing: This technique involves applying heavy pressure with a light-colored pencil over your colored layers to create a smooth, polished look.
- Wet Blending: For a unique effect, you can use a small amount of water on a brush to blend your colored pencil work, giving it a painterly feel.
- Color Mixing: By layering different colors on top of each other, you can create new shades and tones that can add complexity to your artwork.
When selecting colored pencils, consider the quality of the pencils you are using. Professional-grade colored pencils often have higher pigment concentrations, which means they provide better coverage and more vibrant colors. Some popular brands include Prismacolor, Faber-Castell, and Derwent. Each brand has its unique characteristics, so it might be worth trying a few to see which ones suit your style best.
Moreover, the type of paper you choose can make a significant difference in your colored pencil drawings. A textured paper, like watercolor paper or bristol board, can hold the pigment better and allow for more intricate detailing. On the other hand, smooth paper can be excellent for blending and layering. It’s essential to experiment with different papers to find what works best for your technique.
In conclusion, colored pencils are an incredible medium for artists of all levels. With practice and experimentation, you can unlock their full potential and create stunning pieces that reflect your unique artistic vision. So grab your colored pencils, some quality paper, and let your imagination run wild!
Q: Can I use colored pencils on regular drawing paper?
A: Yes, you can use colored pencils on regular drawing paper, but the results may vary. For best results, choose paper specifically designed for colored pencils.
Q: How do I prevent my colored pencil artwork from smudging?
A: To prevent smudging, allow your artwork to dry completely. You can also use a fixative spray to protect your work once it's finished.
Q: What is the best way to store colored pencils?
A: Store your colored pencils in a cool, dry place, and consider using a pencil case or holder to keep them organized and prevent breakage.
Choosing the Right Paper
When it comes to drawing, the choice of paper can significantly influence the outcome of your artwork. Just like a chef selects the finest ingredients for a dish, an artist must carefully choose their paper to ensure the best results. The right paper not only enhances your techniques but also complements your style. With so many options available, it can be overwhelming to decide which type suits your needs. Let’s break it down!
First and foremost, consider the weight of the paper. Heavier papers, typically 200 gsm (grams per square meter) and above, are ideal for wet media like watercolor or ink, while lighter papers are better suited for pencil or charcoal. The texture of the paper also plays a crucial role. Smooth papers are fantastic for detailed work, while textured papers can add an interesting dimension to your drawings. Here’s a quick overview of common paper types:
| Paper Type | Best For | Texture |
|---|---|---|
| Sketch Paper | Pencil, charcoal | Smooth to lightly textured |
| Watercolor Paper | Watercolor, ink | Rough, cold-pressed, or hot-pressed |
| Mixed Media Paper | Various mediums | Textured |
| Illustration Board | Ink, markers | Very smooth |
Next, think about the finish of the paper. Some artists prefer a matte finish for a more subdued look, while others may opt for a glossy finish to make colors pop. Additionally, consider the color of the paper. White paper is a classic choice, but colored or toned paper can add an exciting twist to your drawings, allowing for unique highlights and shadows.
Ultimately, the best way to find the right paper is through experimentation. Don’t be afraid to try different types and brands to see what resonates with your artistic style. You might discover that a certain paper enhances your favorite techniques or inspires new ideas. Remember, every artist is unique, and what works for one may not work for another. So grab a few different sheets, and start drawing!
- What is the best paper for beginners? Sketch paper is a great starting point as it is versatile and affordable.
- Can I use watercolor paper for pencil drawings? Yes, but be mindful that the texture may affect the smoothness of your lines.
- How do I know the weight of the paper? The weight is usually indicated on the packaging, expressed in gsm (grams per square meter).

Fundamental Drawing Techniques
Mastering the is like laying the groundwork for a sturdy building; without it, your artistic aspirations may falter. These techniques are essential for any artist aiming to elevate their drawing skills, whether you're sketching a simple scene or crafting a complex portrait. Let's dive into some of the core skills that every aspiring artist should practice diligently.
First and foremost, shading is a technique that can bring your drawings to life. Think of shading as the magic wand that adds depth and dimension to your work. Without it, your drawings may appear flat and lifeless. There are several methods you can explore to achieve stunning shading effects:
- Hatching: This involves drawing closely spaced parallel lines. The closer the lines are, the darker the area appears.
- Cross-Hatching: A combination of hatching lines that intersect creates a richer texture and darker shades.
- Blending: This technique uses tools like blending stumps or your fingers to smooth out the pencil strokes for a softer transition.
By practicing these shading methods, you can transform a simple outline into a captivating piece of art that draws the viewer in. The key is to experiment with pressure and angle to see how it affects the outcome. After all, every artist develops their unique style through exploration!
Next up is perspective, which is crucial for creating realistic drawings. Imagine trying to depict a bustling cityscape without understanding how buildings recede into the distance. That would be like trying to navigate a maze blindfolded! One-point and two-point perspectives are fundamental concepts that help you accurately portray three-dimensional space on a two-dimensional surface.
In one-point perspective, all lines converge at a single vanishing point on the horizon line, making it perfect for drawing roads or railway tracks. On the other hand, two-point perspective uses two vanishing points, ideal for drawing more complex structures like buildings viewed from a corner. Mastering these techniques will significantly enhance your ability to create realistic scenes.
Another critical skill is understanding proportions. Proportions refer to the relationship between different elements in your drawing. For instance, when sketching a human figure, getting the proportions right ensures that the head, torso, and limbs are in harmony. A common technique is to use the grid method, where you draw a grid over your reference image and a corresponding grid on your drawing surface. This helps you accurately translate the proportions from one to the other.
To wrap it all up, mastering these fundamental drawing techniques—shading, perspective, and proportions—will provide you with the tools needed to create compelling and realistic artworks. Remember, practice makes perfect! The more you draw, the better you'll become. So grab your pencils, and let's get sketching!
Q: How often should I practice my drawing skills?
A: Consistency is key! Aim for at least 30 minutes a day to see significant improvement over time.
Q: What is the best way to learn shading techniques?
A: Try out different methods like hatching and blending on various surfaces. Experimentation will help you find what works best for you.
Q: Can I use digital tools to practice these techniques?
A: Absolutely! Many artists use digital software to practice shading and perspective, which can offer unique advantages like undo options and layer manipulation.
Shading Techniques
Shading is an essential skill that can dramatically enhance the depth and realism of your drawings. Think of shading as the magic wand that transforms a flat image into a three-dimensional masterpiece. Without it, your drawings may appear lifeless and lacking dimension. By mastering various shading techniques, you can create a sense of volume and texture, making your artwork truly pop. So, let's dive into some of the most effective shading methods that every aspiring artist should explore!
One of the most fundamental techniques is hatching. This method involves drawing closely spaced parallel lines to create the illusion of shadow. The closer the lines are together, the darker the area appears. This technique is great for creating a textured look, especially in areas where you want to convey depth. For example, if you're drawing a sphere, you can use hatching on one side to indicate the shadow cast by a light source.
Cross-hatching takes hatching a step further by layering lines in different directions. By crossing lines over each other, you can achieve even darker shades and more intricate textures. This technique is particularly useful for detailing complex shapes or creating a more dramatic effect in your artwork. Imagine drawing a tree trunk; using cross-hatching can help you depict the roughness of the bark beautifully.
Another popular method is blending. This technique involves smoothing out the lines and transitions between different shades, creating a soft gradient effect. Blending can be done using various tools, such as blending stumps, your fingers, or even a soft cloth. This method is perfect for achieving smooth skin tones in portraits or the gentle transitions of light and shadow on a rounded object. It's like icing on a cake, giving your artwork that polished finish!
To help you understand these techniques better, here's a quick comparison of the three methods:
| Technique | Description | Best For |
|---|---|---|
| Hatching | Parallel lines create shadows | Textured areas, basic shading |
| Cross-hatching | Layered lines in different directions | Complex shapes, dramatic effects |
| Blending | Smoothing transitions between shades | Soft gradients, realistic textures |
As you practice these techniques, remember that shading is not just about making things darker. It's about understanding light and how it interacts with objects. Consider the direction of your light source and how it affects the shadows on your subject. By observing real-life objects and practicing these techniques, you'll develop a keen eye for detail and improve your overall drawing skills.
In conclusion, shading techniques are vital tools in your artistic arsenal. Whether you choose hatching, cross-hatching, or blending, each method offers unique advantages that can help you create stunning artworks. So grab your pencils and start experimenting! The world of shading is waiting for you to explore.
- What is the best pencil for shading? Generally, softer pencils (like 2B, 4B, or 6B) are better for shading because they produce darker marks.
- How can I improve my shading skills? Regular practice is key! Try drawing different objects under various lighting conditions to understand how shadows work.
- Can I use colored pencils for shading? Absolutely! Colored pencils can be blended to create beautiful, vibrant shades and gradients.
Understanding Perspective
When diving into the world of drawing, one concept that stands out as a game-changer is perspective. It’s akin to the magic trick that transforms a flat piece of paper into a three-dimensional space. Imagine standing on a bustling street, where buildings tower over you, and the road seems to stretch infinitely into the distance. That’s perspective at work! Understanding how to manipulate perspective can elevate your drawings from simple sketches to breathtaking representations of reality.
At its core, perspective is about how objects appear smaller as they recede into the distance. This phenomenon is essential for creating depth in your artwork. There are primarily two types of perspective that every artist should master: one-point perspective and two-point perspective. Let’s break these down:
- One-Point Perspective: This is the simplest form of perspective. Imagine you're looking directly down a straight road or railway track. The lines of the road converge at a single point on the horizon, known as the vanishing point. This technique is particularly useful for drawing interiors or straight roads.
- Two-Point Perspective: This method introduces a second vanishing point, typically located on the horizon line. It’s like standing at the corner of a building, where you can see two sides receding into the distance. This perspective adds complexity and is ideal for drawing buildings and urban scenes.
To illustrate these concepts, consider the following table that outlines the key differences between one-point and two-point perspective:
| Aspect | One-Point Perspective | Two-Point Perspective |
|---|---|---|
| Vanishing Points | 1 | 2 |
| Viewpoint | Directly facing the subject | At an angle to the subject |
| Complexity | Less complex, easier for beginners | More complex, offers a dynamic view |
| Best for | Interiors, roads, railways | Buildings, cityscapes |
Now, let’s talk about the horizon line. This is the level where the sky meets the ground in your drawing. It’s a crucial element as it determines where your vanishing points will be placed. Think of it as the eye level of your viewer; everything above the horizon line appears to rise, while everything below seems to descend. Mastering the horizon line will help you create more convincing depth in your artwork.
Another important aspect of perspective is the foreshortening technique. This is where an object appears compressed or shortened when viewed from a particular angle. For instance, if you’re drawing a hand reaching towards the viewer, the fingers will appear larger than the palm, creating a dramatic effect. This technique can add a sense of realism and excitement to your drawings, making them pop off the page.
As you practice these techniques, remember that observation is key. Spend time studying your surroundings, noticing how objects relate to one another in space. Take a sketchbook on your walks and practice capturing the essence of perspective in real life. The more you observe and draw, the more intuitive your understanding of perspective will become.
In conclusion, mastering perspective is like learning to navigate a new world. It opens up a realm of possibilities for your drawings, allowing you to create scenes that are not only visually appealing but also rich in depth and realism. So grab your pencils, find a comfortable spot, and start exploring the fascinating world of perspective!
Q: How can I practice perspective drawing?
A: Start with simple shapes and gradually move to more complex structures. Use reference images and try sketching from real life to improve your skills.
Q: What tools do I need to draw in perspective?
A: A ruler, pencils, and an eraser are essential. You can also use graph paper to help maintain proportions and angles.
Q: Can I use perspective in digital art?
A: Absolutely! The principles of perspective apply to both traditional and digital art. Many digital art programs even have tools to assist with perspective drawing.

Developing Your Unique Style
Finding your artistic voice is like embarking on an exhilarating journey through a vibrant landscape of creativity. It’s not just about mastering techniques; it’s about discovering what makes your heart sing and your pencil dance on the paper. Every artist starts somewhere, and the path to developing a unique style is often filled with experimentation and self-discovery. So, how do you begin this exciting adventure?
First and foremost, experimenting with different mediums can be a game changer. Don’t confine yourself to just pencils or paper. Dive into the world of charcoal, ink, watercolor, or even digital tools. Each medium has its own personality and can evoke different emotions in your work. For instance, charcoal can create dramatic contrasts, while watercolors offer a soft, ethereal quality. By trying out various mediums, you can find what resonates with you and enhances your artistic expression.
Next, consider incorporating personal themes into your artwork. Your experiences, thoughts, and feelings are unique to you, and they can serve as a rich source of inspiration. Think about the places you've been, the people you've met, and the emotions you've felt. How can these aspects be translated into your drawings? Maybe it’s a scene from your childhood that evokes nostalgia or a powerful moment that changed your perspective. By infusing your personal narrative into your art, you create pieces that are not only visually appealing but also deeply meaningful.
As you navigate through this creative journey, it’s essential to remain open-minded. Your style will evolve over time, and that’s perfectly okay! Embrace the changes and allow yourself to grow. You might find that you start with realistic drawings but gradually lean towards abstract expressions. This evolution is part of the artistic process. Remember, every stroke you make is a step closer to uncovering your true self as an artist.
To further enhance your journey, consider seeking feedback and critique from fellow artists or mentors. Sharing your work with others can provide fresh perspectives and valuable insights. Constructive criticism can be a powerful tool for growth; it can help you identify strengths and areas for improvement. Don't shy away from asking for feedback—embrace it! You’ll be surprised at how much you can learn from the opinions of others.
In conclusion, developing your unique style is an exciting and ongoing process. It requires patience, practice, and a willingness to explore. So, grab your sketchbook, try new things, and let your creativity flow. Remember, the journey is just as important as the destination, and every artist’s path is beautifully unique.
- How do I find my unique style? Start by experimenting with different mediums and subjects. Take note of what excites you and what feels authentic to your expression.
- Is it normal for my style to change over time? Absolutely! Artistic growth is a natural part of the creative process, and your style may evolve as you gain new experiences and skills.
- How can I incorporate personal themes into my artwork? Reflect on your life experiences, emotions, and inspirations. Think about how these elements can be visually represented in your drawings.
- Should I seek feedback on my work? Yes! Constructive feedback can provide valuable insights and help you refine your skills. Don’t hesitate to share your work with others.
Experimenting with Different Mediums
When it comes to drawing, the world is your oyster! Experimenting with different mediums can be a thrilling adventure that not only enhances your skills but also opens up a treasure chest of creative possibilities. Think of it like tasting a variety of cuisines; each medium has its own unique flavor and texture that can elevate your artwork to new heights. Whether you're doodling in a sketchbook or crafting a masterpiece, trying out various tools can ignite your passion and inspire fresh ideas.
One of the most exciting aspects of drawing is the range of mediums available to you. From charcoal to ink, and even digital tools, each medium offers distinct characteristics that can transform your artistic expression. For example, charcoal is known for its rich, deep blacks and soft textures, making it perfect for dramatic shading and expressive lines. On the other hand, ink can create sharp, clean lines that lend themselves beautifully to intricate details and bold designs. The choice of medium can dramatically influence not only the outcome of your work but also the process of creation itself.
To get started on your exploration, consider the following mediums:
- Graphite: Ideal for detailed sketches and shading, graphite pencils range from hard to soft, allowing for versatility in line quality.
- Charcoal: Perfect for expressive drawings, charcoal provides a range of values and can be easily blended to create depth.
- Ink: Great for precision and boldness, ink can be applied with pens or brushes, offering various effects from fine lines to washes.
- Pastels: These colorful sticks can create vibrant, soft textures, perfect for blending and layering colors.
- Digital Tools: Using software like Procreate or Adobe Illustrator allows for endless possibilities, including undo options and layering without mess.
Don’t be afraid to mix and match! Combining mediums can yield unique results that you might not achieve with just one. For instance, you might start with a charcoal base to establish deep shadows and then use colored pencils to add highlights and details. This layering technique can create a stunning visual contrast that captivates viewers.
As you experiment, remember to keep an open mind. Not every medium will resonate with your style, and that’s perfectly okay! The key is to enjoy the process of discovery. You might find that you fall in love with a medium you never considered before. So grab your sketchbook, gather your supplies, and let your imagination run wild. The journey of experimentation is not just about finding what works; it’s also about embracing the unexpected and allowing your creativity to flourish.
To further enhance your experience, consider joining local art classes or online communities where you can share your experiments and learn from others. Engaging with fellow artists can provide you with invaluable insights and inspiration, helping you refine your techniques and discover new mediums you may not have tried yet.
Q: How do I choose the right medium for my drawing?
A: Consider the effect you want to achieve and the style you prefer. Experimenting is key—try different mediums to see what resonates with you!
Q: Can I mix different mediums in one artwork?
A: Absolutely! Mixing mediums can create unique textures and effects, making your artwork more dynamic.
Q: What if I don’t like a medium I’ve tried?
A: That’s totally fine! Not every medium will suit your style, and that’s part of the learning process. Keep experimenting until you find what you love.
Incorporating Personal Themes
When it comes to drawing, can truly elevate your artwork. Think of your drawings as a window into your soul—each piece tells a story, reflects your experiences, and showcases your unique perspective on the world. So, how do you start weaving your personal narrative into your art? It's simpler than you might think!
First, reflect on your experiences. What moments have shaped you? Whether it’s a cherished memory, a challenging time, or a journey of self-discovery, these elements can serve as powerful inspiration. For instance, if you had a transformative trip abroad, consider drawing scenes or objects that represent that experience. It could be the bustling streets of a city, the serene landscapes, or even the people you met along the way.
Next, think about your emotions. Art is a fantastic medium for expressing feelings that might be difficult to articulate. If you’re feeling joyful, your drawings might burst with vibrant colors and lively subjects. Conversely, if you’re grappling with sadness, perhaps your artwork will take on a more subdued palette. By channeling your emotions into your art, you create a piece that resonates not just with you, but also with others who may share similar feelings.
Additionally, consider the themes that resonate with you. Do you have a passion for nature? Social issues? Cultural heritage? Use these themes as a foundation for your drawings. For example, if environmental conservation is important to you, create artwork that highlights the beauty of nature and the need to protect it. This not only allows you to express your beliefs but also invites viewers to engage with the themes you care about deeply.
Another way to incorporate personal themes is to experiment with symbolism. Symbols can convey complex ideas and emotions in a single image. For instance, a broken chain could symbolize freedom from oppression, while a blooming flower might represent hope and renewal. By embedding symbols into your work, you can add layers of meaning that invite viewers to ponder and interpret your art in their own way.
Finally, don’t shy away from telling your story. Every artist has a unique journey, and sharing yours can create a deep connection with your audience. Whether through your choice of subjects, the style you adopt, or the techniques you use, let your personal narrative shine through. Remember, your art is an extension of who you are, and by sharing your story, you invite others to see the world through your eyes.
- How can I find my personal themes in art? Start by reflecting on your life experiences, interests, and emotions. Keep a journal to jot down moments or feelings that resonate with you.
- Is it okay to draw inspiration from other artists? Absolutely! Just ensure that you infuse your unique perspective into the work, making it distinctly yours.
- What if I struggle to express my themes visually? Practice is key! Experiment with different styles and mediums until you find what feels right for you.

Practicing and Improving Your Skills
Consistent practice is the heartbeat of any artist's journey. If you want to elevate your drawing skills, you have to embrace the process of improvement with open arms. Think of it like training for a marathon: it's not just about showing up on race day; it's about the daily runs, the stretching, and even the occasional sore muscles. The same goes for drawing. Each stroke you make is a step towards becoming a better artist.
One of the most effective ways to practice is through daily drawing exercises. These exercises can range from quick sketches to more detailed studies. Imagine setting aside just 15 to 30 minutes each day to draw whatever inspires you. It could be a still life arrangement, a quick portrait of a friend, or even a scene from your favorite movie. The key is to keep it varied and engaging. Here are a few ideas to get you started:
- Sketch a different object from your home each day.
- Draw a character from your favorite book or film.
- Experiment with drawing from photographs or life.
- Set a timer for 5 minutes and do a quick gesture drawing.
These prompts can help keep your practice fresh and exciting. Moreover, don't shy away from seeking feedback and critique. Sharing your work with others can be daunting, but constructive criticism is invaluable. It’s like having a coach who helps you identify areas for improvement that you might not notice yourself. You can join online art communities, participate in local art groups, or even ask friends and family for their thoughts on your work. Remember, feedback is not a personal attack; it’s a tool for growth.
Additionally, consider setting up a structured routine for your drawing practice. This could involve dedicating specific days to focus on different skills. For instance, you might spend Mondays on shading techniques, Wednesdays on perspective, and Fridays on experimenting with new mediums. A structured approach can help you cover all the bases and ensure you're not neglecting any vital skills.
Finally, don’t forget the importance of self-reflection. After each drawing session, take a moment to look back at your work. What did you enjoy? What challenged you? Keeping a drawing journal can be a great way to track your progress over time. You can jot down your thoughts, document your challenges, and celebrate your successes. This reflection will not only help you recognize how far you've come but also guide your future practice.
Q: How often should I practice drawing?
A: Aim for daily practice, even if it's just for a short period. Consistency is key to improvement.
Q: What should I focus on when practicing?
A: Focus on various skills such as shading, perspective, and proportions. Mix it up to keep your practice engaging!
Q: Is it important to seek feedback?
A: Absolutely! Constructive feedback can provide insights that help you grow as an artist.
Q: How can I stay motivated to draw?
A: Set personal goals, join art communities, and keep your practice varied to stay inspired.

Daily Drawing Exercises
Engaging in is one of the best ways to sharpen your artistic skills and keep your creativity flowing. Think of it like a workout for your artistic muscles; just as athletes train regularly to enhance their performance, artists need to practice consistently to improve their craft. The beauty of daily drawing is that it doesn’t require a lot of time or fancy materials. You can start with just a pencil and paper, and the possibilities are endless!
To kickstart your daily drawing routine, consider setting aside a specific time each day. This could be as little as 15 minutes or as long as an hour—whatever fits into your schedule. The key is to make it a habit. You might want to keep a sketchbook handy so you can jot down ideas or doodle whenever inspiration strikes. Here are a few engaging exercises you can incorporate into your daily practice:
- Gesture Drawing: Spend a few minutes capturing the essence of a moving subject. This could be a person walking by or even your pet. The goal is to create quick sketches that focus on movement and form.
- Still Life: Arrange a few objects around your home—like fruits, vases, or books—and draw them. This helps you practice observation and improves your ability to depict shapes and shadows.
- Copying Masters: Choose a piece of artwork from a renowned artist and try to replicate it. This exercise helps you understand different techniques and styles, enhancing your own skills in the process.
Another effective approach is to set drawing challenges for yourself. For example, you could choose a theme for the week, such as "animals" or "landscapes," and create a new drawing each day based on that theme. This not only keeps your practice exciting but also encourages you to explore different subjects and techniques.
Additionally, you can incorporate drawing prompts into your routine. These prompts can be anything from "draw your favorite food" to "create a character from your imagination." They serve as a fantastic way to spark creativity and push you out of your comfort zone.
To make your practice even more engaging, consider joining an online drawing community or participating in social media challenges. Platforms like Instagram and Twitter often host drawing challenges that encourage artists to share their work and connect with others. This not only provides motivation but also allows you to receive feedback and learn from fellow artists.
Remember, consistency is key. It’s perfectly normal to have days when you feel uninspired or frustrated. On those days, just pick up your pencil and draw something—anything! The act of creating can often reignite your passion and lead to unexpected breakthroughs.
Q: How long should I draw each day?
A: Aim for at least 15-30 minutes daily. However, if you have more time, feel free to extend your practice!
Q: What if I don't know what to draw?
A: Use drawing prompts, still life arrangements, or even reference photos to inspire your creativity.
Q: Can I improve my skills by just copying other artists?
A: Yes, copying can help you learn different techniques, but always strive to develop your own style as well.
Q: Is it necessary to share my work online?
A: Sharing is not mandatory, but it can provide valuable feedback and connect you with other artists, which can be encouraging.

Seeking Feedback and Critique
As an artist, one of the most valuable tools at your disposal is the ability to seek feedback and critique. It might feel intimidating to share your work with others, but it's a crucial step in your artistic journey. Think of feedback as a mirror; it reflects aspects of your work that you might not see on your own. Just like a seasoned chef tastes their dish before serving it, you too can benefit from the insights of fellow artists, mentors, or even friends who appreciate art.
When you share your drawings, you're opening a door to a world of perspectives. Constructive criticism can highlight your strengths, point out areas for improvement, and inspire new ideas. But remember, not all feedback is created equal. Aim to connect with individuals who understand the nuances of art and can provide thoughtful insights. This could be through art classes, online forums, or local art groups. Engaging with a community of artists can also foster a sense of belonging and motivation.
Here are some tips on how to effectively seek out feedback:
- Be Specific: When asking for feedback, specify what aspects you're looking for input on. Are you struggling with proportions, shading, or overall composition? This helps the reviewer focus on the areas that matter most to you.
- Choose the Right Audience: Share your work with those who have a good understanding of art. This could be teachers, fellow students, or experienced artists who can provide valuable insights.
- Stay Open-Minded: Remember, feedback is not a personal attack. Embrace critiques as opportunities for growth. Even if you disagree with some points, consider them carefully before dismissing them.
- Follow Up: After receiving feedback, don’t hesitate to ask follow-up questions. Understanding the rationale behind the critique can deepen your knowledge and help you improve.
Incorporating feedback into your practice isn't just about improving a single piece; it's about evolving as an artist. As you refine your skills, you'll find that your style develops more distinctly, allowing you to express your unique voice. Additionally, sharing your art and receiving critiques can build your confidence, making you more comfortable in your artistic skin.
Lastly, consider documenting the feedback you receive. Keeping a feedback journal can help you track your progress over time. You can note down the critiques, your responses, and how you applied the suggestions in your future works. This practice not only solidifies the learning process but also serves as a motivational tool, reminding you of how far you've come.
| Question | Answer |
|---|---|
| How can I find a critique group? | Look for local art classes, online forums, or social media groups dedicated to artists. Many communities offer platforms for sharing work and receiving feedback. |
| What should I do if I receive negative feedback? | Take a moment to process the feedback without taking it personally. Analyze it objectively and see if there are constructive elements you can incorporate into your practice. |
| How often should I seek feedback? | Regularly seeking feedback can be beneficial, especially after completing a new piece. However, balance it with time for self-reflection and personal growth. |
Frequently Asked Questions
- What are the basic skills I need to start drawing?
To kickstart your drawing journey, it’s essential to grasp the fundamentals like line, shape, and form. These are the building blocks of any artwork. Think of them as your ABCs in the art world—master them, and you'll be well on your way to creating stunning pieces!
- What drawing tools should I invest in?
Choosing the right tools can make a world of difference! Start with a good set of graphite pencils, some colored pencils for that pop of color, and a few sheets of quality drawing paper. It's like picking the right ingredients for a recipe; the better the tools, the tastier the results!
- How can I improve my shading techniques?
Improving your shading is all about practice! Techniques like hatching, cross-hatching, and blending can add depth to your drawings. Try experimenting with these methods on different surfaces to see how they affect your artwork. It's like finding the right seasoning for your dish—sometimes a little tweak can make all the difference!
- What is perspective and why is it important?
Perspective gives your drawings a sense of depth and realism. Understanding one-point and two-point perspective can help you accurately depict three-dimensional spaces. Imagine looking down a long road; it narrows into the distance. That’s perspective in action!
- How do I find my unique drawing style?
Finding your unique style is part of the fun! Experiment with different mediums, techniques, and themes. Allow your personal experiences to influence your art. It’s like trying on different outfits until you find the one that feels just right—your art should reflect who you are!
- What are some good daily drawing exercises?
Daily drawing exercises can keep your skills sharp and your creativity flowing! Consider setting aside time for quick sketches, drawing from life, or using prompts to challenge yourself. Think of it as a workout for your artistic muscles—the more you practice, the stronger you get!
- How can I get constructive feedback on my drawings?
Sharing your work with others is a fantastic way to gain insights and improve! Join art communities, forums, or social media groups where you can post your drawings and receive critiques. It’s like having a personal coach who helps you see your blind spots and grow!


