
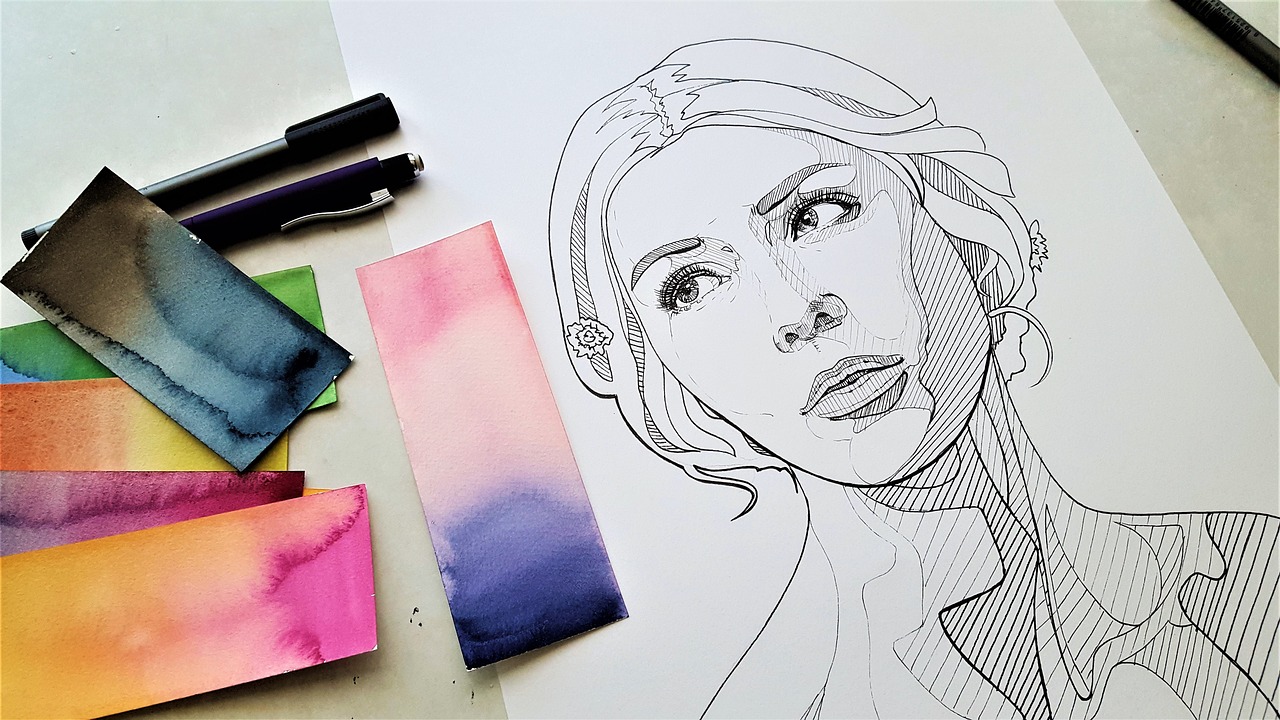
A Comprehensive Guide to Drawing Cartoon Faces
Drawing cartoon faces is not just about putting pencil to paper; it's about capturing the essence of a character in a way that resonates with viewers. Whether you’re a budding artist or someone with a bit more experience under your belt, this guide is designed to take you through the exciting journey of creating expressive cartoon faces. From the foundational shapes that form the basis of every face to the intricate details that bring characters to life, you’ll find insights and techniques that can elevate your art. So, grab your sketchbook and let’s dive into the whimsical world of cartoon faces!
The journey of drawing cartoon faces begins with mastering basic shapes. These shapes are the building blocks that help simplify the complex structures of human faces. Imagine the face as a puzzle; each piece is a shape that contributes to the overall picture. Start by sketching circles for the head, ovals for cheeks, and triangles for the chin. By simplifying facial structures into these basic forms, you can create a solid foundation upon which to build more complex features and expressions.
For example, the roundness of a circle can evoke a sense of friendliness, while sharp angles from triangles can suggest a more mischievous character. This understanding of shapes allows you to play with proportions and features, giving you the freedom to experiment with various styles and expressions. Remember, every great artist started with a simple shape!
Once you're comfortable with basic shapes, the next step is to grasp facial proportions. This knowledge is crucial in cartooning, as it helps you achieve a balanced and appealing look. Typically, the face can be divided into sections. For instance, the eyes are usually located halfway down the head, while the nose sits about halfway between the eyes and the chin. Understanding these placements can help you create faces that feel natural, even in their exaggerated cartoon forms.
The placement of eyes can dramatically influence a character's expression. Have you ever noticed how a slight shift in eye position can change a character from happy to sad? By exploring various techniques for positioning eyes, you can effectively convey emotions and maintain proportion in your cartoon faces. For instance, placing the eyes closer together can create a more innocent look, while wider-set eyes can suggest a more mature character.
Different eye shapes can also alter a character's personality significantly. Round eyes might suggest innocence or curiosity, while narrow, slanted eyes can give off a more cunning or mischievous vibe. Experimenting with these shapes allows you to enhance the uniqueness of your cartoon characters. Consider creating a character sheet where you sketch different eye shapes and note the emotions they evoke. This practice can be incredibly beneficial in developing your own style.
Don’t underestimate the power of eyebrows! They play a vital role in expression. Well-drawn eyebrows can amplify your character's emotions, adding depth to their facial expressions. For instance, raised eyebrows can indicate surprise or excitement, while furrowed brows can suggest anger or confusion. By learning how to draw eyebrows that complement your character's emotions, you can create faces that truly resonate with your audience.
The nose and mouth are key elements in conveying emotion in cartoon faces. A simple smile can transform a character from gloomy to cheerful. This section will guide you through various styles and techniques for drawing noses and mouths. You might consider experimenting with different mouth shapes, such as wide grins or tiny smirks, to see how they affect the overall expression. Remember, the nose doesn’t need to be realistic; it just needs to fit the style of your cartoon!
To make your cartoon faces truly stand out, incorporating unique character traits is essential. This section discusses how to personalize features to create memorable and relatable characters. Think about what makes a character unique: is it their quirky hairstyle, a signature accessory, or an unusual facial feature? Adding these traits not only enhances individuality but also helps your audience connect with the character on a personal level.
Hairstyles and accessories can define a character's personality. A wild, unkempt hairstyle might suggest a free spirit, while a neat, slicked-back look could imply someone who is organized and serious. Learn how to draw different hairstyles and accessorize your characters to enhance their individuality. Don't shy away from experimenting with colors and styles; the more diverse your characters are, the more engaging your art becomes!
Coloring can truly bring your cartoon faces to life. Explore various coloring techniques, including shading and highlighting, to add dimension and vibrancy to your artwork. Consider using a color palette that reflects the character's mood or personality. For instance, warm colors can evoke feelings of happiness and energy, while cooler tones can suggest calmness or sadness. The right colors can enhance the emotional impact of your cartoon faces significantly.
Practicing different facial expressions is vital for character development. This section provides exercises and tips for drawing a range of emotions, from happiness to sadness. One effective method is to create an emotion chart where you sketch a character displaying various emotions. This practice not only hones your skills but also helps you understand how subtle changes in features can convey different feelings.
Using reference guides can help artists accurately depict emotions. Discover various resources and techniques for capturing authentic expressions in your cartoon faces. You might find it helpful to study real-life expressions or even use photographs as references. The more you understand how emotions manifest in facial features, the better equipped you'll be to translate those feelings into your art.
Dynamic poses enhance the storytelling aspect of cartoon faces. Learn how to position your characters in ways that reflect their emotions and personalities effectively. A character leaning forward might suggest eagerness, while one leaning back could indicate reluctance or fear. By mastering body language alongside facial expressions, you can create characters that feel alive and relatable.
Finalizing your cartoon face drawings involves refining details and enhancing features. This section offers tips on how to polish your artwork for a professional finish. Pay attention to the final touches, such as cleaning up line work and ensuring consistent shading. These details can make a significant difference in the overall presentation of your artwork.
Inking is a crucial step in finalizing cartoon faces. Explore different inking techniques to define your lines and enhance the overall presentation of your artwork. Whether you prefer traditional ink pens or digital tools, mastering line work can elevate your cartoon faces from sketches to polished pieces. Don't be afraid to experiment with line thickness and styles to find what best suits your artistic voice.
Understanding the differences between digital and traditional art techniques can inform your approach. This section compares methods, tools, and benefits of both styles in creating cartoon faces. Digital art allows for easy corrections and experimentation, while traditional methods can offer a tactile experience that many artists cherish. Ultimately, the choice between digital and traditional techniques depends on your personal preference and the style you wish to achieve.
- What materials do I need to start drawing cartoon faces? You can start with basic drawing tools like pencils, erasers, and paper. As you progress, consider investing in markers or digital tablets for inking and coloring.
- How can I improve my cartoon drawing skills? Practice regularly, study various styles, and seek feedback from other artists. Joining art communities can also provide motivation and inspiration.
- What are some common mistakes to avoid? Avoid overcomplicating facial features. Stick to basic shapes and proportions to maintain the cartoon style. Also, don’t forget to practice drawing expressions!
Understanding Basic Shapes
Mastering basic shapes is essential for drawing cartoon faces, as these shapes form the foundation for more complex features and expressions. Think of it like building a house; without a solid foundation, everything else becomes unstable. When you break down facial structures into simple forms like circles, ovals, and triangles, you’ll find that creating expressive faces becomes much easier. For instance, a circle can represent a head, while ovals can effectively depict cheeks or a chin. Triangles can be used for noses or even to create dynamic hairstyles, adding a playful twist to your character.
To illustrate the importance of these shapes, let’s take a look at how they can be combined:
| Shape | Purpose | Example |
|---|---|---|
| Circle | Head | Basic head shape |
| Oval | Cheeks | Adding fullness to the face |
| Triangle | Nose | Pointed or rounded nose |
When you start sketching, remember to keep your lines light and fluid. This approach allows you to adjust shapes easily without feeling stuck. As you gain confidence, you can begin to refine these shapes into more detailed features. The beauty of cartooning lies in its flexibility; you can exaggerate features for comedic effect or simplify them for a more minimalist style. The key is to experiment and find what resonates with your artistic voice.
As you practice, consider how different shapes can convey various emotions. For example, a round face often feels friendly and approachable, while a more angular shape might suggest seriousness or even villainy. By understanding how these basic shapes affect the overall perception of your character, you can manipulate them to tell a story through your art.
In conclusion, mastering basic shapes is your first step towards creating captivating cartoon faces. These shapes not only simplify the drawing process but also enhance your ability to convey emotions and personalities. So grab your sketchpad and start experimenting with circles, ovals, and triangles. You'll be amazed at how much character you can create with just these fundamental forms!
Facial Proportions
When it comes to drawing cartoon faces, understanding is crucial. It’s like the skeleton of your artwork; without it, everything else can feel off-balance or awkward. You might be wondering, what exactly are facial proportions? Well, they refer to the relative sizes and positions of the facial features in relation to each other. Get this right, and your characters will not only look more appealing but also more expressive!
To start, let’s break down the typical measurements for a cartoon face. While realism isn’t the goal in cartooning, having a basic grasp of proportions can help you exaggerate features effectively. A common guideline is the “five eyes wide” rule, where the width of the face is roughly equal to five eye widths. This means that the space between the eyes should be about the width of one eye. It’s a simple but effective way to ensure your characters have a balanced look.
Now, let’s delve into some essential proportions:
| Feature | Proportion |
|---|---|
| Eyes | 1 eye width apart |
| Nose | Halfway between the eyes and chin |
| Mouth | One-third from the nose to the chin |
| Ears | Align with the eyes and nose |
These proportions serve as a guideline, but feel free to play around with them! After all, cartooning is all about creativity and exaggeration. For instance, if your character is supposed to be goofy, you might want to give them a larger nose or wider eyes. On the other hand, if you're aiming for a more serious character, you might want to keep the features more subdued.
Another important aspect to consider is the placement of features. The eyes should ideally be positioned about halfway down the head. The nose typically sits just below the halfway point between the eyes and the chin, while the mouth can be placed about one-third of the way down from the nose to the chin. This creates a natural flow and balance in your character's face, making them more relatable and engaging.
Don’t forget about the ears! They usually align with the eyes and nose. However, their size and shape can vary dramatically depending on your character's personality. For instance, larger ears might suggest a whimsical or cartoonish character, while smaller ears could indicate a more serious demeanor.
As you practice, try sketching out different faces using these proportions as a starting point. You can create a variety of characters simply by adjusting the size and position of their features. Remember, the beauty of cartooning lies in its flexibility and the ability to convey emotion through exaggerated features. So grab your pencil, and let your creativity flow!
- What if my cartoon face doesn't look right? Don't worry! Keep practicing and adjust the proportions as needed. Every artist has their own style!
- Can I use these proportions for all cartoon styles? These are general guidelines, but feel free to adapt them to suit your unique style!
- How do I know when to exaggerate features? Trust your instincts! If a feature feels too subtle for the character's personality, don't hesitate to exaggerate it.
Eye Placement Techniques
When it comes to drawing cartoon faces, the placement of the eyes is absolutely crucial. Think of the eyes as the windows to the soul; they convey emotions and personality like nothing else. If you place them too high, your character might look surprised or even a bit silly. Conversely, if they’re too low, your character might appear sad or tired. So, how do you achieve that perfect eye placement? Let's dive into some techniques!
First off, consider the general rule of thirds. This technique divides the face into three equal horizontal sections. The eyes typically sit in the upper third, which can help create a balanced and appealing look. To visualize this, you can imagine drawing two horizontal lines across a face—one at the top of the forehead and one just above the mouth. The eyes should be nestled comfortably between these lines, providing a natural and engaging expression.
Another important aspect to consider is the distance between the eyes. A common guideline is that the space between the eyes should be roughly the width of one eye. This spacing helps maintain proportionality and makes your character look more relatable. If you want your character to appear more whimsical or exaggerated, you can play around with this distance—widening it can create a more comical effect, while narrowing it can give a more serious tone.
Now, let’s talk about the angle of the eyes. The angle can dramatically affect the overall expression of your character. For instance, if the outer corners of the eyes are higher than the inner corners, your character may look happy or surprised. On the flip side, if the inner corners are higher, the character might appear sad or angry. This subtle shift can change everything, so don’t underestimate the power of eye angles!
To help you visualize these techniques, here’s a simple table summarizing the effects of different eye placements:
| Eye Placement | Expression |
|---|---|
| High outer corners | Happy or surprised |
| Low outer corners | Sad or angry |
| Wide spacing | Whimsical or childlike |
| Narrow spacing | Serious or focused |
Finally, don’t forget about the eyelids and eyelashes. These features can add depth to your character's expression. For example, droopy eyelids can make a character look tired, while wide-open eyes can convey excitement or shock. Adding eyelashes can also enhance femininity or expressiveness, depending on the style you’re aiming for.
In summary, mastering eye placement techniques is vital for creating expressive cartoon faces. By experimenting with the positioning, spacing, and angles of the eyes, you can breathe life into your characters and make them truly memorable. So, grab your sketchpad and start practicing—your characters are waiting to come to life!
- How do I know if my eye placement is correct? One way to check is by taking a step back and looking at your drawing from a distance. If the eyes seem to convey the right emotion and are proportionate, you're on the right track!
- Can I use different eye shapes for different characters? Absolutely! Different eye shapes can reflect various personalities, so feel free to experiment with shapes to match the character's traits.
- What tools can help improve my eye-drawing skills? Practice is key! Consider using reference photos or watching tutorials specifically focused on eye placement and expression to enhance your skills.
Different Eye Shapes
When it comes to cartoon faces, the shape of the eyes can dramatically influence how a character is perceived. Think of the eyes as the windows to the soul, or in this case, the windows to your character's personality! Different eye shapes can convey a range of emotions and traits, from innocence and curiosity to mischief and wisdom. For instance, large, round eyes often suggest a sense of wonder and innocence, while narrow, slanted eyes can give off a more cunning or mischievous vibe.
Let’s explore some common eye shapes and the emotions they typically express:
| Eye Shape | Description | Common Emotions |
|---|---|---|
| Round | Big and circular, often used for youthful characters. | Surprise, happiness, curiosity |
| Almond | Slender and slightly pointed at the ends, resembling an almond. | Calmness, confidence, mystery |
| Slanted | Narrow with a sharp angle, giving a more intense look. | Anger, cunning, mischief |
| Droopy | Eyes that slope downwards, often giving a tired or sad appearance. | Sadness, fatigue, disappointment |
As you can see from the table, each eye shape brings its own unique flavor to a character's personality. To create compelling cartoon faces, experiment with these shapes and see how altering them changes the overall expression. For example, a character with round eyes might be seen as more approachable, while a character with slanted eyes could appear more intimidating. The key is to play around with proportions and angles to find the perfect fit for your character.
Don’t forget about the pupils and eyelids! These elements can further enhance the emotion conveyed by the eyes. For instance, adding a sparkle to the pupils can suggest excitement or joy, while heavy eyelids can indicate fatigue or boredom. By combining different eye shapes with various pupil sizes and eyelid positions, you can create a vast array of expressions that make your characters truly come alive.
In conclusion, mastering different eye shapes is crucial in cartooning. The eyes are not just features; they are powerful tools for storytelling. So grab your pencil and start experimenting with these shapes! You might be surprised at how much a simple change in eye design can transform your cartoon faces from ordinary to extraordinary.
- What is the best way to practice drawing different eye shapes? Start by sketching basic shapes and gradually add details. Use reference images for inspiration.
- Can I create my own unique eye shapes? Absolutely! Feel free to experiment and combine different shapes to create something entirely new.
- How do eye shapes affect character design? Eye shapes significantly influence how audiences perceive a character's personality and emotions.
Expressive Eyebrows
When it comes to drawing cartoon faces, eyebrows are often the unsung heroes of expression. They can transform a neutral face into one filled with emotion in just a few strokes. Think of eyebrows as the curtains to the windows of the soul; they frame the eyes and set the tone for the entire expression. Whether you’re aiming for a look of surprise, anger, joy, or sadness, the way you draw eyebrows can significantly alter the character’s emotional impact.
To master the art of expressive eyebrows, consider their shape, angle, and thickness. For instance, raised eyebrows can indicate surprise or excitement, while furrowed brows often suggest anger or confusion. Here are a few common eyebrow shapes and their associated emotions:
| Eyebrow Shape | Emotion Conveyed |
|---|---|
| Arched | Surprise or Interest |
| Flat | Calm or Neutral |
| Angled Downwards | Anger or Displeasure |
| Curved Upwards | Happiness or Joy |
When sketching eyebrows, remember to pay attention to their proximity to the eyes. The closer they are to the eyes, the more intense the expression can appear. This is particularly important in cartooning, where exaggeration is key. Don't shy away from experimenting with different styles; cartoon eyebrows can be thick and bushy, thin and delicate, or even wildly exaggerated. Each style can lend a unique personality to your character.
Another crucial aspect is the eyebrow angle. A slight tilt can convey a multitude of feelings. For example, eyebrows angled upwards can give a sense of curiosity or excitement, while a downward angle can suggest skepticism or disapproval. Additionally, consider the use of eyebrow movement in your animations. Just like in real life, eyebrows move in response to emotions, and capturing this movement can add a layer of depth to your character.
In summary, expressive eyebrows are a powerful tool in your cartooning arsenal. They can enhance your character's personality and emotional range, making them more relatable and engaging. So, the next time you sit down to draw, take a moment to think about how the eyebrows can elevate your artwork and truly bring your characters to life.
- How do I choose the right eyebrow shape for my character? Consider the personality traits and emotions you want to convey. Experiment with different shapes to see what fits best.
- Can I exaggerate eyebrows in cartooning? Absolutely! Exaggeration is a fundamental aspect of cartooning, so feel free to play with size and shape.
- What tools can help me draw better eyebrows? Pencils, pens, and digital art tools can all be effective. Practice will also improve your skills.

Nose and Mouth Features
When it comes to drawing cartoon faces, the nose and mouth are like the vibrant strokes of a painter's brush—they can completely change the mood and personality of your character. These features are not just functional; they are expressive tools that help convey a wide range of emotions. Whether your character is grinning from ear to ear or frowning deeply, the way you draw these features will play a crucial role in expressing their feelings. Let's dive into some techniques and styles that can help you master these important elements!
First, consider the nose. In cartooning, noses can take on many forms, from simple dots to elaborate shapes. The choice of nose style can significantly influence how a character is perceived. For instance, a small, button-like nose often suggests innocence or cuteness, while a larger, more angular nose might indicate a more serious or mature character. To draw a nose, start with basic shapes; a simple triangle or oval can serve as the foundation. From there, you can add details like nostrils or shading to give it depth. Experiment with different styles to see what fits your character best!
Next up is the mouth. The mouth is one of the most expressive features of the face, capable of showing a spectrum of emotions. A wide, open mouth can signify laughter or surprise, while a tightly closed mouth might suggest sadness or contemplation. When drawing mouths, think about the shapes you can create. For example, a curved line can represent a smile, while a downward curve can depict a frown. To add more character, consider the placement of the mouth in relation to the rest of the face. A mouth that sits higher may suggest a more youthful character, while a lower placement can give an older appearance.
To illustrate these concepts, let’s take a look at a simple table that summarizes different nose and mouth styles and their associated emotions:
| Feature Style | Emotion |
|---|---|
| Small Button Nose | Cuteness, Innocence |
| Large Angular Nose | Seriousness, Maturity |
| Wide Open Mouth | Laughter, Surprise |
| Tightly Closed Mouth | Sadness, Contemplation |
Remember, the key to making your cartoon faces truly expressive lies in the details. Adding elements like teeth, tongue, or even a subtle quirk in the lip can bring your character to life. Don’t shy away from exaggeration—cartooning thrives on it! A character with an oversized grin or a tiny, upturned nose can be more relatable and memorable.
As you practice, try drawing various combinations of noses and mouths to see how they interact. This experimentation will not only enhance your skills but also deepen your understanding of how facial features work together to create emotion. So grab your sketchbook and start playing around with these features; you might be surprised at the characters you create!
- What are some tips for drawing cartoon noses? Start with basic shapes, and don’t be afraid to experiment with size and style to find what fits your character.
- How can I make my cartoon mouths more expressive? Focus on the shape and placement; try different expressions and exaggerate features for added impact.
- Is it important to study real human anatomy? Yes, understanding basic human anatomy can help you create more believable cartoon features.
Adding Unique Character Traits
When it comes to cartooning, is like seasoning a dish; it transforms a bland creation into something flavorful and memorable. Every cartoon face has the potential to tell a story, and the key to bringing that story to life lies in the details. By incorporating distinctive features and quirks, you can create characters that resonate with viewers, making them not only visually appealing but also relatable. Think of your favorite cartoon characters; what makes them stand out? It’s often their unique characteristics that leave a lasting impression.
One of the most effective ways to add personality to your cartoon faces is through hairstyles and accessories. Just like how a particular hairstyle can define a person’s style in real life, it can do the same for your characters. Consider the following aspects when designing hairstyles:
- Shape and Volume: Is the hair long, short, curly, or straight? The shape can communicate a lot about the character's personality.
- Color: Bright, vibrant colors can indicate a playful character, while muted tones might suggest a more serious demeanor.
- Accessories: Hats, glasses, or headbands can add an extra layer of uniqueness. They can also serve as visual cues about the character's interests or background.
Next, let’s talk about facial features. The small details can make a significant impact. For instance, a character with oversized ears or a tiny nose can evoke humor or endearment. Think about how different features can alter a character's identity:
| Feature | Effect on Character |
|---|---|
| Big Eyes | Conveys innocence and curiosity. |
| Pointy Chin | Suggests a mischievous or cunning personality. |
| Freckles | Adds charm and approachability. |
Incorporating these elements not only enhances the visual appeal but also deepens the narrative behind your characters. Think of them as the brushstrokes that add depth to a painting. When you give your characters unique traits, you allow them to break free from the generic mold and truly come alive on the page.
Moreover, don't forget the power of coloring techniques in defining character traits. The way you color your characters can drastically change their perception. For instance, warm colors like reds and yellows can evoke feelings of happiness and excitement, while cool colors like blues and greens can suggest calmness or sadness. Balancing these colors can help in portraying the right emotions and traits effectively.
Ultimately, the goal is to create characters that are not just visually striking but also resonate with emotions and experiences. Whether it's through their expressive features, distinctive hairstyles, or vibrant colors, each element contributes to a richer storytelling experience. So, let your imagination run wild, and don’t shy away from experimenting with different traits. After all, the beauty of cartooning lies in its endless possibilities!
Q: How can I make my cartoon characters more relatable?
A: Focus on adding unique traits that reflect real-life emotions and experiences. Consider giving them quirks or features that viewers can connect with.
Q: What role do hairstyles play in character design?
A: Hairstyles can significantly influence how a character is perceived. They can convey personality traits, age, and even mood, making them a vital aspect of character design.
Q: Can color choices affect a character’s personality?
A: Absolutely! Colors evoke emotions and can alter the viewer's perception of a character. Choosing the right palette can enhance the character's traits and overall appeal.
Hairstyles and Accessories
When it comes to drawing cartoon faces, are not just embellishments; they are essential elements that can define a character's personality and mood. Think of hairstyles as the crowning glory of your characters—just like in real life, they can convey a wealth of information about who someone is. A spiky hairstyle might suggest a rebellious spirit, while a neat bun could hint at a more reserved personality. So, how do you effectively incorporate these features into your cartoon faces?
First, consider the shape of the head. The hairstyle should complement the overall structure of the face. For instance, if you're drawing a round face, a voluminous hairstyle can add height and balance. On the other hand, a long, flowing hairstyle may enhance the features of a more angular face. Remember, the key is to create harmony between the hair and the facial features.
Now, let’s delve into some popular hairstyles you might want to experiment with:
- Short and Spiky: Perfect for energetic characters, this style adds a sense of playfulness.
- Long and Flowing: Ideal for romantic or dreamy characters, this hairstyle adds grace.
- Ponytails and Buns: These styles can suggest practicality or a no-nonsense attitude.
- Curly Hair: Curls can convey a fun-loving or quirky personality.
Accessories also play a vital role in character design. They can add depth and interest, making your characters more relatable and memorable. Think about incorporating items like hats, glasses, or jewelry. Each accessory can tell a story; for example, a pair of oversized glasses might indicate a studious character, while a flashy necklace could suggest someone who loves to stand out.
When drawing accessories, consider their placement and how they interact with the hair and face. A hat tilted to one side can add a touch of mischief, while a headband can soften the look of a character. It's crucial to maintain balance; too many accessories can clutter the design, while too few can make it feel incomplete.
In summary, hairstyles and accessories are not just afterthoughts in cartoon face creation; they are integral to conveying personality and emotion. By experimenting with different styles and accessories, you can create unique and engaging characters that resonate with your audience. So grab your sketchpad and start exploring the endless possibilities of hair and accessories in your cartoon creations!
Q: How can I choose the right hairstyle for my character?
A: Consider the character's personality, age, and the overall tone of your cartoon. Think about what the hairstyle says about them and how it complements their facial features.
Q: Are accessories necessary for every character?
A: While not every character needs accessories, they can enhance your design and add depth. Use them strategically to highlight personality traits.
Q: How do I ensure my hairstyles look natural?
A: Study real-life hairstyles and observe how they fall and flow. Practice sketching different styles to understand their structure and movement.
Coloring Techniques
Coloring your cartoon faces is where the magic truly happens! It’s not just about filling in shapes with colors; it’s about bringing your characters to life and making them resonate with your audience. Whether you're using digital tools or traditional mediums, understanding various coloring techniques can elevate your artwork from simple sketches to vibrant masterpieces.
One of the most effective methods is the use of shading and highlighting. Shading adds depth and dimension, making your characters appear more three-dimensional. You can achieve this by choosing a base color and then selecting a darker shade to create shadows in areas where light wouldn’t hit directly, like under the chin or around the nose. Conversely, highlights can be added to areas where light naturally reflects, such as the forehead or cheekbones. This contrast between light and dark not only enhances the visual appeal but also helps convey the emotional state of your character.
Another technique worth exploring is the layering of colors. By applying multiple layers of different shades, you can create a richer and more textured look. For instance, if you’re coloring hair, start with a base color and gradually add darker and lighter shades to give it that realistic shine and depth. This technique works wonders in both digital and traditional art, allowing for a more polished finish.
For those working digitally, tools like opacity adjustments and blending modes can significantly enhance your coloring process. Adjusting the opacity allows you to create softer transitions between colors, while blending modes can change how colors interact with each other, providing unique effects that can make your characters pop off the page. Here’s a quick overview of some common blending modes:
| Blending Mode | Effect |
|---|---|
| Multiply | Darkens the base color |
| Screen | Lightens the base color |
| Overlay | Combines Multiply and Screen for a contrast effect |
When it comes to traditional coloring, experimenting with different mediums can yield exciting results. For example, using colored pencils allows for fine details and smooth blending, while markers can provide bold and vibrant colors. Watercolors, on the other hand, can create soft gradients and a dreamy effect. Each medium has its unique charm and can be used to achieve different styles, so don’t hesitate to switch things up!
Lastly, always remember that color theory plays a crucial role in your coloring techniques. Understanding the color wheel, complementary colors, and color harmony can significantly impact the mood and feel of your cartoon faces. For example, a character drawn in warm colors like reds and yellows might feel energetic and lively, while cool colors like blues and greens can evoke calmness or sadness. So, as you color, ask yourself: What emotion do I want to convey?
In conclusion, mastering coloring techniques is essential for any artist looking to enhance their cartoon faces. By incorporating shading, layering, and a solid understanding of color theory, you can create characters that not only look good but also tell a story. So grab your tools, unleash your creativity, and let your characters shine!
- What tools do I need for coloring cartoon faces?
You can use digital tools like graphic tablets and software (e.g., Photoshop, Procreate) or traditional tools like colored pencils, markers, and watercolors. - How do I choose colors for my characters?
Consider the personality and emotion you want to convey. Use the color wheel to find complementary colors that work well together. - Can I mix different coloring techniques?
Absolutely! Mixing techniques can lead to unique styles and effects. Don’t be afraid to experiment!
Practicing Expressions
When it comes to drawing cartoon faces, mastering expressions is not just an option; it’s a necessity! Think of your cartoon character as an actor on a stage, where every facial expression tells a story. Whether your character is bursting with joy, feeling down in the dumps, or caught in a moment of surprise, each emotion needs to be captured with precision. Practicing expressions is essential for character development, and it can be incredibly fun. So, how do you go about it?
One effective method is to create a series of sketches that focus solely on different emotions. You can start by selecting a few emotions that you want to depict, such as:
- Happiness
- Sadness
- Anger
- Surprise
- Confusion
Once you’ve chosen your emotions, dedicate a sketch page to each one. For instance, when illustrating happiness, think about how the eyes widen, the mouth stretches into a smile, and the eyebrows lift. You can even exaggerate these features to make the expression more cartoonish and lively. On the other hand, sadness might involve drooping eyes, a frown, and lowered eyebrows. By breaking down each emotion into its visual components, you’ll begin to develop a library of expressions that you can draw upon in your artwork.
Another fantastic approach is to use emotion reference guides. These guides can provide you with visual cues and inspiration for depicting various emotions accurately. You might find it helpful to study photos of people expressing different feelings or even watch animated films where characters display a wide range of emotions. Pay close attention to how the animators convey feelings through subtle changes in the face. This observation can significantly enhance your ability to portray emotions in your own characters.
Moreover, practicing expressions isn’t just about the face; it’s also about body language. The way a character stands or moves can dramatically affect how their emotions are perceived. For example, a character who is excited might jump with glee, while a sad character might slouch with their shoulders down. By incorporating body language into your sketches, you can create more dynamic and relatable cartoon faces.
To further refine your skills, consider keeping an emotion journal. This journal can be a space where you doodle various expressions and even write down the emotions you want to capture. You could categorize them by mood or situation, making it easier to reference them later. This practice not only hones your drawing skills but also helps you understand how different emotions can be expressed visually.
Finally, don’t be afraid to experiment! Try drawing the same character displaying different emotions. This exercise will help you understand how to maintain consistency in your character design while still conveying a variety of feelings. Remember, the more you practice, the better you’ll become at capturing the essence of emotions in your cartoon faces!
Q: How can I improve my ability to draw facial expressions?
A: Practice is key! Create sketches focusing on different emotions, use reference guides, and keep an emotion journal to track your progress.
Q: Are there specific resources for learning about expressions?
A: Yes! Look for books on character design, online courses, and even YouTube tutorials that focus on drawing expressions.
Q: Is it important to include body language when drawing expressions?
A: Absolutely! Body language can enhance the emotional impact of your character and provide more context to their feelings.
Emotion Reference Guides
When it comes to drawing cartoon faces, capturing emotions is an art in itself. Think of it like trying to catch lightning in a bottle; you want to encapsulate that fleeting moment of feeling and express it through your art. serve as invaluable tools for artists, providing visual cues that help in accurately portraying a wide range of emotions. Whether you're aiming for a wide-eyed look of surprise or the furrowed brow of deep contemplation, these guides can help you nail those expressions with precision.
One effective way to develop your understanding of facial expressions is by studying real-life references. Take photos of friends or family members displaying various emotions and use them as a basis for your drawings. You can also explore online resources that compile images of different emotional states, which can be particularly useful. Here are a few types of resources you might consider:
- Photography Websites: Sites like Unsplash or Pexels offer high-quality images that you can use for reference.
- Emotion Charts: Many artists create charts that showcase different facial expressions side by side, making it easier to see the subtle differences.
- Animation References: Animated films often exaggerate emotions, providing a clear visual guide for artists looking to convey feelings in a more pronounced way.
Additionally, you can create your own emotion reference guide by sketching various expressions from your imagination or by observing the world around you. For example, you might find that a child's laughter is contagious, and their expressions can be a great source of inspiration. By compiling a collection of these sketches, you can build a personal library that you can refer to whenever you're in need of a little emotional inspiration.
Another tip is to break down emotions into basic components. For instance, happiness often involves raised eyebrows, a wide smile, and bright eyes. Conversely, sadness might include drooping eyelids, a frown, and a downturned mouth. By dissecting these emotions into their fundamental parts, you can practice drawing each piece individually before combining them into a complete expression. This method not only simplifies the process but also enhances your understanding of how emotions manifest physically.
Lastly, consider the impact of body language in conveying emotion. A character's posture, hand gestures, and even the tilt of their head can add layers of meaning to their facial expressions. For example, a character with slumped shoulders and a downcast gaze instantly communicates sadness, even if their face is not explicitly drawn in a sorrowful manner. By integrating body language into your practice, you’ll create more dynamic and relatable cartoon faces.
Q: What are some good resources for studying emotions?
A: Photography websites, emotion charts, and animation references are excellent resources. You can also take your own photos or sketches as references.
Q: How can I practice drawing emotions effectively?
A: Break down emotions into basic components, observe real-life expressions, and practice sketching them regularly. Creating a personal reference guide can also be beneficial.
Q: Does body language affect facial expressions in cartooning?
A: Absolutely! Body language can enhance the emotional depth of your characters, so be sure to consider posture and gestures alongside facial expressions.
Creating Dynamic Poses
When it comes to cartoon faces, the magic often lies in their poses. Dynamic poses can transform a simple character into a vibrant, engaging figure that tells a story all on its own. Imagine a character mid-jump, arms flailing and a huge grin plastered across their face; that’s the power of movement! To create these lively poses, you need to think beyond the static and embrace the energy of your character's actions.
Start by considering the emotion you want to convey. Is your character excited, angry, or perhaps a little shy? Each emotion can significantly influence how you position their body. For instance, a character showing joy might have arms raised high, while one expressing sadness might be hunched over with their head down. To illustrate this, here’s a simple breakdown:
| Emotion | Pose Characteristics |
|---|---|
| Happiness | Arms raised, wide smile, open stance |
| Anger | Furrowed brow, clenched fists, leaning forward |
| Sadness | Slumped shoulders, downturned mouth, head lowered |
| Surprise | Wide eyes, mouth open, hands on cheeks |
Next, consider the flow of movement. When your character is in action, think about how their body moves through space. Use lines of action to guide your drawing; this is an imaginary line that runs through the character's body, indicating the direction of their movement. For example, if a character is leaping, the line might curve upward, showcasing the trajectory of their jump. This technique not only adds dynamism but also helps maintain balance and proportion in your drawing.
Another crucial aspect of dynamic poses is the use of exaggeration. Cartooning thrives on the ability to amplify expressions and movements. Don’t be afraid to stretch a character's limbs or exaggerate their facial expressions to enhance the action. Think of it as a dance; every movement should flow into the next, creating a rhythm that captivates the viewer's eye. For instance, if your character is throwing a punch, you might extend their arm further than reality would allow, emphasizing the force behind the action.
Lastly, practice makes perfect! Start with simple sketches, focusing on different poses and gradually build up to more complex scenes. You might even want to use reference materials, such as photographs of athletes or dancers, to capture realistic movements that you can then stylize into your cartoon characters. Remember, the goal is to breathe life into your characters, allowing them to leap off the page and engage your audience.
- What are some tips for creating more dynamic poses? Focus on the emotion you want to portray, use lines of action, and don’t hesitate to exaggerate movements.
- How can I practice dynamic poses effectively? Use reference materials, start with simple sketches, and gradually build complexity.
- Is there a specific technique to maintain balance in poses? Yes! Use the center of gravity concept, ensuring that the weight distribution feels natural.
Finalizing Your Artwork
Finalizing your cartoon face drawings is an exciting yet crucial step in the artistic process. This is where your sketches transform into polished pieces that truly reflect your creative vision. It’s like the cherry on top of a delicious sundae; without it, the whole experience feels incomplete. In this section, we’ll explore essential techniques to refine your artwork, ensuring that every detail shines and captures the viewer's attention.
One of the first steps in finalizing your artwork is refining the details. This involves going back to your initial sketches and enhancing any features that may have been overlooked. Pay close attention to the outlines of your characters. Are they smooth and consistent? A clean line can make a world of difference in how your cartoon face is perceived. You might want to consider varying the line thickness to add depth and interest. Thicker lines can emphasize certain features, while thinner lines can add delicate details.
Next, let’s talk about coloring. This is where your cartoon faces truly come to life! Choose a color palette that complements the personality of your characters. For instance, vibrant colors can convey energy and excitement, while softer hues might evoke calmness or sadness. Remember to incorporate shading and highlighting techniques to give your characters a three-dimensional look. A well-placed shadow can make a flat drawing pop off the page, creating a sense of realism in your cartoon world.
Now, let’s not forget about the importance of backgrounds. A well-designed background can enhance the overall composition of your artwork. Think of it as the stage where your characters perform. It should complement but not overpower the main focus—your cartoon faces. Whether it’s a simple gradient or a detailed scene, the background can add context and depth to your characters’ stories.
As you finalize your artwork, consider the presentation. If you’re planning to share your work online or in a gallery, think about how you want it to be displayed. This could involve framing your artwork, creating digital mockups, or even preparing it for print. A professional presentation can elevate your work and make a lasting impression on your audience.
Lastly, don’t rush this process. Take your time to step back and evaluate your artwork. Sometimes, giving your piece a little distance can help you see areas that need improvement. You might even want to get feedback from fellow artists or friends. Constructive criticism can be invaluable in helping you refine your final piece.
- What tools do I need to finalize my cartoon artwork?
Essential tools include fine liners for inking, quality coloring materials (like markers or digital software), and a good eraser for cleaning up any stray lines. - How do I choose the right color palette?
Consider the mood and personality of your character. Use color theory to select complementary colors that enhance your artwork. - Is it necessary to use a background?
While not mandatory, a background can significantly enhance the storytelling aspect of your artwork and provide context for your characters. - How can I make my artwork look more professional?
Focus on clean lines, cohesive color schemes, and thoughtful composition. Taking the time to refine details will elevate your work.

Line Work and Inking
When it comes to finalizing your cartoon face drawings, are crucial steps that can make or break your artwork. Think of inking as the icing on a cake; it’s the finishing touch that brings everything together and makes it visually appealing. The process involves going over your pencil sketches with ink to create clean, defined lines that enhance the overall presentation of your cartoon characters. But how do you achieve that perfect line work? Let’s dive into some essential techniques!
First off, it's important to choose the right tools for inking. There are various options available, including pens, brushes, and digital tools. Each has its own unique qualities:
| Tool | Characteristics | Best For |
|---|---|---|
| Fine-liner Pens | Consistent ink flow, precision | Detailed work and fine lines |
| Brush Pens | Variable line thickness, expressive | Dynamic and bold illustrations |
| Digital Tablets | Undo options, layers, versatility | Flexible editing and diverse styles |
Once you've selected your tools, it’s time to get to work! Start by using light pressure to outline your characters, focusing on the contours and key features. This is where your pencil sketch becomes a blueprint for your inked lines. Remember, confidence is key—steady hands create smoother lines. If you're using a brush, practice varying your pressure to achieve different line weights, which can add depth and interest to your artwork.
Another essential aspect of inking is understanding line weight. Varying the thickness of your lines can dramatically affect the mood and personality of your cartoon faces. For instance:
- Thicker lines can convey strength and boldness.
- Thinner lines often suggest delicacy and subtlety.
As you ink, don’t be afraid to add some texture and detail to your characters. This could involve cross-hatching, stippling, or even adding little patterns. These elements can bring your cartoon faces to life, making them more engaging and relatable. After inking, take a step back and evaluate your work. Look for areas that might need more definition or adjustment, and don’t hesitate to make corrections.
Finally, once you’re satisfied with your line work, it’s time to clean up! If you’re working traditionally, gently erase any leftover pencil marks after the ink has dried. For digital artists, you can simply hide or delete the sketch layer, leaving you with a crisp, clean line drawing ready for coloring and shading.
In conclusion, mastering line work and inking is a vital skill for any cartoon artist. With the right tools, techniques, and a bit of practice, you can elevate your cartoon faces from simple sketches to stunning, expressive characters that leap off the page!
- What type of ink should I use for inking? It depends on your preference! Waterproof ink is great for traditional work, while digital artists can choose from a variety of brushes in software.
- Can I ink over colored pencil? Yes, but ensure the colored pencil is smudge-proof and dry to avoid unwanted blending.
- How can I improve my inking skills? Practice is key! Try inking different styles and characters regularly to build confidence and technique.
Digital vs. Traditional Techniques
This guide offers insights into the techniques and styles for creating expressive cartoon faces, covering everything from basic shapes to advanced expressions for both beginners and experienced artists.
Mastering basic shapes is essential for drawing cartoon faces, as they form the foundation for more complex features and expressions. Learn how to simplify facial structures into circles, ovals, and triangles.
Understanding facial proportions is crucial in cartooning. This section delves into the typical measurements and placements of eyes, nose, mouth, and ears to achieve a balanced and appealing look.
The placement of eyes greatly influences a character's expression. Explore various techniques for positioning eyes to convey emotions effectively and maintain proportion in your cartoon faces.
Different eye shapes can dramatically alter a character's personality. Discover how to create diverse eye shapes that enhance the uniqueness of your cartoon characters.
Eyebrows play a vital role in expression. Learn how to draw eyebrows that complement your character's emotions and add depth to their facial expressions.
The nose and mouth are key elements in conveying emotion. This section will guide you through various styles and techniques for drawing noses and mouths in cartoon faces.
To make your cartoon faces stand out, incorporating unique character traits is essential. This section discusses how to personalize features to create memorable and relatable characters.
Hairstyles and accessories can define a character's personality. Learn how to draw different hairstyles and accessorize your characters to enhance their individuality.
Coloring can bring your cartoon faces to life. Explore various coloring techniques, including shading and highlighting, to add dimension and vibrancy to your artwork.
Practicing different facial expressions is vital for character development. This section provides exercises and tips for drawing a range of emotions, from happiness to sadness, in cartoon faces.
Using reference guides can help artists accurately depict emotions. Discover various resources and techniques for capturing authentic expressions in your cartoon faces.
Dynamic poses enhance the storytelling aspect of cartoon faces. Learn how to position your characters in ways that reflect their emotions and personalities effectively.
Finalizing your cartoon face drawings involves refining details and enhancing features. This section offers tips on how to polish your artwork for a professional finish.
Inking is a crucial step in finalizing cartoon faces. Explore different inking techniques to define your lines and enhance the overall presentation of your artwork.
When it comes to creating cartoon faces, the debate between digital and traditional techniques is as lively as a character in motion! Each method has its own unique flair, and understanding the differences can significantly influence your artistic journey.
Digital techniques offer incredible flexibility and efficiency. With software like Adobe Illustrator or Procreate, artists can easily manipulate shapes, colors, and layers. The ability to undo mistakes with a simple click can be liberating, allowing for experimentation without the fear of ruining a piece. Moreover, digital art can be easily shared and modified, making it a favorite among many modern artists.
On the flip side, traditional techniques—such as pencil, ink, and paint—bring a tactile quality that many artists cherish. The feel of a brush on canvas or the smooth glide of a pencil on paper can inspire creativity in ways that digital tools sometimes cannot. Traditional artwork often carries a unique charm, with each stroke showcasing the artist's hand and personality.
Here’s a quick comparison of the two:
| Aspect | Digital Techniques | Traditional Techniques |
|---|---|---|
| Flexibility | High - Easy to edit and manipulate | Low - Changes can be permanent |
| Tools | Software and digital tablets | Pencils, inks, paints, and canvases |
| Learning Curve | Steeper - Requires familiarity with software | Gentler - More intuitive for beginners |
| Final Output | Can be easily shared online | Physical art can be framed and displayed |
Ultimately, the choice between digital and traditional techniques depends on your personal style and preferences. Some artists even blend both methods to leverage the strengths of each. So, whether you prefer the sleekness of a digital canvas or the raw authenticity of traditional media, the key is to find what resonates with you and fuels your creativity!
- What materials do I need for traditional cartoon drawing? You will need basic drawing tools like pencils, ink pens, erasers, and paper. Optional materials include colored pencils, markers, and watercolor paints.
- Which software is best for digital cartoon drawing? Popular choices include Adobe Illustrator, Corel Painter, and Procreate for iPad users.
- How can I improve my cartoon drawing skills? Regular practice, studying anatomy, and analyzing other artists’ work can significantly enhance your skills.
- Can I mix digital and traditional techniques? Absolutely! Many artists find that a combination of both methods can yield unique and exciting results.
Frequently Asked Questions
- What are the basic shapes I need to master for drawing cartoon faces?
To start your journey in cartoon drawing, focus on mastering basic shapes such as circles, ovals, and triangles. These shapes are the building blocks of all cartoon faces and will help you simplify complex features into manageable forms.
- How important are facial proportions in cartooning?
Facial proportions are crucial in cartooning. They help you achieve a balanced look that is visually appealing. Understanding where to place the eyes, nose, mouth, and ears can make a huge difference in how your character is perceived.
- What techniques can I use for eye placement?
The placement of eyes can dramatically influence your character's expression. Experiment with different positions and distances between the eyes to convey various emotions effectively, ensuring they maintain proportion with the rest of the face.
- How can I create unique eye shapes for my characters?
Different eye shapes can alter a character's personality significantly. Try drawing various shapes such as round, almond, or slanted eyes to add uniqueness and depth to your characters, making them more relatable and memorable.
- Why are eyebrows important in cartoon expressions?
Eyebrows play a vital role in conveying emotions. They can enhance your character's expressions and add depth. Learning how to draw expressive eyebrows will help you communicate feelings like happiness, anger, or surprise more effectively.
- What styles can I use for noses and mouths in cartoon faces?
Noses and mouths are key elements in expressing emotion. Explore various styles, from simple lines to more detailed features, to find what works best for your characters. The right style can help convey a wide range of emotions.
- How do I add unique character traits to my cartoon faces?
Incorporating unique traits is essential for making your characters stand out. Think about distinct features like freckles, scars, or unique hairstyles that reflect their personality, making them relatable and memorable.
- What are some effective coloring techniques for cartoon faces?
Coloring can bring your characters to life! Experiment with techniques like shading, highlighting, and using color palettes to add dimension and vibrancy to your artwork, enhancing the overall appeal of your cartoon faces.
- How can I practice drawing different facial expressions?
Practicing various expressions is vital for character development. Use reference images or guides to draw emotions like happiness, sadness, and anger. This practice will help you understand how to depict these feelings effectively in your artwork.
- What resources can I use for emotion reference guides?
There are plenty of resources available, including online tutorials, books, and videos. These guides can help you capture authentic expressions and improve your skills in portraying emotions accurately in your cartoon faces.
- How do dynamic poses enhance my cartoon faces?
Dynamic poses can tell a story and reflect your character's emotions. Learning how to position your characters effectively will add energy and life to your artwork, making it more engaging for the viewer.
- What tips can help me finalize my cartoon face drawings?
Finalizing your artwork involves refining details and enhancing features. Focus on clean line work and inking techniques to define your characters better, ensuring they have a polished and professional finish.
- What are the differences between digital and traditional techniques?
Digital and traditional techniques each have their own benefits. Digital art offers flexibility and easy corrections, while traditional methods can provide a tangible feel and unique textures. Understanding these differences can help you choose the right approach for your cartoon faces.


