
Mastering the Skill of Forest Painting in Acrylic
Welcome to the enchanting world of forest painting! If you've ever wandered through a lush, green forest and felt a sense of peace wash over you, you know just how magical these landscapes can be. Now, imagine capturing that beauty on canvas using acrylic paints. This article will guide you through the techniques, tips, and inspirations needed to create stunning forest landscapes that resonate with your audience. Whether you're a budding artist or a seasoned pro, the world of acrylics offers endless possibilities for expression. So, grab your brushes and let’s embark on this creative journey together!
Acrylic paints are not only versatile but also quick to dry, making them the perfect medium for depicting the vibrant life found in forests. With their ability to mimic the richness of nature, acrylics allow you to layer colors, create depth, and experiment with textures. In this article, we will explore everything from choosing the right tools to mastering color theory, ensuring you have all the knowledge you need to bring your forest scenes to life.
Throughout this guide, we’ll delve into essential tools and materials, including the best brushes and palettes for forest painting. We'll also cover the fundamentals of color theory, demonstrating how to evoke mood and create depth with your color choices. Additionally, we will discuss various painting techniques such as glazing and dry brushing that can add realism and texture to your artwork.
But it doesn't stop there! Finding inspiration in nature is crucial for any artist. We’ll provide tips on how to observe and capture the essence of forests, as well as how to use photographic references effectively. Finally, we will explore the importance of adding those final touches that can elevate your painting from good to truly stunning.
By the end of this article, you will not only feel more confident in your abilities to paint forests but also develop a deeper connection with the natural world around you. So, are you ready to unleash your creativity and master the skill of forest painting in acrylic? Let’s dive in!
- What is the best type of canvas for acrylic painting?
Stretched canvas or canvas boards are ideal for acrylics, as they provide a sturdy surface that holds paint well.
- How do I clean my brushes after using acrylic paints?
Simply rinse them under warm water and use mild soap if needed. Make sure to reshape the bristles afterward!
- Can I use acrylic paints on paper?
Yes, but make sure to use heavier weight paper or watercolor paper to prevent warping.
Understanding Acrylic Paints
Acrylic paints are a dynamic medium that offers a world of possibilities for artists, especially those venturing into the enchanting realm of forest painting. Known for their versatility and fast-drying properties, acrylics allow you to work quickly and efficiently, making them a favorite among both beginners and seasoned artists alike. Unlike oil paints, which can take days to dry, acrylics dry in a matter of minutes, enabling you to layer colors without waiting too long. This characteristic is particularly beneficial when capturing the intricate details of a forest landscape.
When choosing acrylic paints, it's essential to understand their composition and how it affects your work. Acrylics are made from pigment suspended in an acrylic polymer emulsion, which means they can be diluted with water and cleaned up easily while wet. Once dry, however, they become water-resistant, ensuring that your artwork remains vibrant and intact over time. This durability makes them ideal for outdoor painting sessions, where the elements can be unpredictable.
Here are some key advantages of using acrylic paints for forest landscapes:
- Quick Drying Time: Allows for layering and immediate adjustments.
- Water-Soluble: Easy to clean and mix with water.
- Vibrant Colors: Acrylics offer a wide range of bright and bold hues.
- Versatile Techniques: Suitable for various painting techniques, from washes to impasto.
When selecting acrylic paints, consider the following factors:
- Quality: Artist-grade paints have higher pigment concentrations, resulting in more vibrant colors.
- Type: Heavy body acrylics are thick and retain brush strokes, while fluid acrylics are thinner and ideal for washes.
- Brand: Different brands may have varying qualities, so experimenting with a few can help you find your favorites.
In summary, understanding the properties and advantages of acrylic paints can significantly enhance your forest painting experience. With the right knowledge, you can select the perfect paints to bring your artistic vision to life. So, grab your brushes, and let the magic of acrylics transform your canvas into a breathtaking forest landscape!

Essential Tools and Materials
Creating beautiful forest paintings requires not just talent but also the right tools and materials. Think of it like cooking; you wouldn't want to make a gourmet meal without a good set of knives and fresh ingredients, right? Similarly, having the right gear can make your painting experience smoother and more enjoyable. First and foremost, you'll need quality acrylic paints. These paints are known for their versatility and vibrant colors, which are essential for capturing the lushness of a forest. When selecting paints, consider a set that includes a range of greens, browns, yellows, and blues, as these will form the foundation of your forest palette.
Next up is your choice of canvas. A sturdy canvas or canvas board provides a solid surface to work on, allowing you to layer your colors without worrying about the paint sinking in too much. You can opt for pre-stretched canvases or canvas panels, depending on your preference. If you're feeling adventurous, you might even try painting on wood panels for a unique texture!
Now, let's talk about brushes. The right brushes can make all the difference in your painting technique. You'll want a variety of brushes to achieve different effects. For broad strokes and backgrounds, flat brushes are your best bet. Meanwhile, round brushes are perfect for adding detail and intricacy to your trees and foliage. Don’t forget to include some fan brushes, as they can create beautiful textures that mimic leaves and branches. Here's a quick reference table to help you choose the right brushes:
| Brush Type | Best For |
|---|---|
| Flat Brush | Broad strokes, backgrounds |
| Round Brush | Detail work, foliage |
| Fan Brush | Creating textures like leaves |
Additionally, don’t overlook the importance of a good palette. A well-chosen palette can significantly enhance your color mixing and application. You can use a traditional wooden palette or opt for a disposable palette pad for easy cleanup. Whatever you choose, make sure it's large enough to accommodate all the colors you plan to mix. This will save you time and frustration as you work on your masterpiece.
Finally, consider investing in some medium and varnish. These can alter the properties of your acrylic paints, allowing for different finishes and effects. For instance, a glazing medium can help you achieve those luminous layers that make your forest scenes pop. Varnishes can protect your finished artwork and give it a professional look. In summary, having the right tools and materials not only boosts your confidence as an artist but also enhances the overall quality of your forest paintings.
- What type of acrylic paint should I use for forest painting?
Acrylic paints with a high pigment concentration are ideal. Look for brands known for their vibrant colors and good coverage. - Can I use water with acrylic paints?
Yes, you can use water to thin acrylic paints, but be cautious not to dilute them too much, as this can affect the color and coverage. - How do I clean my brushes after painting?
Clean your brushes with warm soapy water immediately after use to prevent the paint from drying and ruining the bristles.

Choosing the Right Brushes
When it comes to forest painting, selecting the right brushes can make a world of difference in the outcome of your artwork. Brushes are like the instruments of a musician; each type produces a unique sound and effect. The right brush can help you capture the essence of a lush forest, from the delicate leaves to the sturdy trunks of trees. So, how do you choose the perfect brush for your acrylic forest scenes?
First, it’s essential to understand the different types of brushes available and their specific uses. Each brush type offers unique capabilities that can enhance your painting technique. For instance, flat brushes are fantastic for creating broad strokes and filling in backgrounds, while round brushes excel in detail work, such as adding intricate foliage and textures. When selecting brushes, consider the following:
- Brush Size: Larger brushes are great for covering large areas quickly, while smaller brushes allow for precision and detail.
- Brush Shape: Different shapes provide varying effects. Flat brushes can create sharp edges, while round brushes are perfect for soft, curved lines.
- Brush Material: Synthetic brushes are durable and maintain their shape well, while natural hair brushes can offer a softer touch and better paint absorption.
Moreover, it’s crucial to consider how you plan to use these brushes in your painting. For example, if you want to create the illusion of depth in your forest scene, you might opt for a combination of flat and round brushes. Start with a flat brush to lay down the base colors of the trees and underbrush. Then, switch to a round brush to add details like leaves and highlights. This layering technique can add a beautiful complexity to your artwork.
To help you decide which brushes to incorporate into your painting toolkit, here’s a simple table summarizing the best brush types for forest painting:
| Brush Type | Best For | Techniques |
|---|---|---|
| Flat Brush | Backgrounds, broad strokes | Filling in large areas, creating straight lines |
| Round Brush | Detail work, foliage | Adding intricate details, soft curves |
| Filbert Brush | Blending, petals | Creating soft edges, blending colors |
| Fan Brush | Texture, grass | Creating texture, foliage effects |
In conclusion, choosing the right brushes is a fundamental step in mastering the art of forest painting. Experiment with various types and sizes to discover what works best for you. Remember, the brush is an extension of your artistic vision, so let it guide you in creating breathtaking forest landscapes that resonate with your audience.
Q: What type of brush is best for beginners?
A: For beginners, a set of flat and round brushes in various sizes is ideal. These will allow you to explore different techniques without overwhelming you.
Q: How do I clean my brushes after painting?
A: Clean your brushes with warm soapy water immediately after use. For stubborn paint, you might need to use a brush cleaner or a gentle solvent.
Q: Can I use the same brush for different colors?
A: Yes, but it’s best to rinse the brush between color changes to avoid muddying your colors. If you’re working with similar shades, you may get away with using the same brush without rinsing.
Flat Brushes
When it comes to painting forests in acrylic, are your best friends. These brushes, characterized by their rectangular shape and stiff bristles, are perfect for creating broad strokes and filling in large areas of color. Imagine standing in a lush forest, where the sunlight filters through the leaves, casting shadows on the ground. A flat brush allows you to replicate that expansive feel, effortlessly covering the canvas with rich greens and earthy browns.
One of the most significant advantages of flat brushes is their ability to create clean, sharp edges. This is particularly useful when painting trees or distant mountains, where you want to maintain a sense of definition. When you use a flat brush, you can vary the pressure to achieve different effects; applying more pressure will give you a wider stroke, while lighter pressure can produce finer lines, adding versatility to your artwork.
To master the use of flat brushes, consider the following techniques:
- Loading the Brush: Dip your flat brush into the paint, ensuring you load it evenly across the bristles. This will help you achieve consistent color application.
- Creating Backgrounds: Use broad strokes to lay down the background of your forest scene. This sets the stage for the details to come.
- Blending Colors: Flat brushes are excellent for blending colors together. You can create a smooth transition between shades, mimicking the natural gradients found in nature.
Another fascinating aspect of flat brushes is their ability to create texture. By varying the angle and pressure, you can produce different effects, such as the rough bark of a tree or the delicate leaves fluttering in the wind. Additionally, they can be used for scumbling, a technique where you apply a lighter color over a dried darker layer, adding depth and dimension to your forest landscapes.
In summary, flat brushes are essential tools for any artist looking to capture the beauty of forest scenes. Their versatility allows you to create everything from expansive skies to intricate details, making them a staple in your acrylic painting toolkit. So, grab your flat brush, and let your creativity flow like a gentle stream through the woods!
1. What size flat brush should I use for forest painting?
The size of the flat brush you choose depends on the scale of your painting. For larger canvases, opt for wider brushes (1 inch or more), while smaller canvases may require brushes that are ½ inch or smaller.
2. Can I use flat brushes for detail work?
Yes, while flat brushes are primarily used for broader strokes, you can also use the edges for finer details. Just be sure to adjust your pressure and angle to achieve the desired effect.
3. How do I clean my flat brushes?
Cleaning your flat brushes is crucial for maintaining their shape and longevity. Rinse them in lukewarm water immediately after use, and gently reshape the bristles to their original form.
Round Brushes
Round brushes are a painter's best friend when it comes to adding the intricate details that bring forest landscapes to life. Their unique shape allows for both fine lines and broader strokes, making them incredibly versatile. Imagine standing in a lush forest, where every leaf and branch tells a story; that’s the kind of detail you can achieve with a round brush. Whether you’re painting delicate foliage or the textured bark of a tree, these brushes are essential for capturing the nuances of nature.
When choosing round brushes for your forest paintings, consider the following factors:
- Size: Round brushes come in various sizes, from tiny detail brushes to larger ones for broader strokes. Smaller brushes are perfect for fine details, like individual leaves or flowers, while larger ones can cover more area quickly.
- Bristle Type: Synthetic bristles are great for acrylic paints as they hold their shape well and provide a smooth application. Natural bristles, on the other hand, can offer a more organic feel but may not perform as well with acrylics.
- Handle Length: Longer handles give you more control and can be useful for painting larger canvases, while shorter handles allow for more precision in detail work.
To effectively use round brushes in your forest paintings, start by loading your brush with paint, allowing it to absorb enough color without dripping. Use the tip of the brush for fine details, and the belly of the brush for broader strokes. A common technique is to use a flicking motion to create the illusion of leaves and branches swaying in the wind. This not only adds realism but also brings a sense of life to your artwork.
Furthermore, layering is key when using round brushes. Begin with a base layer of color, then gradually build up details. For instance, if you're painting a tree, start with a solid trunk color, then add layers of greens and yellows to depict leaves, using the round brush to create depth and texture. The beauty of acrylic paints is their quick drying time, allowing you to work in layers without long waits.
In summary, round brushes are invaluable tools in the artist's arsenal. They enable you to explore the delicate intricacies of forest scenes while also providing the flexibility to create broader strokes. So, the next time you set out to paint a forest landscape, remember to grab your round brushes and let your creativity flow!
Palette Selection
Choosing the right palette is a crucial step in the journey of creating your forest masterpiece. A well-selected palette not only influences your color mixing but also enhances your overall painting experience. Think of your palette as the stage where your colors perform, and just like a great performance, the right setup can make all the difference. When selecting a palette, consider the following factors:
First, the material of the palette can affect how you work. You might opt for a traditional wooden palette, which offers a smooth surface that can be easily cleaned. Alternatively, a glass palette provides a non-porous surface that allows for easy mixing and viewing of colors. Each material has its own unique feel and may inspire different techniques in your forest painting.
Next, the size of your palette matters too. A larger palette gives you ample space to mix and blend colors, which is essential when creating the rich, layered hues found in forest landscapes. However, if you're working in a smaller space or prefer a more compact setup, a smaller palette can still be effective as long as you manage your color mixing efficiently.
Additionally, consider the palette layout. Organizing your colors in a way that makes sense to you can streamline your painting process. For example, you might want to arrange your colors in a gradient from warm to cool tones or group them by the primary, secondary, and tertiary colors. This visual organization can help you quickly find the colors you need as you bring your forest scene to life.
| Palette Type | Advantages |
|---|---|
| Wooden Palette | Durable, traditional feel, easy to clean. |
| Glass Palette | Non-porous, easy to mix, great for color visibility. |
| Disposable Palette | Convenient, no cleanup required, ideal for quick sessions. |
Ultimately, the choice of palette should align with your personal preferences and painting style. Experimenting with different types can lead to surprising discoveries about how they influence your work. So, don’t hesitate to try out various palettes until you find the one that feels just right for your artistic journey. After all, the right palette can be a game-changer, transforming your forest paintings from mere images into enchanting landscapes that capture the beauty of nature.
As you delve deeper into the world of forest painting, remember that your palette is more than just a tool; it's an extension of your creativity. Let it inspire you as you mix, layer, and breathe life into your forest scenes!
1. What type of palette is best for beginners?
A disposable palette can be a great choice for beginners as it requires no cleanup and allows for easy mixing of colors without the worry of damaging a more permanent surface.
2. How do I clean my wooden palette?
To clean a wooden palette, simply scrape off dried paint, then wipe it down with a cloth dampened with water or a palette cleaner. Avoid soaking the wood to prevent warping.
3. Can I use a plastic palette for acrylics?
Yes, plastic palettes are suitable for acrylics, but ensure they have a smooth surface for easy mixing. Some artists find that acrylics can stain plastic, so regular cleaning is essential.
4. How do I organize my colors on the palette?
You can organize your colors by grouping similar shades together or arranging them in a gradient from warm to cool. Find a method that feels intuitive for your workflow.
5. Is it necessary to have a large palette?
While a larger palette provides more mixing space, it's not strictly necessary. A smaller palette can work just as well if you manage your color mixing effectively.
Color Theory for Forest Scenes
When it comes to painting forest landscapes, understanding color theory is like having a secret map that guides you through the lush terrain of creativity. It’s not just about slapping on some green paint and calling it a day; it’s about knowing how colors interact, how they can evoke emotions, and how they can transform an ordinary scene into something truly magical. Imagine standing in a serene forest, the sunlight filtering through the leaves, casting a warm glow on the ground. This is the kind of atmosphere you want to capture, and it all starts with your color choices.
One of the primary concepts in color theory is color mixing. By blending colors, you can create a wide range of hues that can mimic the natural world. For instance, mixing a bit of yellow into your green can give you that sunlit leaf effect, while adding a touch of blue can create the shadowy depths of a dense forest. Understanding how to mix colors effectively allows you to create depth and realism in your paintings.
Another important aspect is using complementary colors. These are colors that are opposite each other on the color wheel, like blue and orange or red and green. By placing complementary colors next to each other, you can create a vibrant contrast that makes your forest scenes pop. For example, if you have a lush green tree, consider adding some warm oranges or reds in the background to make the greenery stand out even more. It’s like a visual dance that brings your painting to life!
But color theory isn’t just about mixing and matching; it’s also about evoking mood. Think about how different colors can make you feel. Warm colors like reds, yellows, and oranges can create a sense of warmth and comfort, reminiscent of a sunny autumn day, while cool colors like blues and greens can evoke tranquility and calmness, perfect for a misty morning in the woods. When planning your forest scene, consider what emotion you want to convey and choose your colors accordingly.
To help you better understand how to apply these concepts, let’s take a look at a simple color palette that can work wonders for your forest paintings:
| Color | Use |
|---|---|
| Forest Green | Main foliage color |
| Olive Green | Shadows in foliage |
| Yellow Ochre | Sunlit areas |
| Burnt Sienna | Tree trunks and earth |
| Sky Blue | Background sky |
As you work on your forest paintings, remember that creating depth with color is crucial. Layering colors can add dimension and richness to your artwork. For instance, start with a base layer of a lighter color and gradually add darker shades on top, allowing the lighter tones to peek through. This technique can create a sense of light filtering through the trees, adding life to your scene.
Lastly, don’t forget about the balance of warm and cool colors. A harmonious composition often features a blend of both, which can help create a dynamic yet cohesive look. Think of it like a perfectly brewed cup of coffee: too much cream, and you lose the richness; too much coffee, and it’s overwhelming. Striking the right balance will elevate your painting from good to breathtaking.
- What colors should I use for a forest painting? Aim for a variety of greens, browns, and earthy tones, supplemented by warm colors for highlights and cool colors for shadows.
- How do I create depth in my forest painting? Use layering techniques with varying shades to create a sense of depth, and utilize warm and cool colors strategically.
- Can I use photographs for reference? Absolutely! Photographs can provide invaluable insights into color, light, and composition.
Creating Depth with Color
When it comes to painting forests, creating a sense of depth is crucial to capturing the enchanting beauty of nature. By skillfully layering colors, you can transform a flat canvas into a vibrant, three-dimensional landscape that draws the viewer in. Imagine standing in a lush forest, where the sunlight filters through the leaves, casting dappled shadows on the forest floor. This is the kind of depth you want to replicate in your artwork!
One effective way to create depth is through the use of layering techniques. Start with a base layer of color that represents the distant trees or foliage. Use a lighter shade of green or blue to mimic the atmospheric perspective, as colors tend to fade into the background. Once this layer is dry, you can gradually add darker shades to the foreground, which will help to create a sense of dimension. Think of it like building a sandwich: the base is light and airy, while the fillings are rich and dense.
Another technique is to utilize color temperature. Warm colors, like oranges and yellows, can be used to bring elements forward, while cool colors, like blues and purples, can push elements back. By balancing these colors, you create a harmonious composition that feels alive. For instance, if you have a warm, sunlit area in your painting, consider placing cooler colors in the shadowed areas to enhance the contrast and depth.
Additionally, contrasting values can significantly enhance depth. By varying the lightness and darkness of your colors, you can create a more dynamic scene. For instance, a bright highlight on a tree trunk can make it pop against a darker background, giving the viewer a sense of distance and perspective. Don’t be afraid to experiment with different shades and tones; sometimes, the most unexpected combinations yield the most stunning results.
To summarize, here are some key techniques to keep in mind when creating depth with color in your forest paintings:
- Layering: Build your landscape from light to dark, starting with distant elements.
- Color Temperature: Use warm colors to bring elements forward and cool colors to recede them.
- Contrasting Values: Play with light and dark shades to create a more dynamic and three-dimensional effect.
By mastering these techniques, you'll be well on your way to creating stunning forest landscapes that not only capture the eye but also evoke the feeling of wandering through a serene woodland. So grab your brushes, mix those colors, and let your creativity flow!
Q: How can I make my forest paintings look more realistic?
A: Focus on using layering techniques, varying color temperatures, and contrasting values to create depth. Observing real forests and understanding their color dynamics will also help improve realism.
Q: What type of brushes are best for creating texture in forest paintings?
A: Flat brushes are excellent for broad strokes and backgrounds, while round brushes are perfect for detailing foliage and adding intricate textures.
Q: Can I use other mediums along with acrylics for forest painting?
A: Yes! You can incorporate other mediums such as watercolors or pastels for highlights and textures, but be sure to let each layer dry before applying others to maintain the integrity of your acrylic work.
Using Warm and Cool Colors
When it comes to painting forest landscapes, the choice between warm and cool colors can dramatically influence the mood and atmosphere of your artwork. Think of warm colors—like reds, oranges, and yellows—as the sun's embrace, bringing energy and vibrancy to your scene. In contrast, cool colors—such as blues, greens, and purples—evoke a sense of calm and serenity, reminiscent of a quiet, shaded grove. Understanding how to balance these colors is essential for achieving a harmonious composition that resonates with viewers.
Let’s explore how these colors interact and affect your forest paintings. For instance, if you want to create a sun-drenched forest scene, incorporating warm colors in the foreground can draw the viewer's eye and make the scene feel inviting. On the other hand, using cool colors in the background can create a sense of distance and depth, making your forest appear more expansive.
Here’s a quick breakdown of how you can use warm and cool colors effectively:
- Foreground Elements: Use warm colors to highlight trees, flowers, or sunlight filtering through the leaves. This adds vibrancy and life to the front of your painting.
- Background Elements: Employ cool colors to depict distant trees or shadows. This helps to establish depth and perspective, making your painting feel more three-dimensional.
- Color Harmony: Strive for balance by mixing warm and cool colors. For example, a warm orange sunset can beautifully contrast with the cool greens of the forest, creating a dynamic interplay that captures the viewer’s attention.
Moreover, consider the time of day in your forest painting. A sunrise might call for a palette rich in warm colors, while a twilight scene could benefit from cooler hues. The key is to remember that colors can evoke emotions, so think about what feelings you want to convey. Do you want your audience to feel the warmth of a summer afternoon or the chill of a misty morning? By strategically using warm and cool colors, you can effectively communicate the essence of your forest scene.
Incorporating these techniques will not only enhance the visual appeal of your artwork but also deepen the emotional connection your audience feels towards your painting. So, grab your brushes, and let your imagination run wild as you explore the enchanting world of warm and cool colors in your forest landscapes!
Q1: How do I choose between warm and cool colors for my forest painting?
A1: Consider the mood you want to convey. Warm colors evoke energy and vibrancy, while cool colors create a sense of calm. You can also mix both to achieve balance and depth.
Q2: Can I use warm and cool colors in the same area of my painting?
A2: Absolutely! Using both can create interesting contrasts and enhance the overall composition. Just be mindful of how they interact to maintain harmony.
Q3: What are some common warm and cool colors I should know?
A3: Common warm colors include reds, oranges, and yellows, while cool colors encompass blues, greens, and purples. Familiarizing yourself with these will help you make informed choices in your artwork.
Techniques for Forest Painting
When it comes to forest painting, the techniques you choose can make all the difference between a flat representation and a vibrant, lifelike scene that draws viewers in. Various methods can help you capture the enchanting essence of forests, transforming your canvas into a lush, inviting landscape. Let's explore some of these exciting techniques that will not only enhance your artistic skills but also breathe life into your forest scenes.
One of the most effective techniques for creating depth and richness in your forest paintings is glazing. This method involves applying thin, transparent layers of paint over dried layers, allowing the underlying colors to show through. The result is a luminous effect that can mimic the dappled light filtering through trees. To get started with glazing, select a medium that slows the drying time of your acrylic paints, such as a glazing medium. Apply a thin wash of color, ensuring that each layer dries completely before adding the next. This technique is particularly useful for creating the illusion of depth in the foliage and capturing the subtleties of light in your forest scenes.
Another technique that can add incredible texture and realism is dry brushing. This method involves using a relatively dry brush loaded with a small amount of paint to create a scratchy, textured effect. It’s perfect for depicting the rough bark of trees or the delicate details of leaves. To master dry brushing, choose a stiff-bristled brush and dip it lightly into your paint. Wipe off excess paint on a paper towel, then gently drag the brush across the surface of your canvas. This technique allows you to build up layers of texture gradually, giving your forest scene a more organic feel.
Incorporating layering into your painting process is also essential. Layering involves applying multiple coats of paint to create depth, texture, and complexity. Start with your background, using broader strokes and lighter colors to establish the sky and distant trees. Gradually work your way forward, adding darker and more detailed elements as you approach the foreground. This technique not only enhances the dimensionality of your painting but also helps guide the viewer’s eye through the composition.
To further enhance your forest painting, consider using a combination of these techniques. For example, you might start with a base layer using glazing to establish an atmospheric background, then apply dry brushing to add texture to the trees. As you layer colors and textures, remember to step back frequently to assess your work. This will help you maintain a balanced composition and ensure that your painting captures the enchanting beauty of the forest.
In summary, mastering the techniques of glazing, dry brushing, and layering can transform your forest paintings into captivating works of art. Each method offers unique advantages and can be combined in various ways to create stunning visuals. So grab your brushes, unleash your creativity, and let the magic of the forest inspire your next masterpiece!
- What materials do I need for forest painting? You will need acrylic paints, a variety of brushes (flat and round), a suitable canvas, and a palette for mixing colors.
- Can I use these techniques on other types of landscapes? Absolutely! While these techniques are great for forest scenes, they can be applied to any landscape painting to enhance depth and texture.
- How do I know when to stop adding layers? A good rule of thumb is to step back and evaluate your painting from a distance. If it feels balanced and captures the essence of your vision, it’s likely time to stop.
Glazing Techniques
Glazing is a technique that can truly elevate your acrylic forest paintings, allowing you to create rich, transparent layers of color that add depth and luminosity. Imagine the way sunlight filters through the leaves, creating a dance of light and shadow—this is the magic glazing can bring to your artwork. By applying thin layers of paint over a dried base layer, you can achieve a sense of atmosphere that makes your forest scenes come alive.
To begin glazing, it's essential to understand the right consistency of your paint. You want your acrylics to be fluid but not too watery; a good rule of thumb is to mix your paint with a glazing medium or water until it flows easily off the brush. This ensures that the underlying layers remain visible, which is crucial for creating that depth we’re after. A common ratio is one part paint to one part medium, but feel free to adjust based on your desired transparency.
When applying the glaze, use a soft brush to maintain control and avoid harsh lines. Start with a small area and gradually build up your layers. It’s often best to work from dark to light, as this helps in creating a natural gradient that mimics the way light behaves in a forest. For instance, if you're painting a dense thicket, begin with a dark green base and layer lighter greens and yellows on top to simulate the varying light conditions.
Here’s a simple step-by-step process to get you started with glazing:
- Prepare Your Base Layer: Paint the initial layers of your forest scene, allowing them to dry completely.
- Mix Your Glaze: Combine your chosen color with a glazing medium to achieve the desired transparency.
- Apply the Glaze: Using a soft brush, apply the glaze over your dried base layer, working in small sections.
- Build Up Layers: Allow each glaze to dry before adding the next layer, gradually building depth and richness.
One of the best aspects of glazing is its versatility. You can use it to create misty effects in the background, giving your forest a sense of mystery, or to highlight specific areas, such as sunlit leaves or the shimmer of water in a forest stream. By experimenting with different colors and layering techniques, you can discover unique effects that resonate with your personal style.
As you become more comfortable with glazing, don’t hesitate to explore unconventional colors. For example, a warm golden glaze over a cooler blue base can produce stunning results, reminiscent of a sunset filtering through the trees. Remember, the key to mastering glazing is patience—allow each layer to dry thoroughly before applying the next, and take the time to observe how light interacts with the colors in your painting.
Q: Can I use glazing techniques on top of wet paint?
A: It’s best to allow your base layers to dry completely before applying a glaze. This ensures that the colors underneath remain intact and visible.
Q: What types of colors work best for glazing?
A: Generally, transparent or semi-transparent colors are ideal for glazing. Colors like quinacridone gold, phthalo blue, and transparent red oxide work wonderfully.
Q: How do I clean my brushes after using glazing mediums?
A: Clean your brushes immediately after use with soap and water to prevent the medium from drying on the bristles.
Dry Brushing Techniques
Dry brushing is one of those magical techniques that can transform your forest paintings from ordinary to extraordinary. Imagine standing in front of a dense, sunlit forest, the light filtering through the leaves, creating a dance of shadows and highlights. That’s the essence of dry brushing! It involves using a brush that is barely loaded with paint, allowing for a textured, natural look that mimics the intricate details found in nature.
To master dry brushing, start by selecting a stiff-bristled brush. A flat or a fan brush works wonders for this technique, as they can create varied textures. The key here is to ensure that your brush is not overloaded with paint. Dip it lightly into your chosen color, then wipe off most of the paint on a paper towel. This will leave just enough pigment to create a subtle, layered effect on your canvas.
When applying the dry brush technique, think of it as a gentle caress over the surface of your painting. Use quick, light strokes to build up layers of color, focusing on areas where you want to add texture, such as the bark of trees or the underbrush of the forest floor. For instance, if you're painting tree trunks, a dry brush technique can effectively simulate the rough texture of bark. As you work, you can mix different shades of the same color to add depth and interest, enhancing the realism of your scene.
Another fascinating aspect of dry brushing is its ability to create highlights. By using a lighter shade of the same color, you can emphasize the edges of leaves or the tips of grass blades, making them pop against the darker background. This technique is particularly effective in forest scenes where light plays a significant role in the overall composition.
Here are a few tips to keep in mind while practicing dry brushing:
- Experiment with pressure: The amount of pressure you apply to the brush can dramatically change the outcome. Light pressure will yield softer textures, while firmer strokes can create more pronounced details.
- Layer your colors: Don’t be afraid to layer different colors. Start with a base layer and gradually build up the highlights and shadows to create a more dynamic and realistic effect.
- Practice on scrap paper: Before applying this technique to your canvas, practice on scrap paper to get a feel for how much paint to use and how to manipulate the brush.
Incorporating dry brushing into your forest paintings can really bring your artwork to life. It’s like adding the finishing touches to a masterpiece, where every stroke counts and contributes to the overall beauty of the scene. So grab your brushes, let your creativity flow, and watch as your forest landscapes come alive with texture and depth!
Q: What type of paint should I use for dry brushing?
A: Acrylic paints are ideal for dry brushing due to their quick drying time and versatility. You can also use oil paints, but they require more patience as they take longer to dry.
Q: Can I use dry brushing on other subjects besides forests?
A: Absolutely! Dry brushing can be used on a variety of subjects, including landscapes, portraits, and still life. It’s a great technique for adding texture and depth to any painting.
Q: How do I clean my brush after dry brushing?
A: To clean your brush, simply rinse it under warm water and use mild soap if needed. Make sure to reshape the bristles before letting it dry to maintain its shape for future use.
Q: Is dry brushing suitable for beginners?
A: Yes! Dry brushing is a beginner-friendly technique that allows you to experiment with texture and layering without the pressure of achieving perfect results right away.
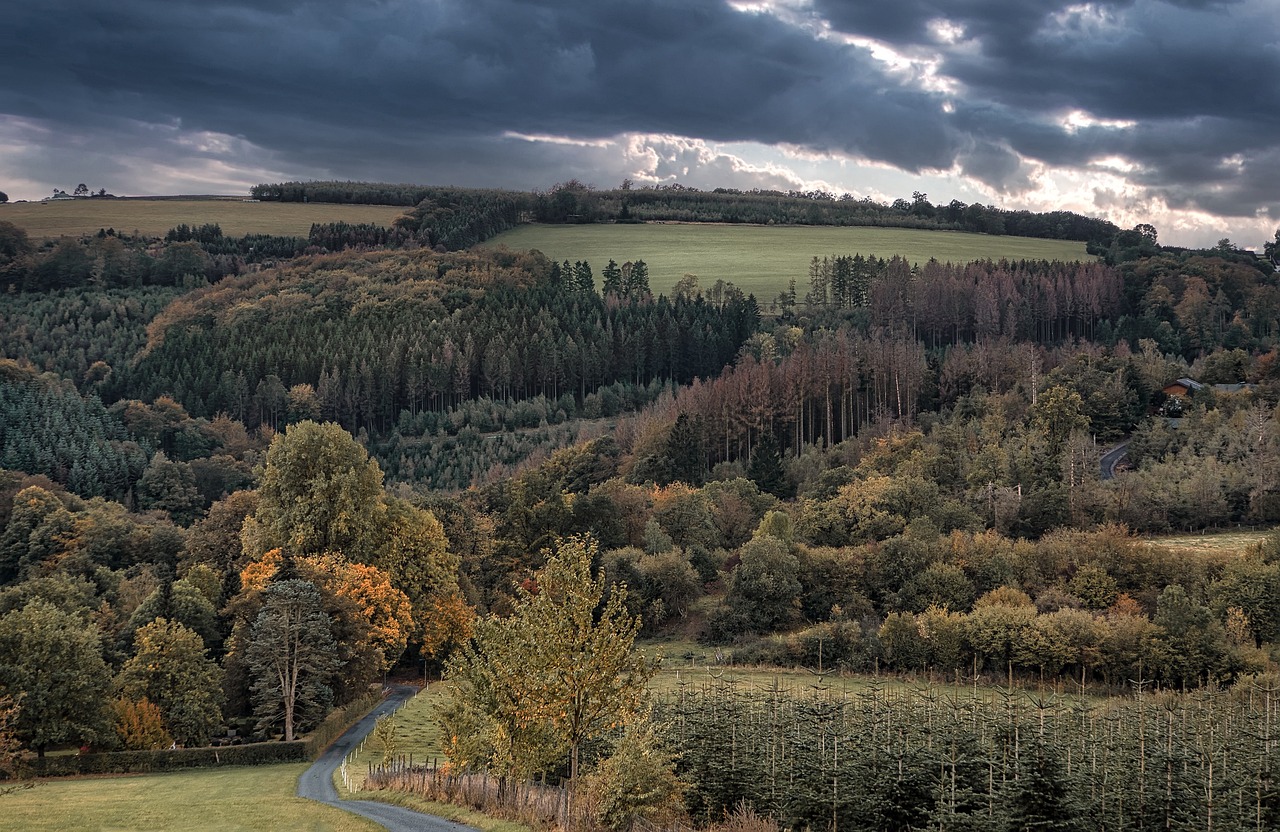
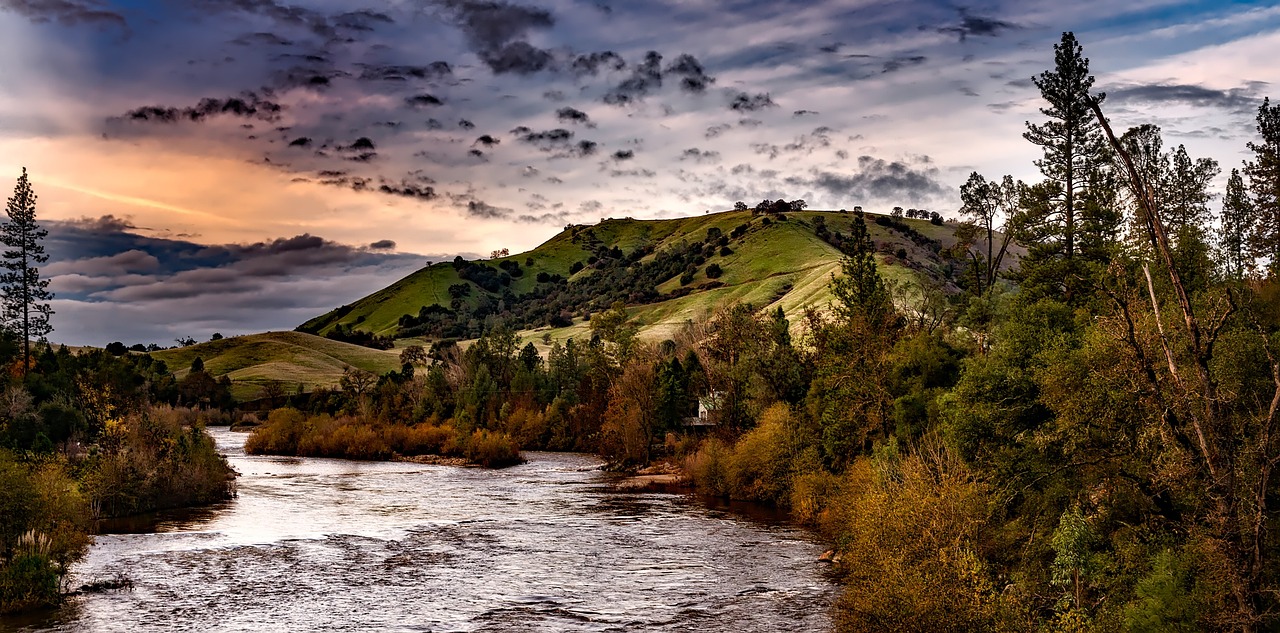
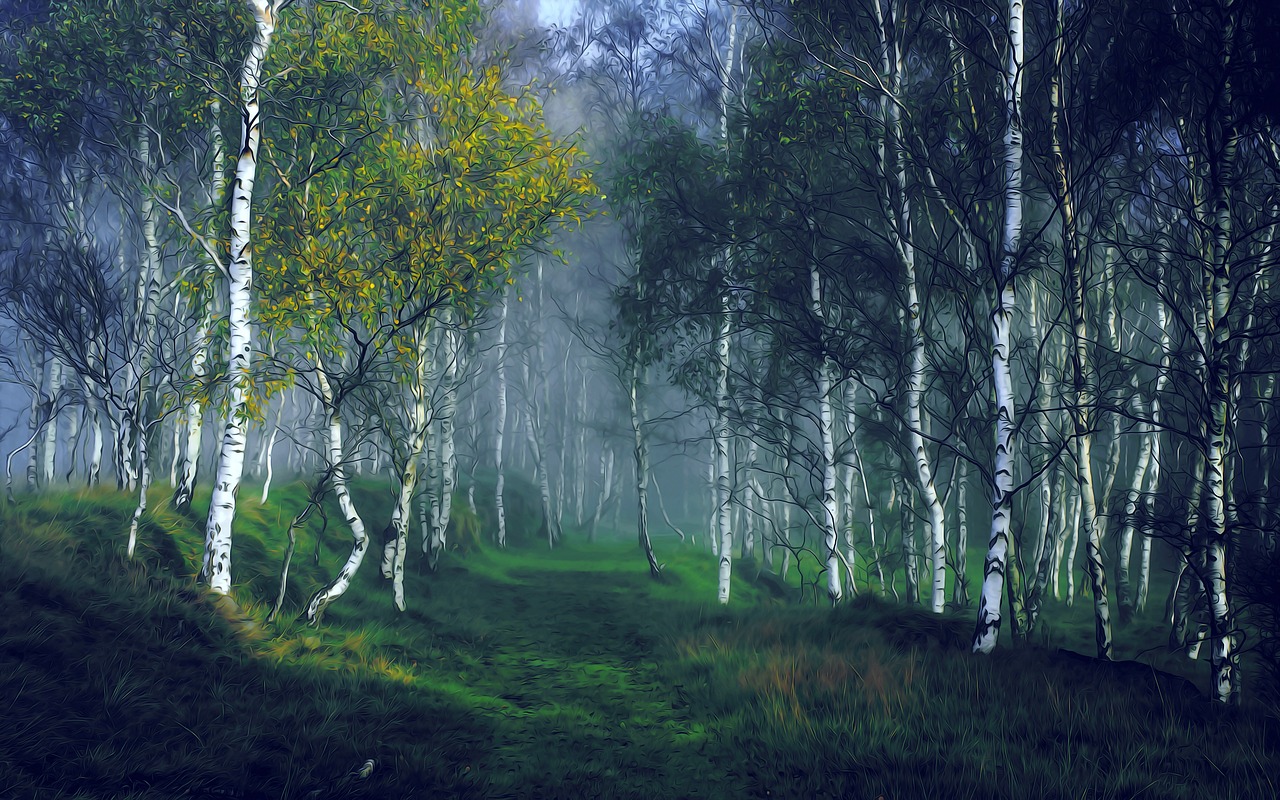
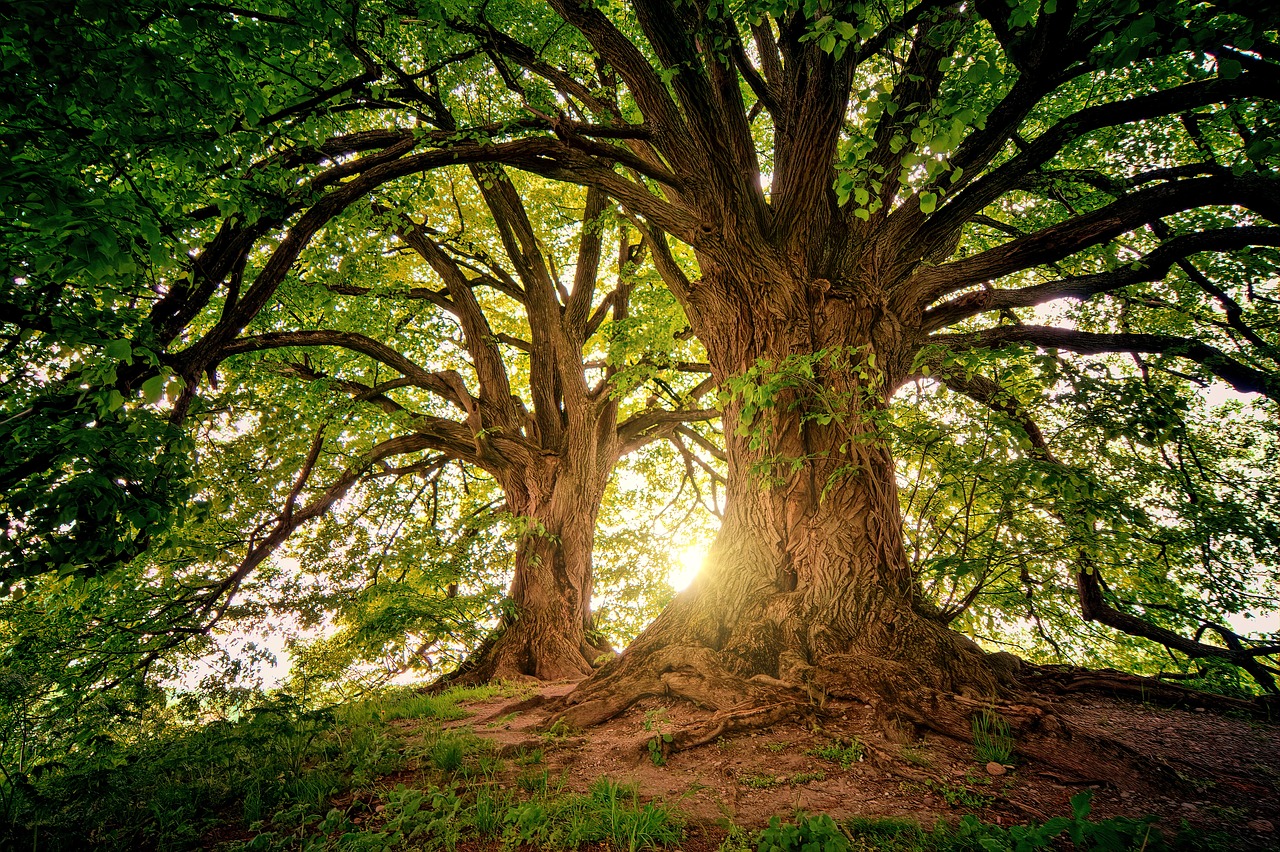
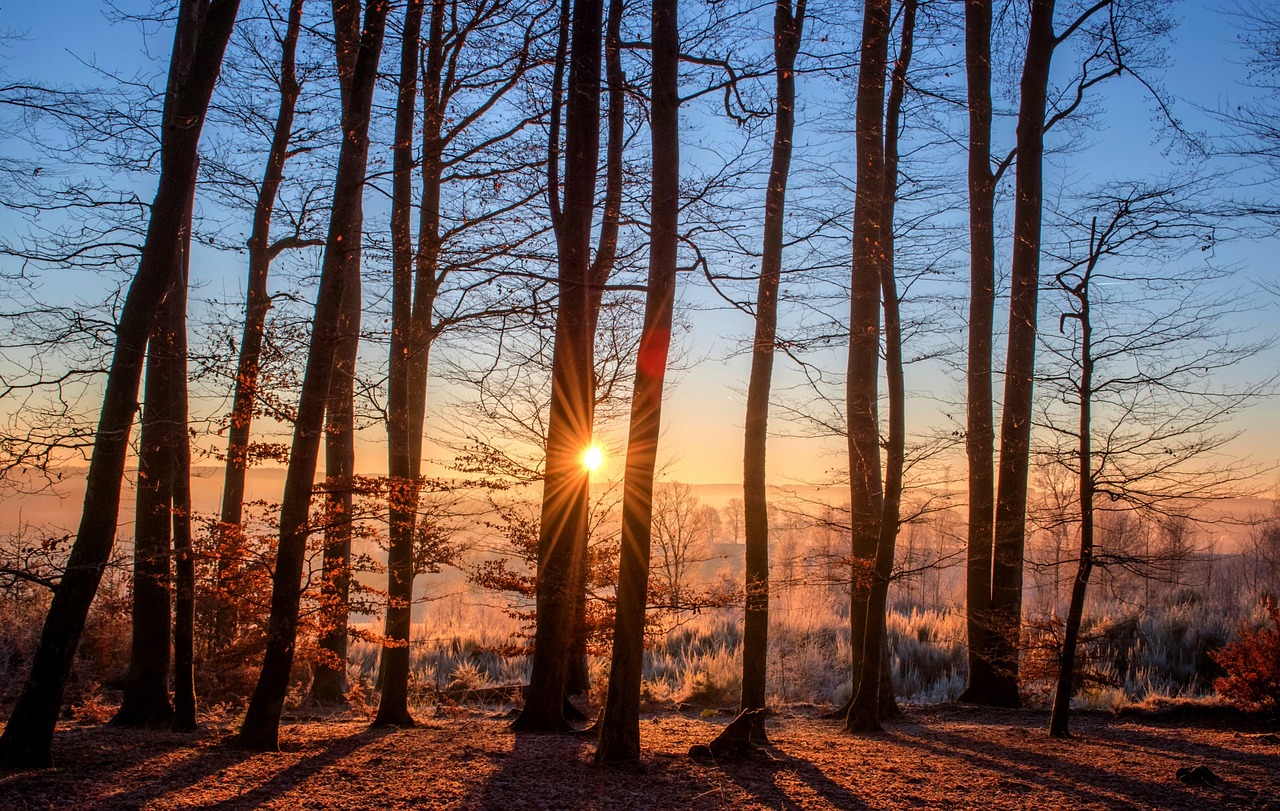
Inspiration from Nature
Finding inspiration in nature is not just a suggestion; it's a vital part of the artistic journey, especially when it comes to forest painting. The woods are alive with color, texture, and movement, offering a **treasure trove** of ideas just waiting to be captured on canvas. Have you ever walked through a forest and felt the magic of the dappled sunlight filtering through the leaves or the rich smell of damp earth after a rain? These experiences can ignite your creativity and help you translate those sensations into breathtaking artwork.
To truly harness the essence of forests in your paintings, it's essential to immerse yourself in different types of environments. Each forest type has its own unique characteristics that can influence your artistic expression. For instance, consider the differences between a sun-drenched pine forest and a shadowy, moss-covered woodland. These contrasts can inspire various color palettes and techniques in your work. Here are some forest types to explore:
- Deciduous Forests: Rich in a variety of colors, especially in autumn, these forests can inspire vibrant palettes of oranges, yellows, and reds.
- Pine Forests: The deep greens and cool shadows of pine trees can evoke a sense of calm and serenity.
- Tropical Rainforests: Full of life, these forests offer a riot of colors and textures, perfect for capturing lush foliage and exotic wildlife.
Additionally, using photographs as references can significantly enhance your painting process. A well-chosen photograph can act as a **visual guide**, helping you understand the play of light, shadow, and color in a real forest scene. When selecting a photograph, look for images that capture the mood you want to convey in your artwork. Pay attention to details such as:
| Aspect | Details to Observe |
|---|---|
| Lighting | Observe how light interacts with trees, creating highlights and shadows. |
| Color | Notice the range of colors present and how they blend together in different areas. |
| Texture | Look for textures in bark, leaves, and the forest floor that can add depth to your painting. |
Ultimately, the key to capturing the essence of forests in your acrylic paintings lies in your ability to observe and translate what you see into your art. So, grab your sketchbook, head out into nature, and let the beauty of the forest inspire you. Remember, every tree, every leaf, and every ray of sunlight has a story to tell, and it's up to you to bring that story to life on your canvas.
Q: How can I find inspiration for my forest paintings?
A: Inspiration can be found by immersing yourself in nature, exploring different forest types, and using photographs as references. Observing the colors, textures, and lighting in real life can spark your creativity.
Q: What are the best colors to use for forest landscapes?
A: The best colors depend on the type of forest you're painting. For deciduous forests, vibrant autumn colors work well, while pine forests may benefit from deep greens and cool tones. Always consider the mood you want to convey.
Q: How can I create depth in my forest paintings?
A: You can create depth by layering colors, using warm and cool tones to create contrast, and incorporating highlights and shadows effectively.
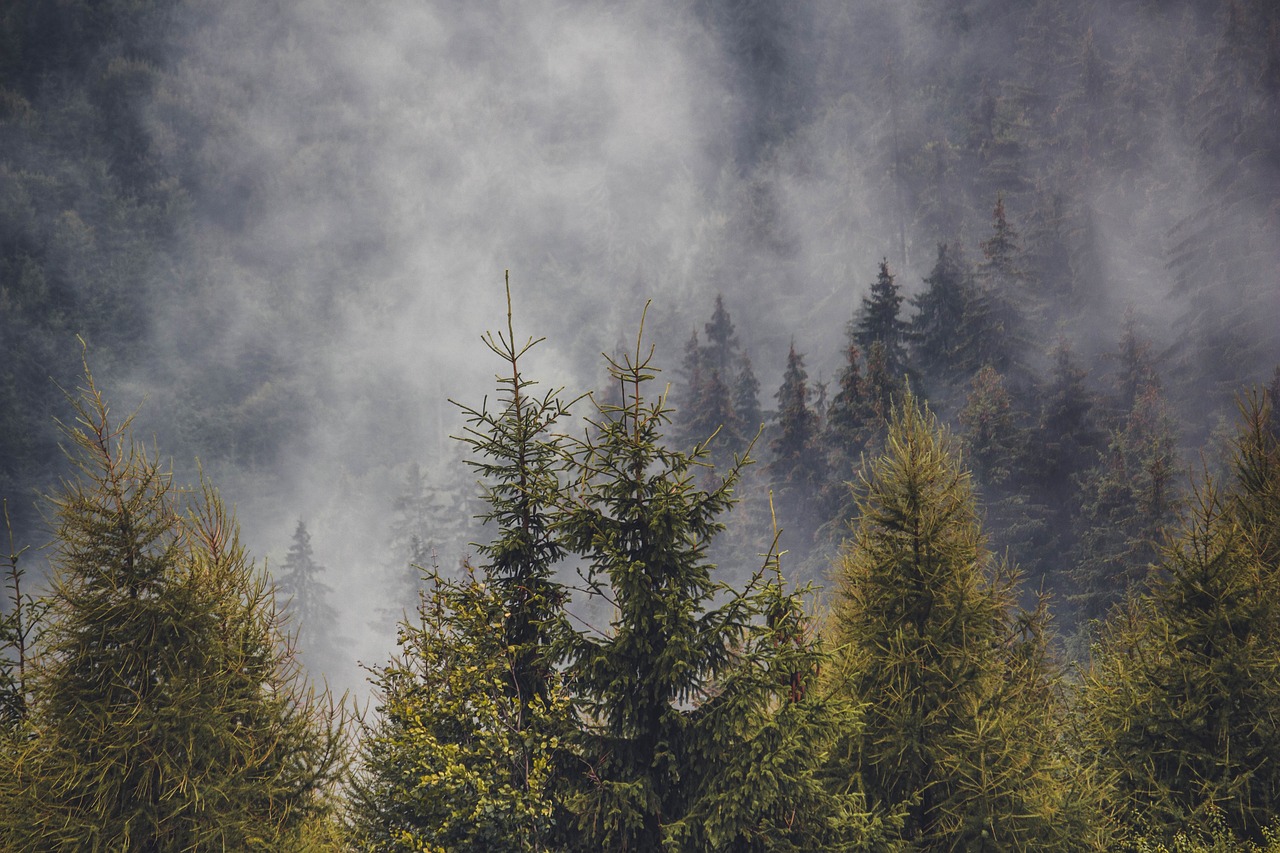
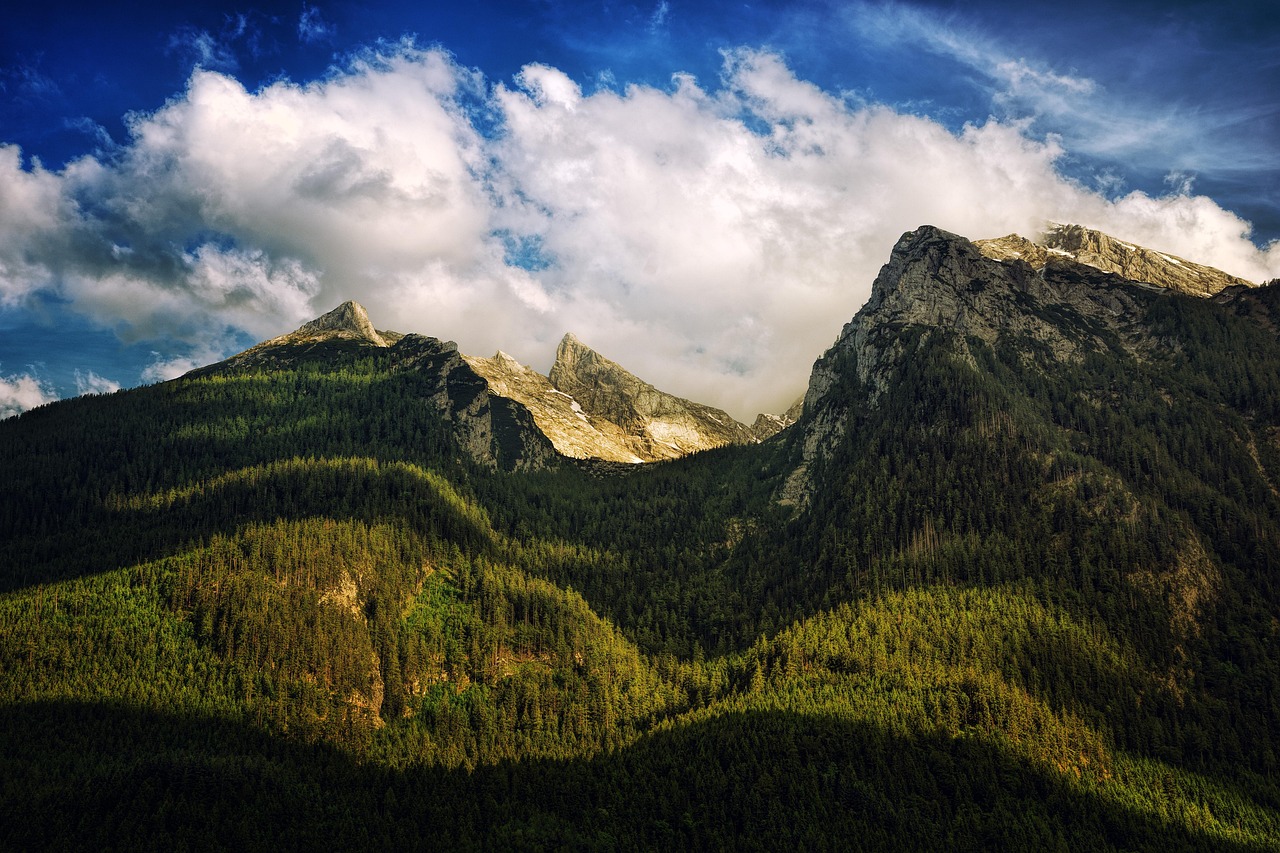
Exploring Different Forest Types
When it comes to painting forests, the diversity of forest types can be a goldmine for inspiration. Each forest type offers unique characteristics that can influence your artistic choices, from the colors you select to the textures you create. Imagine stepping into a lush, green rainforest, where the air is thick with humidity and the sounds of wildlife fill your ears. Now, picture a serene, sun-dappled pine forest, where the scent of pine needles wafts around you. Each of these environments tells a different story, and as an artist, your job is to capture that essence on canvas.
Let’s dive deeper into some of the most captivating forest types you might want to explore in your acrylic paintings:
- Rainforests: These vibrant ecosystems are teeming with life. The rich greens, deep browns, and splashes of bright colors from flowers and fruits create a dynamic palette. When painting a rainforest, consider the intricate layering of foliage and the play of light filtering through the dense canopy.
- Deciduous Forests: Known for their seasonal changes, deciduous forests can be a feast for the eyes, especially in autumn. The vivid reds, oranges, and yellows can evoke powerful emotions. Capturing the transition of seasons can add depth to your artwork, showcasing the beauty of change.
- Pine Forests: With their tall, slender trees and often cooler color palette, pine forests can create a sense of tranquility. The texture of the bark and the needles can be beautifully rendered with techniques like dry brushing, allowing you to convey the unique feel of this environment.
- Boreal Forests: These forests, also known as taiga, are characterized by coniferous trees and long winters. The muted colors and stark landscapes can provide a dramatic backdrop for your paintings. Consider using a cooler palette to reflect the chill of the air and the stillness of the scene.
Each of these forest types can serve as a rich source of inspiration. As you explore these environments, take the time to observe the details that make them unique. Notice how the light interacts with the leaves, the way shadows dance across the ground, and the variety of textures that exist in each setting. By immersing yourself in these natural wonders, you’ll find that your acrylic paintings will not only capture the beauty of the forest but also evoke the emotions that come with being surrounded by nature.
So, grab your brushes and let the forests inspire you! Whether you’re depicting the vibrant life of a rainforest or the serene stillness of a boreal landscape, remember that your interpretation is what makes your artwork truly unique. Every stroke of your brush is a conversation between you and the forest, a chance to share your vision with the world.
Q: What is the best time of year to paint forests?
A: Each season offers different colors and moods. Spring and summer provide vibrant greens, while autumn showcases rich reds and oranges. Winter can offer a unique, serene perspective with snow-covered landscapes.
Q: Can I use photographs to help with my forest paintings?
A: Absolutely! Photographs can serve as great references for color, light, and composition. Just make sure to interpret the scene in your own style.
Q: What if I struggle with color mixing?
A: Practice makes perfect! Start with a limited palette and experiment with mixing colors to see how they interact. Understanding color theory can also help you make more informed choices.
Q: How do I add texture to my forest paintings?
A: Techniques like dry brushing, glazing, and layering can create depth and texture. Experiment with different brush types and methods to find what works best for you.

Photographic References
When it comes to painting forests, can be your best friend. They serve as a window into the enchanting world of nature, capturing the intricate details and vibrant colors that you might miss during a quick stroll through the woods. But how do you effectively use these photographs to elevate your acrylic paintings? Well, let’s dive into some practical tips!
First off, it’s important to choose photographs that resonate with you. Look for images that evoke a certain mood or feeling; this emotional connection will translate into your artwork. Whether it’s a sun-dappled glade or a misty woodland, the right photograph can provide a solid foundation for your creative process. You might find inspiration in various sources, such as:
- Nature magazines
- Online photography platforms like Unsplash or Pexels
- Your own collection of travel photos
- Social media platforms where nature photographers showcase their work
Once you’ve selected a photograph, take the time to study it closely. Notice the composition, the play of light and shadow, and the color palette. Ask yourself questions like: What makes this scene captivating? How do the colors interact? Observing these elements will help you understand how to replicate them in your painting.
Next, consider the technical aspects of the photograph. Pay attention to the lighting—is it soft and diffused, or harsh and direct? The quality of light can drastically alter the mood of your painting. For instance, a photograph taken during the golden hour will have a warm glow, which can be beautifully captured using warm acrylic tones in your palette.
Another important factor is the depth of field. Photographs often have a sharp focus on a particular subject while allowing the background to blur, creating a sense of depth. You can mimic this effect in your painting by using layering techniques and varying the sharpness of your brushwork. For example, you might use more detailed strokes for foreground elements while keeping the background softer and less defined.
Lastly, don’t hesitate to modify the photograph. Use it as a starting point, but feel free to add your own twist! Change colors, add or remove elements, or even alter the composition to better suit your vision. Remember, the goal is to create a piece that reflects your unique artistic voice while drawing inspiration from the beauty of nature.
Incorporating photographic references into your forest painting process can significantly enhance your work. They are not just tools for replication but rather stepping stones to deeper artistic exploration. So grab your camera or smartphone, head out into nature, and start capturing those breathtaking moments. Your next masterpiece awaits!
Q: How do I choose the best photographs for reference?
A: Look for images that resonate with you emotionally and capture the elements you want to portray in your painting. Consider composition, lighting, and color palette.
Q: Can I use multiple photographs for one painting?
A: Absolutely! Many artists combine elements from various photographs to create a unique scene that reflects their vision.
Q: Should I strictly replicate the photograph?
A: No, feel free to modify the photograph as you see fit. Use it as a guide but let your creativity shine through in your artwork.
Final Touches and Techniques
When it comes to forest painting, the final touches can make all the difference between a good piece of art and a truly stunning one. These finishing techniques are essential for bringing your forest scenes to life, adding depth, vibrancy, and an overall sense of realism. Think of these final touches as the cherry on top of a beautifully crafted cake; they elevate the entire composition and leave a lasting impression on the viewer.
One of the most effective ways to enhance your painting is through the use of highlights. Applying white or light colors to specific areas can create a sense of light and movement, drawing the eye to focal points within your forest landscape. For instance, imagine the sun filtering through the leaves of a tree; those little spots of light can be captured by dabbing a bit of white or a light yellow onto the foliage. This technique not only adds vibrancy but also creates a three-dimensional effect, making your trees appear to sway gently in the breeze.
To achieve a harmonious balance, it's crucial to consider the interplay of light and shadow. Shadows are not just dark areas; they are essential for creating depth and dimension in your artwork. By using darker colors in the appropriate areas, you can establish realistic shadows that ground your elements within the scene. For example, the base of a tree trunk or the underside of leaves can be accentuated with darker greens or browns, providing a stark contrast to the lighter highlights above. This contrast helps to create a more immersive experience for the viewer, as they can almost feel the cool shade of the forest floor.
Another technique worth mastering is the application of glazing. This method involves layering transparent colors over dried paint to create depth and richness. Glazing can be particularly effective in forest paintings where you want to simulate the effect of light filtering through layers of leaves. Start with a base layer of color, allow it to dry completely, and then apply a thin wash of a different color. This technique can add a beautiful luminosity to your work, making it feel alive and vibrant.
Furthermore, don't underestimate the power of texture in your forest paintings. Using techniques such as dry brushing can add an organic feel to your artwork. This method involves using a dry brush with minimal paint to lightly drag across the surface, creating a textured effect that mimics the roughness of bark or the softness of moss. It’s a great way to add intricate details without overwhelming the viewer with too much information.
In summary, the final touches and techniques you apply to your forest paintings are what truly bring them to life. Whether it's through highlights, shadows, glazing, or texture, each element plays a pivotal role in enhancing the overall composition. So, take your time with these final details; they’re the finishing strokes that will transform your artwork from merely good to absolutely breathtaking.
Q: What are the best colors to use for highlights in forest paintings?
A: The best colors for highlights often include whites, yellows, and light greens. These colors can mimic sunlight and create a sense of vibrancy in your artwork.
Q: How can I create realistic shadows in my forest scenes?
A: To create realistic shadows, use darker shades of the colors you’ve already applied. For instance, if you’ve used light green for the leaves, consider using a dark green or even a deep blue for the shadows.
Q: Is glazing difficult to master?
A: Glazing can take some practice, but it’s a valuable technique that can greatly enhance your paintings. Start with thin layers and gradually build up until you achieve the desired effect.
Q: Can I use a palette knife for final touches?
A: Absolutely! A palette knife can be used to add texture and create sharp edges in your artwork, especially for highlights and textured areas.

Highlighting with White and Light Colors
When it comes to forest painting, highlights play a crucial role in bringing your artwork to life. They add vibrancy and depth, making your forest scenes feel more dynamic and inviting. Think of highlights as the sparkle in your painting; they draw the viewer's eye and create a sense of realism. So, how do you effectively incorporate white and light colors into your forest landscapes?
First off, it's essential to understand that highlights should not be applied uniformly across your painting. Instead, they should be strategically placed to enhance the focal points of your composition. For instance, imagine the sun filtering through the leaves of a tree. The areas directly illuminated by sunlight will be brighter, while the shaded parts will retain their darker tones. This contrast is what creates the illusion of depth and dimension in your artwork.
One effective method is to use a palette knife or a stiff brush to apply white or light colors. This technique allows you to create texture and mimic the natural irregularities found in nature. When highlighting tree trunks or branches, consider using a lighter shade of brown or beige rather than pure white. This approach ensures that your highlights remain harmonious with the overall color scheme of your painting.
Additionally, you can create a sense of warmth by incorporating light yellows or soft greens into your highlights. These colors can evoke the feeling of sunlight filtering through foliage, giving your forest scene a more inviting atmosphere. Remember, the goal is to create a balance between light and shadow, which can be achieved through careful layering and blending.
To illustrate the impact of highlights, let’s take a look at a simple table that outlines the effects of different highlighting techniques:
| Technique | Description | Effect |
|---|---|---|
| Dry Brushing | Using a dry brush to apply light colors. | Creates a soft, textured highlight. |
| Glazing | Layering thin washes of color over dried paint. | Adds luminosity and depth. |
| Palette Knife | Applying paint with a palette knife for a more pronounced texture. | Creates bold, striking highlights. |
In conclusion, highlighting with white and light colors is not just about slapping on some paint; it's an art form in itself. By observing how light interacts with the natural elements in a forest, you can replicate that beauty in your artwork. So, grab your brushes, experiment with different techniques, and watch as your forest paintings transform into captivating scenes that invite viewers to step into the enchanting world you've created.
- What colors should I use for highlights in forest paintings?
Using a combination of white, light yellows, and soft greens can create an inviting atmosphere and mimic sunlight filtering through leaves.
- Can I use pure white for highlights?
While pure white can be used, it's often more effective to use lighter shades of your base colors for a more harmonious look.
- How do I create depth with highlights?
By contrasting highlights with darker shadows and strategically placing them, you can create a sense of depth and dimension in your paintings.
Creating Shadows for Depth
When it comes to painting forest landscapes, shadows play a crucial role in creating a sense of depth and realism. Think of shadows as the unsung heroes of your artwork; they are the subtle whispers that add dimension and life to your scenes. Without them, your forest might feel flat and lifeless, much like a pancake without syrup. So, how do you effectively incorporate shadows into your acrylic paintings? Let’s dive into some techniques and tips that will help you master this essential skill.
First and foremost, understanding the light source in your composition is key. Where is the light coming from? Is it a bright sunny day, or is it a moody, overcast afternoon? The direction and intensity of light will dictate how shadows fall across your forest landscape. For instance, if the sun is shining from the left, the shadows on the right side of the trees and foliage will be darker and more pronounced. This contrast not only enhances the three-dimensionality of your painting but also guides the viewer's eye through the scene.
Next, let’s talk about color selection for shadows. Many beginners make the mistake of using pure black for shadows, which can often lead to a stark and unnatural appearance. Instead, consider using darker hues of the colors already present in your painting. For example, if you have a vibrant green forest, mixing a bit of blue or purple into your green can create a more organic shadow. This technique not only maintains color harmony but also adds richness to your artwork. Below is a simple table that outlines some common colors and their shadow counterparts:
| Base Color | Shadow Color |
|---|---|
| Green | Dark Green + Blue |
| Brown | Dark Brown + Purple |
| Yellow | Dark Yellow + Orange |
| Sky Blue | Dark Blue + Gray |
Once you have your colors ready, it’s time to apply them strategically. Start by laying down a base layer of your shadow color in the areas where you want to create depth. Use a round brush for more detailed work around tree trunks and foliage, and a flat brush for broader areas. Remember, shadows are not just solid shapes; they should have a gradient effect. This can be achieved by blending the edges of your shadow color into the surrounding hues. A gentle transition will make your shadows feel more natural and integrated into the scene.
Another technique to consider is the use of layering. Start with a lighter shadow and gradually build up to darker tones. This method allows for greater control over the depth and intensity of your shadows. As you layer, you’ll notice how the interplay between light and dark can create a captivating visual narrative within your forest landscape. It’s like telling a story through your paintbrush, where each layer adds a new chapter to your artistic tale.
Lastly, don’t forget about the importance of highlights. While shadows provide depth, highlights can enhance that depth by creating contrast. A well-placed highlight on the edge of a tree trunk or a sunlit patch of grass can make your shadows pop even more. Think of it as the cherry on top of your artistic sundae—essential for a complete and satisfying visual experience.
In summary, creating shadows in your forest paintings is all about understanding light, choosing the right colors, applying them strategically, and layering for depth. With practice, you’ll find that shadows can transform your artwork from ordinary to extraordinary, inviting viewers to step into the enchanting world you’ve created. So grab your brushes and start experimenting; your forest scenes are waiting to come to life!
- What colors should I use for shadows in forest paintings? It's best to use darker shades of the colors already present in your painting, rather than pure black.
- How can I create realistic shadows? Focus on the light source and apply shadows gradually, blending them into the surrounding colors for a natural look.
- Do I need to add highlights to my shadows? Yes, highlights can enhance the depth of your shadows and add realism to your painting.
Frequently Asked Questions
- What type of acrylic paints should I use for forest painting?
When it comes to forest painting, you should opt for high-quality acrylic paints that have good pigmentation and a smooth consistency. Brands like Liquitex and Golden are excellent choices. They offer a wide range of colors that can help you capture the vibrant hues of nature.
- Do I need special brushes for painting forests?
While you don’t need special brushes, having a variety of brush types will greatly enhance your forest painting. Flat brushes are great for broad strokes and backgrounds, while round brushes are perfect for adding details like leaves and tree bark. Experimenting with different brushes can help you achieve various textures.
- How can I create depth in my forest paintings?
Creating depth is all about layering colors. Start with darker shades for the background and gradually add lighter colors in the foreground. This technique, combined with the use of warm and cool colors, can give your painting a three-dimensional feel that draws the viewer in.
- What techniques can I use to make my forest paintings more realistic?
Techniques like glazing and dry brushing can significantly enhance the realism of your forest scenes. Glazing allows you to build up transparent layers of color, while dry brushing adds texture and detail. Don't forget to incorporate highlights and shadows to create a more dynamic composition!
- Where can I find inspiration for my forest paintings?
Nature is your best muse! Take walks in different types of forests, observe their unique characteristics, and capture those moments. Additionally, using photographic references can help you understand the intricacies of light, shadow, and color in natural settings.
- What are the final touches I should consider for my painting?
Final touches can make a huge difference! Focus on adding highlights with lighter colors to draw attention to focal points, and use darker shades to create shadows that add depth. These finishing details can really bring your forest scene to life and give it that polished look.


