
Techniques for Creating Beautiful Sunsets in Your Paintings
Creating stunning sunset paintings is an exhilarating journey that allows artists to express their creativity while capturing the breathtaking beauty of nature. Imagine standing on a beach, watching the sun dip below the horizon, casting vibrant hues across the sky. This moment of tranquility and awe can be translated onto your canvas through various techniques and tips that will enhance your skills and creativity. In this article, we will delve into the essential methods for painting sunsets, from understanding color theory to adding those final touches that make your artwork truly shine.
A solid grasp of color theory is essential for painting sunsets. The colors of a sunset can range from deep reds and oranges to soft purples and blues. To achieve vibrant and harmonious sunset palettes, it’s crucial to understand how to mix colors effectively. Start by familiarizing yourself with the color wheel. For example, when mixing complementary colors, such as blue and orange, you can create a more dynamic and visually appealing contrast. Additionally, consider the use of analogous colors—colors that are next to each other on the color wheel, like reds, oranges, and yellows, which can create a smooth transition in your sunset paintings.
Selecting the appropriate canvas can significantly affect your sunset painting. The size and texture of your canvas can influence how your colors appear and how much detail you can include. For larger, more dramatic sunset scenes, opt for a bigger canvas that allows for expansive color work. Conversely, smaller canvases can be perfect for intimate sunset moments. Here’s a quick overview of canvas types:
| Canvas Type | Best For |
|---|---|
| Stretched Canvas | Large, vibrant scenes |
| Canvas Board | Smaller, detailed works |
| Wood Panel | Mixed media and texture |
Preparing your canvas with the right texture can enhance your painting's depth. A smooth surface is often ideal for blending colors, while a textured surface can add an interesting dynamic to your sunset scenes. To prepare your canvas, you might consider using a layer of gesso. This not only primes the canvas but also provides a foundation that enhances color application. When applying gesso, use a wide brush to ensure an even coat, and allow it to dry completely before starting your painting.
Gesso is a popular primer for canvases and is essential for creating a smooth surface that enhances color application in sunset paintings. By applying two to three thin layers of gesso and allowing each layer to dry, you can create a perfect base for your vibrant sunset colors. This technique will help your paints adhere better and allow for smoother blending, which is crucial for capturing the soft gradients often seen in sunset skies.
Incorporating mixed media can add unique textures to your sunset art. Consider using materials like pastels, charcoal, or even collage elements to enhance your paintings. For instance, using pastels can help you achieve softer edges in the sky, while a bit of metallic paint can add a shimmering effect to the sun. The beauty of mixed media is that it invites experimentation—don’t be afraid to try new things!
Different brush techniques can create diverse effects in sunset paintings. For example, using a fan brush can help you depict fluffy clouds, while a flat brush can create sweeping strokes that mimic the smooth transition of colors in the sky. Don’t forget to play with the pressure of your brush strokes; light touches can yield soft, delicate effects, while firmer strokes can create bold, dramatic contrasts. Remember, the key is to observe how light interacts with the environment and replicate that in your artwork.
Understanding how light interacts with the environment is crucial for painting sunsets. The interplay of light and shadow can bring your sunset paintings to life. To effectively portray this, consider the direction of the light source—the sun—and how it casts shadows on clouds and the landscape. This will not only add depth but also create a more realistic scene that draws the viewer in.
Glazing can add depth and luminosity to sunset paintings. By layering transparent colors over dried paint, you can create a rich, glowing effect that mimics the ethereal quality of a sunset. Start with a base layer of your sunset colors, allow it to dry, and then apply a thin layer of glaze. This technique can enhance the vibrancy of your colors and add an element of surprise to your artwork.
Atmospheric perspective helps convey depth in landscape paintings. This technique involves using lighter and less saturated colors for distant objects, mimicking how the atmosphere affects our perception of color. When painting your sunset, remember that the foreground should be more vibrant and detailed, while the background can fade into softer hues. This not only creates a sense of depth but also emphasizes the beauty of the sunset itself.
Adding final touches can elevate your sunset painting. Pay attention to small details like highlights on the clouds or the reflection of the sun on water. These elements can bring your artwork to life, making it visually captivating. Don’t forget to step back and evaluate your painting from a distance; this can help you identify areas that may need more contrast or detail. Remember, the goal is to create a piece that resonates with viewers and evokes the emotion of a sunset.
- What colors should I use for a sunset painting?
Typically, warm colors like reds, oranges, and yellows are dominant, complemented by cooler shades like purples and blues.
- How do I create depth in my sunset paintings?
Using atmospheric perspective and glazing techniques can help achieve depth and realism in your artwork.
- Can I use different mediums for sunset paintings?
Absolutely! Experimenting with mixed media can add unique textures and effects to your sunset art.
Understanding Color Theory
To truly capture the breathtaking beauty of sunsets in your paintings, a solid grasp of color theory is essential. Think of color theory as your artistic toolbox; it equips you with the knowledge to mix and blend colors effectively, creating vibrant and harmonious palettes that evoke emotion and atmosphere. When you look at a sunset, you see a symphony of colors—rich oranges, deep purples, and soft pinks all dancing together in the sky. The key to replicating this stunning display lies in understanding how to manipulate these colors on your canvas.
At its core, color theory revolves around the color wheel, which categorizes colors into three primary types: primary, secondary, and tertiary colors. Primary colors—red, blue, and yellow—cannot be created by mixing other colors. However, when you blend these primary colors, you create secondary colors like green, orange, and purple. Tertiary colors emerge from mixing primary and secondary colors, leading to a rich variety of hues. By familiarizing yourself with this wheel, you can start to see how different colors interact and how they can be combined to achieve the stunning effects you desire in your sunset paintings.
When painting sunsets, you’ll often find that certain color combinations work better than others. For instance, the warm tones of yellows and oranges can create a feeling of warmth and tranquility, while cooler shades of blues and purples can evoke a sense of calm and serenity. Here’s where the concept of color harmony comes into play. You want your colors to work together, creating a visually pleasing composition. To achieve this, consider using analogous colors, which are located next to each other on the color wheel. For example, pairing yellows with oranges and reds can enhance the warmth of your sunset, making it feel more inviting.
Another important aspect of color theory is understanding complementary colors. These are colors that are opposite each other on the color wheel, such as blue and orange. When used together, complementary colors can create vibrant contrasts that make your sunset pop. For instance, if your sunset features a lot of warm oranges and yellows, consider adding touches of blue to the sky to create a striking contrast that draws the viewer's eye. This technique can help you achieve a sense of depth and dimension in your artwork.
To further enhance your understanding of color theory, it's beneficial to experiment with color mixing. This involves not only blending colors on your palette but also layering them on your canvas. For sunsets, you might start with a base layer of warm yellow, then gradually add layers of orange and red, allowing each layer to dry before applying the next. This technique can create a sense of luminosity, mimicking the way light interacts with the atmosphere during a sunset.
In summary, mastering color theory is crucial for any artist looking to capture the essence of sunsets in their paintings. By understanding how to mix colors effectively, recognize the relationships between different hues, and apply techniques like layering and using complementary colors, you can elevate your sunset paintings to new heights. So grab your brushes, and let’s get mixing!
Choosing the Right Canvas
When it comes to painting stunning sunsets, the choice of canvas is more than just a technical decision; it's an artistic one that can significantly influence the outcome of your work. Think of your canvas as the stage where your vibrant colors and emotional strokes will perform. Selecting the right canvas size and material can enhance the overall impact of your sunset painting, allowing you to capture the essence of those breathtaking moments when the sun dips below the horizon.
First, let's talk about canvas types. You have several options, each with its own unique characteristics. For instance, cotton canvas is a popular choice among artists due to its affordability and versatility. It holds paint well and is suitable for both oil and acrylic mediums. On the other hand, linen canvas is a bit pricier but offers superior texture and durability, making it ideal for serious artists who want their work to last.
In terms of size, consider how you want your sunset to be portrayed. A larger canvas can create a dramatic effect, allowing you to play with expansive skies and vast landscapes. Conversely, a smaller canvas can focus on intimate details, like the glow of the sun reflecting off water. Here’s a quick guide to help you decide:
| Canvas Size | Best For |
|---|---|
| 16" x 20" | Mid-sized landscapes, good for showcasing detail |
| 24" x 36" | Large, dramatic sunsets with expansive views |
| 8" x 10" | Small, intimate scenes or studies |
Another factor to consider is the surface texture of your canvas. A smooth surface can be beneficial for fine details, while a textured canvas can add depth and interest to your sunset scenes. If you want to create a more dynamic piece, you might experiment with different textures. For instance, using a stretched canvas provides a taut surface perfect for clean lines, while a canvas board offers a more rigid option that can withstand heavy paint applications.
Lastly, don’t forget about the importance of priming your canvas. A well-primed surface not only protects the canvas but also enhances the vibrancy of your colors. Using gesso is a great way to prepare your canvas, ensuring that your sunset hues pop off the surface. So, before you dive into painting, take a moment to choose a canvas that not only fits your artistic vision but also complements the stunning sunsets you aim to capture.
- What size canvas is best for beginners? A 16" x 20" canvas is a great starting point, providing enough space to practice without being overwhelming.
- Can I use acrylic paint on a linen canvas? Absolutely! Linen canvases work beautifully with acrylics, providing a luxurious surface for your artwork.
- How do I know if my canvas is properly primed? A properly primed canvas should feel smooth to the touch and allow paint to glide on without soaking in excessively.
Texture and Surface Preparation
When it comes to creating stunning sunset paintings, the texture and surface preparation of your canvas play a pivotal role in the overall outcome of your artwork. Think of your canvas as the foundation of a house; if the foundation is not solid, everything built upon it may crumble. A well-prepared surface not only enhances the vibrancy of the colors but also adds depth and dimension to your sunset scenes.
Before diving into painting, it’s essential to choose the right texture that complements your artistic style. For instance, a smooth surface is ideal for detailed work and fine blending, while a textured canvas can create a more dynamic and expressive feel. You can prepare your canvas in several ways, and here are a few techniques to consider:
- Gesso Application: Applying a layer of gesso is one of the most common methods for priming a canvas. Gesso serves as a barrier that prevents the paint from soaking into the fabric, allowing for better color application and blending. To apply gesso, use a wide brush or a palette knife to spread it evenly across the surface. Let it dry completely before adding another layer if desired.
- Texturing with Tools: Consider using tools like sponges, rags, or even your fingers to create unique textures on your canvas. This can add an interesting element to your sunset painting, making it feel more alive and engaging.
- Layering Techniques: You can also experiment with layering different materials, such as sand or acrylic mediums, to create a varied surface. This technique can result in a more tactile experience and can enhance the way light interacts with your painting.
Once you have prepared your canvas, it's time to think about how the texture will interact with your paint. For example, using oil paints on a textured surface can yield beautiful results, as the paint can settle into the grooves and ridges, creating a sense of movement that mimics the fluidity of a sunset sky. On the other hand, acrylic paints dry quickly, allowing for rapid layering, which can be beneficial if you're looking to create a more abstract representation of a sunset.
In addition to texture, consider the size of your canvas. A larger canvas can provide more space to experiment with bold strokes and expansive skies, while a smaller canvas may encourage more intricate details. Ultimately, the choice of canvas size and texture should align with your artistic vision and the story you want to tell through your sunset painting.
As you prepare your canvas, remember that each artist has their unique approach. Don’t be afraid to experiment and find what works best for you. The beauty of art lies in its subjectivity, and your personal touch is what will make your sunset painting truly special. So grab your materials, let your creativity flow, and prepare to capture the breathtaking beauty of sunsets like never before!
Q1: What type of canvas is best for painting sunsets?
A1: The best type of canvas often depends on your preferred medium. For oil paints, a primed cotton canvas is ideal, while acrylics can work well on both primed and unprimed canvases.
Q2: How many layers of gesso should I apply?
A2: Typically, one to three layers of gesso are sufficient. The more layers you apply, the smoother the surface will be. Just ensure each layer dries completely before adding the next.
Q3: Can I use other materials to create texture?
A3: Absolutely! You can experiment with various materials like sand, modeling paste, or even fabric to create different textures on your canvas.
Q4: Is it necessary to prepare the canvas before painting?
A4: While it's not strictly necessary, preparing your canvas can significantly enhance the quality of your artwork. It helps the paint adhere better and improves the overall finish of your painting.
Using Gesso for Priming
When it comes to preparing your canvas for a stunning sunset painting, gesso is your best friend. This versatile primer not only creates a smooth surface but also enhances the vibrancy of the colors you apply. Imagine gesso as the blank canvas for your creativity, setting the stage for the magical hues of orange, pink, and purple that define a sunset. By using gesso, you provide a foundation that allows your paint to adhere better, ensuring that your artwork lasts for years to come.
Applying gesso is a straightforward process, but there are a few techniques you should keep in mind to achieve the best results. First, choose a high-quality acrylic gesso, as it is designed to work well with most painting mediums. You can apply it with a brush, a palette knife, or even a roller, depending on your preference. Here’s a quick rundown of the steps you should follow:
- Step 1: Start by ensuring your canvas is clean and free from dust or debris.
- Step 2: Pour a small amount of gesso onto your palette or directly onto the canvas.
- Step 3: Use your chosen tool to spread the gesso evenly across the surface, covering all areas.
- Step 4: Allow the first layer to dry completely before applying a second layer, if desired.
- Step 5: Once dry, lightly sand the surface for an even smoother finish.
One of the great things about gesso is its versatility. You can use it in various ways to achieve different textures. For instance, if you want to create a more textured surface, try using a thicker layer of gesso or even adding some fine sand to it. This technique can give your sunset painting a unique depth, making the colors pop even more. Think of it like adding a secret ingredient to your favorite recipe—just a little tweak can transform the entire dish!
Moreover, gesso comes in different finishes, such as matte or glossy. A matte finish is often preferred for painting, as it provides a non-reflective surface that allows for better color application. On the other hand, a glossy finish can add a beautiful sheen to your work, particularly if you want to emphasize the shimmering effects of water in your sunset scene. Experimenting with these different finishes can open up a whole new realm of possibilities for your artwork.
In conclusion, using gesso for priming your canvas is an essential step in the painting process, especially for capturing the breathtaking beauty of sunsets. By creating a well-prepared surface, you set yourself up for success, allowing your artistic vision to shine through. So, grab that gesso, and let your creativity flow like the colors of a sunset!
Q: Can I use gesso on any type of canvas?
A: Yes, gesso is suitable for most canvas types, including cotton and linen. Just ensure the canvas is clean before applying.
Q: How many layers of gesso should I apply?
A: Typically, one to two layers are sufficient, but you can add more if you desire a thicker texture.
Q: Is gesso necessary for oil painting?
A: While it's not strictly necessary, using gesso can greatly enhance the adhesion and vibrancy of oil paints.

Experimenting with Mixed Media
When it comes to painting sunsets, the beauty of mixed media cannot be overstated. Imagine the depth and vibrancy you can achieve by combining traditional paint with other materials! Mixed media allows artists to break free from the confines of standard painting techniques, opening up a world of creative possibilities. By incorporating elements like pastels, inks, or even textured papers, you can add layers of interest that truly capture the essence of a stunning sunset.
One of the first steps in experimenting with mixed media is to consider the materials you already have on hand. You might be surprised by how everyday items can contribute to your artwork. For instance, using oil pastels can create a soft, dreamy effect when blended with acrylic paints, simulating the gentle transitions of colors in the sky. Alternatively, watercolor washes can provide a translucent quality that mimics the ethereal glow of sunset light.
To get started, gather a variety of materials. Here’s a quick list to inspire your mixed media adventure:
- Acrylic paints
- Oil pastels
- Watercolors
- Colored pencils
- Textured papers
- Inks
Once you have your materials, think about how you can layer them. For example, start with a base layer of acrylic paint for the sky, then add a wash of watercolor to create soft clouds. After that, use oil pastels to emphasize the sun's glow and add highlights to the clouds. This layering technique not only enhances the visual appeal but also contributes to a more dynamic composition.
Don't be afraid to experiment with different applications. Try using a palette knife to apply thick layers of paint, or splatter ink for a spontaneous effect that mimics the unpredictable nature of a sunset. The key is to play around and see what works best for your artistic vision. Remember, there are no rules—just guidelines to help you express your creativity!
Finally, always step back and evaluate your work as you go. Mixed media can sometimes lead to unexpected results, which can be both exciting and challenging. By keeping an open mind, you might discover new techniques or effects that enhance your sunset painting in ways you never imagined. So grab your brushes, gather your materials, and let your creativity flow as you explore the stunning world of mixed media!
Q: What is mixed media?
A: Mixed media refers to the use of multiple artistic mediums in a single artwork. This can include combining paint with materials like pastels, ink, or textured papers.
Q: Can I use any type of paint for mixed media?
A: Yes! You can use acrylics, watercolors, oils, or any other type of paint. The key is to ensure that the materials you use can work well together, especially in terms of drying times and adhesion.
Q: How do I know when to stop adding layers?
A: It's important to step back and assess your painting from a distance. If you feel that the composition is balanced and the colors are harmonious, it may be time to stop. Trust your instincts!

Brush Techniques for Sunset Effects
When it comes to painting sunsets, the right brush techniques can make all the difference in capturing the ethereal beauty of those fleeting moments. Each brushstroke can evoke emotion, create movement, and bring your canvas to life. So, how do you harness the power of your brush to depict the stunning gradients and soft clouds of a sunset? Let’s dive into some effective techniques that can elevate your sunset paintings to new heights!
First off, consider using a fan brush for creating the soft, wispy clouds that often accompany a sunset. The unique shape of the fan brush allows for a gentle, feathered effect that mimics the natural look of clouds. To use it effectively, dip the brush into a mix of white and a hint of orange or pink, and lightly drag it across the canvas in a horizontal motion. This technique can create a dreamy, atmospheric quality that is essential for sunset scenes.
Next, the dry brushing technique can be an excellent way to add texture and depth. By using a dry brush with minimal paint, you can create soft highlights and subtle gradients that reflect the setting sun's light. For instance, if you want to emphasize the glow of the sun against the horizon, lightly drag your brush across the area with a mixture of yellow and orange. This method allows the underlying colors to peek through, enhancing the overall luminosity of your painting.
Another fantastic technique is the blending method, which involves using a clean, soft brush to blend colors seamlessly. After applying your base colors, take a clean brush and gently blend the edges where colors meet. This technique is particularly effective for creating smooth transitions between the warm hues of the sunset and the cooler tones of the evening sky. Remember, blending is all about patience—take your time to achieve that perfect gradient!
For those looking to add a bit of drama, consider incorporating a palette knife into your toolkit. While it might seem unconventional, a palette knife can create sharp, defined edges that contrast beautifully with soft brushwork. Use it to apply thick layers of paint for the sun or to carve out the shapes of distant mountains silhouetted against the fiery sky. This juxtaposition of textures can add visual interest and depth to your artwork.
Lastly, don't underestimate the power of stippling. This technique involves using the tip of your brush to create small dots of color, which can be particularly effective for depicting distant trees or the shimmering reflections on water. By layering stippled dots of varying colors, you can create a sense of movement and life, making your sunset painting feel dynamic and engaging.
In summary, mastering these brush techniques will not only enhance your ability to capture the beauty of sunsets but also develop your unique artistic voice. Experiment with different brushes, pressure, and angles to discover what works best for you. The beauty of art lies in its ability to express your individual style, so don’t be afraid to play around and let your creativity flow!
- What type of brushes should I use for painting sunsets? It’s best to have a variety of brushes, including fan brushes, flat brushes, and soft round brushes, to create different effects.
- How can I achieve a smooth gradient in my sunset painting? Use a clean brush to blend the colors where they meet, applying gentle pressure to create a seamless transition.
- Can I use acrylics to paint sunsets? Absolutely! Acrylic paints are versatile and dry quickly, making them ideal for layering and blending.
- What colors are essential for painting a sunset? Key colors include various shades of yellow, orange, pink, and purple. Experiment with mixing these colors to achieve the desired effect.
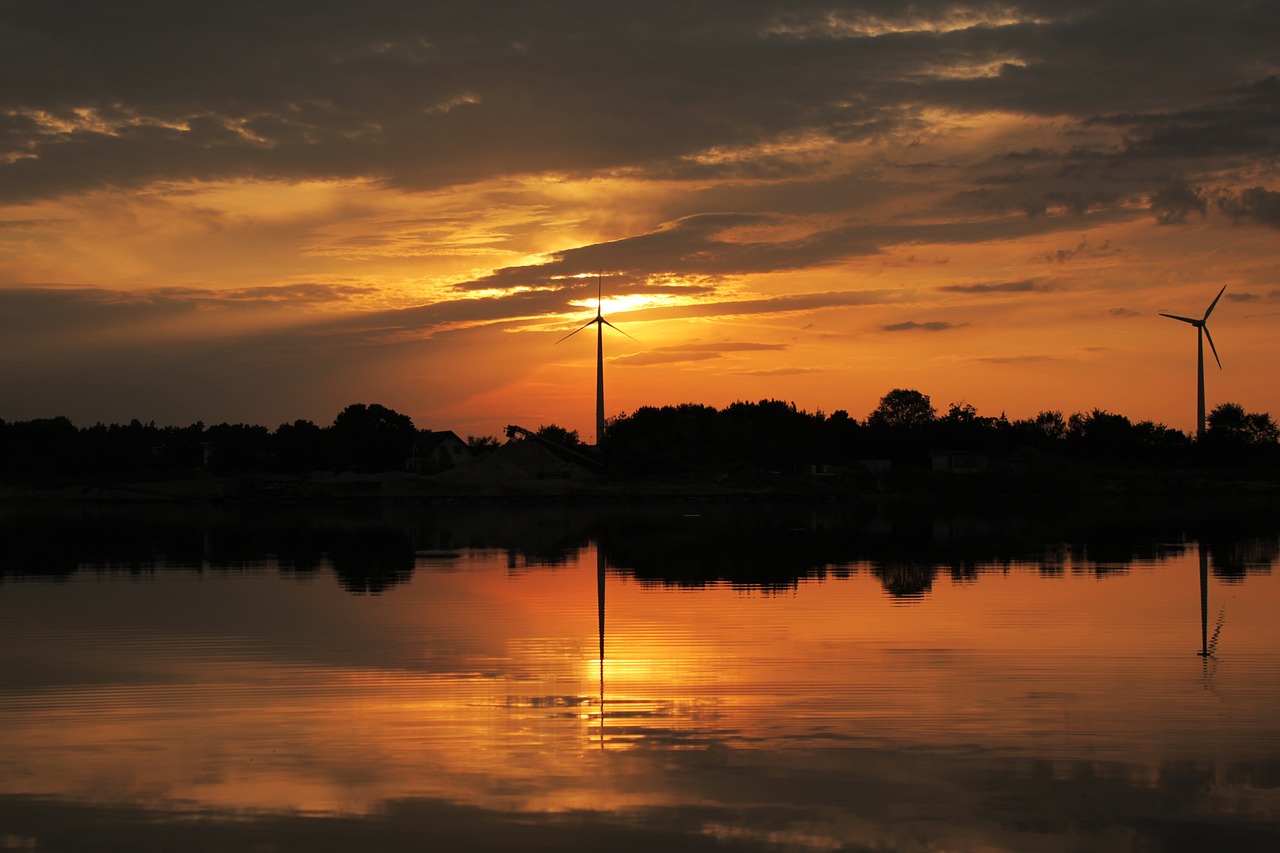
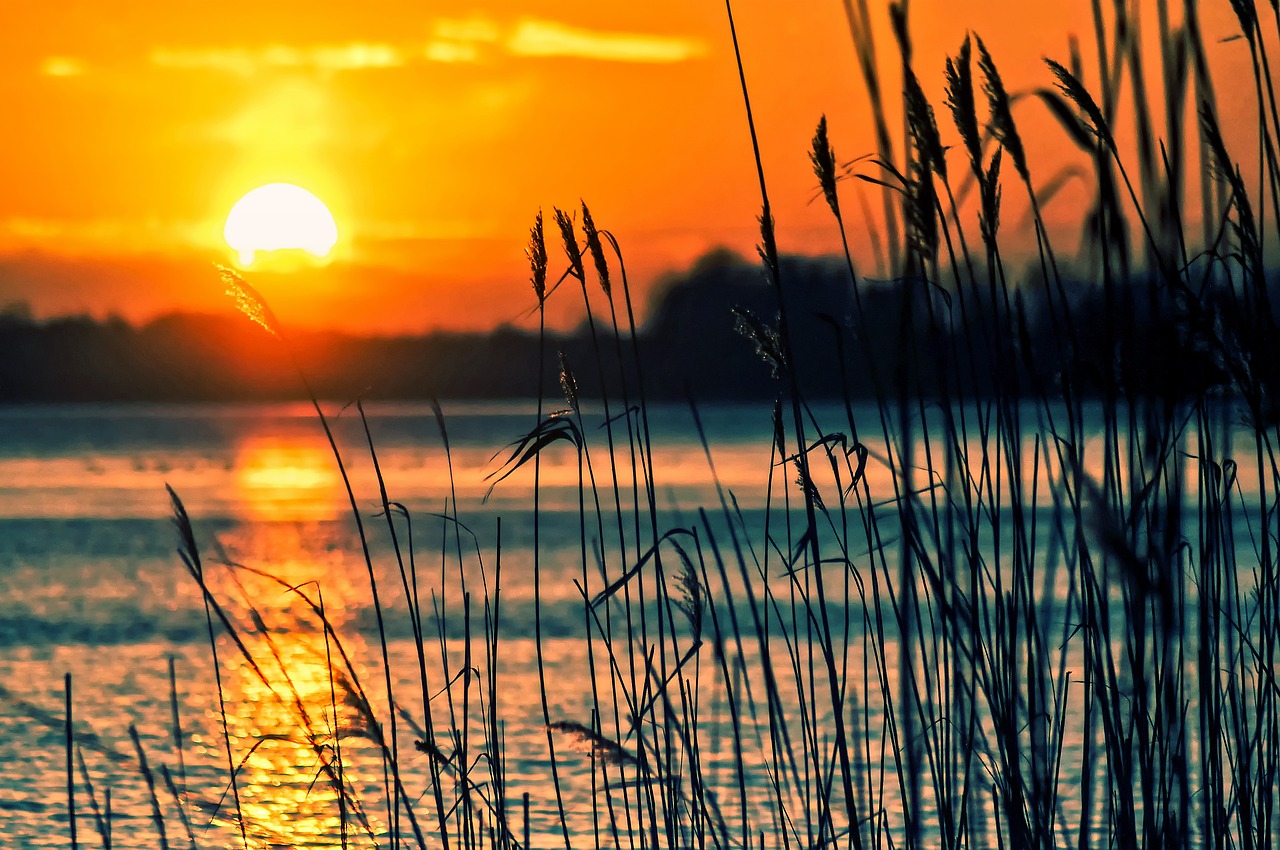
Capturing Light and Shadow
When it comes to painting sunsets, one of the most mesmerizing aspects to capture is the interplay of light and shadow. Imagine standing on a beach, watching the sun dip below the horizon, casting a warm glow across the sky while shadows stretch and deepen. This dynamic relationship not only adds depth to your painting but also evokes emotions, drawing viewers into the scene. To effectively portray this enchanting phenomenon, artists must understand how to manipulate light and shadow through various techniques.
First off, consider the source of light in your painting. The sun, as the primary light source, creates dramatic contrasts. The areas directly illuminated by the sun will be bright and vibrant, while the regions in shadow will be darker and cooler. This contrast can be emphasized by using a limited color palette. For instance, mixing warm yellows, oranges, and reds for the sunlit areas, while incorporating cooler blues and purples for the shadows, can create a stunning visual effect. The key is to maintain harmony in your color choices, ensuring that they complement rather than clash.
Next, think about the direction of light. In a sunset scene, the light typically comes from a low angle, casting long shadows and creating interesting shapes. To portray this, you might want to use soft, sweeping brush strokes to depict the clouds and reflections in the water. This technique can help convey a sense of movement, as if the light is dancing across the canvas. Additionally, layering your colors can enhance the feeling of depth. For instance, applying a light wash of color and gradually building up darker tones can mimic the natural gradation seen in real sunsets.
Another technique to consider is the use of glazing. Glazing involves applying thin, transparent layers of paint over dried layers to create luminous effects. This technique is particularly effective in sunset paintings, as it allows you to build up complex colors and achieve a sense of glowing light. Start with a base layer of warm colors and gradually apply glazes of cooler tones to create shadows. This approach not only enhances the vibrancy of your painting but also adds a three-dimensional quality to the light and shadow interplay.
Furthermore, incorporating atmospheric perspective can significantly enhance the realism of your sunset painting. As objects recede into the distance, they tend to lose contrast and become lighter in color. To achieve this, consider how the colors of the sky change as the sun sets. The foreground may be rich in color and detail, while the background fades into softer, muted tones. This technique not only adds depth to your artwork but also guides the viewer's eye across the canvas.
Lastly, don’t underestimate the power of details and highlights. After establishing your primary colors and shadows, adding small touches of white or lighter colors can simulate the glint of sunlight reflecting off water or the edges of clouds. These highlights can bring your painting to life, creating focal points that draw the viewer in. Remember, the goal is to create a balance between light and shadow, allowing each element to complement the other.
- What colors should I use for painting sunsets? A combination of warm colors like yellows, oranges, and reds for the light areas, and cooler colors such as blues and purples for the shadows works best.
- How can I create depth in my sunset painting? Use atmospheric perspective by fading colors as they recede into the background and layering glazes to enhance luminosity.
- What is glazing, and how can it help my painting? Glazing involves applying thin layers of transparent paint to build depth and create glowing effects, perfect for capturing the essence of a sunset.
Using Glazing Techniques
When it comes to painting sunsets, glazing techniques can be a game-changer. Imagine standing on a beach, watching the sun dip below the horizon, the sky ablaze with colors that seem to dance and shimmer. That's the effect you want to capture in your artwork, and glazing is the perfect method to achieve that ethereal quality. By layering transparent colors over dried paint, you can create a sense of depth and luminosity that makes your sunset truly come alive.
So, how do you get started with glazing? First, you'll want to choose a medium that allows for transparency. Many artists prefer using acrylics or oils for this purpose, as they both offer unique benefits. Acrylics dry quickly, allowing you to build layers rapidly, while oils provide a longer working time, enabling more blending and manipulation. Here’s a quick comparison of the two:
| Medium | Drying Time | Transparency |
|---|---|---|
| Acrylics | Fast | High |
| Oils | Slow | Moderate |
Once you've selected your medium, it's essential to mix your glazing colors correctly. Start with a small amount of paint and mix it with a glazing medium or a clear gel. This combination will ensure that your colors remain transparent while still providing rich pigment. A common ratio to start with is one part paint to two parts medium, but feel free to experiment until you find the perfect consistency that works for you.
Now, let’s talk about application. Using a soft brush, apply your glaze in thin layers, allowing each layer to dry before adding the next. This technique not only builds depth but also allows the colors underneath to subtly influence the hues on top, creating a stunning interplay of light and shadow. For sunset paintings, consider using warm tones like oranges, pinks, and yellows for the sky, while cooler colors like purples and blues can be used to depict distant clouds or reflections on water.
One of the most exciting aspects of glazing is the ability to modify the mood of your painting. Want a more dramatic sunset? Add a layer of deep red or purple to intensify the sky. Looking for a softer, romantic feel? A wash of light pink or peach can transform the entire atmosphere. The possibilities are endless, and the best part is that you can adjust your painting as you go, making it a dynamic and engaging process.
As you layer your glazes, remember to step back frequently to assess your work from a distance. This practice helps you see the overall effect and make necessary adjustments. It’s easy to get lost in the details, but keeping the bigger picture in mind is crucial for achieving that breathtaking sunset effect.
In conclusion, glazing techniques are an invaluable tool for artists looking to enhance their sunset paintings. By layering transparent colors and experimenting with different mediums, you can create stunning visual effects that capture the beauty of nature. So grab your brushes, mix your colors, and let the magic of glazing transform your artwork into a mesmerizing sunset masterpiece!
- What is glazing in painting? Glazing is a technique used to apply transparent layers of paint over dried layers, enhancing depth and luminosity.
- Can I use glazing techniques with watercolors? Yes, glazing can be applied with watercolors by layering transparent washes to build color and depth.
- How long does it take for each glaze layer to dry? Drying time varies by medium; acrylics dry quickly (within minutes), while oils can take hours or even days.
- What colors work best for sunset glazing? Warm colors like oranges, pinks, and yellows are ideal, complemented by cooler tones for added depth.
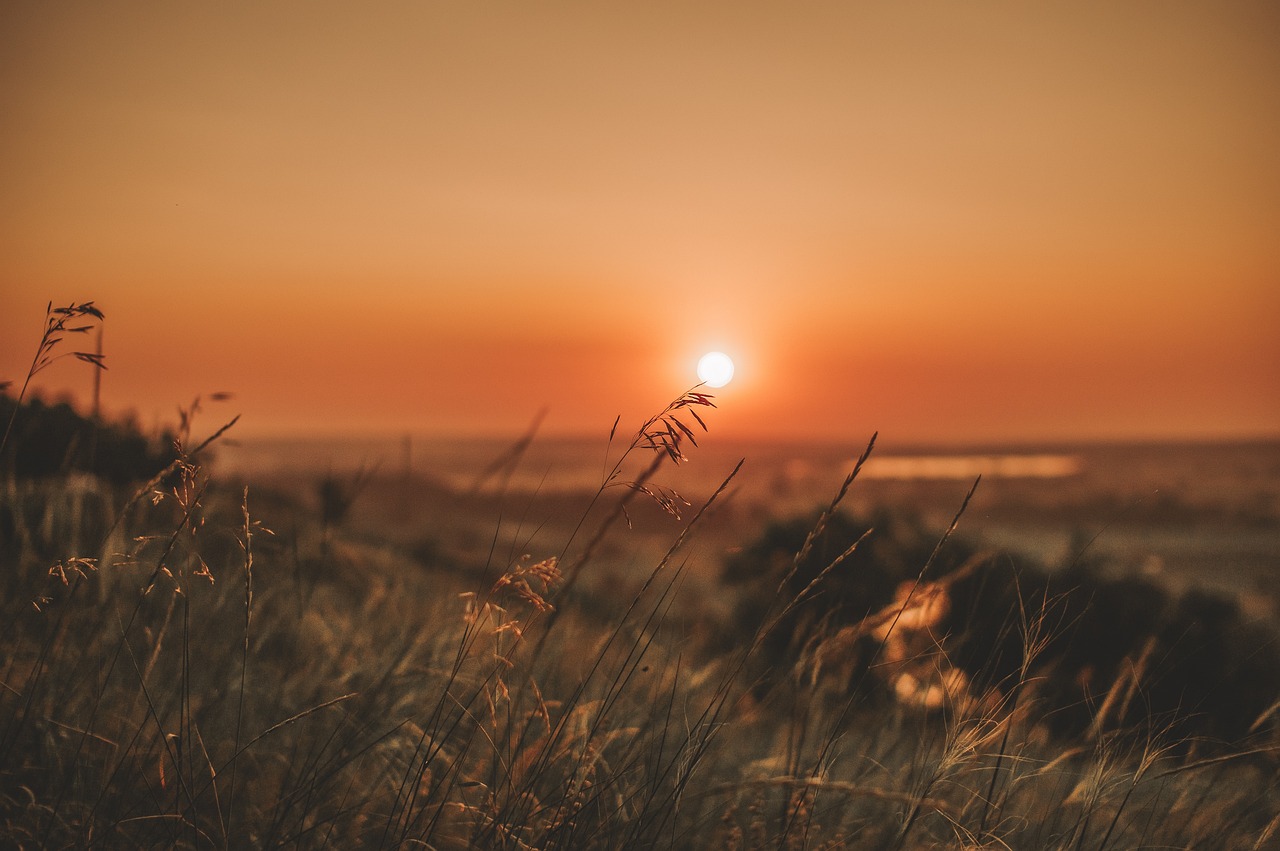
Creating Atmospheric Perspective
When it comes to painting sunsets, one of the most enchanting techniques you can employ is atmospheric perspective. This method helps you convey a sense of depth and distance in your landscape, making your sunset scenes not just beautiful, but also incredibly realistic. Imagine standing on a hilltop, watching the sun dip below the horizon, with layers of colors fading into the distance. That is the magic of atmospheric perspective!
At its core, atmospheric perspective relies on the understanding that colors appear lighter and less saturated as they recede into the background. The haze of the atmosphere scatters light, causing distant objects to lose their sharpness and vibrancy. To master this technique, you’ll want to focus on three key elements: color, value, and clarity.
- Color: Use cooler colors (like blues and purples) for distant elements. This helps create a sense of depth, as the warmer colors (like oranges and reds) should dominate the foreground.
- Value: Lighter values should be used in the background, gradually transitioning to darker values in the foreground. This gradient effect enhances the illusion of distance.
- Clarity: Keep the details sharper and more defined in the foreground, while allowing the background to be softer and more blurred. This contrast draws the viewer's eye to the main subject of your painting.
To put this into practice, start by sketching your sunset scene lightly on your canvas. Lay down the horizon line and begin with the sky, using a gradient wash of colors to represent the sunset. As you move towards the horizon, gradually introduce cooler tones, blending them seamlessly into the warmer hues above. This transition is crucial; it’s what will create that stunning depth you’re after.
Another effective way to enhance atmospheric perspective is through layering. As you paint, allow each layer to dry before adding the next. This technique not only helps in building depth but also gives your painting a richness that can be quite captivating. Consider using a glazing technique for the final layers, which will allow you to add luminous effects without losing the underlying colors.
Finally, don’t forget to step back and assess your painting from a distance. Sometimes, what looks good up close may not translate well from afar. Adjust the values and colors as needed until you achieve that perfect balance of depth and vibrancy. Remember, capturing the essence of a sunset is about more than just the colors; it’s about the feeling it evokes. So, take your time and enjoy the process!
Q: What is atmospheric perspective?
A: Atmospheric perspective is a technique used in painting to create the illusion of depth by altering color and clarity. Distant objects appear lighter and less detailed due to the scattering of light in the atmosphere.
Q: How can I practice atmospheric perspective?
A: You can practice by painting landscapes with a clear foreground and a distant background, focusing on using cooler colors for the background and warmer, more saturated colors for the foreground.
Q: What materials do I need to experiment with atmospheric perspective?
A: Basic materials include a canvas, acrylic or oil paints, brushes, and a palette. You may also want to use glazing mediums to enhance depth.
Final Touches and Detailing
When it comes to painting sunsets, the final touches can make all the difference between a good painting and a truly stunning one. After spending hours perfecting your color palette and brush techniques, you might wonder how to elevate your artwork to the next level. Think of these final adjustments as the cherry on top of a delicious sundae; they enhance the overall experience and draw the viewer's eye. So, let’s dive into some essential techniques that will help you add those final strokes of brilliance to your sunset masterpiece.
One of the first things to consider is the contrast. Adding highlights and shadows can create a dynamic interplay of light, making your sunset glow with life. For instance, you might want to intensify the brightness of the sun’s reflection on water or the edges of clouds. Using a lighter color or even a touch of white can help you achieve this effect. Just remember, a little goes a long way! Too much can make your painting look overworked.
Next, consider the details that can bring your painting to life. This includes elements like birds in the sky, silhouettes of trees, or even a distant mountain range. These small additions can create a sense of scale and depth, inviting the viewer into the scene. You might think of these details as the seasoning in a dish; they can transform a bland painting into a flavorful experience. However, be careful not to overcrowd your canvas. Balance is key!
Another technique to consider is the use of glazing. This involves applying a thin layer of transparent paint over dried areas of your painting. Glazing can enhance the luminosity of your colors and create a sense of depth. For sunsets, consider glazing with warm tones like yellows, oranges, and reds to enrich the sky. Remember, patience is essential here; allow each layer to dry before adding another to avoid muddying your colors.
Finally, take a step back and assess your painting from a distance. Sometimes, what looks good up close may need adjustments when viewed from afar. You might want to soften some edges or enhance certain colors to create a more cohesive look. This is where your intuition comes into play. Trust your instincts and don’t be afraid to make bold choices!
In conclusion, the final touches and detailing in your sunset painting are crucial for achieving that breathtaking effect. By focusing on contrast, adding meaningful details, experimenting with glazing, and stepping back to evaluate your work, you can ensure that your sunset painting is not just beautiful but also captivating. Now, let’s address some common questions that many artists have about this process.
- How do I know when my painting is finished? Trust your instincts! If you feel that it captures the essence of what you wanted to portray, it’s likely done.
- Can I add details after the painting has dried? Yes, you can! Just be sure to use appropriate techniques like glazing or dry brushing to ensure seamless integration.
- What if I make a mistake during the final touches? Mistakes are part of the process. You can often paint over them or incorporate them into your artwork creatively!
Frequently Asked Questions
- What colors should I use to paint a sunset?
When painting sunsets, it's essential to use a blend of warm colors like reds, oranges, and yellows, along with cooler colors like purples and blues to create depth. Mixing these colors effectively can help you achieve a vibrant and harmonious sunset palette.
- What type of canvas is best for painting sunsets?
The choice of canvas can greatly influence your painting. A medium to large-sized canvas is often recommended to allow for expansive sunset scenes. You might want to consider a canvas with a smooth texture for detailed work, or a rougher texture for a more expressive style.
- How do I prepare my canvas for sunset painting?
Preparing your canvas involves priming it with gesso to create a smooth surface that enhances color application. You can also experiment with different textures by applying additional layers or using various materials to give depth to your sunset scenes.
- What brush techniques are effective for painting sunsets?
Using a variety of brush techniques can create stunning effects in your sunset paintings. Techniques like dry brushing for clouds or stippling for texture can help depict the nuances of light and shadow in the sky.
- How can I capture light and shadow in my sunset paintings?
To effectively capture light and shadow, consider using glazing techniques to layer colors and create luminosity. Additionally, understanding atmospheric perspective can help convey depth, making your sunset scenes feel more realistic and dynamic.
- What final touches should I add to my sunset painting?
Final touches can include adding highlights to clouds, refining reflections in water, or enhancing the contrast between light and dark areas. These adjustments can significantly elevate your artwork and make it truly stand out.


