How to Draw the Human Figure in Motion
Drawing the human figure in motion is an exhilarating journey that combines creativity, observation, and technical skill. Whether you are a seasoned artist or just starting out, capturing the essence of movement can transform your artwork from static to dynamic. Imagine the thrill of seeing a figure leap, dance, or sprint across the page, and the challenge of translating that energy into lines and shapes. This article explores techniques and tips for enhancing your drawing skills and understanding of anatomy and movement, so you can breathe life into your sketches.
Before diving into the world of motion, it's essential to have a solid grasp of human anatomy. Understanding the basic structures and proportions of the human body is like having a roadmap for your artistic journey. The human figure is composed of various parts, each with its own unique characteristics and movements. For instance, the head, torso, arms, and legs all play crucial roles in how we perceive motion. Familiarizing yourself with these components will not only help you draw more accurately but also allow you to depict movement with greater confidence.
Gesture drawing is all about capturing the essence of movement rather than getting bogged down in details. Think of it as a way to distill the energy of a pose into its simplest form. To improve your efficiency in figure drawing, you can use techniques that focus on the flow and energy of a pose. This approach can be likened to a dancer moving gracefully across a stage; the goal is to capture the rhythm and fluidity of the motion rather than every intricate detail.
Incorporating warm-up exercises into your drawing routine can significantly enhance your skills. Just as athletes warm up before a game, artists can benefit from quick sketching techniques that loosen up their hands and minds. These exercises can include:
- Quick five-minute sketches of various poses
- Drawing simple shapes to get comfortable with your medium
- Practicing lines and curves to improve your control
By engaging in these warm-up activities, you'll find that your confidence grows, making it easier to tackle more complex poses later on.
Timed sketching is a fantastic way to encourage spontaneity and fluidity in your drawings. By setting a timer—whether it's for 30 seconds or a few minutes—you force yourself to focus on the essence of the movement rather than striving for perfection. This practice can lead to surprising results, as you might capture a pose in a way you never thought possible. It’s like trying to catch a fleeting moment in time; the pressure of the clock can lead to more expressive and dynamic sketches.
The line of action is a crucial element in gesture drawing. It represents the primary movement within a pose, acting as an invisible thread that guides the viewer’s eye through the figure. By incorporating this principle into your sketches, you can create more dynamic and engaging poses. Think of the line of action as the backbone of your drawing; it provides structure while allowing for the fluidity of motion. Start by drawing a simple curve that represents the flow of the pose before fleshing out the figure around it.
Exploring dynamic poses adds life to your figure drawings. Consider how athletes, dancers, or even everyday people move; each action carries its own energy and rhythm. When selecting poses to depict, think about how the body interacts with gravity and space. A figure mid-leap will convey a different feeling than one standing still. To effectively depict motion, pay attention to the angles and positioning of limbs, as well as the overall balance of the figure.
Reference images are invaluable tools for learning how to depict movement accurately. They can serve as guides that help you understand the subtleties of human motion. Quality references can be found in various places, such as online databases, art books, or even your own photography. By studying these images, you can learn how to adapt and incorporate different elements into your figure drawings.
Using photo references can provide clarity and inspiration for your work. Analyzing photographs allows you to see how light and shadow interact with the human form, and how different poses convey emotion and action. When working from photos, try to break down the image into basic shapes, which can simplify the drawing process. This technique is akin to piecing together a puzzle; once you understand how each part fits together, the whole picture becomes clearer.
Drawing from live models offers unique insights into motion that photographs simply cannot capture. Observing a live figure in action allows you to grasp the nuances of movement and the subtleties of anatomy in real-time. To make the most of this experience, focus on capturing the overall pose first before diving into details. This practice not only enhances your observational skills but also helps you develop a deeper understanding of how the human body moves.
Consistent practice is key to mastering figure drawing. By dedicating time to develop your skills, you’ll find that your confidence in depicting the human figure in motion grows exponentially. Here are a few techniques to integrate into your practice routine:
Engaging in daily sketching routines can significantly improve your drawing abilities. Set aside just 10-15 minutes each day to focus on figure drawing. Whether you use reference images or draw from imagination, the important thing is to make it a habit. Over time, you’ll notice a marked improvement in your understanding of movement and anatomy.
Participating in group drawing sessions fosters collaboration and feedback, which can be incredibly beneficial for your growth as an artist. Drawing with others not only provides motivation but also exposes you to different styles and techniques. It’s like being part of a team; you learn from each other and push each other to improve. So grab some friends, head to the local art studio, and start sketching!
Q: How can I improve my gesture drawing skills?
A: Practice regularly with timed sketches and focus on capturing the essence of movement rather than details.
Q: What are the best resources for finding reference images?
A: Websites like Unsplash, Pexels, and various art reference sites offer high-quality images for artists.
Q: Is it necessary to understand anatomy to draw the human figure?
A: While it's not mandatory, having a basic understanding of anatomy can greatly enhance your ability to depict movement accurately.

Understanding Anatomy
When it comes to drawing the human figure in motion, a solid grasp of human anatomy is absolutely essential. Think of anatomy as the foundation of a house; without a strong base, everything else can crumble. Understanding the basic structures and proportions of the human body not only enhances your figure drawing abilities but also helps you convey movement more effectively. By familiarizing yourself with the major bones and muscle groups, you’ll be better equipped to capture the dynamic essence of the human form.
The human body is a complex structure composed of various elements that work together seamlessly. To get started, let’s break down the key components:
| Body Part | Function | Importance in Drawing |
|---|---|---|
| Skeleton | Provides structure and support | Understanding bone structure helps in depicting accurate poses |
| Muscles | Facilitates movement | Knowing muscle groups aids in showing tension and relaxation |
| Joints | Allows flexibility and motion | Understanding joint movement is crucial for dynamic poses |
To depict the human figure accurately, it's also vital to understand proportions. The classic proportion of an adult human figure is often divided into eight head lengths. This serves as a crucial guideline to ensure that your drawings maintain a sense of realism. For example:
- The head is typically one-eighth of the total height.
- The shoulders are generally about two head widths apart.
- The waist is about four head lengths from the ground.
By mastering these proportions, you can create figures that look balanced and natural. Additionally, consider the line of action when drawing. This imaginary line runs through the body and indicates the direction of movement. It’s like the backbone of your drawing, guiding the viewer’s eye through the composition and enhancing the sense of motion.
In conclusion, understanding anatomy is not just about memorizing the names of bones and muscles; it’s about developing a deep comprehension of how these elements interact to create movement. This knowledge will not only improve your technical skills but also allow you to infuse your artwork with life and energy, making your figures leap off the page.

Capturing Gesture
When it comes to drawing, capturing the essence of movement is like trying to catch a fleeting moment in a bottle; it requires both skill and intuition. Gesture drawing is all about expressing the dynamic flow of the human body in motion. Imagine a dancer mid-twirl or a runner launching off the starting blocks—these moments are filled with energy and potential, and your goal as an artist is to encapsulate that vitality on paper. The beauty of gesture drawing lies in its simplicity; it emphasizes the overall movement rather than getting bogged down by intricate details. So, how do you go about mastering this art?
One of the most effective techniques to enhance your gesture drawing is to focus on the flow and energy of a pose. Instead of meticulously outlining each muscle and joint, allow your pencil to move fluidly across the page, capturing the essence of the figure. Think of it like dancing with your pencil—let it glide and swoop as you interpret the human form. This approach not only makes the process more enjoyable but also helps you develop a deeper understanding of how the body moves. Remember, the goal is to convey a sense of motion, so don’t hesitate to exaggerate certain aspects of the pose to reflect that energy.
Before diving into gesture drawing, it's essential to warm up. Just like an athlete stretches before a big game, you need to loosen up your hand and mind. Warm-up exercises can include quick sketches of various poses, focusing on capturing the overall shape and movement in just a few lines. Try setting a timer for 30 seconds for each sketch; this will encourage you to work quickly and intuitively, honing your ability to see and represent movement effectively.
Timed sketching is a fantastic way to push yourself out of your comfort zone. By limiting the amount of time you spend on each drawing, you’ll be forced to prioritize the most critical aspects of the pose. Set a timer for 1 to 5 minutes and challenge yourself to create as many sketches as possible within that timeframe. This practice not only enhances your speed but also helps you focus on the line of action—the invisible line that captures the primary direction of movement in your figure.
The line of action is a fundamental principle in gesture drawing that can transform your sketches from static to dynamic. Think of it as the backbone of your figure; it defines the overall direction and flow of the pose. To incorporate this into your drawings, start by drawing a simple line that represents the movement of the figure. Then, build your drawing around that line, allowing it to guide the placement of limbs and the overall composition. This technique not only adds energy to your sketches but also ensures that the proportions remain balanced and harmonious.
Incorporating these techniques into your practice will significantly improve your ability to capture gesture. Remember, the journey of mastering gesture drawing is ongoing, and every sketch is a step towards greater understanding. The more you practice, the more you'll find your unique style and voice as an artist. So grab your sketchbook, let your pencil dance, and embrace the beautiful chaos of motion!
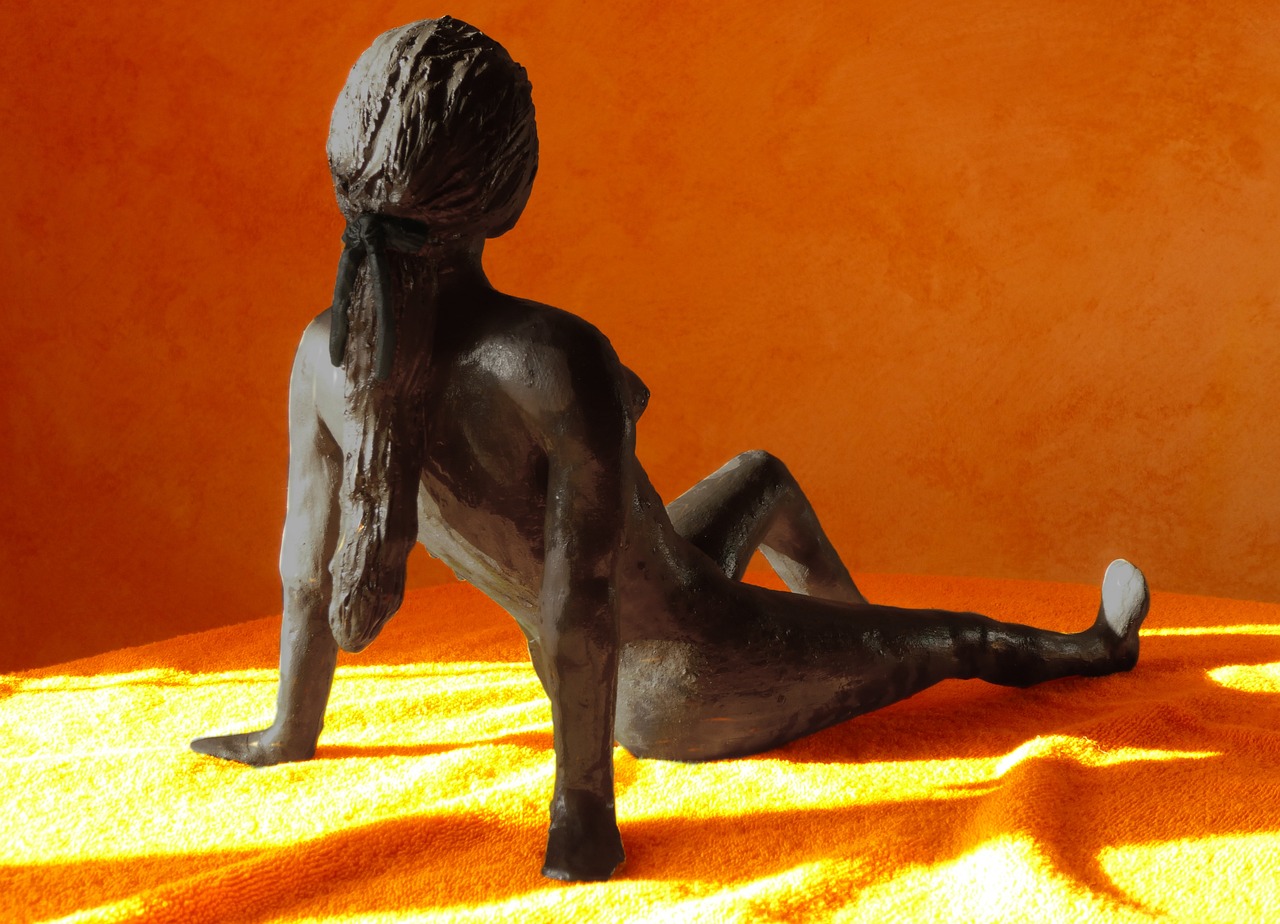
Warm-Up Exercises
Before diving into the intricate world of figure drawing, it’s essential to warm up your creative muscles. Just like athletes stretch before a game, artists need to prepare their hands and minds for the task ahead. Warm-up exercises not only help you loosen up but also enhance your ability to capture the fluidity of motion in your drawings. Think of these exercises as a way to shake off the cobwebs and get into the groove of drawing!
One effective warm-up technique is to start with quick gesture sketches. These sketches should be done in a matter of seconds – aim for 30 seconds to a minute per pose. The goal here is to focus on the overall movement and energy rather than the details. You can use a timer to keep yourself accountable. Set it for one minute, and draw whatever comes to mind, letting your hand flow freely across the paper. This not only gets your hand moving but also helps you to think about the dynamic aspects of the human figure.
Another excellent warm-up is to practice contour drawing. This technique involves drawing the outline of a figure without lifting your pencil from the paper. It forces you to truly observe the subject and understand its form. You can start with simple shapes and gradually progress to more complex figures. The beauty of contour drawing lies in its ability to train your eye to see and capture the essence of form and movement.
Here are a few more warm-up exercises you might find beneficial:
- Line Drills: Draw straight, curved, and zigzag lines to get comfortable with your tools.
- Shape Building: Create figures using basic shapes like circles, squares, and triangles to form the human body.
- Foreshortening Practice: Experiment with drawing limbs and body parts that appear shorter or compressed due to perspective.
Incorporating these warm-up exercises into your routine can significantly enhance your drawing skills. As you practice, try to maintain a relaxed posture and breathe deeply. This will help you stay focused and in the moment, allowing your creativity to flow freely. Remember, the key to effective warm-ups is consistency. Make it a habit to warm up before each drawing session, and you’ll notice a remarkable improvement in your ability to capture the human figure in motion.
Now that you’re warmed up and ready to go, let’s explore how to effectively capture the essence of movement in your sketches!
Q1: How long should I spend on warm-up exercises?
A1: Ideally, spend about 10-15 minutes on warm-up exercises. This will help you loosen up and prepare for more detailed work.
Q2: Can I use any medium for warm-ups?
A2: Absolutely! Whether you prefer pencils, charcoal, or digital tools, the medium is less important than the act of drawing itself.
Q3: What if I feel stuck during warm-ups?
A3: If you feel stuck, try changing your approach. Switch to a different exercise or take a short break to refresh your mind.
Q4: How often should I practice warm-ups?
A4: Incorporating warm-ups into every drawing session is ideal. The more you practice, the more natural it will become.

Timed Sketching
Timed sketching is a fantastic way to unleash your creativity and improve your drawing skills. Imagine being in a race against time, where each second counts, and you must capture the essence of a pose before it slips away. This practice encourages spontaneity, helping you to focus on the overall movement rather than getting bogged down in fine details. By setting a timer for your sketches, you can develop a sense of urgency that pushes you to work faster and think more dynamically.
One of the key benefits of timed sketching is that it trains your eye to quickly identify the most important aspects of a figure. Instead of laboring over every line, you learn to distill the pose into its essential elements. This is similar to how a photographer captures a fleeting moment, freezing it in time with just a click of the shutter. In timed sketching, you’re doing the same with your pencil or brush, aiming to create a powerful image in just a few minutes.
To get started with timed sketching, consider the following steps:
- Set a Time Limit: Start with shorter intervals, like 1-2 minutes, and gradually increase as you become more comfortable.
- Choose Your Reference: Use dynamic poses from reference images or live models to inspire your sketches.
- Focus on the Flow: Rather than aiming for perfection, concentrate on the movement and energy of the pose.
As you practice, you'll find that your ability to capture movement improves significantly. You might even discover that the pressure of a ticking clock can ignite a burst of creativity you didn’t know you had. Think of it as a workout for your artistic muscles—each session strengthens your ability to convey motion and emotion in your drawings.
Additionally, consider keeping a sketchbook dedicated to your timed sketches. This can serve as a visual diary of your progress, showing how your skills evolve over time. You can also challenge yourself by inviting friends to join in on the fun. Turn your timed sketching sessions into a friendly competition, where you can compare your work and provide constructive feedback to one another. This camaraderie can lead to new insights and techniques that you might not have discovered on your own.
Ultimately, timed sketching is not just about speed; it's about learning to see and interpret movement in a way that feels natural and instinctive. So, grab your sketchbook, set that timer, and let the magic of motion flow through your pencil!
Q1: How long should I set my timer for timed sketching?
A1: Start with 1-2 minutes for each sketch, and as you become more comfortable, gradually increase the time to 5 or even 10 minutes.
Q2: Can I use reference images for timed sketching?
A2: Absolutely! Reference images can provide great inspiration and help you focus on dynamic poses.
Q3: What materials do I need for timed sketching?
A3: All you need is a sketchbook and a pencil or pen. You can also use markers or charcoal for a different effect.
Q4: How can I track my progress in timed sketching?
A4: Keep a dedicated sketchbook for your timed sketches. This allows you to see how your skills improve over time.
Line of Action
The is a fundamental concept in figure drawing that can transform your sketches from static to dynamic. Imagine it as the invisible thread that runs through a pose, guiding the viewer's eye and conveying the energy of movement. By establishing this line, you can create a sense of flow and rhythm in your drawings, making them feel alive and engaging.
To grasp the line of action, picture a dancer mid-leap or an athlete in full sprint. The line of action is the path their body takes, often represented as a simple curve or straight line that connects the head, torso, and limbs. This line not only captures the overall direction of the figure but also emphasizes the weight and balance of the pose. By focusing on this line, you can simplify complex forms and make your drawings more expressive.
Here are a few tips to effectively incorporate the line of action into your figure drawings:
- Start with a Gesture Sketch: Before diving into details, quickly sketch the line of action to capture the essence of the pose. This will serve as the backbone of your drawing.
- Use Fluid Lines: Allow your hand to move freely as you draw the line of action. The more fluid and natural the line, the more dynamic your figure will appear.
- Emphasize Curves: Curved lines often convey motion better than straight ones. Look for opportunities to create curves in your line of action, especially in poses that involve twisting or bending.
Once you’ve established the line of action, you can build the rest of your figure around it. Start by sketching the major forms, such as the head, torso, and limbs, ensuring they follow the flow of the line. This will help maintain a sense of unity and coherence in your drawing. Remember, the line of action is not just a guideline; it’s a tool that can help you understand the underlying structure and movement of the human body.
Incorporating the line of action into your practice will not only enhance your figure drawings but also deepen your understanding of anatomy and motion. So the next time you pick up your pencil, start with that line. You might be surprised at how much it transforms your work!
Q: What is the line of action?
A: The line of action is an imaginary line that represents the direction of movement in a figure drawing. It helps to create a sense of flow and energy.
Q: How do I find the line of action in a pose?
A: Observe the overall movement of the figure. Look for the main direction that connects the head, torso, and limbs, and sketch a simple line that captures that flow.
Q: Can I use the line of action for static poses?
A: Yes! Even in static poses, the line of action can help convey balance and weight, making your drawings more engaging.
Q: How does the line of action improve my drawing skills?
A: Focusing on the line of action helps simplify complex poses, allowing you to capture the essence of movement more effectively, which ultimately enhances your overall drawing skills.

Dynamic Poses
When it comes to drawing the human figure, breathe life into your artwork. They are not just about the position of the body; they encapsulate the very essence of motion and emotion. Think of a dancer mid-twirl or an athlete leaping into the air. These moments are filled with energy, and capturing that energy is what makes your drawings come alive. But how do you choose and depict these poses effectively?
First, consider the context of the pose. Is it a moment of action, like a sprinting runner or a relaxed pose, such as someone sitting back with a book? Each scenario demands a different approach. For instance, a running figure should have extended limbs and a forward-leaning torso to convey speed, while a seated figure might have a more compact form. Understanding the context helps you to choose poses that resonate with the viewer.
Next, think about the flow of movement. Every pose has a natural rhythm to it, and your job as an artist is to capture that flow. Look for the curves and angles in the body. For example, when drawing a figure in a twisting motion, the curves of the spine and limbs should lead the eye along the path of movement. This not only enhances the visual appeal but also conveys a sense of action. Pay attention to how the body shifts its weight and how limbs extend and contract, creating a sense of balance and tension.
To help visualize this, consider using the line of action concept. This principle involves drawing a single, sweeping line that represents the main movement of the pose. This line acts as a guide, helping you to maintain the energy and direction of the figure. For example, if you’re sketching a figure reaching out, the line might start from the feet and extend through the torso and out to the fingertips. This technique not only simplifies the drawing process but also ensures that the final piece feels cohesive and dynamic.
Lastly, don't shy away from experimenting. Try different angles and perspectives to see how they affect the portrayal of motion. A pose that looks static from one angle might come alive when viewed from another. Use your imagination and let your creativity flow. Remember, the goal is to convey a story through your figures, and sometimes that requires stepping outside of conventional norms.
- What are the best ways to practice dynamic poses? Regularly sketching from live models or using photo references can greatly enhance your ability to capture dynamic poses.
- How do I find inspiration for dynamic poses? Look at sports, dance, or even action movies. Observing real-life movement can provide a wealth of ideas for your drawings.
- Is it necessary to understand anatomy to draw dynamic poses? While it's not mandatory, a solid understanding of anatomy can significantly improve your ability to depict movement accurately.

Using Reference Images
When it comes to mastering the art of drawing the human figure in motion, is an essential tool in your creative arsenal. Reference images can provide you with a wealth of information about anatomy, movement, and proportions that can be challenging to capture from memory alone. They serve as visual guides that can inspire and direct your artistic choices, helping you to create more accurate and dynamic figure drawings.
There are two primary sources for reference images: photo references and live models. Each has its unique benefits and can significantly enhance your understanding of how the human body moves. By incorporating both into your practice, you can develop a more comprehensive skill set. Let’s dive deeper into these sources.
Using photo references can be a game-changer for artists at any level. They allow you to analyze the subtleties of movement and the play of light and shadow on the human form. When selecting photo references, look for images that clearly depict the pose you want to draw. Pay attention to the following elements:
- Lighting: Observe how light interacts with the body. It can create depth and dimension in your drawings.
- Angles: Different angles can reveal various aspects of the body’s structure and movement.
- Expression: Capturing facial expressions can add emotion and life to your figure drawings.
Once you have selected your reference images, spend time analyzing them. Break down the pose into basic shapes and forms, focusing on how the body segments relate to one another. This process will help you understand the underlying anatomy and make your drawings more lifelike.
Drawing from live models offers a unique experience that photographs simply cannot replicate. When you draw a live model, you can observe the nuances of movement in real-time, allowing you to capture the essence of motion more effectively. Here are some advantages of working with live figures:
- Real-time observation: You can see how the body moves and shifts, providing insight into dynamic poses.
- Spatial awareness: Drawing from life helps you develop a better understanding of three-dimensional forms and how they exist in space.
- Improved timing: You learn to react quickly and capture fleeting moments, which is crucial for dynamic figure drawing.
When working with live models, consider the following tips to enhance your experience:
- Communicate: Talk to your model about what poses you want them to try. This collaboration can lead to more engaging and dynamic poses.
- Use a variety of poses: Encourage your model to switch poses frequently to capture a range of movements.
- Limit your time: Set short time limits for each pose to challenge yourself and improve your quick sketching skills.
Incorporating both photo references and live models into your practice can create a more well-rounded understanding of the human figure in motion. By learning to analyze and adapt these references, you will not only improve your technical skills but also develop a deeper appreciation for the beauty and complexity of the human form.
Q: How can I find quality reference images?
A: You can find quality reference images on various websites dedicated to artists, such as Pexels or Unsplash. Additionally, social media platforms like Instagram and Pinterest can be great sources for inspiration.
Q: Is it better to draw from photos or live models?
A: Both have their advantages. Drawing from photos can help you focus on specific details, while live models provide real-time movement and spatial awareness. A combination of both methods is often the most beneficial.
Q: How often should I practice drawing from references?
A: Consistent practice is key. Aim to incorporate reference drawing into your routine several times a week to see significant improvement over time.

Photo References
Using can be a game-changer in the world of figure drawing. They're not just mere images; they serve as windows into the dynamic world of human movement. Imagine trying to catch a fleeting moment—a dancer leaping through the air or an athlete in mid-stride. Without a reference, you might struggle to capture that energy and motion. But with a well-chosen photograph, you can study the intricacies of the pose, the tension in the muscles, and the overall composition of the human figure in action.
When selecting photo references, consider a few key aspects to ensure they serve your artistic needs effectively. Look for high-quality images that showcase the subject in a variety of poses. The lighting should be clear, allowing you to see the details of the anatomy. Here are some things to keep in mind:
- Clarity: Ensure the photo is sharp and well-lit.
- Angle: Choose images that show the figure from different angles.
- Emotion: Look for photos that convey a strong sense of movement or emotion.
Once you've selected your references, the next step is to analyze them. Take a moment to break down the figure into basic shapes. This technique, often referred to as shape language, allows you to simplify complex forms into manageable components. For example, the torso can be represented as a box, while limbs can be visualized as cylinders. This approach not only aids in proportion but also helps in understanding how the body moves through space.
Moreover, don’t hesitate to adapt the reference images to fit your artistic vision. You might find that a photo inspires you to change the pose slightly or to exaggerate certain elements for dramatic effect. Remember, art is about expression, and while references are helpful, they should serve as a guide rather than a strict rulebook.
Lastly, consider creating a personal library of your favorite references. Organizing them by categories, such as action poses, emotional expressions, or specific body parts, can make it easier to find the right image when you need it. You can even use digital tools or apps to keep your collection accessible and easily searchable.
In conclusion, photo references are invaluable resources for artists seeking to enhance their figure drawing skills. They provide a means to study movement closely, understand anatomy, and ultimately, create more dynamic and lifelike representations of the human form. So, the next time you sit down to draw, remember to grab a reference photo and let it guide your creative journey!
Q: Why are photo references important for figure drawing?
A: Photo references help artists capture realistic poses and understand the nuances of human anatomy and movement.
Q: Where can I find quality photo references?
A: You can find quality references on photography websites, stock photo platforms, or even by taking your own photos. Social media platforms like Instagram also have many artists sharing their work.
Q: Can I use photos from the internet without permission?
A: It's essential to respect copyright laws. Always check the usage rights of any image you want to use and consider using images that are labeled for reuse or are in the public domain.
Q: How do I analyze a photo reference for drawing?
A: Break down the figure into basic shapes, study the proportions, and observe the lighting and shadows to understand how they affect the form.

Live Models
Drawing from is an experience that can fundamentally change your understanding of motion and anatomy. Unlike static images, live models breathe, shift, and express emotions, providing a dynamic reference that can elevate your figure drawing skills to new heights. When you're capturing the human form in motion, there's something incredibly powerful about observing a model as they move, allowing you to grasp the subtleties of posture and gesture that photographs simply can't convey.
One of the key benefits of drawing from live models is the opportunity to study real-life anatomy in three dimensions. You can see how muscles contract and relax, how joints articulate, and how gravity affects the body. This understanding is crucial for artists who want to depict motion accurately. When you sketch a live model, you're not just copying what you see; you're interpreting the essence of their movement, which can lead to more expressive and lifelike drawings.
To make the most of your live model sessions, consider the following tips:
- Choose the Right Environment: A well-lit, comfortable space can make a huge difference. Natural light can enhance the model's features, while a clutter-free background helps keep the focus on the figure.
- Communicate with the Model: If possible, discuss the poses beforehand. This can help the model understand what you’re looking to capture, whether it's a specific action or a more relaxed stance.
- Bring Your Tools: Make sure to have all your drawing materials ready. Pencils, charcoal, sketch pads, and even digital devices can all be useful depending on your style.
Moreover, it’s essential to approach each session with an open mind. Every model brings their own unique energy and style, which can inspire you to explore new techniques and perspectives. Don't be afraid to experiment with different styles of drawing—sometimes, the most unexpected approaches can yield the most exciting results.
Finally, remember that practice makes perfect. Regular sessions with live models will not only improve your skills but also boost your confidence. As you become more comfortable capturing movement, you'll find that your drawings become increasingly dynamic and engaging. So, grab your sketchbook, find a local figure drawing group, or even ask friends to pose for you. The more you practice, the more you'll develop your unique artistic voice.
Q: How do I find live models for drawing?
A: You can find live models through local art schools, community centers, or figure drawing groups. Many artists also hire models for private sessions.
Q: What should I bring to a live drawing session?
A: Bring your preferred drawing materials, such as pencils, charcoal, or pastels, along with a sketchbook. It's also helpful to have an eraser and a sharpener on hand.
Q: How long do poses usually last?
A: Poses can vary in length, from quick gestures lasting a few minutes to longer poses that may last half an hour or more. It often depends on the format of the session.
Q: Can I take photos of the model?
A: Always ask for permission before taking photos. Some models may be comfortable with it, while others may prefer to keep the session private.
Practice Techniques
Consistent practice is the cornerstone of mastering the art of figure drawing, especially when it comes to capturing the human figure in motion. Just like athletes train their bodies to perform at their best, artists must also engage in regular practice to refine their skills and enhance their understanding of anatomy and movement. It's not just about picking up a pencil and drawing; it's about creating a structured routine that challenges you and pushes your artistic boundaries.
One of the most effective ways to incorporate figure drawing into your daily life is through daily sketching. This practice can be as simple as dedicating 15-30 minutes each day to sketching human figures from imagination or reference. By making this a habit, you’ll notice significant improvements in your ability to capture movement and proportion over time. Think of it as a workout for your artistic muscles; the more you do it, the stronger and more agile your skills will become.
In addition to solo practice, consider joining group drawing sessions. These sessions can be incredibly beneficial, as they provide an opportunity to collaborate with other artists and receive constructive feedback. Drawing in a group setting fosters a sense of community and can inspire you to experiment with new techniques and styles. Plus, observing others can give you fresh perspectives on how to approach figure drawing, particularly in capturing dynamic poses.
To enhance your practice further, you might want to explore various . Here are a few ideas to get you started:
- Timed Sketching: Set a timer for 1-5 minutes and draw as many poses as you can within that time frame. This exercise encourages quick thinking and helps you focus on the essence of movement rather than getting bogged down in details.
- Gesture Drawing: Focus on capturing the flow and energy of a pose. Use loose, flowing lines to represent the overall motion of the figure without worrying about accuracy. This technique helps you develop a keen sense of movement.
- Warm-Up Exercises: Start each drawing session with warm-up sketches. These can be simple shapes or quick figure outlines that help you loosen up and prepare for more detailed work.
Don't forget to keep track of your progress. Consider maintaining a sketchbook where you can document your daily drawings and reflect on your growth over time. This not only provides a visual representation of your improvement but also serves as a source of motivation when you see how far you’ve come. Remember, every artist has their unique journey, and it's perfectly fine to take your time to develop your skills.
Q: How long should I practice figure drawing each day?
A: Aim for at least 15-30 minutes of dedicated practice daily. Consistency is more important than the length of each session.
Q: What materials do I need for figure drawing?
A: Basic materials include sketch paper, pencils, erasers, and possibly charcoal or ink for more expressive sketches. Experiment with different mediums to find what works best for you!
Q: Can I improve my figure drawing skills without a live model?
A: Absolutely! While live models provide valuable insights, you can also use reference images, online resources, and anatomy books to practice and improve your skills.
Q: How do I know if I’m improving?
A: Keep a sketchbook and regularly review your past work. You’ll likely notice improvements in your understanding of anatomy, movement, and overall style.
Daily Sketching
Engaging in routines can significantly improve your drawing abilities. Think of it as a workout for your artistic muscles. Just like athletes train every day to enhance their performance, artists need to practice consistently to refine their skills. By dedicating even a few minutes each day to sketching, you’ll notice a remarkable transformation in your ability to capture the human figure in motion.
So, how can you incorporate daily sketching into your routine? It doesn’t have to be a daunting task. Start small! Set aside just 10-15 minutes each day to focus on figure drawing. You can use a variety of methods to keep things fresh and exciting. For instance, you might choose to:
- Sketch from reference images or photographs.
- Draw from life, capturing friends or family in spontaneous poses.
- Experiment with different mediums, such as charcoal, ink, or digital tools.
Incorporating variety will not only keep your practice engaging, but it will also challenge you to adapt to different styles and techniques. You might even consider keeping a sketchbook dedicated solely to figure drawing. This way, you can track your progress over time and look back at how far you've come. It's like a visual diary of your artistic journey!
Another effective strategy is to set specific themes for each day of the week. For example:
| Day | Theme |
|---|---|
| Monday | Dynamic Poses |
| Tuesday | Gesture Drawings |
| Wednesday | Facial Expressions |
| Thursday | Action Scenes |
| Friday | Character Design |
| Saturday | Life Drawing |
| Sunday | Review and Reflect |
This structure not only provides direction but also helps you explore different aspects of figure drawing. By focusing on a specific theme each day, you’ll develop a more well-rounded skill set. Plus, it makes your daily practice feel less like a chore and more like an exciting challenge!
Lastly, don't forget to embrace mistakes. Every artist has off days, and that’s perfectly normal. Instead of getting discouraged, view these moments as opportunities for growth. Reflect on what went wrong, and use that insight to improve in your next session. Remember, the journey of an artist is filled with ups and downs, but it’s the consistent effort that leads to mastery.
In conclusion, daily sketching is a powerful tool for any aspiring artist. By committing to a regular practice, experimenting with different techniques, and maintaining a positive mindset, you’ll find yourself not only improving your skills but also enjoying the process of becoming a better artist.
Q: How long should I sketch each day?
A: Aim for at least 10-15 minutes daily. Consistency is key!
Q: What materials do I need for daily sketching?
A: A sketchbook and a pencil are sufficient to start. As you progress, you can explore other mediums.
Q: Can I sketch anything, or should I focus on the human figure?
A: While focusing on the human figure is beneficial, don’t hesitate to sketch other subjects to keep your practice varied and enjoyable.
Q: How can I stay motivated to sketch daily?
A: Setting themes, tracking your progress, and joining drawing communities can help keep you motivated and engaged.
Group Sessions
Group drawing sessions can be a game changer for artists looking to enhance their figure drawing skills. Imagine being surrounded by fellow creatives, each with their unique perspectives and techniques. It’s not just about drawing; it’s about sharing, learning, and growing together. When you participate in these sessions, you open yourself up to a world of inspiration and feedback that can significantly elevate your work.
One of the most significant advantages of group sessions is the opportunity for collaboration. When you draw alongside others, you can observe different approaches to capturing motion and anatomy. This exposure can spark new ideas and methods that you might not have considered on your own. Plus, the energy in a room filled with artists can be incredibly motivating. You’ll find yourself pushing your limits, experimenting with new styles, and perhaps even stepping out of your comfort zone.
Additionally, feedback is invaluable in the artistic process. In a group setting, you can receive constructive criticism from peers who understand the challenges of figure drawing. This feedback can help you identify areas for improvement that you might not see when working solo. For instance, someone might notice that you’re not fully capturing the tension in a pose or that your proportions are slightly off. Such insights can be crucial for your growth as an artist.
To make the most out of your group sessions, consider implementing some of the following strategies:
- Set Goals: Before each session, outline what you want to achieve. Whether it’s mastering a specific pose or experimenting with a new technique, having clear goals can keep you focused.
- Rotate Models: If possible, change the models regularly to expose yourself to different body types and movement styles. This variety will enhance your adaptability and understanding of human anatomy.
- Encourage Open Dialogue: Create an environment where everyone feels comfortable sharing their thoughts and critiques. Constructive dialogue can lead to deeper insights and learning.
Moreover, group sessions can also be a fantastic way to network with other artists. You never know who you might meet—perhaps a mentor who can guide you on your artistic journey or a fellow artist who shares your passion for motion in figure drawing. Building these connections can lead to future collaborations, workshops, or even exhibitions.
In conclusion, group sessions are not just about drawing; they are about community, collaboration, and growth. By engaging with others, you can enhance your skills, gain valuable feedback, and find inspiration in the creativity that surrounds you. So, gather your art supplies, invite some friends, and dive into the dynamic world of group figure drawing!
Q: How often should I participate in group drawing sessions?
A: Ideally, try to participate weekly or bi-weekly. Regular practice helps reinforce skills and keeps you motivated.
Q: What materials should I bring to a group session?
A: Bring your preferred drawing tools, such as pencils, charcoal, or ink, along with sketchbooks and any reference materials you might need.
Q: Can beginners join group sessions?
A: Absolutely! Group sessions are a fantastic place for beginners to learn and grow. Everyone starts somewhere, and most artists are happy to help!
Q: How do I find local group drawing sessions?
A: Check local art schools, community centers, or online platforms like Meetup. Many artists organize sessions through social media as well.
Frequently Asked Questions
- What are the key elements to consider when drawing the human figure in motion?
When capturing the human figure in motion, focus on understanding anatomy, gesture, and dynamic poses. Start by grasping the basic structures and proportions of the body, then practice gesture drawing to convey the essence of movement. Finally, explore dynamic poses that express energy and flow, making your drawings come alive!
- How can I improve my gesture drawing skills?
Improving gesture drawing skills can be achieved through regular practice and warm-up exercises. Incorporate timed sketching sessions where you limit the time for each pose, pushing yourself to capture the flow quickly. Additionally, using the line of action can help create more engaging and dynamic sketches.
- Where can I find good reference images for figure drawing?
You can find quality reference images through various online resources, including stock photo websites, art communities, and social media platforms. Websites like Unsplash, Pexels, and Pinterest offer a plethora of images that can inspire and guide your figure drawing practice.
- What are the benefits of drawing from live models?
Drawing from live models provides invaluable insights into human motion and anatomy. It allows you to observe real-time movements and capture the subtleties of poses that photos may not convey. This practice enhances your observational skills and helps you understand how different body parts interact during movement.
- How often should I practice figure drawing?
Consistency is key! Engaging in daily sketching routines can significantly improve your figure drawing abilities. Even short sessions can lead to progress, so try to incorporate figure drawing into your everyday practice. You'll be amazed at how quickly you develop your skills!
- What is the importance of group drawing sessions?
Group drawing sessions foster collaboration and provide opportunities for feedback, which can greatly enhance your understanding of movement. By drawing with others, you can share techniques, learn from different perspectives, and motivate each other to improve, making the experience both educational and enjoyable!


