
Drawing Clothes and Drapery: Techniques and Tips
When it comes to drawing clothes and drapery, the challenge lies in capturing the intricate details that bring fabric to life. Imagine trying to depict a flowing gown or a crumpled shirt without understanding how fabric behaves; it would be like trying to paint a sunset without knowing the colors of the sky! This article explores essential techniques and tips for drawing clothes and drapery, helping artists enhance their skills in fabric representation and create more realistic and dynamic figures.
Different fabrics possess unique properties that affect how they drape and fold. For instance, a heavy velvet behaves quite differently than a lightweight chiffon. Understanding these differences can significantly impact your drawings. Here’s a quick overview of some common fabric types:
| Fabric Type | Characteristics | Common Uses |
|---|---|---|
| Cotton | Breathable, soft, and versatile | T-shirts, dresses, and casual wear |
| Silk | Shiny, smooth, and luxurious | Evening gowns, scarves, and high-end fashion |
| Wool | Warm, thick, and insulating | Coats, sweaters, and winter wear |
| Linen | Lightweight, breathable, and wrinkly | Summer clothing and table linens |
By understanding these fabric types, artists can choose the right material to represent in their drawings, allowing for a more authentic portrayal of clothing and drapery.
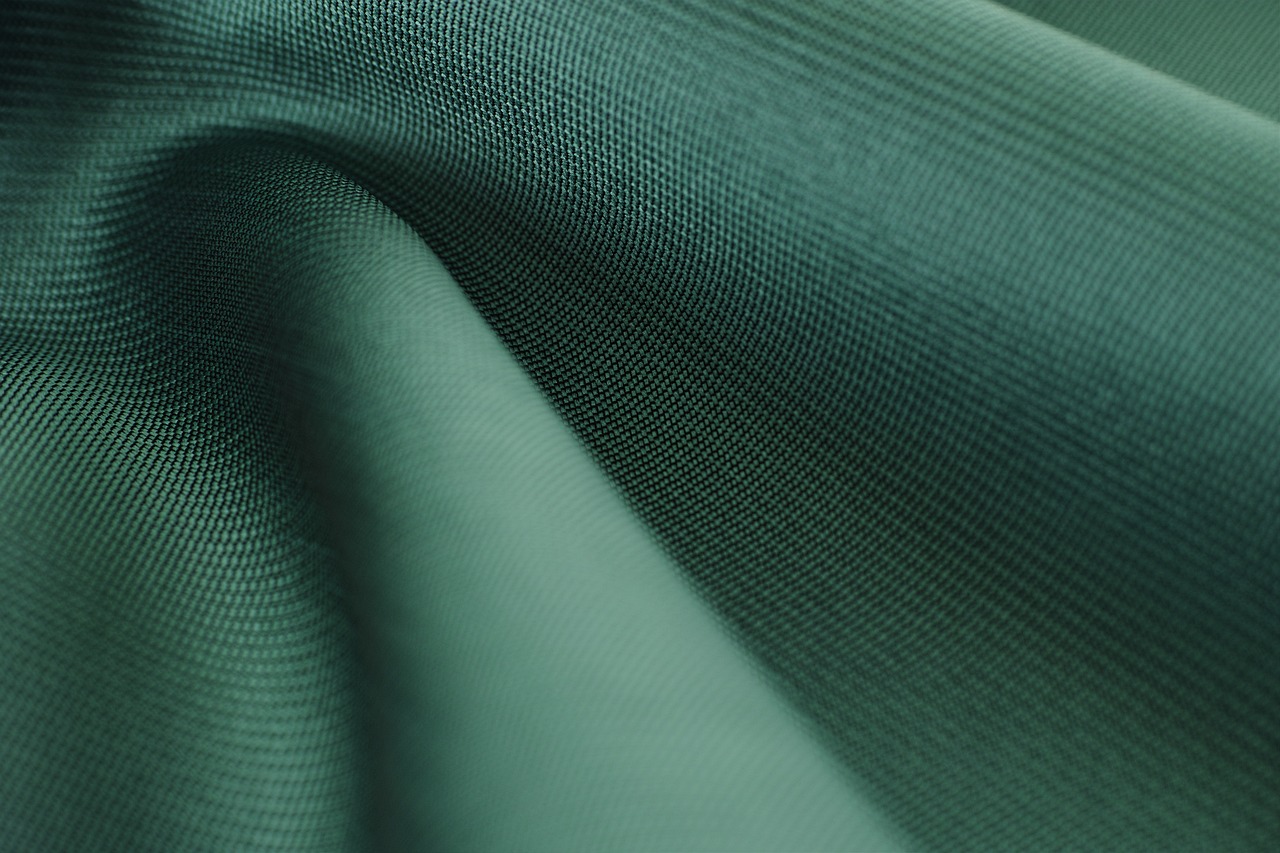
Mastering basic drapery techniques is crucial for realistic representation. It's not just about drawing lines; it's about understanding how fabric interacts with the body and the environment. Sketching folds and creases effectively can truly capture the essence of fabric. Think of it like sculpting with a pencil; you’re creating depth and dimension on a flat surface.
Folds are essential in depicting clothing realistically. They are the visual cues that inform the viewer about the weight and texture of the fabric. To draw folds, start by observing how they form in real life. Consider the following:
- Shapes: Folds can be angular, soft, or flowing.
- Directions: Notice how gravity affects the orientation of folds.
- Effects of Gravity: Heavier fabrics will create deeper, more pronounced folds compared to lighter fabrics.
By focusing on these aspects, you can create more dynamic and lifelike representations of clothing.
Understanding various fold types can enhance your drawings significantly. Here are a few common types:
- Angular Folds: Sharp and defined, often seen in structured garments.
- Circular Folds: Soft and rounded, typically found in draped clothing.
- Cascading Folds: Flowing and layered, like a waterfall, often seen in skirts or dresses.
By practicing these different types of folds, you’ll be able to convey a better sense of realism in your fabric drawings.
Proper shading techniques can bring folds to life. Shadows and highlights are your best friends when it comes to adding depth and dimension. Consider using a range of values; lighter areas can indicate where light hits the fabric, while darker areas suggest depth and shadow. Experiment with different shading styles, such as cross-hatching or stippling, to see what works best for you!
Clothing often moves with the body, creating dynamic shapes that can be quite captivating. To capture movement in fabric, focus on the gesture and flow of the clothing. Think of the way a dancer’s dress sways or how a shirt billows in the wind. By emphasizing these movements in your drawings, you can create a sense of life and energy that draws viewers in.
Reference images are invaluable for artists. They serve as a guide to understanding how fabric behaves in various situations. When using photographs or real-life examples, pay attention to the details: the way light interacts with the fabric, the folds created by movement, and the overall texture. These elements can significantly improve the accuracy and detail in your drawings.
Learning to analyze reference material is key to understanding fabric behavior. Look for:
- Light sources and shadows
- Different types of folds and their formations
- The overall composition of the clothing
By honing your observational skills, you’ll be able to replicate these elements in your own work more effectively.
Working with live models can significantly improve your drawing skills. It’s like having a real-life canvas where you can observe how clothing interacts with movement. Here are some tips for practicing with models:
- Start with quick sketches to capture movement and flow.
- Focus on different angles and perspectives.
- Experiment with various fabrics to see how they behave.
By incorporating live models into your practice, you’ll gain invaluable insights into the world of drapery and fabric representation.
Q: What is the best way to start drawing drapery?
A: Begin by studying different fabric types and their properties. Practice sketching basic folds and gradually move to more complex designs.
Q: How can I improve my shading techniques?
A: Experiment with various shading methods, such as cross-hatching and blending, and practice regularly to find what works best for your style.
Q: Are reference images necessary for drawing drapery?
A: While not mandatory, reference images can greatly enhance your understanding of fabric behavior and improve the accuracy of your drawings.
Understanding Fabric Types
When it comes to drawing clothes and drapery, understanding the different types of fabrics is essential. Each fabric has its own unique properties that influence how it drapes, folds, and interacts with light. For artists, knowing these characteristics can enhance the realism and dynamism of their drawings. Think of fabric as the skin of your artwork; just as skin has different textures and tones, fabrics do too, and they can dramatically affect the overall look of your figure.
Let's dive into some of the most common fabric types and their characteristics:
| Fabric Type | Characteristics | Common Uses |
|---|---|---|
| Cotton | Soft, breathable, and versatile; holds shape well. | Casual wear, shirts, and dresses. |
| Silk | Luxurious, smooth, and has a natural sheen; drapes beautifully. | Formal wear, scarves, and lingerie. |
| Wool | Warm, textured, and can be bulky; excellent for layering. | Coats, suits, and sweaters. |
| Linen | Lightweight, breathable, and has a natural crispness; wrinkles easily. | Summer clothing, tablecloths, and curtains. |
| Polyester | Durable, wrinkle-resistant, and often blended with other fabrics. | Activewear, upholstery, and blended clothing. |
Understanding these fabric types is not just about knowing what they are; it's about how they behave. For instance, silk will flow and catch the light in a way that wool simply cannot. When you observe how different fabrics fall and fold, you’ll start to notice the subtleties that make your drawings pop. Imagine trying to capture the lightness of a silk dress versus the heavy drape of a wool coat; each requires a different approach in both technique and shading.
Moreover, the way fabric interacts with the human body adds another layer of complexity. For example, when a figure moves, the fabric stretches and pulls in different directions. This dynamic interplay is crucial to capturing realistic clothing in motion. Understanding fabric types will help you predict how they will behave in different scenarios, making your artwork more lifelike.
In conclusion, as an artist, taking the time to study various fabric types will pay off immensely in your drawings. It’s like having a secret weapon in your artistic arsenal. So, next time you sit down to sketch, consider the fabric's properties and how they can enhance the story you're trying to tell through your art.

Basic Drapery Techniques
When it comes to drawing clothes and drapery, mastering basic techniques is absolutely essential for achieving realistic representations. Think of it as laying the groundwork for a beautiful building; without a solid foundation, the structure can easily crumble. In the world of fabric, understanding how to sketch folds and creases is like learning to speak the language of textiles. This knowledge allows artists to capture the essence of clothing, bringing their figures to life with depth and movement.
One of the first things to consider is the direction of the folds. Just like water flows down a hill, fabric will naturally follow the contours of the body or the environment it’s in. When sketching, pay attention to how gravity influences the fabric. For instance, a dress hanging from a shoulder will have different fold patterns compared to pants draping from the waist. Observing how fabric behaves in various situations can provide invaluable insights into your drawings.
Another crucial aspect is the weight of the fabric. Heavier materials, like denim or wool, will create more pronounced and structured folds, while lighter fabrics, such as silk or chiffon, will have softer, more flowing drapes. To illustrate this, consider the difference between a thick curtain and a delicate scarf; each will behave differently in the wind, creating unique shapes and shadows. Artists should strive to understand these characteristics to make informed decisions about how to represent different types of fabric in their work.
Furthermore, practicing the sketching of folds in various positions can greatly enhance your skill set. Start with simple shapes and gradually introduce complexity. For instance, begin with a basic shirt, focusing on how the fabric gathers at the seams, then move on to more intricate designs like a flowing gown. As you sketch, don’t hesitate to use reference images to guide you. They can serve as a roadmap, helping you navigate the nuances of fabric representation.
To aid your understanding, here’s a simple table summarizing the different types of folds you might encounter:
| Type of Fold | Description | Example |
|---|---|---|
| Angular | Sharp, defined folds that create a structured look. | Suit jackets, tailored shirts |
| Circular | Soft, rounded folds that create a sense of flow. | Skirts, draped dresses |
| Cascading | Folds that fall in a waterfall-like manner. | Long coats, capes |
Lastly, don’t forget about shading techniques. Proper shading can transform your drapery from a flat drawing into a three-dimensional masterpiece. By understanding light sources and how they interact with fabric, you can create stunning highlights and shadows that add depth. Remember, every fold casts a shadow, and these shadows are just as important as the folds themselves. The interplay of light and dark will breathe life into your artwork, making it more dynamic and engaging.
In conclusion, mastering basic drapery techniques is not just about knowing how to draw folds; it’s about understanding the very nature of fabric. By observing, practicing, and applying these skills, you’ll be well on your way to creating stunning, realistic representations of clothing that truly captivate your audience.
- What are the best fabrics to practice drawing?
Start with a variety of fabrics such as cotton, silk, and denim to understand how different materials behave. - How can I improve my fold-drawing skills?
Regular practice with reference images and live models will enhance your ability to capture realistic folds. - Is shading important in drawing drapery?
Absolutely! Shading adds depth and dimension, making your drawings look more lifelike.
Creating Folds
When it comes to drawing clothes, folds are the lifeblood of your fabric representation. They add depth, texture, and a sense of realism to your artwork. Think of folds as the intricate dance of fabric moving with the body, responding to gravity, tension, and the contours of the figure beneath. Understanding how to create and depict these folds is crucial for any artist aiming to capture the essence of clothing.
To start, it's essential to observe how fabric behaves in different situations. For instance, when a person sits, stands, or moves, the fabric reacts accordingly, creating various types of folds. Here are some key aspects to consider when creating folds:
- Shape: Folds can be angular, rounded, or cascading. Each type plays a role in how the fabric looks and feels.
- Direction: The direction of the folds will often follow the body's movement or the way the fabric is pulled. Pay attention to how the fabric drapes over curves.
- Gravity: Gravity plays a significant role in how folds form. The heavier the fabric, the more pronounced the folds will be.
When sketching folds, start with a light outline to represent the fabric's flow. Focus on the main folds first, and then gradually add in smaller details. Consider using a layering technique where you build up the complexity of the folds in stages. This method allows you to adjust and refine your work without overwhelming yourself from the get-go.
Another effective approach is to study real-life examples. Observe how different fabrics behave in various situations. For instance, a silk dress will create soft, flowing folds, while denim may have sharper, more defined creases. Take the time to analyze these characteristics, as they will inform your drawing style and technique.
As you practice creating folds, don’t hesitate to experiment with different tools and techniques. Whether you’re using pencils, charcoal, or digital mediums, each tool offers unique ways to express the texture and depth of fabric. Remember, the goal is to make the fabric feel alive, as if it could flutter in the wind or flow with the body’s movement.
In conclusion, creating folds is about more than just drawing lines on paper; it's about capturing the essence of fabric in motion. With practice and observation, you can develop a keen eye for detail and a confident hand for depicting the beautiful complexity of clothing.
Types of Folds
Understanding the different types of folds is essential for any artist looking to enhance their representation of clothing and drapery. Each fold has its own unique characteristics and can convey different emotions and movements in your drawings. Think of folds as the language of fabric; they tell a story about how a garment interacts with the body and the environment. By mastering these folds, you can create more dynamic and lifelike representations of clothing.
There are several key types of folds that you should be familiar with, each serving a distinct purpose in your artwork. Let's take a closer look at these types:
- Angular Folds: These folds are sharp and defined, often created by the tension of the fabric. They occur when the fabric is pulled tight or when there are sudden changes in direction. Angular folds can give a sense of rigidity and structure to the clothing.
- Circular Folds: Circular folds are softer and more fluid, resembling gentle curves. They often appear in lightweight fabrics and can create a sense of movement and grace. These folds are typically seen in skirts, drapes, and other flowing garments.
- Cascading Folds: These folds occur when the fabric falls over itself, creating a waterfall effect. Cascading folds are often seen in longer garments and can add a dramatic flair to your drawings. They can convey a sense of elegance and fluidity, making them visually captivating.
When drawing these folds, it's important to observe how they interact with the body and the forces acting upon them. For instance, consider how gravity affects the way fabric hangs and how movement can create new shapes and lines. By practicing these observations, you can develop a keen eye for detail that will elevate your artwork.
Moreover, using reference images or studying real-life examples can greatly enhance your understanding of these folds. Take the time to analyze how different fabrics behave and how they create various fold types in different situations. This practice will not only improve your observational skills but also enrich your artistic repertoire.
In conclusion, mastering the types of folds is a crucial step in your journey as an artist. By understanding angular, circular, and cascading folds, you can bring a new level of realism and dynamism to your drawings. So grab your sketchbook and start experimenting with these folds; you'll be amazed at how they can transform your artwork!

Shading Techniques for Folds
When it comes to bringing your drawings of drapery to life, shading techniques are your secret weapon. Just like a magician reveals their best tricks, mastering the art of shading can transform flat sketches into dynamic, three-dimensional representations of fabric. The way light interacts with folds creates shadows and highlights that define the form and texture of clothing. So, how do you achieve this? Let’s dive into some essential techniques that will help you create realistic folds in your drawings.
First and foremost, understanding the light source is crucial. Whether your light is coming from above, the side, or even below, it dramatically affects how shadows are cast on the fabric. Imagine the sun shining down on a wrinkled shirt; the creases that jut out will catch the light, while the deeper folds will remain in shadow. To begin, sketch out the basic shape of your folds, and then identify where the light hits. Use a soft pencil or charcoal for initial shading, as these materials allow for smooth transitions between light and dark.
Next, let’s talk about gradations. A common mistake artists make is to apply shadows too harshly. Instead, think of shading as a gradient that subtly shifts from light to dark. You can achieve this by layering your strokes. Start with a light hand to create a base layer of shading, then gradually add more pressure to deepen the shadows. This technique not only adds depth but also mimics the soft texture of fabric. For instance, if you’re drawing a flowing silk dress, the shadows will be much softer compared to the crisp folds of denim.
In addition, consider the direction of the folds when applying your shading. Folds that curve inward will create deeper shadows than those that curve outward. Pay attention to the contours of the fabric and shade accordingly. For example, a cascading fold will have a different shadow pattern than an angular fold. This is where observation becomes vital. Take a moment to look at real-life examples or photographs to see how these shadows play out. You might even find it helpful to create a small
| Fold Type | Shading Technique |
|---|---|
| Cascading | Soft, gradual shading with highlights on the top edges |
| Angular | Sharp contrasts with defined shadows and minimal highlights |
| Curved | Subtle gradients that follow the curve of the fabric |
Finally, don’t forget about the highlights. These are just as important as the shadows in creating a realistic depiction of fabric. Use an eraser to lift off some of the pencil where the light would naturally hit, or apply a white gel pen for a more striking highlight effect. This contrast between light and dark is what will give your drapery that lifelike quality. Remember, the goal is to create a sense of volume and texture, so play around with different techniques until you find what works best for you.
In summary, mastering shading techniques for folds is all about understanding light, practicing gradations, and paying close attention to the unique characteristics of different fabric types. By incorporating these tips into your drawing routine, you'll not only enhance your skills but also develop a deeper appreciation for the art of drapery. So grab your pencils, experiment with these techniques, and watch your drawings transform!
- What is the best pencil for shading fabric? A softer pencil, like a 2B or 4B, is ideal for creating smooth gradients and rich shadows.
- How can I practice shading folds effectively? Use reference images of various fabrics and practice sketching them, focusing on light and shadow.
- Should I use color when shading fabric? While monochrome shading is a great start, experimenting with colored pencils can add even more depth and realism.
Capturing Movement
When it comes to drawing clothes and drapery, is like adding life to your artwork. Imagine a dancer twirling in a flowing dress or a runner sprinting in a fitted outfit; the way fabric interacts with motion can transform a static image into a dynamic story. To truly depict movement, artists need to focus on the gesture and flow of the fabric as it responds to the body's movements. This means understanding how different fabrics behave under various conditions—whether they cling, billow, or ripple.
One effective way to capture movement is by observing how clothing shifts and flows with the body. For instance, when a person raises their arms, the fabric will stretch and pull in certain areas while creating folds and creases in others. To illustrate this, consider the following key points:
- Observe the Body's Motion: Pay attention to how the body moves and how that influences the fabric. Look for areas that tighten and those that loosen.
- Use Quick Sketches: Don’t be afraid to make quick sketches that capture the essence of movement. These can serve as great practice and help you understand the flow of fabric.
- Focus on the Direction of Movement: The direction in which a figure is moving will dictate how the fabric falls and folds. For instance, a figure leaning forward will have different fabric dynamics than one leaning back.
Incorporating these observations into your drawings can create a sense of realism and energy. Think of your artwork as a snapshot of a moment in time; you want to freeze that movement while still allowing the viewer to feel the action. This can be achieved through techniques such as dynamic lines that indicate motion and shadows that enhance the three-dimensionality of the fabric.
Furthermore, using reference images of people in motion can significantly aid in understanding how clothing behaves. Whether it's a photograph of an athlete mid-stride or a model caught in a gust of wind, these references can provide invaluable insight. Try to analyze how the fabric reacts to different poses and movements—this will help you grasp the subtleties of drapery in motion.
Lastly, practicing with live models is one of the best ways to hone your skills in capturing movement. Live models can provide a variety of poses and movements that can inspire your drawings. Consider setting up a session where models wear different types of clothing, allowing you to observe firsthand how various fabrics respond to movement. This experience can be eye-opening and will undoubtedly improve your ability to depict clothing realistically.
- What is the best way to practice capturing movement in clothing? Start by observing live models and taking quick sketches. Use reference images to understand how fabric behaves in different poses.
- How can I improve my understanding of different fabric types? Research various fabrics and their properties. Experiment with drawing them in different situations to see how they react to movement.
- Are there specific techniques for shading fabric in motion? Yes! Focus on using shadows and highlights to emphasize the folds and curves of the fabric, paying attention to the light source.
Using Reference Images
When it comes to drawing clothes and drapery, is like having a secret weapon in your artistic arsenal. Imagine trying to capture the intricate details of a flowing gown or the subtle folds of a wrinkled shirt without any visual aid. It would be like trying to navigate a maze blindfolded! Reference images not only help you understand how fabric behaves but also allow you to see the nuances of texture, light, and shadow that are crucial for creating realistic representations.
One of the best things about reference images is that they provide a snapshot of reality. Whether it's a photograph of a model in motion or a still life of draped fabric, these images serve as a guide to help you capture the essence of clothing. When selecting reference images, consider the following aspects:
- Lighting: Observe how light interacts with the fabric. Does it create soft shadows or sharp contrasts? This will influence how you shade your drawing.
- Texture: Different fabrics have unique textures, from smooth silks to rough linens. Pay attention to these details to add realism.
- Movement: Look for images that show clothing in motion. This can help you understand how fabric drapes and flows with the body.
To effectively use reference images, start by analyzing the composition. Break down the image into basic shapes and lines. This will help you simplify the drawing process and focus on the essential elements. For instance, if you're drawing a dress, identify the main shapes of the bodice, skirt, and sleeves before diving into the details. You could create a simple table to summarize your observations:
| Aspect | Observation |
|---|---|
| Type of Fabric | Silk, with a smooth texture |
| Lighting | Soft light creating gentle shadows |
| Movement | Flowing with the wind, creating dynamic folds |
Another fantastic way to enhance your skills is by practicing with live models. This approach allows you to see how clothing interacts with the human form in real time. It’s like having a 3D reference right in front of you! When working with live models, take your time to observe how the fabric falls and moves. You might find it helpful to sketch quick poses to capture the fluidity of the drapery. Remember, the more you practice, the more intuitive your understanding of fabric will become.
In conclusion, reference images are invaluable tools for any artist looking to improve their skills in drawing clothes and drapery. By analyzing these images and practicing with live models, you'll gain a deeper understanding of how fabric behaves, leading to more realistic and dynamic drawings. So grab your sketchbook, find some inspiring reference images, and let your creativity flow!
Analyzing Reference Material
When it comes to drawing clothes and drapery, the importance of analyzing reference material cannot be overstated. Think of reference images as your roadmap; they guide you through the intricate landscape of fabric behavior, folds, and textures. But how do you effectively dissect these images to extract the most useful information? First off, you should look for high-quality images that clearly showcase the fabric in question. Pay attention to the lighting, as it can dramatically affect how shadows and highlights appear. A well-lit image will help you understand the contours and shapes of the fabric better.
Next, focus on the details. Observe how the fabric interacts with the body and the environment. Are there any specific folds or creases that catch your eye? Take notes on how the fabric behaves in different poses. For example, a flowing dress will drape differently than a tight-fitting shirt. This is where your observational skills come into play. By breaking down the fabric's behavior, you’ll be able to replicate those nuances in your drawings.
To make the analysis more effective, consider creating a comparison table of different fabrics and their characteristics. This can serve as a quick reference guide when you’re in the drawing zone. Here’s a simple example:
| Fabric Type | Characteristics | Common Uses |
|---|---|---|
| Cotton | Soft, breathable, and holds shape well | T-shirts, casual wear |
| Silk | Luxurious, smooth, and has a natural sheen | Evening gowns, scarves |
| Wool | Warm, textured, and can be bulky | Coats, sweaters |
Additionally, don't hesitate to use a sketchbook to jot down your observations as you analyze reference material. Sketching out what you see can help solidify your understanding of how different fabrics behave. It’s like having a conversation with the fabric itself—you're not just looking at it; you're engaging with it. What does it remind you of? How does it flow? What emotions does it evoke? This personal connection will enrich your drawings and make them more relatable.
Lastly, remember that practice makes perfect. The more you analyze reference images, the better you'll become at understanding fabric dynamics. So, grab your sketchbook, find some great reference material, and start breaking it down. You'll be amazed at how much your drawing skills improve when you truly understand the fabric you’re trying to depict.
- What types of reference materials are best for drawing clothes? High-resolution photos, fashion magazines, and even real-life observations of clothing in motion are excellent sources.
- How can I improve my observational skills? Regularly practice sketching from life and analyze different types of fabric in various lighting conditions.
- Is it necessary to use reference images? While it's possible to draw from imagination, reference images can significantly enhance accuracy and realism in your artwork.
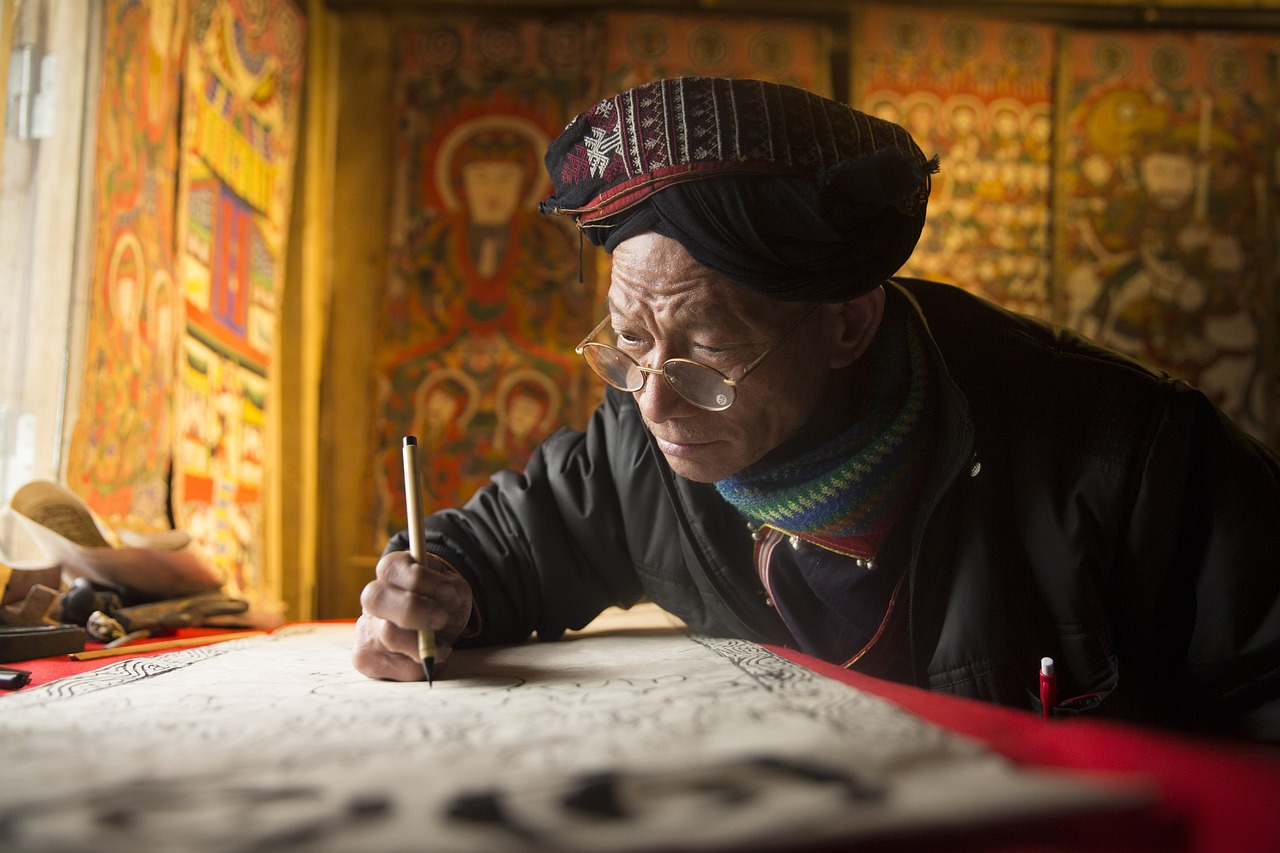
Practicing with Live Models
When it comes to mastering the art of drawing clothes and drapery, nothing beats the experience of practicing with live models. Working with real people allows you to observe the way fabric interacts with the human form in real time, giving you insights that photographs simply can't provide. Imagine being able to see how a silk dress flows as the model moves or how a heavy coat drapes over the shoulders—these nuances are crucial for creating lifelike representations in your artwork.
One of the most significant advantages of drawing from live models is the opportunity to capture dynamic poses. Unlike static images, live models can shift their weight, adjust their posture, and even change their facial expressions, all of which can affect how clothing falls and folds. This variability can bring your drawings to life, making them more engaging and realistic. When you set up a session with a model, consider asking them to pose in various positions to challenge yourself and expand your skills.
To make the most of your practice sessions, here are some tips to keep in mind:
- Choose the Right Model: Select a model who is comfortable with the poses you want to explore. Communication is key—discuss the types of clothing and movements you wish to capture.
- Plan Your Session: Before the session, think about the specific aspects of drapery you want to focus on. Are you interested in how the fabric folds around the body? Or perhaps how light interacts with different textures?
- Use Variety: Incorporate different fabrics and styles in your practice. From flowing dresses to structured jackets, each type of clothing offers unique challenges and learning opportunities.
Another aspect to consider is the environment in which you practice. A well-lit space can make a significant difference. Natural light can enhance the visibility of folds and shadows, allowing you to see the intricate details of the fabric more clearly. If you're working indoors, position your model near a window or use soft artificial lighting to mimic natural conditions.
Furthermore, don’t hesitate to take breaks during your drawing sessions. This allows both you and the model to rest and reassess the poses. During these breaks, take a moment to step back and analyze your work. Are you capturing the essence of the fabric? Are the folds realistic? Sometimes, a fresh perspective can help you identify areas for improvement.
Lastly, remember that practice makes perfect. The more you draw from live models, the more comfortable you will become with the complexities of clothing and drapery. Each session is an opportunity to refine your skills and develop your unique style. So, grab your sketchbook, find a willing model, and immerse yourself in the world of live drawing!
Q: How do I find live models for practice?
A: You can find live models through local art schools, community centers, or online platforms dedicated to artists. Networking with fellow artists can also lead to opportunities.
Q: What should I bring to a live drawing session?
A: Bring your preferred drawing materials, such as pencils, charcoal, or pastels, along with your sketchbook. It’s also helpful to have a portable easel and a timer if you plan to work in timed sessions.
Q: How long should each pose last?
A: It depends on the complexity of the pose. For longer poses, 10 to 20 minutes can be ideal, while quick sketches can be done in 1 to 5 minutes to capture movement and energy.
Frequently Asked Questions
- What are the best fabrics to draw for beginners?
For beginners, it's great to start with fabrics that have clear textures and patterns, such as cotton or linen. These materials are relatively easy to observe and replicate due to their distinct folds and creases. As you gain confidence, you can explore more complex fabrics like silk or velvet, which present unique challenges and opportunities for artistic expression.
- How can I improve my ability to draw folds in clothing?
Improving your ability to draw folds comes down to practice and observation. Start by sketching from real life or reference images, paying close attention to how fabric behaves with gravity. Try breaking down the folds into simpler shapes and practice drawing different fold types, such as angular or circular. Remember, the more you study how fabric interacts with the body, the better you'll become!
- What shading techniques should I use for drapery?
When shading drapery, consider using a combination of hatching and cross-hatching to create depth. Start with lighter shades for the highlights and gradually build up darker tones in the shadow areas. Using a blending tool can also help smooth out transitions between light and dark, making your folds appear more realistic. Don't forget to observe where the light hits the fabric to determine where to place shadows!
- How do I capture movement in my clothing drawings?
To capture movement, focus on the flow and gesture of the fabric. Observe how clothing shifts and stretches as the body moves. Use dynamic lines to depict the direction of movement, and don't be afraid to exaggerate certain aspects to convey motion. Practicing with live models can significantly enhance your ability to portray movement accurately.
- Why are reference images important in drawing clothes?
Reference images are crucial because they provide a visual guide to the complexities of fabric and drapery. They help you understand how different materials behave under various lighting conditions and how they interact with the body. Analyzing these images can sharpen your observational skills and improve the accuracy of your drawings.
- What should I look for when analyzing reference material?
When analyzing reference material, pay attention to the fabric's texture, the way it folds, and how light interacts with it. Look for patterns in the drapery and note the direction of the folds. Understanding these elements will help you replicate the fabric's behavior in your own drawings.
- How can practicing with live models enhance my drawing skills?
Practicing with live models allows you to observe real-time fabric movement and how it drapes on the human form. This experience can significantly enhance your understanding of proportions, perspective, and the subtleties of clothing dynamics. It also encourages you to adapt quickly and capture spontaneous poses, which is invaluable for developing your artistic skills.


