A Beginner's Guide to Figurative Drawing
Welcome to the exciting world of figurative drawing! If you've ever marveled at a beautifully rendered human figure in art, you might have felt a spark of inspiration to pick up a pencil and give it a try yourself. This article serves as an introduction to the essential techniques, tools, and tips for beginners in figurative drawing, helping you develop your skills and confidence in capturing the human form. Whether you're a complete novice or someone looking to refine your craft, this guide will provide you with the foundational knowledge and practical advice you need to embark on your artistic journey.
Figurative drawing revolves around representing the human figure, which can be both challenging and rewarding. To create accurate and expressive drawings, you need to grasp some foundational concepts and principles. First and foremost, it's essential to understand that drawing the human body is not just about replicating what you see; it's about interpreting and conveying emotion, movement, and the essence of the figure. Think of it as telling a story through lines and shapes. A well-executed figurative drawing can evoke feelings and transport the viewer into a different world.
Choosing the right tools is crucial for any artist. When it comes to figurative drawing, having the appropriate materials can make a significant difference in your creative process. Here, we will discuss various drawing materials, including pencils, papers, and erasers, that beginners should consider for their figurative drawing practice. Your toolkit doesn't have to be extensive; even a few quality items can set you on the path to success. Remember, it's not about how many tools you have, but how well you can use them!
Different pencils offer varying levels of hardness and darkness, which can significantly affect your drawing style. For beginners, it's essential to understand the pencil grading system, which ranges from H (hard) to B (black) and F (fine point). Here’s a quick breakdown:
| Pencil Type | Hardness | Best Use |
|---|---|---|
| H | Hard | Fine lines and details |
| HB | Medium | General use, sketching |
| B | Soft | Shading, bold lines |
By experimenting with different types of pencils, you'll discover which ones suit your style best. Don't hesitate to mix and match to achieve the desired effects in your drawings!
Graphite and charcoal each have unique qualities that can enhance your figurative drawing. Graphite is versatile and easy to control, making it ideal for detailed work. On the other hand, charcoal offers a rich, deep black that can create dramatic contrasts and expressive lines. When deciding which medium to use, consider the mood you want to convey. If you're looking for precision, stick with graphite. If you want to capture raw emotion and movement, charcoal might be your best bet.
The choice of paper can significantly affect your drawing's outcome. For figurative drawing, consider using textured paper that can hold the medium well. Here are a few types of paper to consider:
- Sketch Paper: Great for practice and quick studies.
- Drawing Paper: Offers a smooth surface, ideal for detailed work.
- Charcoal Paper: Has a rough texture that grips charcoal well.
Ultimately, your choice of paper should align with your drawing style and the medium you choose to work with.
Mastering basic techniques is vital for effective figurative drawing. Start with simple exercises that focus on shading, contouring, and perspective. Shading adds depth and dimension to your drawings, while contouring helps define the shape of the figure. Perspective is crucial for creating a sense of space and realism. Think of these techniques as the building blocks of your artistic foundation. The more you practice, the more confident you will become in your abilities!
A solid grasp of human proportions and anatomy is crucial for accurate figurative drawing. Understanding how the body is structured can help you create more lifelike representations. Start by familiarizing yourself with the standard proportions of the human body; for instance, the average adult is about 7.5 heads tall. This knowledge will serve as a guideline for your drawings, helping you maintain balance and realism.
Understanding body proportions helps create realistic figures. Here are some key points to remember:
- The head is typically 1/8 of the total height.
- The shoulders are about 2 head widths wide.
- The arms reach down to the mid-thigh when relaxed.
These proportions can vary from person to person, but they provide a solid starting point for your drawings.
Familiarity with basic anatomy enhances the accuracy of your drawings. Focus on essential muscle groups and bone structures that artists should learn, such as the major muscle groups in the arms and legs. Understanding how these muscles work will allow you to depict movement and tension more effectively. Think of anatomy as the framework that supports your artistic expression.
Gesture drawing is a quick way to capture movement and form. It encourages you to draw with speed and fluidity, focusing on the essence of the pose rather than the details. This practice is vital for beginners, as it helps develop your eye for movement and proportion. Set a timer for 1-5 minutes and try to capture the figure in that time frame. You'll be amazed at how much you can learn from these quick sketches!
A well-composed drawing can elevate your artwork. Think of composition as the arrangement of elements within your drawing. Consider the balance, focal points, and flow of your figures. Experiment with different layouts to see how they change the viewer's experience. A dynamic composition can make a simple drawing feel alive and engaging!
Inspiration can come from various sources. Explore different styles and artists to find what resonates with you. Here are some resources to help you on your journey:
- Books: Look for art books that focus on figurative drawing techniques.
- Online Tutorials: Websites and platforms like YouTube offer countless tutorials from professional artists.
- Art Communities: Join online forums or local art groups to share your work and get feedback.
Remember, every artist's journey is unique, and finding your voice takes time and practice. Stay curious, keep experimenting, and most importantly, enjoy the process!
Q: What is the best way to start figurative drawing?
A: Begin by practicing basic shapes and proportions. Use reference images or live models to study the human form, and don't be afraid to make mistakes; they are part of the learning process!
Q: How often should I practice drawing?
A: Consistency is key! Aim to draw a little every day, even if it's just for 15-30 minutes. Regular practice will help you improve over time.
Q: Do I need expensive materials to create good drawings?
A: Not at all! While quality materials can enhance your experience, it's more important to focus on your technique and practice. Start with basic tools and upgrade as you grow.
Q: How can I find my style in figurative drawing?
A: Experiment with different techniques and mediums. Study various artists and styles, and allow your unique voice to emerge through practice and exploration.

Understanding the Basics of Figurative Drawing
Figurative drawing is not just about sketching a human form; it’s an intricate dance between observation and expression. To truly capture the essence of the human figure, you need to understand a few foundational concepts. First and foremost, it's essential to grasp the basic shapes that make up the human body. Think of the body as a collection of simple forms—spheres for the head, cylinders for the arms and legs, and boxes for the torso. This simplification allows you to build a solid structure upon which you can layer details.
Moreover, understanding the line of action is crucial. This is an imaginary line that flows through the figure, capturing its movement and energy. By starting your drawing with this line, you can create a sense of dynamism and life in your artwork. Imagine drawing a dancer; instead of focusing solely on the limbs, consider how the body moves through space, almost like a wave. This perspective will help you create more fluid and engaging compositions.
Another vital aspect of figurative drawing is light and shadow. Mastering how light interacts with the human form can elevate your drawings from flat to three-dimensional. Pay attention to where the light source is coming from and how it casts shadows on the body. A well-placed shadow can add depth and realism, making your figure pop off the page. For instance, when drawing a face, the shadows under the chin or around the nose can significantly enhance the likeness and dimension.
Additionally, understanding proportions is key. The human body follows specific proportional guidelines that artists can use as a reference. For instance, the height of an average adult is roughly seven to eight heads tall. This proportionality helps in achieving balance and realism in your drawings. As you become more familiar with these proportions, you can begin to play with them, exaggerating certain features for stylistic effects or to convey emotion.
To further enhance your understanding, consider practicing with a variety of poses. You can use references from photographs, live models, or even yourself in a mirror. The more you practice, the more you’ll develop a keen eye for detail and movement. Remember, every artist starts somewhere, and the journey of learning figurative drawing is filled with experimentation and discovery.
In summary, figurative drawing is a blend of observation, technique, and creativity. By focusing on basic shapes, lines of action, light and shadow, and proportions, you can build a strong foundation for your artistic journey. Embrace the process, be patient with yourself, and most importantly, enjoy the magic of bringing the human form to life on paper.

Essential Tools and Materials
When diving into the world of figurative drawing, having the right tools at your disposal can make all the difference. It's like trying to cook a gourmet meal without the right kitchen gadgets—frustrating and often disappointing! In the realm of art, your tools are your best friends, guiding you to create stunning representations of the human form. So, let’s explore the essential materials that every beginner should consider, ensuring your artistic journey is both enjoyable and productive.
First and foremost, the choice of pencils is critical. Pencils come in a variety of hardness levels, ranging from hard (H) to soft (B). The harder the pencil, the lighter the mark it makes, while softer pencils produce darker lines. For beginners, it’s beneficial to have a range of pencils on hand. A typical set might include:
- H pencils for fine lines and detailed work.
- B pencils for bold, expressive strokes.
- 2B and 4B pencils for shading and depth.
Next, let’s talk about charcoal. This medium is a favorite among many artists for its rich, deep blacks and ability to create dramatic contrasts. While graphite is excellent for precision, charcoal allows for more expressive and fluid lines. It’s particularly useful in capturing the essence of the human figure in motion. However, keep in mind that charcoal can be messy, so having a blending stump or tortillon handy will help you achieve smooth transitions in your shading.
The choice of paper is equally important. Not all paper is created equal, and the type you choose can significantly influence the final outcome of your drawing. For figurative drawing, consider using:
- Sketch paper: Ideal for practice and quick studies.
- Drawing paper: A heavier weight that can handle erasing and shading.
- Charcoal paper: Specifically designed for use with charcoal, featuring a textured surface that holds the medium beautifully.
Additionally, having a reliable eraser is essential. A kneaded eraser is particularly useful as it can lift graphite without damaging the paper, allowing for corrections and highlights without leaving smudges. Combine this with a standard vinyl eraser for those times you need a clean slate, and you'll be well-equipped to tackle any mistakes that come your way.
Lastly, consider investing in a sturdy drawing board. A drawing board provides a stable surface, especially if you prefer to work on larger sheets of paper. It can also be helpful when working outside or in various locations, ensuring that you can draw comfortably no matter where your creativity takes you.
In summary, the right tools and materials can elevate your figurative drawing experience. By investing in quality pencils, charcoal, paper, and erasers, you’ll set a solid foundation for your artistic journey. Remember, each tool serves a purpose, and understanding how to use them effectively will help you express your creativity and capture the beauty of the human form.
Q: What type of pencil should I start with as a beginner?
A: It's best to start with a range of pencils, including H, HB, and B grades. This variety will allow you to experiment with different techniques and styles.
Q: Can I use regular printer paper for drawing?
A: While you can use printer paper for practice, it may not hold up well to erasing and shading. Investing in quality drawing paper will yield better results.
Q: Is charcoal difficult to work with?
A: Charcoal can be a bit messy, but it offers a unique quality to your drawings. With practice, you'll learn to control it effectively and create stunning pieces.
Q: How often should I practice figurative drawing?
A: Consistency is key! Try to practice several times a week to build your skills and confidence. Even short sessions can be incredibly beneficial.
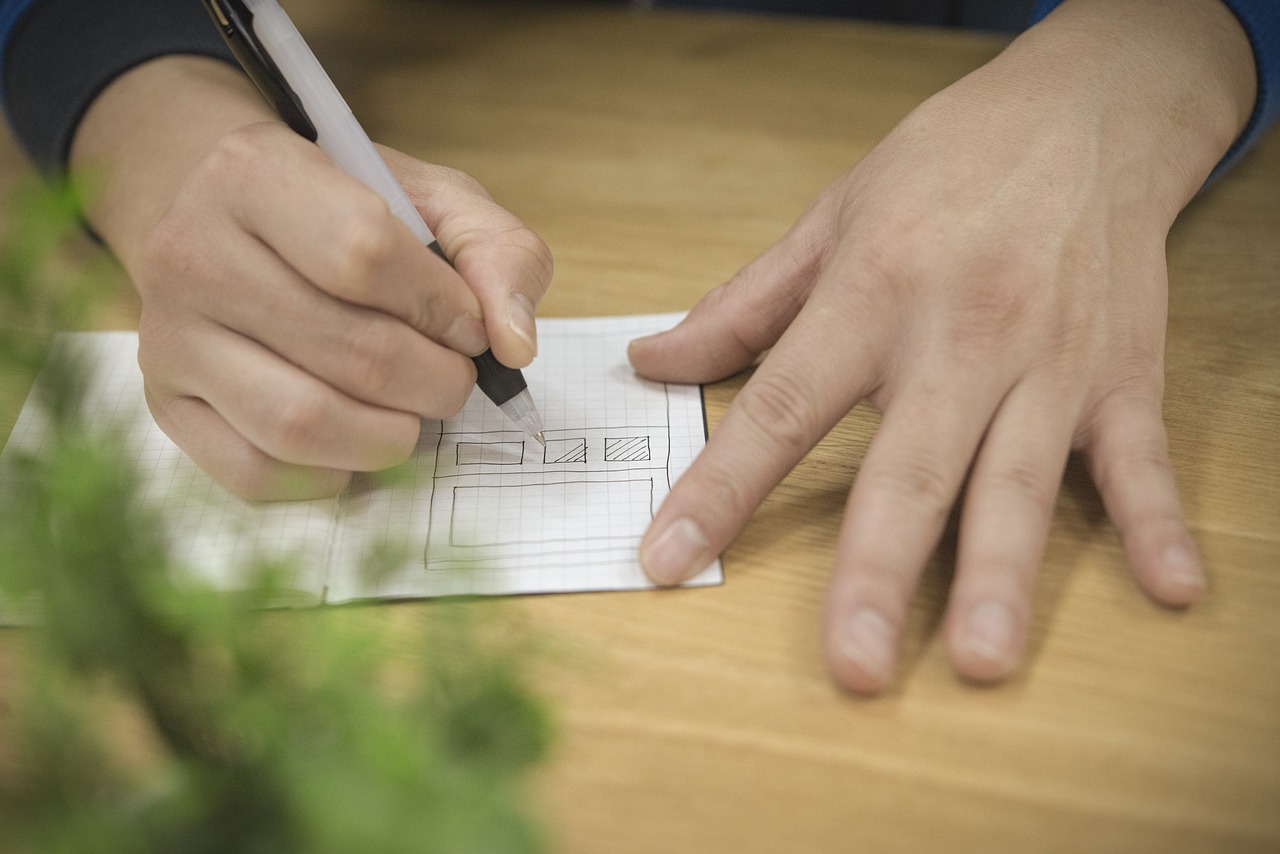
Types of Pencils and Their Uses
When it comes to figurative drawing, the type of pencil you choose can significantly impact your artwork. Each pencil has its unique characteristics, and understanding these can help you select the right one for your drawing style. Generally, pencils are categorized by their hardness, which affects the darkness of the lines they produce. The most common grading system is the H (hard), B (black), and F (fine point) scale. Here’s a quick breakdown:
| Grade | Characteristics | Best Used For |
|---|---|---|
| H | Hard and light | Fine lines, detailed work |
| B | Soft and dark | Shading, bold strokes |
| F | Somewhere in between | General sketching |
For beginners, it’s essential to start with a range of pencils to explore their effects. A typical set might include:
- 2H Pencil: Great for fine details and light lines.
- HB Pencil: A versatile choice for general sketching.
- 4B Pencil: Perfect for shading and creating depth.
- 6B Pencil: Ideal for rich, dark lines and expressive strokes.
Using a combination of these pencils can help you achieve a more dynamic range in your drawings. For instance, starting with a harder pencil like 2H allows you to sketch the basic outlines without the risk of smudging, while switching to a softer pencil like 6B can help you add depth and shadow.
Additionally, consider the pencil grip and drawing technique. The way you hold your pencil can create different effects. A loose grip allows for fluid strokes, perfect for gesture drawing, while a firmer grip can provide precision for detailed work. Experimenting with these techniques will help you find your unique style.
In summary, understanding the types of pencils and their uses is crucial for any aspiring figurative artist. By familiarizing yourself with the pencil grades and practicing different techniques, you can enhance your drawing skills and expressiveness. Remember, the right pencil is not just a tool; it's an extension of your creativity!
Graphite vs. Charcoal
When it comes to figurative drawing, choosing between graphite and charcoal can feel like picking a favorite child—each medium has its own distinct personality and advantages. Understanding the differences between these two popular drawing materials is crucial for any aspiring artist. Let's dive into their unique characteristics and see when you might prefer one over the other.
Graphite is often the go-to choice for beginners due to its ease of use and versatility. It comes in various degrees of hardness, ranging from soft (B) to hard (H), allowing artists to achieve a wide range of tones and textures. Graphite is perfect for detailed work and fine lines, making it an excellent choice for capturing intricate details in figurative drawing. Additionally, it smudges less than charcoal, which can be a significant advantage when you're trying to maintain clean lines and sharp edges.
On the other hand, charcoal offers a rich, deep black that can create stunning contrasts and dramatic effects. It tends to be more expressive than graphite, allowing for bold strokes and softer shading. Charcoal is particularly effective for creating a sense of movement and depth in your drawings. However, it can be messier and requires a bit more practice to control, as it smudges easily and can leave behind residue on your hands and paper.
To give you a clearer picture, here’s a quick comparison of the two mediums:
| Feature | Graphite | Charcoal |
|---|---|---|
| Texture | Smooth, fine lines | Rich, bold strokes |
| Control | Easy to control, less smudging | More challenging, prone to smudging |
| Shading | Good for detailed shading | Excellent for dramatic shading |
| Cleanliness | Less messy | Messy, can get on hands and paper |
Ultimately, the choice between graphite and charcoal comes down to your personal style and the effects you want to achieve in your figurative drawings. Many artists find that using both mediums in tandem can result in stunning artwork, combining the precision of graphite with the expressive qualities of charcoal. So, why not experiment with both and discover which one resonates with your artistic voice?

Paper Selection for Drawing
When it comes to figurative drawing, the choice of paper is just as crucial as the tools you use. Think of paper as the canvas for your creativity; it can either enhance your work or hinder it. The right paper will not only support your drawing techniques but also affect the overall feel of your artwork. So, what should you consider when selecting paper for your figurative drawings? Let's dive into the details!
First off, you need to think about the texture of the paper. Different textures can create different effects in your drawings. For instance, smooth paper is ideal for detailed work and fine lines, while textured paper can add depth and interest to your shading. If you’re planning to use charcoal, a rougher texture will help grip the medium better, allowing for more expressive strokes.
Next, consider the weight of the paper. Paper weight is measured in grams per square meter (gsm), and it can significantly influence how your materials perform. Lighter papers (around 150-200 gsm) are great for sketching and practice, but they may not hold up well to heavy applications of medium. On the other hand, heavier papers (300 gsm and above) are more durable and can handle multiple layers of shading and erasing without tearing. This is particularly beneficial when working on intricate figurative pieces.
Another factor to consider is the color of the paper. While white paper is the most common choice, colored papers can add a unique twist to your drawings. For example, using a toned paper can allow you to create dynamic contrasts with your highlights and shadows. This technique can be especially effective in figurative drawing, where capturing the play of light and shadow is essential.
Lastly, always think about the purpose of your drawing. Are you sketching for practice, or are you creating a final piece for display? For practice, any sketch paper will do, but for final works, investing in high-quality drawing paper can make a significant difference in the presentation and longevity of your art.
In summary, when selecting paper for your figurative drawing, keep these aspects in mind:
- Texture: Smooth for detail, textured for shading.
- Weight: Lighter for sketches, heavier for final works.
- Color: White for traditional, toned for contrast.
- Purpose: Practice vs. final presentation.
Choosing the right paper can be a game-changer in your artistic journey. It's all about experimenting and finding what works best for you. So grab a few different types of paper and start testing them out! You'll soon discover which ones resonate with your style and enhance your figurative drawing skills.
Q: What type of paper is best for beginners?
A: For beginners, a medium-weight sketch paper (around 200 gsm) is a great choice. It’s versatile and can handle various mediums without being too expensive.
Q: Can I use regular printer paper for drawing?
A: While you can use printer paper for quick sketches, it’s not ideal for detailed work or heavy applications of medium, as it can tear easily.
Q: Is watercolor paper suitable for drawing?
A: Yes, watercolor paper can be used for drawing, especially if you plan to use wet mediums like ink or watercolor in your figurative work. Just ensure it’s the right weight for your techniques.
Q: How do I choose between charcoal and graphite paper?
A: If you're using charcoal, opt for a rougher paper that will hold the medium better. For graphite, smooth paper is typically preferred for detailed work.
Essential Techniques for Beginners
When starting your journey into the world of figurative drawing, mastering some essential techniques is crucial for developing your skills. Think of these techniques as the building blocks of your artistic toolbox; they will empower you to express your ideas and capture the human form with greater accuracy and flair. Let's dive into some fundamental techniques that every beginner should focus on.
First and foremost, shading is a technique that adds depth and dimension to your drawings. By varying the pressure on your pencil or charcoal, you can create a range of values from light to dark. This gradient effect can make your figures look more lifelike, as it mimics how light interacts with surfaces. A common practice is to use a technique called hatching, where you draw parallel lines to build up tone, or cross-hatching, where you layer lines in different directions to create richer shadows.
Another vital technique is contouring. This involves drawing the outlines of your subject, capturing its shape and form. Contour drawing encourages you to observe the figure closely, focusing on the curves and angles that define its structure. A fun exercise is to try blind contour drawing, where you draw without looking at your paper. This not only enhances your observation skills but also helps you develop a more intuitive understanding of the human form.
Perspective is also key in figurative drawing. Understanding how to represent depth on a two-dimensional surface will elevate your work significantly. It involves recognizing how objects appear smaller as they recede into the distance. A simple way to practice perspective is to set up a still life with objects of varying sizes and distances from your viewpoint. Draw them, paying attention to how their proportions change based on their placement in space.
Lastly, don't underestimate the power of gesture drawing. This technique captures the essence of a pose in a short amount of time, usually between 30 seconds and 5 minutes. Gesture drawing is all about movement and flow rather than details. It helps you loosen up and encourages spontaneity in your work. You can practice this by attending life drawing sessions or using online resources that provide timed poses.
As you embark on your figurative drawing journey, remember that practice is the key to improvement. Set aside time each day to work on these techniques. Whether it’s shading a simple sphere or sketching a dynamic pose, each stroke brings you closer to mastering the art of figurative drawing.
- What materials do I need to start figurative drawing?
All you need is a sketchbook and a few pencils. As you progress, you can explore other materials like charcoal and different types of paper. - How often should I practice?
Consistency is crucial! Aim to draw a little bit every day, even if it's just quick sketches. - Can I use photographs for reference?
Absolutely! Using photographs can help you understand proportions and details, but try to also draw from life whenever possible for the best results.

Understanding Proportions and Anatomy
When it comes to figurative drawing, is like having a secret map that guides you through the intricate landscape of the human form. Imagine trying to navigate a city without a map; you'd likely get lost, right? Similarly, without a solid grasp of proportions and anatomy, your drawings may not capture the essence of the human figure accurately. This section will delve into the key aspects of human anatomy that every beginner should focus on to elevate their artistic skills.
First things first, let's talk about proportions. The human body follows certain proportional guidelines that, when understood, can help you create more realistic and lifelike figures. For instance, did you know that the average adult human body is roughly seven to eight heads tall? This means that if you measure the height of the head, you can multiply it to determine the overall height of the figure. Here’s a quick breakdown of standard body proportions:
| Body Part | Proportion (in heads) |
|---|---|
| Head | 1 |
| Torso | 2.5 |
| Legs | 4 |
| Arms | 3.5 |
Understanding these proportions is crucial for beginners. It allows you to construct a figure that feels balanced and natural. However, keep in mind that these are just guidelines; artistic interpretation is key! Sometimes, exaggerating certain features can add character and emotion to your drawing, much like how a good actor brings a script to life.
Now, let’s shift our focus to anatomy. Having a basic understanding of human anatomy enhances your ability to depict the figure accurately. It's not just about knowing where the muscles and bones are; it's about understanding how they interact and move. For artists, familiarizing yourself with essential muscle groups and bone structures is vital. Here are some of the critical areas to focus on:
- Major Muscle Groups: Learn about the biceps, triceps, quadriceps, and more. Understanding how these muscles work together can help you portray movement and tension effectively.
- Bone Structures: Familiarize yourself with the skeletal system. Knowing how bones connect and move can prevent your figures from looking stiff or unnatural.
As you practice, consider using reference images or even studying anatomy books specifically designed for artists. These resources can provide valuable insights into how the body functions, allowing you to create more dynamic and believable figures.
Incorporating both proportions and anatomy into your practice will not only improve your technical skills but also enhance the emotional depth of your work. Think of it as building a strong foundation for a house; without a solid base, everything else may crumble. So, take the time to study and practice these concepts—they're the cornerstones of effective figurative drawing!
Q: Why are proportions important in figurative drawing?
A: Proportions help create a sense of realism and balance in your drawings. They guide you in constructing figures that look natural and lifelike.
Q: Do I need to know anatomy to draw the human figure?
A: While it's not strictly necessary, understanding basic anatomy can significantly enhance your ability to depict movement and form accurately.
Q: What resources can I use to learn more about proportions and anatomy?
A: There are many resources available, including anatomy books for artists, online courses, and community workshops focused on figure drawing.

Proportions of the Human Body
Understanding the is fundamental for any artist looking to create realistic and expressive figurative drawings. When we talk about proportions, we refer to the relationships between different parts of the body, which can significantly affect the overall appearance of your artwork. Think of proportions as the building blocks of your figure; if they are off, the entire structure can look awkward or distorted. The classic method of measuring proportions is often based on the "head" as a unit of measurement. For instance, the average adult human figure is typically about 7.5 to 8 heads tall. This means that if you measure the height of the head, you can multiply that by 7.5 or 8 to get the total height of the figure.
To break it down further, here’s a simple guideline to keep in mind when sketching:
| Body Part | Proportion (in heads) |
|---|---|
| Head | 1 |
| Neck | 1/2 |
| Shoulders | 2 |
| Torso | 3-4 |
| Legs | 4-5 |
This table illustrates how each part of the body relates to the head. For example, the shoulders span about two heads wide, while the torso can range from three to four heads in length. Understanding these proportions will help you create a more balanced and harmonious figure.
It's also essential to consider the differences in proportions among various body types. For instance, children have different proportions compared to adults; they are generally about 4 heads tall, with larger heads relative to their bodies. This is an important aspect to keep in mind, especially if you are drawing figures of different ages. As you practice, try to observe and measure the proportions of real-life models or reference images. This will not only improve your understanding but also enhance your ability to capture the essence of the human form.
Another useful technique is to practice drawing the skeleton as it lays the foundation for understanding how muscles and skin fit over the bones. By getting comfortable with the underlying structure, you'll find it easier to depict movement and create dynamic poses. Remember, the goal isn't just to replicate what you see, but to convey the character and emotion of the figure. So, don’t shy away from experimenting with different styles and interpretations of human proportions!
As you advance in your figurative drawing journey, keep in mind that mastering proportions is an ongoing process. Regular practice, along with studying anatomy, will help you develop a keen eye for detail and improve your overall drawing skills. Embrace the challenge and enjoy the journey of bringing the human figure to life on your canvas!
- What is the importance of proportions in figurative drawing? Proportions help create realistic representations of the human body, ensuring that different body parts relate correctly to one another.
- How can I improve my understanding of human proportions? Regular practice, studying anatomy, and using reference images can significantly enhance your grasp of human proportions.
- Are there different proportions for different body types? Yes, body proportions can vary among children, adults, and even between different individuals. It's essential to adapt your approach based on the subject.

Basic Anatomy for Artists
Understanding basic anatomy is like having a secret key that unlocks the door to creating lifelike figures in your drawings. When you know how the human body is structured, you can represent it more accurately, making your art not just look good, but also feel real. Imagine trying to build a house without knowing how many walls it needs or where the doors should go. That's what drawing can feel like without a grasp of anatomy!
So, what should you focus on as a beginner? First, familiarize yourself with the major muscle groups and bone structures. This knowledge will help you understand how the body moves and how to depict those movements in your artwork. Here are a few key areas to concentrate on:
- Skeleton Structure: The skeleton serves as the framework of the body. Knowing the positions of bones like the femur, humerus, and ribcage will give you a solid foundation.
- Major Muscle Groups: Learn about the muscle groups that define the body's shape. The biceps, triceps, quadriceps, and deltoids are just a few that can dramatically affect how a figure looks.
- Joint Movement: Understanding how joints work is crucial. Joints like the shoulder, elbow, and knee allow for a range of motion that can add dynamism to your drawings.
Next, consider the proportions of the body. A common guideline is the "eight heads tall" rule, which suggests that an average adult human figure can be divided into eight equal sections, each the height of the head. This helps in maintaining correct proportions and ensures that your figures look balanced and realistic. However, remember that this is just a guideline; variations exist based on individual body types.
To make your learning process even more effective, you might want to refer to anatomical charts or online resources that provide visual references. Observing real-life models can also be invaluable. Whether it’s a friend posing or a professional model, studying the human form in three dimensions will enhance your understanding and skills.
Lastly, practice is key! The more you draw, the better you’ll become at capturing the nuances of the human body. Don't be afraid to make mistakes; each error is a stepping stone toward improvement. You might even want to keep a sketchbook dedicated to anatomy studies, where you can experiment with different poses and angles.
Q: Why is understanding anatomy important for artists?
A: Understanding anatomy helps artists create more realistic and expressive figures. It allows you to depict movement accurately and understand how different body parts interact.
Q: Do I need to know every muscle and bone to draw well?
A: No, you don't need to know every detail. Focus on the major muscle groups and skeletal structures that will help you in your figurative drawing.
Q: How can I practice anatomy drawing?
A: You can practice by drawing from life, using anatomical reference books, or even online resources. Gesture drawing is also a great way to capture the essence of movement.
Practicing Gesture Drawing
Gesture drawing is an exhilarating way to capture the essence of movement and form in the human figure. Think of it as a dance between your pencil and the paper; it’s all about speed, fluidity, and feeling. Instead of getting bogged down with every minute detail, gesture drawing encourages you to focus on the overall pose and energy of your subject. This practice is essential for beginners because it helps you develop a keen sense of observation and improves your ability to render dynamic figures.
When you start practicing gesture drawing, aim for quick sketches that typically range from 30 seconds to 2 minutes. These short sessions force you to make swift decisions about what to include in your drawing. Rather than worrying about perfection, you’ll learn to trust your instincts and capture the spirit of your subject. Here are some key points to keep in mind as you embark on your gesture drawing journey:
- Use a light hand: Start with light lines to allow for adjustments as you refine your drawing.
- Focus on movement: Try to capture the flow and rhythm of the pose rather than detailing every contour.
- Practice regularly: Like any skill, the more you practice, the better you’ll become. Set aside time each week for gesture drawing.
To make the most out of your gesture drawing sessions, consider using reference materials like live models or online resources. Many websites and apps provide timed poses for gesture drawing, allowing you to practice at your own pace. You might also want to gather a group of friends or fellow artists to engage in a gesture drawing session together. Not only is it more fun, but you can also provide each other with valuable feedback.
Another effective technique is to combine gesture drawing with other drawing methods. For instance, after completing a series of quick gestures, pick one pose and take some time to develop it further. This approach allows you to maintain the energy of your initial sketches while adding detail and refinement.
In conclusion, practicing gesture drawing is a fantastic way to enhance your artistic skills. It helps you understand the human form better and encourages a more spontaneous and expressive style. So grab your sketchbook, set a timer, and let your pencil dance across the page!
Q: How often should I practice gesture drawing?
A: Aim to practice gesture drawing at least a few times a week. Regular practice will help you become more comfortable with capturing movement and form.
Q: What materials do I need for gesture drawing?
A: All you really need is a sketchbook and a pencil. However, some artists prefer using charcoal or ink for a different feel. The key is to use materials that allow for quick and expressive marks.
Q: Can I use photographs for gesture drawing?
A: While live models are ideal for capturing movement, photographs can also be useful. Just remember that they may not convey the same sense of dynamic energy as a live pose.
Q: How do I know if my gesture drawings are improving?
A: Improvement often comes with consistency and practice. Keep your older drawings to compare them with your newer ones. You should start to notice a more fluid and confident style over time.
Creating Dynamic Compositions
When it comes to figurative drawing, composition is the secret sauce that can transform a simple sketch into a captivating masterpiece. Think of composition as the blueprint of your artwork; it determines how the elements interact and guide the viewer's eye throughout the piece. A well-composed drawing not only highlights the human figure but also creates a narrative that pulls the audience in. So, how do you create these dynamic compositions? Let’s explore some fundamental principles!
First, consider the Rule of Thirds. Imagine dividing your canvas into nine equal parts using two horizontal and two vertical lines. By placing your main subject along these lines or at their intersections, you can create a more balanced and engaging composition. This technique encourages movement and helps to avoid a static feel in your artwork. For instance, if you’re drawing a figure, positioning it slightly off-center can lead to a more dynamic visual flow.
Next up is balance. Balance in composition can be symmetrical or asymmetrical. Symmetrical balance is when elements are evenly distributed around a central axis, creating a sense of harmony. On the other hand, asymmetrical balance involves arranging elements of varying visual weight to create a more dynamic and interesting look. Think of it like a seesaw; it doesn’t always have to be perfectly balanced to work! You might have a large figure on one side of the canvas, balanced out by smaller elements or negative space on the other. This contrast can create tension and intrigue.
Another key element is leading lines. These are lines within your artwork that draw the viewer's eye towards the focal point. They can be literal lines, like the edge of a table or the horizon, or they can be implied lines formed by the arrangement of figures or elements. For example, if you’re drawing a group of people, their gazes or gestures can create invisible lines that guide the viewer’s attention to the main subject. This technique not only enhances the flow of your composition but also helps in storytelling.
Don’t forget about framing. Just like a photograph, framing can help isolate your subject and draw attention to it. You can use elements within your drawing, such as trees, doorways, or even other figures, to frame your main subject. This technique creates depth and adds layers to your composition, making it more engaging for the viewer. Imagine a figure standing in a doorway, with the doorframe leading the viewer’s eye directly to them; it’s an effective way to create focus!
Finally, consider the use of negative space. Negative space refers to the areas around and between your subjects. It’s often overlooked, yet it plays a crucial role in composition. By intentionally leaving areas of your drawing blank or less detailed, you can create contrast and emphasize your main subject. This technique can evoke feelings of simplicity and elegance, allowing the viewer to breathe and appreciate the artwork as a whole.
In summary, creating dynamic compositions in figurative drawing is all about understanding how to arrange your elements to guide the viewer’s eye and tell a story. By incorporating the Rule of Thirds, balancing your elements, using leading lines, framing your subject, and being mindful of negative space, you can elevate your artwork to new heights. Remember, practice makes perfect, so don’t hesitate to experiment with these techniques as you develop your unique style!
- What is the Rule of Thirds and how do I use it? The Rule of Thirds involves dividing your canvas into nine equal sections and placing your main subject along these lines or their intersections for a more balanced composition.
- How can I create balance in my drawings? You can achieve balance by using symmetrical arrangements or asymmetrical placements of elements to create visual interest.
- What are leading lines and why are they important? Leading lines are elements that guide the viewer's eye towards the focal point of your drawing, enhancing the flow and storytelling aspect of your artwork.
- How do I effectively use negative space? Negative space is the area around your subject. By leaving some areas blank, you can create contrast and emphasize your main subject more effectively.
Finding Inspiration and Resources
When it comes to figurative drawing, finding inspiration can sometimes feel like searching for a needle in a haystack. But fear not! There are countless avenues to explore that can ignite your creativity and help you develop your skills. Whether you’re looking for stunning visuals, helpful tutorials, or supportive communities, the resources available today are abundant and diverse.
One of the best places to start is by immersing yourself in the world of art books. These tomes are treasure troves of knowledge, showcasing everything from classical techniques to contemporary styles. Look for books that focus on figurative drawing, anatomy, and even art history. Titles like "Figure Drawing for All It's Worth" by Andrew Loomis and "Drawing the Head and Hands" by Andrew Loomis can provide invaluable insights and guidance. Additionally, consider exploring online platforms like Amazon or Goodreads for reviews and recommendations on the best art books out there.
Another fantastic resource is the internet itself! Websites like YouTube offer a plethora of video tutorials that can visually guide you through various techniques. Channels dedicated to art often feature live drawing sessions, tips on anatomy, and even critiques of your work. Engaging with these videos can be a game changer, as they allow you to see the process in action, making the learning experience much more enjoyable.
Don’t overlook the power of social media. Platforms like Instagram and Pinterest are filled with talented artists who share their work and processes. By following artists whose styles resonate with you, you can gain insights into their techniques and find inspiration in their unique approaches to figurative drawing. Moreover, consider joining art-focused groups on Facebook or Reddit, where you can connect with fellow artists, share your work, and receive constructive feedback.
If you're looking for a more structured approach, consider enrolling in online courses or workshops. Websites like Skillshare and Udemy offer a variety of courses tailored to different skill levels. These platforms often provide step-by-step instructions, allowing you to practice alongside experienced instructors. Participating in these courses can significantly boost your confidence and help you refine your skills.
Lastly, don't forget to visit local art galleries and museums. Observing the works of established artists can provide inspiration that’s hard to replicate elsewhere. Take note of how they capture the human form and the emotions they convey through their art. Sometimes, just standing in front of a stunning piece can spark an idea or motivate you to pick up your pencil and draw.
In summary, inspiration for your figurative drawing journey can come from numerous sources. Whether it’s through books, online tutorials, social media, courses, or direct exposure to art in galleries, the key is to remain open and curious. The more you explore, the more you’ll discover what resonates with you and enhances your artistic practice.
Q: How can I overcome artist's block when drawing figures?
A: Try engaging in quick gesture drawings or drawing from life to shake things up. Sometimes, stepping away from your usual routine can help reignite your creativity.
Q: What are the best materials for beginners in figurative drawing?
A: Start with a range of pencils (HB to 6B), quality drawing paper, and an eraser. As you progress, you can experiment with different mediums like charcoal or colored pencils.
Q: How often should I practice figurative drawing?
A: Consistency is key! Aim to practice a little every day, even if it’s just for 15-30 minutes. Regular practice will help you improve over time.
Q: Where can I find models for drawing?
A: Consider using online resources like photo reference websites or attending local life drawing sessions. Many artists also use friends or family members as models.
Frequently Asked Questions
- What is figurative drawing?
Figurative drawing is the art of representing the human figure in a realistic and expressive way. It involves understanding proportions, anatomy, and the use of various drawing techniques to capture the essence of the human form.
- Do I need special tools to start figurative drawing?
While you don’t need fancy tools to begin, having the right materials can enhance your experience. Basic supplies like pencils, erasers, and quality paper are essential. As you progress, you might explore other mediums like charcoal or ink.
- How do I choose the right pencil for drawing?
Pencils come in different hardness levels, which affect the darkness of the lines you create. For detailed work, softer pencils (like 2B or 4B) are great, while harder pencils (like H or 2H) are perfect for fine lines and lighter shading.
- What are the best practices for understanding human proportions?
One effective method is to learn the basic proportions of the human body, such as the head-to-body ratio. Typically, an adult human is about 7.5 heads tall. Practicing with reference images can also help you grasp these proportions better.
- Why is gesture drawing important?
Gesture drawing helps you capture the movement and energy of the human figure quickly. It trains your eye and hand to observe and replicate poses, making your drawings more dynamic and lifelike.
- Where can I find inspiration for my figurative drawings?
Inspiration can come from everywhere! Look for it in art books, online tutorials, and even in nature. Joining art communities or attending life drawing sessions can also spark your creativity and provide valuable feedback.
- How can I improve my figurative drawing skills?
Practice is key! Regularly sketching, studying anatomy, and experimenting with different techniques will help you improve. Don’t forget to seek constructive criticism from peers or mentors to refine your skills further.


