
Drawing Plants and Flowers: Easy Techniques
Are you ready to dive into the enchanting world of botanical art? Drawing plants and flowers can be a delightful and rewarding experience, whether you're a budding artist or someone who simply enjoys the beauty of nature. This article explores simple and effective techniques that will help you transform your blank canvas into a vibrant garden of creativity. With the right tips, tools, and methods, you can enhance your botanical art skills and capture the essence of the flora around you. So, grab your sketchbook and let’s get started!
To draw plants and flowers effectively, start by breaking them down into basic shapes. Think of it like building a house; you wouldn't start with the roof, would you? Instead, you lay a solid foundation. Similarly, when you simplify a flower into its basic components—like circles for petals and ovals for leaves—you make the drawing process much more manageable. This foundational technique not only simplifies your approach but also aids in achieving accurate proportions and perspectives. By focusing on these shapes, you can gradually add complexity and detail, leading to a more polished final piece.
Selecting the right drawing tools is crucial for achieving your desired effects. The world of art supplies can be overwhelming, but understanding your options can help narrow it down. From pencils to watercolors, each tool has its unique charm and utility. For instance, if you're aiming for precision, you might gravitate towards fine-tipped pens or graphite pencils. On the other hand, if you're looking to create a splash of color, watercolors or colored pencils could be your best friends. Here’s a quick rundown of what you might consider:
| Tool Type | Purpose |
|---|---|
| Graphite Pencils | For detailed sketches and shading |
| Colored Pencils | Add vibrancy and depth to your drawings |
| Watercolors | Create soft, flowing colors |
| Brushes | Apply paint with varying effects |
Different pencil types offer unique textures and effects. For instance, a 2B pencil is great for creating soft lines, while an HB pencil is perfect for fine details. Understanding the various grades and how they can impact the quality of your plant and flower sketches is essential. You might find that a combination of different pencils allows you to achieve a greater range of effects in your botanical illustrations.
Graphite pencils provide versatility for shading, while colored pencils add vibrancy. Imagine using graphite to sketch the delicate lines of a flower, then transitioning to colored pencils to bring those petals to life with rich hues. This section compares their uses in botanical illustrations, highlighting how each can complement the other. The beauty lies in knowing when to use each tool for maximum impact.
Watercolor brushes come in various shapes and sizes, each serving specific purposes. For instance, a round brush is fantastic for detail work, while a flat brush can cover larger areas with ease. Understanding how to choose the right brush for painting flowers and plants effectively can make a world of difference in your artwork. It’s like having the right instrument in an orchestra; each brush adds its unique voice to your composition.
Mastering sketching techniques is essential for capturing the essence of plants and flowers. Techniques such as gesture drawing can help you convey movement and life in your sketches, while contour drawing emphasizes the outlines of your subject. Experiment with different methods to find what resonates with your style. Remember, practice makes perfect, so don’t be afraid to make mistakes along the way!
Once the basic shapes are established, adding details and textures brings your drawings to life. The intricacies of a leaf's veins or the delicate fuzz of a flower petal can transform a simple sketch into a stunning piece of art. This section covers techniques for enhancing realism in your botanical art. You might find that using a stipple technique or cross-hatching can create depth and interest in your work.
Shading adds depth and dimension to your drawings. Explore various shading techniques that can be applied to plants and flowers for a more realistic appearance. Techniques like blending and layering colors can help you achieve a three-dimensional look, making your artwork pop off the page.
Different plants have unique textures, and learning how to replicate these textures through specific drawing techniques can greatly enhance the overall quality of your artwork. For example, the smoothness of a tulip petal differs from the roughness of a sunflower’s leaves. By employing techniques like scumbling or feathering, you can effectively mimic these textures and add a tactile element to your drawings.
Coloring is a vital aspect of drawing plants and flowers. This section discusses various coloring techniques that can enhance your botanical illustrations and make them more vibrant. Whether you choose to use watercolors, colored pencils, or markers, understanding how to apply color effectively can elevate your artwork to new heights.
Blending colors creates smooth transitions and depth. Discover effective blending techniques to achieve a more polished look in your floral artwork. Whether you’re using colored pencils or watercolors, the right blending method can make a significant difference in the overall appearance of your piece.
A well-chosen color palette can significantly impact your artwork. Learn how to select and use color palettes for drawing realistic plants and flowers. Consider creating a swatch sheet to experiment with different color combinations before applying them to your final piece. This practice can help you develop a keen eye for color harmony and contrast, essential skills for any artist.
Q: Do I need expensive tools to start drawing plants and flowers?
A: Not at all! You can start with basic pencils and paper. As you progress, you may want to invest in higher-quality tools, but it's not necessary to begin.
Q: How long does it take to become skilled at drawing plants and flowers?
A: Skill development varies from person to person. With consistent practice, you can see improvement in a matter of weeks!
Q: Can I use photographs as references for my drawings?
A: Absolutely! Using photographs can help you understand details and colors better, making it easier to translate them onto paper.

Understanding Basic Shapes
To draw plants and flowers effectively, it's essential to start with the basics. Just like building a house requires a solid foundation, your drawings need a strong base too. By breaking down complex forms into simple shapes, you can create a roadmap that guides your hand and eye. Imagine a flower: at first glance, it may seem intricate, but if you look closer, you can see that it's largely made up of circles, ovals, and curves. This approach not only simplifies the drawing process but also helps you achieve accurate proportions and perspectives.
Let’s dive deeper into this technique. When sketching a flower, start with a basic circle for the flower head, then add ovals for the petals radiating from it. For the stem, a simple elongated rectangle or line can be used. By focusing on these basic shapes, you can capture the essence of the plant without getting overwhelmed by its details. Once you have your foundational shapes in place, you can gradually refine your drawing, adding in more intricate details like the veins on petals or the texture of leaves. This method is not just for beginners; even seasoned artists often revert to basic shapes to maintain accuracy in their work.
Another effective strategy is to practice gesture drawing. This involves quickly sketching the overall form and movement of a plant or flower without getting bogged down in details. It’s like capturing the spirit of the subject in a few swift strokes. You might find that using a timer—say, 30 seconds for each sketch—helps you stay focused and encourages fluidity in your lines. This technique not only improves your observational skills but also enhances your ability to convey motion and life in your botanical illustrations.
To further illustrate how basic shapes can be used in drawing, consider the following table that outlines some common plants and their corresponding basic shapes:
| Plant Type | Basic Shape(s) |
|---|---|
| Sunflower | Circle (flower head), Ovals (petals), Rectangle (stem) |
| Rose | Spirals (petals), Circle (center), Line (stem) |
| Cactus | Rectangle (body), Circles (arms), Lines (spines) |
By using this method, you can enhance your ability to draw a wide variety of plants and flowers. Remember, the key is to observe the shapes around you and translate them into your drawings. As you practice, you'll find that your confidence grows, and soon you’ll be able to tackle more complex botanical subjects with ease. So, grab your sketchbook and start breaking down those beautiful plants into their simplest forms!
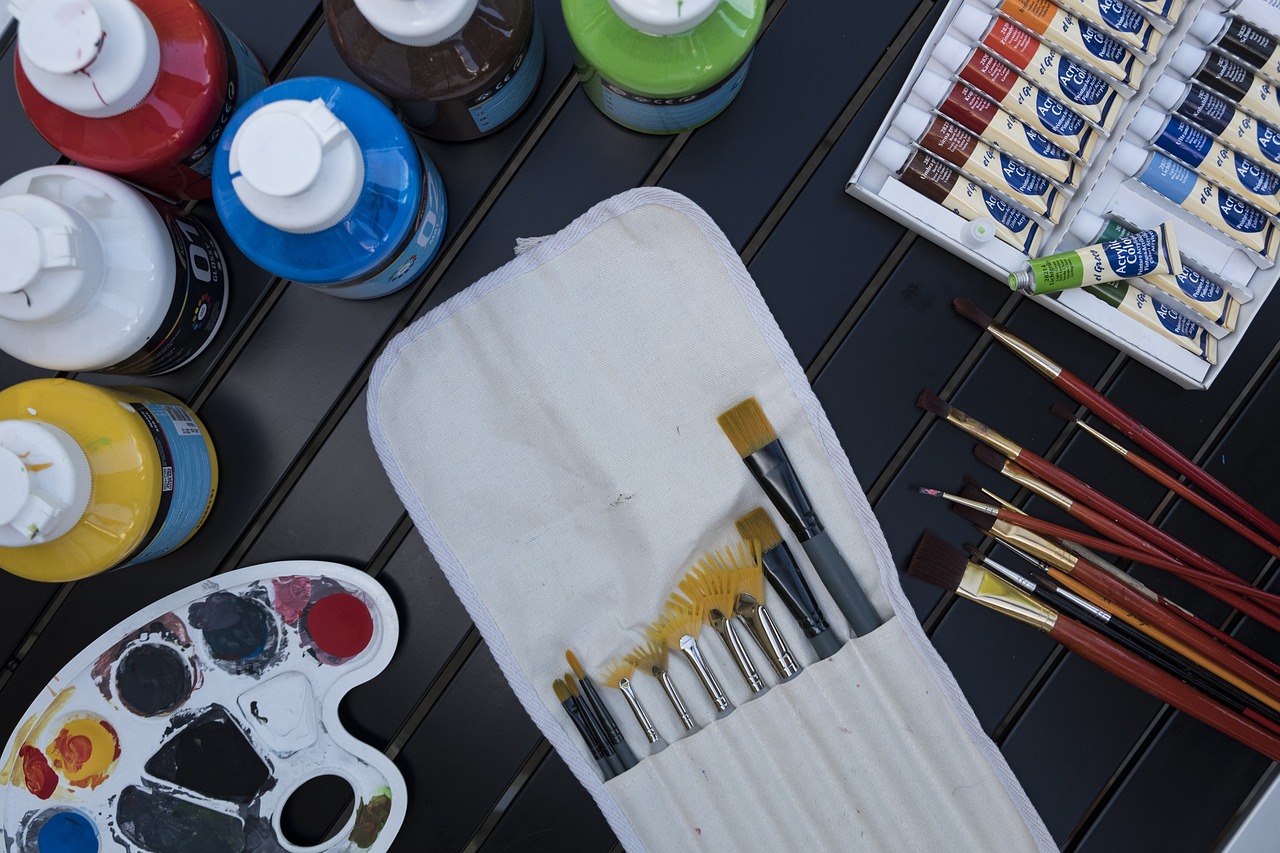
Choosing the Right Tools
When it comes to drawing plants and flowers, is essential for bringing your artistic vision to life. Think of your drawing tools as the brushes and colors in a painter's palette; they can make a significant difference in the outcome of your artwork. Whether you're sketching delicate petals or vibrant leaves, the right tools will help you achieve the desired effects and elevate your botanical illustrations to new heights.
First off, let’s talk about the basic tools you’ll need. A good set of pencils is crucial, but not all pencils are created equal. You’ll find that different types of pencils offer unique textures and effects, which can dramatically impact your sketches. For example, graphite pencils are fantastic for creating fine lines and subtle shading, while colored pencils can inject life and vibrancy into your drawings. Each type has its own strengths, so understanding their differences is key.
Moreover, when you’re selecting your pencils, consider the pencil grades. They range from hard (H) to soft (B), with HB being the middle ground. Here’s a quick breakdown:
| Pencil Grade | Characteristics | Best Use |
|---|---|---|
| H (Hard) | Produces lighter lines | Fine details and light shading |
| HB | Medium hardness | General-purpose drawing |
| B (Soft) | Creates darker, softer lines | Shading and bold outlines |
Another important tool in your arsenal is the watercolor brush. These brushes come in various shapes and sizes, each serving specific purposes. For example, a round brush is great for detailed work, while a flat brush can cover larger areas quickly. Understanding the different types of brushes will allow you to paint flowers and plants more effectively, capturing their essence and beauty.
In addition to pencils and brushes, you might also want to consider using fine-liners or ink pens for outlining your sketches. They can add a beautiful contrast and help define your drawings. When used carefully, they can enhance the overall composition and make your plants and flowers pop off the page.
Lastly, don’t overlook the importance of high-quality paper. The right paper can enhance your drawing experience and the final result. Look for paper that is specifically designed for drawing or watercolor, as it will hold your medium better and prevent smudging. Choosing a heavier weight paper can also make a significant difference, especially if you plan to use watercolors.
In summary, selecting the right tools for drawing plants and flowers is a vital step in your artistic journey. By understanding the characteristics of different pencils, brushes, and papers, you'll be well-equipped to create stunning botanical illustrations that capture the beauty of nature. Remember, the tools you choose can either enhance or hinder your artistic expression, so take the time to explore and find what works best for you.
- What type of pencil is best for beginners? A medium HB pencil is a great starting point as it offers versatility for both light and dark lines.
- Can I use regular paper for watercolor? It's best to use watercolor paper, as it can handle the moisture without warping.
- How do I choose the right brush size? Consider the detail of your work; smaller brushes for intricate details, larger brushes for broader strokes.

Types of Pencils
When it comes to drawing plants and flowers, the type of pencil you choose can make a world of difference in your artwork. Different pencils have unique textures, hardness levels, and characteristics that can greatly influence the outcome of your sketches. Understanding these differences is crucial for any aspiring artist looking to enhance their botanical illustrations.
One way to categorize pencils is by their hardness, which is indicated by a grading scale. Graphite pencils are typically graded on a scale from H (hard) to B (soft), with F (fine point) in the middle. Here's a quick breakdown:
| Grade | Description |
|---|---|
| H | Hard pencils produce lighter, finer lines, making them ideal for detailed work and initial sketches. |
| B | Soft pencils create darker, richer lines, perfect for shading and adding depth to your drawings. |
| F | Fine point pencils offer a balance between hardness and softness, suitable for general use. |
For botanical art, a combination of H and B pencils can be particularly effective. Start with an H pencil to outline the basic shapes of your plants and flowers, then switch to a B pencil to add depth and detail. This technique allows for a clean initial sketch that can be easily adjusted before committing to darker lines.
Another essential consideration is whether to use graphite or colored pencils. Graphite pencils are incredibly versatile; they allow for smooth shading and fine detailing, making them a staple for most artists. On the other hand, colored pencils can add vibrancy and life to your botanical sketches. They come in a wide range of hues, allowing you to capture the essence of the flora you’re depicting. Many artists prefer to use both types, starting with graphite for the initial sketch and then layering colored pencils for the final touches.
Ultimately, the choice of pencil type depends on your personal style and the specific effects you want to achieve in your artwork. Experimenting with different pencils can lead to surprising discoveries about your drawing technique and artistic preferences. So, grab a few pencils from each category and start sketching—who knows what beautiful botanical art you might create!

Graphite vs. Colored Pencils
When it comes to drawing plants and flowers, the choice between graphite pencils and colored pencils can make a significant difference in the final outcome of your artwork. Each type of pencil offers its own unique advantages and challenges, which can impact your creative process and the overall aesthetic of your illustrations. Let's dive into the characteristics of both to help you make an informed decision.
Graphite pencils are often the go-to choice for many artists, especially beginners. They come in various grades, ranging from hard (H) to soft (B), allowing for a wide range of shading and detailing options. The beauty of graphite lies in its versatility; you can create everything from delicate, light lines to deep, dark shadows effortlessly. This makes it an ideal medium for capturing the intricate details of plant leaves or the soft petals of a flower. Additionally, graphite is perfect for sketching and laying down initial outlines before transitioning to color.
On the other hand, colored pencils bring a vibrant and lively aspect to your botanical art. They allow you to add color directly, which can make your drawings pop with life and energy. Colored pencils come in a variety of hues and can be layered to create depth and texture. However, they require a different technique compared to graphite. Achieving smooth transitions and blending colors can be a bit tricky at first, but with practice, you can master the art of color application. One of the exciting aspects of using colored pencils is the ability to mix colors to create new shades, giving your flowers and plants a more realistic appearance.
Here’s a quick comparison table to summarize the key differences:
| Feature | Graphite Pencils | Colored Pencils |
|---|---|---|
| Versatility | High (great for detailed sketches and shading) | Moderate (requires skill for blending) |
| Color Range | Monochromatic | Vast (many colors available) |
| Application Technique | Easy to layer and blend | Requires practice for smooth blending |
| Final Appearance | Realistic shading and depth | Vibrant and colorful |
In conclusion, both graphite and colored pencils have their unique strengths and can be used effectively in drawing plants and flowers. If you’re just starting, you might want to experiment with both to see which medium resonates more with your style. Why not try sketching a flower using graphite and then coloring it in with colored pencils? This way, you can enjoy the best of both worlds and develop a well-rounded skill set in botanical illustration.
- Can I use both graphite and colored pencils together?
Absolutely! Many artists find that combining both mediums can enhance their work, allowing for detailed sketches with vibrant colors. - What paper is best for using colored pencils?
A textured paper, such as bristol or watercolor paper, works well for colored pencils, as it helps to hold the pigment better. - How can I improve my blending technique with colored pencils?
Practice layering colors gradually and use a blending tool or a white pencil to smooth out transitions.
Watercolor Brushes
When it comes to painting plants and flowers, choosing the right watercolor brush can make all the difference in achieving the desired effect. Each brush has a unique shape and size, designed for specific techniques, which can help you express the intricate beauty of botanical art. For beginners, it might feel overwhelming to navigate through the myriad of options available, but understanding a few key types will set you on the right path.
One of the most versatile brushes is the round brush. With its pointed tip, it allows for both fine details and broader strokes, making it perfect for various parts of a flower or leaf. Whether you’re painting delicate petals or the rough texture of a stem, a round brush can adapt to your needs. On the other hand, a flat brush is ideal for creating bold strokes and washes. It’s particularly useful for filling in larger areas of color or producing sharp edges, which can be essential when defining the shape of leaves or the background of your composition.
For those intricate details, consider using a liner brush. This brush is thin and long, perfect for adding fine lines and textures that mimic the delicate veins of leaves or the intricate patterns on petals. If you want to achieve a soft, feathered look, a fan brush can be a fun tool to experiment with. It’s excellent for creating texture and can be used to replicate the look of foliage or the softness of flower petals.
When selecting brushes, it’s also crucial to consider the material of the bristles. Natural hair brushes, such as those made from sable or squirrel hair, tend to hold more water and pigment, allowing for smoother application and blending. However, they can be pricier. Synthetic brushes, on the other hand, are more affordable and can be quite durable, making them a great choice for beginners who are just starting out. Ultimately, the choice between natural and synthetic brushes will depend on your personal preference and budget.
To help you navigate your options, here's a simple table summarizing the types of watercolor brushes along with their uses:
| Brush Type | Best For |
|---|---|
| Round Brush | Fine details and broad strokes |
| Flat Brush | Bold strokes and washes |
| Liner Brush | Fine lines and textures |
| Fan Brush | Texture and soft effects |
In conclusion, understanding the different types of watercolor brushes and their specific uses can significantly enhance your ability to capture the beauty of plants and flowers in your artwork. Experimenting with various brushes will not only improve your skills but also allow you to develop your unique style. So, grab your brushes and let your creativity flow!
- What type of brush should I start with as a beginner?
Starting with a round brush is advisable because of its versatility. It can handle various techniques, making it perfect for beginners. - How do I clean my watercolor brushes?
Always rinse your brushes in clean water immediately after use to prevent paint from drying on the bristles. Gently reshape the bristles and lay them flat to dry. - Can I use acrylic brushes for watercolor painting?
While you can use acrylic brushes, they may not perform as well as watercolor brushes, which are specifically designed to hold water and pigment optimally.
Sketching Techniques
When it comes to drawing plants and flowers, mastering is essential for capturing their beauty and intricacies. Think of sketching as the foundation of a house; without a solid base, everything else can crumble. To begin, you should focus on the way you observe your subject. Instead of merely looking at the plant or flower, take a moment to really study it. Notice the shapes, lines, and proportions. This deep observation will enhance your ability to translate what you see onto paper.
One effective technique is the gesture drawing. This method involves quickly sketching the overall form of the plant or flower in just a few strokes. Imagine you're capturing the essence of a dance; you want to convey movement and life in your drawing. This technique not only warms up your hand but also helps you understand the flow and rhythm of your subject. Aim for capturing the general shape and posture rather than focusing on details initially. You can practice this by setting a timer for one or two minutes and sketching as many plants as you can within that time frame.
Another important aspect is the use of contour lines. These are the lines that define the edges of your subject. They help you establish the outline of the plant or flower, giving it structure. When drawing contour lines, try to keep your pencil moving smoothly without lifting it from the paper. This technique encourages a more fluid representation of your subject. You can also experiment with varying the pressure on your pencil to create thicker and thinner lines, which adds interest to your sketches.
As you become more comfortable with these techniques, consider incorporating shading into your sketches. Shading can add depth and dimension, making your drawings more lifelike. Start with a light touch and gradually build up darker areas. Use the side of your pencil for broader strokes and the tip for finer details. Remember, shading is like telling a story; it reveals the character of the plant or flower, highlighting its unique features.
Finally, don’t shy away from experimenting with different styles and approaches. Every artist has a unique voice, and your sketches should reflect your personal style. Try using different mediums like charcoal, ink, or even pastels to see how they change the way you express your botanical art. The more you explore, the more you’ll discover what resonates with you.
In summary, sketching techniques are not just about putting pencil to paper; they are about observing, feeling, and expressing the natural beauty around us. By practicing gesture drawing, contour lines, and shading, you'll not only improve your skills but also develop a deeper appreciation for the plants and flowers you choose to draw. So grab your sketchbook and let your creativity bloom!
- What materials do I need for sketching plants and flowers?
You can start with basic materials like a sketchbook, graphite pencils, and erasers. As you progress, consider adding colored pencils or watercolors for more vibrant artwork. - How can I improve my observation skills?
Practice drawing from life as much as possible. Set aside time to sit with a plant or flower and really study its details, shapes, and colors. - Is it necessary to use color in my sketches?
Not at all! Many artists create stunning black-and-white sketches that capture the essence of their subjects. Color can enhance your work, but it’s not a requirement.
Adding Detail and Texture
Once you’ve laid down the basic shapes of your plants and flowers, it's time to breathe life into your sketches by . This step is where your artwork transitions from a simple outline to a vibrant representation of nature. Think of it as dressing your drawing in the intricate patterns and characteristics that make each plant unique. The details you add will not only enhance the realism of your work but also invite viewers to appreciate the beauty of the natural world.
To begin with, consider the specific features of the plant or flower you are drawing. For instance, the delicate veins of a leaf or the soft petals of a flower can be captured through careful observation and practice. Start by using a finer pencil or a sharp colored pencil to outline these features. Pay attention to light and shadow—this is crucial for creating depth. You want to mimic how light interacts with the surfaces of your subjects. For example, the way sunlight hits a flower can create highlights that make it appear more three-dimensional.
Moreover, incorporating texture can significantly elevate your botanical art. Different plants possess distinct textures that can be replicated through various techniques. For instance, a rough bark can be suggested with short, jagged strokes, while the smooth surface of a petal might require gentle, sweeping motions. Here are a few techniques to consider:
- Cross-Hatching: This technique involves drawing intersecting lines to create shading and texture. It’s particularly effective for rendering the rough surfaces of tree bark or the intricate patterns on a leaf.
- Stippling: By using tiny dots, you can build up texture gradually. This method is excellent for depicting soft, fuzzy surfaces like the petals of certain flowers.
- Scumbling: This involves using circular, scribbled motions to create a textured effect. It works well for capturing the softness of flower petals or the uneven surfaces of leaves.
Furthermore, don't shy away from experimenting with your tools. For instance, using a blending stump can help you smooth out pencil strokes, creating a more polished look. Alternatively, if you’re working with watercolors, consider layering your colors to build texture. Start with a light wash and gradually add darker shades, allowing each layer to dry before applying the next. This technique can give your flowers a vibrant, lifelike quality.
As you progress, remember that practice makes perfect. The more you draw, the better you will become at observing and replicating the details and textures that make each plant special. Don't hesitate to use reference photos or real-life specimens to enhance your understanding. With time and patience, your botanical illustrations will not only capture the essence of the plants and flowers but also resonate with the viewer on a deeper level.
Q: How can I improve my observation skills for drawing plants?
A: Practice drawing from life as much as possible. Spend time observing the plants in your garden or local park. Take notes on their shapes, colors, and textures. The more you observe, the better your drawings will become.
Q: What if I make a mistake while drawing?
A: Mistakes are part of the learning process! You can use an eraser for pencil drawings or paint over mistakes with watercolors. Embrace the imperfections; they can often lead to unexpected creativity.
Q: Do I need expensive materials to create good botanical art?
A: Not at all! While quality materials can enhance your work, you can create beautiful art with basic supplies. Focus on mastering techniques and developing your style, and the results will follow.
Shading Techniques
Shading is one of the most crucial aspects of drawing plants and flowers, as it adds depth and dimension, transforming flat images into lifelike representations. Many beginners often overlook the importance of shading, thinking that merely outlining a plant or flower is sufficient. However, just like how a chef enhances a dish with spices, shading can elevate your artwork to a whole new level. So, how do you achieve that perfect shade? Let’s dive into some effective techniques!
One of the fundamental techniques in shading is the hatching method. This involves drawing parallel lines to create areas of shadow. The closer the lines are together, the darker the area appears. For instance, when shading a leaf, you can use closely spaced lines to depict the darker veins and gradually space them out towards the edges to create a lighter effect. Alongside hatching, there’s also cross-hatching, where you layer lines in different directions. This technique can add even more depth, especially in areas where shadows overlap.
Another popular method is the blending technique, which is particularly useful when working with colored pencils. After applying color to your drawing, you can use a blending stump or even your finger to gently smudge the colors together. This creates a smooth transition between shades, making your flowers look more vibrant and realistic. However, be careful not to over-blend, as you may lose the texture and detail that makes your artwork unique.
For those who prefer a more dramatic effect, consider using the stippling technique. This method involves creating shadows with tiny dots instead of lines. By varying the density of the dots, you can achieve different levels of darkness. This technique is particularly effective for creating intricate details in flower petals or the delicate textures of leaves. It requires patience, but the end result can be stunning!
To help you visualize these techniques, here’s a simple comparison table:
| Technique | Description | Best For |
|---|---|---|
| Hatching | Using parallel lines to create shadows | Basic shading for leaves and petals |
| Cross-Hatching | Layering lines in different directions | Complex shadows and depth |
| Blending | Smudging colors for smooth transitions | Colored pencil artworks |
| Stippling | Creating shadows with dots | Intricate details and textures |
Remember, the key to mastering shading techniques is practice. Don’t be afraid to experiment with different methods to see what works best for you. Try drawing the same plant using various shading techniques and observe how each method affects the overall appearance. Over time, you’ll develop a personal style that will make your botanical illustrations stand out.
In conclusion, shading is not just about adding darkness; it’s about creating a three-dimensional feel and bringing your artwork to life. By incorporating these techniques into your practice, you’ll not only improve your skills but also gain confidence in your ability to capture the beauty of nature on paper. So grab your pencils, and let’s get shading!
- What is the best pencil for shading? Generally, softer pencils (like 2B to 8B) are better for shading as they produce darker marks, while harder pencils (like H or 2H) are great for fine lines.
- Can I use markers for shading? Yes! Markers can be blended with each other or with a colorless blender for smooth shading.
- How do I know where to shade? Observe the light source in your reference image; shadows will be opposite the light source.
Creating Textures
When it comes to drawing plants and flowers, is like adding the final brush strokes to a masterpiece. It’s what gives your artwork that realistic touch and makes it pop off the page. Think of textures as the personality of your botanical subjects; they tell a story about the plant's environment and character. For instance, the smoothness of a petal can evoke feelings of delicacy, while the roughness of bark can suggest strength and endurance.
To effectively replicate textures, it’s essential to observe the plants closely. Take a moment to look at the intricate details; notice how light interacts with the surfaces. Are the leaves shiny and smooth, or do they have a matte finish? This observation will guide your technique. Here are some common textures you might encounter:
- Smooth: Often found in petals, smooth textures can be achieved with gentle strokes and blending techniques.
- Rough: Textures like bark or certain leaves require a more aggressive approach, using short, jagged strokes to mimic the uneven surface.
- Veined: Many leaves have a network of veins. Use fine lines to create this effect, paying attention to the direction and depth of each vein.
One effective method to create texture is through cross-hatching. This technique involves drawing closely spaced parallel lines in one direction and then layering another set of lines in a different direction. The more densely you apply these lines, the darker and more textured the area appears. This is particularly useful for creating shadows and depth in your drawings.
Additionally, experimenting with different drawing tools can yield fascinating results. For example, using a rougher paper can enhance the texture of your pencil strokes, while softer brushes can create a smooth gradient in watercolor. It's all about finding the right balance and techniques that work for you.
Lastly, don’t forget about the importance of color in texture. The way you apply color can also influence how texture is perceived. For instance, layering colors can add depth and complexity, making a simple flower appear multi-dimensional. Remember, practice makes perfect. The more you draw, the better you’ll become at capturing the unique textures of plants and flowers.
Q: What tools are best for creating textures in botanical drawings?
A: The best tools include a variety of pencils (hard and soft), colored pencils for layering, and different types of brushes for watercolor. Experimenting with different surfaces can also enhance texture.
Q: How can I practice creating textures?
A: Start by observing real plants and flowers. Try sketching them with different techniques, focusing on how to replicate their textures. You can also practice with different mediums to see which gives you the best results.
Q: Is it important to study textures before drawing?
A: Absolutely! Understanding textures helps you convey realism in your work. It’s essential to observe and analyze the textures in nature to replicate them effectively in your art.
Coloring Techniques
Coloring is not just a final touch; it's the heartbeat of your botanical illustrations. When you think about it, color can transform a simple sketch of a flower into a vibrant masterpiece that practically jumps off the page. So, how do you elevate your coloring game? Let's dive into some essential techniques that can make your plants and flowers truly come alive!
First off, blending colors is a fundamental technique that creates smooth transitions and adds depth to your artwork. Imagine a sunset where the colors seamlessly flow into one another; that's the kind of effect you want to achieve in your drawings. To blend effectively, you can use a variety of tools, such as blending stumps, your fingers, or even a soft cloth. Start with two or more colors that complement each other and gently layer them. The key is to apply light pressure and gradually work in circular motions to create that soft gradient.
Next, let's talk about the importance of a well-chosen color palette. Selecting the right colors can significantly impact the overall feel of your artwork. Think of your color palette as the mood board for your illustration. It sets the tone! A harmonious palette can evoke feelings of serenity or vibrancy, depending on your choice. For flowers, consider using a combination of analogous colors (colors next to each other on the color wheel) to create a sense of unity. For example, if you're drawing a rose, shades of red, pink, and a touch of orange can work wonders together.
But how do you actually create that perfect palette? Start by observing the flowers you want to draw. Take note of their natural colors, and don’t shy away from using a color wheel to guide your selections. You might even want to create a small swatch of colors before you start your drawing. This way, you can visualize how they interact with one another and ensure that your final piece will be cohesive.
Let’s not forget about layering! Layering is a technique that allows you to build color gradually, which is particularly useful for achieving depth and richness in your illustrations. Start with a base color and then add additional layers of darker or lighter shades. This process can create a three-dimensional feel, especially important for petals and leaves. Remember, patience is key here. Allow each layer to dry before applying the next if you are using watercolors, as this will prevent muddiness and maintain clarity.
Lastly, don’t be afraid to experiment! Coloring is an art form that thrives on creativity and exploration. Whether it's using unconventional colors or mixing mediums, let your imagination run wild. You might discover a unique technique that becomes your signature style!
- What type of paper is best for coloring botanical illustrations?
Use heavyweight watercolor paper for watercolors and smooth drawing paper for colored pencils. This ensures your colors apply evenly and the paper withstands blending techniques.
- Can I use markers for coloring plants and flowers?
Absolutely! Markers can provide vibrant colors and are great for detailed work. Just be cautious as they can bleed through some papers.
- How do I know which colors to choose for realistic plants?
Study real plants and flowers closely. Take photos or create swatches to capture their true colors, and use those as a reference for your palette.
Blending Colors
Blending colors is an essential technique in botanical art that can transform your drawings from flat to fabulous. Imagine the way sunlight dances on the petals of a flower, creating a spectrum of hues that evoke emotion and life. To replicate this in your artwork, mastering the art of blending is crucial. It allows you to create smooth transitions between colors, giving your plants and flowers a more realistic and vibrant appearance. Whether you’re using colored pencils, watercolors, or markers, the principles of blending remain the same.
One of the most effective ways to blend colors is to start with a light hand. Begin by applying your base color gently and gradually build up layers. This technique not only helps in achieving a smooth gradient but also prevents the colors from becoming muddy. For instance, when drawing a rose, you might start with a light pink base and then layer deeper shades of crimson and burgundy to create depth and dimension.
Another method to enhance your blending skills is to use a blending tool. Tools such as blending stumps, tortillons, or even your fingers can help merge colors seamlessly. When using colored pencils, for example, a blending stump can be used to smudge and soften the lines between different colors, creating a soft, painterly effect. On the other hand, with watercolors, you can achieve beautiful blends by wetting your brush and lightly dragging it across the paper, allowing the colors to mingle naturally.
Here’s a quick overview of some popular blending techniques:
- Layering: Build colors gradually to create depth.
- Burnishing: Use a white or light-colored pencil to blend and smooth out the colors.
- Wet-on-wet: Apply wet paint onto wet paper for soft blends.
- Dry brushing: Use a dry brush to apply color lightly over a dry surface, allowing for texture.
To further illustrate the importance of color blending, let’s consider a simple table comparing different mediums and their blending techniques:
| Medium | Blending Technique | Effect |
|---|---|---|
| Colored Pencils | Layering and Burnishing | Soft, rich colors with depth |
| Watercolors | Wet-on-wet | Fluid, organic blends |
| Markers | Colorless Blender or Alcohol | Smooth transitions and vibrant colors |
Ultimately, the key to successful color blending is practice. Don’t be afraid to experiment with different techniques and mediums. Each artist has their own unique style, and finding what works for you will only enhance your skills. So grab your tools, put on some music, and let your creativity flow as you blend your way to stunning botanical illustrations!
1. What is the best medium for blending colors?
While it depends on personal preference, colored pencils and watercolors are popular choices for blending due to their versatility and the variety of techniques available.
2. How can I prevent my colors from becoming muddy?
To avoid muddy colors, always start with lighter shades and gradually layer darker colors. Keep your blending tools clean and use a light hand.
3. Can I blend colors with my fingers?
Yes! Using your fingers can create a very organic blend, especially with colored pencils. Just make sure your hands are clean to avoid unwanted colors.
4. How do I know which blending technique to use?
It often comes down to the effect you want to achieve. Experiment with different techniques on scrap paper to see which works best for your style.
Using a Color Palette
When it comes to drawing plants and flowers, the colors you choose can make or break your artwork. A well-thought-out color palette not only enhances the visual appeal but also helps in creating a cohesive look that draws the viewer in. Imagine trying to paint a vibrant garden with a palette that consists only of dull grays and browns; it simply won't capture the essence of nature. Therefore, selecting the right colors is akin to picking the right ingredients for a delicious recipe—each hue plays a role in the overall flavor of your artwork.
To get started, it’s essential to understand the basics of color theory. Colors can be categorized into three main types: primary, secondary, and tertiary. Primary colors (red, blue, and yellow) are the building blocks for all other colors. By mixing primary colors, you can create secondary colors (green, orange, and purple), and further mixing these results in tertiary colors. Familiarizing yourself with the color wheel can greatly aid in your selection process, allowing you to choose complementary colors that enhance one another.
When creating a color palette for your botanical drawings, consider the following tips:
- Nature's Palette: Look at real plants and flowers for inspiration. Nature offers a plethora of colors that can guide your choices.
- Limit Your Colors: Start with a limited palette (3-5 colors). This helps maintain harmony and prevents your artwork from becoming overwhelming.
- Experiment: Don’t hesitate to mix colors. Sometimes unexpected combinations can lead to beautiful results.
- Test Swatches: Before committing to a color, create a small test swatch to see how it interacts with other colors on your palette.
Moreover, using a color palette is not just about the colors themselves but also about understanding how they can be applied. For instance, lighter colors can be used to create highlights, while darker shades can add depth and shadow. This interplay between light and dark can significantly enhance the three-dimensionality of your drawings.
Finally, remember that the emotional impact of color is profound. Warm colors (like reds and yellows) can evoke feelings of warmth and happiness, while cool colors (like blues and greens) can create a sense of calm and tranquility. Think about the mood you want to convey with your artwork and choose your colors accordingly. Just as a chef considers the balance of flavors, a good artist must consider the balance of colors to create a masterpiece.
In conclusion, a thoughtfully chosen color palette is essential for drawing realistic and vibrant plants and flowers. By understanding color theory, experimenting with combinations, and considering the emotional impact of colors, you can elevate your botanical art to new heights. So grab those pencils and paints, and let your creativity blossom!
Q: How do I choose the right colors for my botanical art?
A: Start by observing real plants and flowers for inspiration. Use a limited palette to maintain harmony and don't hesitate to experiment with mixing colors.
Q: What is the importance of color theory in art?
A: Color theory helps artists understand how colors interact with one another, allowing for more effective and harmonious color choices in their artwork.
Q: Can I use digital tools to create a color palette?
A: Absolutely! There are many digital tools and apps available that can help you create and visualize color palettes effectively.
Frequently Asked Questions
- What are the best techniques for drawing plants and flowers?
To draw plants and flowers effectively, start by breaking them down into basic shapes. This foundational technique simplifies the drawing process and helps in achieving accurate proportions and perspectives. Additionally, mastering sketching techniques and adding details and textures will enhance your artwork significantly.
- Which drawing tools are essential for botanical art?
Choosing the right tools is crucial. Essential tools include various grades of graphite and colored pencils for different textures, as well as watercolor brushes in various shapes and sizes to achieve specific effects. Each tool serves a unique purpose in enhancing your botanical drawings.
- How do I add depth to my drawings?
Adding depth can be achieved through effective shading techniques. Use different shading methods to create dimension and realism in your drawings. Additionally, incorporating textures that replicate the unique characteristics of various plants will further enhance the overall quality of your artwork.
- What are some tips for coloring my botanical illustrations?
Coloring is vital for bringing your drawings to life. Blending colors smoothly creates depth and transitions, making your artwork pop. It's also important to select a well-chosen color palette that complements the plants and flowers you are illustrating.
- Can I use both graphite and colored pencils in my artwork?
Absolutely! Graphite pencils are great for shading and creating detailed sketches, while colored pencils add vibrancy and can bring your botanical illustrations to life. Combining both can yield stunning results, allowing for a versatile approach to your art.
- How can I improve my sketching skills?
Improving sketching skills takes practice. Regularly sketching from real plants and flowers will help you understand their forms and details better. Experiment with different sketching techniques and don’t be afraid to make mistakes; they’re part of the learning process!


